Week 9
Assignment - Design a 3D mold, machine it, and cast parts from it.
This week we were required to mould and cast something. I wanted to keep this week simple and create something that I could benefit from personally.
Stuart one of our tutors had made a simple Facebook like stamp which made me think about what I could make for a stamp. I had recently created a logo to put onto my website, I wanted to make this logo into a small stamp that I could use in my office for scrap paper and other things that I wanted to print onto.

The logo was reasonably simple only using black and white and having a border.
I wanted the stamp to be about 50-75mm wide and how ever long the width of the document was, it needed to be big enough to pick up all the details in the text.
Wendy showed us how to melt down wax in a pot where we simply heated the wax and a medium to high range temp until it was a complete liquid with no bubbles in it.
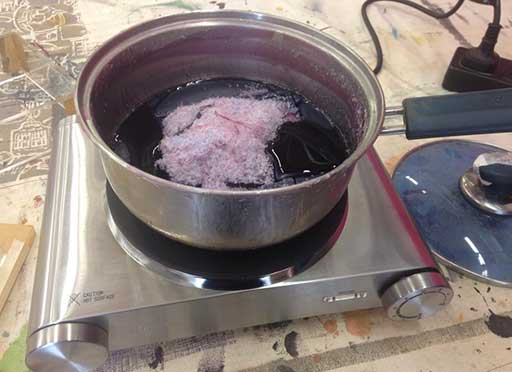
When then poured the liquid into an acrylic cast of a specific size to fit into the MDX-40 machine.

We then need to let the wax have 48 hours to set.
I created my logo in Indesign and put this into Illustrator and made it all vector paths and imported it into Rhino onto a rectangle that I created of my specific size.
A few important tips I had with making this was that I needed to include draft angles and also the way that the male mould needed to be so that when I cast parts from it, it would be the correct way around.
Once I had my file completed in Rhino and happy with how it looked I prepared the MDX-40 for milling. I choose to use the machinable wax that we had as it was advised that we use this and it is also a material that can be used over and over which I really like. First I needed to find the centre of the wax block so I drew a line from corner to corner to find the centre, this will be used when setting coordinates in the SRP player software to let the software know the X and Y origins.
I hot glued the wax block to the base of the MDX-40 so that it would move about when the milling was going on.
I opened up the SRP player and went through the various steps to get the file ready, the software was very easy to follow and very intuitive. I choose to use a 1/8 mill bit to do one roughing pass and a finishing path and then I used a 1/64 for the final pass where it would be small enough to get around all the letters.
Machining speeds for roughing were, feed rate: 720 mm/min, spindle RPM: 9000, cut depth: 1.8 mm and step Over: 1.91 mm
Finishing was feed rate: 300 mm/min, spindle RPM: 10000, cut depth: 0.1 mm step Over: 0.08 mm
I have included all my tooling paths in my download files. Once my mould had finished milling I was very happy with how it looked and the size of it.
I mixed up some silicon with Jasmin on some scales where we roughly estimated how much both of us would need and we made enough for both our models. A good way to make sure you are going to have enough is to W x H x L and always add a little more as its better to have more than less. I just put a very thin layer of silicon into the bottom of mine as I had made it quite a deep cast in terms of the Z axis.
Once it was set I was able to easily peel it out because of my draft angles.
I laser cut up a little acrylic box for it so that I could keep the size of it relatively small.
I then went into the 3D workshop where they had better extraction and Wendy recommended that I use a reasonable fast setting flexicast polyurethane and can refer to the photo for the pot life. I used this type below. It had a really easy ratio where I would mix up the same amount of A and B solution. I weighed this with scales and mixed it up in a little cup. I poured the mixture into the mould and then went and put it into the vacuum compression chamber to try and pull all the bubbles out of the mixture. It worked pretty well and was worth doing, I properly should have put the silicon in there before I poured it though.
I let it sit overnight and pulled the mould out and it was exactly as I imagined and was stoked to finally have that weeks work done!