Week 6
Assignment - Redraw the echo hello-world board, add (at least) a button and LED (with current-limiting resistor).
We started by watching Neil's video and lecture on this weekŐs topic. We have been finding it very useful to be able to pause the video and ask Wendy and Craig questions about certain areas we are unsure of. Not doing physics at school but having a basic understanding of how circuit boards work, most of the information was very new to me. Asking about things like components, resistors and capacitors was very helpful for understanding their functions on the boards.
Craig used a good analogy about explaining voltage and current where he compared it to water flowing through a water pipe. The size of the pipe is the voltage and the water flow is the current and that we need to make sure we are delivering the right amount of water to the parts of the board otherwise they will receive too much and blow up or not enough and will not work. This really helped me understand why I needed to consider these factors.
We then sat down as a group and downloaded Eagle. We decided as a group that we would all give Eagle a go first and then if we ran into problems we could solve them together and once we were confident in that programme we could explore with additional ones.
Craig gave us a basic over view of the Eagle program, how it works and some work that he had previously done using the program. I found this good website:
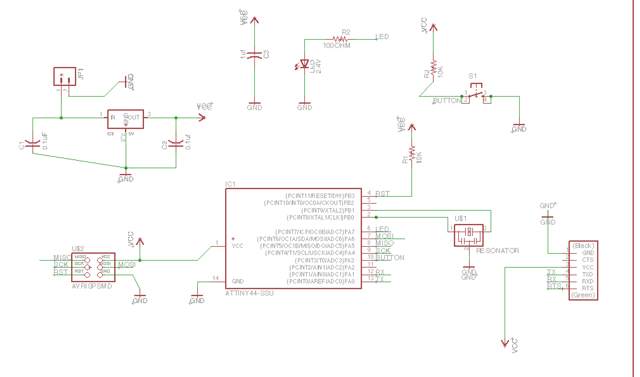
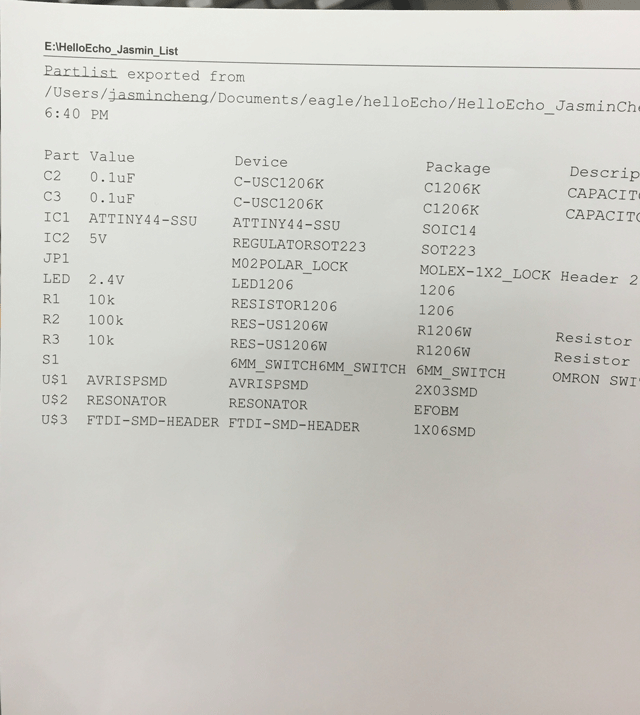
That explained in more detail what Craig had showed us. We then as a group downloaded the library importing the Fab Lab Library and got all the part list showing and working. We than began creating our boards in the systemic view.
Fab Lab Module Checker for Eagle.
Once we got the wires linked up and looking like it was all working fine we then changed over to the over view where we looked at the boards layout and the physical view of the board and how it would be milled out.
I used a quick auto route tool which does a reasonable job of getting the board somewhat better laid out.
A small tip using this function is to make sure you only have one side of the board selected so it doesn't make through holes.
Once it has prepared a rough layout you can manually go through and rotate and move some of the components to make the board function without having to use too many jumpers.
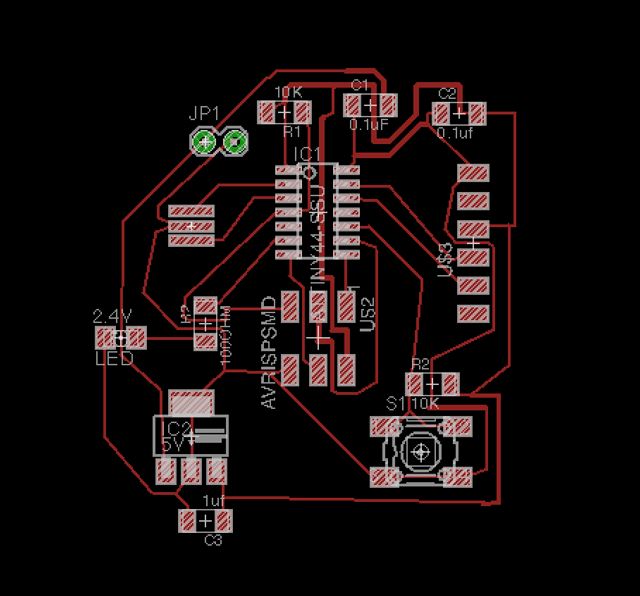
I finally got the board working and downloaded a Wellington Fab Lab DRC module to use use as a check I had enough clearances between my lines with the 1/64 mill bit that we were intending to use. It identified a few problems and I used the move tool and the line delete tool to space things out a little more to make sure it all worked.
I then followed Anna's tutorial to save the files in the correct PNG file format for the milling machine. Exporting the traces with monochrome and a high DPI so that the cuts are highly accurate. I then exported the outer cut line with the same PNG file settings.
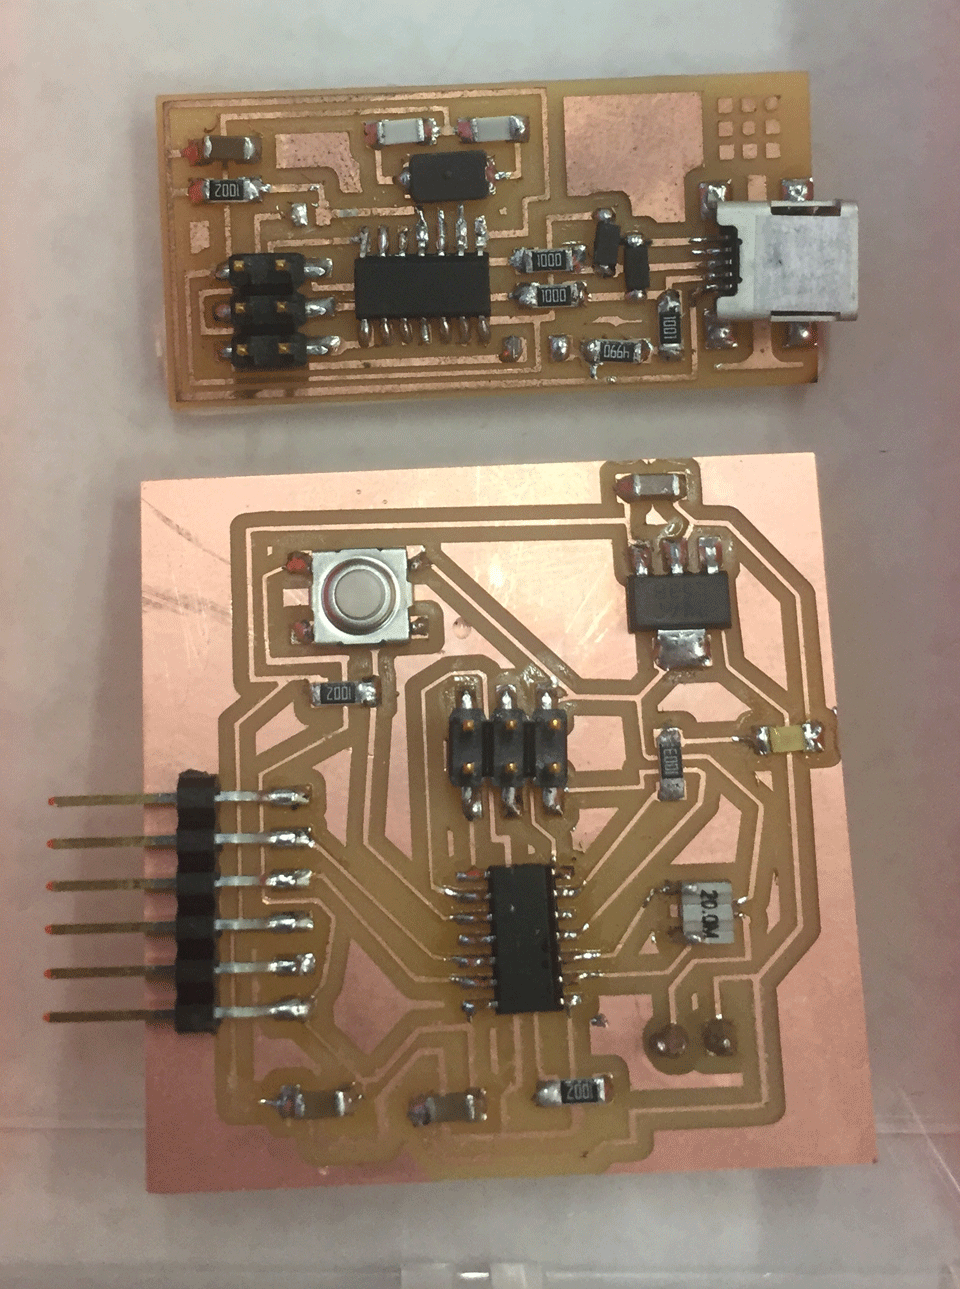
I used the mill machine exactly how I did when milling out our Fab ISP board and everything went according to plan. The traces were cut and then I milled the board out.
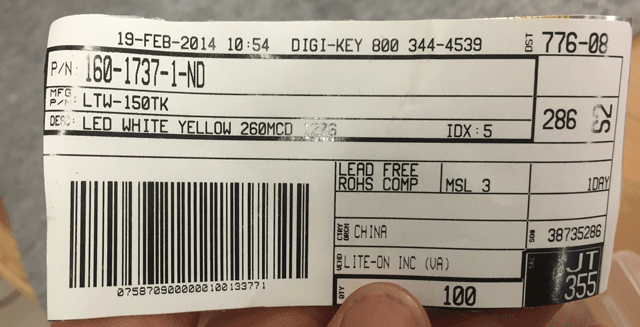
Finding the components was time consuming so we did it with some other class mates to make the process simpler. I needed to make sure we were getting the right components and we knew which was which, so we drew it up on a piece of paper, looking at Eagle to confirm which component was which with the right divi key number. The piece of paper had the number and then we placed the component next to it so we could tell which was which.
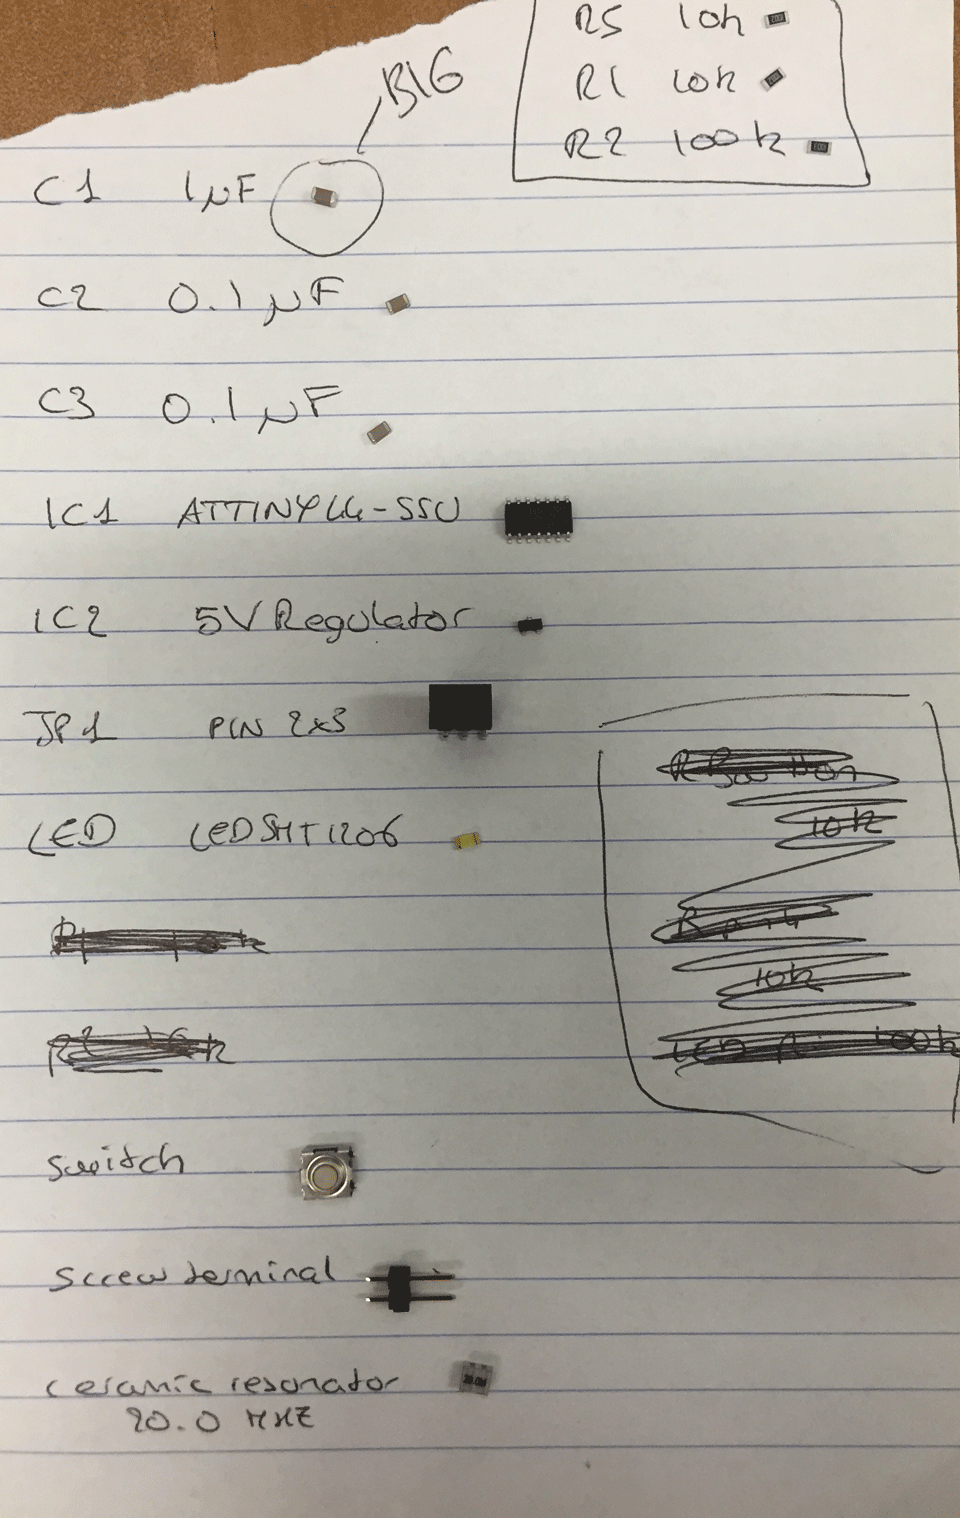
I then used my computer screen and the soldering station and the right Eagle systemic to see which components needed to be soldered and where they needed to be placed. Something I had learnt from my ISP was that my ATtiny needed to be the right way around.