Design and build a wired &/or wireless network connecting at least two processors.
How to control something remotely?
HTML + Python + PostgreSQL
I decided to impove my final project (smart wardrobe) and decided to make a web site for remote access to my wardrobe.
So I installed Apache web-server and wrote a small web page and CGI script which can answer to Intel Galileo using request by curl program.
Than I used VERY useful link to understand how to connect Python and GET/POST methods.
Code is attached. Intel Galileo connected to the Internet and send a post-request. So it looks like this:
If your browser does not support mkv video - download it here.
Files are here (index.html and iot.cgi). They don't work on Fab Academy site because it's not configured to run cgi scripts.
Pin connection to other controller
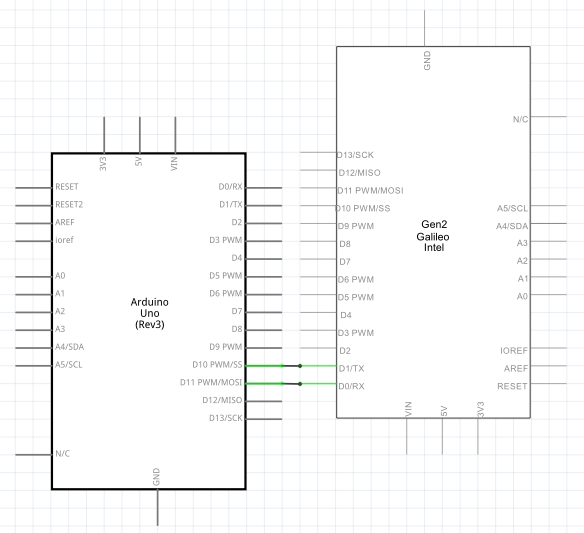
To obtain information from another controller serial port could be used. In my project I used Arduino Leonardo 10 and 11 pins to connect and send commands to Galileo RX/TX pins: 1 - open wardrobe, 0 - close wardrobe. Such code were used on Arduino (modified SoftwareSerial example):
            #include

SoftwareSerial serialToGalileo(10, 11); // RX, TX


void setup()

{

   // Open serial communications and wait for port to open:

   Serial.begin(9600);

   while (!Serial) {

      ; // wait for serial port to connect. Needed for Leonardo only

   }


   Serial.println("Enter command (1 - open wardrobe, 0 - close wardrobe): ");


   // set the data rate for the SoftwareSerial port

   serialToGalileo.begin(9600);

   // serialToGalileo.println("Hello, world?"); // for debug purposes

}


void loop() // run over and over

{

   if (Serial.available())

      serialToGalileo.write(Serial.read());

   delay(100);

}
To control Wardrobe serial port monitor of Arduino could be used.
Schematic connection for this type of networking should look like this:
Circuit with pins for network connection
Further text were taken from electronics page.
I decided to make my homework corresponds to the final project (smart wardrobe). I chose Intel Galileo as the base platform for the electronic part because it can be easily connected to the Internet through Ethernet network. On Galileo platform microcontroller (processor) soldered to the circuit so I decided to make a great shield with connection to RFID sensor and engine (which will open and close wardrobe).
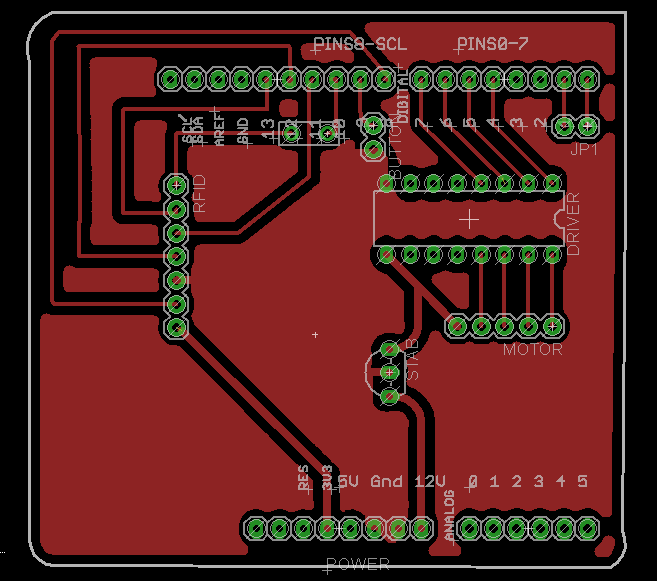
I downloaded Eagle files of proto shield for Arduino from the official site and redesigned it. Firstly I deleted all unuseful things (to delete several items in the same time - define a group, choose delete tool and press Ctrl+Right Click on the group). I saved pins near the edges of the circuit board - the needed to insert shield to Galileo.
For motor driver I used ULN-UDN library, for voltage stabilizer - SM-Eagle library (Galileo 12V to 5V for the stepper motor). I took into account sensor (RFID module), motor driver, stabilizer and networking communication so final result looks like this:
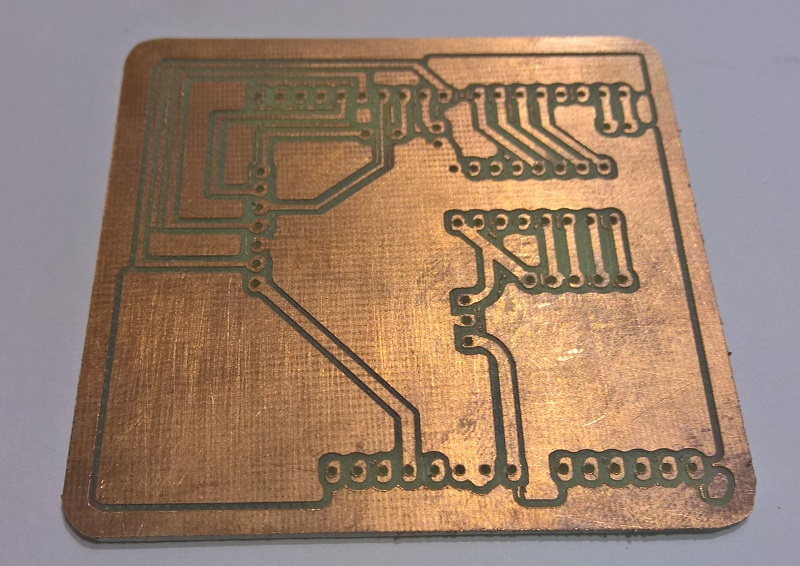
Before cutting I checked designing rules in Eagle and found that my 0 Ohm resistor is too small so I decided to use wire to connect to electric routes. Board were cutted on FlexiCAM S2 150250:
After the soldering I tested almost every connection with tester and it saved me several hours later to debug my project. How it works:
I reserved two pins 0 and 1 for connection with other controllers. In case of using another controller to open/close wardrobe code should be append by Serial.read() which should be used to reading information (0 or 1) through serial port.
Yocto Linux were installed on the Galileo so it's possible to retrieve any kind of date from the Internet. Such programming languages were used: Bash, Java, Processing, C/C++ (libmraa), Python. Also I wrote small server application which can share data with my controller and could control it (if I'll add database).