W6 - 3D SCANNING AND PRINTING

W6 - REFERENCES
link:kinect
link:makerbot
link:makerware
link:rhino grasshopper3d + anemone
W6 - DOWNLOAD
link:DESIGN FILES
3D PRINTING
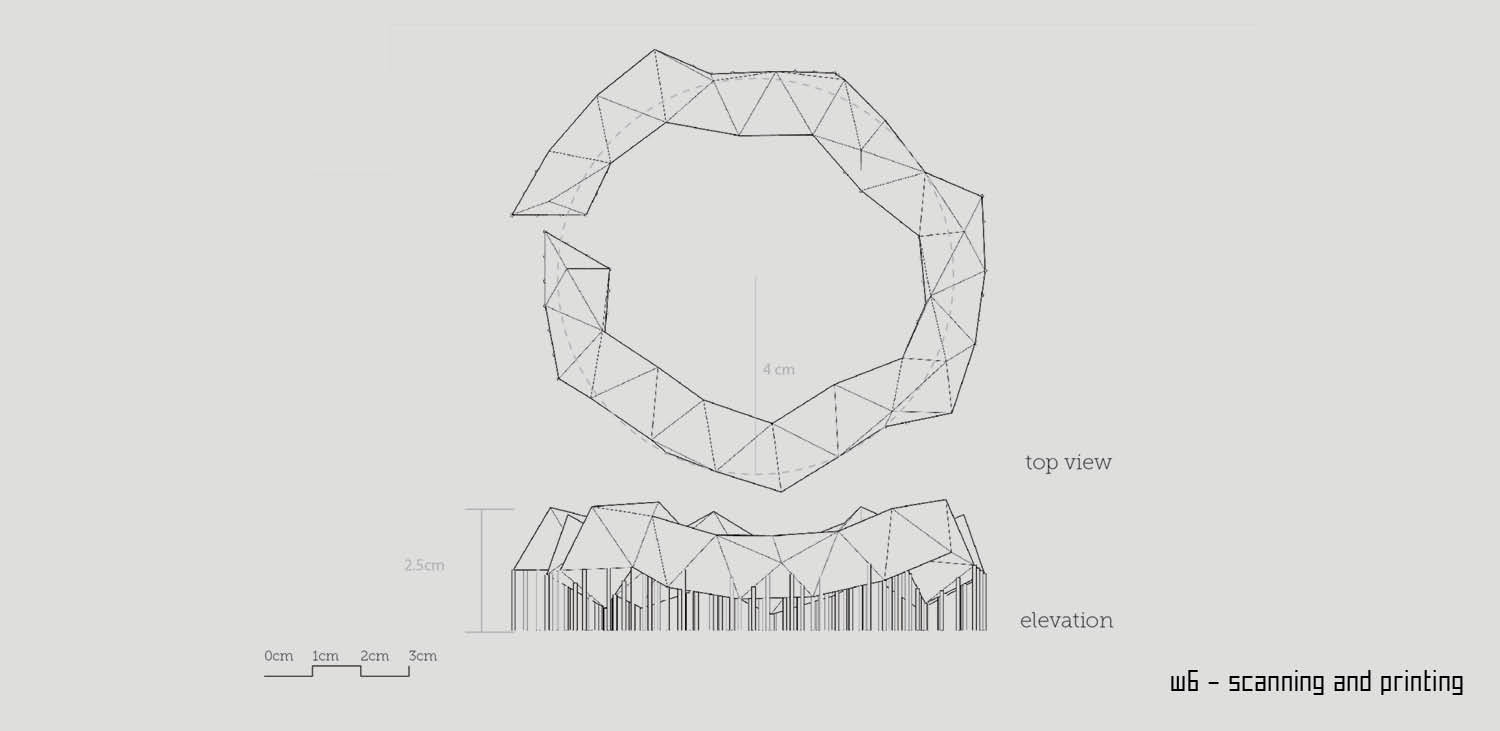
For this assignment I decided first to play a little bit with the definition made for the previous one. I decided to explore a bit the settings of the machine so I decided at first to find the right combination between geometry and support.
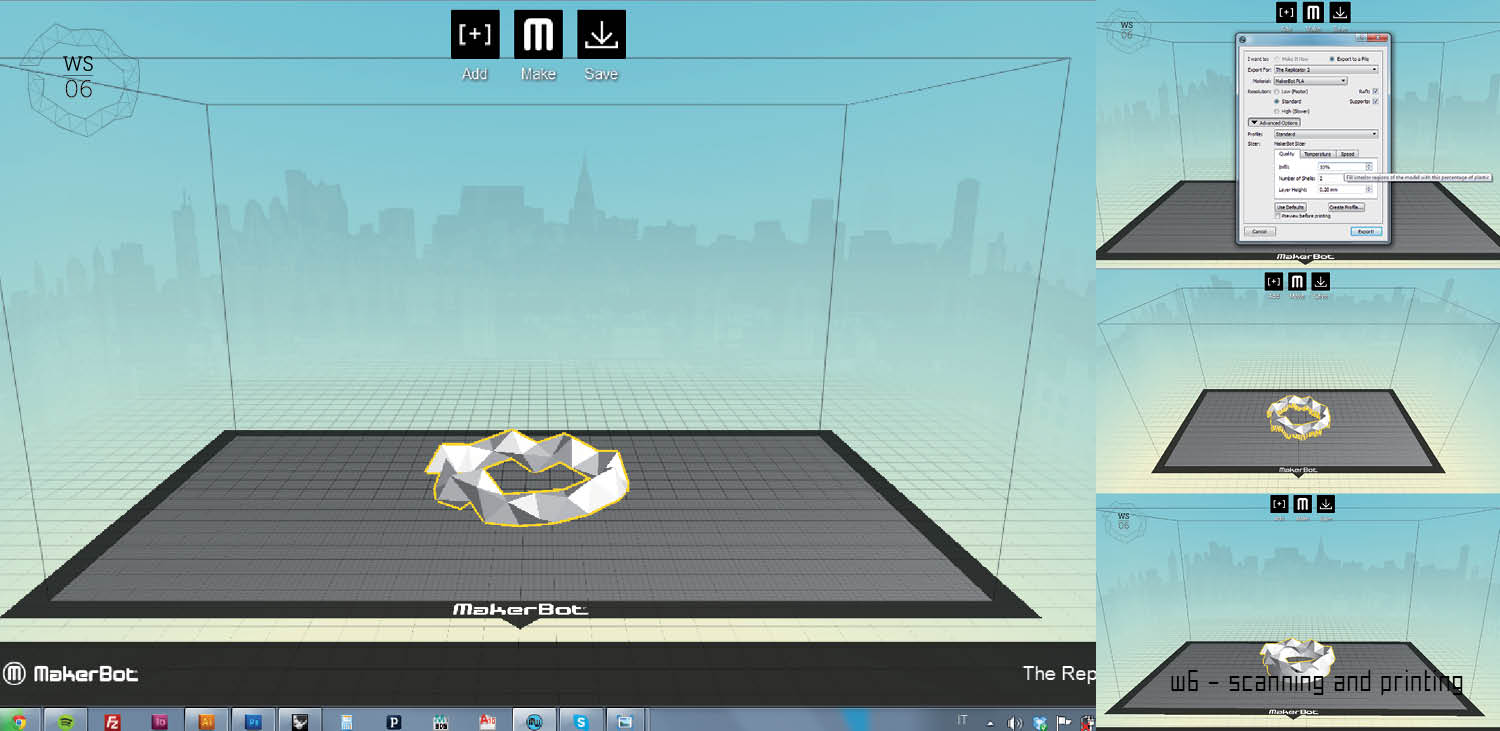
At first I decided to design my own supports. The only problem in this case is that the machine need many more than the one I did. It was a faile!
So I made a try with the one automatically generated from makerware. This time the result was much better. It takes a bit of time and patience to clean the geometry while printed but there are way less problems during the extrusion.
The infill was each time of 20% and the extrusion height was set to 2mm. The machine used was the MAKERBOT REPLICATOR 2 and the material PLA. As the guys of makerbot say MakerBot PLA Filament sticks to the build surface reliably with practically no peeling, curling, sliding or shrinking.
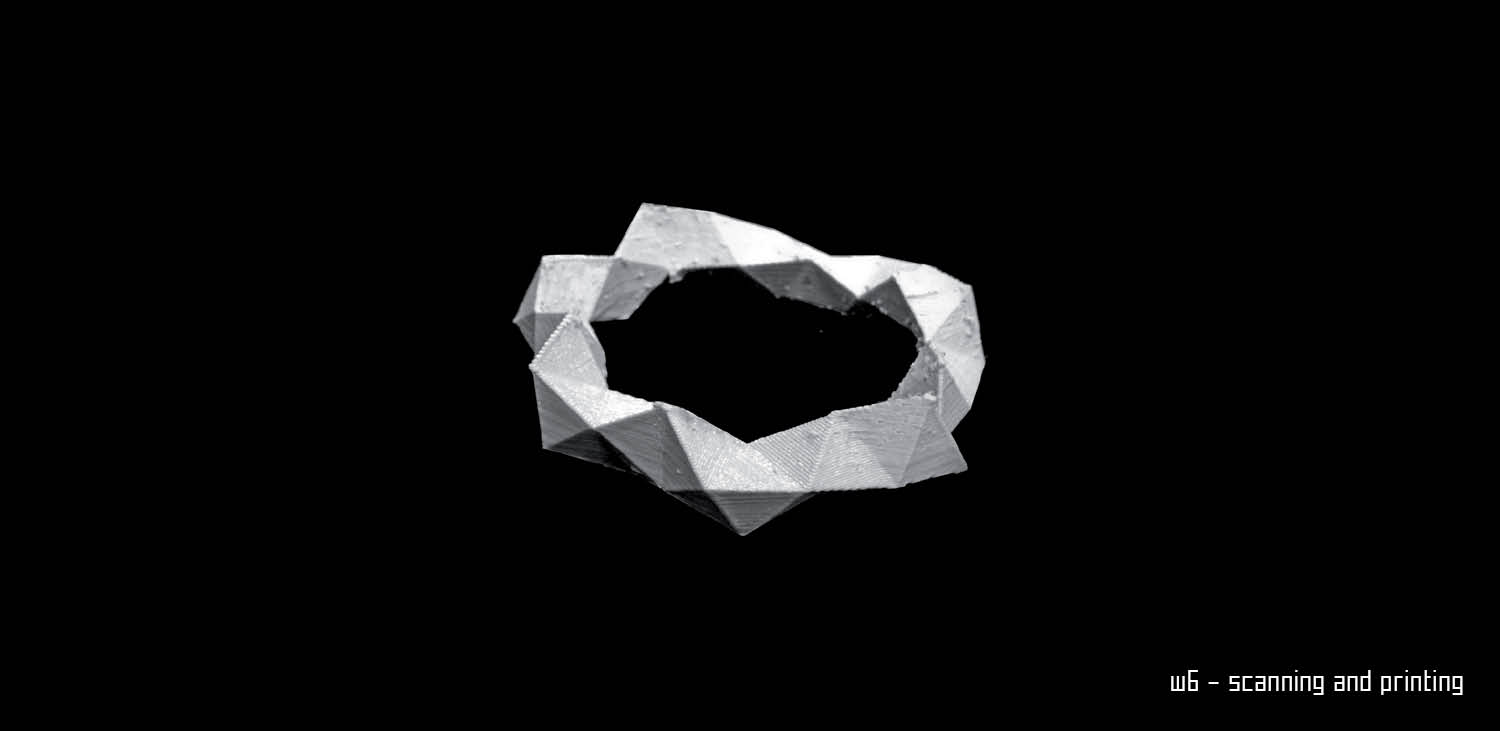
Now I have a nice bracelet to give as a gift!
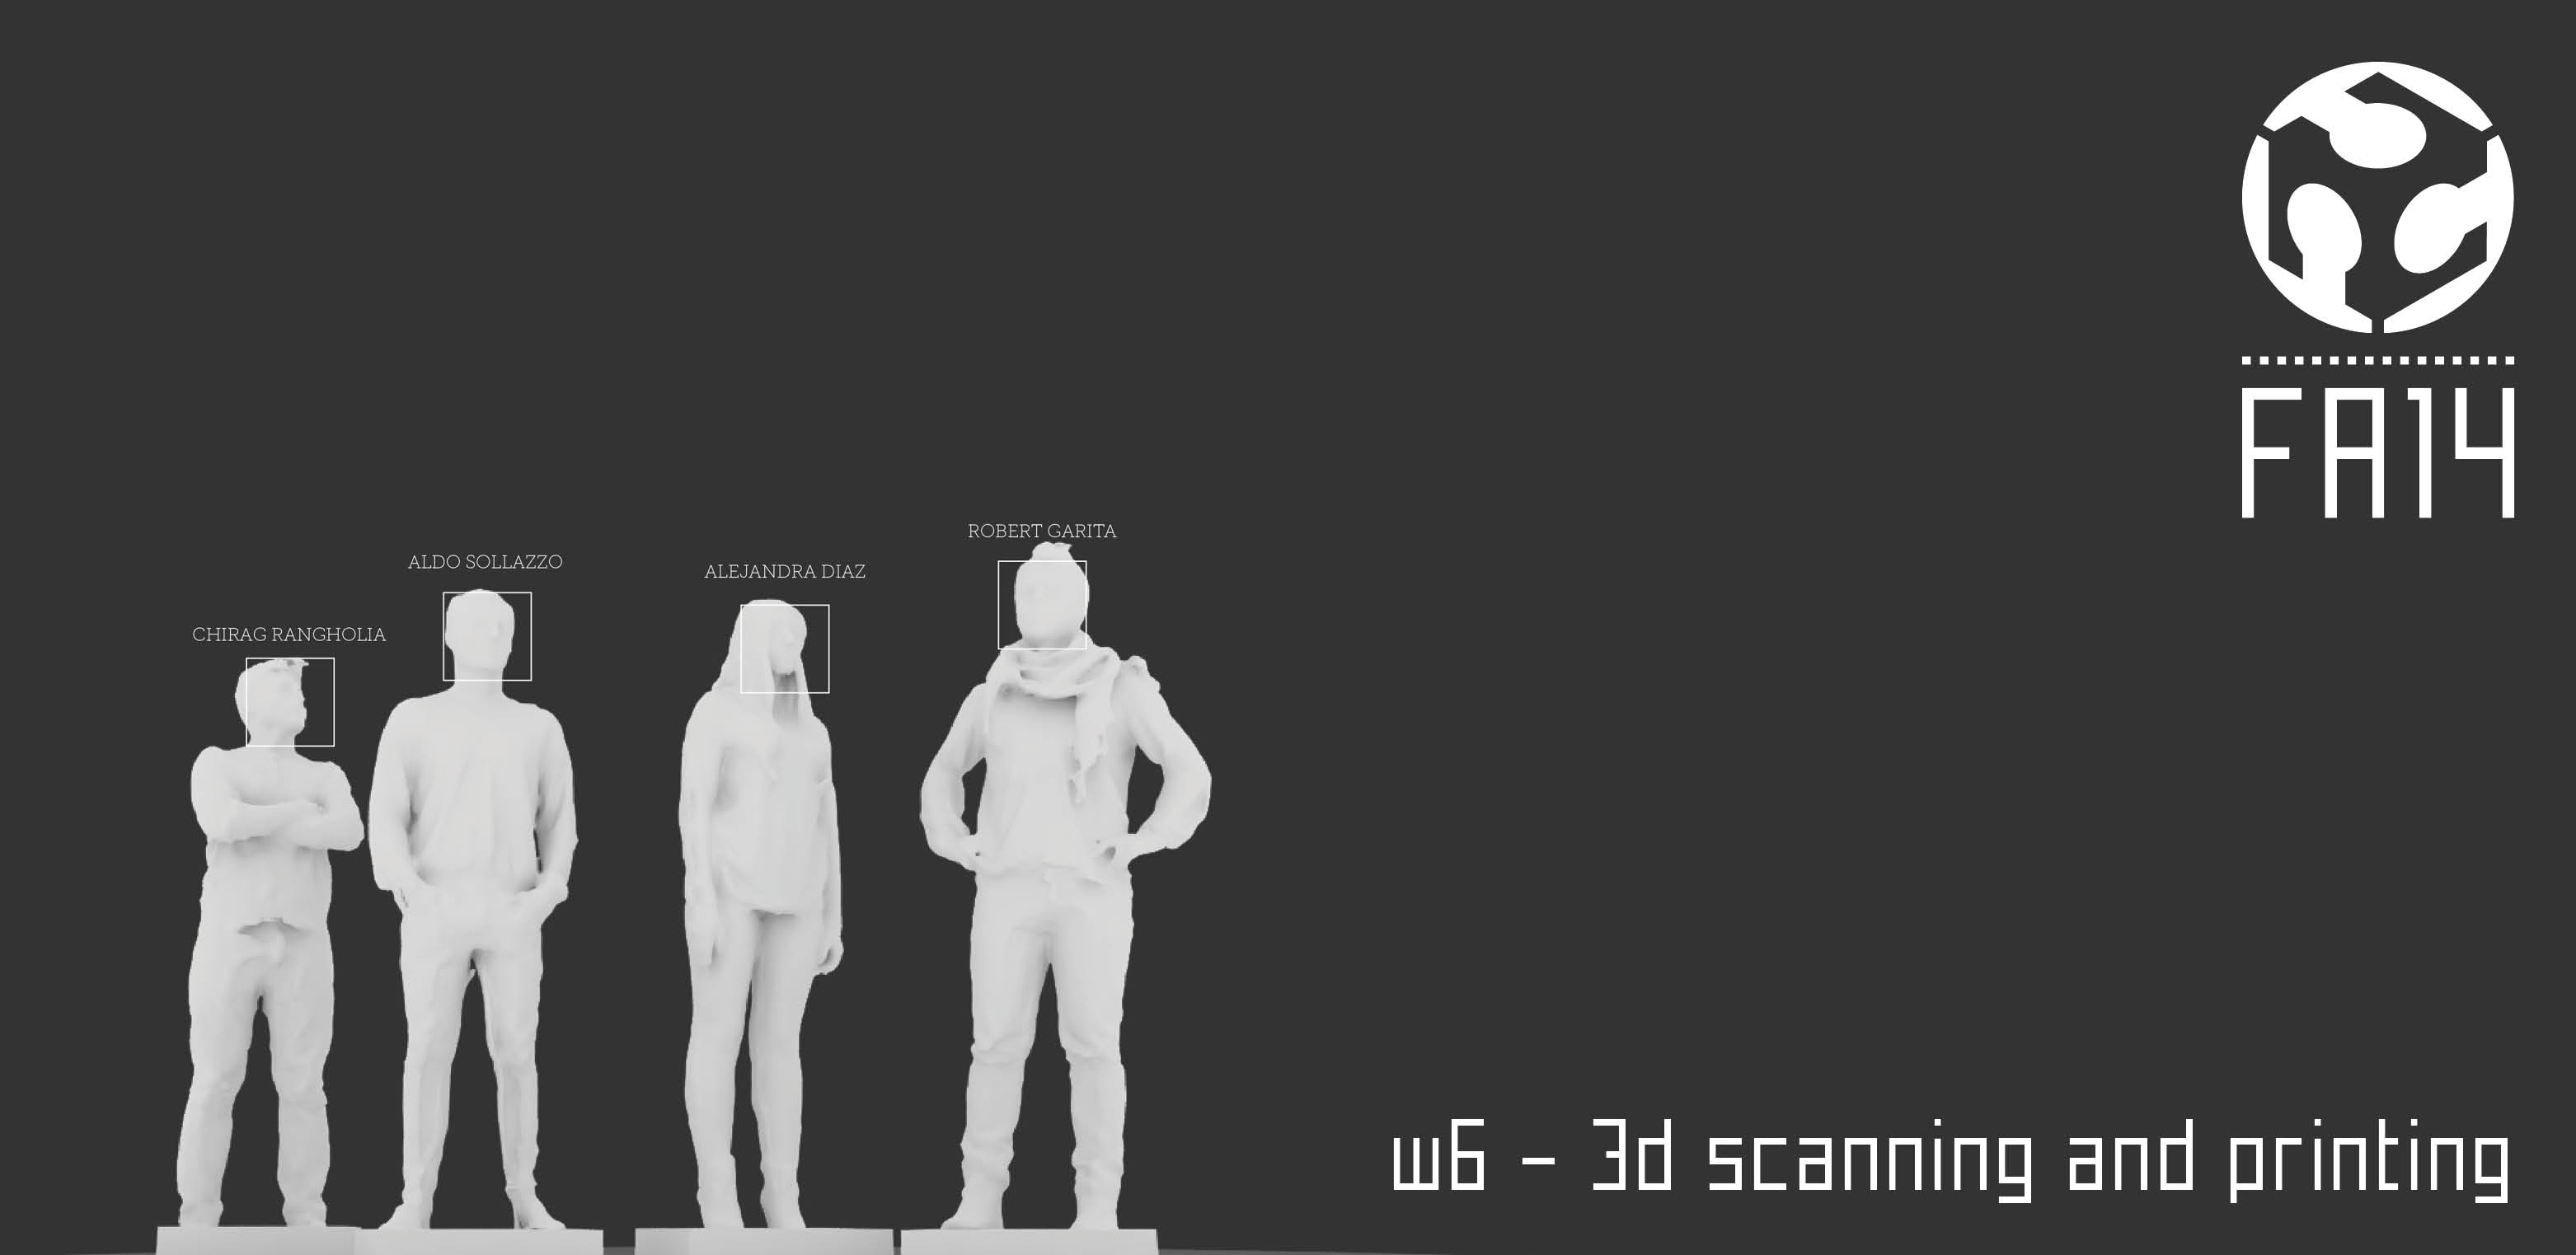
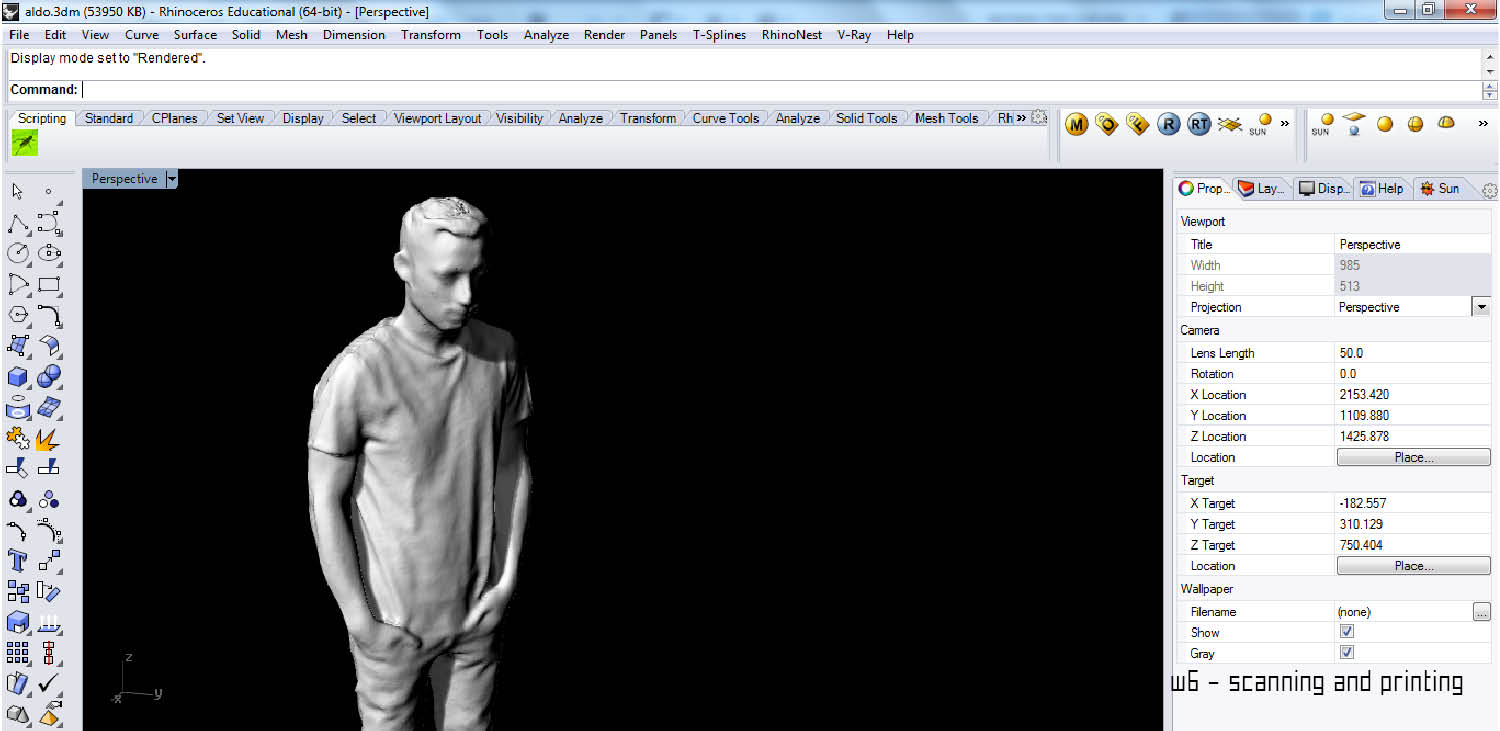
3D SCANNING AND PRINTING
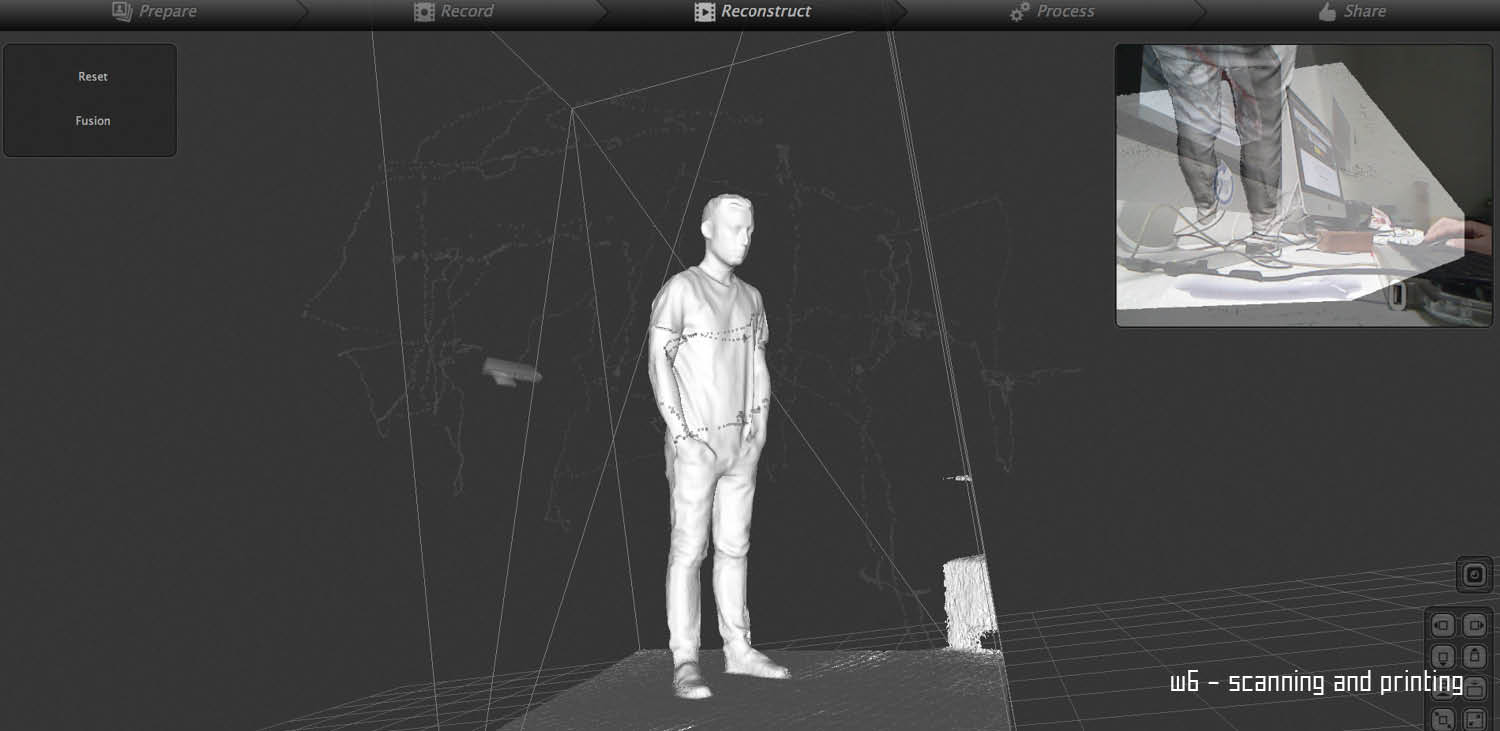
To explore a 3d scanning exercise I could start from something personal: myself!
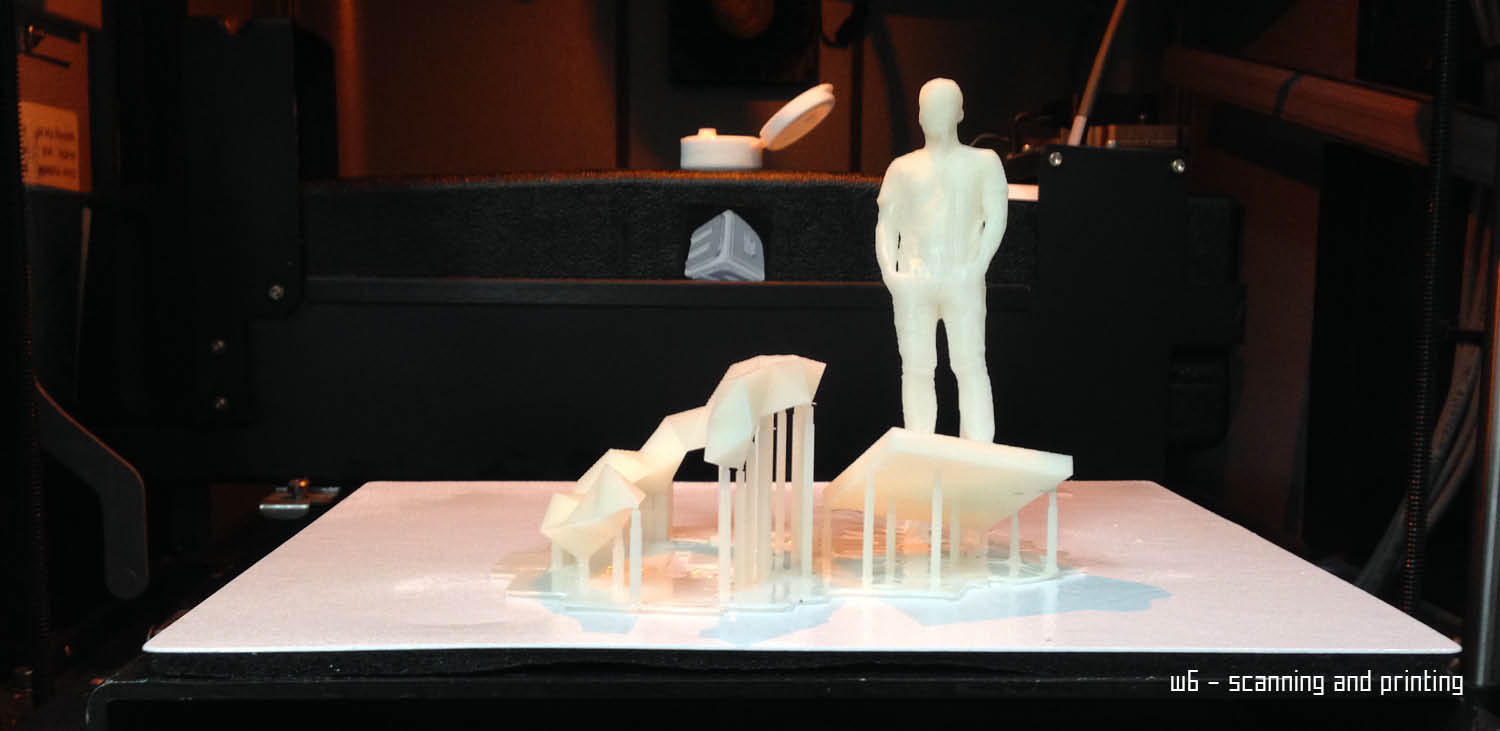
I did with a bunch of guys here at the academy a nice experiment using the Kuka Robot that we have at the Iaac. The video is available here .
The kuka scan was very funny even if it took more time than it was actually expected, generating several error of mesh in different parts.
For those reasons I repeated manually the operation and it took way less time and effort. Once I had my mesh I closed all the holes on it in rhino and evaluate the quality of the mesh. The problem when you have to print is to avoid the naked edges.
The machine used to 3d print was a Projet 1500.
Related Projects