

Week 8. Embedded programming
This week it was the moment to start learning how to program our boards to do what we want. The assigments were to read a microcontroller datasheet and later to program the board we built in previous week to do something in as many languages as possible.
Programming my board in Arduino
On my first approach I decided to programm my board with Arduino. I have never done before anything with Arduino, but everybody is saying that it is very easy, so I think it could be a good starting point.
Setting up the Arduino IDE
The Arduino IDE is designed to work with the Arduino boards, so the first step was to configure it to be able to use different boards. There is a nice tutorial that explains you how to use Arduino to program an Attiny. Summarizing:
- Download and install the Arduino IDE.
- Locate your Arduino sketchbook folder, and create inside a folder named hardware.
- Download the Attiny master.zip, and extract the attiny folder there.
- Restart Arduino IDE. You should see Attiny entries in the Tools > Board menu.
As I was doing this assignment in a Windows computer, before programming my board, I also needed to install the drivers for the FabISP and for the FTDI cable.
Connecting the board
Before programming, it is needed to power both boards and to connect the programmer to the target board:
- Connect the FabISP to the USB port.
- Connect the FTDI cable to the target board to power it.
- Connect the FabISP to the target board to download the programm.
|
|
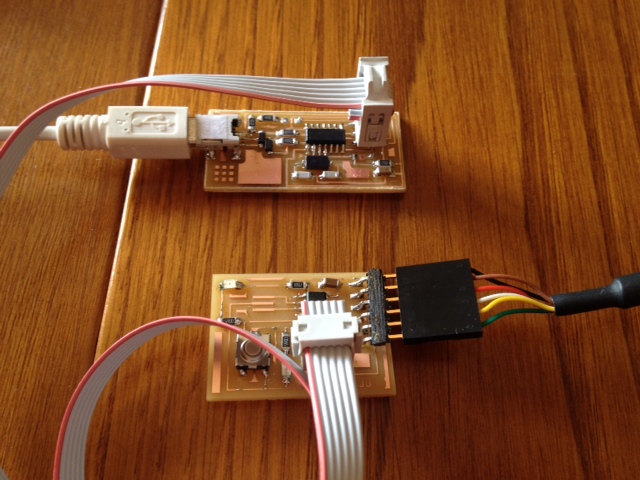
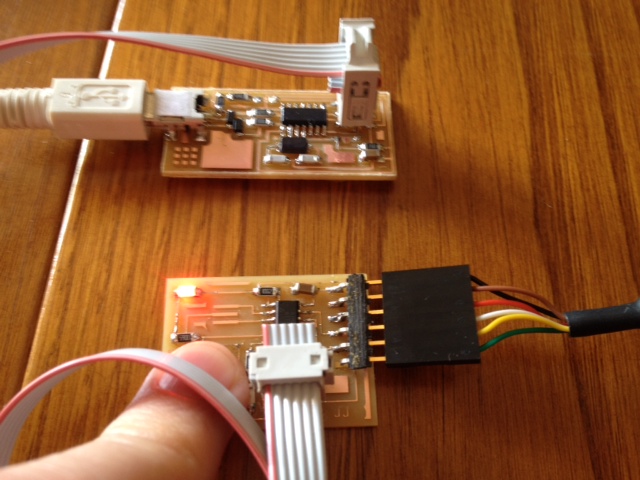
In the picture above you see all the connections. If you remember also from week 6, I included one LED that it is switched on only from hardware when the button is pressed. You could see in the image below that the LED is on when the button is pressed, validating the power supply to the board.
|
|
Burn the bootloader
The last step before programming it is burn the bootloader. This will load to the microcontroller the value of all the fuses defined. In this situation, as no external oscillator was placed, it was used the 8MHz internall oscillator. However, when burning the bootloader, an error appears:
|
|
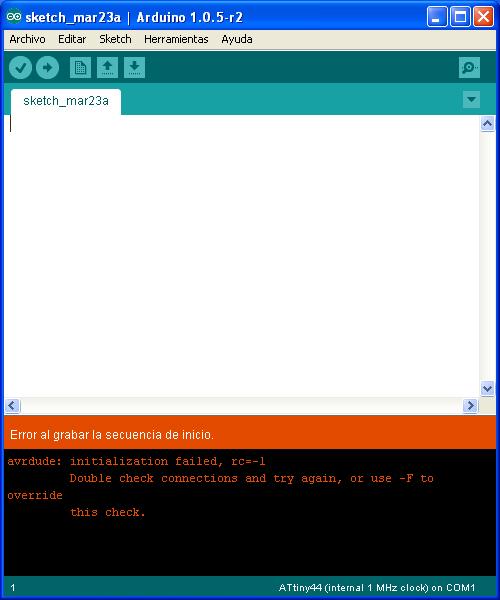
I have been looking in different places which could be the root of the error but I have not found it yet. This same error happened to me in the week 4, and I was able to solve it using a different usb port in my computer. However, I tested it also next week, and this time it was not a success. I am starting to wonder if my computer is not very happy with AVR microcontrollers...
I will continue trying to find the root of the problem and I will update this web when I find it.
Edited on April 6th
Problem solved!!
I finally found the problem why I was not able to burn the bootloader. It was a silly mistake, but that it took me a long time to discover. The connectors of the flat wire I was using to connect the FabISP to the board to program were connected in opposite direction!!!! This is a mistake I was having since the electronics production week, when it only worked with the AVRisp, as it was using a different wire...
It was just the moment to programm in the Arduino IDE the code of the board. I programmed it to switch on and off alternatively both leds. As one is connected to Vcc and the other one the GND, when the output signal of the microcontroller of both pins have the same values, both are in different status. I also sent the led which is on and off to the computer through the serial port.
In the video you can see the hello world board blinking the leds and sending the status to the computer.
The final version of the code developed can be downloaded here.