
When you use the Dremel tool for milling and engraving, normally the chips don't let you to see the work, so I created an accessory for this issue...
Materials & Equipments
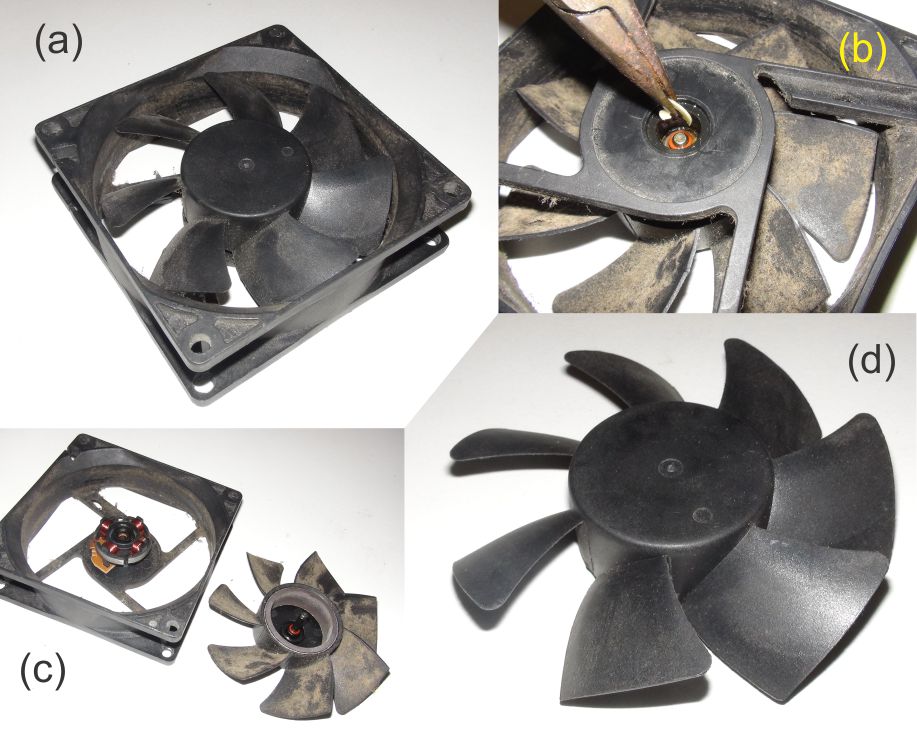
First of all I take an old computer fan (a), then I disassembly (b) to take the rotor (c) and clean it (d). This will be the objecto to scan.
3D Scan
I used an analog 3D scan process, using the milkscanner concept, but without the software. I reconstruct the 3D manually using other softwares (the software that I download from the page doesn't function in my computer), is a long work, but the result is pretty good.
Photograph proccess
|
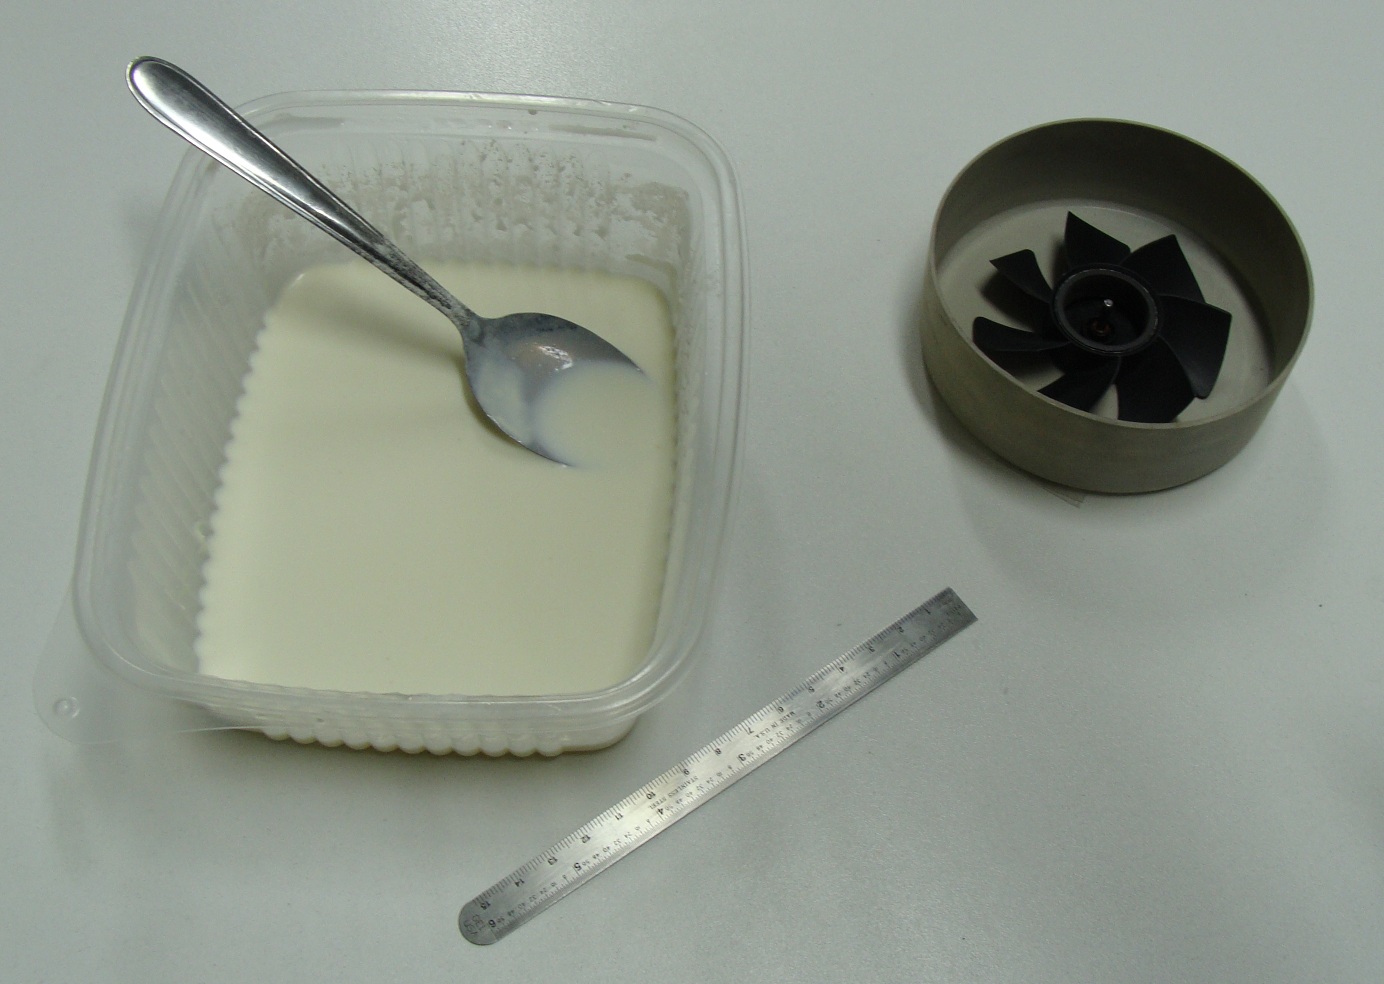
First, install the camera with the tripod the far away you can over the fan (zoom to get a good picture of it). The fan has to be pasted to the bottom of liquid container to avoid the floating when the liquid will pour. Pour some milk (or the colored liquid) and with the ruler take note of the heigh of the liquid, then take a photo. Repeat this process until cover the object with liquid. Try to fill the same height step of liquid for each photo (I.E.: I used 0.5cm). |
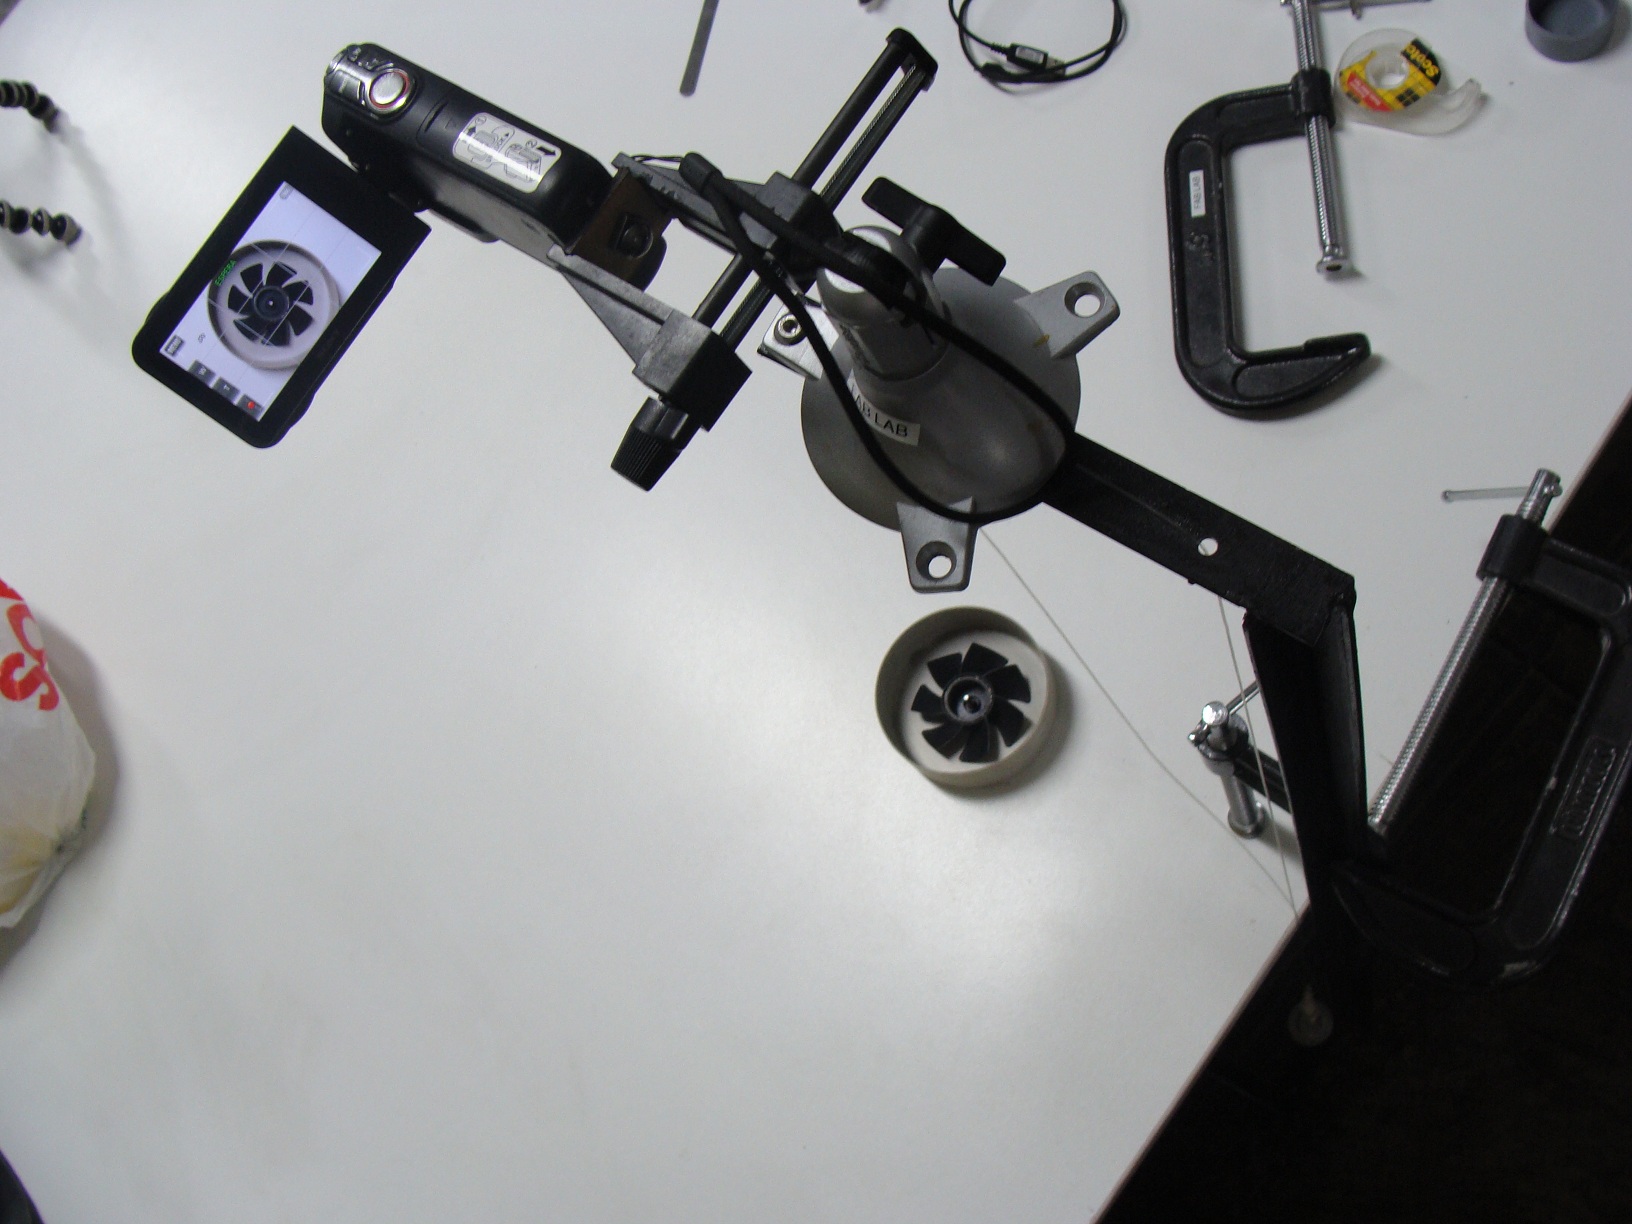 *I didn't have a tripod so I improvice a camera support with vices and a metal frame |
NOTE: The liquid has to be contrasting to the object to scan, to get a better image processing.
Image Processing
To get the curves of the fan blades need 6 steps as see in the next picture:
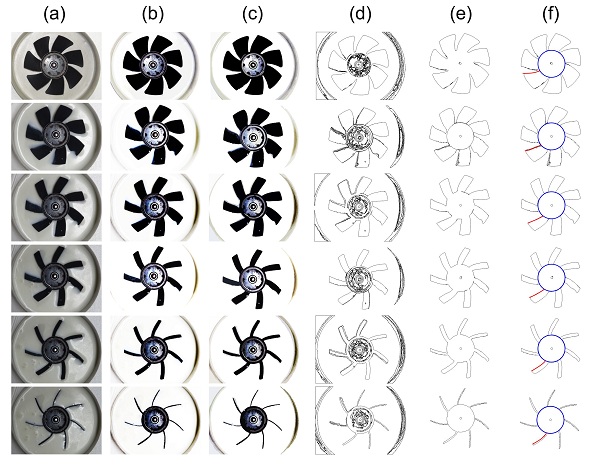
(a) The original photographs
(b) Increase of contrast
(c) Vectorize
(d) Get borders
(e) Clean the unnecesary lines
(f) Simplify the cuantity of nodes (red curves) & create a reference (blue circle)
CAD Work
For this part I used AutoCAD 2013(with Rhinoceros is easy, but I like the challenge).
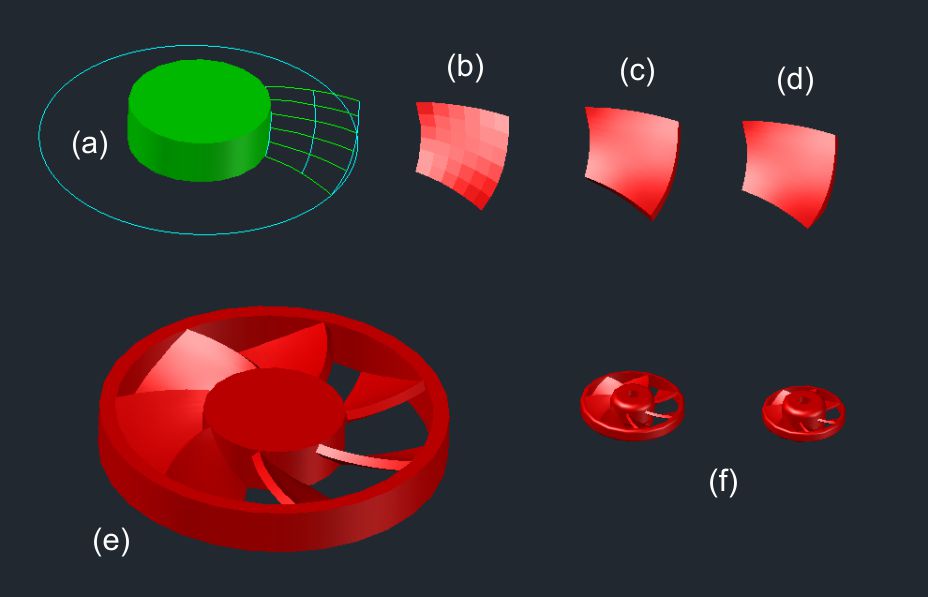
(a)First import the curves obtained in the image processing and use the reference (blue circle) to align all the curves, move up each curve the height that you use in the photograph process.
(b) To get a surface use loft tool or network
(c) Then use thicken tool to get a fan blade volume (if AutoCAD ask you to convert the surface to 3D solid o surface, choose convert to smooth 3D object).
(d) Edit the edges of the fan blade to make it sharp.
(e) Make a circular matrix and draw The center of the fan and the protective ring around the fan blades (this also gives more resistance to the part). Notice that the final model blade is a mirror of the original.
(f) Scale to get a smaller fan and substract a volume to fit the dremel chuck, also made a hole to pass the mill, round edges, etc.
Save the file as .STL and it's ready to print.
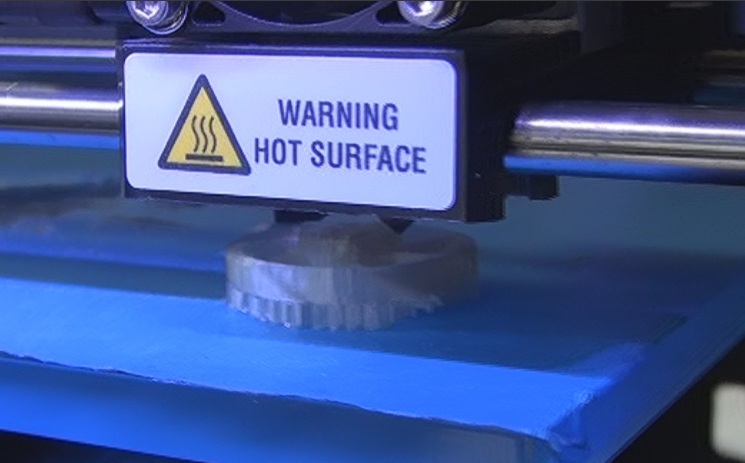
3D Printing
I printed 2 models, first a smaller prototipe in draft quality for testing (red fan), and then a bigger fan in high quality (translucent fan).
Some consideration before printing: (1)Check the correct level of the printing surface (this is more important for bigger models), (2) Check that in the top position the printing surface has a thin gap between the heater to ensure a correct paste of the raft.
 Prototype printing process Prototype printing process |
 Final model printing process Final model printing process |
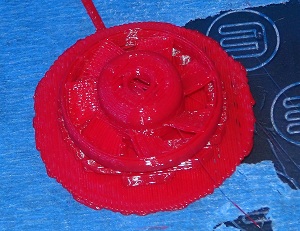 Prototype printed Prototype printed |
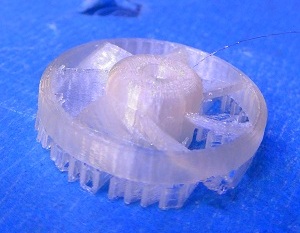 Final model printed Final model printed |
 Prototype without the raft Prototype without the raft |
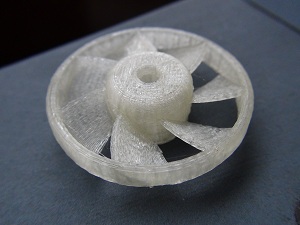 Final model without the raft Final model without the raft |
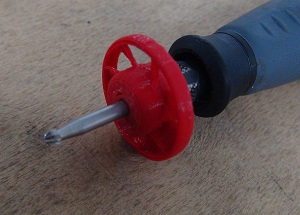 Prototype on the Dremel Prototype on the Dremel |
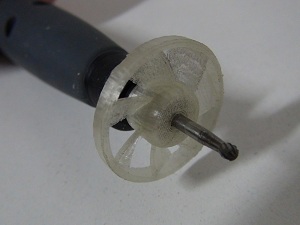 Final model on the Dremel Final model on the Dremel |
The test
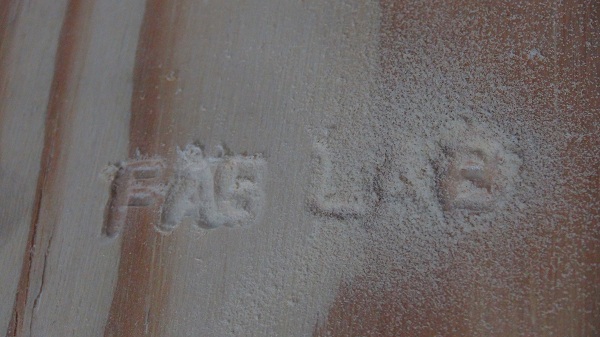
The "Fab" word was milled with the fan, and the "Lab" word was milled without it... The small fan works very well.