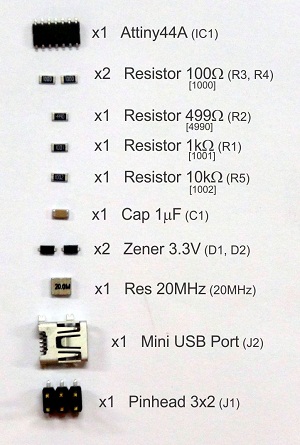
Materials & Equipments

Before Milling Process
In order to generate a circuit path for the Roland Modela, we used the Fab Modules in Ubuntu OS.

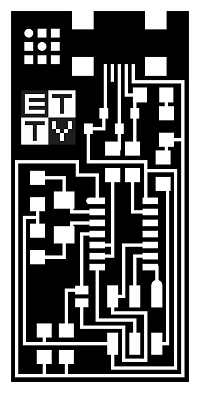
Editing the Fab ISP source image
The board model was download from the electronic production page at the bottom.
I like to personalice my circuit, so that, I put my signature logo on the free space of the boards
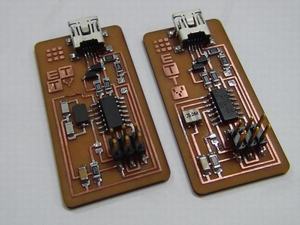
I fabricate the two boards (with resonator model and without one). For mill it I placed both boards in a same image file.
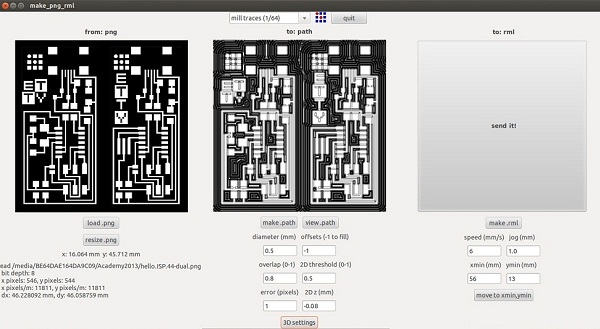
Loading the Fab Modules
Then load the Fab Modules. Open terminal and type in "sudo bash":
fablab@fablab:~$ sudo bash
[sudo] password for fablab:
Write the password of sudo mode, then type in "fab":
root@fablab:~# fab
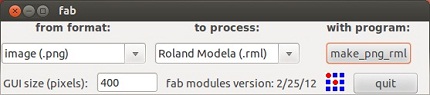
The Fab Tools window will appear. Pic [Image(.png)] in format popup and [Roland Modela(.rml)] in process popup, and click
Another window will appear with three columns:
- [diameter(mm)] is the diameter of the mill sharp point
- [offsets(-1 to fill)] controls the thickness of the gap between the path and de useless copper zones, if you want leave only the paths and clean all the other zones use -1.
- [overlap (0-1)] is the fraction of area that the mill pass over the uncut region
- [2D threshold(0-1)] is to control the border recognition.
- [2Dz(mm)] is the cut depth, for our boards and mills we used 0.08mm of depth;
- [speed(mm/s)] is the speed of cutting movements. The value depends from the cutting material, the diametre of the mill the number of sharp edges, etc.
- [jog(mm)] controls height when the mill moves in void
- [xmin(mm)] and [ymin(mm)] are position on the machine coordinate axis of the bottom-left corner cutting region
* The button move the spindle to the coordinates (xmin,ymin).
On the top, the popup has the common mills that the fab uses. Each one loads default parameters for the milling proccess.
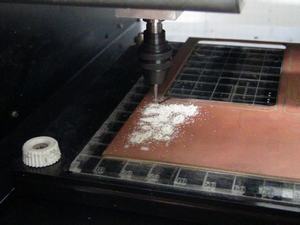
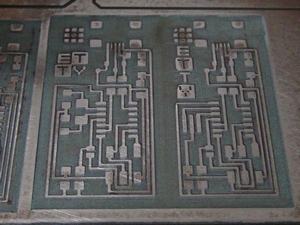
Milling & Cutting Process
Milling the Circuit with the Modela MDX-20 using our Mill Adaptor and not standar mill bits (conical bit). In our case normally need to use sandpaper to eliminate the mill burr on the copper surface.
The board cutting we did with the laser cutter, it was easy and faster than the milling process. The copper layer on the cutting path was removed before this process. The parameters was Power = 100%, Speed = 50%, Frecuency = 5000Hz
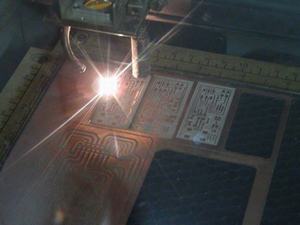

NOTE: Only the bakelite boards can be cut with laser. The glass-fiber boards can't be cut with laser.
Welding the Electronic Components

First the continuity of all the paths was checked. In one of the boards one of the paths was cutted by the sanding, and repaired welding a small piece of copper paper
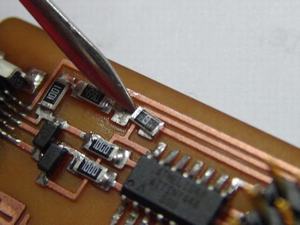
 For place the Attiny44, tinned one leg of the microchipand the corresponding pad before welding it, this make easy the correct placement of this important component.
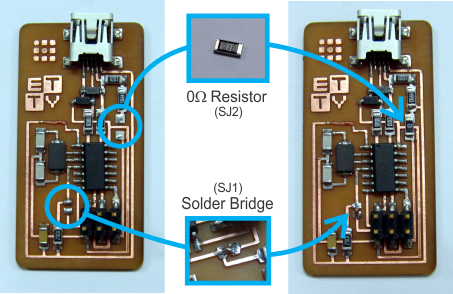
Weld the two temporaly bridges, that will be removed after the programing
Programing the FabISP
I follow the academy tutorial to made this part.
Downloading the Softwares
Get all the softwares and drivers to your computer. In my case I did it in Ubuntu OS. On the ubunto Terminal and with the sudo active type in:
root@fablab:~# apt-get install flex byacc bison gcc libusb-dev avrdude
root@fablab:~# apt-get install gcc-avr
root@fablab:~# apt-get install avr-libc
root@fablab:~# apt-get install libc6-dev
Connecting the FabISP
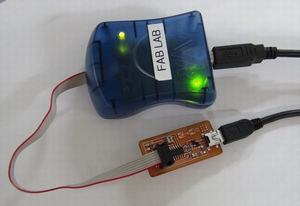
Connect the AVRISP2 programer to the pinhead of the FabISP board and the microUSB port to the computer USB-port. If all is correct the AVRISP2 LED light will be green.
Programing the FabISP
Download the FabISP firmware (here), then unzip it in the desktop.
Then go to the firmware folder (in my case is "fabISP_mac.0.8.2_firmware"):
root@fablab:~# cd ~/Desktop/fabISP_mac.0.8.2_firmware/
Then type "make clean":
root@fablab:~/Desktop/fabISP_mac.0.8.2_firmware# make cleanAll was correct and the window looks like this:

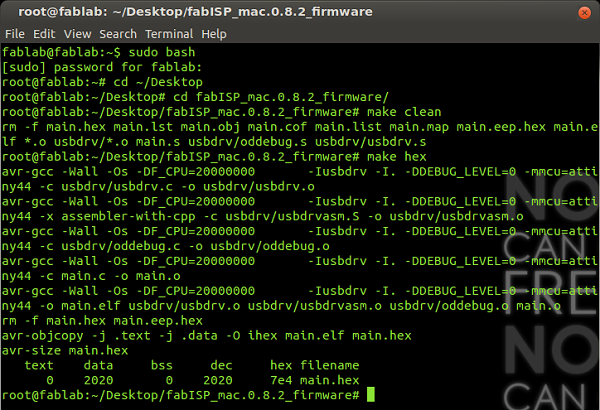
Then type "make hex":
root@fablab:~/Desktop/fabISP_mac.0.8.2_firmware# make hexAll was correct:
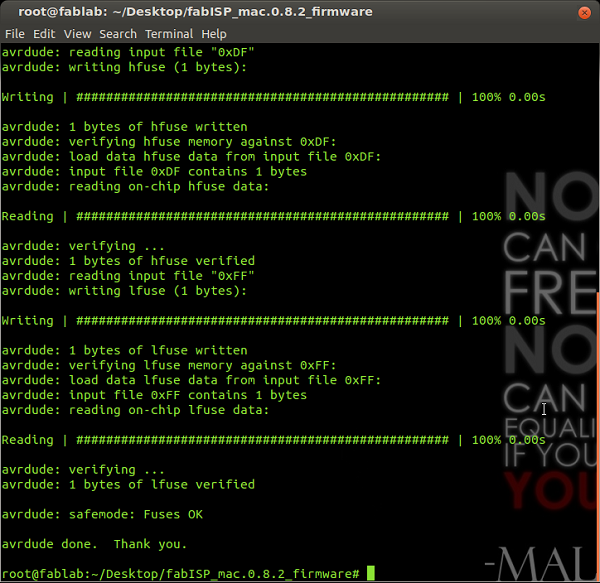
Then type "make fuse":
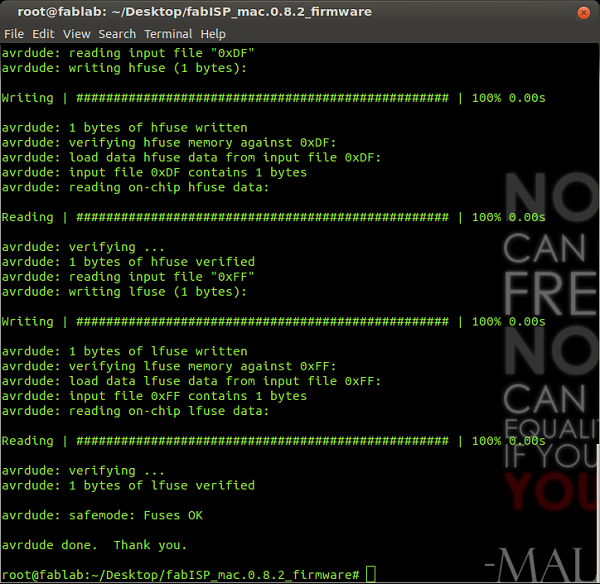
root@fablab:~/Desktop/fabISP_mac.0.8.2_firmware# make fuseAll was correct:
Then type "make hex":
root@fablab:~/Desktop/fabISP_mac.0.8.2_firmware# make program
All was correct:
Checking the devices
In the terminal check the usb devices type "lsusb":
root@fablab:~# lsusb
In the list will appear "Multiple Vendors USBtiny"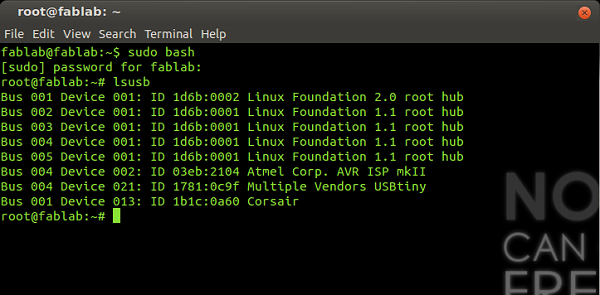
Now remove the solder bridge and the 0-Ohm resistor (this could be removed with the desoldering wire)
Final Products