applications and implications, project development
Topic(s) of this week
- applications and implications (video, review)
- project development (video, review)
- Define the scope of a project
- Develop a project plan including a bill of materials (BOM)
Hero shots

Assignments
Individual assignment
Just as a note to what happened this week:
- LCD screen via SPI note working
- I2C deadlock and pullup resistors
Propose a final project masterpiece that integrates the range of units covered.
Your project should incorporate:
- 2D and 3D design
- Additive and subtractive fabrication processes
- Electronics design and production
- Embedded microcontroller interfacing and programming
- System integration and packaging.
Where possible, you should make rather than buy the parts of your project. See Final Project Requirements for a complete list of requirements you must fulfil. create your BOM (Bill Of Materials).
Tasks
Have you answered these questions?
- What will it do?
- Who has done what beforehand?
- What will you design?
- What materials and components will be used?
- Where will they come from?
- How much will they cost?
- What parts and systems will be made?
- What processes will be used?
- What questions need to be answered?
- How will it be evaluated?
- Leave feedback in Nueval that this weekly is ready for evaluation.
Individual assignment
My final project proposal is in the documentation of my final project. As not to duplicate those notes in here, I’ll suffice with links to the relevant part of this documentation and images that are also already in the final project documentation.
Final project masterpiece
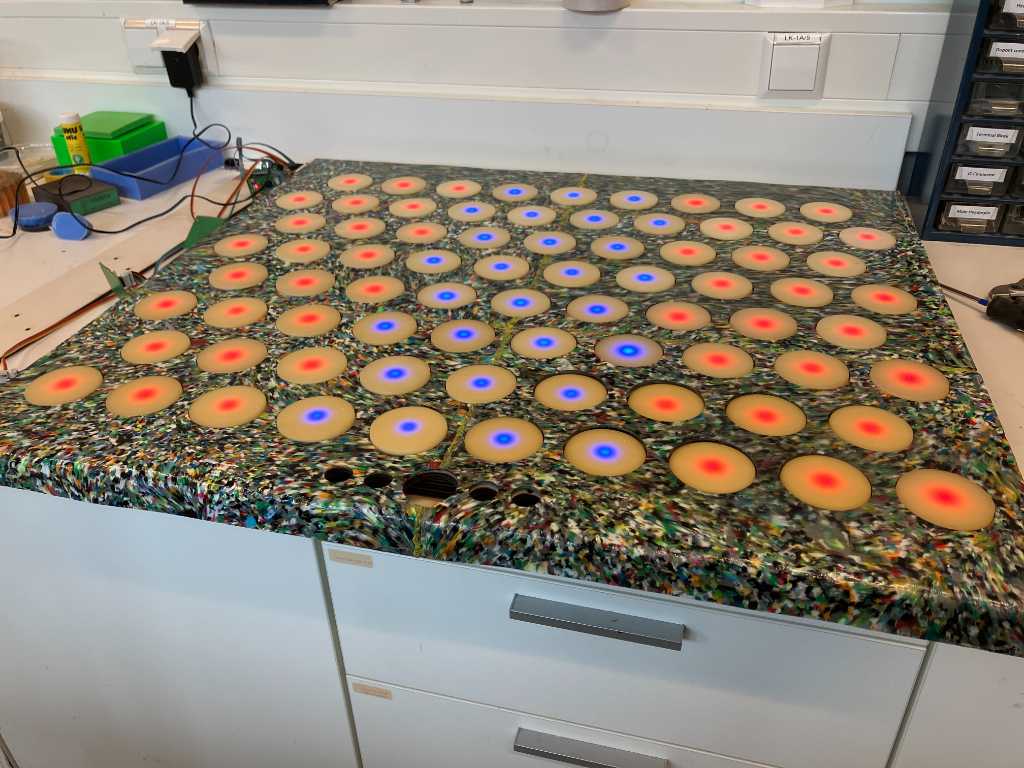
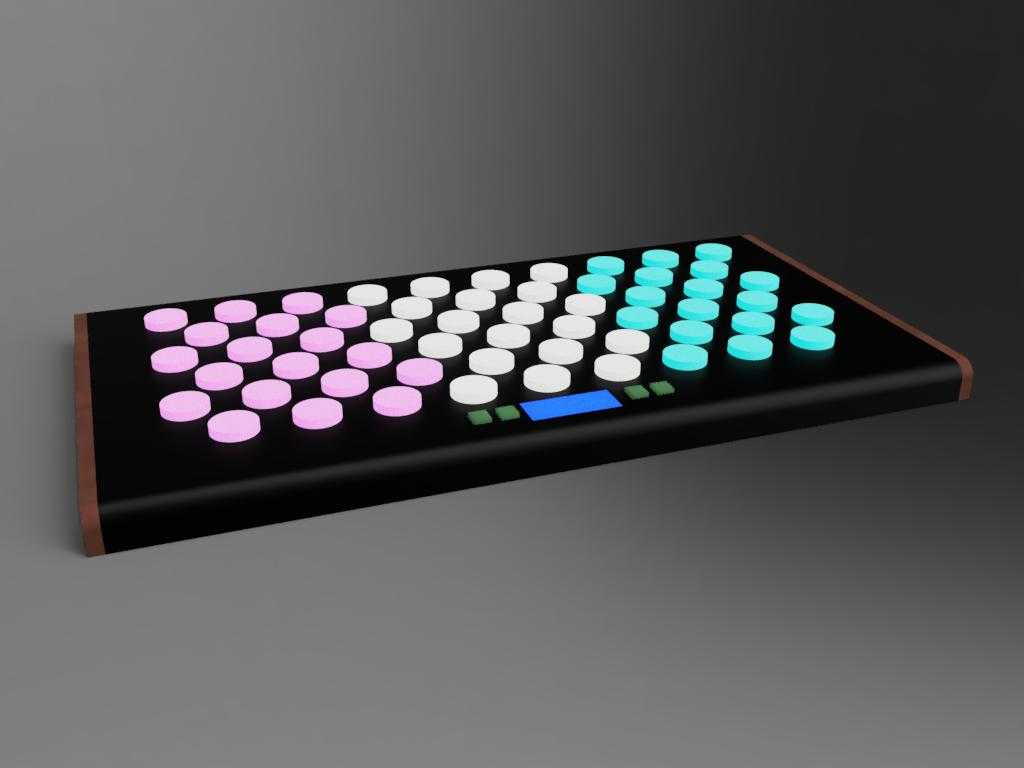
My final project is the Marimbatron, a MIDI-based musical instrument that you play with drumsticks and/or mallets. It supports an isomorphic key layout which maintains consistent musical intervals between keys, allowing for the same shapes to be used for chords and scales regardless of the root note. It also supports the traditional piano key layout. See here for more information: 00_marimbatron
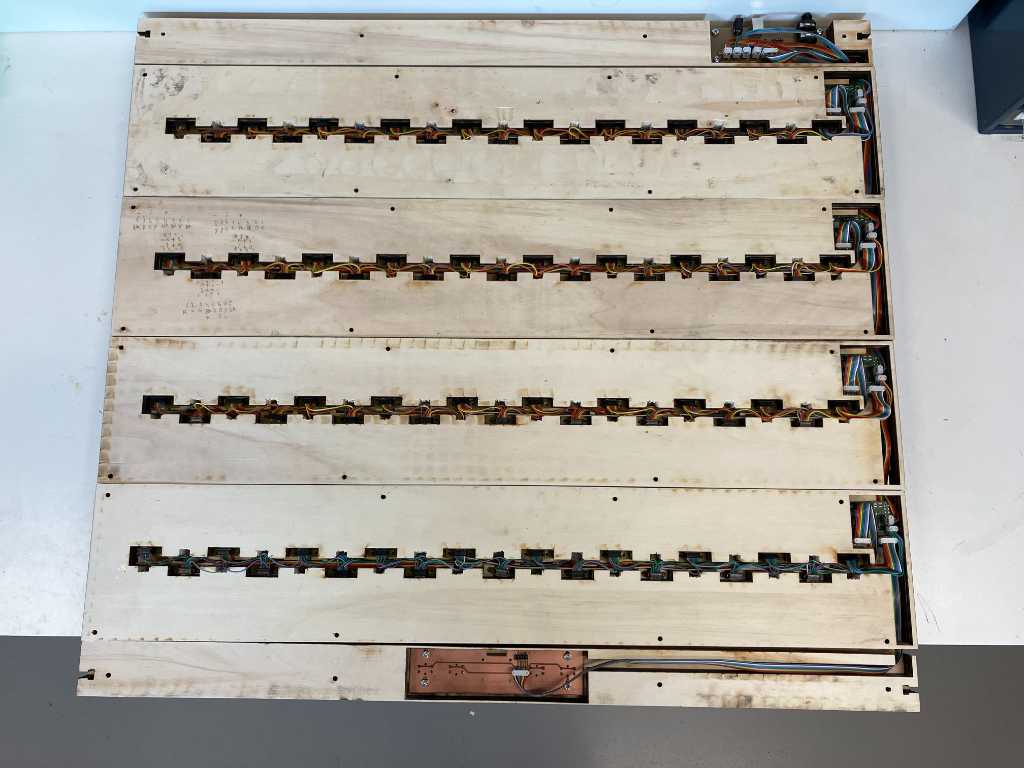
The Marimbatron modular designed. Every octave is a fully self-contained module.
In total it consists of 76 fab-made pressure sensors with high-speed readout (200 us to read 19 sensors, 12-bit ADC). This will make it output MIDI data in less than 10ms, so no noticeable latency.
- Who has done what beforehand? See 02_prior-works
- What will you design?
- Everything :-) Well, maybe not the keycaps. But other than that: all designed by me. So lots of documentation. The Final Project documentation is therefore split into logical parts:
- The pressure sensor is a fully selfcontained unit and therefore has its own page: 05_pressure-sensor
- The mechanical design and fabrication documentation can be found here: 06_mechanical
- The electronics design and fabrication documentation can be found here: 07_electronics
- The programming of the embedded microcontrollers can be found here: 08_programming
- Everything :-) Well, maybe not the keycaps. But other than that: all designed by me. So lots of documentation. The Final Project documentation is therefore split into logical parts:
- What parts and systems will be made?
- Everything part and subsystem of the Marimbatron will be made and integrated into one fully working unit.
- What materials and components will be used?
- Plywood for the fixtures
- Recycled PLA (from failed 3D prints) for the top sheet
- Polyurethane, PET sheets, graphite spraypowder for the pressure sensors
- Flexible PCBs sourced at a PCB house, but also fablab-made using coppertape and Kaptontape
- Where will they come from?
- All these materials are sourced from contracted suppliers of our University
- What processes will be used?
- The Marimbatron is fully fablab-able and made using the following processes:
- 2D design
- most importantly the lasercut fixtures
- 3D design
- the sensor molds are 3D designed
- Additive and subtractive fabrication processes
- the sensor molds and keycaps are 3D printed
- the sides are CNC milled
- Electronics design and production
- The 4 octave version contains 6 custom PCBs and 76 custom designed flexible PCBs
- Prototypes of each PCB are milled in the Fablab and fully functional
- Prototypes of the flexible PCB are cut on the vinylcutter using coppertape on kaptontape
- Embedded microcontroller interfacing and programming
- The 4 sensorboards contain a SAMD21J18A Cortex-M0+ microcontroller
- The mainboard contains a SAMD21E18A Cortex-M0+ microcontroller
- System integration and packaging
- See system integrations week: 16_system-integration
- 2D design
- The Marimbatron is fully fablab-able and made using the following processes:
- What questions were answered?
- Can I make a fully Fablab-able digital intrument using pressure sensors (meaning can it fully be made in a Fablab, including the pressure sensors)? And yes, I can. Although the I ordered flex-PCBs from a PCB house, I did make the very same design using coppertape-on-kaptontape and that works. The weeding is no fun and I needed a lot, so that’s why I ordered them. I also ordered the sensor PCBs, but again, I also made a fully working sensor PCB using the same design in our Fablab.
- What worked? What didn’t?
- The vast majority works. I have a digital marimba that sends MIDI messages, it is pressure sensitive and it is fully Fablab-able. Really the only thing that I couldn’t get to work is the round LCD display. That is most probably due to faulty hardware, so it is on the list for future spirals.
The Bill Of Materials (BOM) including cost overview can be found here: 09_bill-of-material
Reflection
Wow, that was a huge project. Didn’t really think it would end up this big. I enjoyed every bit of it. Well, maybe not the part when I lost far too much time working with a faulty LCD screen. But still, even from that I took some learnings.
There are a lot of things to reflect on. Both in terms of what I learned as well as in what the implications are. To start with the first part. Even though I already knew quite a bit on digital making, still a world of possibilities opened up. And I didn’t expect that to happen that much. I’m sure I will get back to my notes and accompanying lectures to find more gems that I didn’t have time to investigate during this program. Even now (almost 2 weeks after presenting to Neil) I daily think about how to improve the Marimbatron and what other things I could do with the technology in it. But that’s just on the technical part.
Personally, I loved being introduced to the Fab-family. The international community that makes this all possible. The energy with which various projects are done together. I really hope to stay part of this and to stay in touch with the wonderful Fabacademy people. I’d like to take this opportunity to thank everyone involved in the Fabacademy. A huge shoutout to Henk & Michelle at WAAG for making all of this possible at their local node. Your support and guidance is FABulous! Also big thanks to Erwin, Bas and Saco for their lectures & support. A big round of applause for my fellow students Vera, Joe, Edwin and Joany. You made this an amazing experience.
In terms of implications, I think there will be quite a few. Even though I already knew quite a bit about digital making, the fact that I could do this deep dive made me much more confident to actually say that I’m a maker. That a lot of the knowledge that I have, but that I almost forgot about, reemerged and is now ready to be used. And that I’m now even more so loaded with ideas and information that I can use to help others in their path to digital making.
On a broader note, participating in Fabacademy also helps to “get into the Fablab mindset”. I work at a Fablab. Do we really act like a Fablab? Is it enough or can we be more Fablab? Those kind of questions pop up now and I’m eager to get them answered. Same goes for getting the word out. We, especially in the Western world, are trained to work with our brains. But our hands are an equal part of us. We’re designed to make. The Fabacademy is a challenge both on the brains as well as on the hands. So a perfect combination of how I think how we should be educated. I’m sure this is something that I will tell about to a lot of people and hopefully change some minds and get people to make.