wildcard week
Topic(s) of this week
- wildcard week (video, review)
- Demonstrate workflows used in the chosen process
- Select and apply suitable processes (and materials) to do your assignment.
Hero shots


Assignments
Individual assignment
- Design and produce something with a digital process not covered in another assignment, documenting the requirements that your assignment meets, and including everything necessary to reproduce it. Possibilities include but are not limited to wildcard week examples
What I want to learn
So far I learned a lot on how to process different materials using different processing techniques. But I’ve not yet created an actual material itself. It would be great if I could make my own material and then use one of the techniques available in the Fablab to process it. So let’s see if I can make a plate of PLA out of failed 3D prints.
SSTM planning
Supply
| Day | Supply | Tasks |
|---|---|---|
| Thursday | Bank holiday | |
| 18:00-20:00 | FP remove flashing from casted sensors | |
| Friday | 10:00-16:00 | FP put together sensors |
| Saturday | 14:00-16:00 | FP solder connectors to sensors |
| Sunday | - | - |
| Monday | 11:00-17:30 (fablab) | Create PLA plates using heatpress |
| 21:00-20:00 | Document | |
| Tuesday | 9:00-17:30 (fablab) | Create large PLA plate and lasercut |
| 21:00 | FP programming | |
| Wednesday | 9:00-12:00 (fablab) | friction welding PLA sheets |
| 12:00-13:00 | Local review | |
| 13:00-14:00 | Regional review | |
| 15:00-18:00 | Neil time |
Tasks
Have you answered these questions?
- Documented the workflow(s) and process(es) you used
- Described problems encountered (if any) and how you fixed them
- Included original design files and source code
- Included ‘hero shot’ of the result
- Leave feedback in Nueval that this weekly is ready for evaluation.
Individual assignment
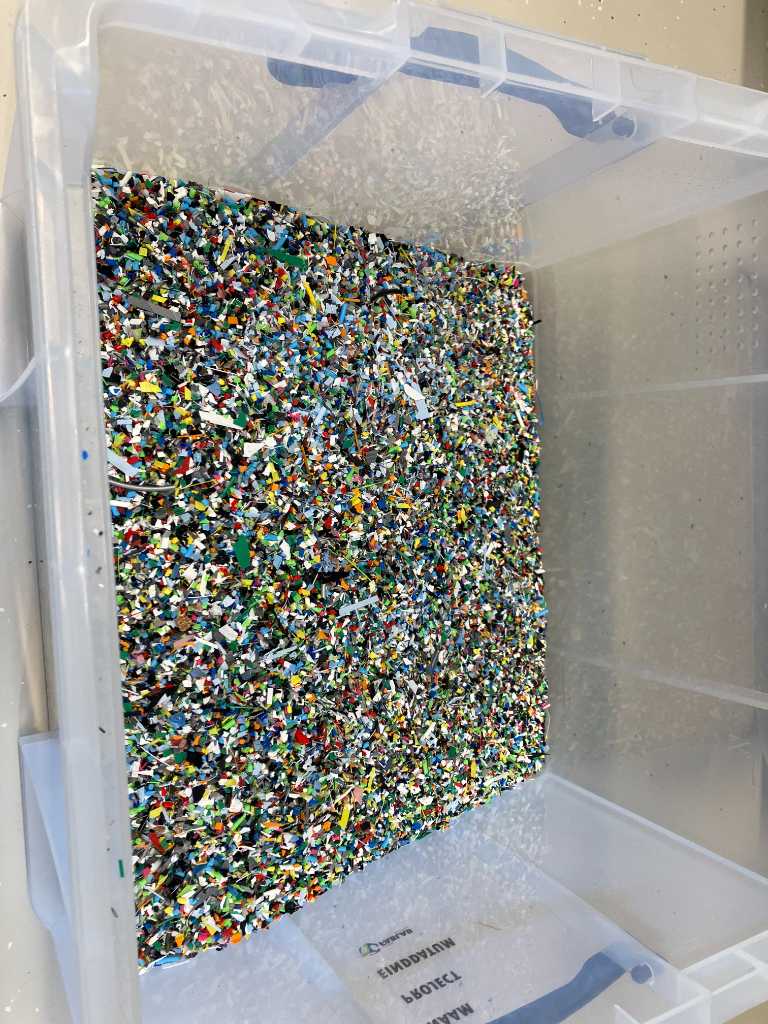
In the recent past a grad student from our Fablab used a shredder and a heatpress of one of the other research groups at the Saxion University of Applied Sciences to create plates of platics. Out of that work, we still have shredded pieces of PLA left. This PLA granules are made out of failed 3D prints, which we collect in the hope to find ways to recycle it.
This is about 5kg of PLA granules. More than enough for me.
In my final project I still need a top cover plate to cover this:
The size of this marimbatron is length 708mm x 794mm. I want the top cover to also overlap on the front and the back, so it needs to be 2x 30mm = 60mm longer. So total size of the PLA plate that I need will be 768 x 794mm.
Eenor hydraulic press
At the Thermoplastics Composites Application Center of Saxion University they work on creating and testing composites on a daily basis. One of the tools that they use often is the hot plate press. With this machine you can create plate of 300x400mm of any type of plastic, as long as you have granules.
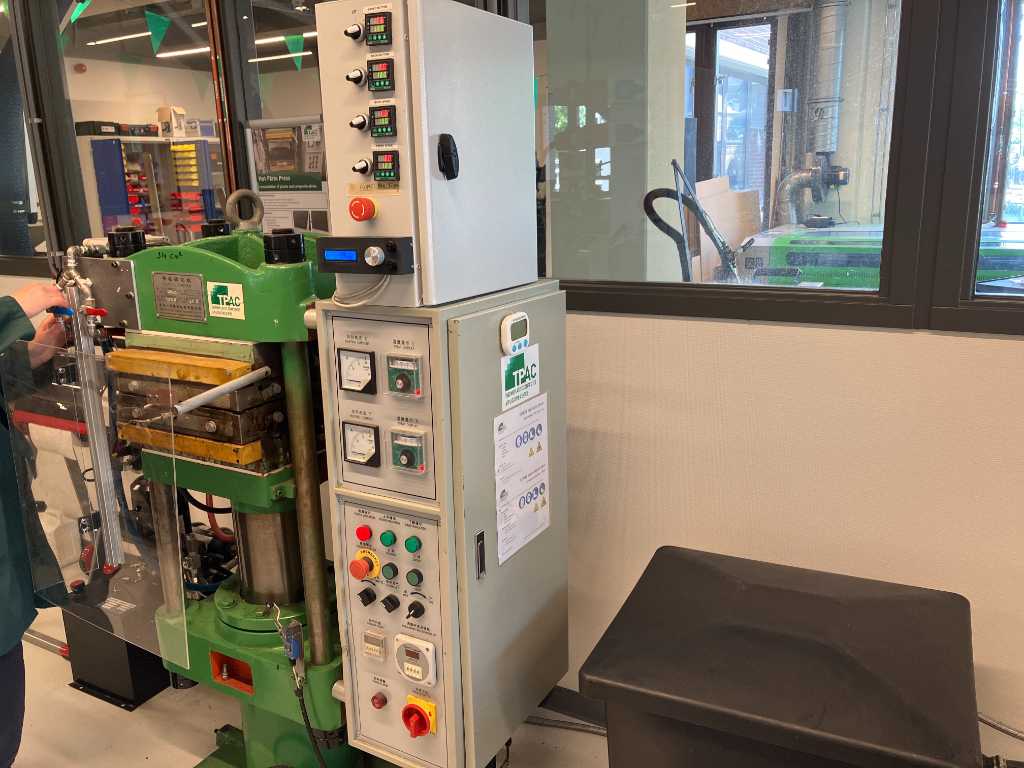
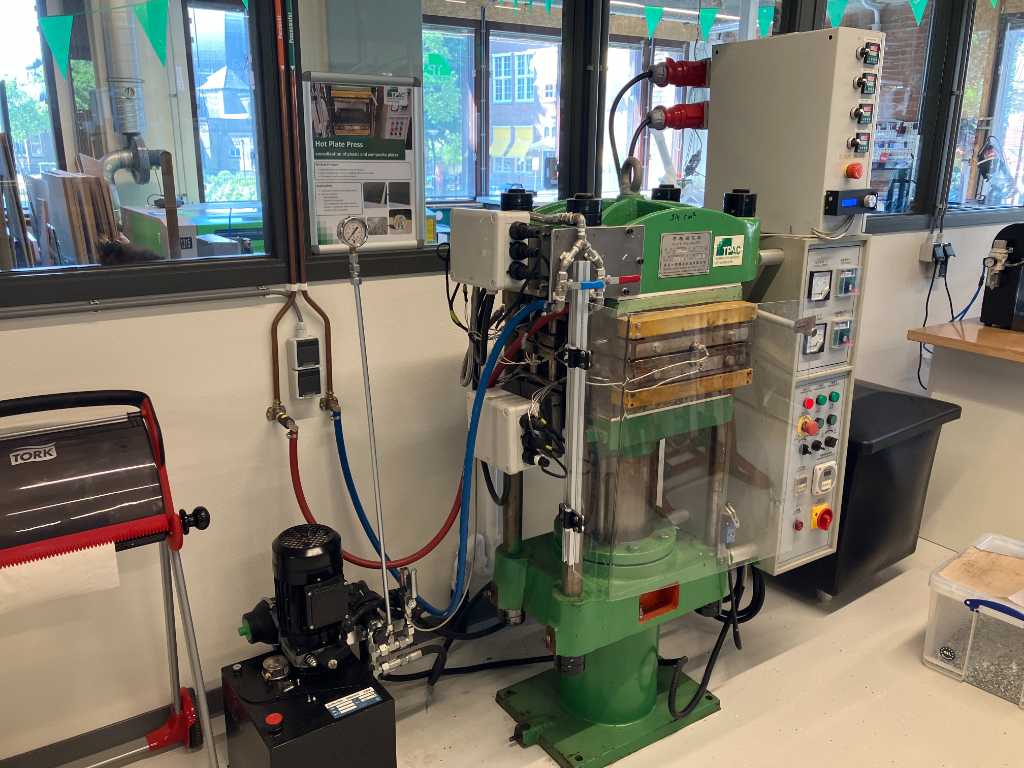
The machine that I’m going to use today is the Eenor Hydraulic press.
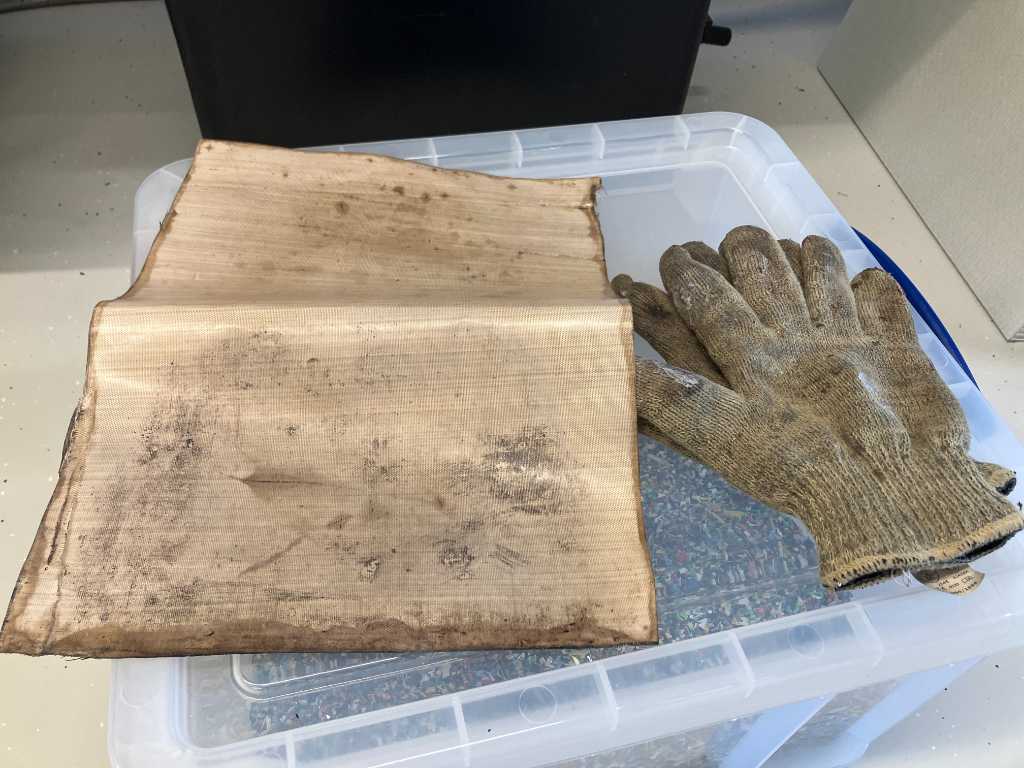
Safety is important in this lab as well. So wear safety shoes, a labcoat, safety glasses and heat resistant gloves when working on the machine. Also make sure the air extration system is turned on because you really don’t want to breath molten plastic…
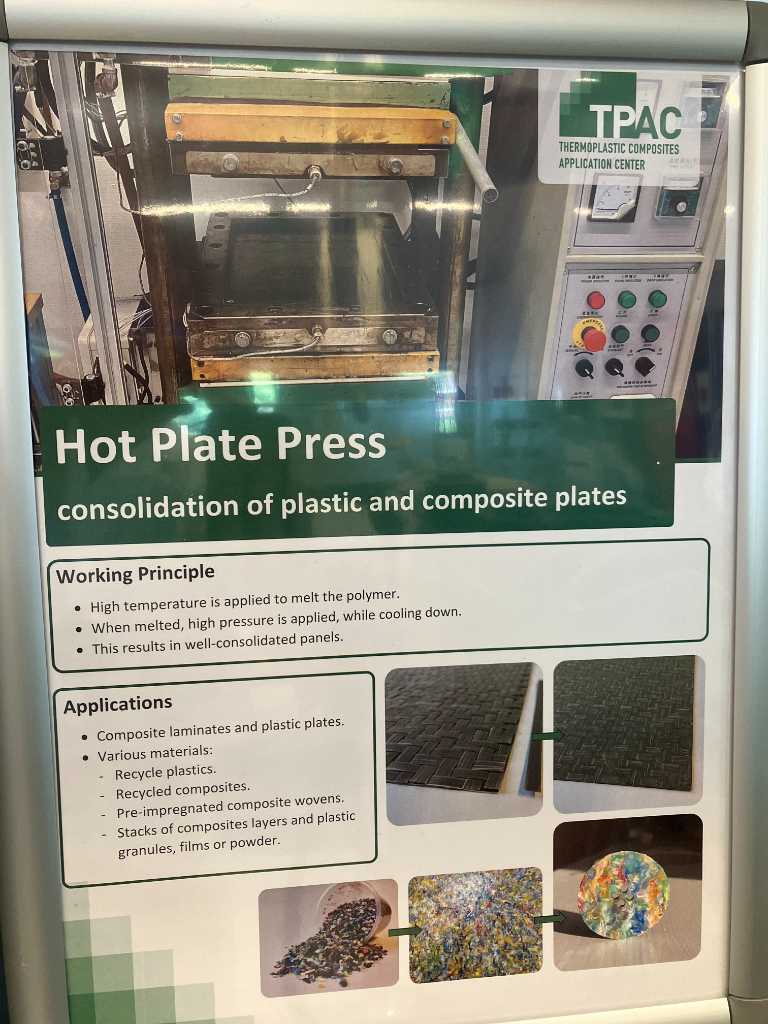

The press can reach temperatures of up to 250 degrees Celcius. I don’t know the maximum pressure, but I’ve seen that 25 bar is achievable. This is not needed for PLA, we’re going for 180 degrees and about 8 to 10 bars of pressure.
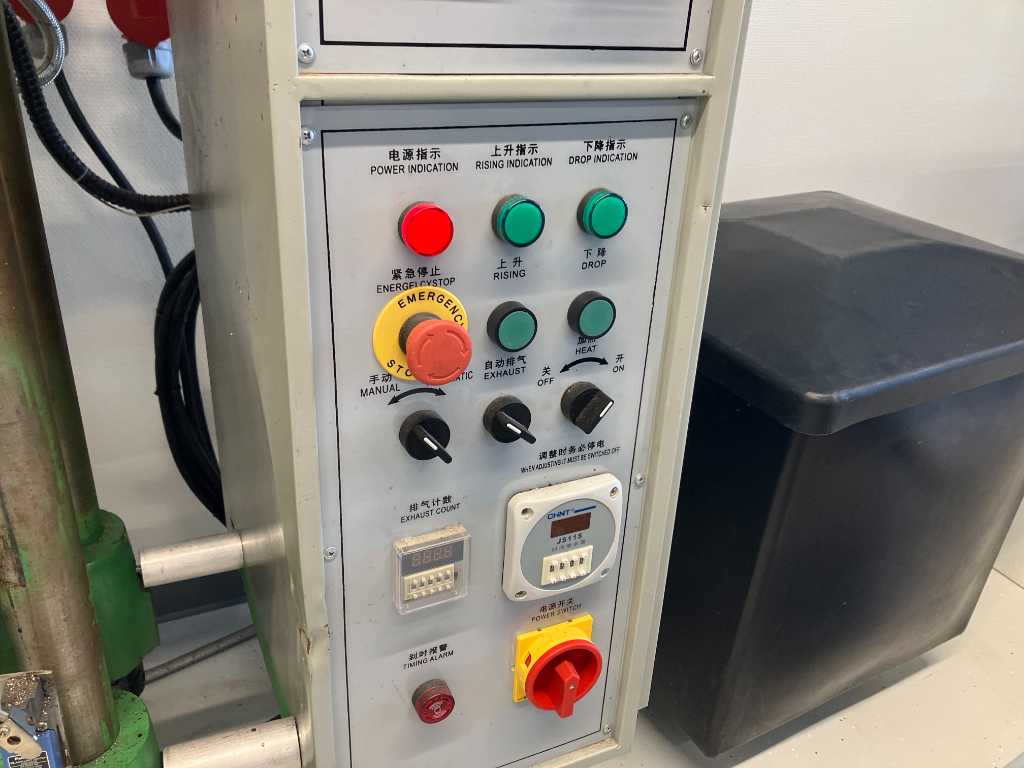
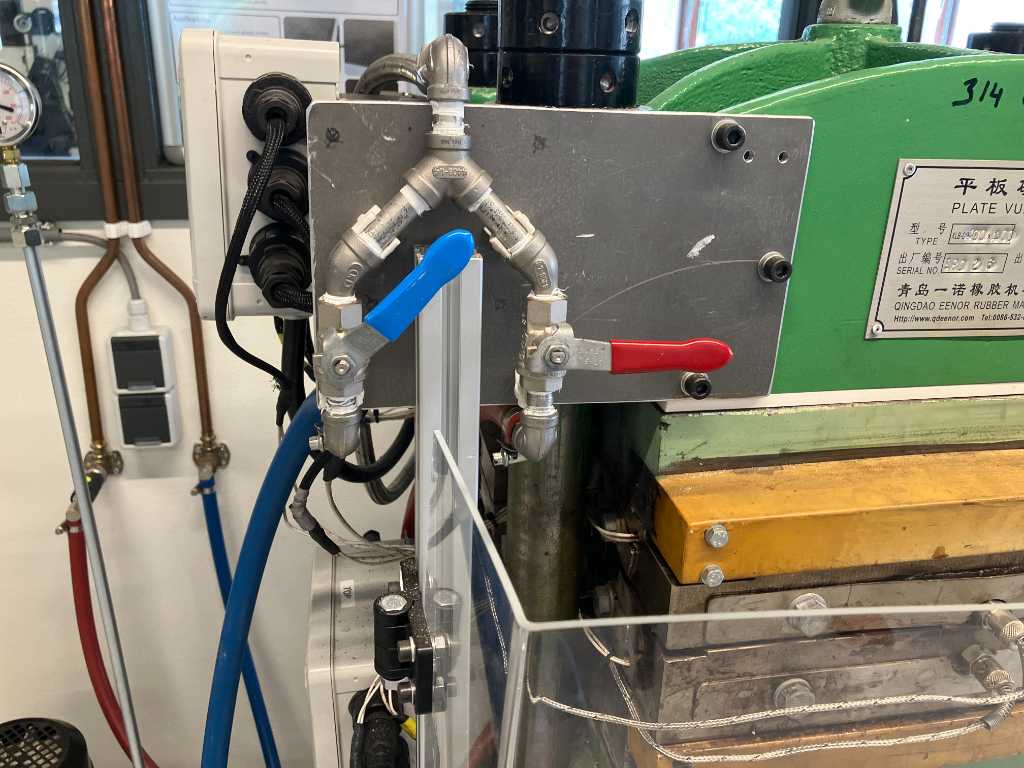
On the left (green) you see the actual press. In between the yellow plates is the 300x400mm mold. On the right you see the controls for the machine.

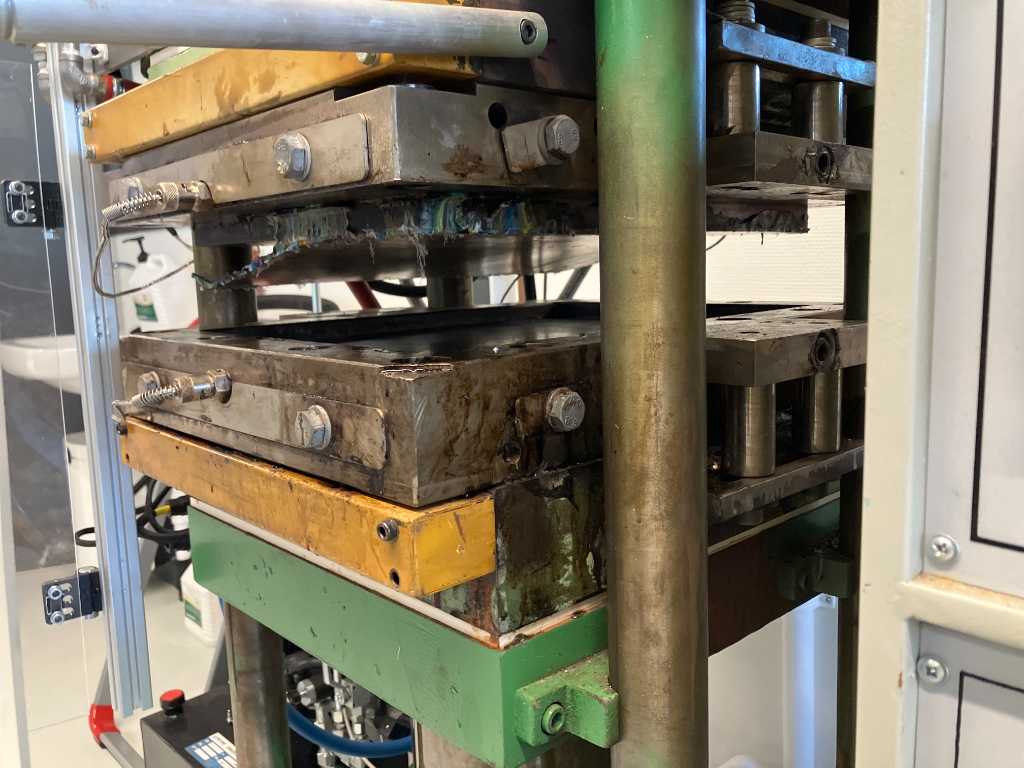
In the mold holes are drilled for the heating elements, water/air pipes (to cool down) and temperature sensors. In the image below, on the right, you can see the wires to the temperature sensors (silver wires). On the left are the wires to the heating elements (white wires).

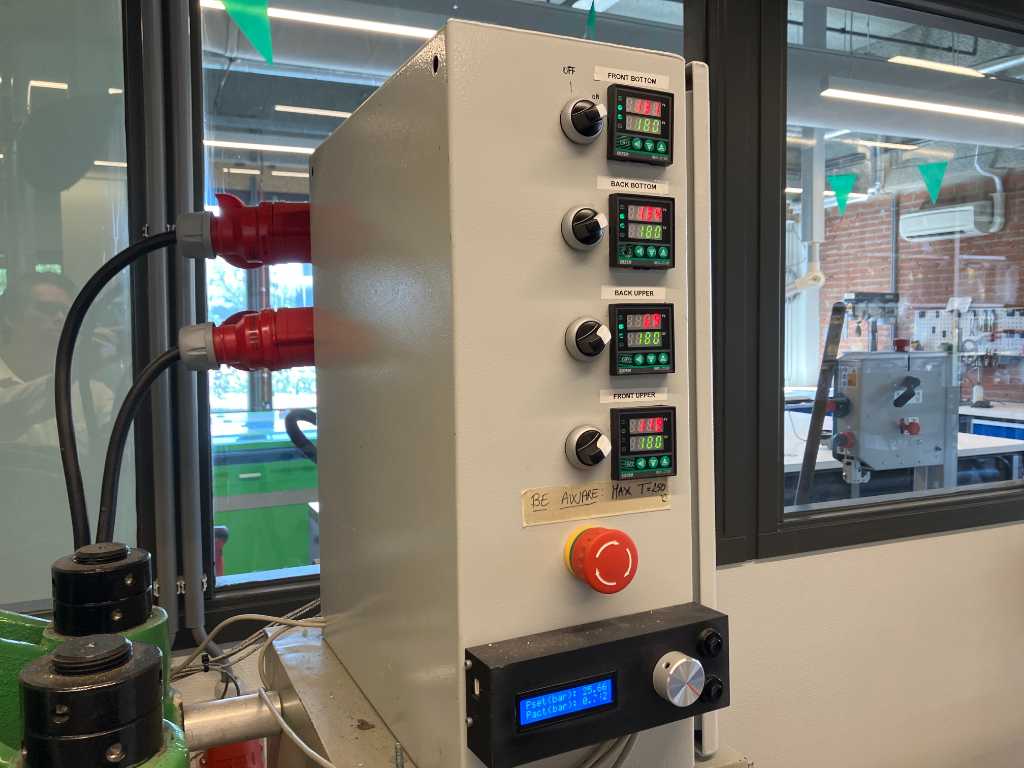
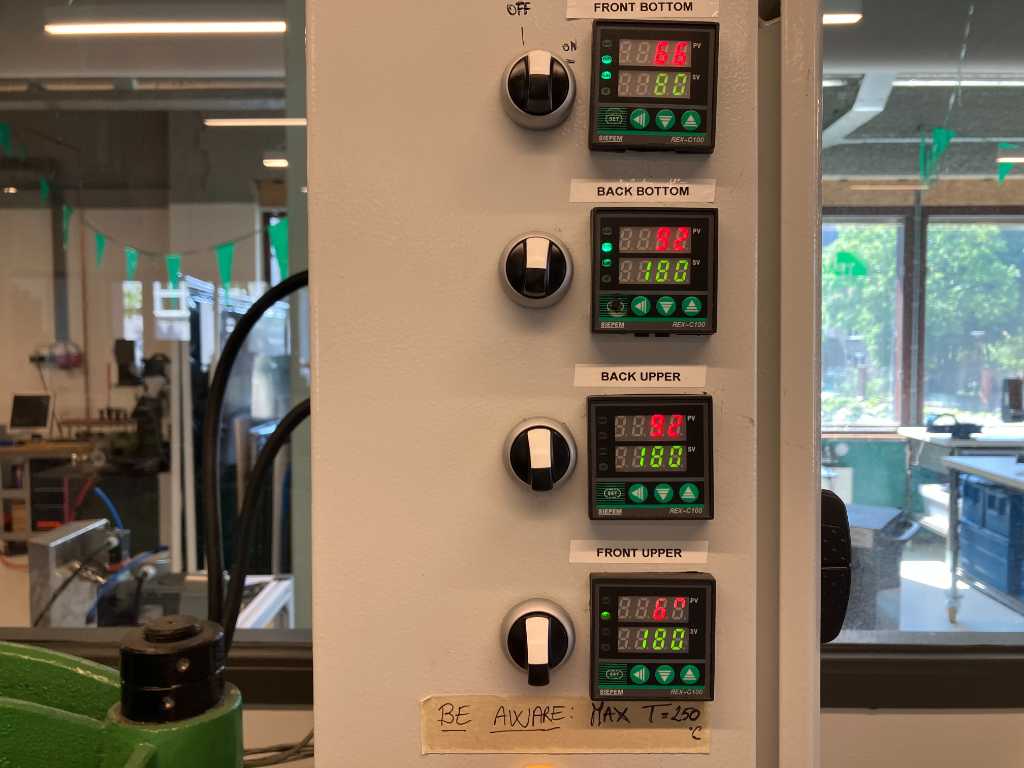
Temperature control is done using the top 4 control units. It is measured at 4 positions: top front, top back and bottom front, bottom back.
The green number on the display is the set temperature, red is actual temperature.
Turning the switch to the left of the temperature control will turn on that heating element.
After heating the material for a certain amount of time, the mold needs to be cooled. That is done with water. So switch of the heating elements first, then run water through the pipes in the mold using the blue valve. Open it slowly!

Open the blue valve slowly because the water will end up in the black tank next to the machine. Opening it too quickly will make it overflow. The lid of this tank is not firmly attached on purpose: when you run water through a heated mold, the water will start to boil and that steam will have to go somewhere. If the tank would be fullly sealed, it would probably blow up…

After cooling for a certain amount of time the water needs to be pushed out of the mold. If you don’t the water in the mold will boil when reheating, creating steam and over pressure the system, causing safety hazard. Use pressured air to press the water out of the mold. First close the blue water valve and then slowly open the red valve. Run air through for about 1 minute.
The black control box is the pressure control. The reading is the amount of pressure on the system (which is different to the actual pressure on the material, but closely related and easy to measure). The upper value in the display is the set value. Lower value is the actual value. The silver dial sets the pressure level.

Pressure is especially important during cooling because it prevents the material from warping. It is applied by the green rise and drop buttons. So you set pressure using silver dial and then use the rise and drop buttons. The machine will not go up further when the set pressure is reached.
The shredded material is placed in between 2 sheets of Teflon. Whenever you do this you have to wear heat resistant gloves, eye protection and a lab coat. Safety shoes are also required in this lab.
I want a plate of 2mm thickness. A plate of 300x400x2mm PLA is 240 cm3. The density of PLA is around 1.24 gr/cm3. So I need 300 gr. of PLA granules.

Close the mold and apply heat. When all 4 temperature sensors reach 180 degrees, open the mold.
Next, add the first sheet of teflon:

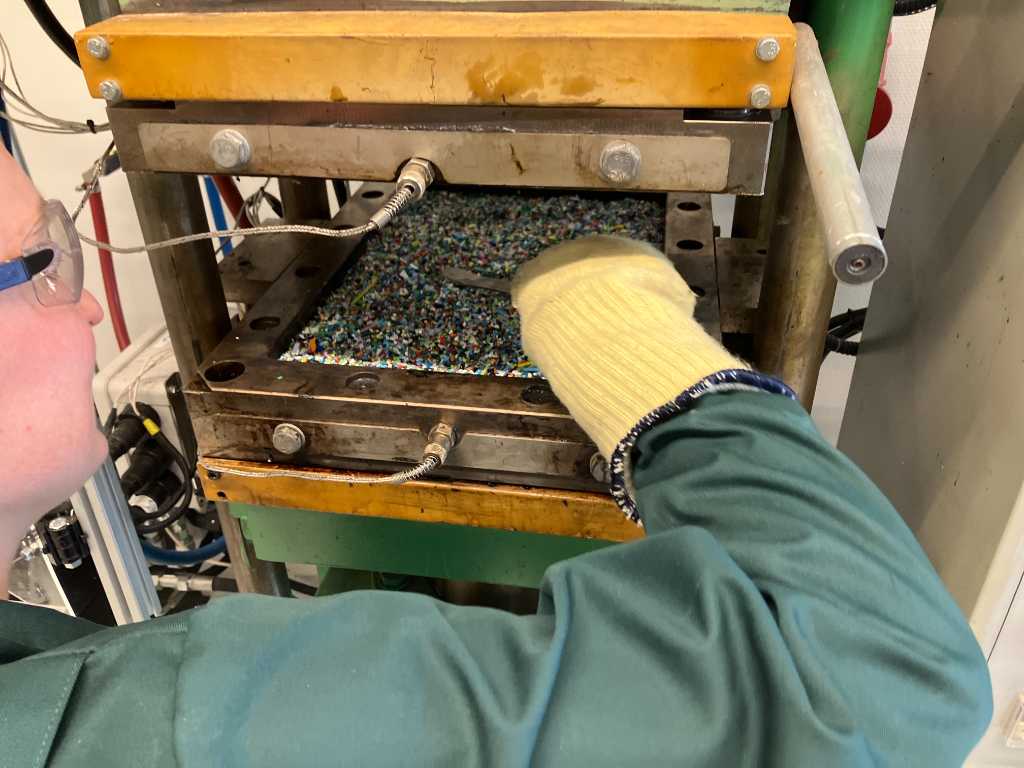
Add the PLA granules. Be careful, the mold is very hot! The PLA will immediately melt so spread it out as evenly and as fast as possible.
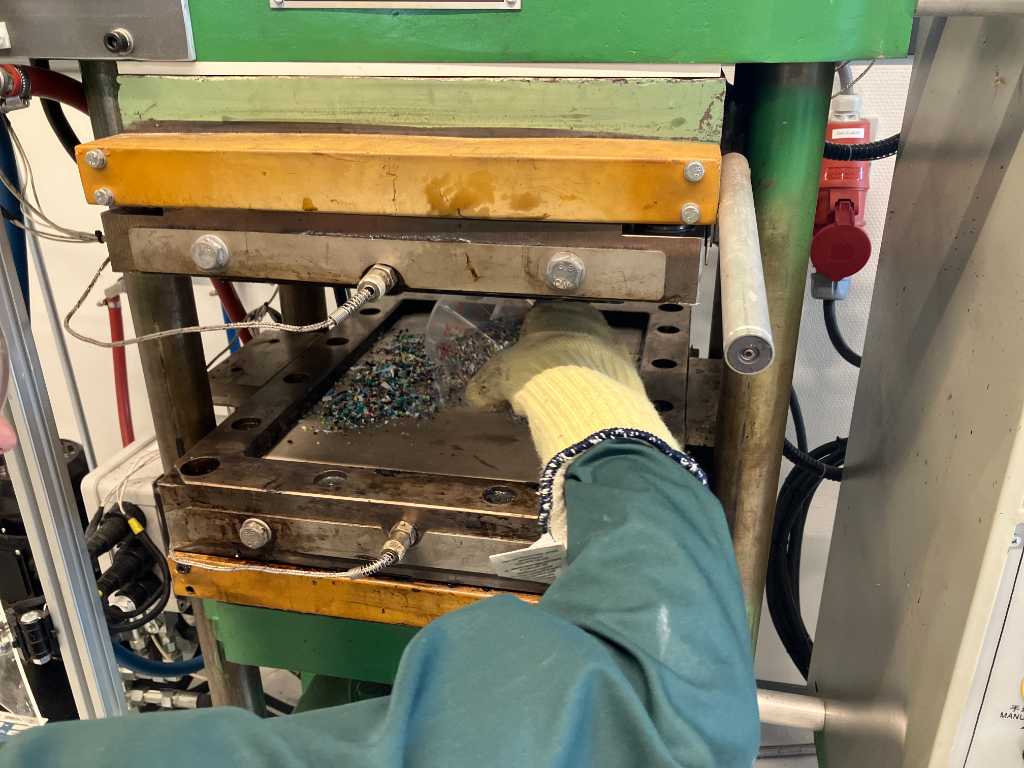
Next add the second sheet of teflon.

Close the mold and let the PLA melt without pressure for around 5 minutes. Then add around 8 bars pressure for about 3 minutes.
Next cool with water while keeping pressure at 8 bar until the temperature sensors readout values around 80 to 90 degrees. Due to the way this specific mold is manufactured, the cooling of the mold is unfortunately not even.
When you slowly open the blue water valve, you’ll hear boiling water in the tank. After a while it’ll be a steady flow.
When temperature is around 80 to 90 degrees, close the water valve and slowly open the air valve.

After about 1 minute, close the air valve and open the mold. You might need to use a crowbar to get it to open. Only use the crowbar on the very corner of the mold.

Carefully remove the package from the mold.
Place it on a metal plate and put another one on top. Let it cool between these heavy metal plates.
Turn temperature back on, clean mold if needed and repeat the process!
It takes 15 minutes to warm up to 180 degrees Celcius (from about 80 degrees).
It takes 10 minutes to fill the mold with granules, melt it and press it.
It takes about 10 minutes to cool down to around 80 to 90 degrees.
So the total process takes at least 35 to 40 minutes per plate.
after cooling for about 10 minutes, gently peel off the teflon sheet. You might need to use a small knife.
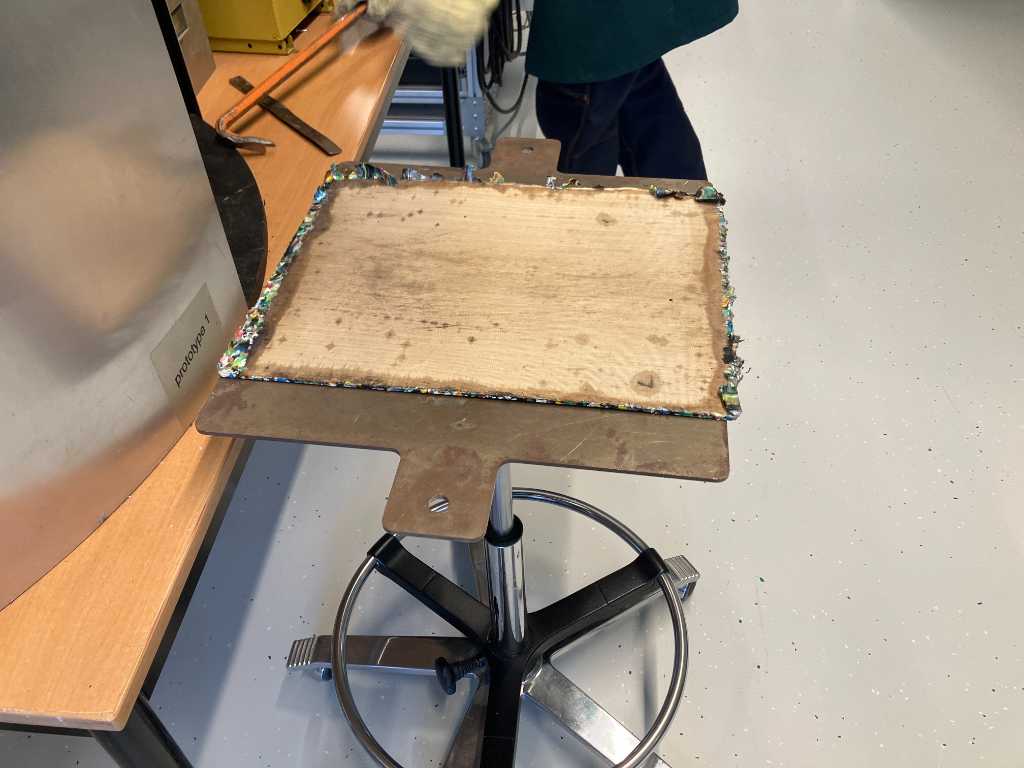
The end result:
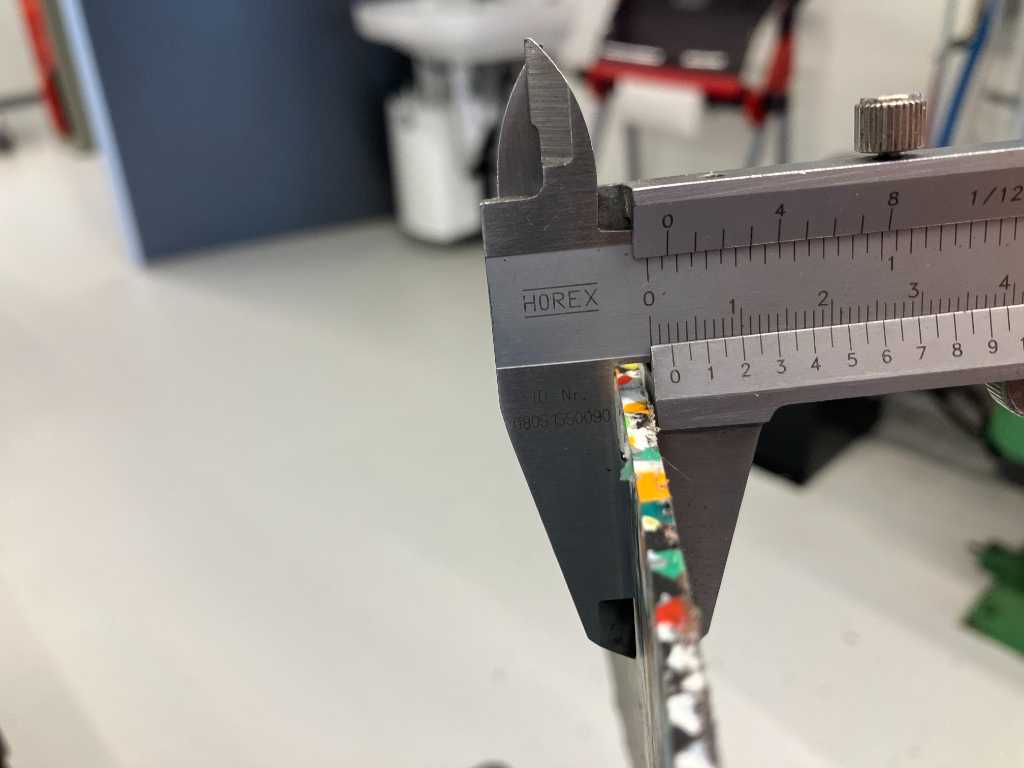
It’s not entirely 2 mm but close enough for my purpose!
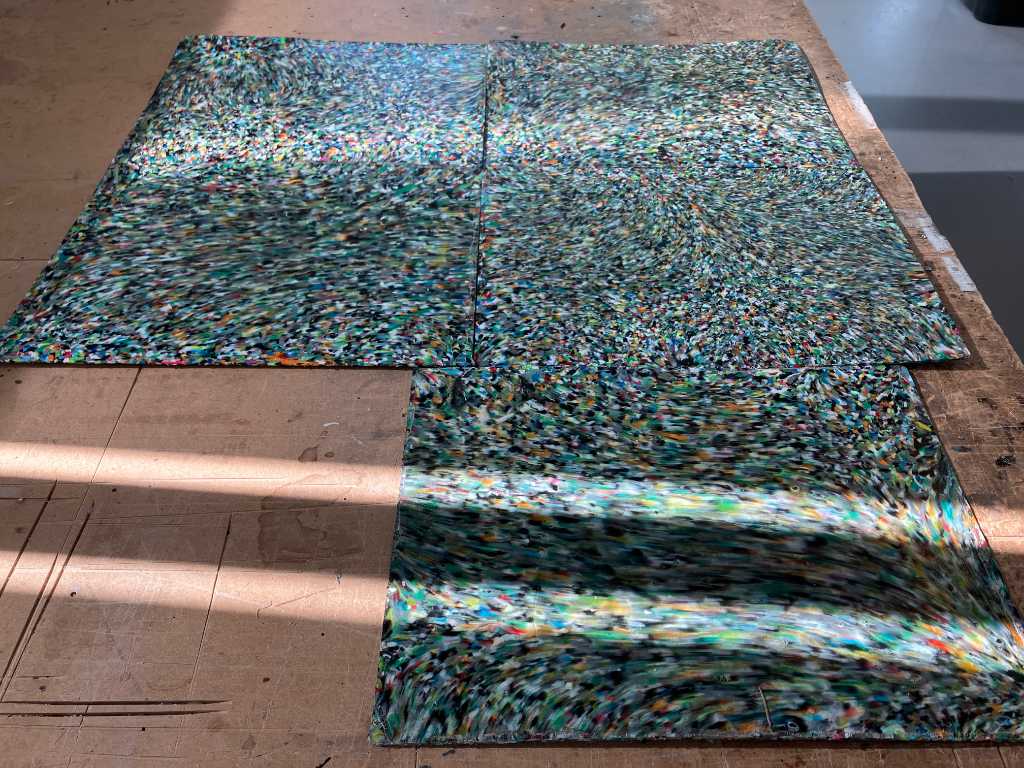
Creating a big plate
Now I’ll have to put all these sheets together creating one big sheet that fits on top of my Marimbatron.
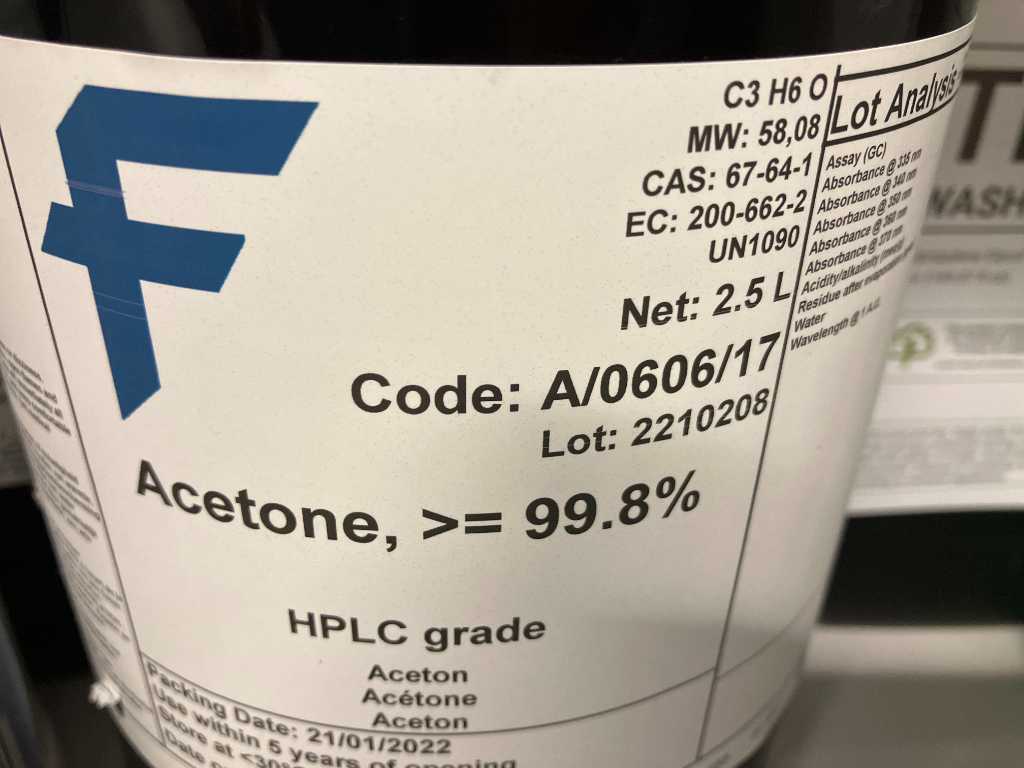
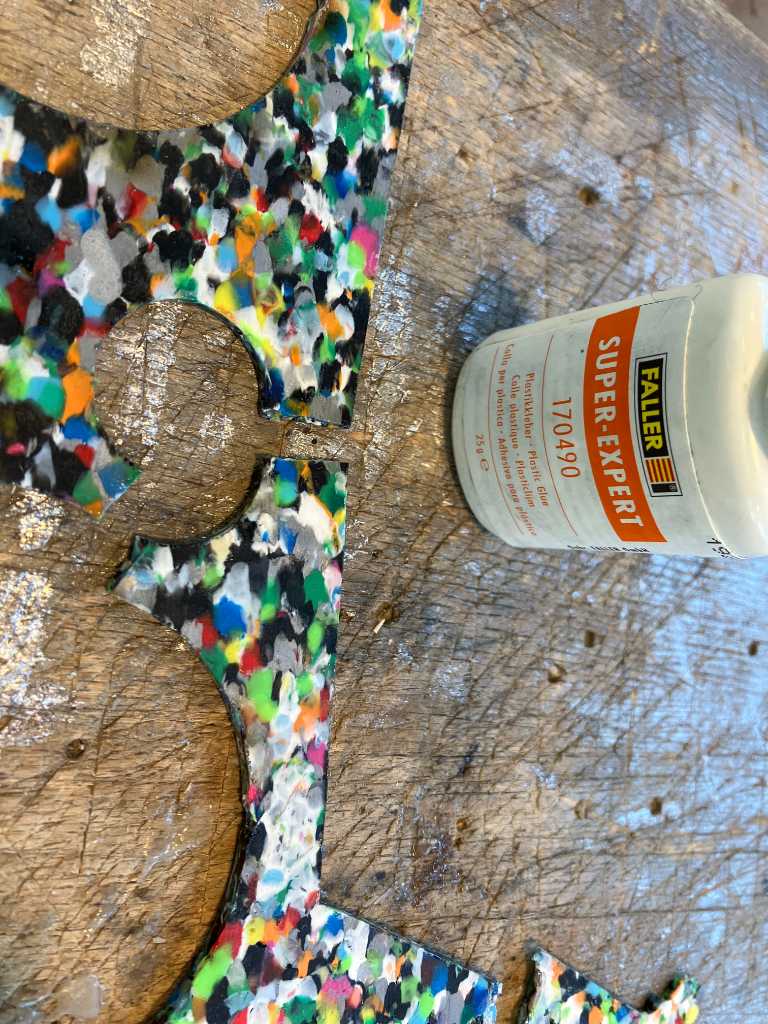
I tried different types of glues and also I tried Acetone, but the edges of the plates are too small. So it doesn’t stick at all.
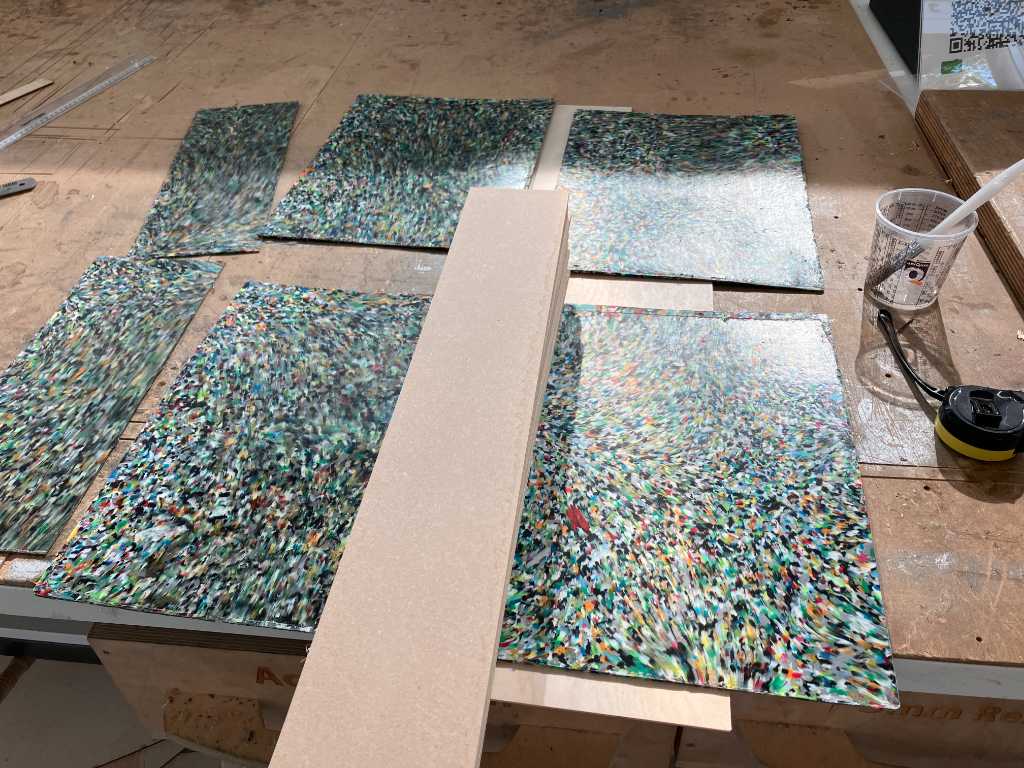

And then I found out about friction welding. It was this youtube video by polymaker that taught me how to do it.
That worked fantastic! It takes time but that’s time well spend.
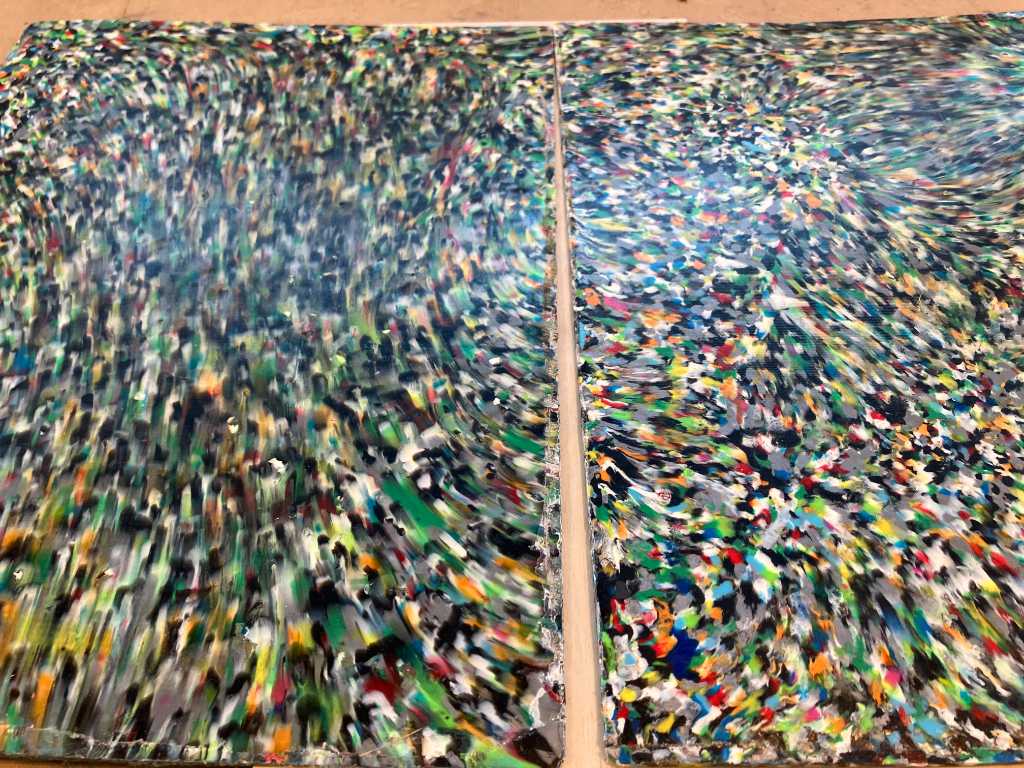
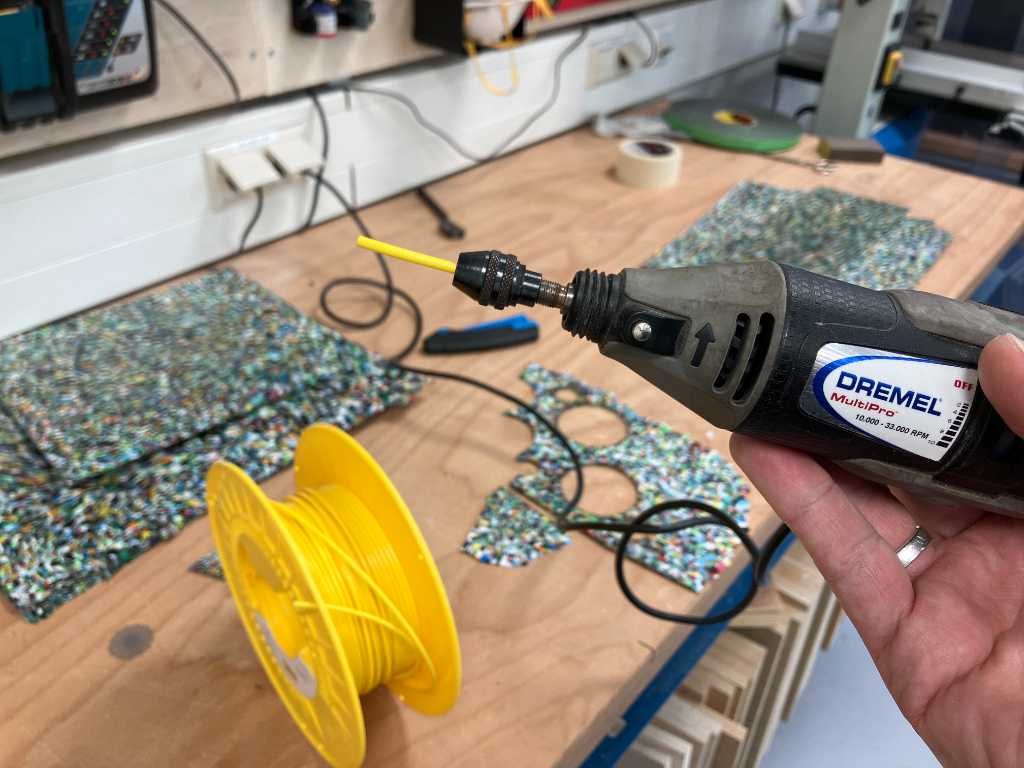
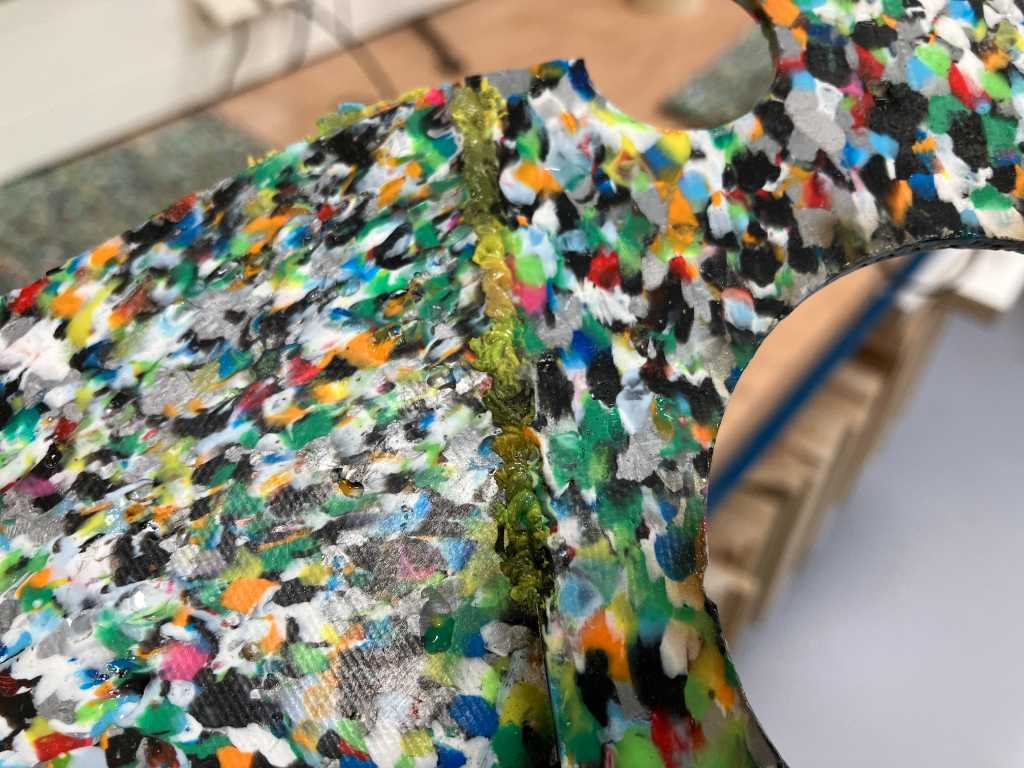
I used a standard Dremel on position 8. I cut pieces of 2.85mm PLA, around 3cm each and put it in the Dremel. I found the best way is to drag from the top downwards a couple of centimeters and then from down going up circularly. That creates nice seams.
Friction welding on a test piece:
Close up:
The PLA actually goes into the seam and not just on top. So this is a very solid seam.
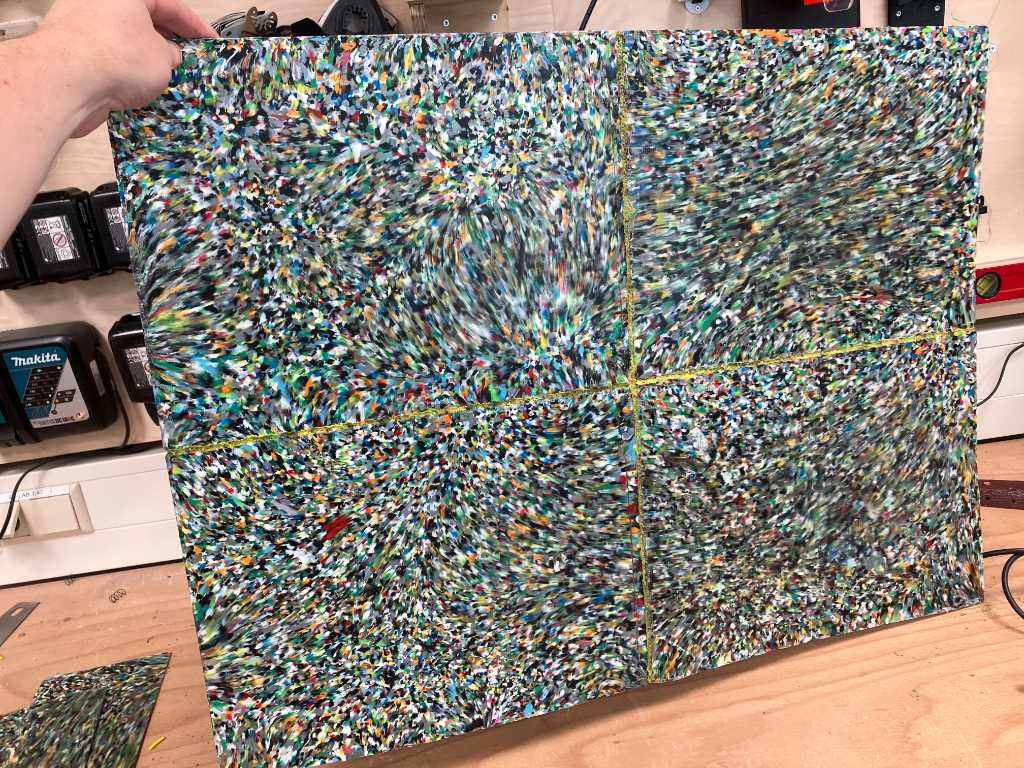
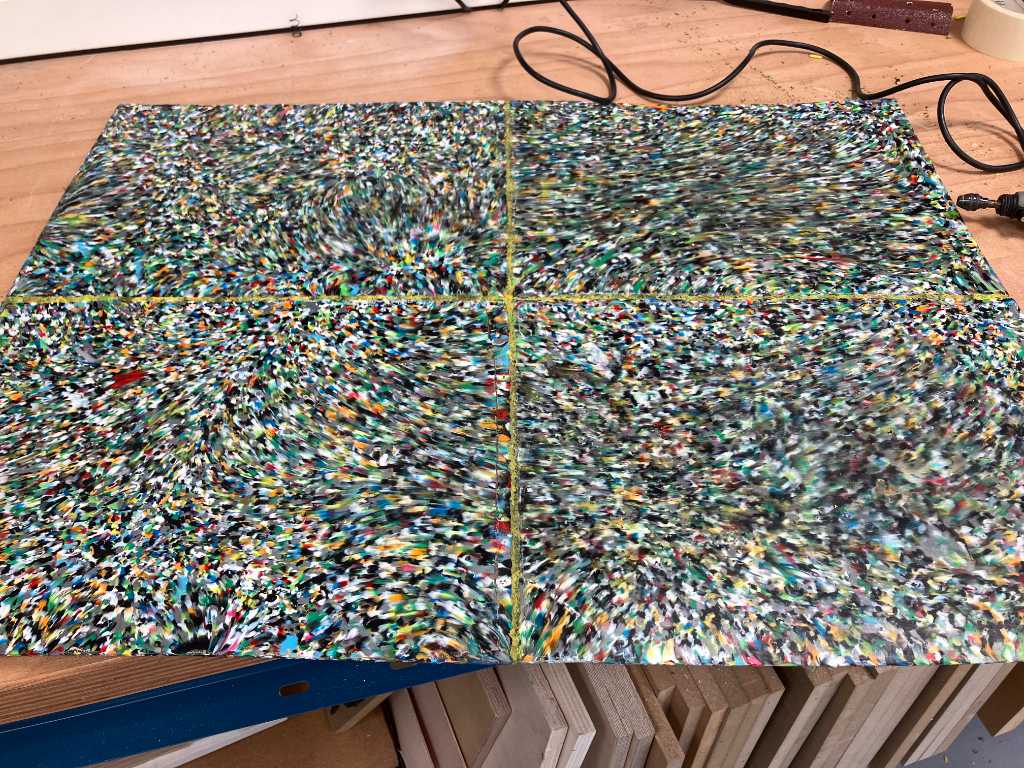
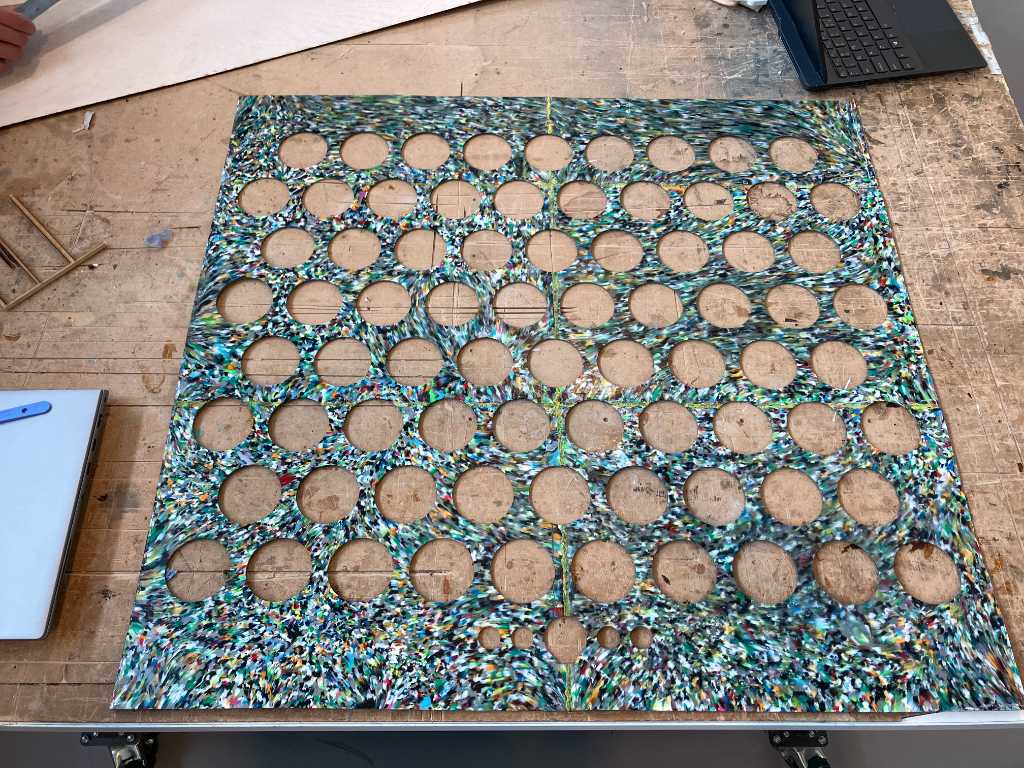
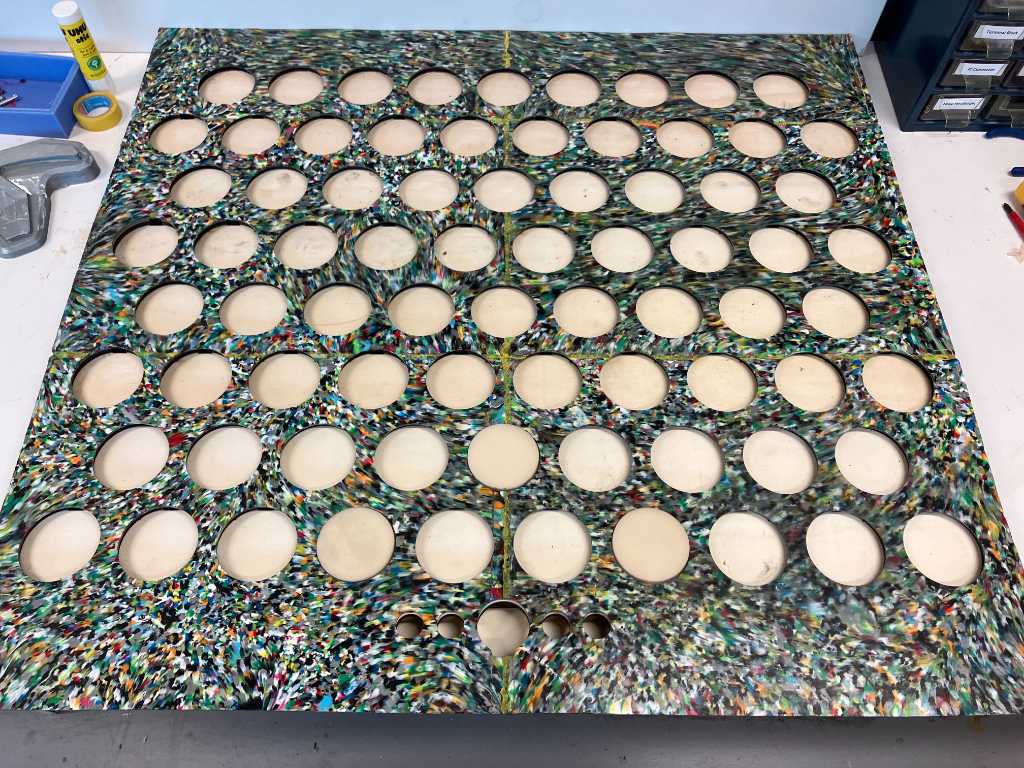
The end result with friction welding 4 sheets is beautiful!
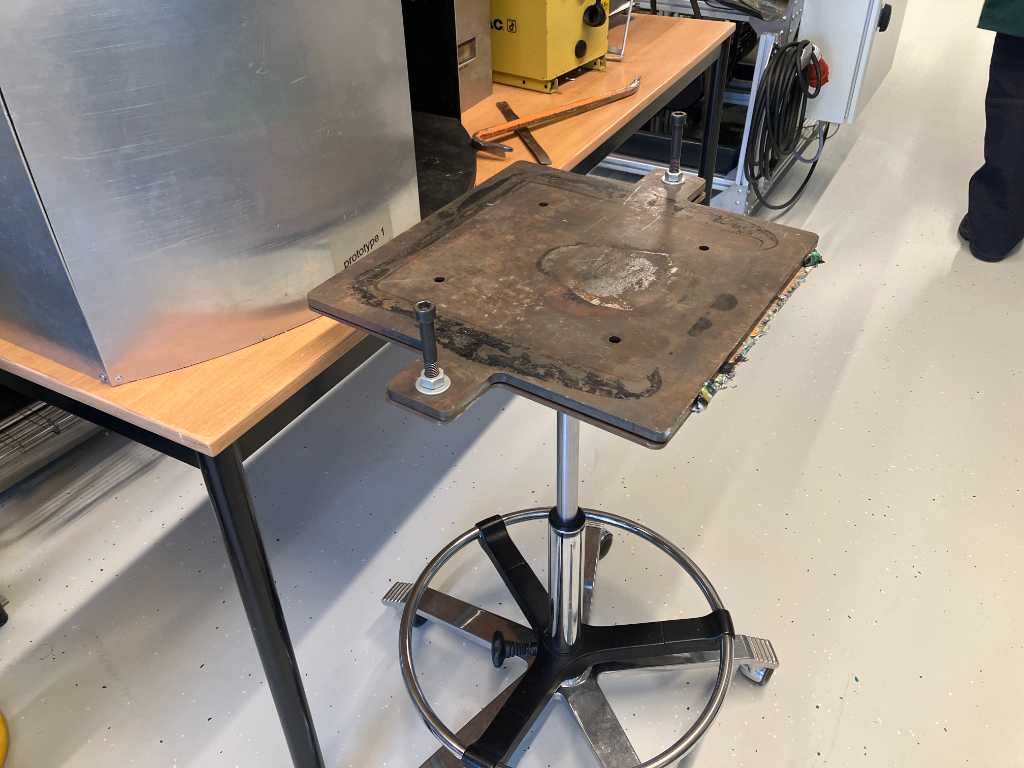
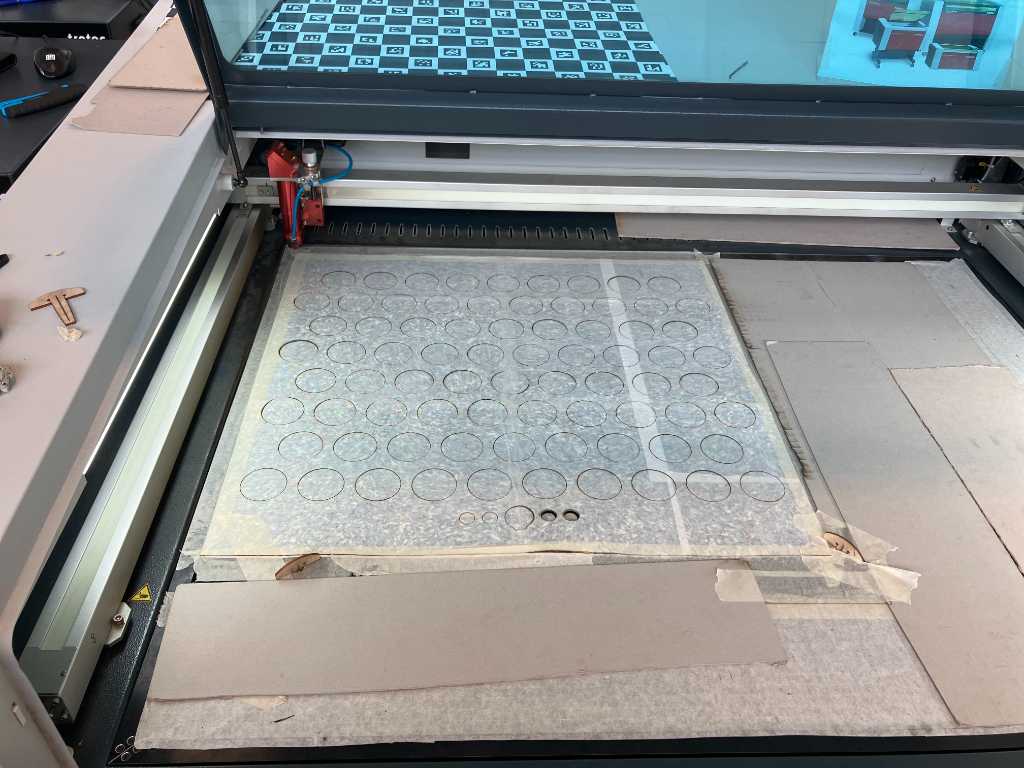
Lasercutting PLA sheet
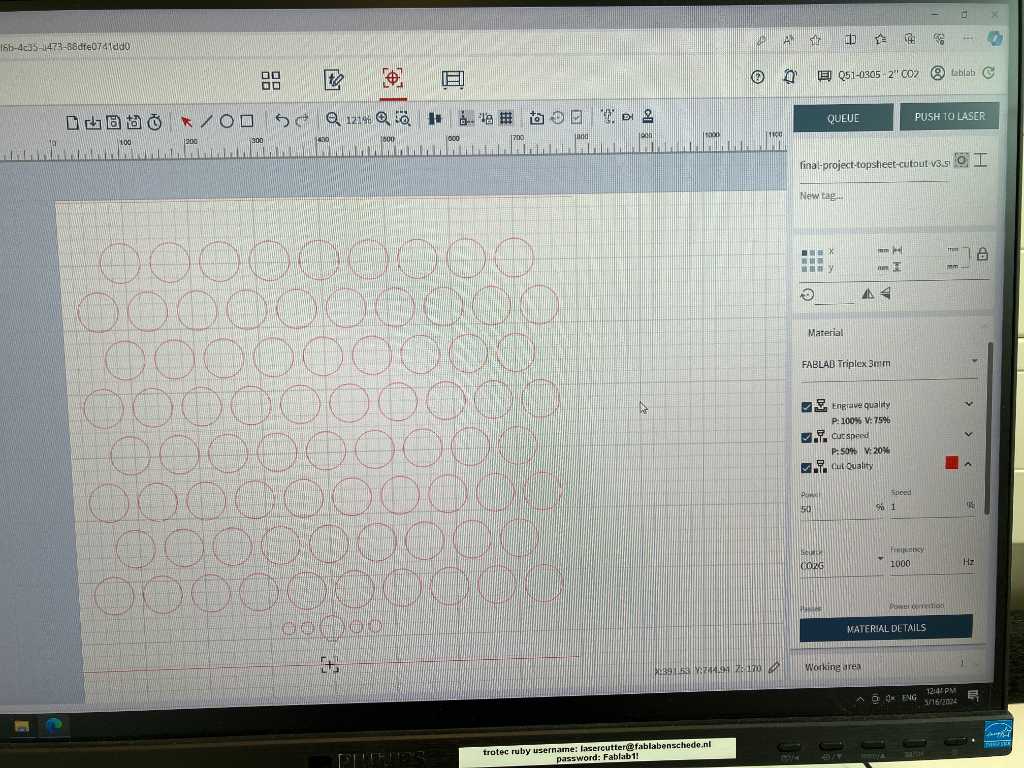
Now I have to lasercut this big sheet. In fusion I created this design (which is just a derivative of the final project design, so I used the “project” command a lot).
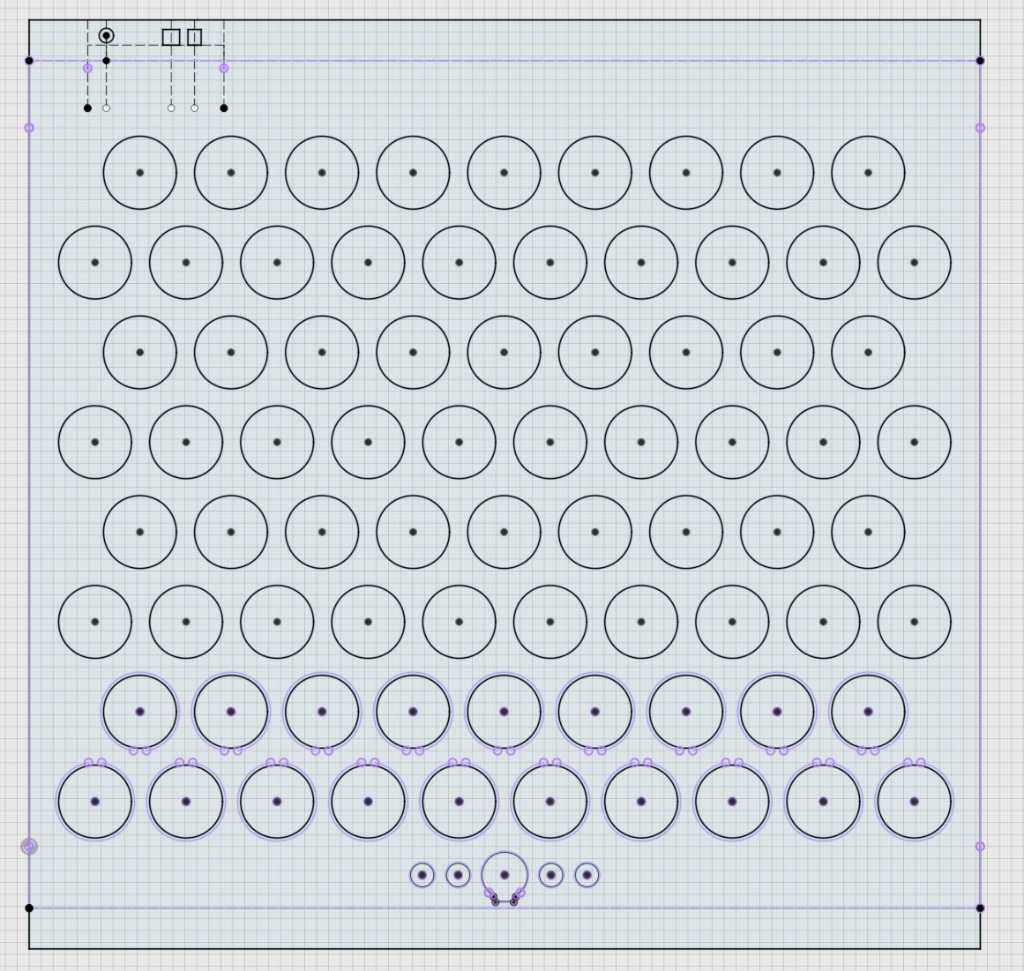
The top and bottom side will be bend 90 degrees and so I calculated that I need about 4mm extra material. I guessed where the holes for the connectors on the top would go.
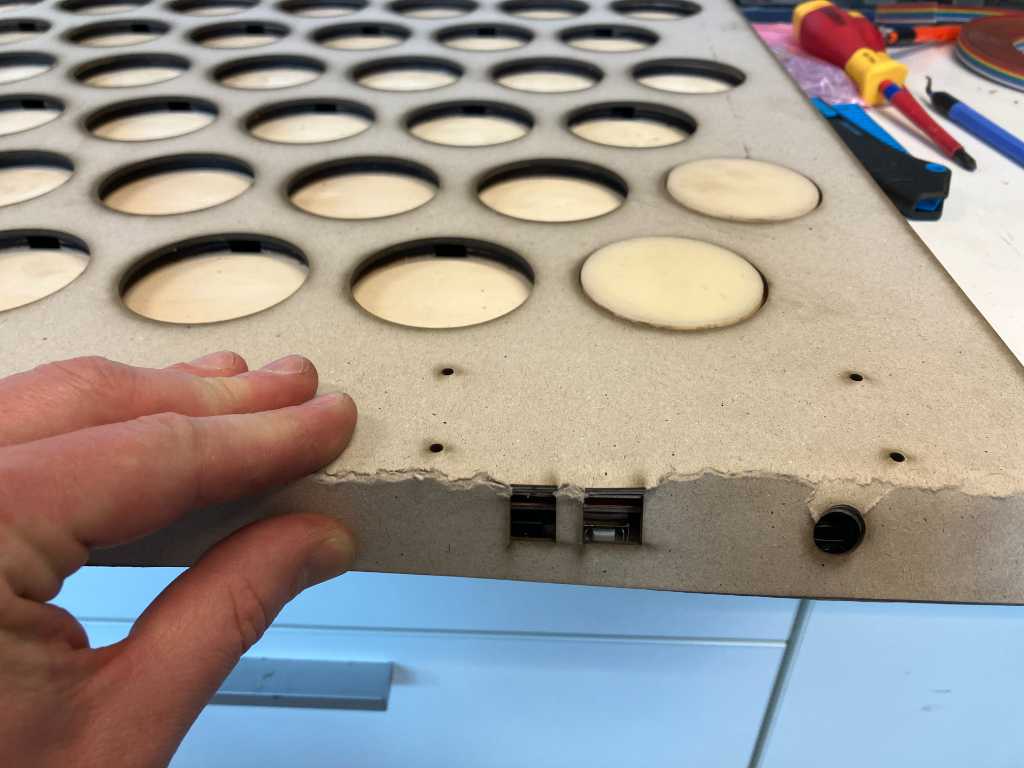
First I tested my design using cardboard. And quickly found out that the holes for the connectors will have to move down about 8mm.
Next will be to find proper lasercut settings for a sheet of PLA. A while ago we tried lasercutting PLA in our fablab and that worked fine. We didn’t document the settings though. So need to redo that.
Here are some samples that we did a while ago:

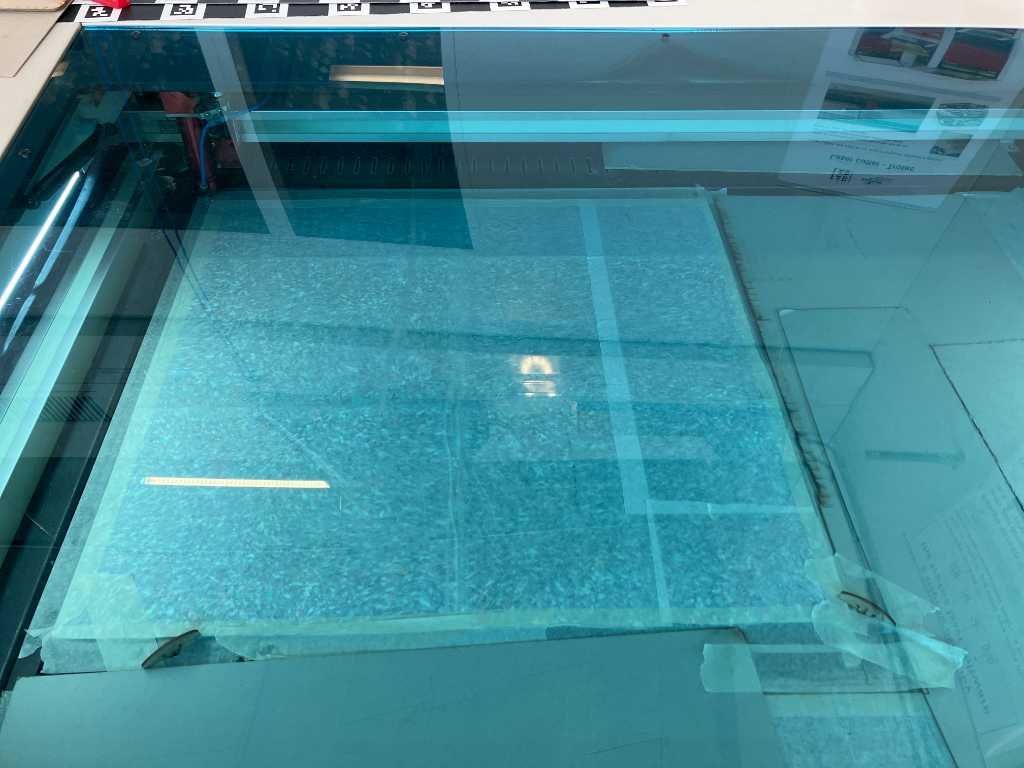
So prevent any staints and burnmarks, I’ve covered my PLA sheet with sticky paper (transfer foil).

And I used another piece of PLA sheet to do some test cuts.
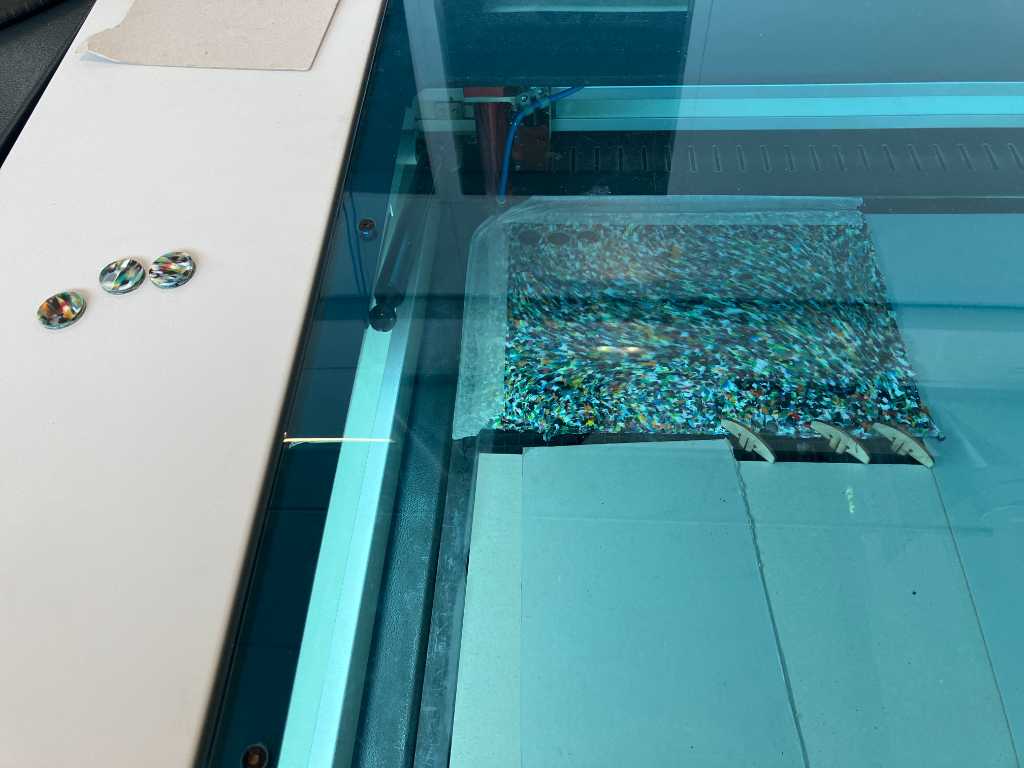
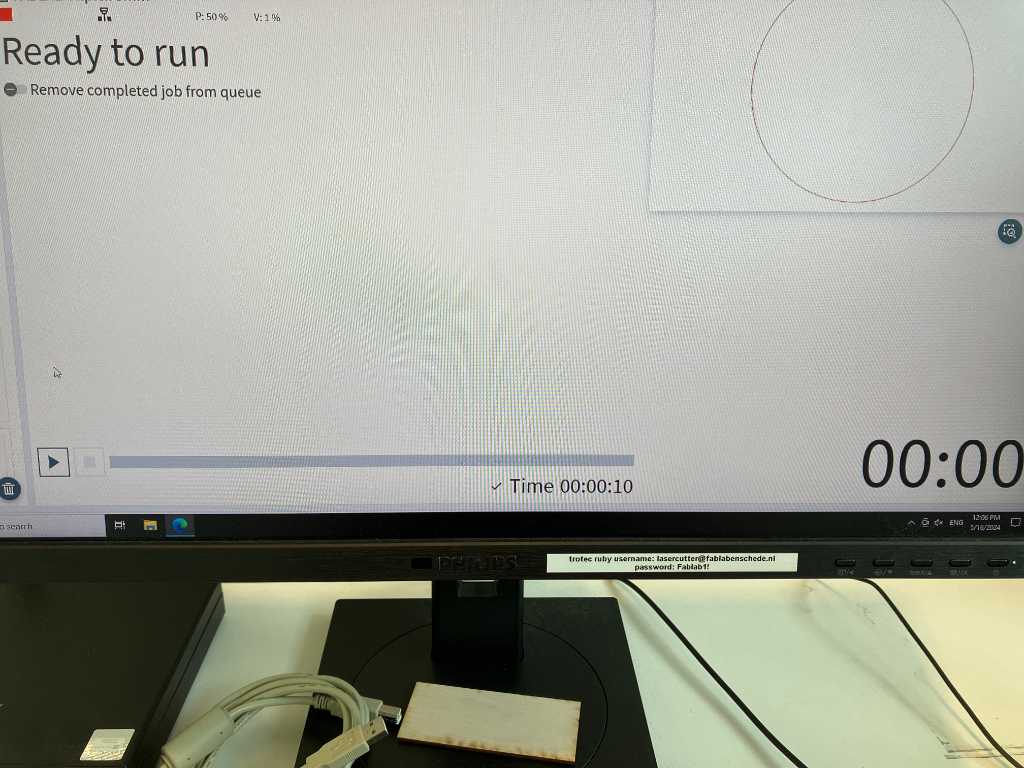
After a few tries, the best setting on our Trotec Q500 appeared to be 50% power and 1% velocity.
3.3mm and 1.3mm thickness: both fine with 1%/50%.

Time for the real deal!

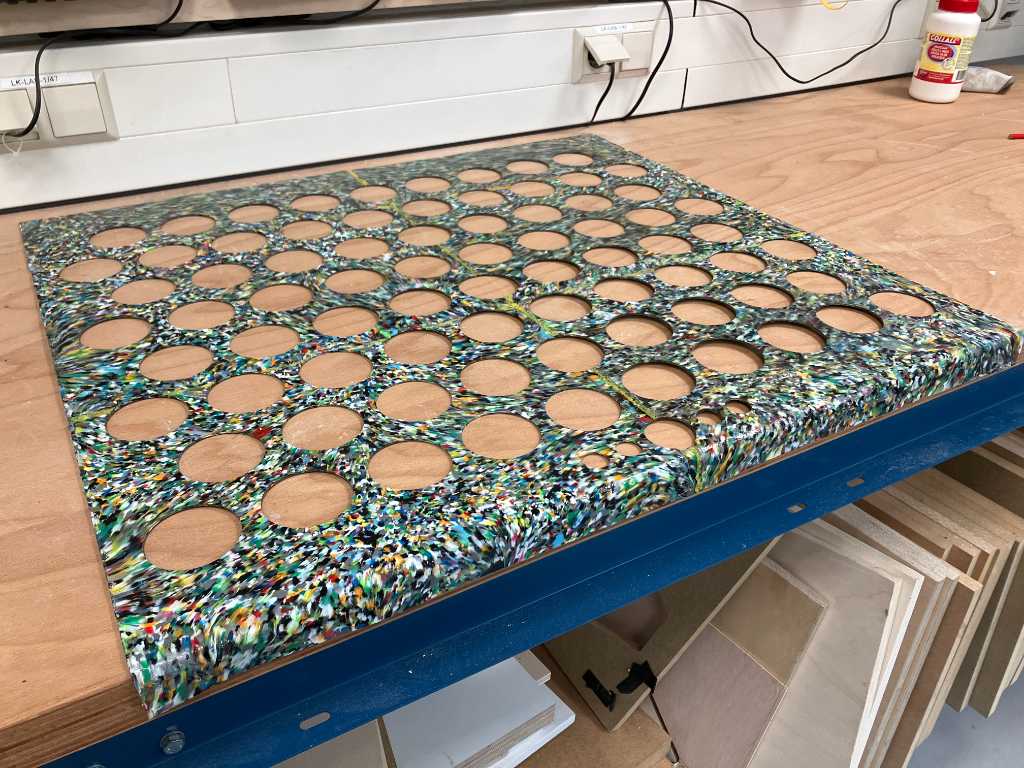
My PLA sheet is just 30mm too short to fit around the Marimbatron. So I decided to only do 1 bend on the front and cut it off straight on the backside. I’ll make a separate coverplate for the backside.
So the resulting design is this:
Bending
Now it’s time to bend the PLA sheet so that it nicely folds around the front edge. I’m going to do this manually using a hot airgun. To prevent the PLA to stick, I covered bottom and top with baking paper.
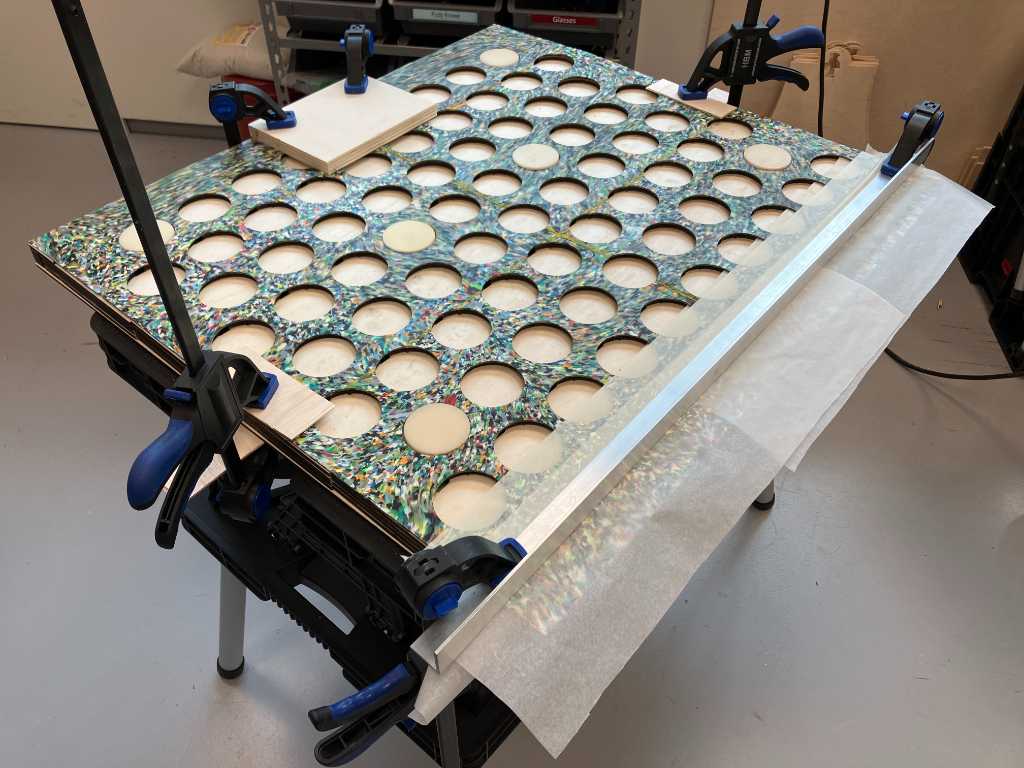

The result:

Link to repo
The only design is the lasercut file, which you can find here in my repo. Please note that I changed this design slightly in the Trotec Ruby software, but you can’t save those designs. The changes are to remove the indicated lines:
What I learned this week
Successes
The top plate is looking beautiful, a real addition to the design of the Marimbatron. Heatpressing these plates took a long time, friction welding takes manual labour but is satisfying to do and lasercutting this sheet was scary to do, because of the amount of work to create the sheet. But the end result is great!
Fails & Fixes
no real fails this week. Only thing is that the size of the sheet wasn’t large enough, but that was something that could be fixed in the design, as explained above.