Week 3: Computer Controlled cutting
The group assignment can be found at the following link:
Group assignment here
Individual assignment tasks are as follows:
Checklist
Tasks to be completedin this Computer-Controlled Cutting class
Linked to the group assignment page. (1) This reffers to the link above provided.
Explained how you created your parametric design. (2)
Documented how you made your press-fit kit.(3)
Documented how you made something with the vinyl cutter.(4)
Included your original design files.(5)
Included hero shots of your results.(6)
2.Explain how you created your parametric design
Introduction to parametric design
Parametric design is a design method where features (such as building elements and engineering components) are shaped according to algorithmic processes, in contrast to being designed directly.
In this method, parameters and rules determine the relationship between design intent and design response.
- List of steps i followed to create my press fit
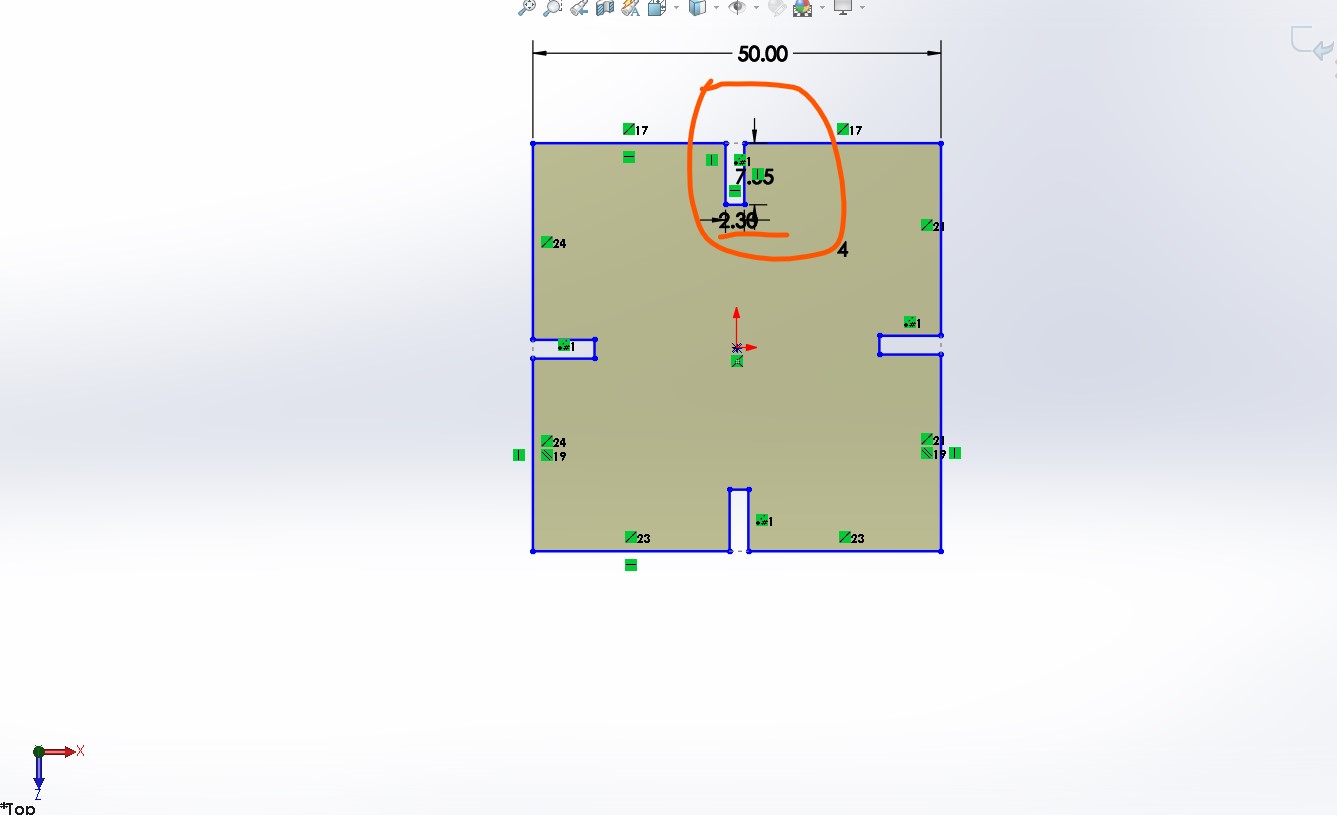
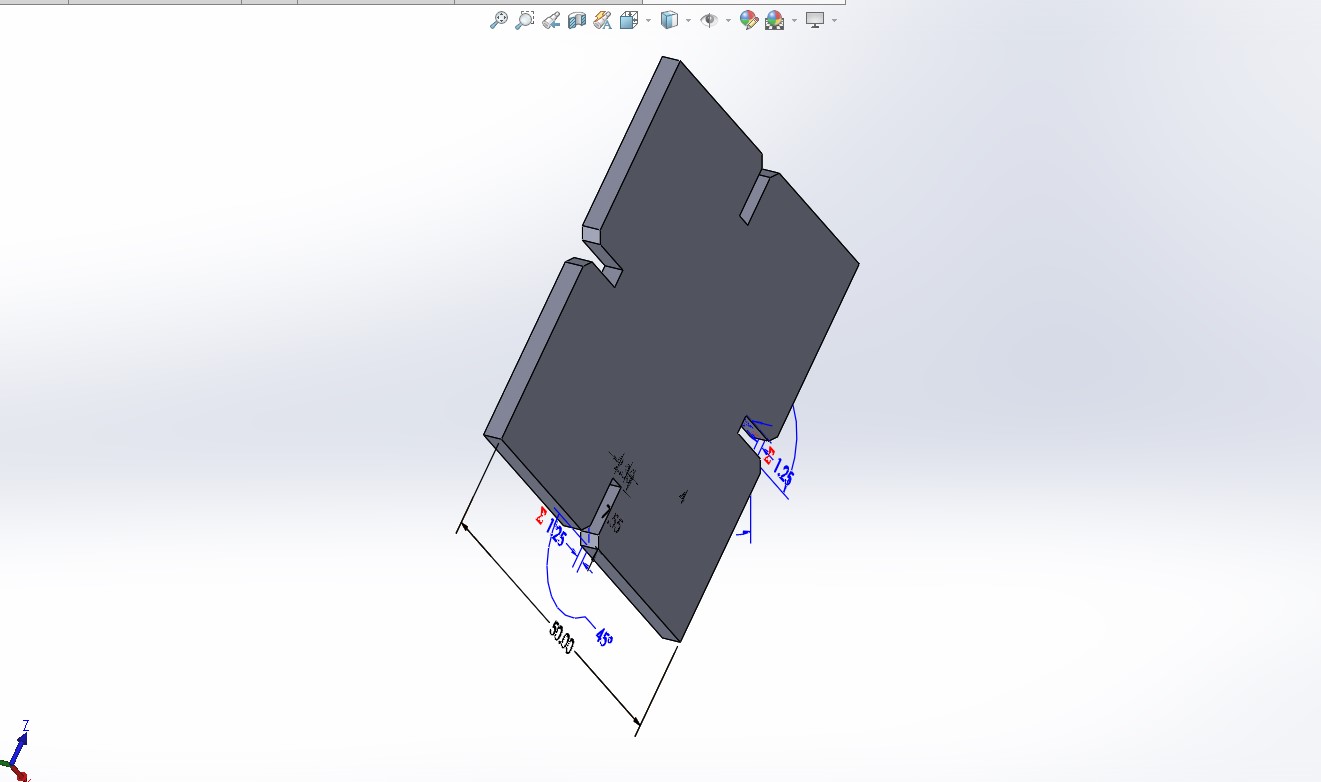
- In solidworks, i created a 50x50mm box, on one side. create another rectangle where the base is equal to global value= material thickness, and it's height is the double ouf the thickness
- I selected the rectangle, clicked on linear patterns--> Circular pattern and immediately 3 more rectangles were created with the same properties
- I then extruded to the size of the material thickness as the defined global variable
- I added a chamfer of 45 degrees with a radius of 10mm to the edges of the opening where the fits will go
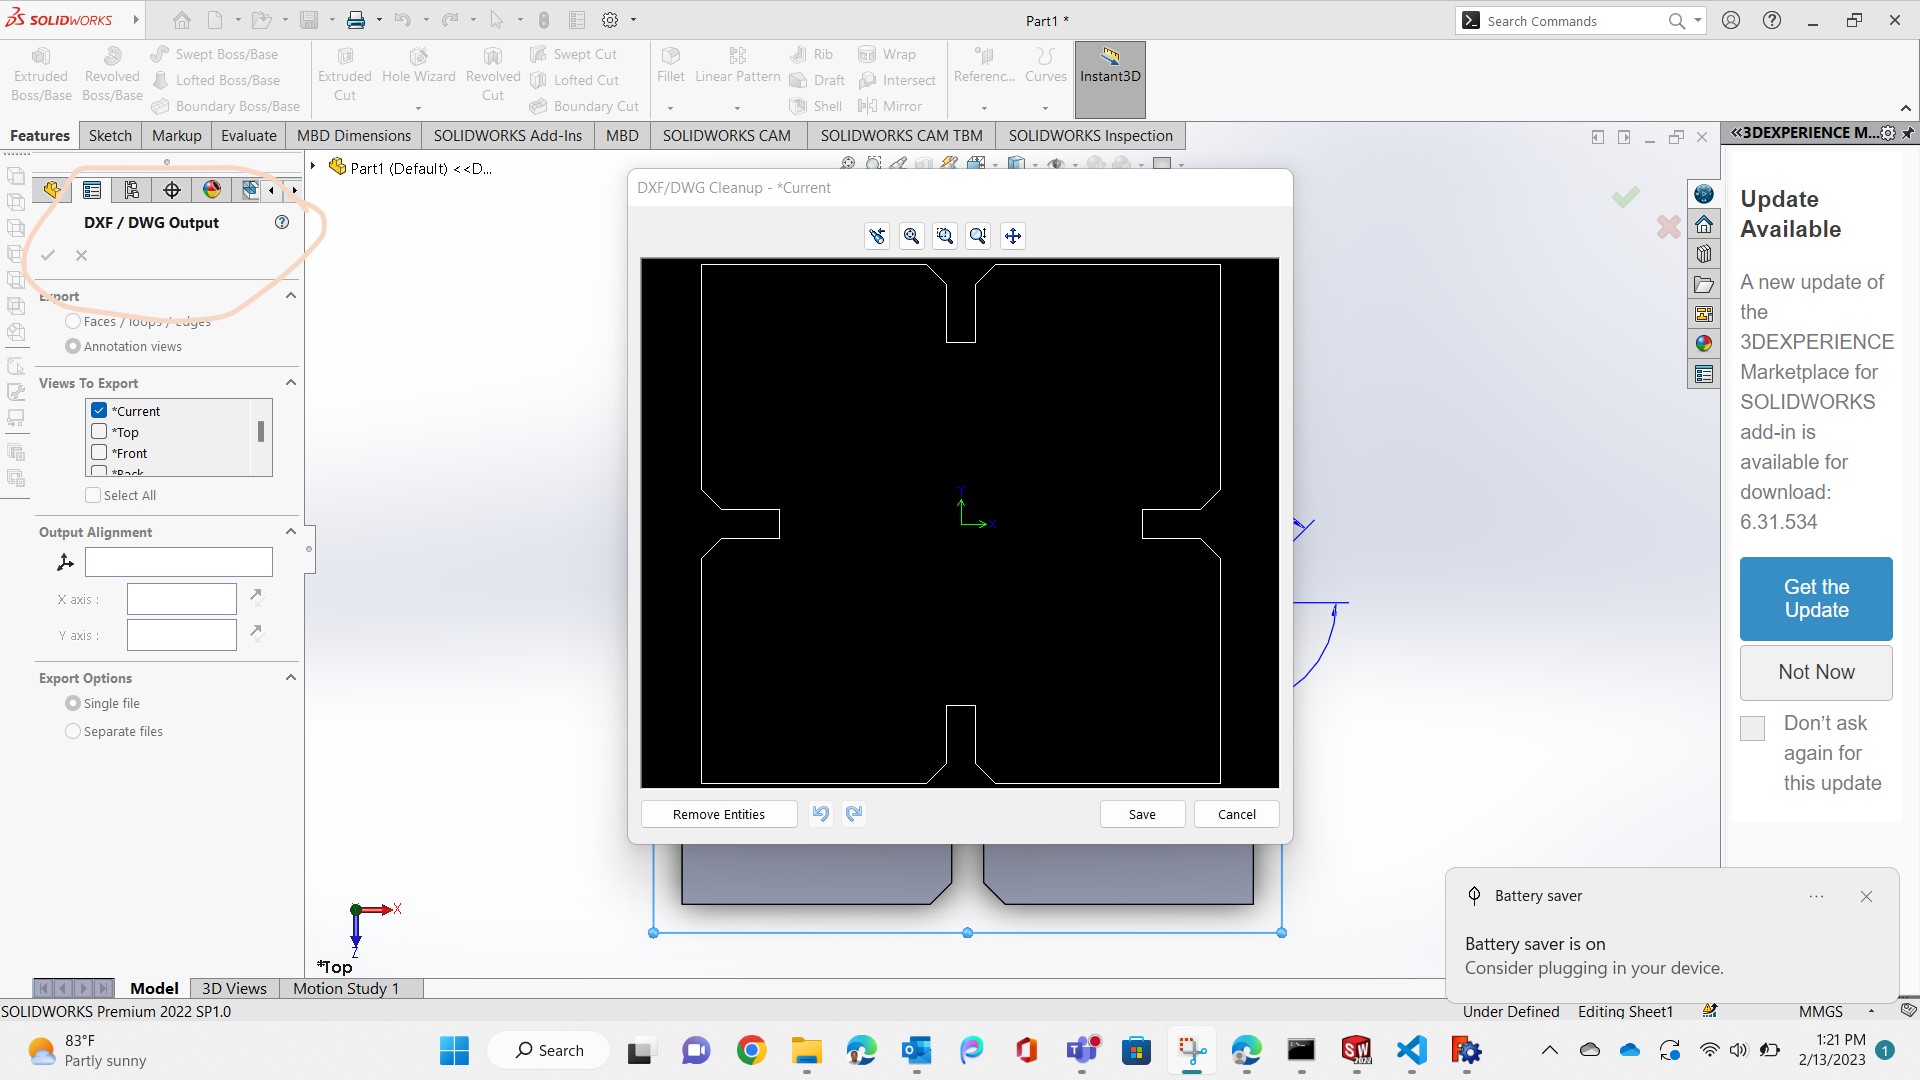
- I saved the part as a "DXF" file with the ration of 1:1. this is the file that will go to the CorelDraw for printing
- I also saved the part for future editing
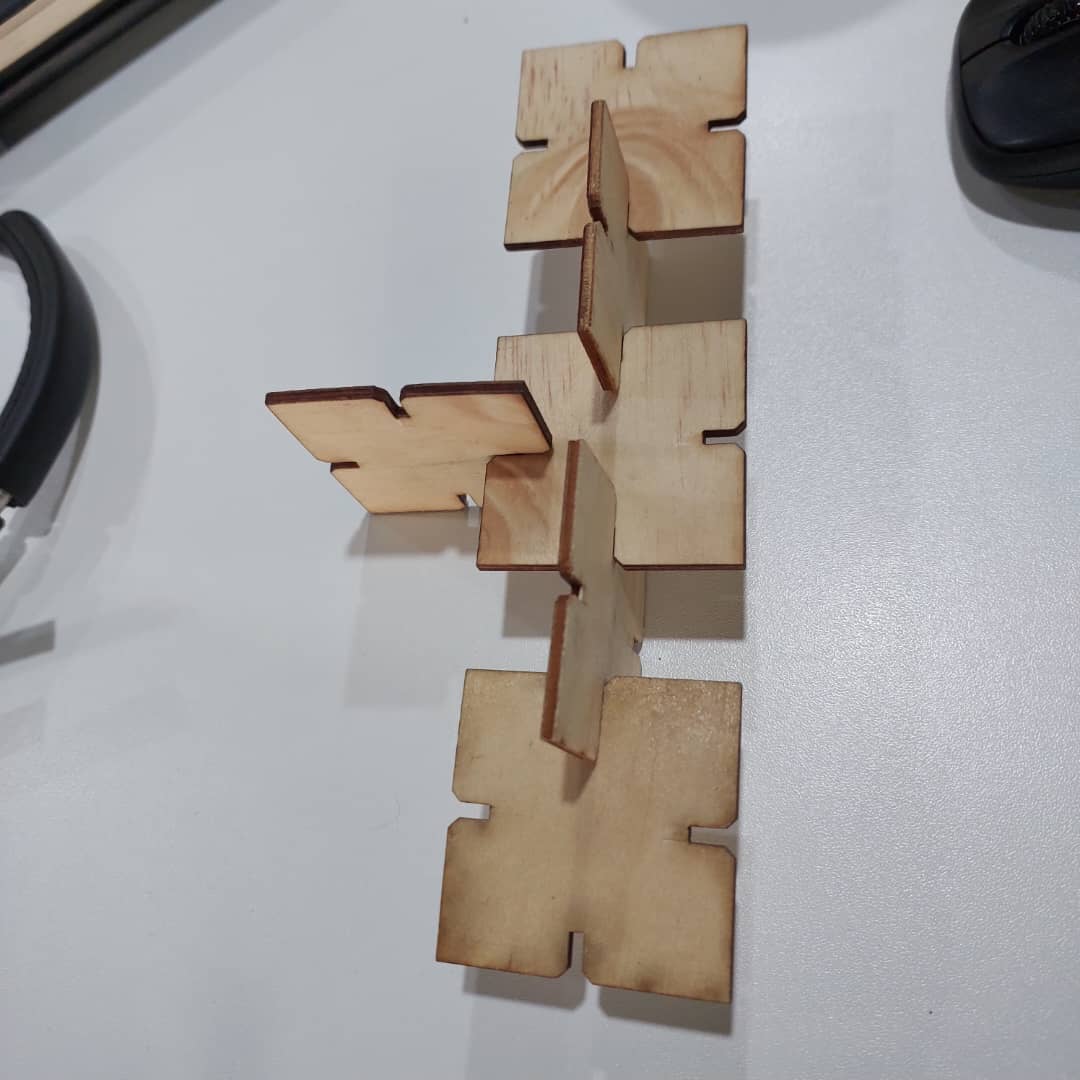
3. Documentation on how I made my press-fit kit
-
How i lasercut the DXF file:
- First i opened the dxf in CorelDraw
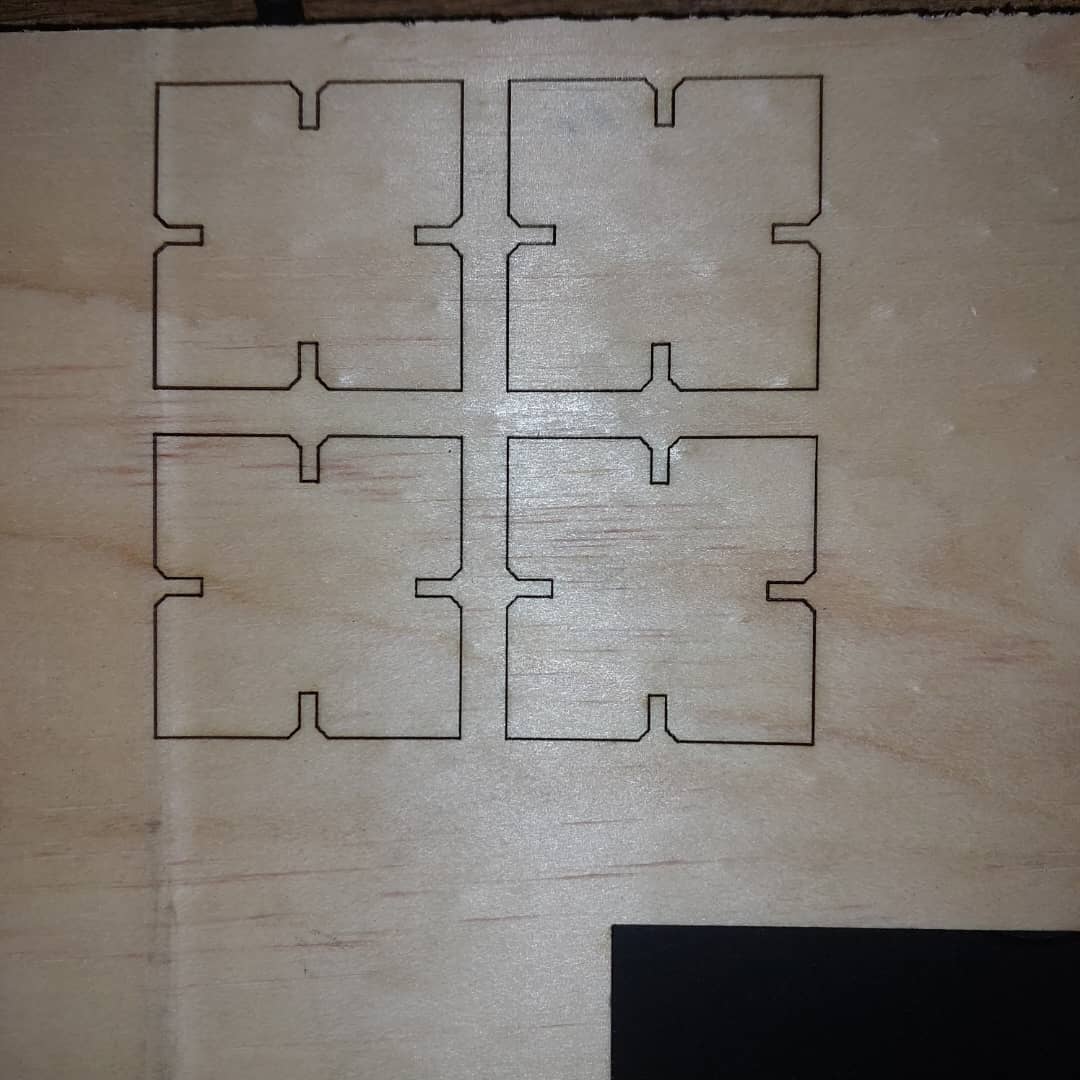
- Second, Cinverted lines into hairlines,i welded the vectors together, I copied and arranged it into a set of 4 similar item using the file where the thickness equals to 2.8mm
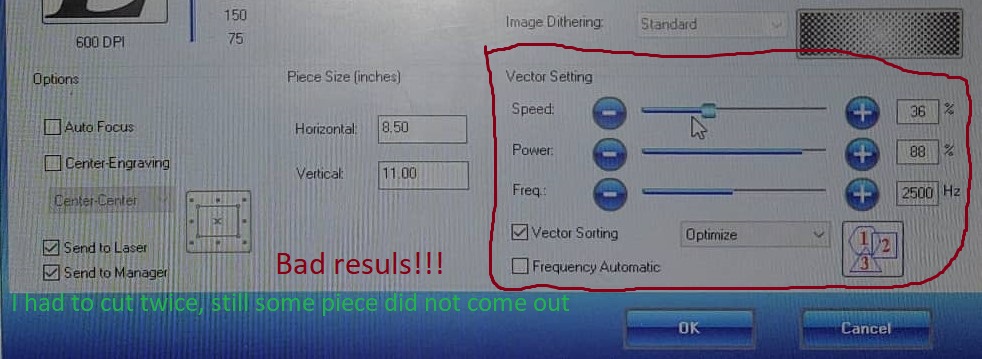
- Thirdly, i started the printing, setting the power and speed of the laser cutter, selecting the vector mode and other preferences.
- the part that came out was Loose the joint would not tighten
- I went back to solidworks, edited the global varialbe named: material and changed it from 2.8mm to 2.3mm, did auto rebuild.
- I exported another dxf file.
- I repeated the same process as above, but increased the power and reduced the speed. The piece came out nicely, it fits well.
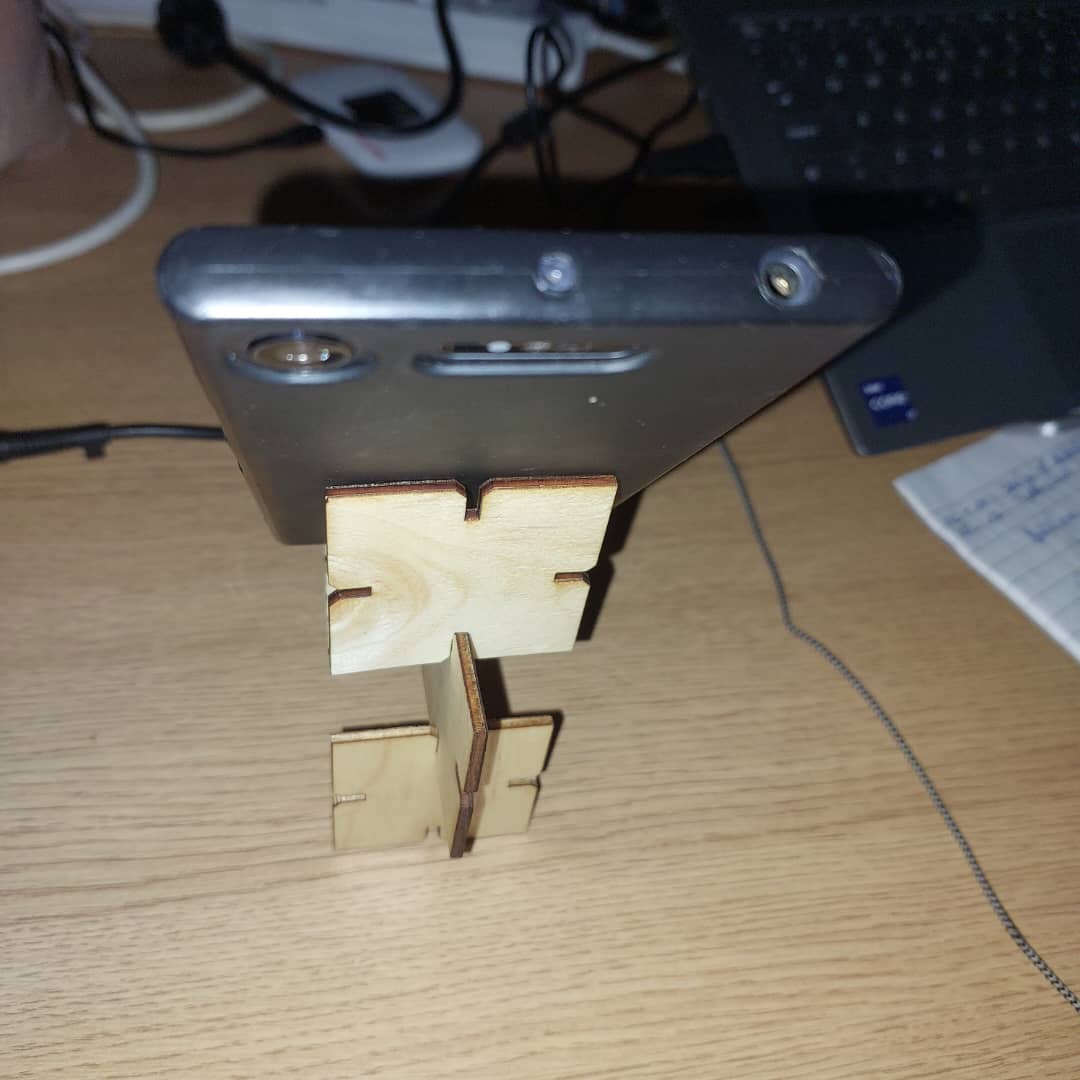
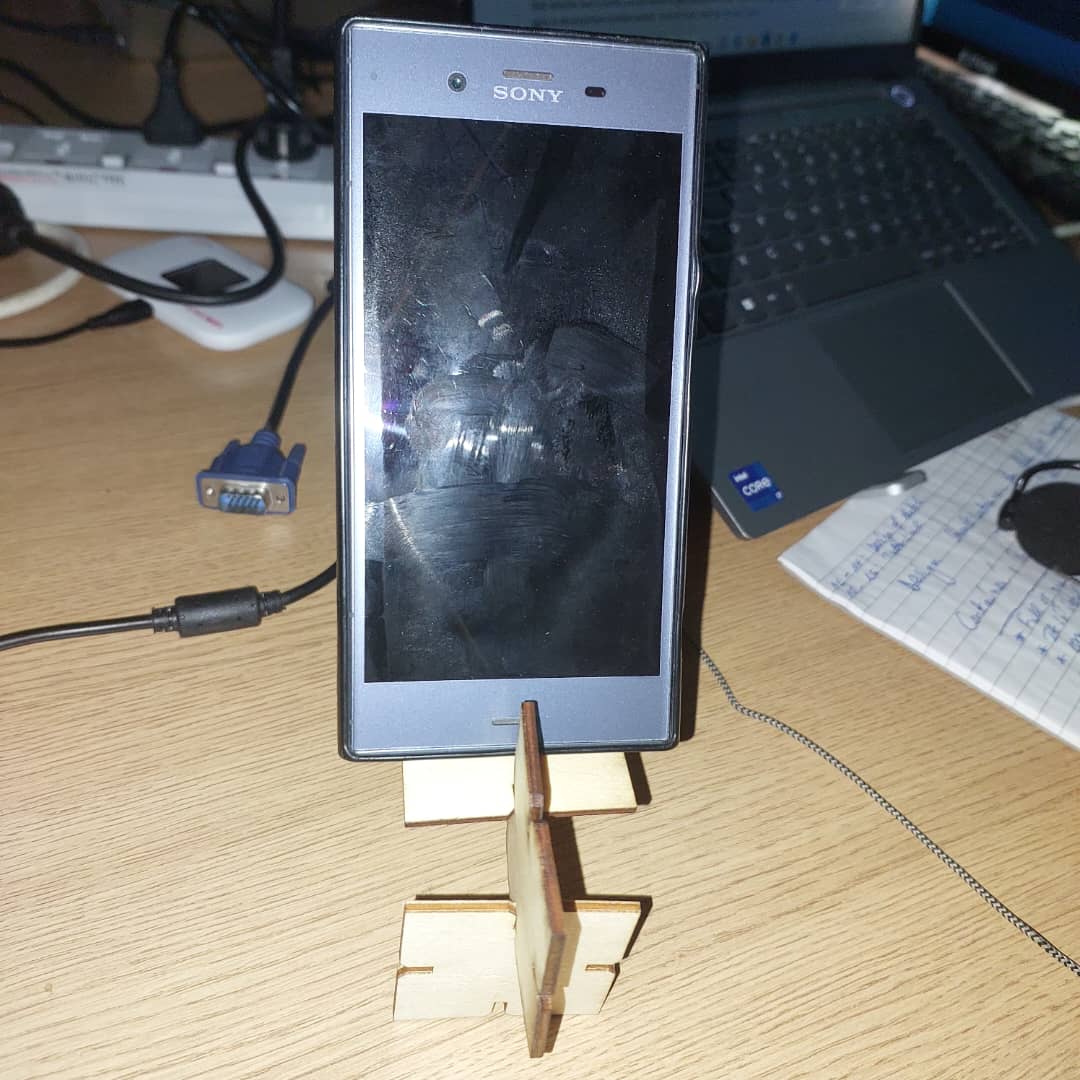
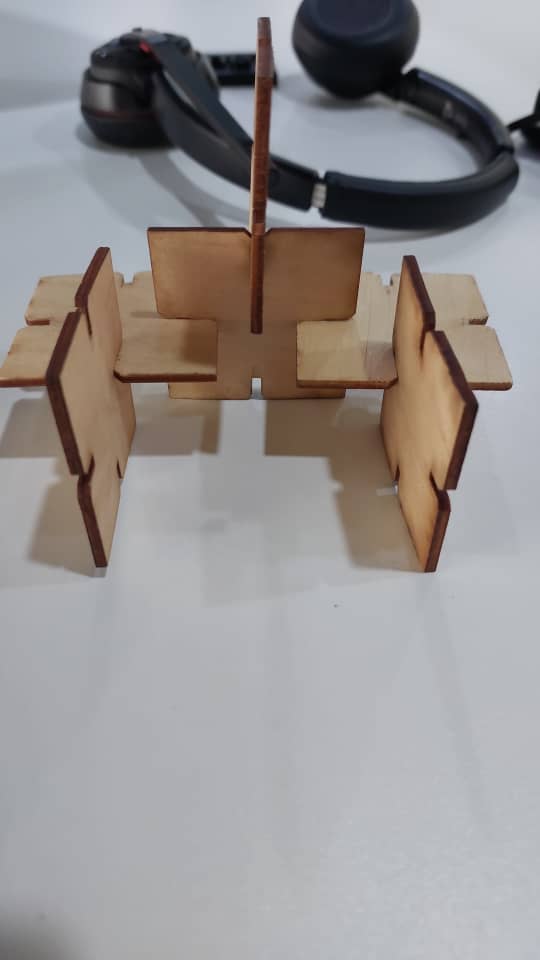
- The press-fit can be used as phone stand, building blocks for may shapes
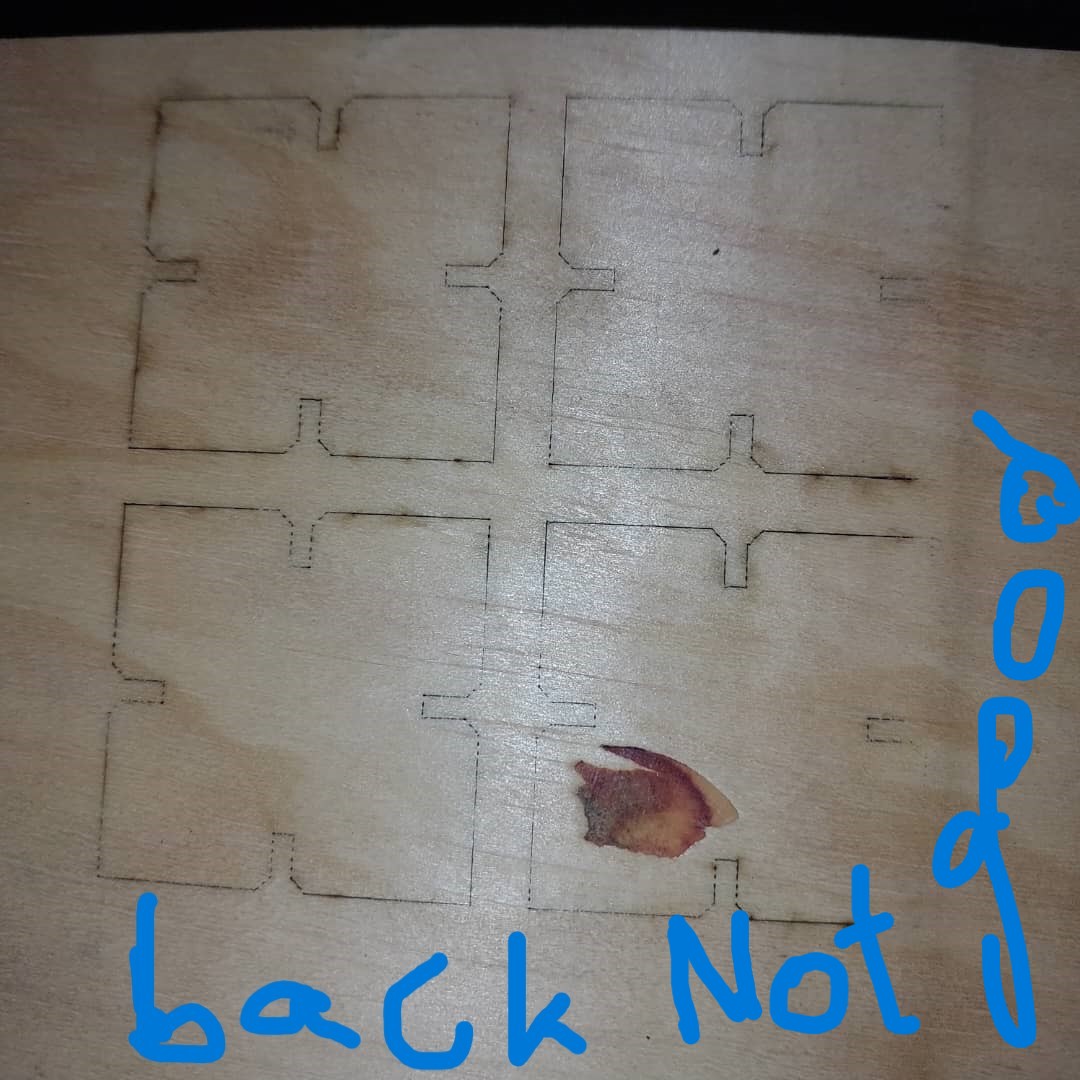
The second cut
4. Documentation of how I made something with the vinyl cutter
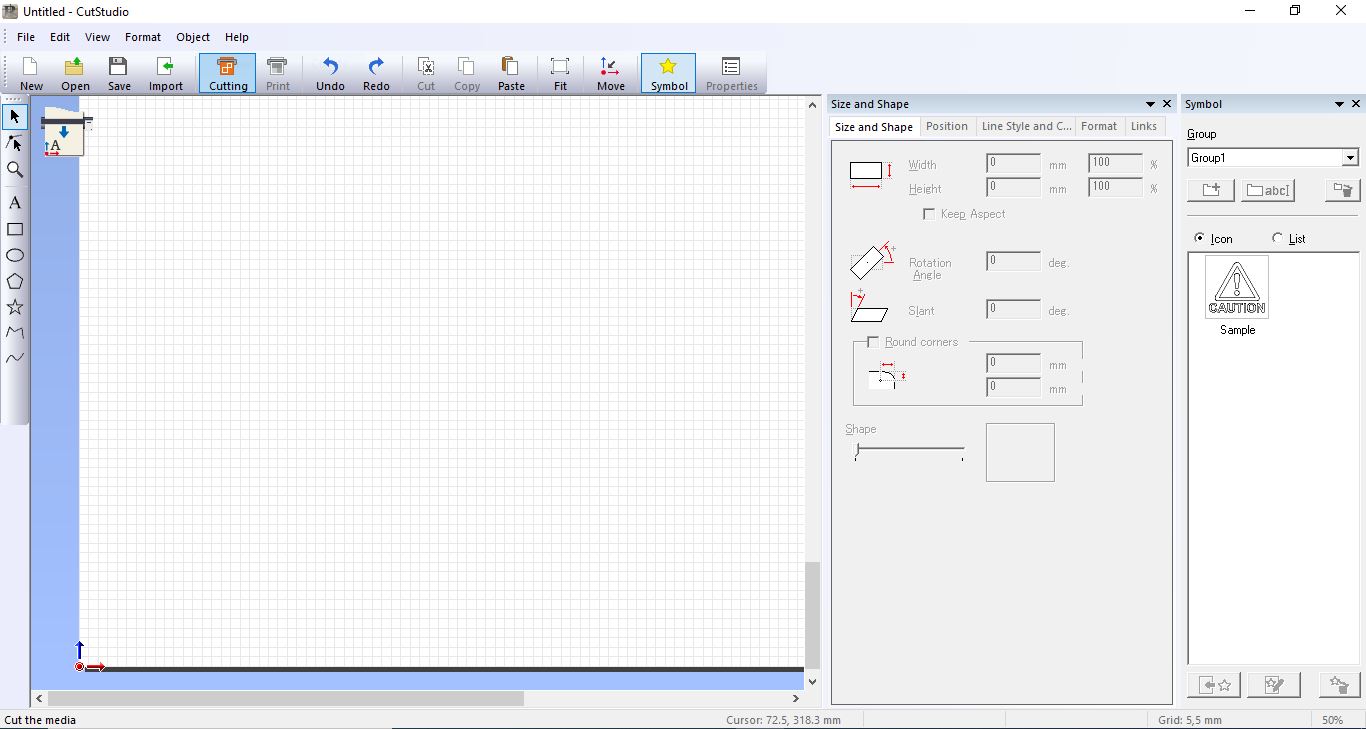
- Roland cutstudio edits:
- this is how the work place looks
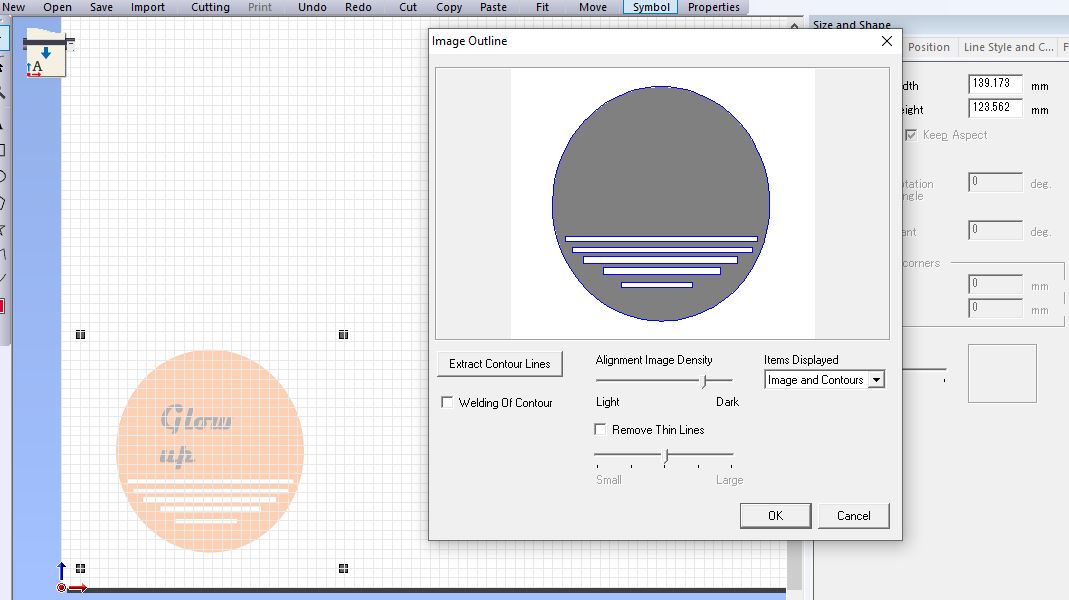
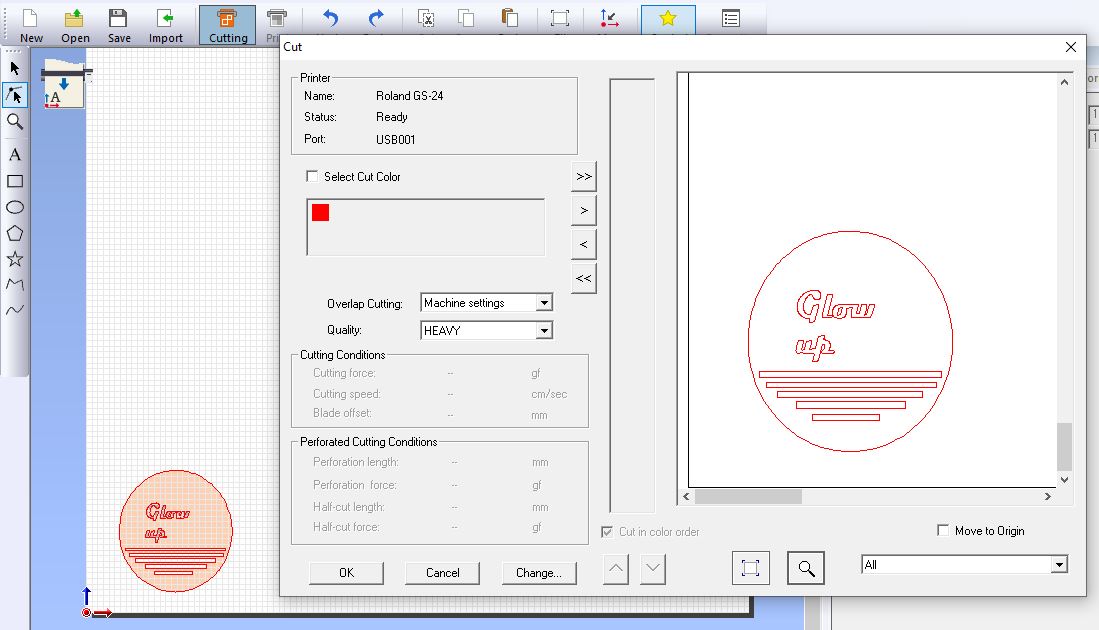
- I imported in CutStudio an jpg file that my collegue designed in photoshop
- Since CutStudio does not import PDF, i had to take a streenshot and save the jpg to be imprted
- After successfully importing, i traced the image and contour, changed the lines' colors into Red to get the path for the machine's blade
- As the lines looked clean and welded, and nothingwas left out, i proceeded to cutting. By either pressing ctrl+p or clicking on cut, you get a preview of how the cut wull be.
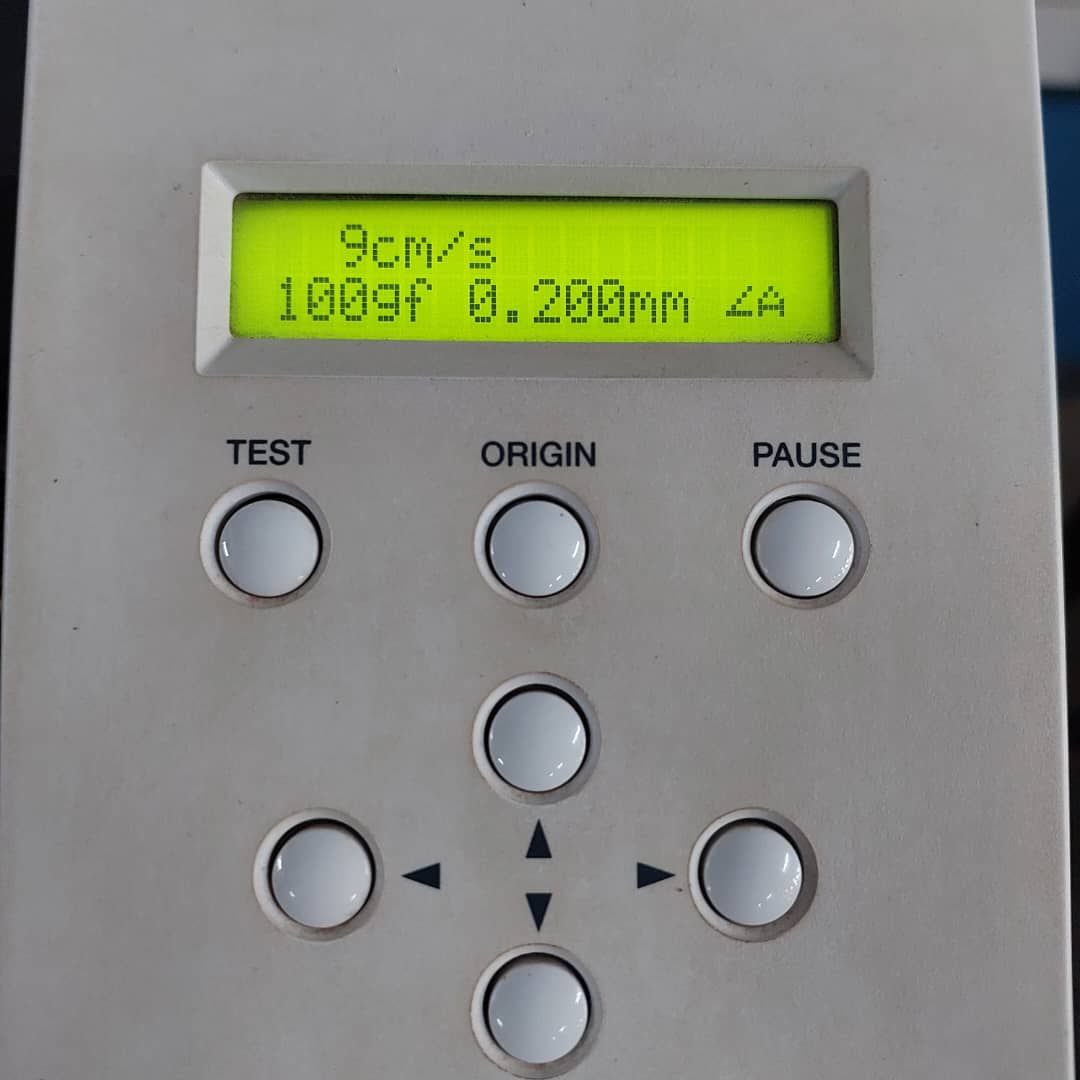
- this is the parameters that i put into the machine before cutting: 100gf, 9cm/s speed, with a 45degree blade, a pen force at 0
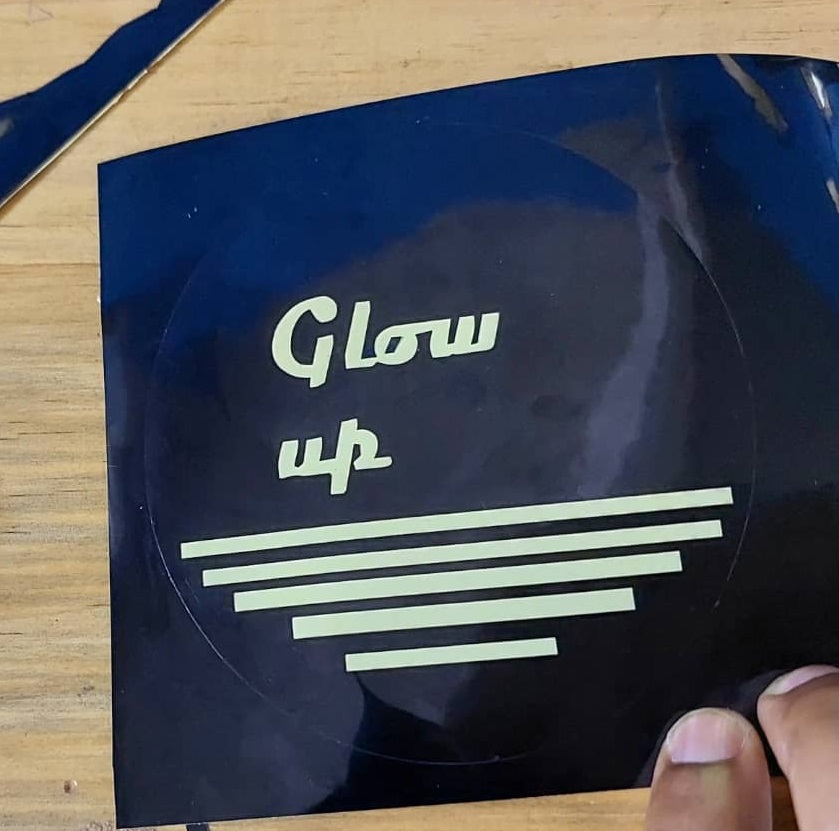
- After cutting the lines out i traced a rectangle around the cut piece change its color to red, cut it with the same gforce twice so to remove it without using scissors this is how the image looks like:
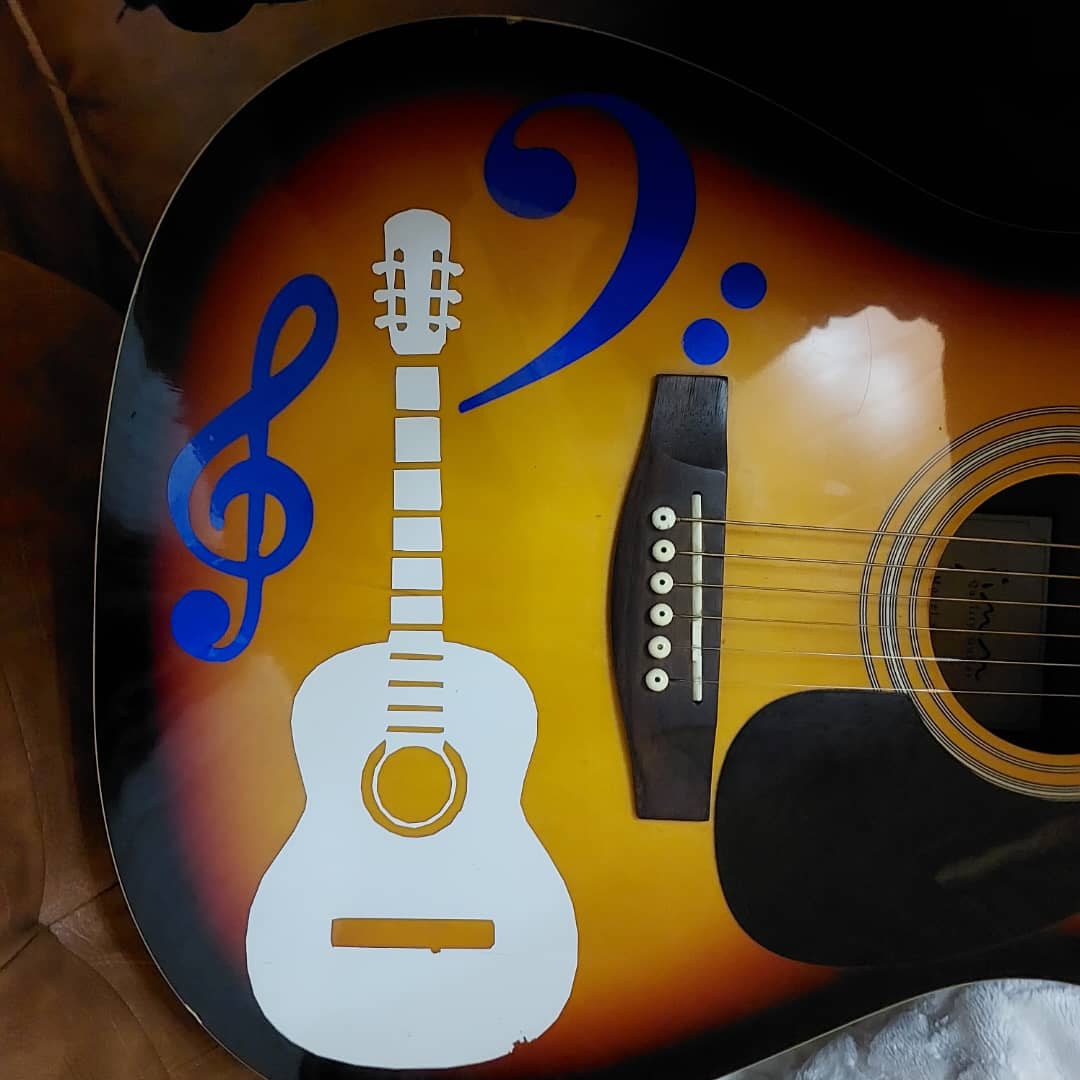
- In the past i have made different stickers for my guitar at home:
 Credit goes to Mr. Evode Munyensanga for the desing.

Issues:
- we did not have the working software (cutstudio) at the Fablab). I had to use a machine from another lab
- we did not have pulling tape, nor the twizzers, so i used the hands to take out my cuts and paste it to the destination place.