2. Computer-Aided Design
Assignment
- model (raster, vector, 2D, 3D, render, animate, simulate, ...) a possible final project
- compress your images and videos,
- and post a description with your design files on your class page<
Research
Throughout The Week
This week I learned and re-learned how to use multiple CAD software including Gimp, Cuttle, photoshop, and Freecad. Prior I already have a vast experience in Fusion 360 and CorelDraw, but I also wanted to learn more about other cad software. I also had touched on photo-shop once or twice but was not super proficient with it. Not including those three I had never touched the other programs before and I learned a lot while using them.
Tutorials
2D Design
Gimp
Gimp is a raster software that lets you design 2D drawings in the workspace. My experience with gimp was not a good one. The UI was so bad and it felt very janky. I followed the gimp tutorials above but doing them honestly felt way harder than it should have been. I had trouble with all the layers and it was overall just confusing. I also had trouble masking the words to make them pop because there were so many steps to do it. Because of all this, I will be using Photoshop for my raster instead of Gimp, But here are my results for the gimp tutorials
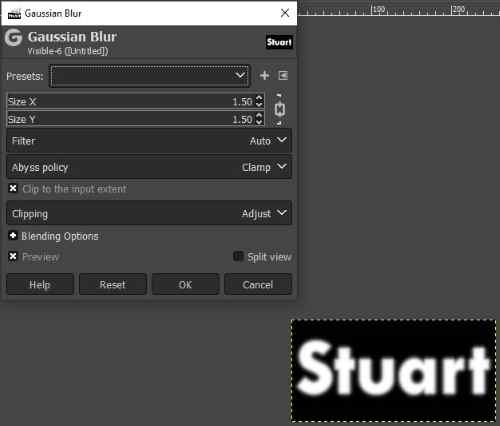
While learning Gimp I followed the floating logo gimp tutorial linked above I learned how to change the color of the ground and background, I also learned how to use the tool to put my name in the middle. After that, I truly got into the more advanced stuff like layers and filters. in the modify tab there is an option for blur. Once you click it you can choose between many types and strengths of blurring for the layer you have selected.

After that, I added a Plasma Filter as an extra layer above the previous one. A plasma layer is a random colorful layer that covers the whole screen. to set a plasma layer you have to go to the filter tab then go down to plasma and hit ok so you can have one.
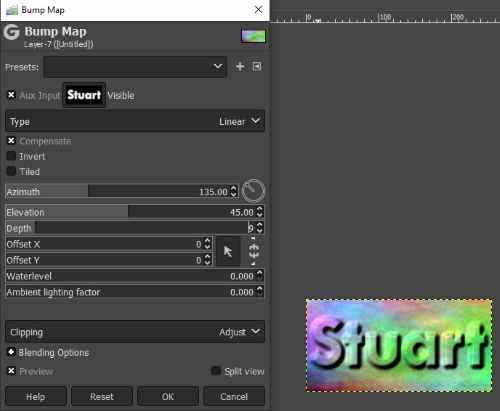
After I set the layer I went back down to the text layer and used bump-map in the modify tab which caused it to go up into the plasma layer. Using the bump-up also allows you to set the depth of your clip so you can make the shadows bigger. After that you use select the background layer and mask it so that you can have any color background with your text

here is my final design for the gimp tutorial. the text and shadow are a seperate layer and I can chaneg the background to whatever color I want and it wont effect the other layers or the shading.
Cuttle
Cuttle is a vector software that you can access online. Using cuttle was a lot better than using gimp. I still prefer CorelDraw more but I can use Cuttle and It has its uses. The tutorials I followed linker above are called getting starting 1 and 2. In these, we make a pentagon with scorch-marked tabs so that you can put them together. I followed both to learn how to use Cuttle and now the basics. Here is what I learned.
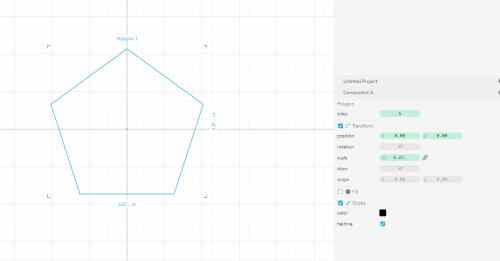
I started the tutorial by making a pentagon, You can make shapes in cuttle by dragging them from the sidebar of the UI.

After I made the pentagon and got it to the right size, I dragged a rectangle in and aligned it with one side of the pentagon and made it short.
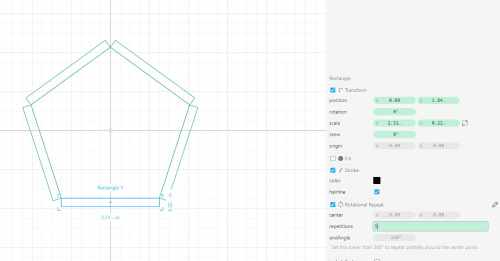
Next, I learned about the rotation reputation tool so that I could have the rectangle aligned with all sides of the pentagon. Then I grouped them so that I could edit the whole thing.
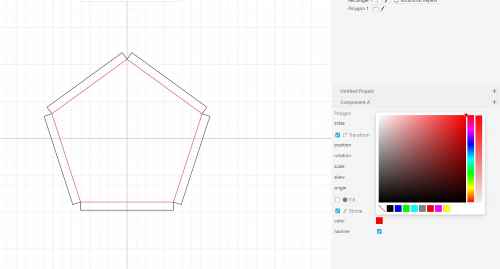
Then I copied the inner pentagon and pasted it making it red so that I can score it if I were to laser cut it.
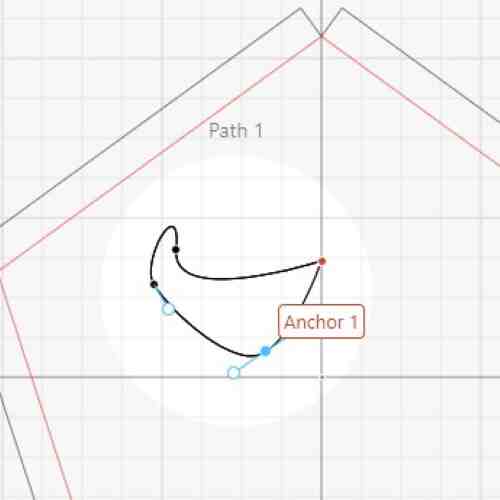
After this, I learned how to use the pen tool. The pen tool allows me to make my shapes and allows me to curve all the points on it for extra detail.
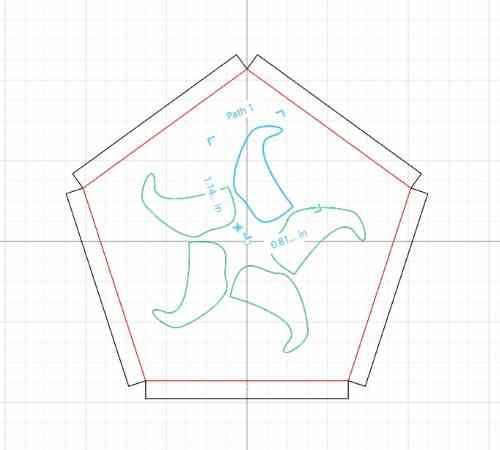
Once I made the shape I used the Rotate repetition to make 5 copies of my shape turned around in the pentagon. After that, I made more shapes and circles in the pentagon and then put them in the same rotational group as the previous shape so that it was symmetrical and nice.
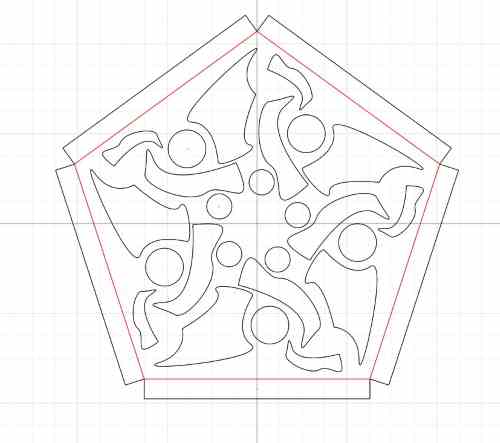
Once all of that was done I had my final pentagon with a design in it and learned how to use cuttle. I honestly like cuttle a lot compared to gimp, but CorelDraw is still better in my opinion because its more refined.
3D Design
FreeCad
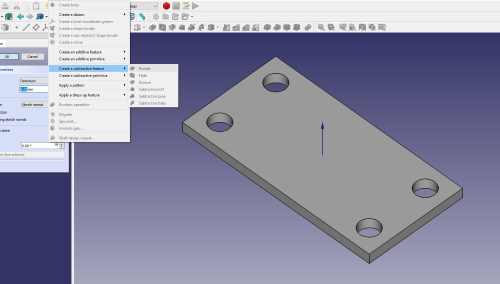
FreeCad is a 3D design software that lets you sketch, model and simualte designs all in one. using this software was a little akward compared to what I was used to with fusion 360 but it was a good learning experience. I learned how to use all the tools to make a model in the workspace, like sketch, constraints, and pocket among other tools. While I prefer using fusion 360 FreeCad is not a bad modeling tool.
Starting FreeCad I was genuinely surprised. Its UI is really good and all its tools work well. I watched two tutorials to get acquainted with the software both linked above. The first one teaches you all about the tools, preferences, and settings on the site. The second one got into how to design objects in the FreeCad. It starts by telling you how to make a workspace then how to make a body on the left and lastly to make a sketch on the XY plane.
After you make the plane it makes you make a rectangle and learn constraints with the horizontal and verticle constraint tools that let you set the size of objects.
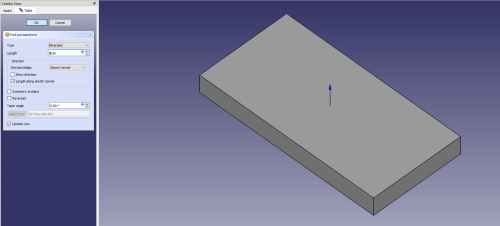
Once you get the rectangle to the correct size you use a pad command in the modify drop-down list, which extrudes the rectangle.
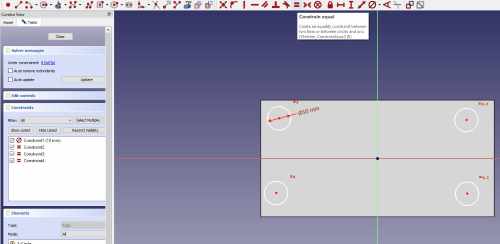
Next, we sketched the box face and drew four holes in it. Then I used the diameter constraint tool to set the size of the first circle. then I used the equalize constraint tool to make all the circles the same size. Next, I used constraints to put the first circle in the right place then I used the horizontal and verticle constraint to get the rest of the circles in place.
After that, I used the pocket command in the modify drop-down menu to make the circles hole into the block
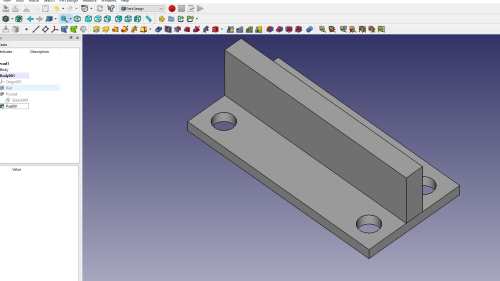
For the last part of the tutorial, I made 1 more extrude off of a rectangle I made on the face of the block.
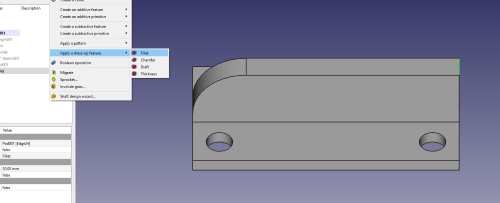
with that extrude I learned how to use the filet tool in the modify menu to smooth out the edges.
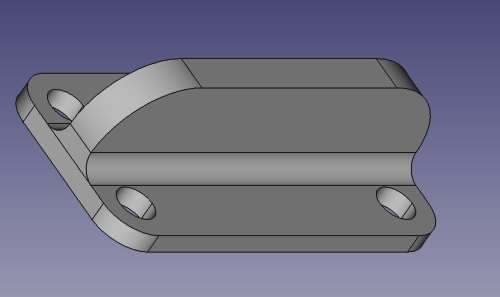
Once I finished this is what I ended up with. FreeCad really helped me understand constraints more then what i new from fusion but also made me apreciate fusion 360 more becuase of the humanized UI.
Final project Designs
PhotoShop
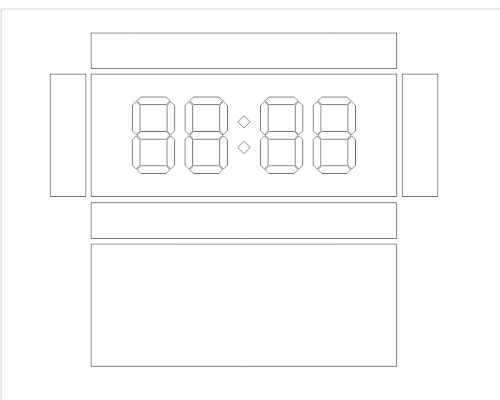
For my final project raster design in the photo-shop, I designed the front of my final project. I used the gimp tutorial for the idea of shadows and how to do the front.

First I started with a blank canvas and set a background gradient for some differences in the front and the background. Then I just made a white rectangle in the middle of the screen.
Then I had to design one block on the canvas. To do this I used the rectangle tool and then put two triangles on each end of the rectangle. I used pythageram theorem to find out how tall to make the triangle so it would fit in with the other blocks and then grouped it all.
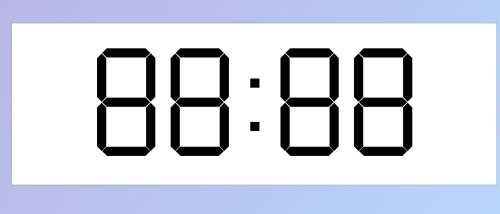
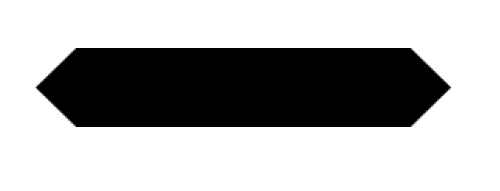
Then I just duplicated it until I put together a full digit of the clock together. Next, I copied that until I had 4 digits. Next, I used the rectangle tool to make a square for the semi-colon.
then once they were all spaced out I duplicated the layer set a blur on it, turned the opacity down, and added a distortion so that I could add a shadow so that you can see the blocks are out of the clock. And then I was done.
CorelDraw
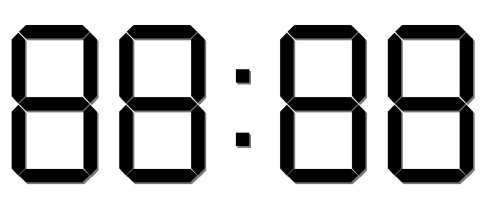
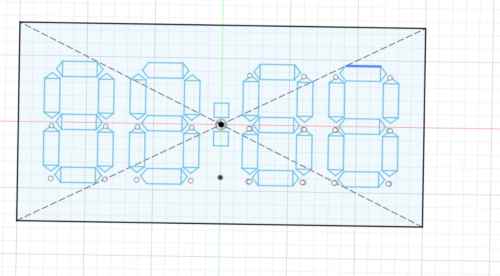
For my CorelDraw Final Project Vector design I wanted to design the box or case for the clock as a tab box so I can take it apart and put it back together later.
I started by drawing a box and making it the correct size of the real thing so that I can just laser cut it later.
Then I had to design one block on the canvas. To do this I used the rectangle tool and then put two triangles on each end of the rectangle. I used math to find out how tall to make the triangle so it would fit in with the other blocks and then grouped it all. Then I just duplicated it until I put together a full digit of the clock together. Next, I copied that until I had 4 digits. Then I made 2 squares and rotated them and put them in the middle of all the digits. Next, I aligned all the digits and the center of the box so that it's all centered.
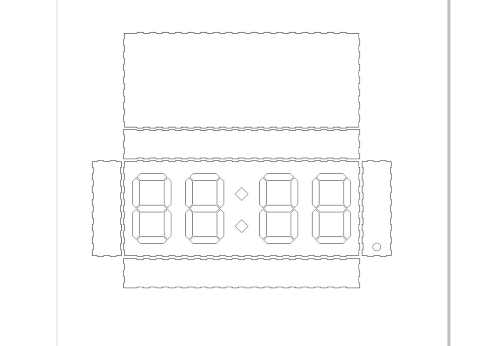
Then to wrap it all up I added tabs to all the box panels with spots for hinges on the back and bottom panels so that I can have back access.
Fusion
Hinge For Tab Box
After designing my tab box in Corel I needed to design the hinges for the tab box. So I designed them in Fusion 360 becuase that is what im most confident in.
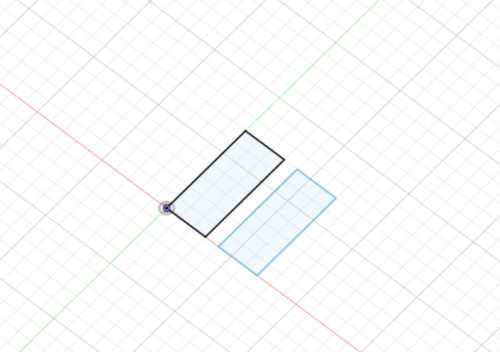
I started by making two rectangles in a sketch on that I will base my design.
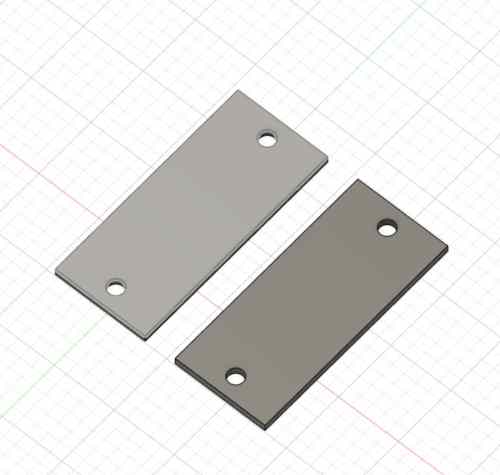
After I made the boxes to the correct size I needed, I extruded them out to the correct width. Then I added holes onto the design in case I want to be able to screw it in later.
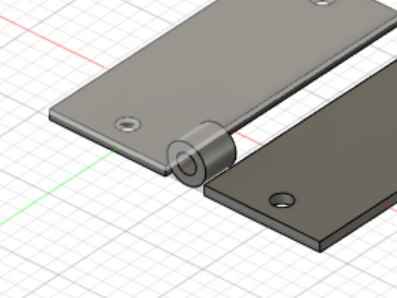
Once I finished designing the pads of the hinge I designed the first bracket of the hinge in the middle of the two pads.
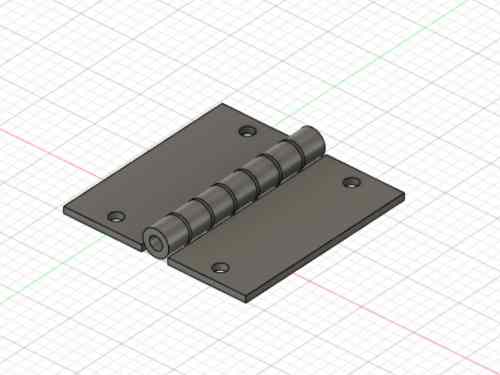
I then duplicated the bracket over and over so that it took up the whole middle area.
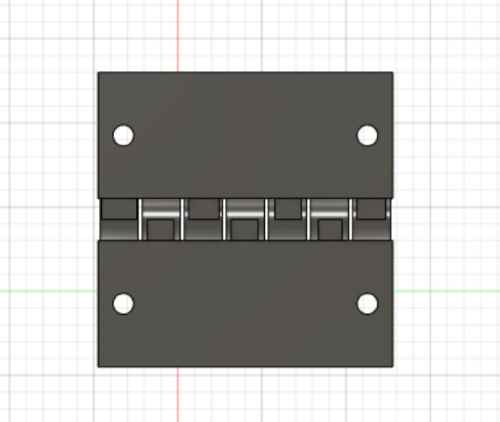
the next step was connecting the brackets to their pads. I did this by just drawing boxes underneath them to the pad and extruding it out of the connection with the pad so that blocks are connecting each bracket.
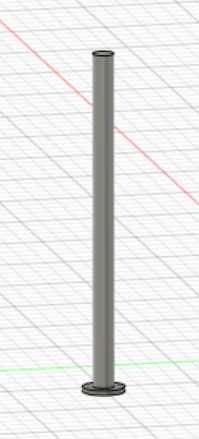
Once I was finished I made a doll to the correct size of the holes in the brackets so that they have something to spin around and it can work like a hinge. My goal with this design is during wild card week to mold and cast this in metal to make my brackets for my design.
Final Clock rough design
After designing my hinge I wanted to see a quick 3d model of what my project would look like in Fusion 360 so I made it.
I Started by importing my Corel Draw file and tracing over the top face to get the dimensions to end up with my original sketch.
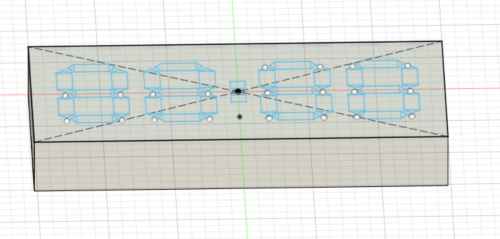
I Once I had my original sketch it was as simple as extruding the whole rectangle down.
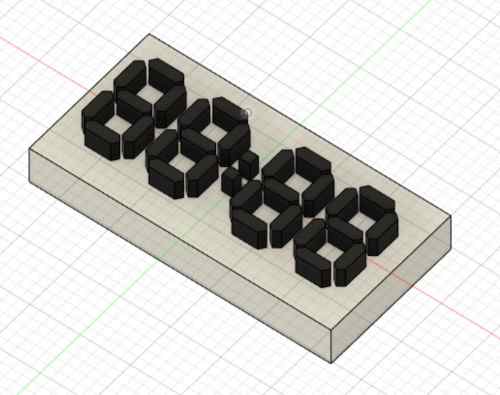
Then I extruded all the numbers or blocks up.
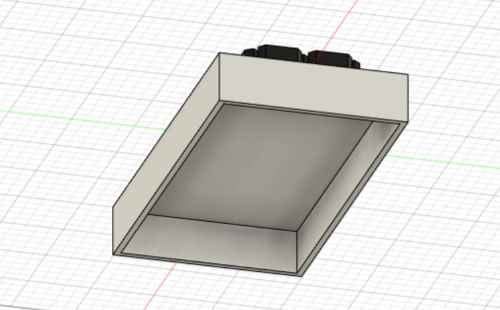
Once I did that I shelled out the box so that I can model out the block mechanism in the future once I completely figure out how I would like that to work. But until then here is the final basic model of my Final Project.
Summary
Throughout all of these lessons and projects I learned how to use many 2D and 3D softwares such as cuttle, gimp and freeCad. Learning these softwares really helped me understand many different techniques and stylws of designe that I can use in the future. freeCad helped me learn constraints and paramiters, and cuttle helped me learn rotaitional semitry. learning those things helped me with designing my final project designs