Week 9: Molding and Casting
Molding and Casting is the process where we can produce many copies of the original item. Mold is the liquid materials that we pour on the item in the box to be casted. Mold materials harden on getting set to flexy material taking the shape of the item that is used.
Casting is the process where we pour semi liquid materials (usually the materials like cement paste which harden on getting set) into the mold and letting it dry.
One mold can cast as many as possible to create a copy of original item.
Instruction:
Design a mold around the stock and tooling that you'll be using
Mill it (rough cut + three-axis finish cut) and use it to cast parts.
Extra Credit:
☞ Use more then two mold parts
Group Assignment:
Review the safety data sheets for each of your molding and casting materials, then make and compare test casts with each of them
Extra Credit:
☞ Try other molding and casting processes
- To Do:
- Learn and document on Molding and Casting.
- Review the safety datasheet for every materials to be used.
- Design 3D mold and create Roughing and Smoothing toolpath.
- Make mold aand cast parts.
- Group Assignment.
Molding and Casting Materials
Mold making Materials:
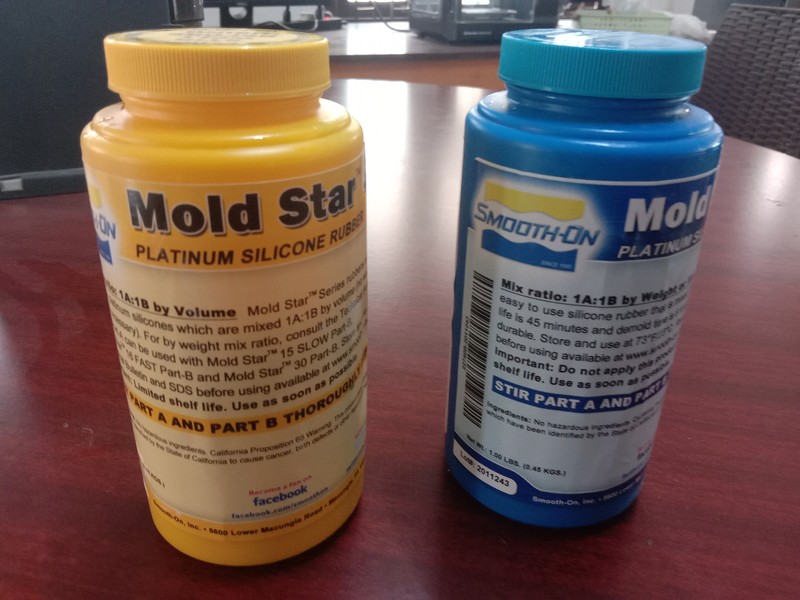
For molding we are using Mold Star - Platinum Silicon Rubber. It contains in two part as Part A and Part B, which are require in equal amount for mold making.
Safty Precuation
Respiratory Protection
Respiratory protection is not normally required when using this product in open environments with adequate ventilation.
Hand Protection
Wear any liquid-tight gloves such as butyl rubber, neoprene or PVC.
Eye Protection
Safety glasses with side shields per OSHA eye- and face-protection regulations 29 CFR 1910.133 and European Standard EN166. Contact lenses are not eye protective devices. Appropriate eye protection must be worn instead of, or in conjunction with contact lenses.
Other Protective Clothing/Equipment
Additional protective clothing or equipment is not normally required. Provide eye bath and safety shower.
Comments
Never eat, drink, or smoke in work areas. Practice good personal hygiene after using this material, especially before eating, drinking, smoking, using the toilet, or applying cosmetics. Wash thoroughly after handling.
Casting Materials:
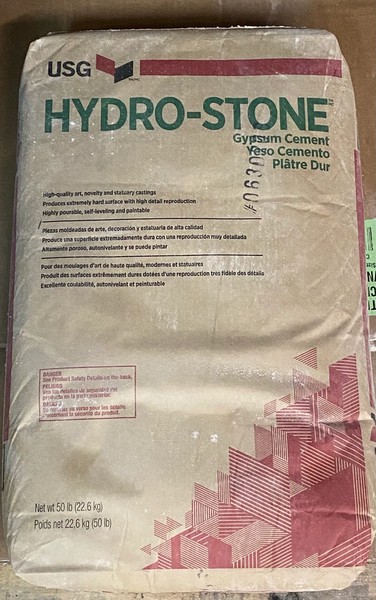
We used Hydro-stone for casting for our assignment. It becomes hard and rigid after setting or cooldown.
Precuations to be taken in Handling and Storage:
During handling wear the appropriate respiratory, eye and skin protection if warranted per environmental conditions. Keep dry. Dew point conditions or other conditions causing presence of liquid will harden this material during storage.
Mold Designing:
We can also directly cast the item available but for the week assignment, we require to design our mold item to be casted. Mill in the CNC milling machine and than cast it to get the final product.
I wanted to design stupa for my molding and casting assignment. First I assign the Length and Width of the material (Wax Block) that I will be using for milling my design. I also need to consider the depth that milling can go, it is only 20mm depth that I can mill.
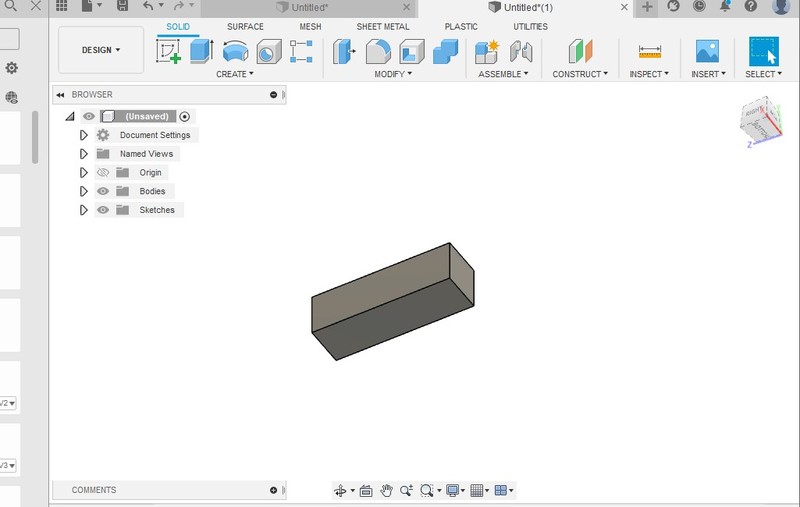
So, I decided to make the width of 30mm where my depth can be 15mm only. I don't want to consider height as I want it to be auto else my design will get reshaped.
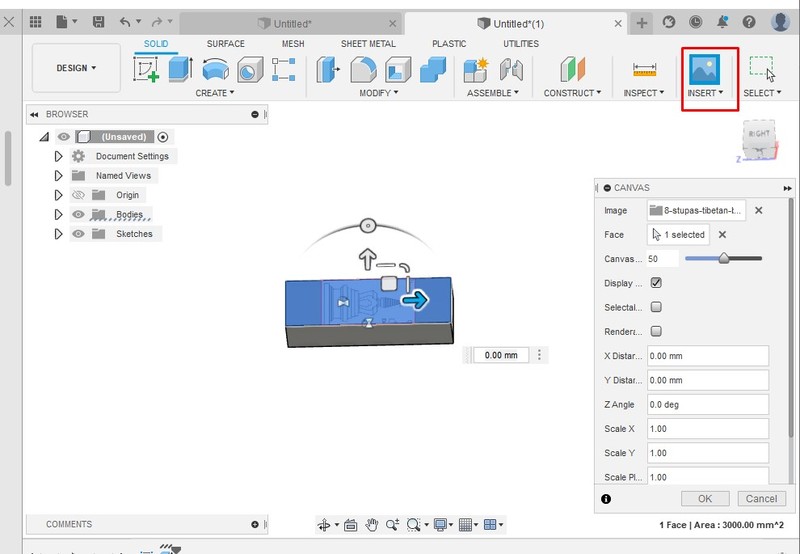
I inserted the image on the surface after selecting it and inserting from the Insert tab highlighted.
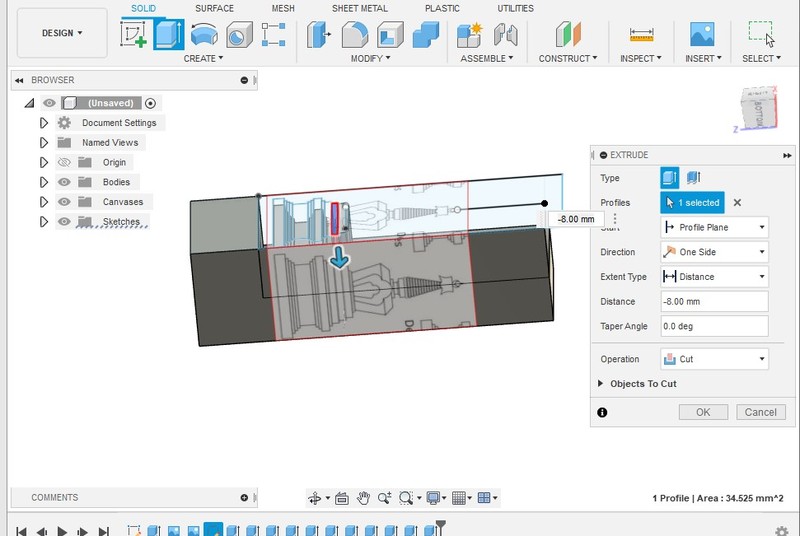
So, I sketch the design using the reference of the images on two side of the block. From one side I need to extrude half the image of other side to make it half.
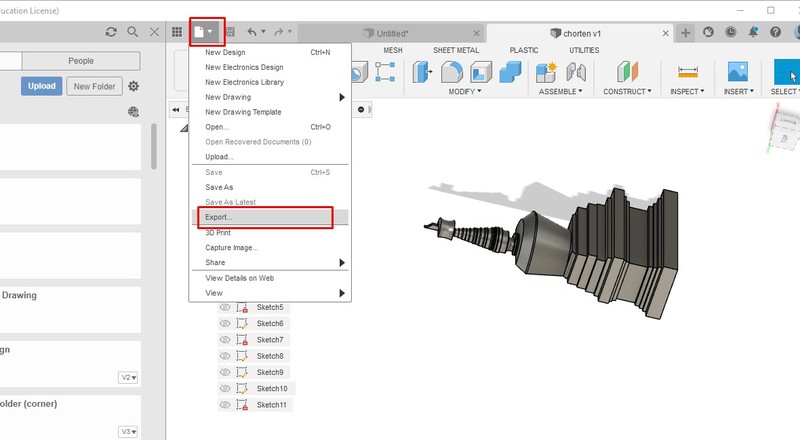
So, after completing the design, I removed all the unwanted side blocks and made it lone design. Than I exported using export command in .stl file.
Milling
So, after the designing in the 3D software, we need to mill it in the cnc milling machine to create the positive mold. Milling of mold is done in two process as Roughing and Smoothing.
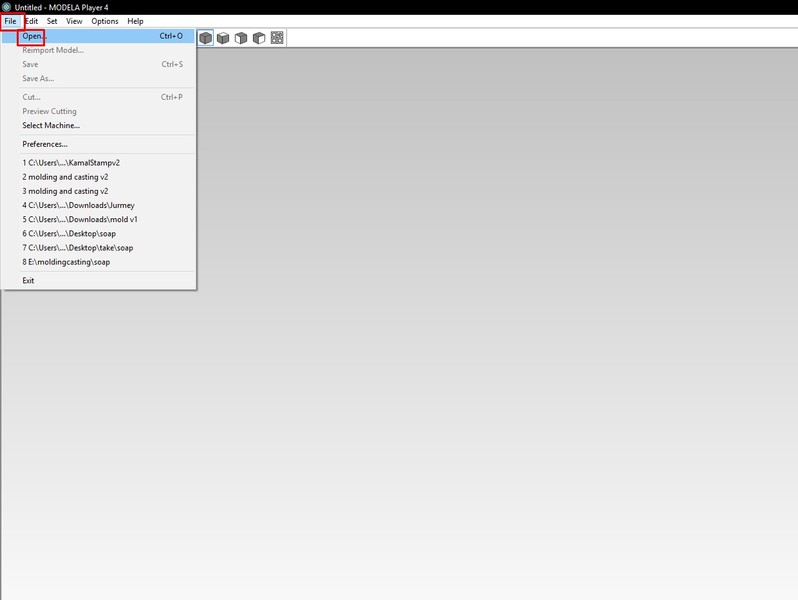
We used Modela Player to create the file for milling. From the Open tab, we can open our .stl file into the software.
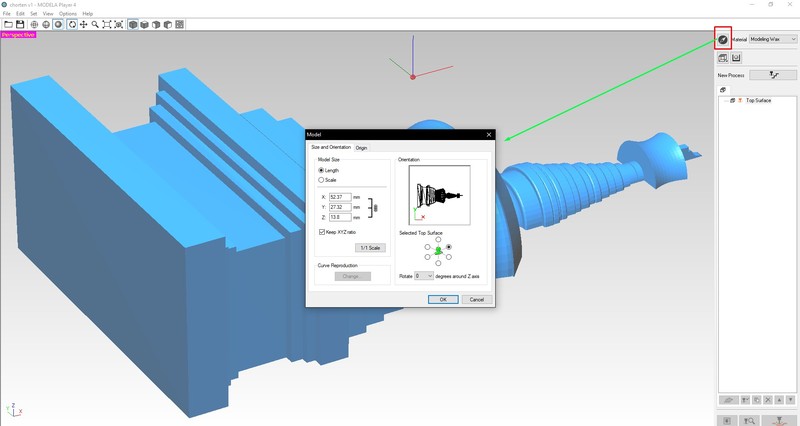
After opening the design file in Modela, now we have to select the top face of the that will be during the milling. Use the Model tap shown in above image and use Selected Top Surface to select your top surface of the design. Usually in the Model window, make the top surface you want to be face you.
This is to select the number of sides you will be milling. the selected is single side as I am going to mill from only one side.
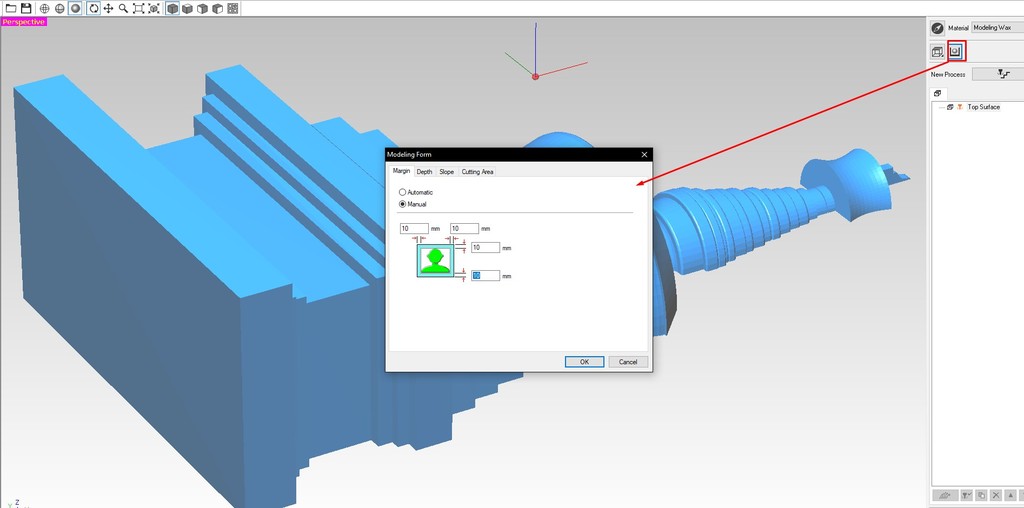
This is one important setting for the print. It will keep the distance outside of your design which you require as the border in the positive mold.
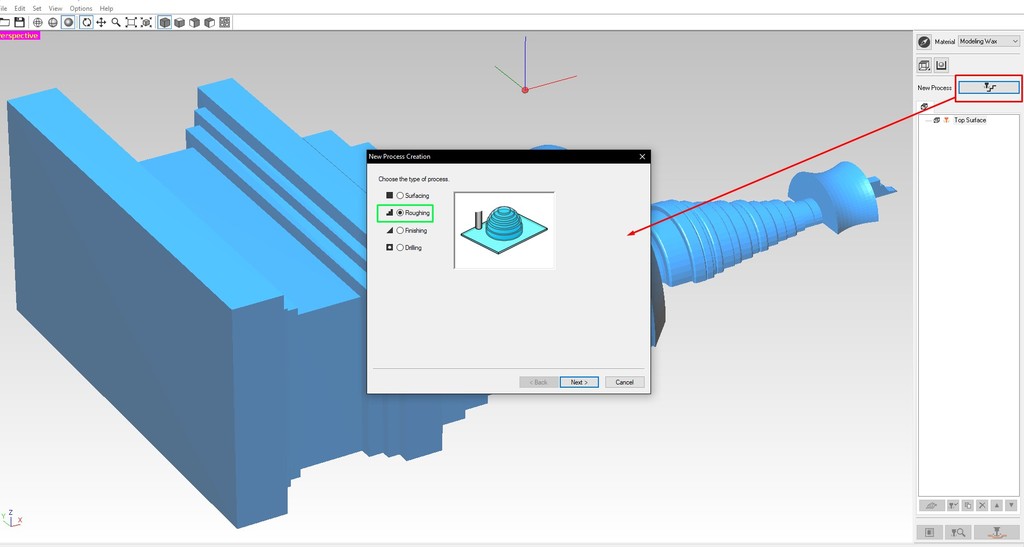
Now you need to do setting in the New Process. Select roughing for the first milling. This will remove major parts of unwanted surface.
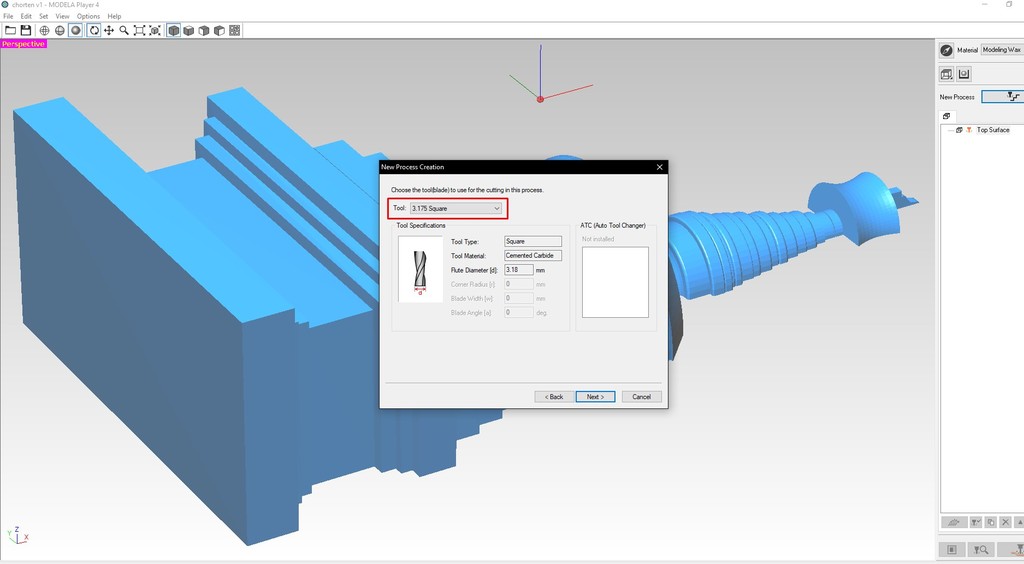
After the above setting Next will take you to next seeting of above. Select the tools that will be used for roughing the design. Ususally 3.175 square is used for roughing purpose.

Next, this is the setting. Select the Partial and Start Height to 5, this means the shape taking of your design will start after 5mm from the surface of the materials. This is important to keep because later during the molding time of negative mold, this 5mm will be the thickness of the base.
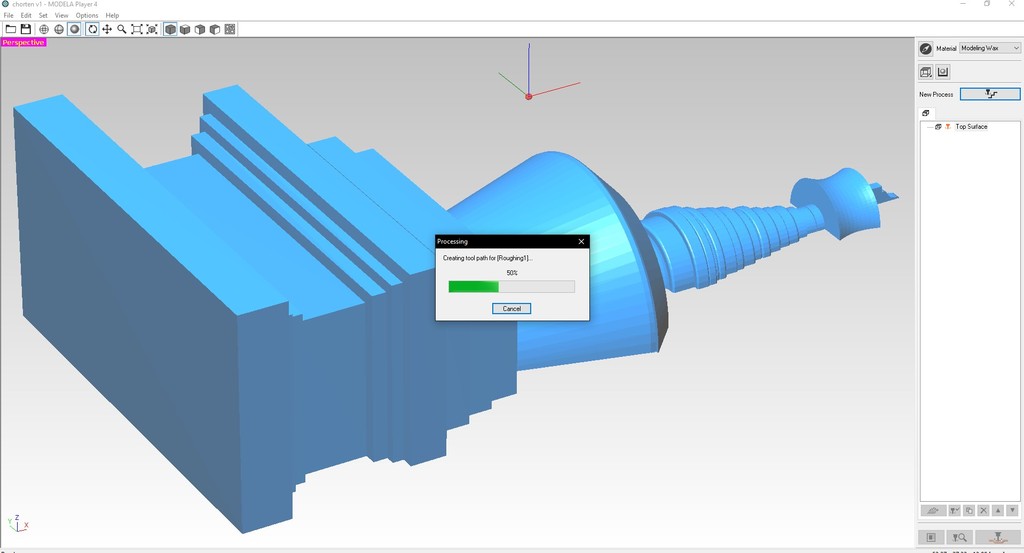
After that do Next, Next and there is nothing to change and select Finish to complete the toolpath.
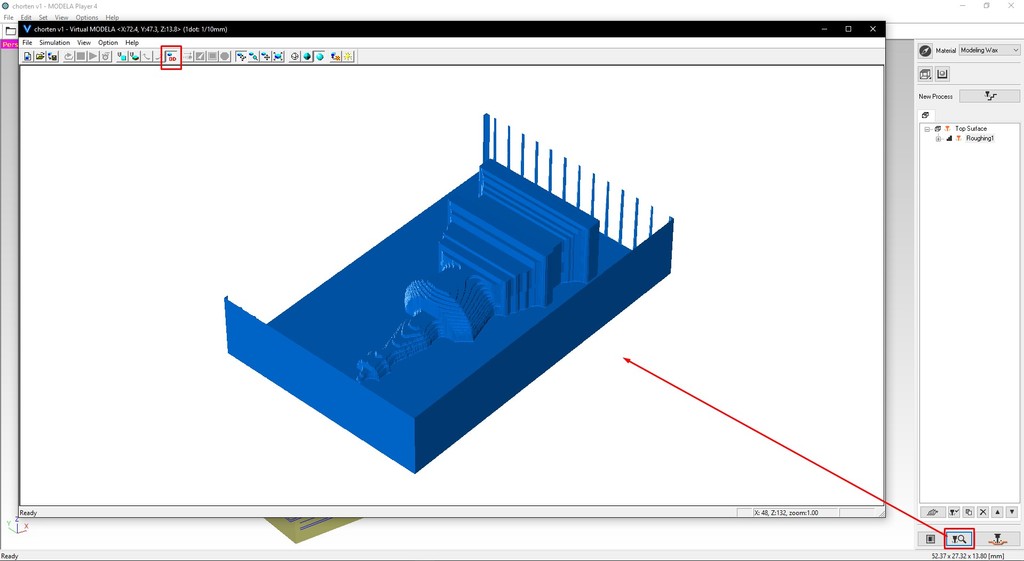
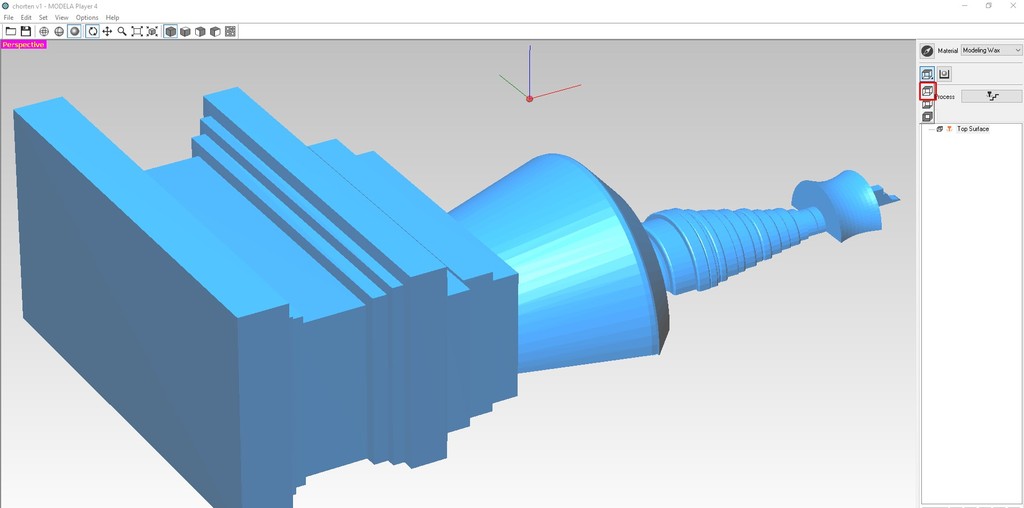
After saving the file, you can view it in the Virtual Modela.
Now repeat the process for the Smoothing. Steps are similar to that of roughing. Select Finishing in the Choose the Type of Process and R1.5825 Ball as the Tool for finishing. View in the Virtual Modela to see if it is satifying.
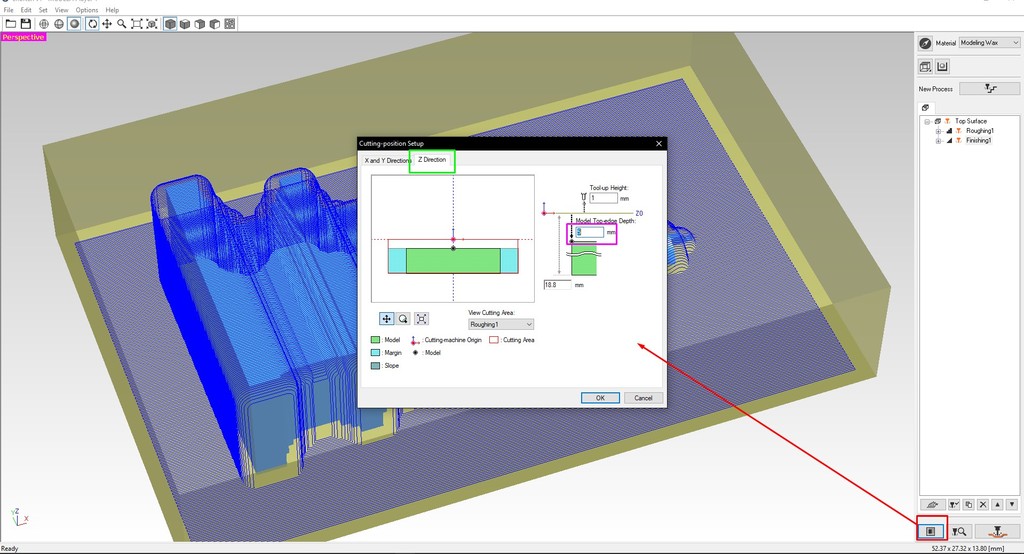
Before you go on saving the toolpath, you need to set in the Cutting Position Setup. In the Z-Direction make Model Top-Edge Depth as 5mm else machine will cut in the air.
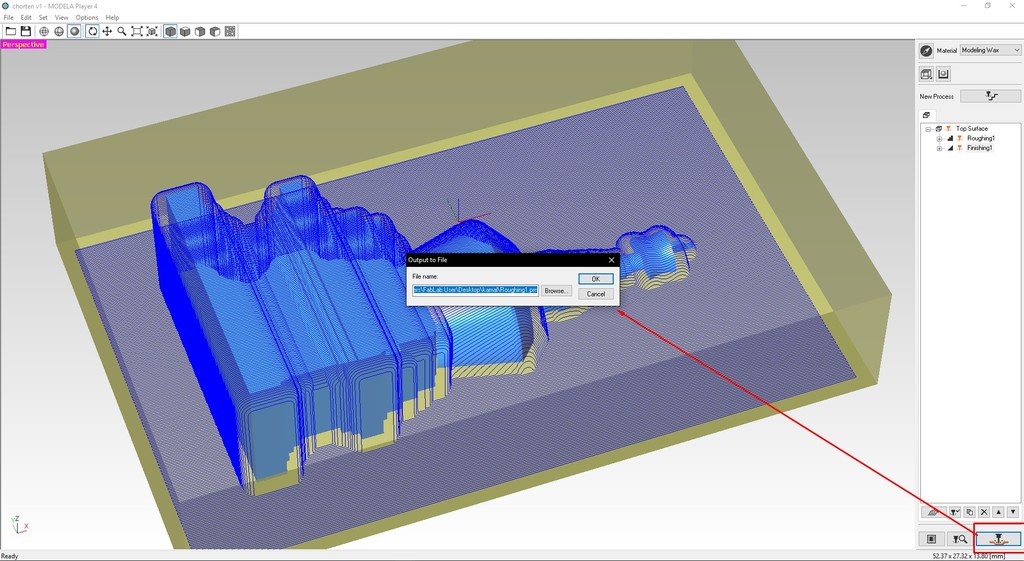
Now save both the toolpaths using Output to File tap.
After saving it's time for milling in the cnc milling machine. Machine setup are same to that of pcb milling but select the zero in the center of the materials. Start the milling first with the Roughing and than finishing to make your design clean.
- Parameters for roughing
- Tools: 3.175 square end mill
- Spindle Speed: 9000RPM
- Feed rate: 240mm/min Parameters for smoothing
- Tools: R1.5825 Ball nose
- Spindle Speed: 9000RPM
- Feed rate: 240mm/min
Casting Negative Mold
After the milling of the design, we need to cast our negative mold. For this negative mold we use Silicone material as we require the negative mold to be flexible.
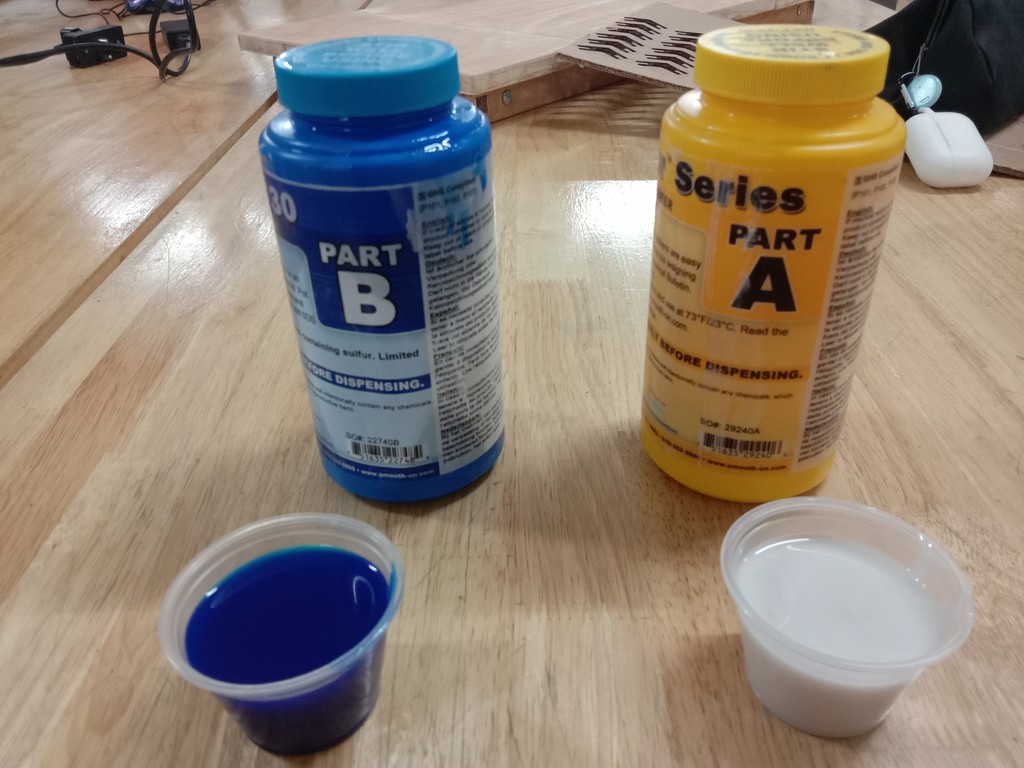
The requirement of silicone of part A and Part B are 1A:1B by volume, we do not take it by weight. So, pour equal amount of part A and Part B.
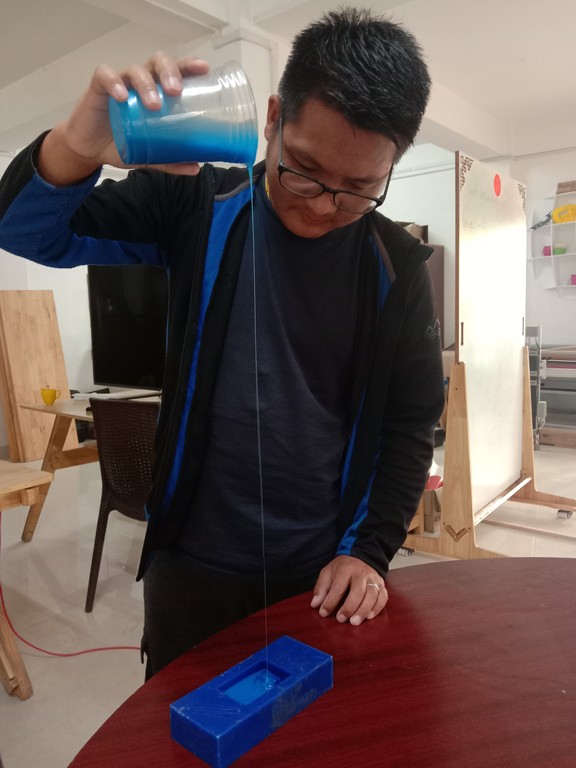
Mix well in one container and pour as thin as possible and as high as possible. Pouring from high and thin will remove the air bubble that entered in the mixture during the process. It is good to use the air remover before casting. After filling the mold, tap for sometime to further remove the air bubble and than let it dry for around 4-6hours.
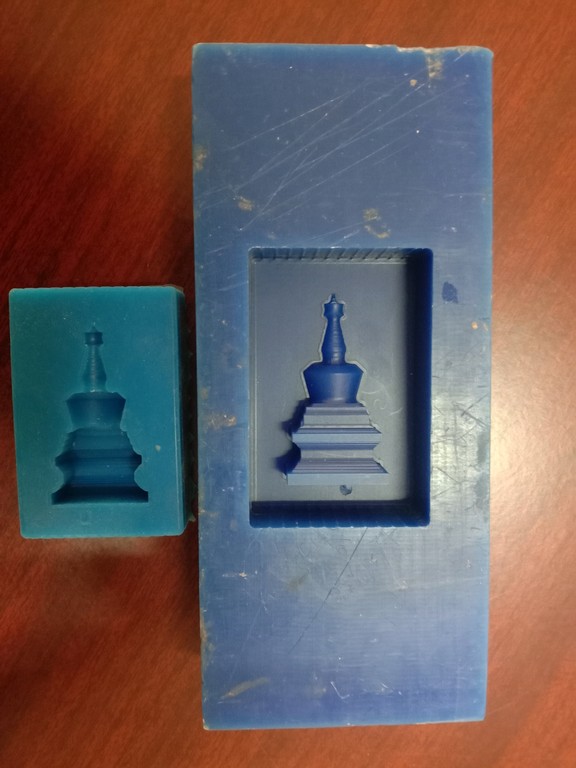
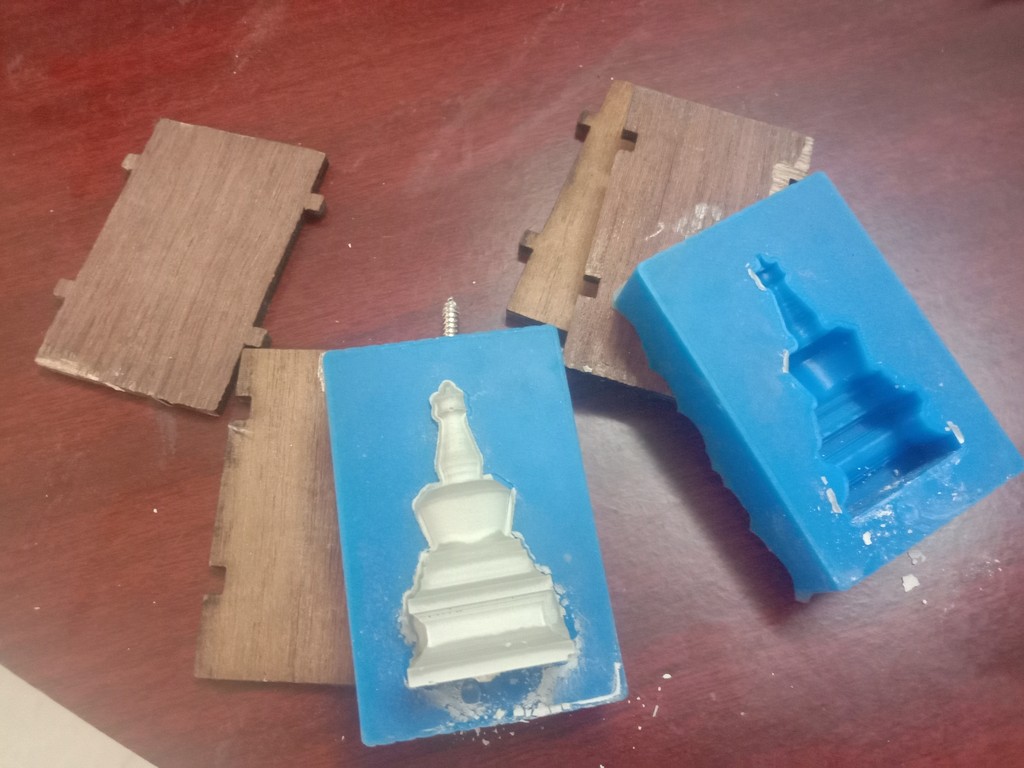
Remove the cast from the material after getting it set. This will become the negative mold which we will use it to cast later using hydrostone.
I made two negative mold which will work as half part of the stupa I want to cast.
Casting
After creating the negative mold, we can cast using Hydro-Stone or other materials like lead. For the assignment I used the Hydro-Stone for casting.
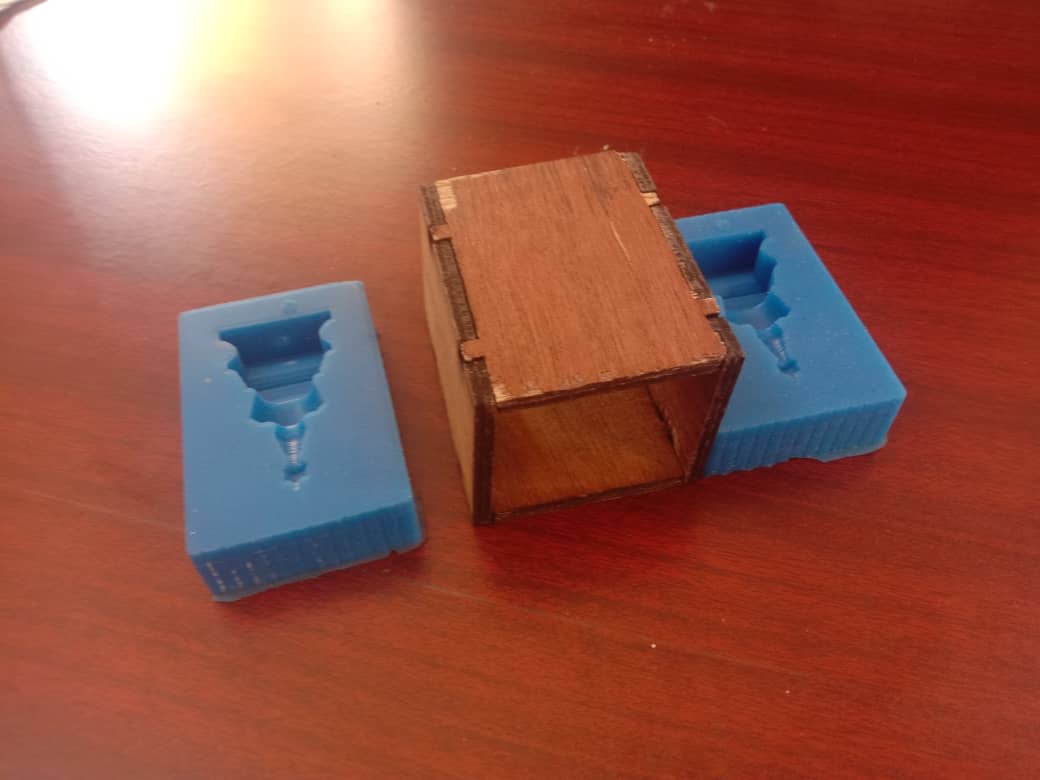
To hold two negative mold together to cast became my challenge as I haven't kept any holding nut or anything. So, I made the box in laser to hold the two negative mold together from the sides.
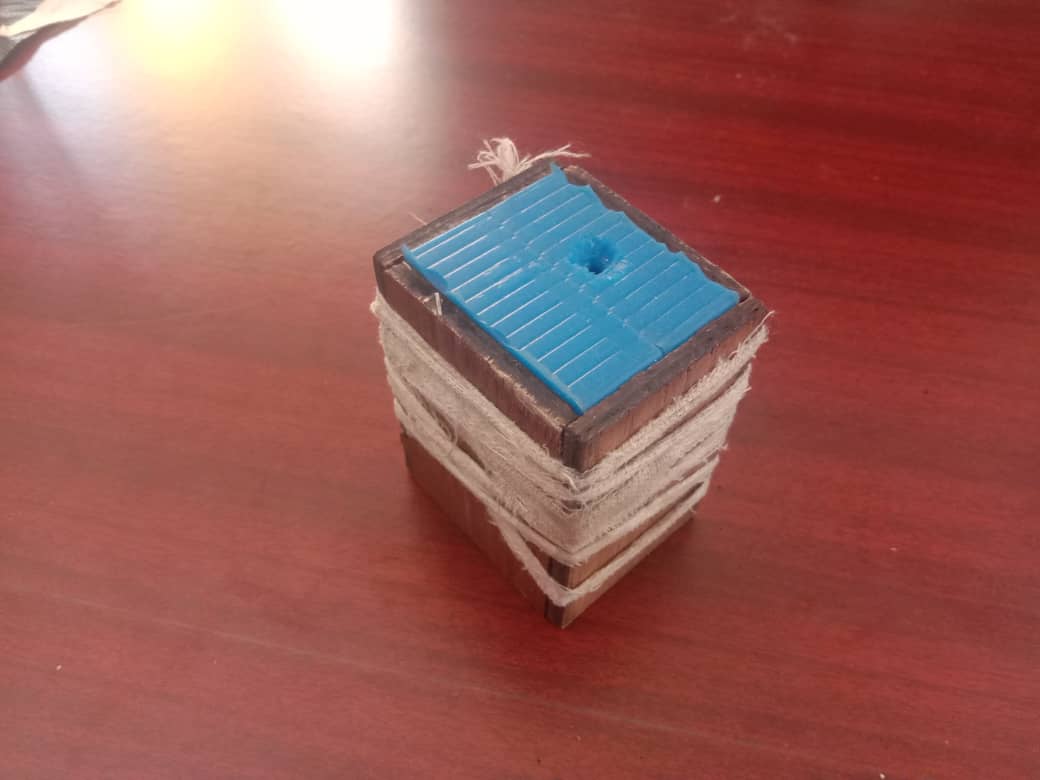
This made me ready for casting. Now I need to get ready with hydro-stone paste to cast. First one, I tried with only one hole for pouring the hydro-stone paste.
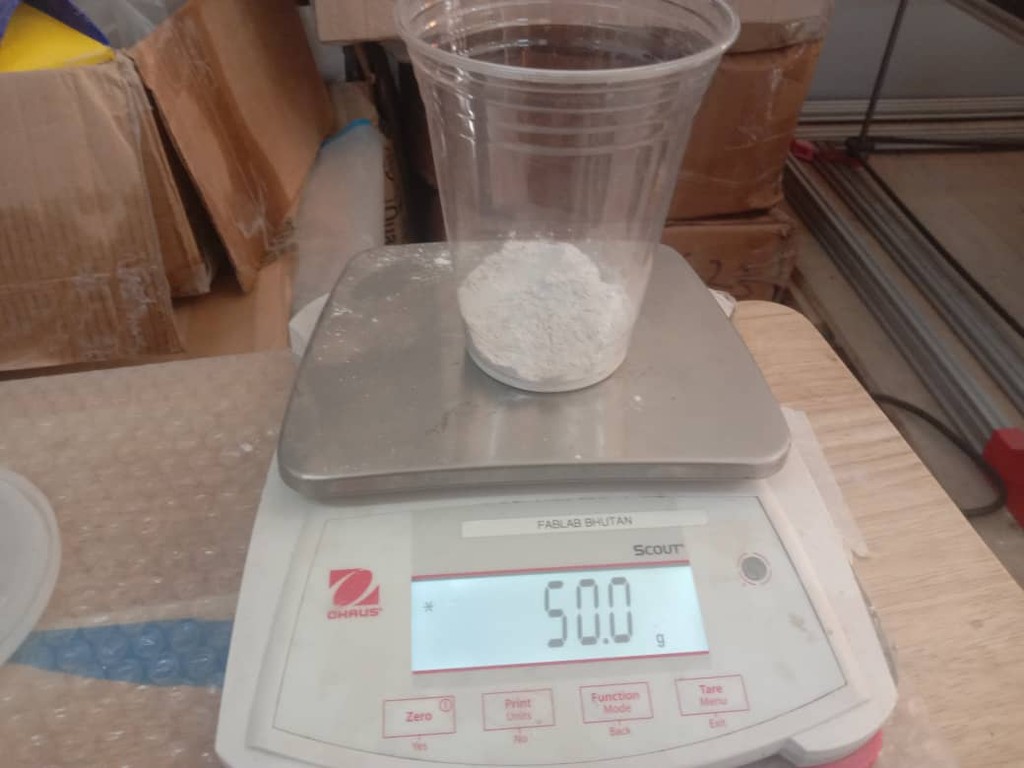

So, the ratio of Hydro-Stone powder to water to make a mixture is 100:32 in gram respectively. It seems I do not require 100g of hydro-stone, so, I made it half i.e 50g of hydro-stone powder with 16g of water.
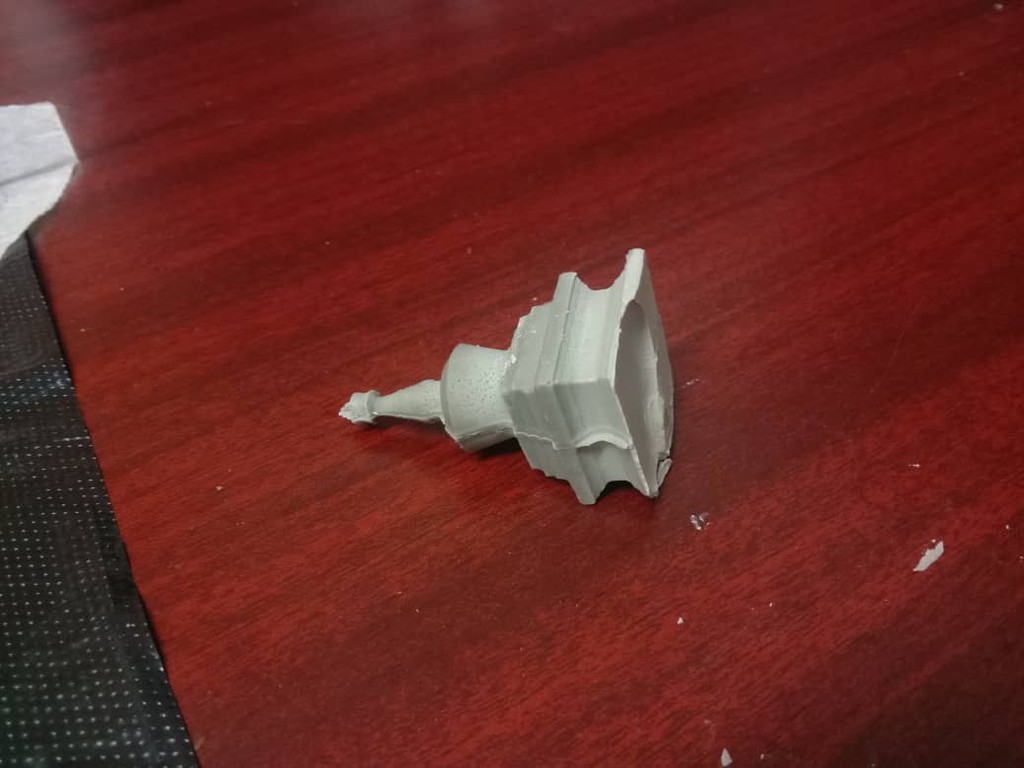
I mixed the hydro-stone and water well and poured in my mold. I faced hard time to fill the mold with only one hole. I needed the airway where air can escape easily. I let it dry after pouring and later I found out unsatisfactory result as above. It seemed, I poured less amount of mixture than required.
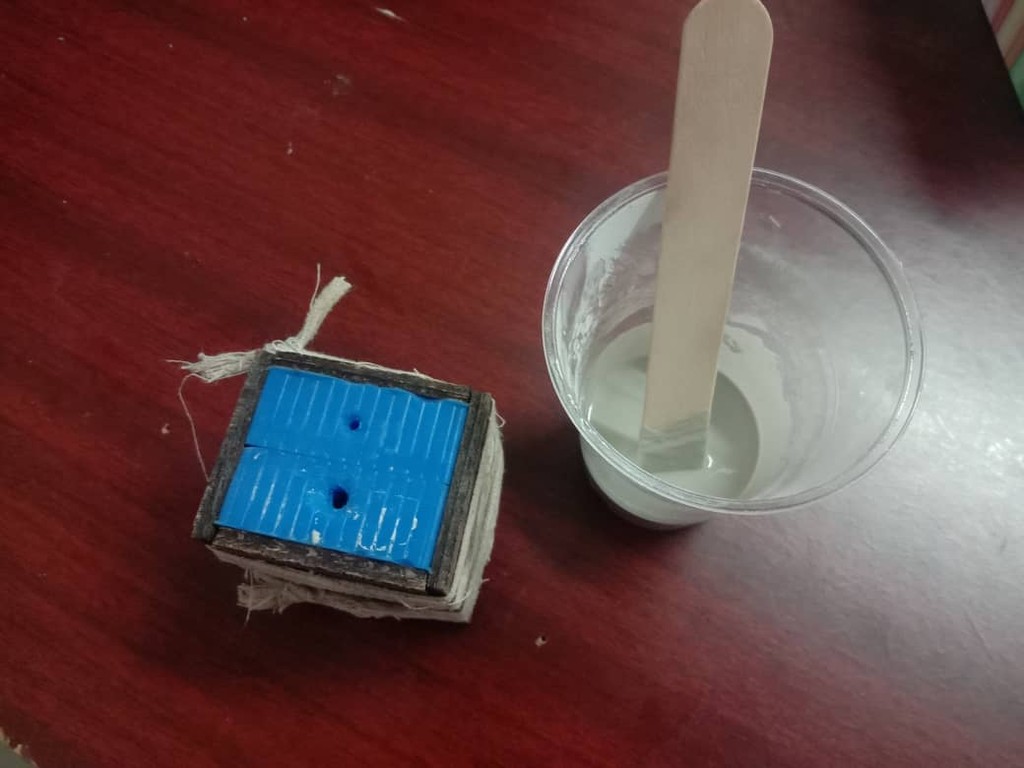
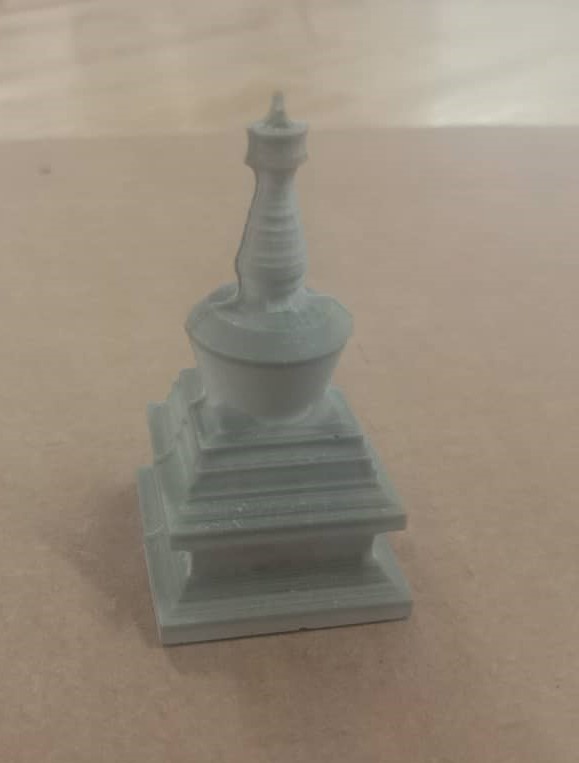
I repeat the process after making two holes on the base, one for pouring the mixture and other to let out the air easily.
Removing the cast after drying.
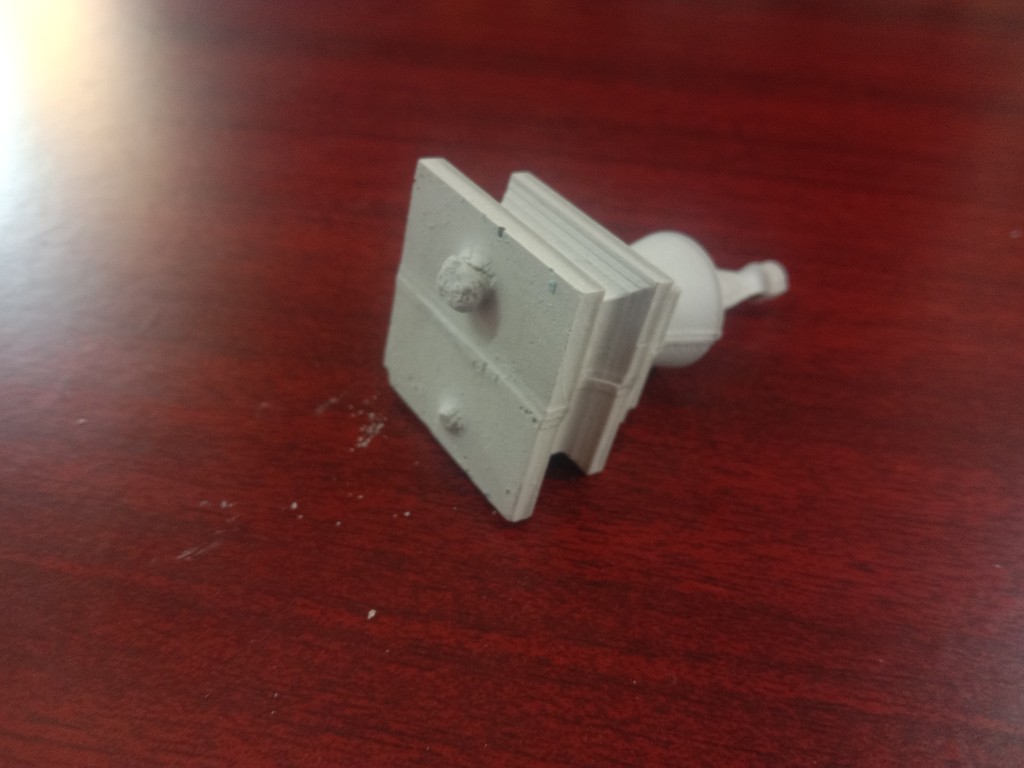
Raw result after removing from the mold. There were few unwanteds to be removed.
Reference
- Silicone Safty Datasheet: https://www.smooth-on.com/msds/files/BD_DS_Eco_Equ_EZB_EZS_Psy_MS_OOMOO_Reb_ST_SS_Soma_Sol_Sorta.pdf
- Hydro-Stone safty Datasheet: http://shop.clay-planet.com/MSDS/plaster/Hydrostone%20Plaster.pdf
- ATtiny Datasheet: https://www.alldatasheet.com/view_datasheet.jsp?Searchword=ATTINY44&sField=4
- Attiny44 with Arduino: https://42bots.com/tutorials/programming-attiny84-attiny44-with-arduino-uno/