Assignment:
1# 2D Computer Aided Design
2# 3D Computer Aided Design
Brainstorm
2D Softwares:
 - Fusion 360 - A CAD software that allows both 3D and 2D designing
 - Adobe Photoshop - a great photo editing software that allows you to edit and manipulate your photos
 - Adobe Illustrator - a great software that allows editing and manipulating vector images
3D Softwares:
 - Blender
 - Tinkercad
 Tutorials
Because it was the first time I used some of the softwares below, I had to use tutorials which actually really helped me a lot.
2D Design in Fusion 360
I have been using Fusion 360 since 2018, however there are still many things and "shortcuts" I don't know about. The tutorials I have linked above a good place to start learning. Fusion 360 is a really user friendly application. It is simple, aesthetically pleasing, has a good view system, and is made for both professional users and hobbiest. Fusion 360 has two modes: 2D and 3D. In 2D mode the user mainly makes drawings that later will be what the 3D part of the app will be based on.
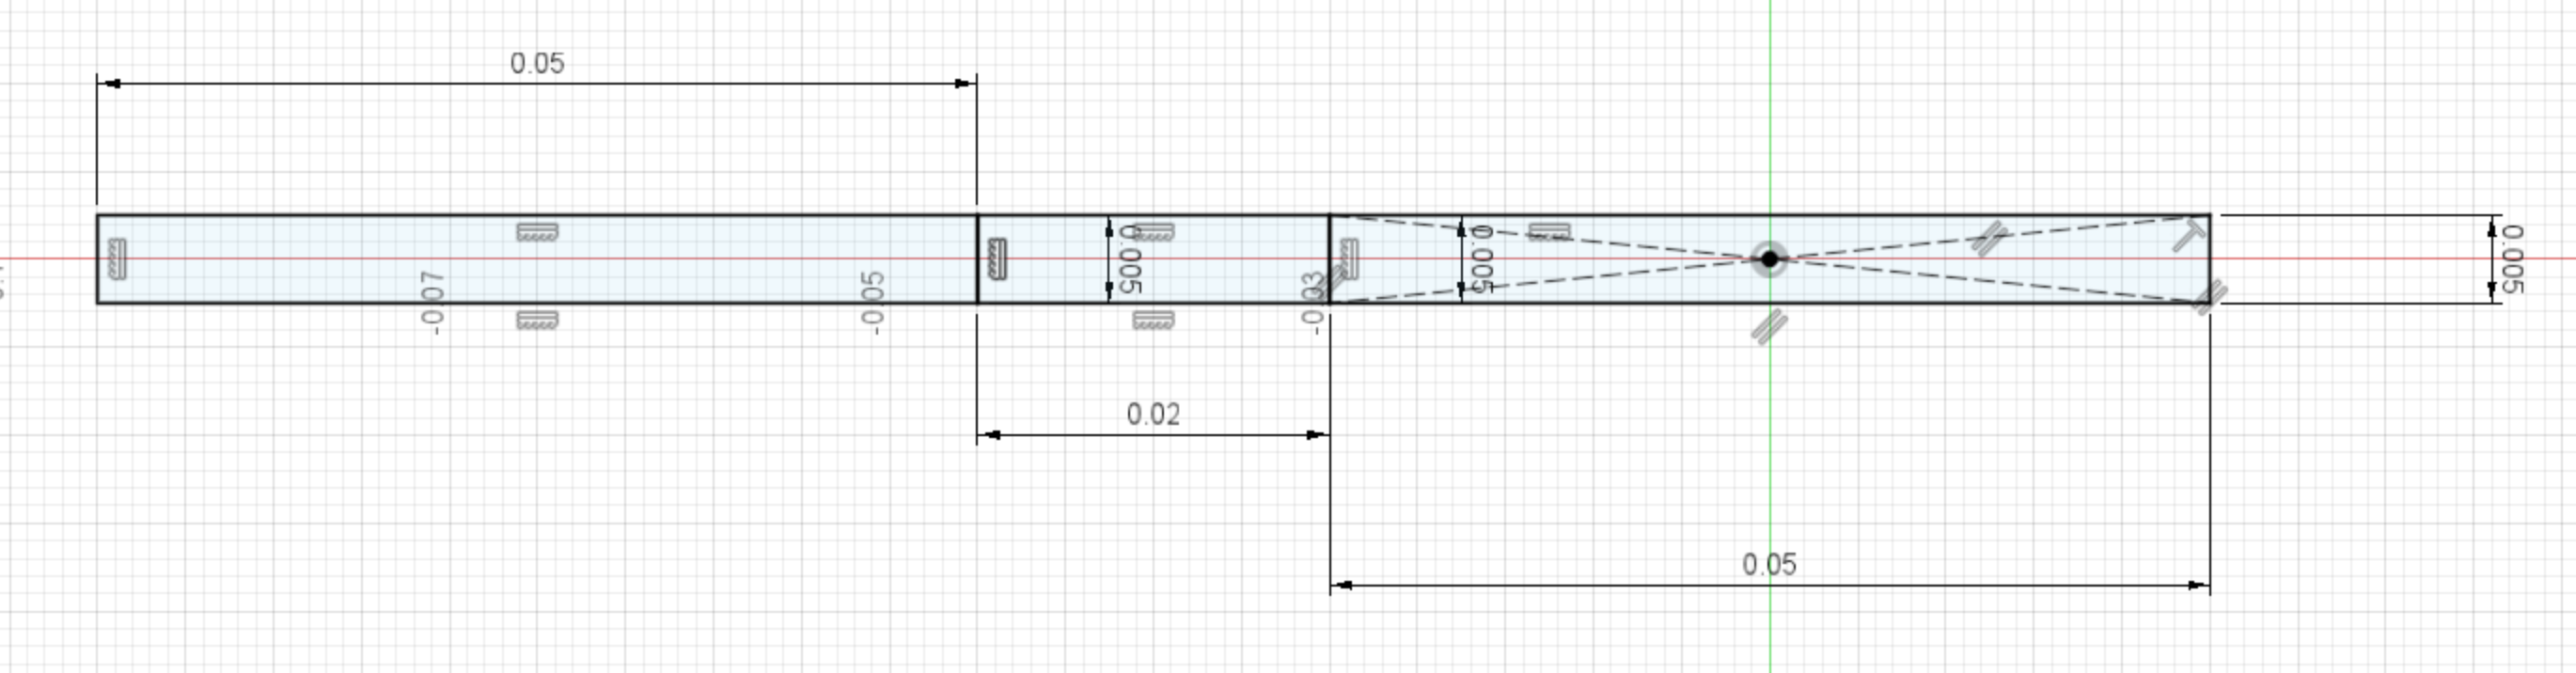
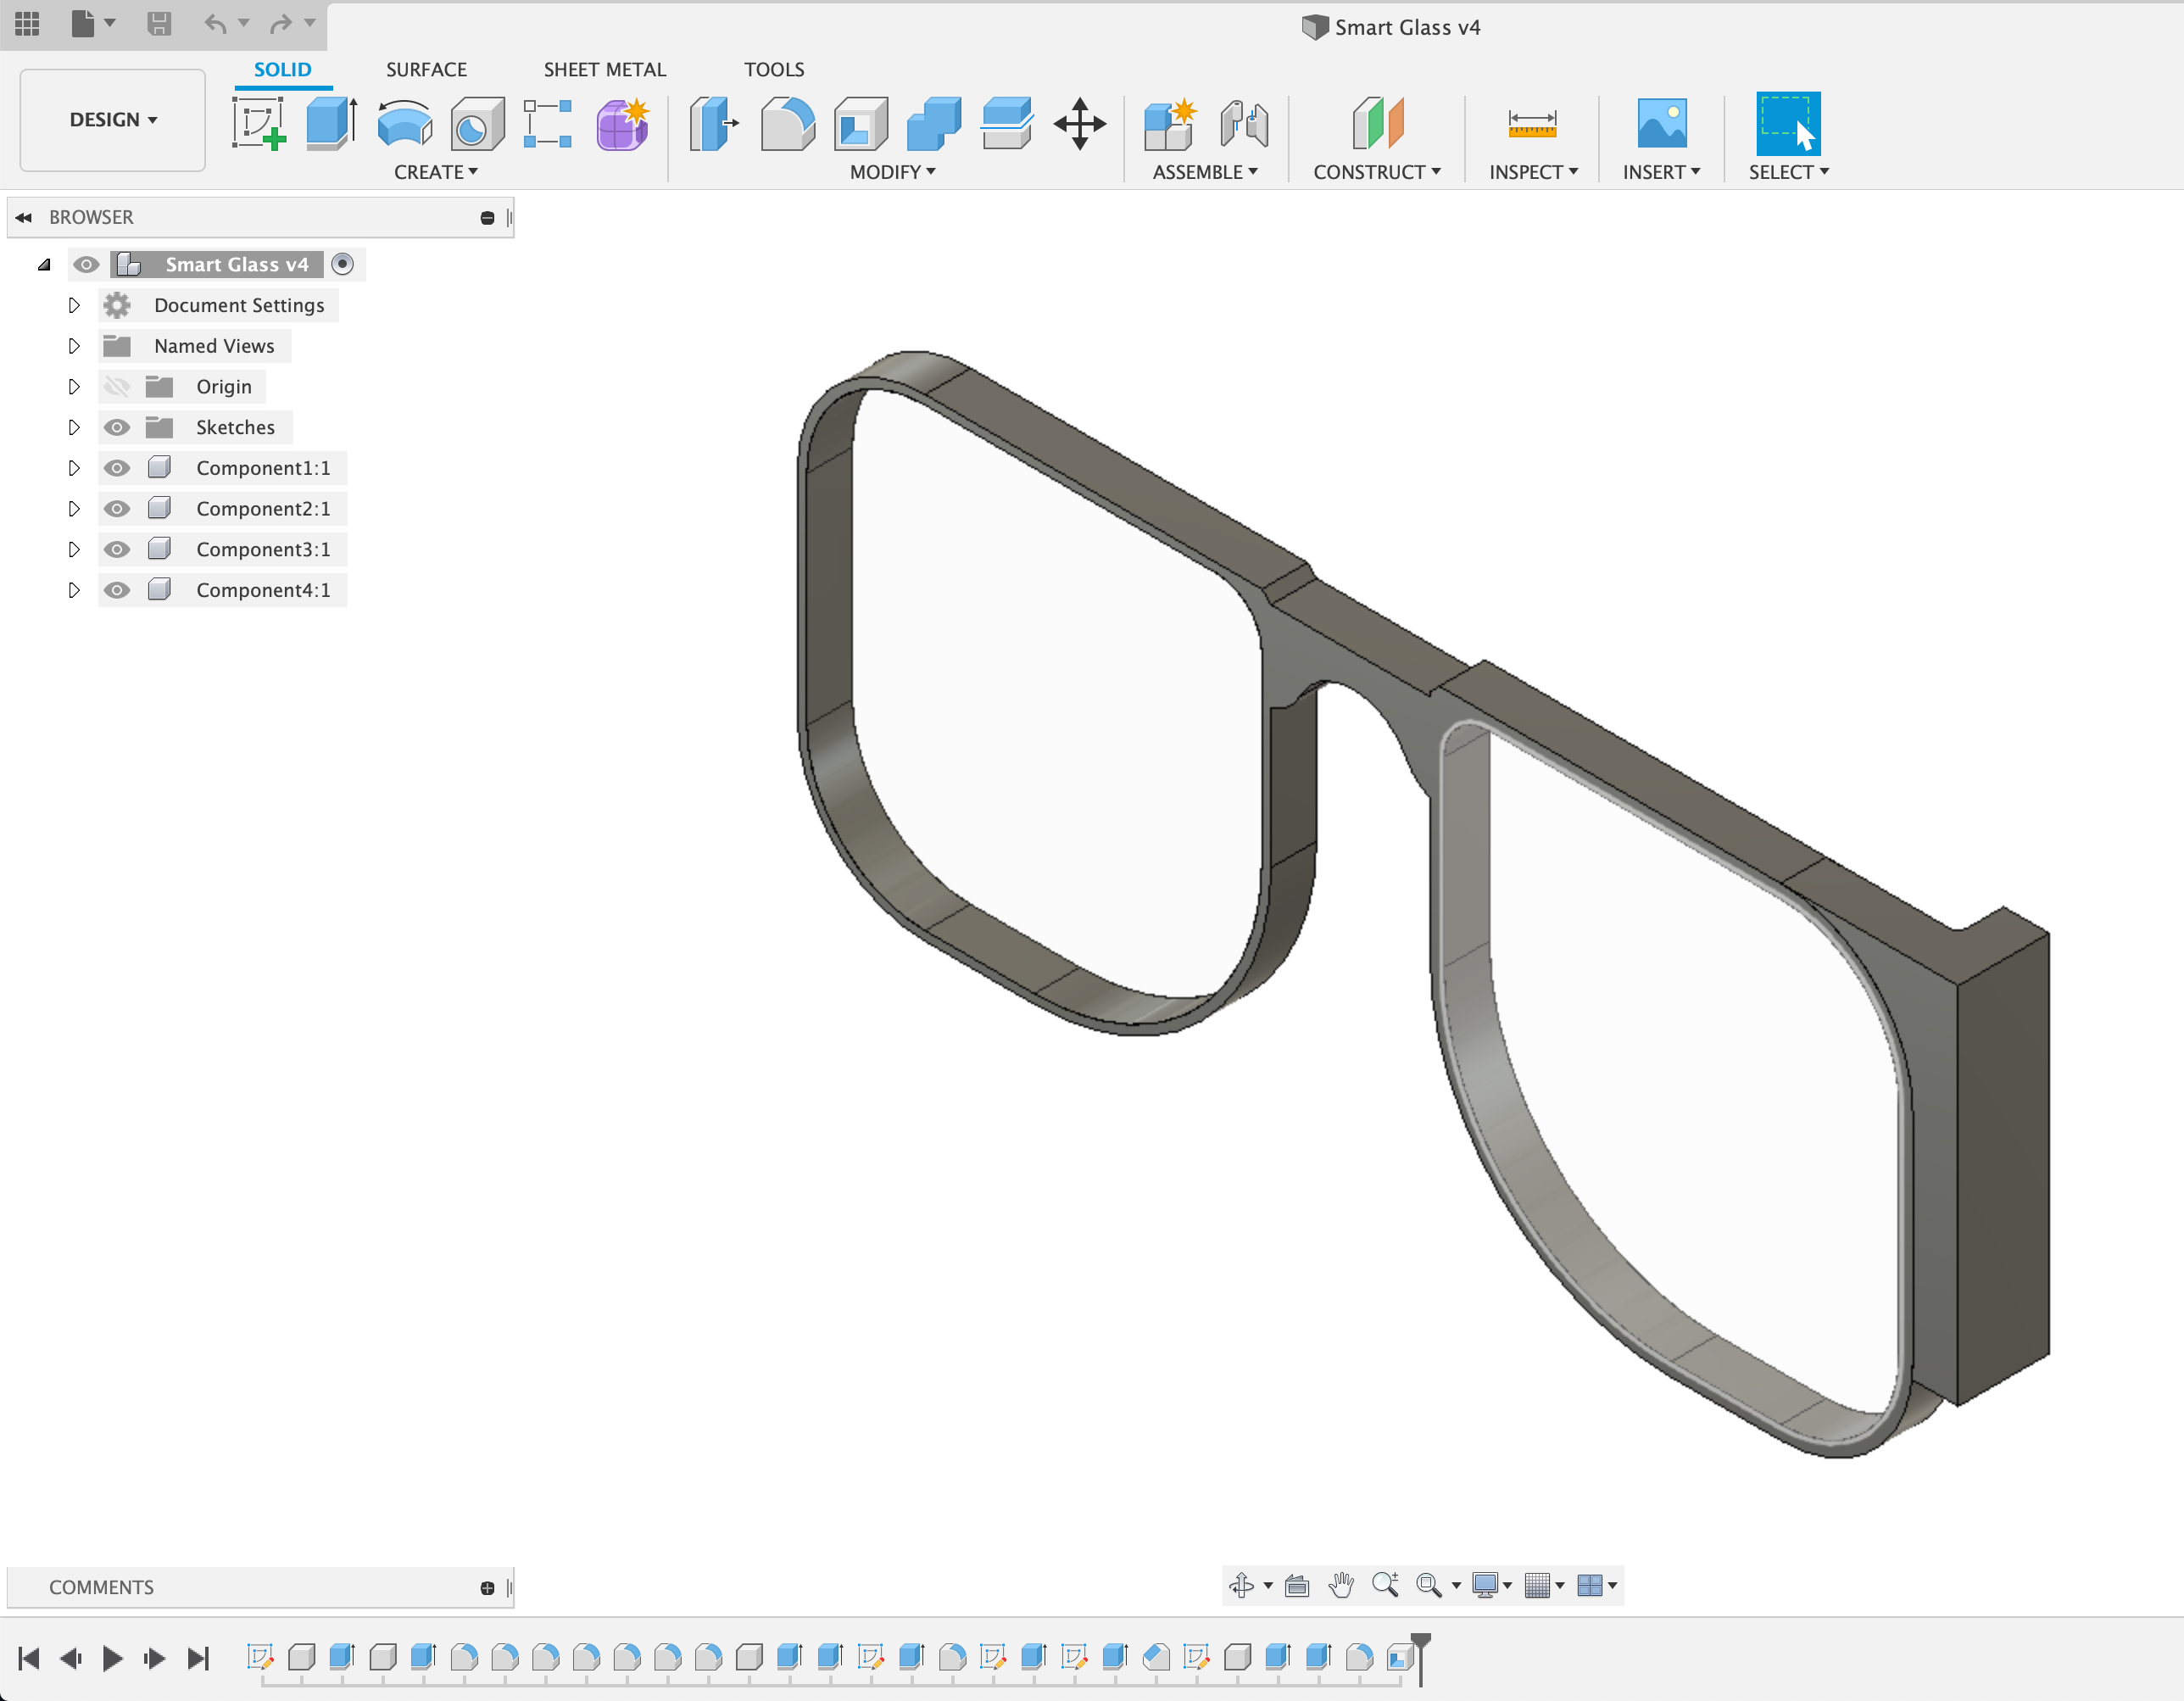
In the image above, I am creating a sketch that has some rectangles that represents how the front portion of my glasses would look like in 2D top view. This allows users to draw a shape with exact dimensions you want and extrude it to make it 3D. I used Fusion 360 because it is a really powerful tool once you know have a basic understanding on how to use it. With it's 2D sketch mode, it forces you to think your design thoroughly and actually makes it easier for it to become a reality. Fusion 360, gives a really clean view of all the dimensions and restrictions in the design you did. Moreover, cross platform transfer of design files is really easy with Fusion. Fusion 360 supports many types of File from svg to SLDPRT (Solidworks save file).
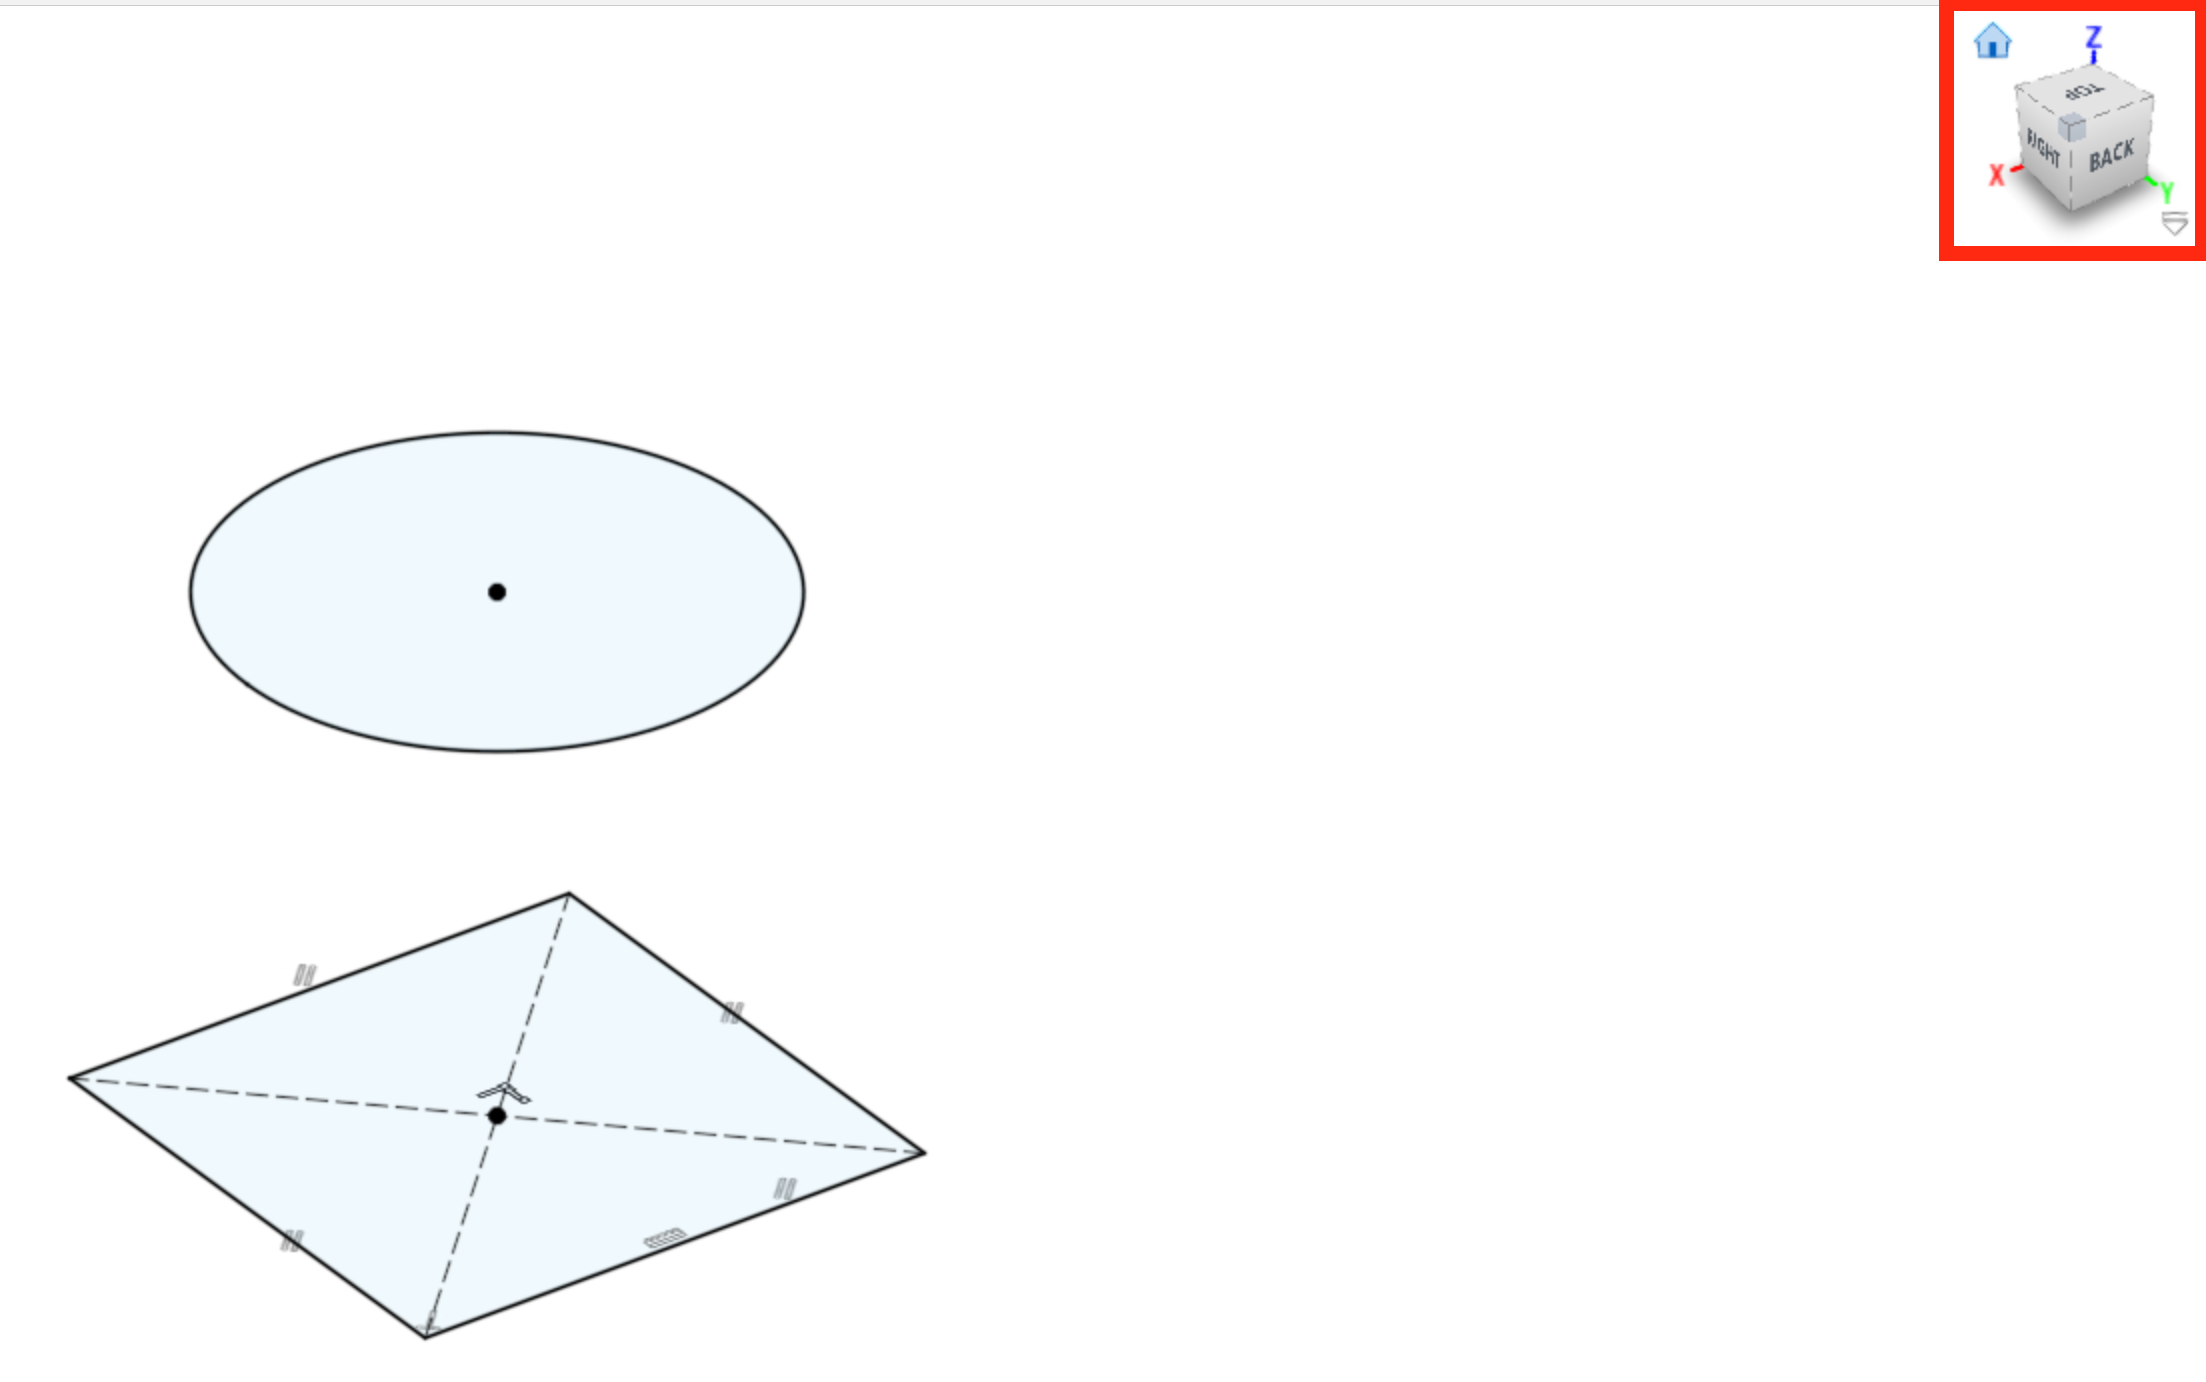
One of my favorite parts of Fusion 360 is its view system. I can easily navigate using a mouse or even a trackpad. It allows me to see my sketch from different angles. On the top right corner, Fusion 360, has a box and a home button. The box shows the user from which angle the user is currently looking at the object and can also be used to align in specific angles by cliking at the specific faces and the edges of the box. The home button returns you back to the initially set view angle. This is a really helpful tool because when you are doing a big complex design with multiple parts it allows you to return back to a normal view. In Fusion you can have multiple sketches in different heights, this allows users to have 3D inherited in 2D. For example in the image below, we can use the sketches (in the picture above) to make a vase with different shaped start and end.
2D Design in Photoshop
I have been using photoshop for quite a while now but I never used in professional sense. I wanted to use Photoshop to create a better visual representation of my Final Project. Since, I still have not manufactured it, it is still just a design. Hence, using Blender (which I will talk about later on this page), I have created a 3D Design of my Final project and imported in to photoshop.
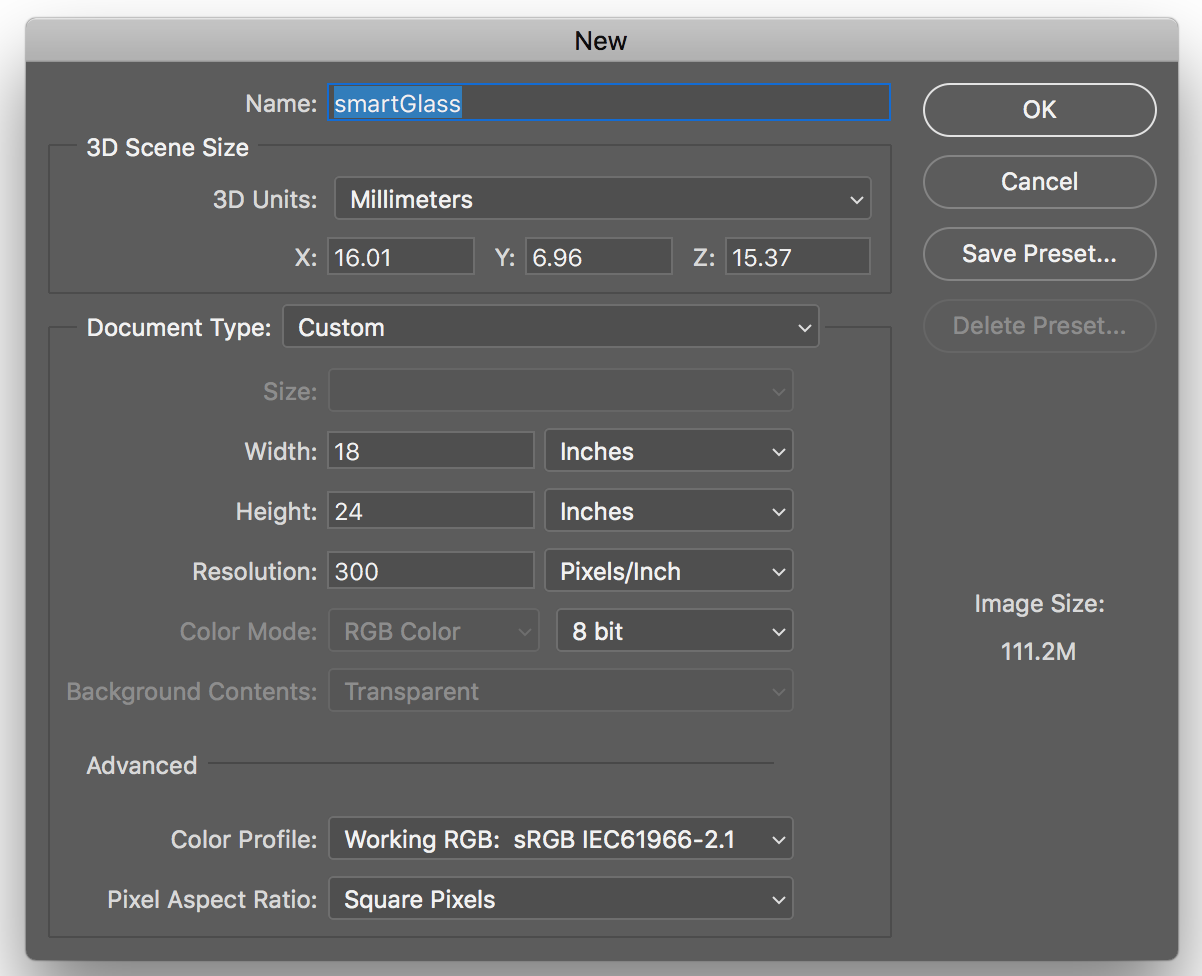
For me the hardest part was exporting from Blender to Photoshop, because I did not know how. Fortunately, I was able to find a tutorial here: itstillworks.com. Blender does not have a specific export file type for Adobe Photoshop, fortunately Photoshop allows the use of 3 different file types from Blender to Photoshop ( Collada (.dae)," "3D Studio (.3ds)," or "Wavefront (.obj) ). Initially, I opened my project on Blender, then clicked to "File" and hovered on "Export" which made another menu to pop-up and show me export options. I selected Wavefront (.obj) because I was familiar with it while I was trying to 3D print the map of Kashmir. Export the file to a location with easy access. After exporting it, we need to open Photoshop and go to "File" "Open" and select the file you exported from Blender.
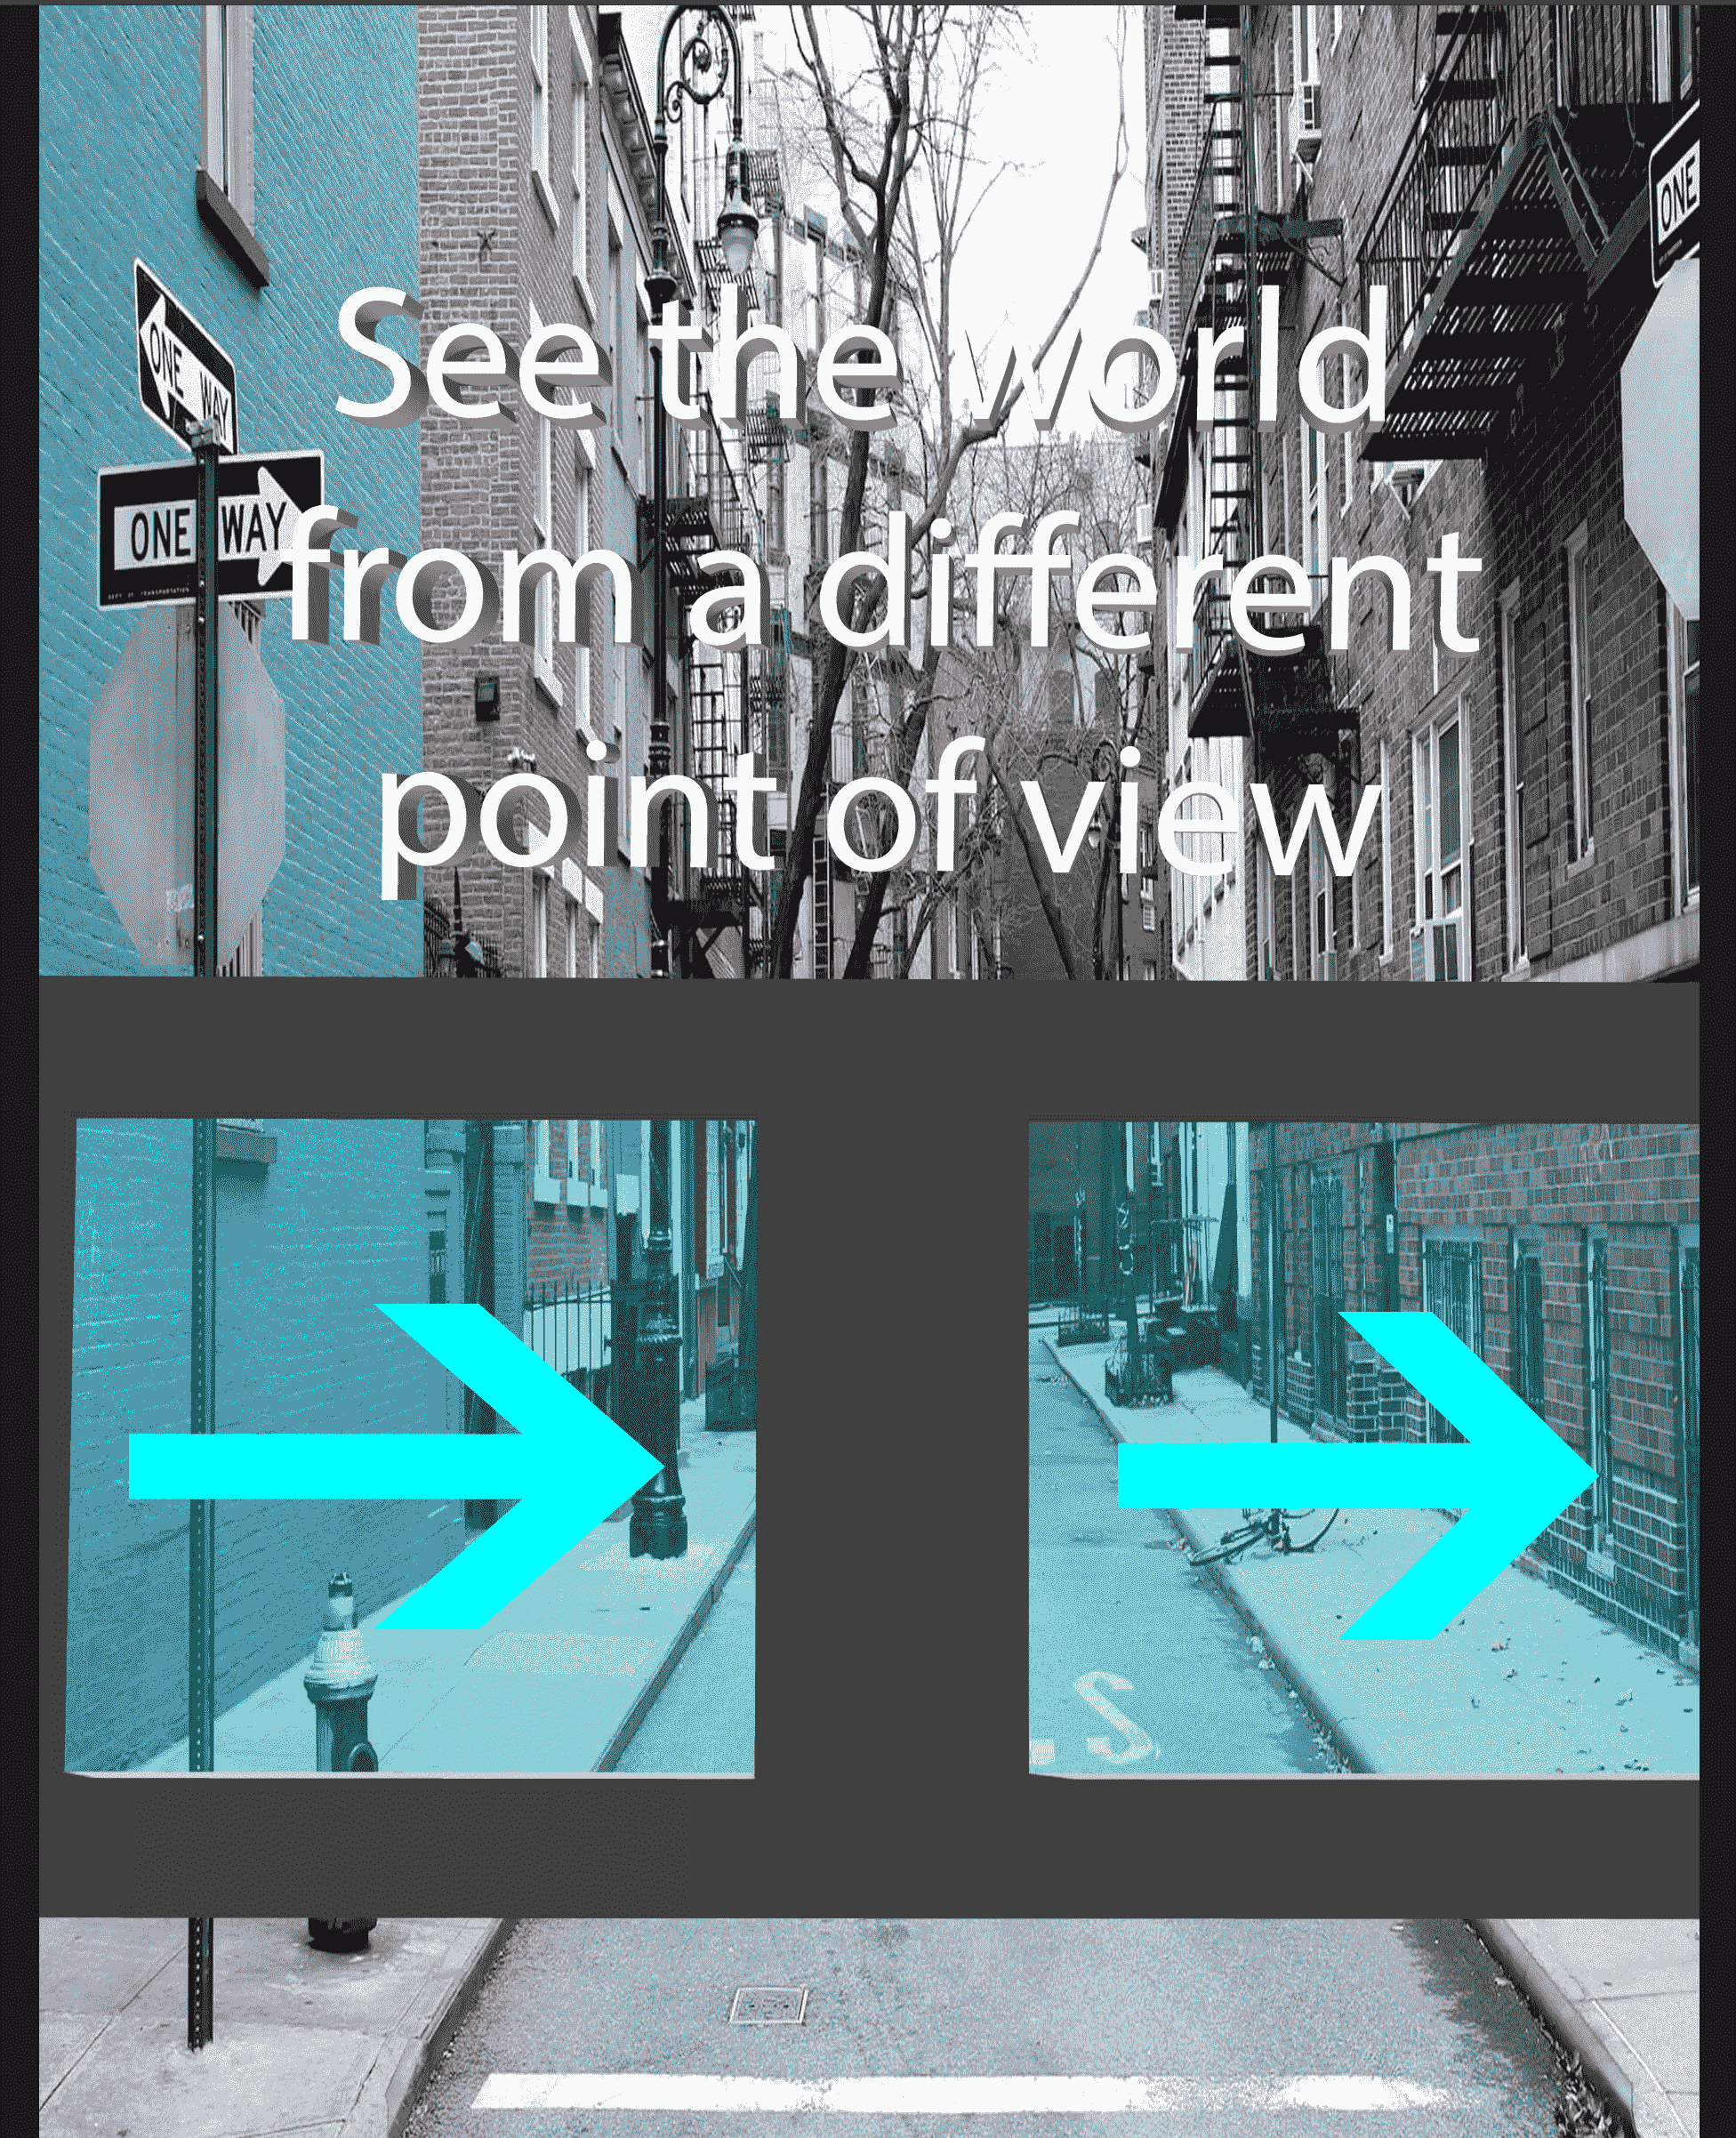
Once the object opened in Photoshop, it creates a 3D space for you where you can adjust the rotation and the size of the 3D object to look like on 2D poster. After doing that I have took a street view photo from internet and use it as the background image. After, that I have created a semitransparent blue rectangle to be the glass part of the glasses and put blue arrows on it to simulate the Augmented Reality.
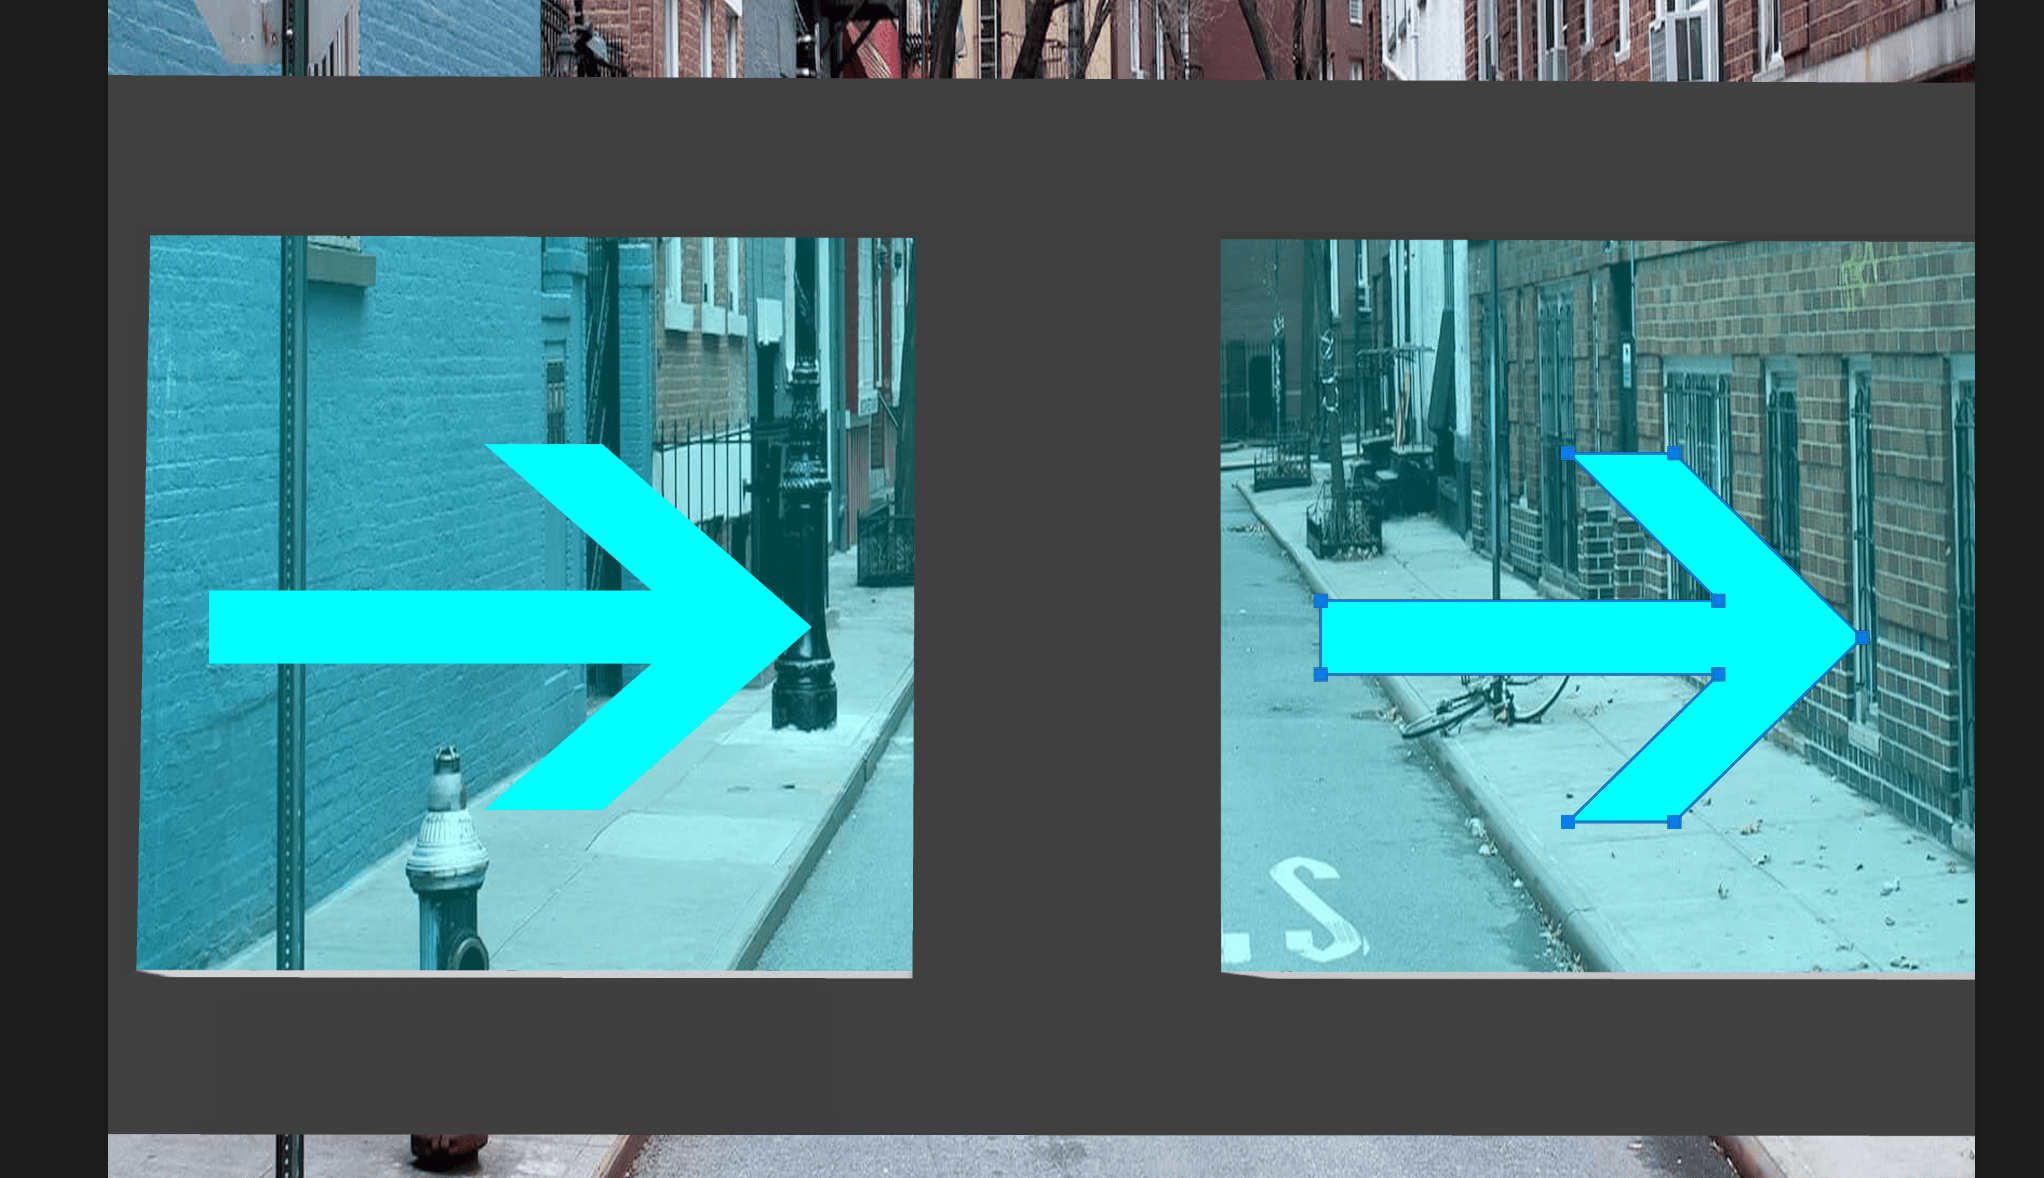
Finally, I have included 3D text and finally it looked like this:
2D Design in Illustrator
I have started using Adobe Illustrator last year and I am still a begginer. Using Illustrator, I wanted to enchance my hand drawn sketches and create a 2D drawing of them on Illustrator. For this I have took the photo of my sketch and uploaded it to Illustrator.
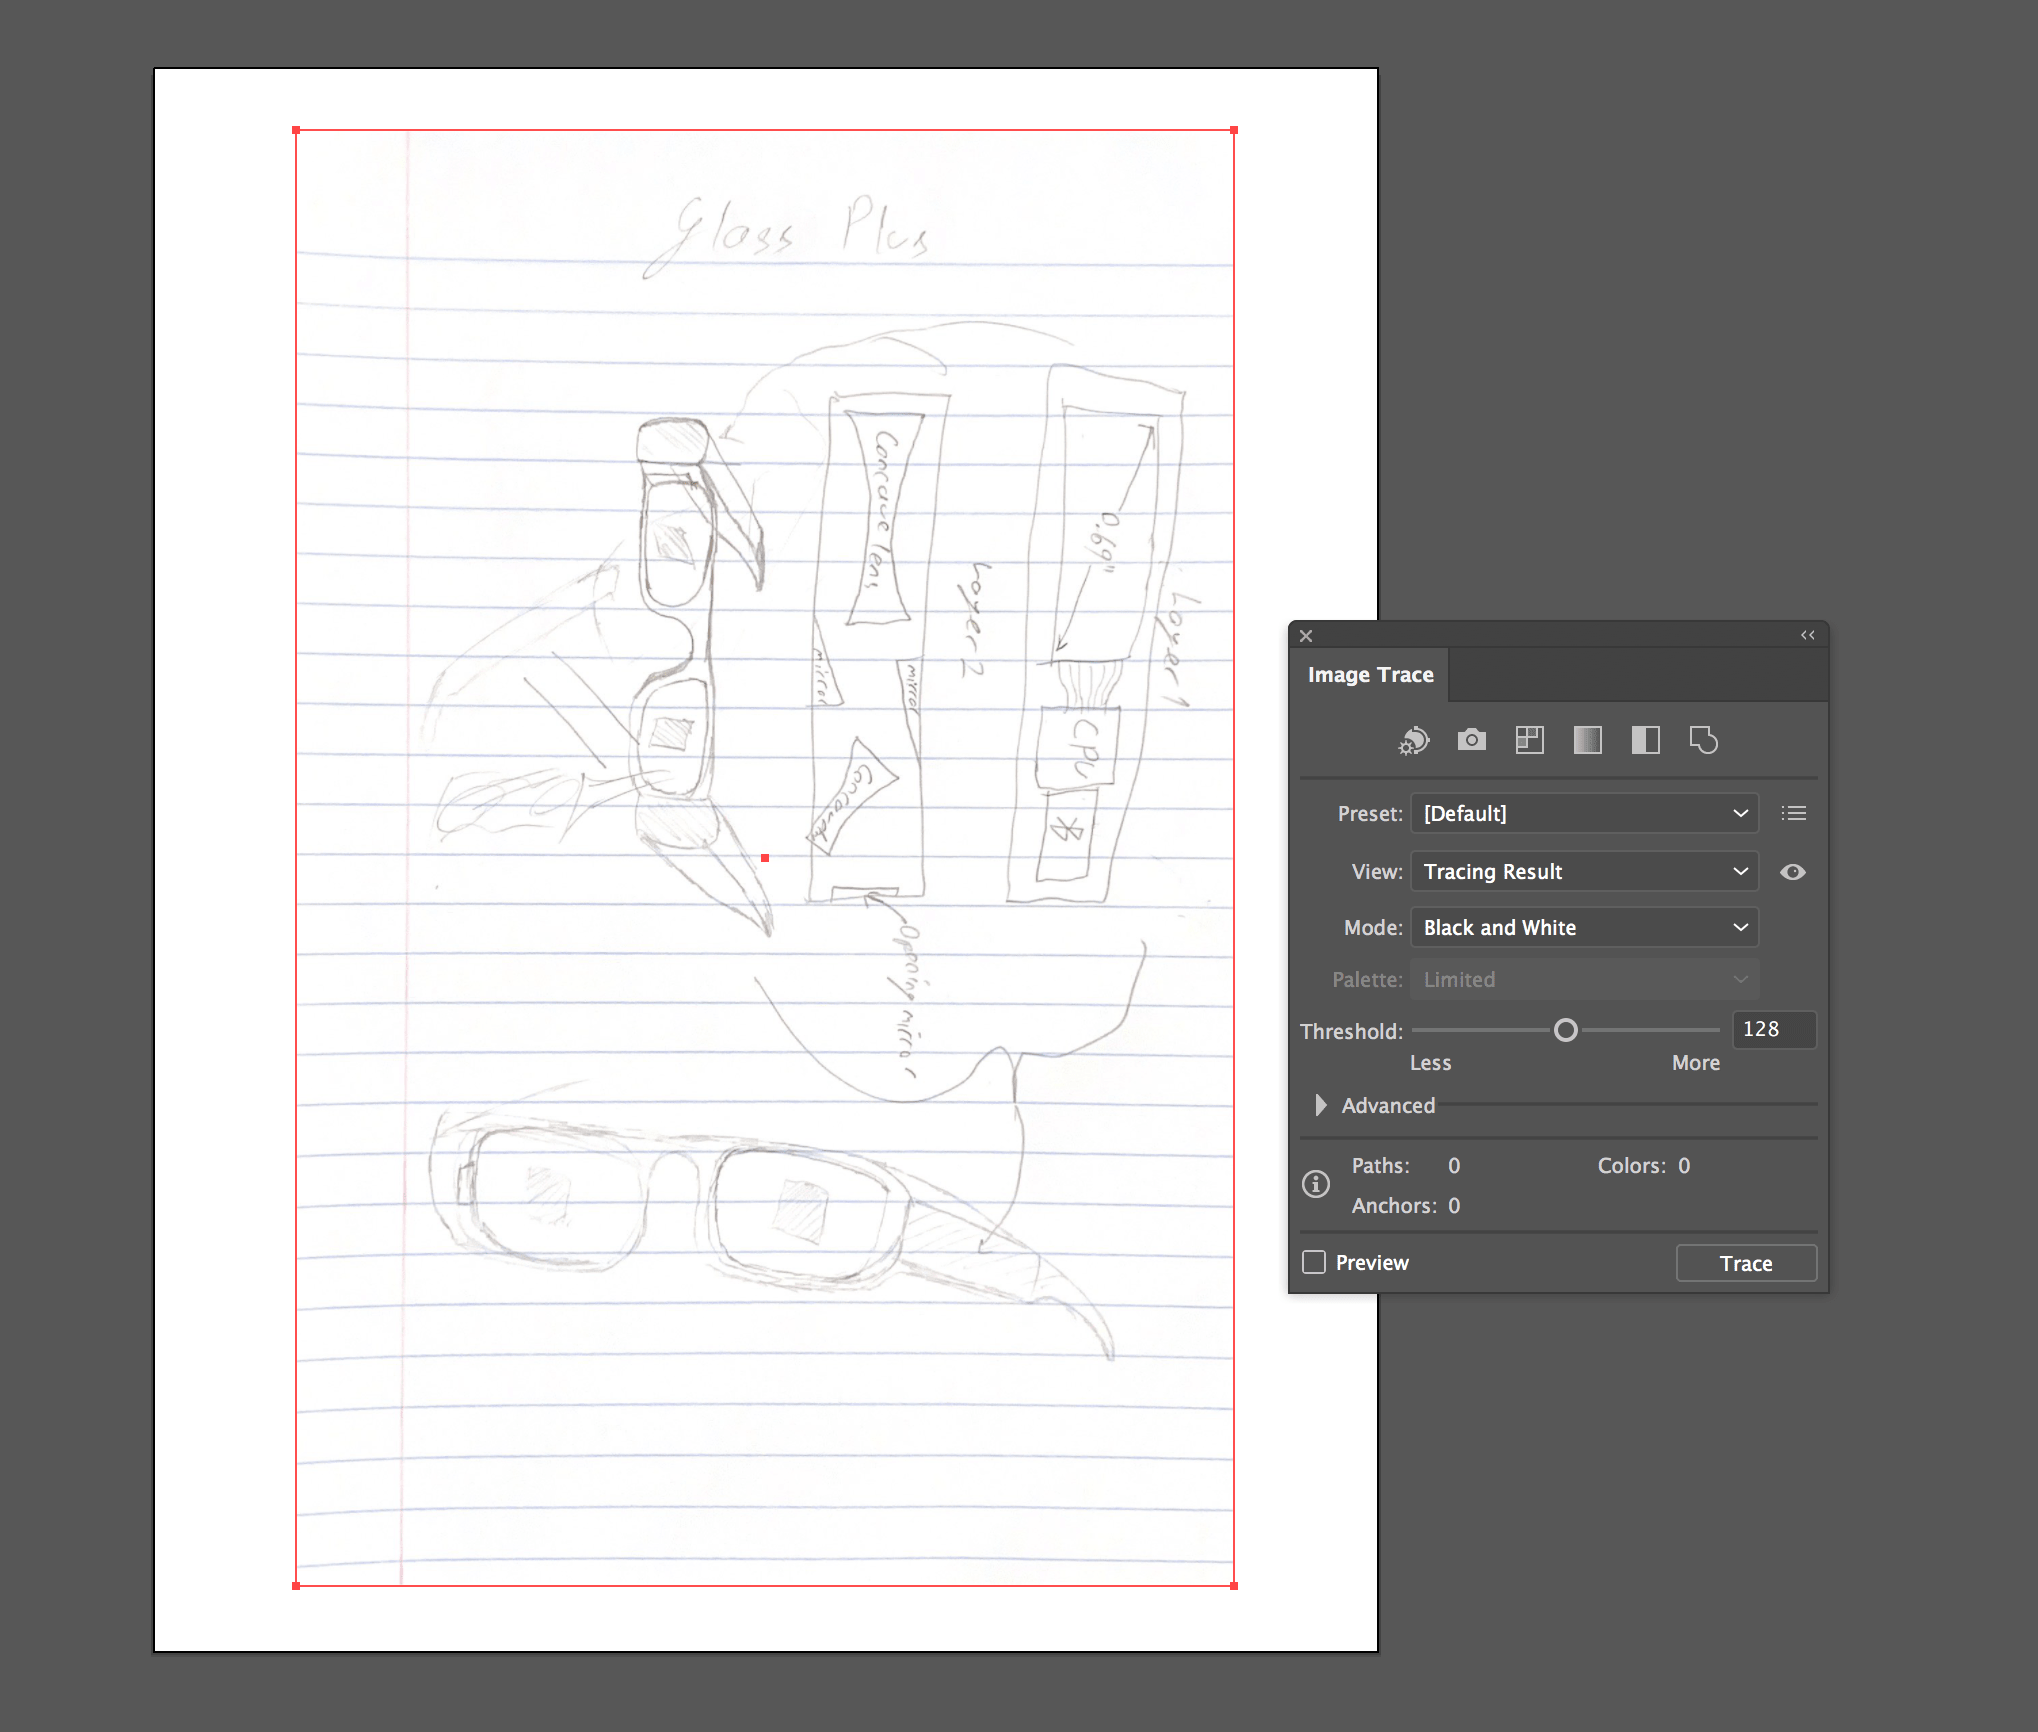
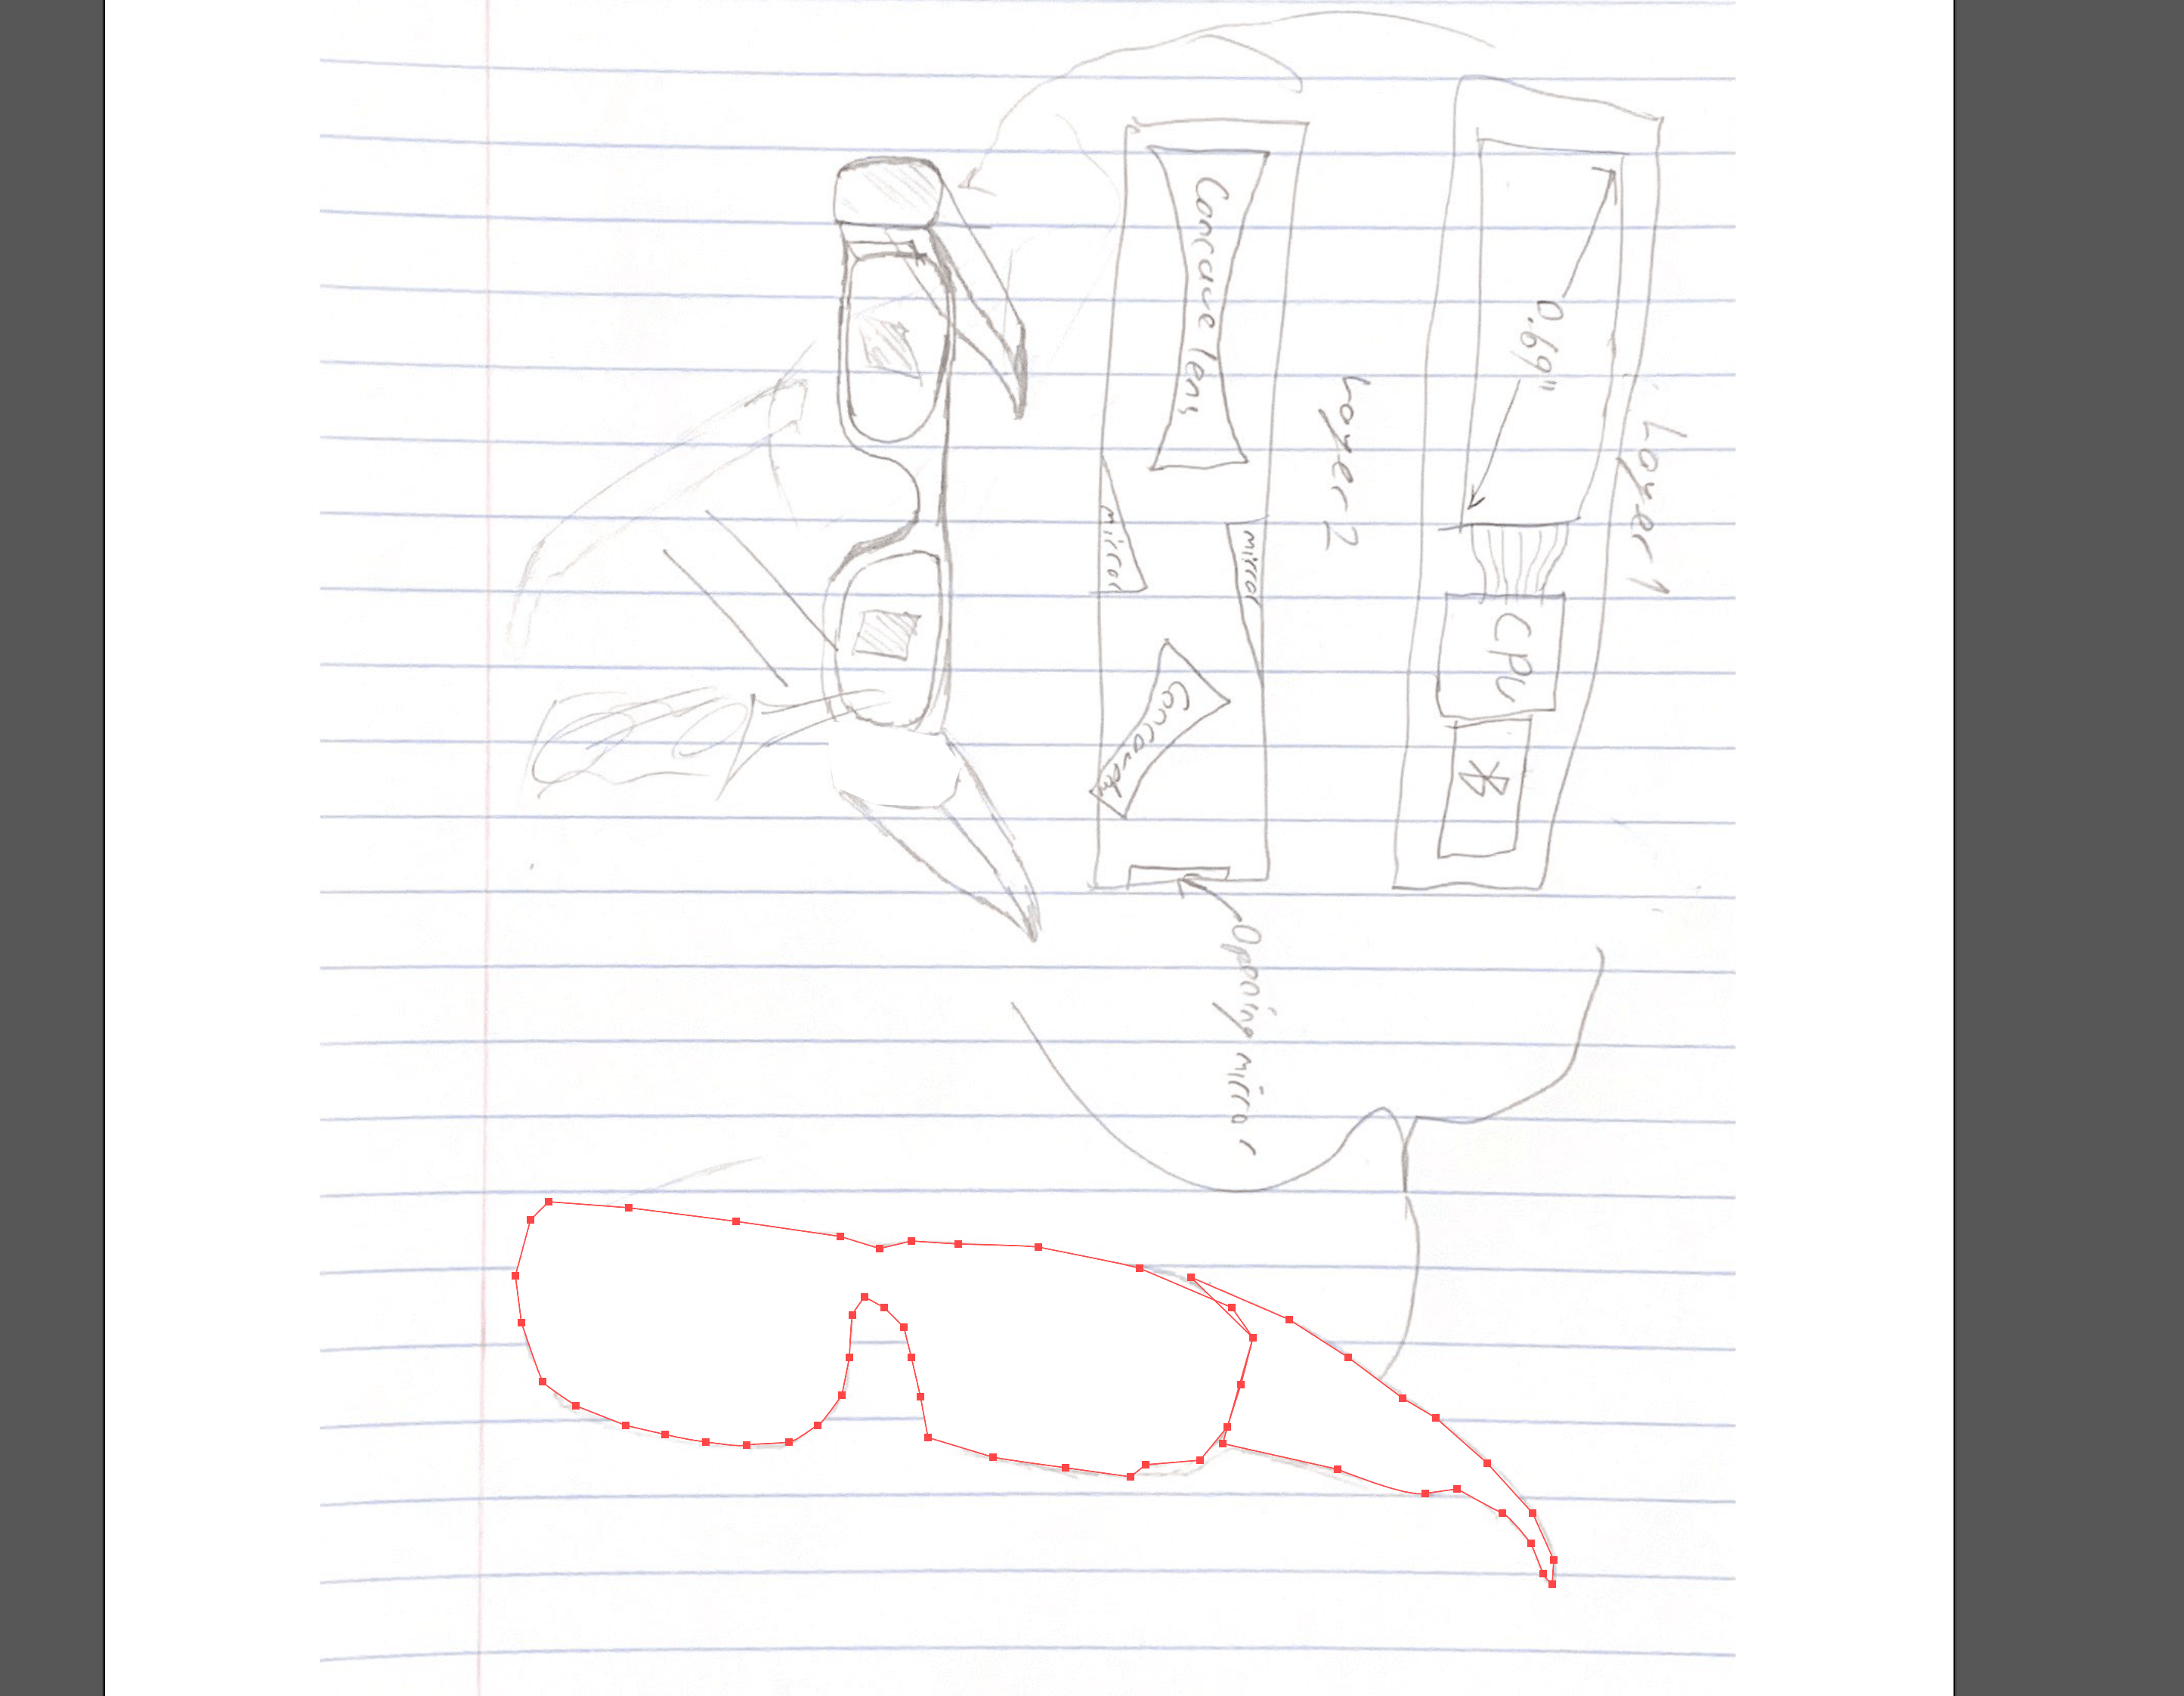
Afterwards, I have used image trace to turn the image to a better resolution and better collored version which allowed me to zoom in and trace the lines over my sketch using trace tool.
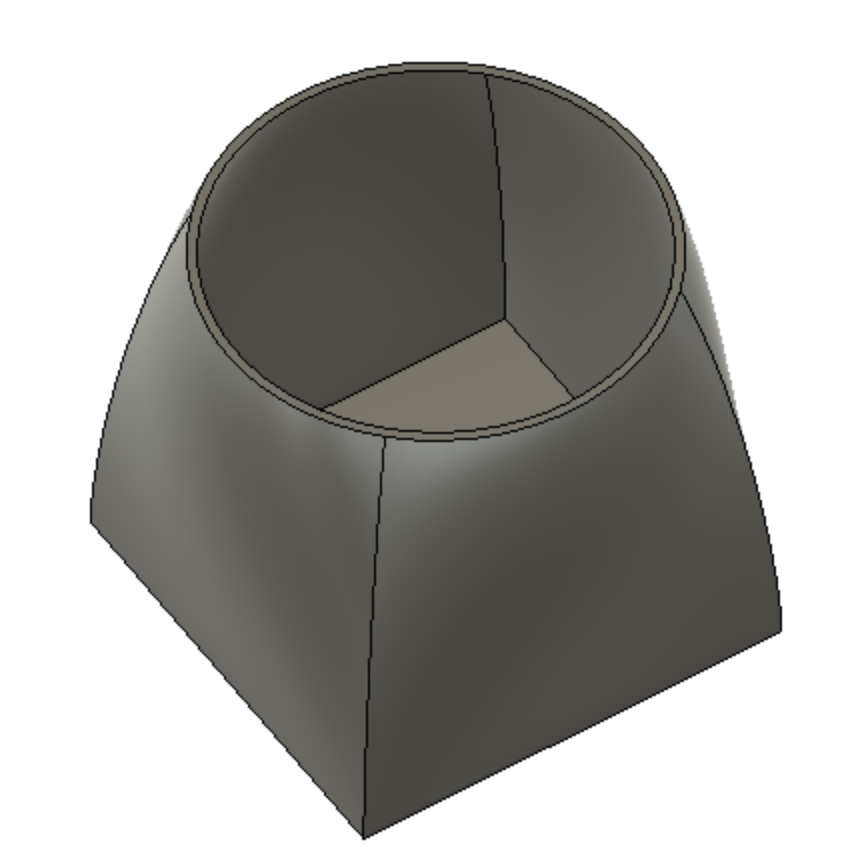
3D Design in Fusion
Fusion allows users to turn 2D drawings in to 3D objects which you can edit them using different tools. I like Fusion so much because it is really user friendly and easy to get started to. Fusion also takes notes of what you did and allows you to edit the actions you did in the past which automatically renders the rest automatically. This is a really powerful tool because it allows you to change your design without redoing everything. Moreover, you can have more than one object and components which can have their own properties.
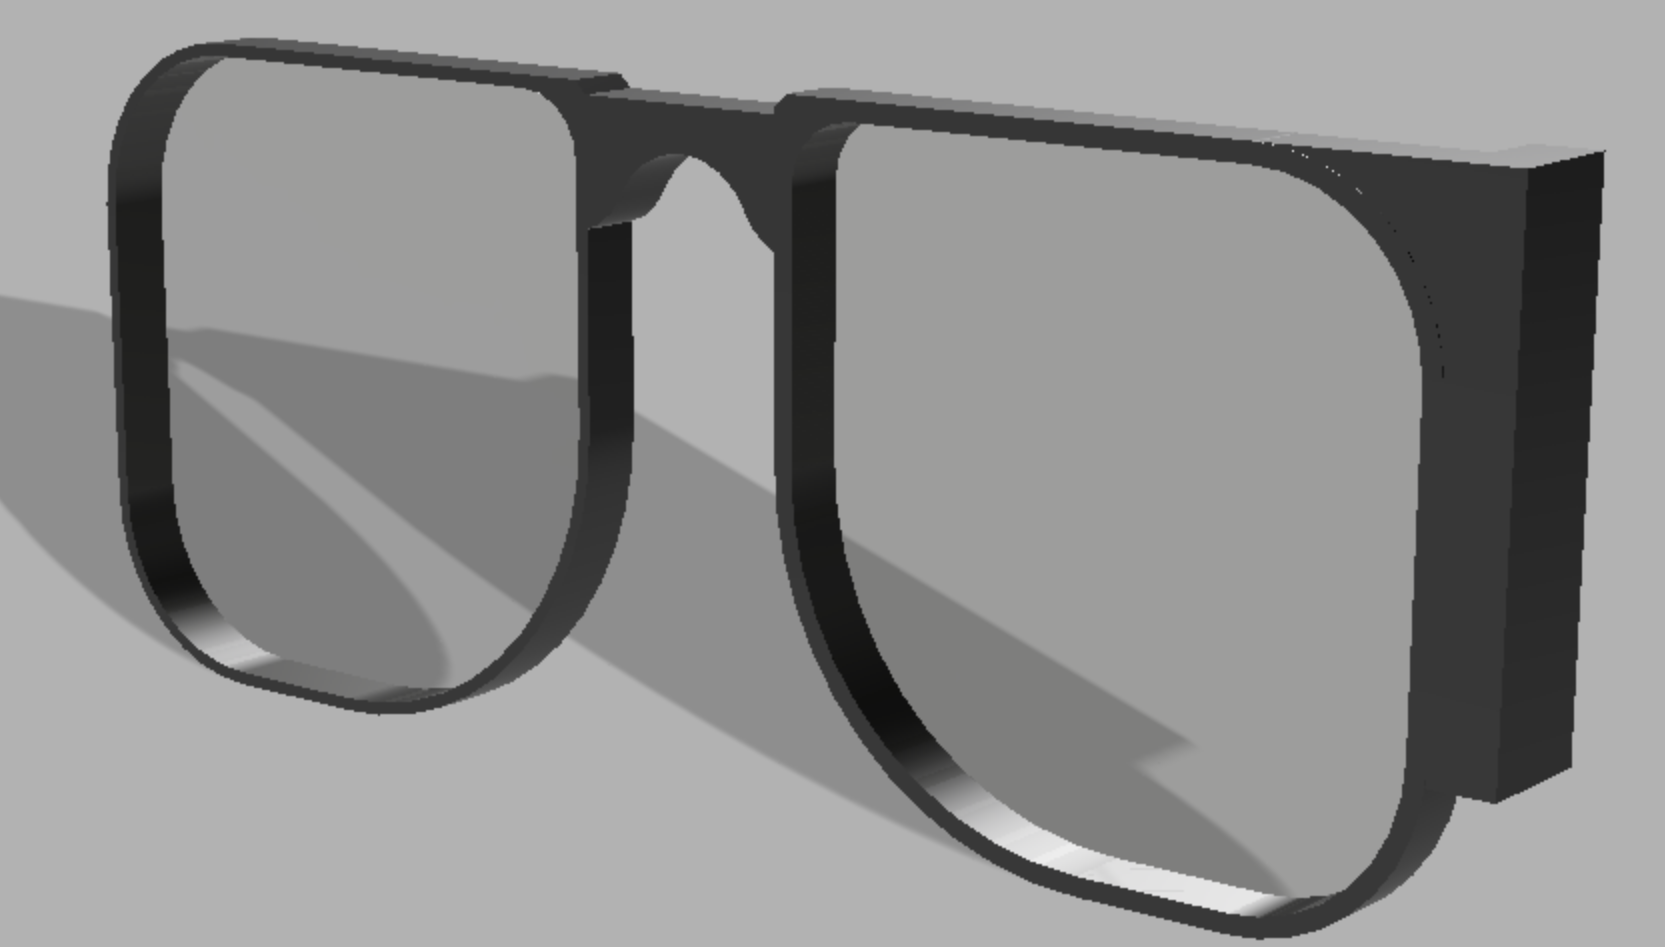
3D Design in Blender
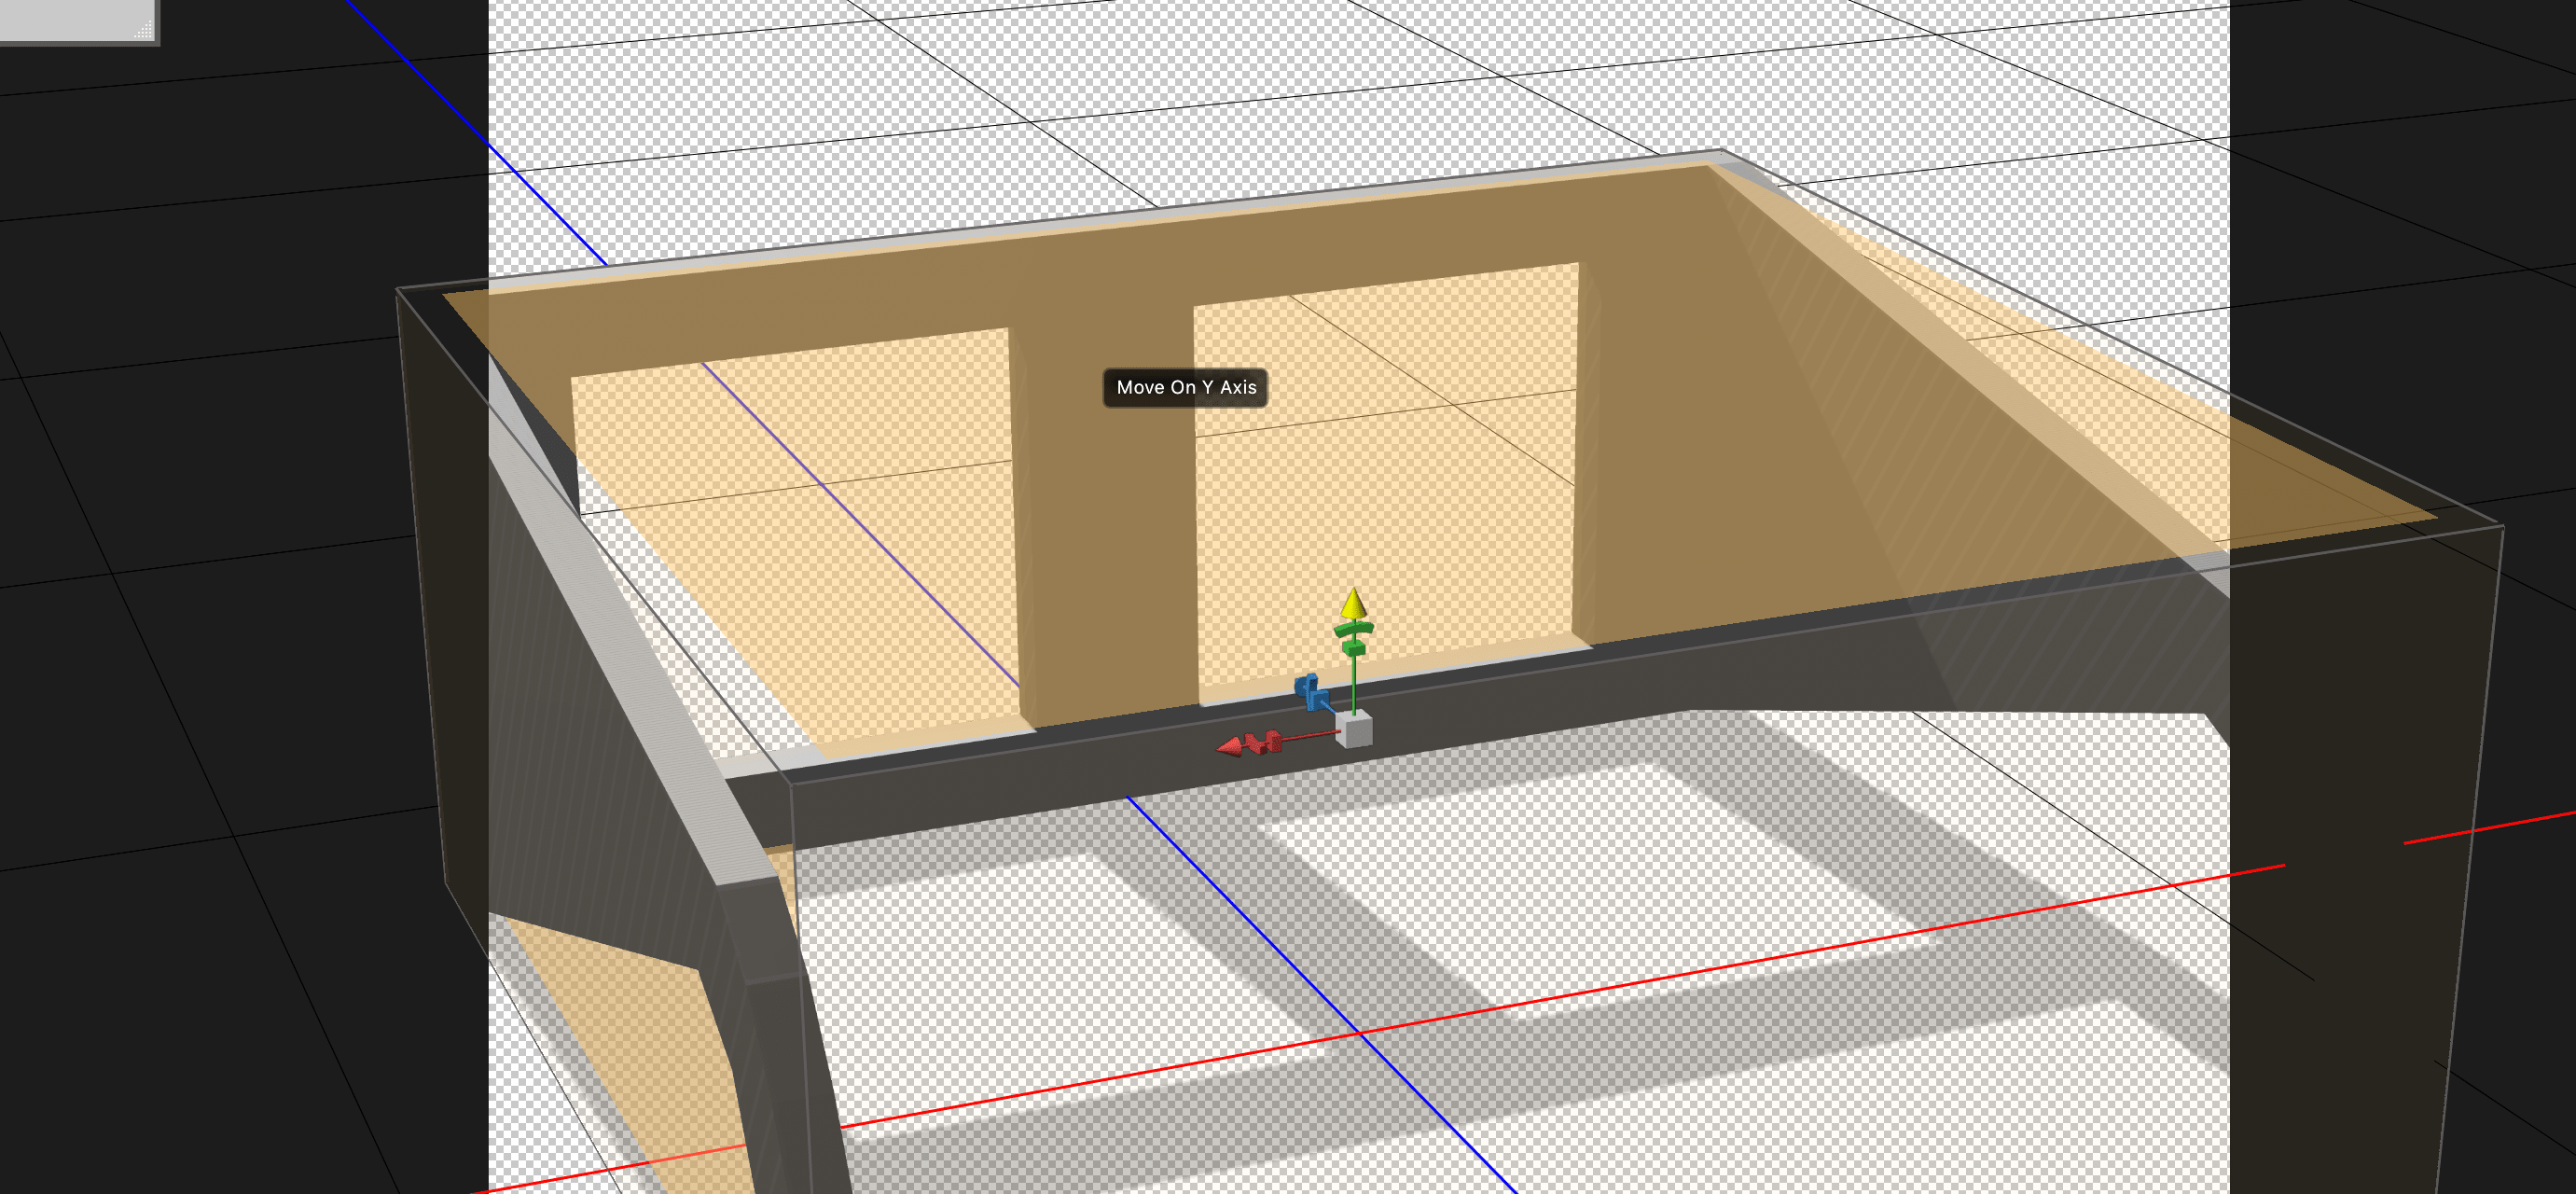
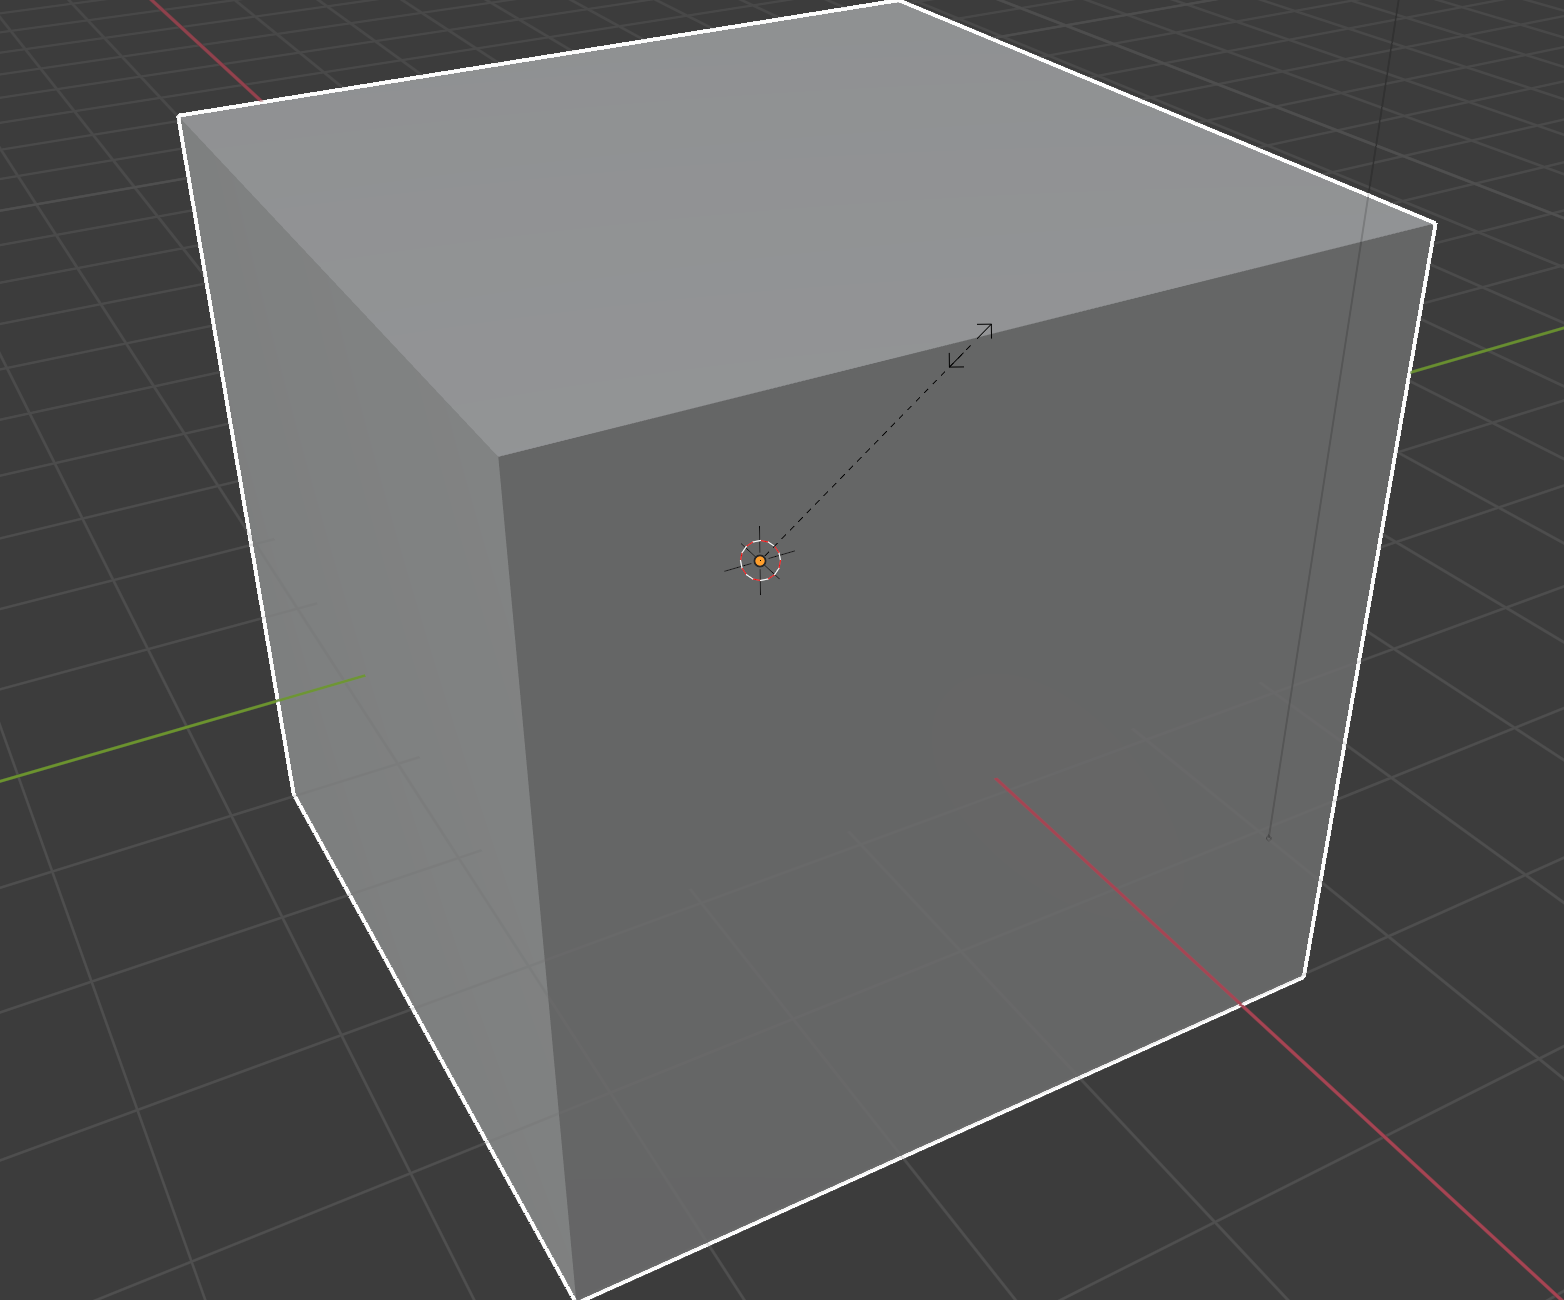
Blender is a really powerful that allows so many things from animation creation to sculpting. However, from my experience, it is so hard to get started to. It is really not friendly and hard to navigate. it is mostly dependent on shortcuts which can be really confusing if you just started. However, I was able to learn the basics using the tutorials. Unfortunately, Blender took me too long to learn. I felt like giving up and using a different software. After watching the tutorials and asking for help, I was finally able to learn some basics and some shortcuts key which helped me figure out how to use Blender. For scaling you can use the 's' key shortcut and if you want to move only in x or y or z axes than you just click at 'x' or 'y' or 'z' keys after pressing the shortcuts.
After scaling it to a thin rectangle, I wanted to create more vectors on the rectangle so that I can edit only some portions of it while leaving the rest in the same shape. For this I have switched to the Edit mode by clicking the tab key.

While in Edit mode, by clicking "command + R" on Mac or "Control + R" on Windows, I was able to create a new vector on the rectangle.
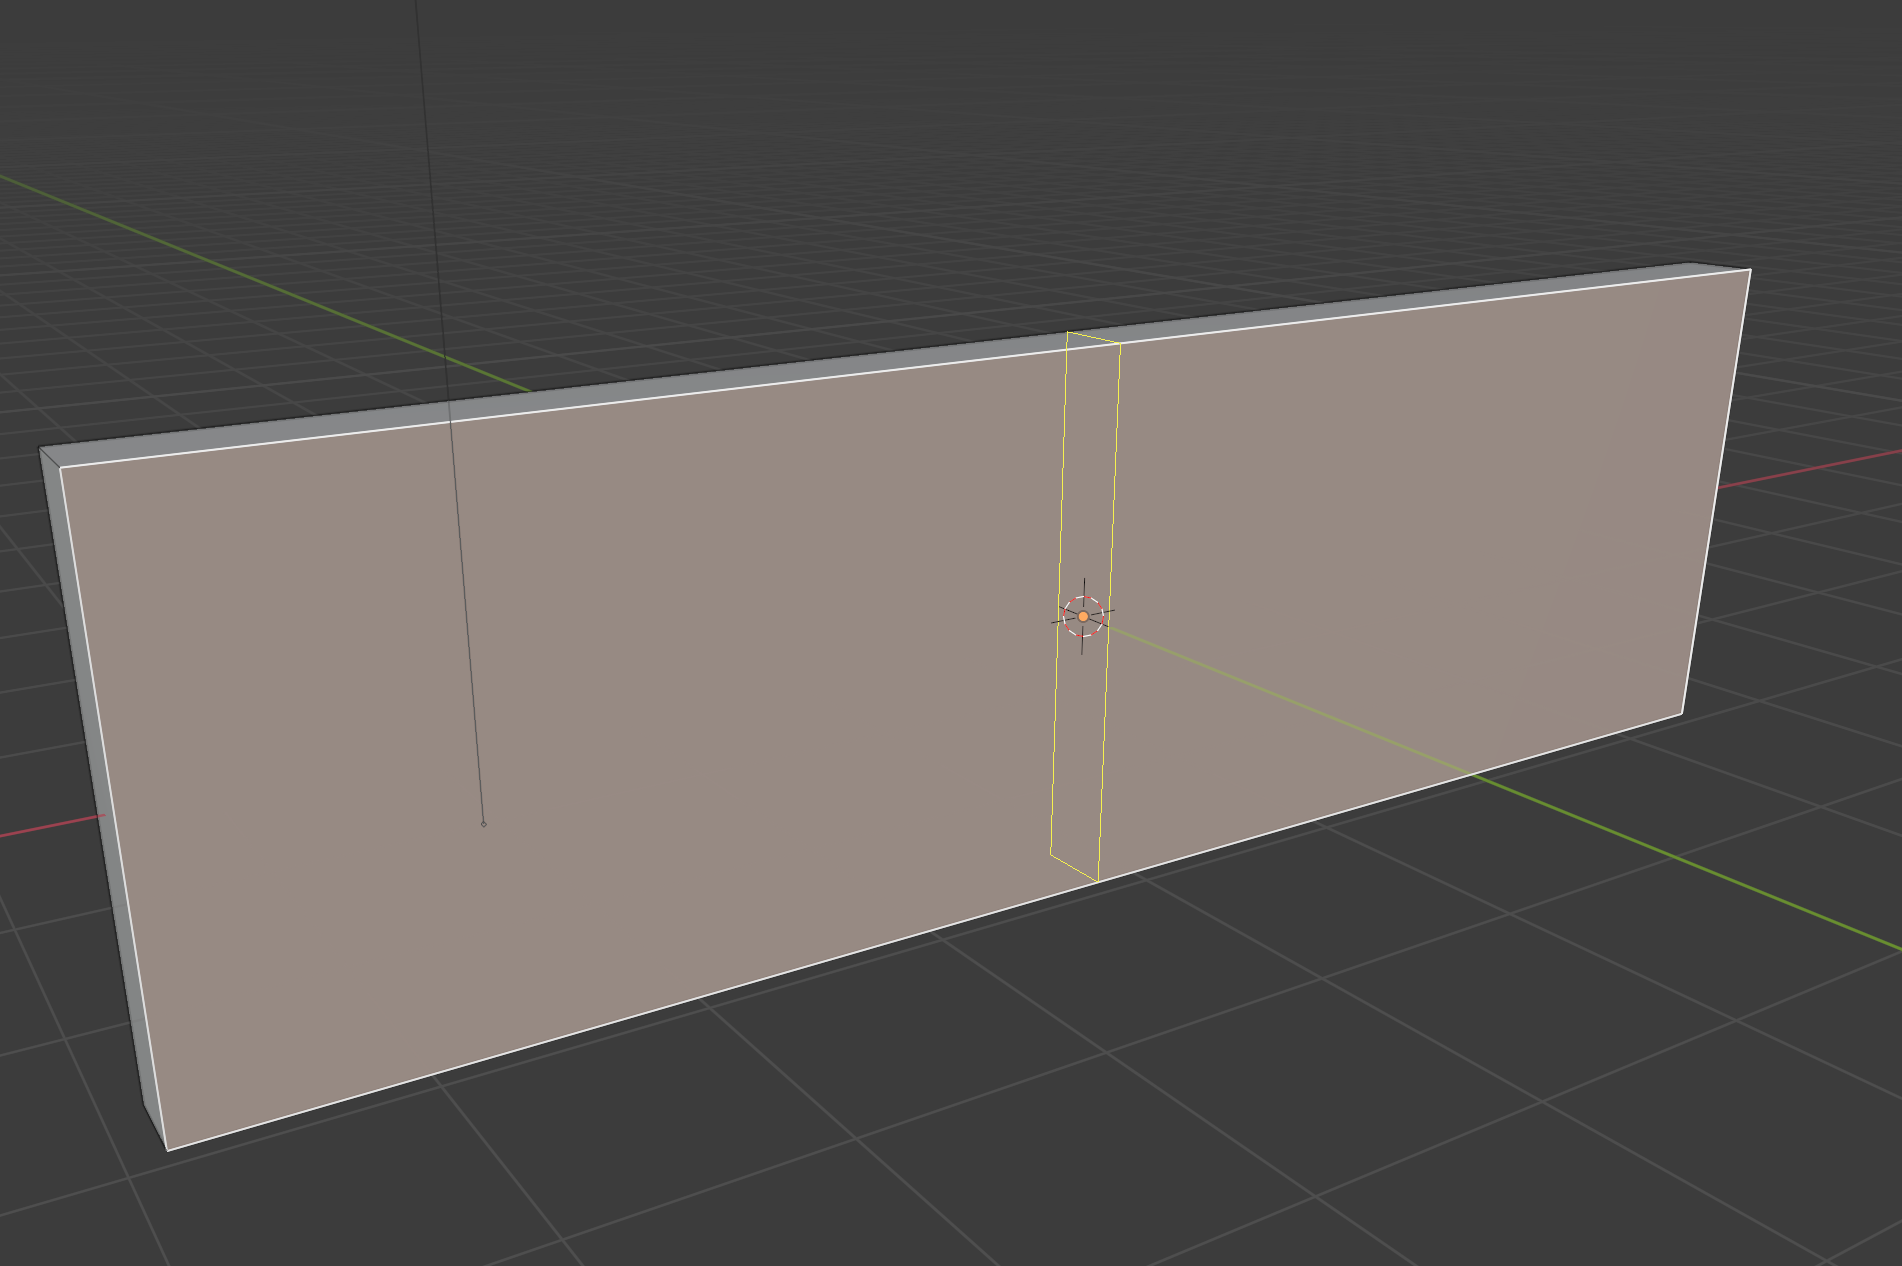
Then using the 'E' key I was able to extrude the new face I have created by making a new vector.
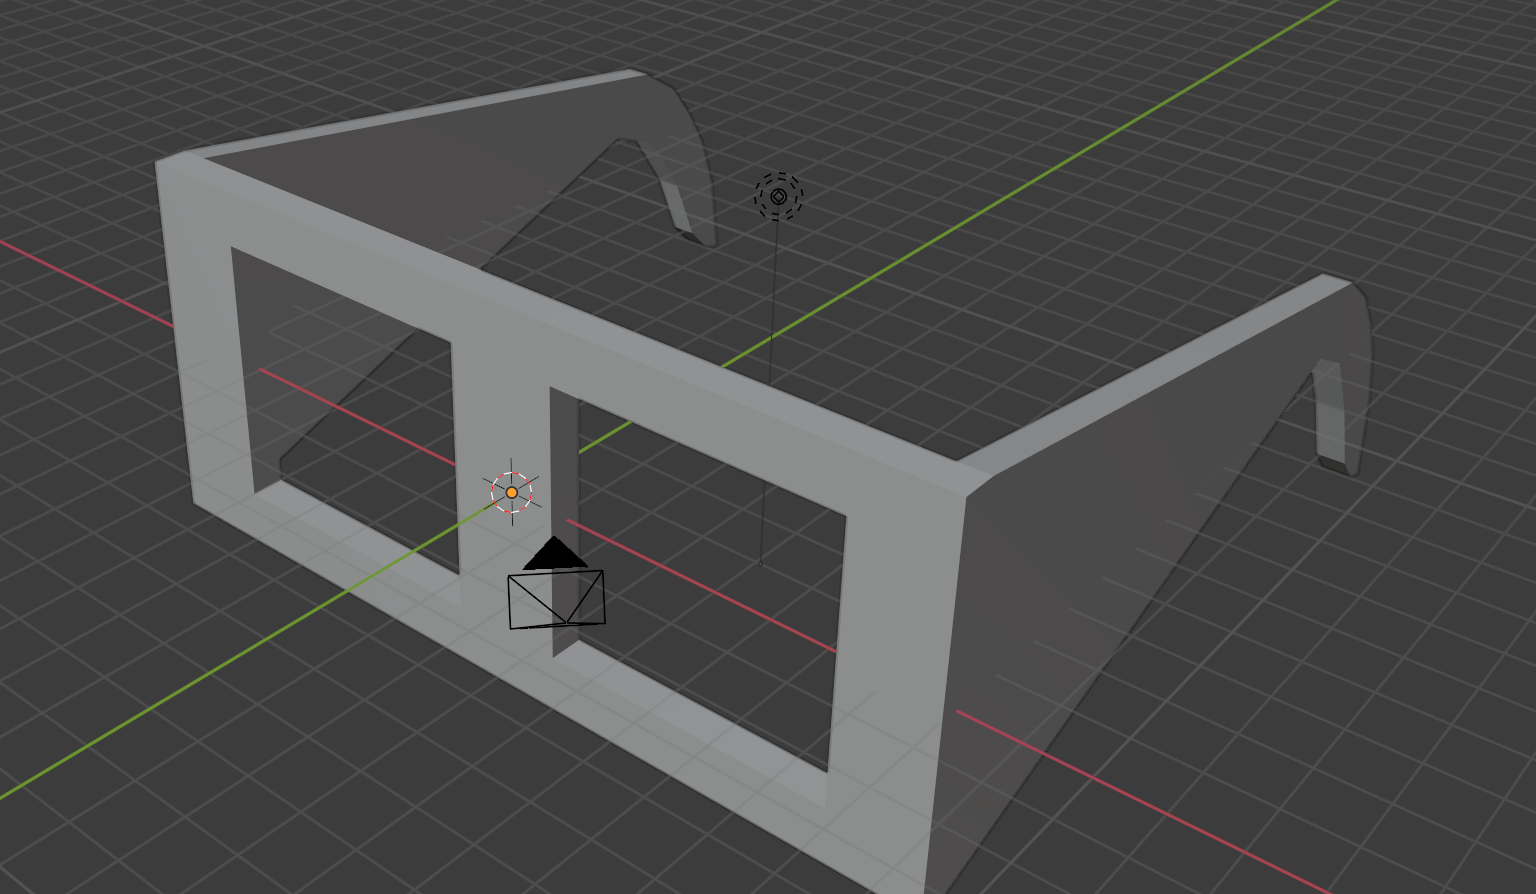
Finally it looked like this:
3D/2D Design in Tinkercad
Unlike all the other softwares I have mentioned, Tinkercad is maybe the least powerful, but I really like it because of its simplicity. Normally you can use Tinkercad to do 3D CAD however, I used it to do circuits and play with electronic equipment to learn and design more.