Assignment:
Group Assignment:
1# There is no group Assignment This Week
Individual Assignment:
1# Design and produce something with a digital fabrication process (incorporating computer-aided design and manufacturing) not covered in another assignment, documenting the requirements that your assignment meets, and including everything necessary to reproduce it. Possibilities include (but are not limited to) composites, textiles,biotechnology, robotics, and cooking.
Brainstorm
Softwares:
 - Fusion 360 - A CAD software that allows both 3D and 2D designing
Machines:
 Tormach PCNC 440 is a great hobbiest or small scale digital milling machine
 Tutorials:
 Tormach PCNC 440 Walkthrough
 Individual Assignment
For my Individual Assignment, I have decided to use the Tormach PCNC 440. In my family almost everyone has a CNC mill, and I have always wanted to use one. Hence, I was so eager to use Tormach PCNC 440 at Dassault Systems. At first I thought after months of Fab Academy, I would be prepared for PCNC 440. However, it took me and my friend, at least 1 hour to figure out how to put the endmill in and set the home point. While I was mostly working on creating the designs, he was mostly focused on making the machine work.
After consulting to someone who already have used the Tormach PCNC 440, we have learned how to use it. For this week's individual assignment, I have collaborated with Kevin Elkhoury. We have worked together in unleashing the secrets of Tormach PCNC 440 and learning how to use it.
Before using the machine I needed to design something. Initially, I was just going to make a test cut which checks the machine. However, than I wanted to use the Robotic arm at Dassault's lab. Hence, I decided that I was going to make lego pieces out of Aluminium. Hence, I designed this.
Kevin had the great idea of doing a test cut, since we don't kow much about the machine. Hence, we decided to mill only the male part on machinable wax rather than Aluminium.
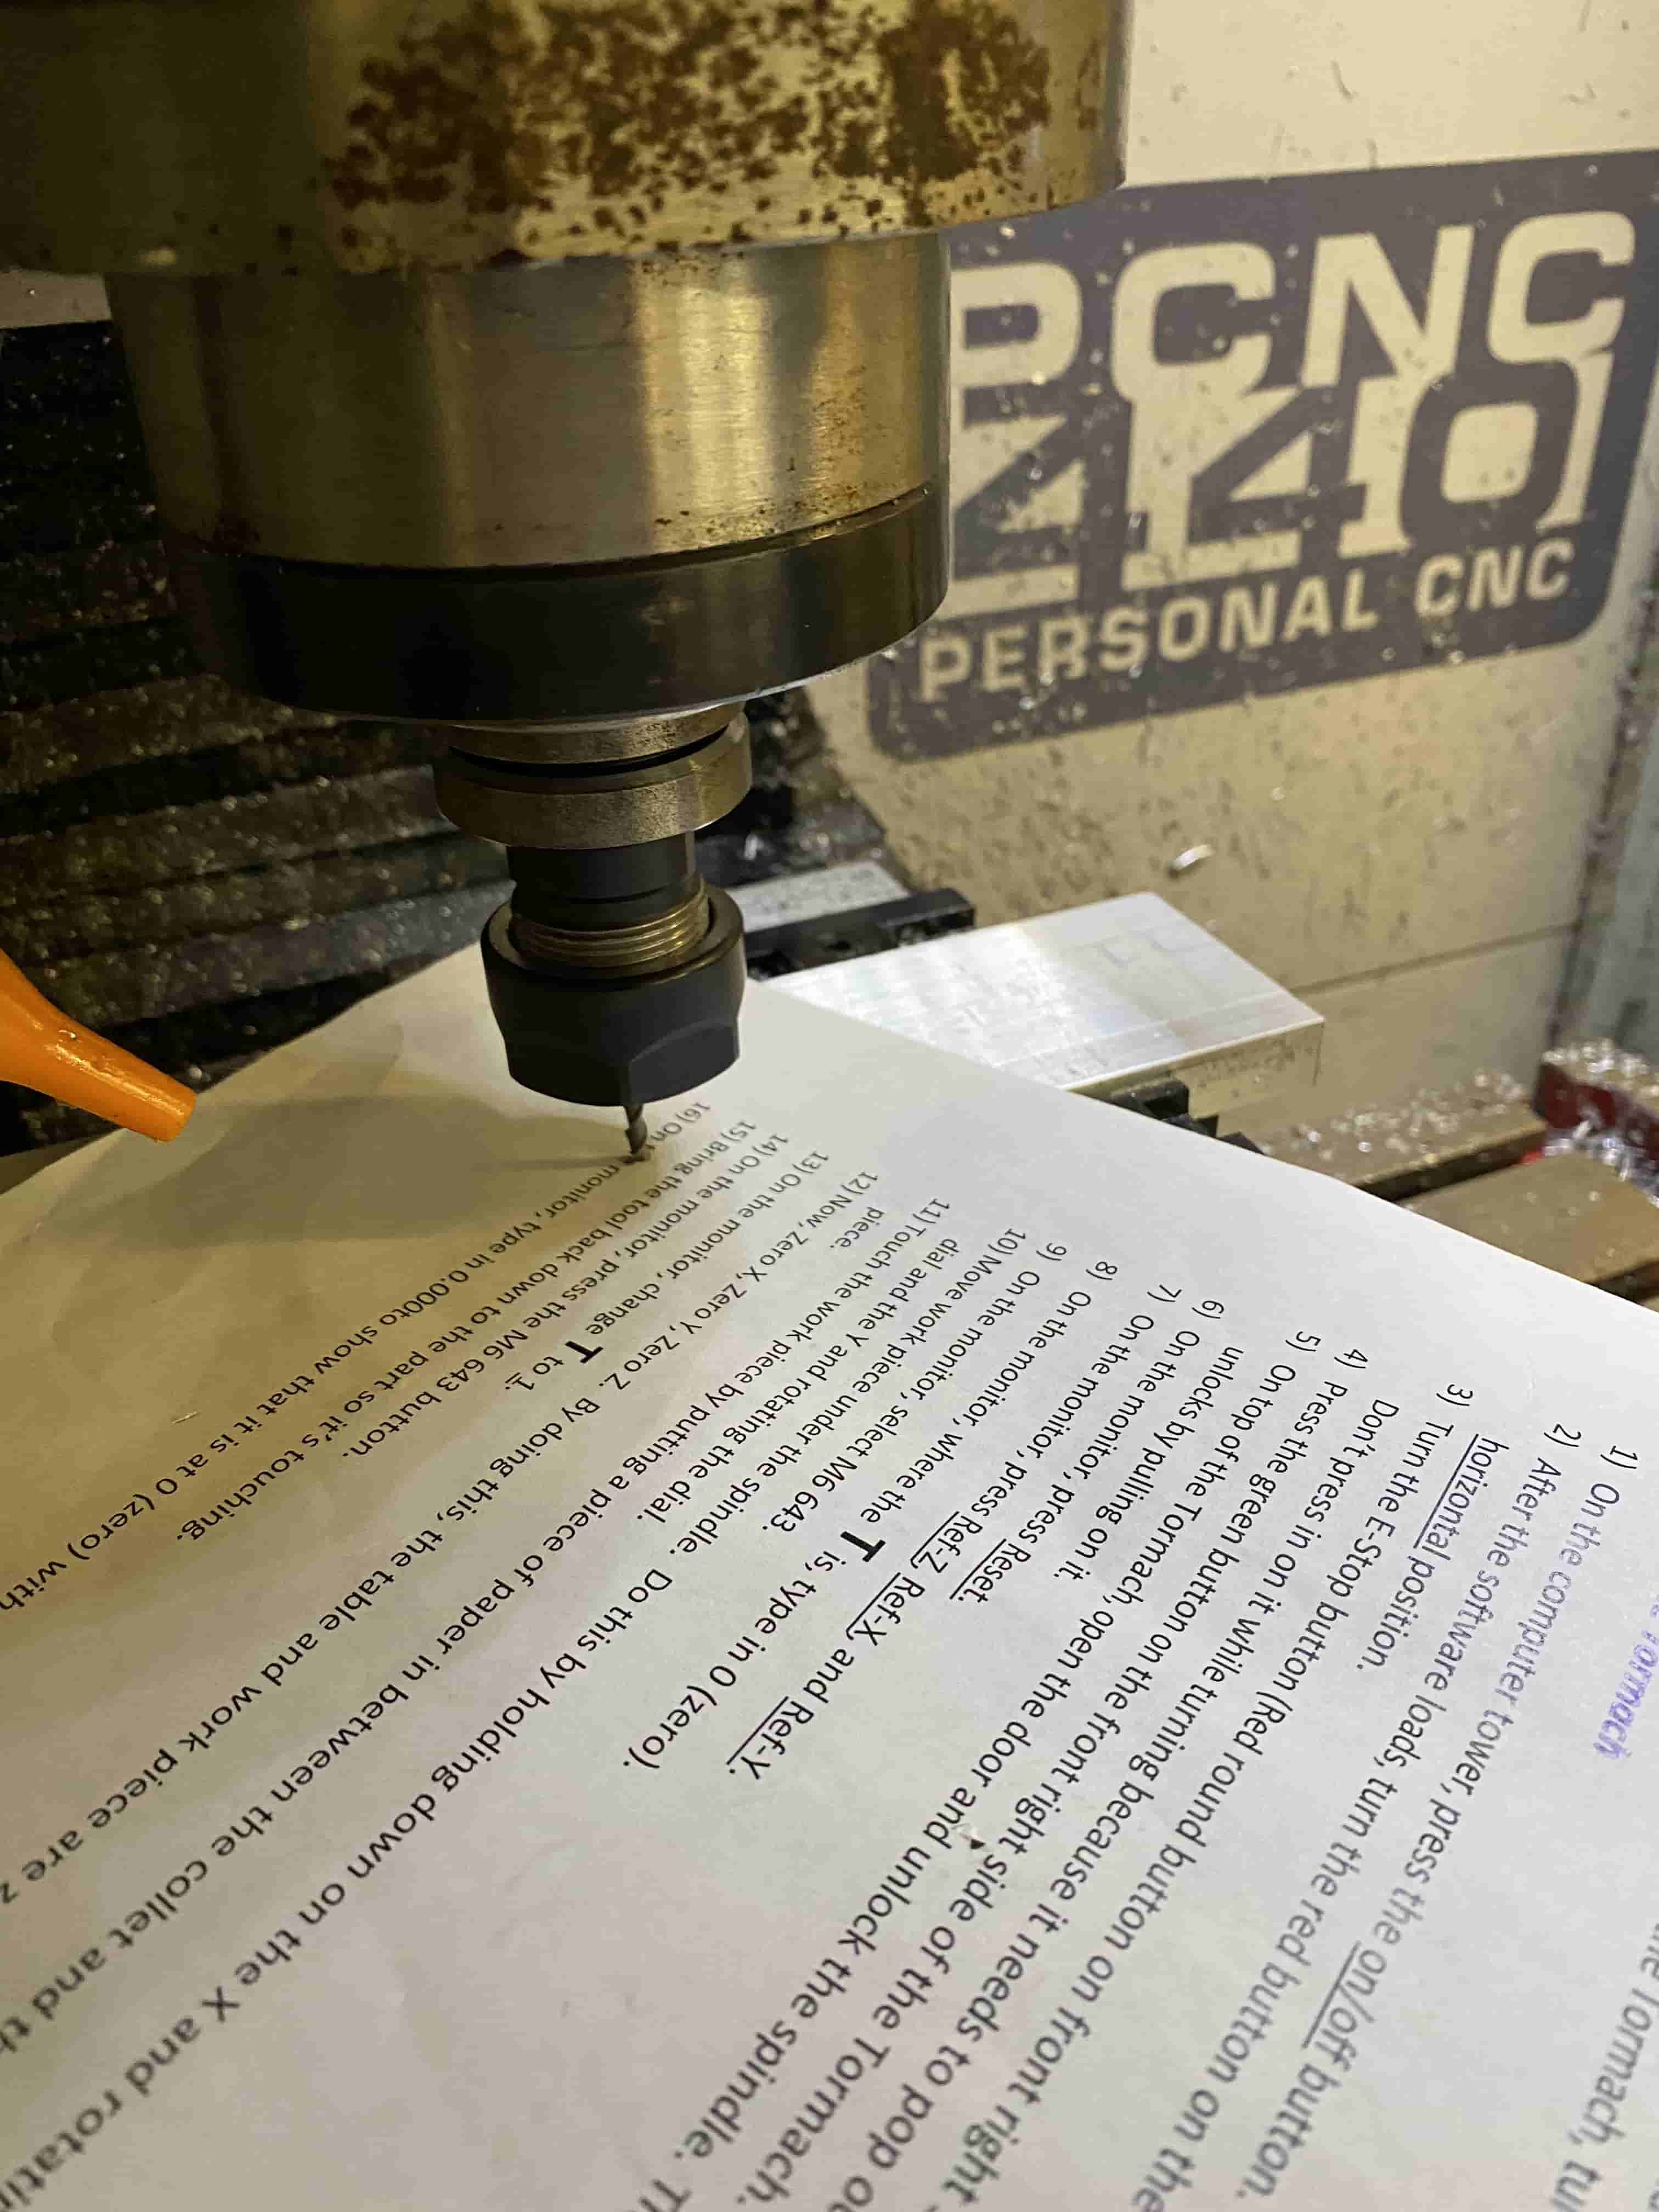
Now that we have the design, we moved on to booting up the machine and setting up the stock and the origin positions. To do that, we got some help. There was an instruction guide, right next to the machine which explain somewhat in clearn detailed manner. However, we had to contact a person who used this machine before.
We found out that there is a computer underneath the PCNC 440, after booting it up and turning on the machine, the machine was in operatable mode. However, while I was trying to move the bed, I accidentally made it go too far in Y-axis and hit a break switch. This costed us almost an hour because we did not know how to dissable the breakswitch. After some research we have found out that there is an option to disable the break switches so you can get of the break poisition and continue as normal.
After, freeing ourselves from the position we got stuck in, we have continued in setting the reference points. Apparetnly, unlike traditional routers or precision mills, this machine does not auto callibrate and finds the reference point. Hence, you need to tell the machine to find the most extreme positions of each Axis to find the reference point. After doing that, we put the Stock on the vise inside the machine. However, we couldn't just put the stock into the wise, because our toolpath was suppose to go out of the stuck for atleast 1/16" which means if we were to put our stock flush with the bottom of the vise then we would have milled the vise too. Hence, we used some of the flat metal pieces that comes with Tormach to adjust your item in the vise, to increase the height of the item, so that most of the item will be over the vise, while still maintaining the flat horizontalness from the flat vise. After finished putting our on the stock, we have started doing the homing process.
As you can see in the image above, we have selected the bottom left corner for our origin on our Fusion 360 file, hence, we homed it there. We also used a wax rather than Aluminium for our first ever run on this machine because we didn't want to break anything and we wanted to see if everything will go correctly. For setting the Z axis, we had some complications. At first I thought we should use the endmill with a gauge on it which shows how much pressure is applied. But after discussing with a person who has expertiees on Tormach PCNC 440 and also Kevin suggesting from his experties with 3D printers, we decided on just puting in the endmill in and use a paper to callibrate it.
Kevin has lowered the Z-axis just enough that the endmill does not let the paper slide however, does not press on the stock neither. The perfect balance. Meanwhile I was shaking the paper to check if it is getting caught to the endmill.
To put the endmill in, there is a collet inside the machine. However, unlike other machines the way to thighten the collet is a bit different. In the Axiom, or Shopbot or the Roland SRM-20, we always got a collet with a screw to thighten. However, with Tormach PCNC 440 the way to tighten it, you need to open the belt box on the top of the machine and start tightening the bolt on the top while the endmill is in the collet. This thigtens the collet enough to hold the endmill. I was the one who used two different wrenches to loosen the collet, load the endmill and thighten it. It was pretty tricky because technically you need two wrenches to thighten the collet or otherwise it just starts spinning. However, I was able to hold the collet with my left hand while putting the endmill in it and thighten the top nut just enough with my hand so that it will hold the endmill. After loading the endmill to tighten it I have used two wrenches and turned them in opposite directions.
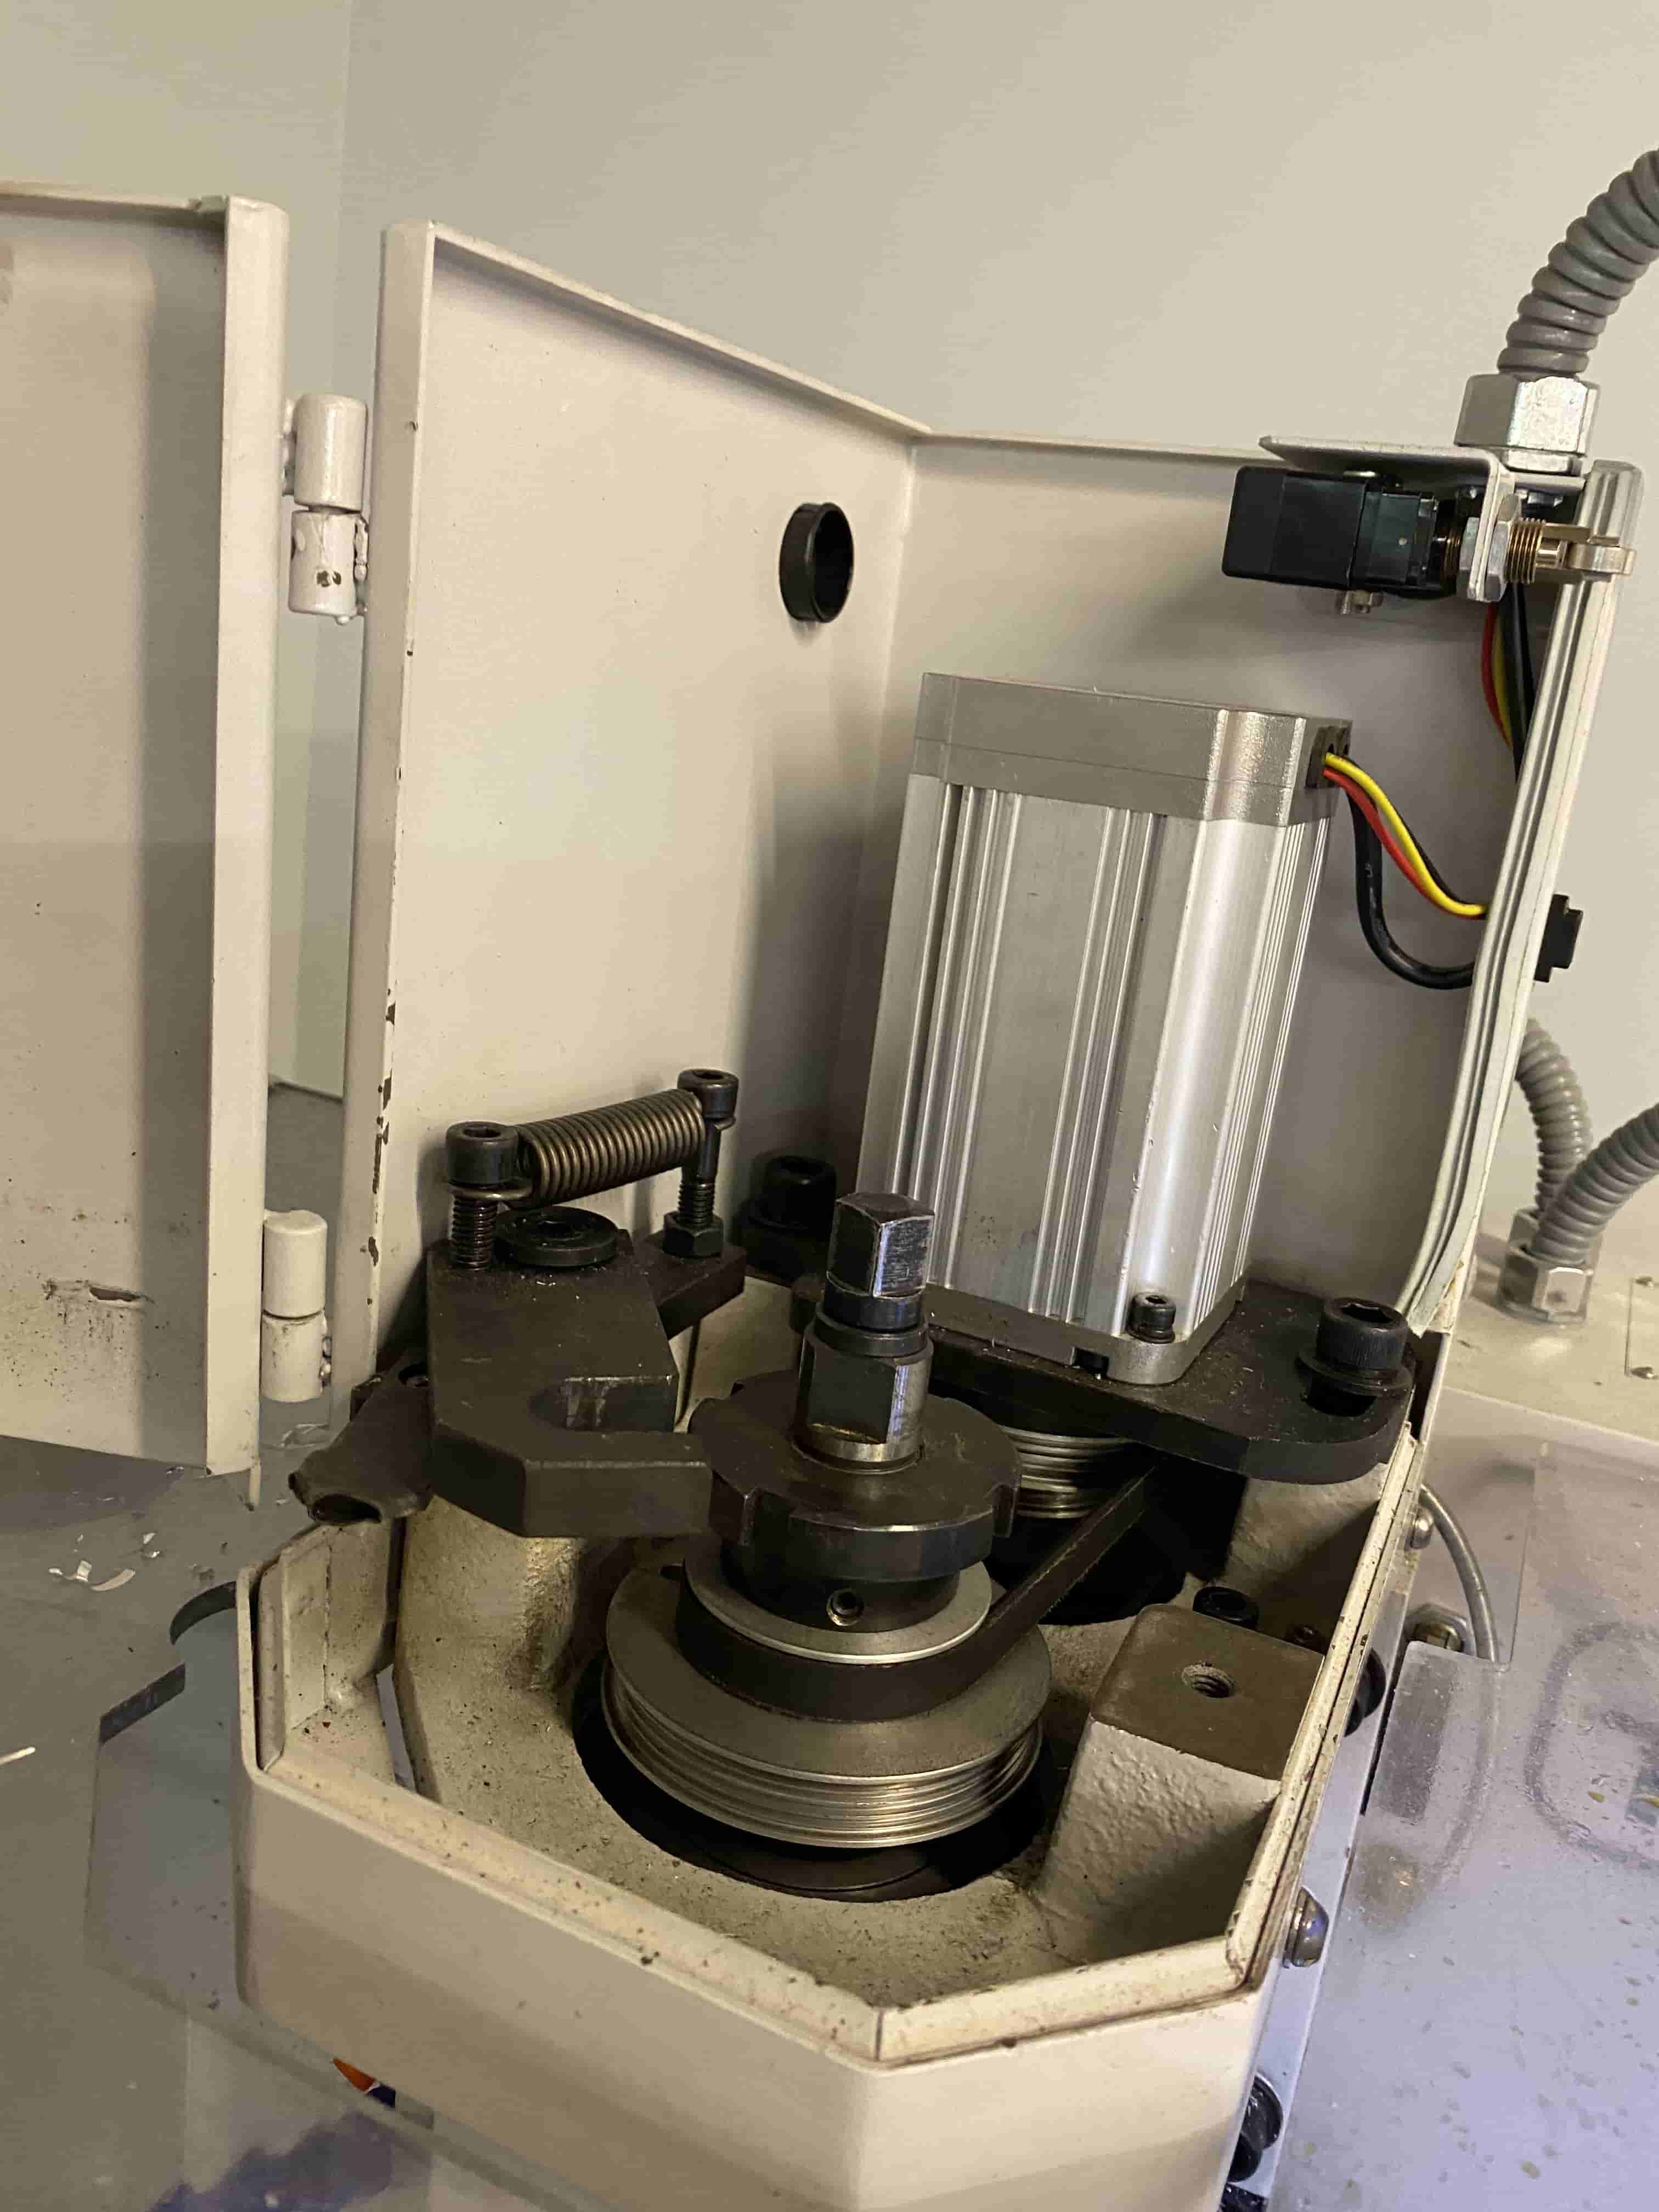
After putting the collet in, the inside of the machine looks like this:
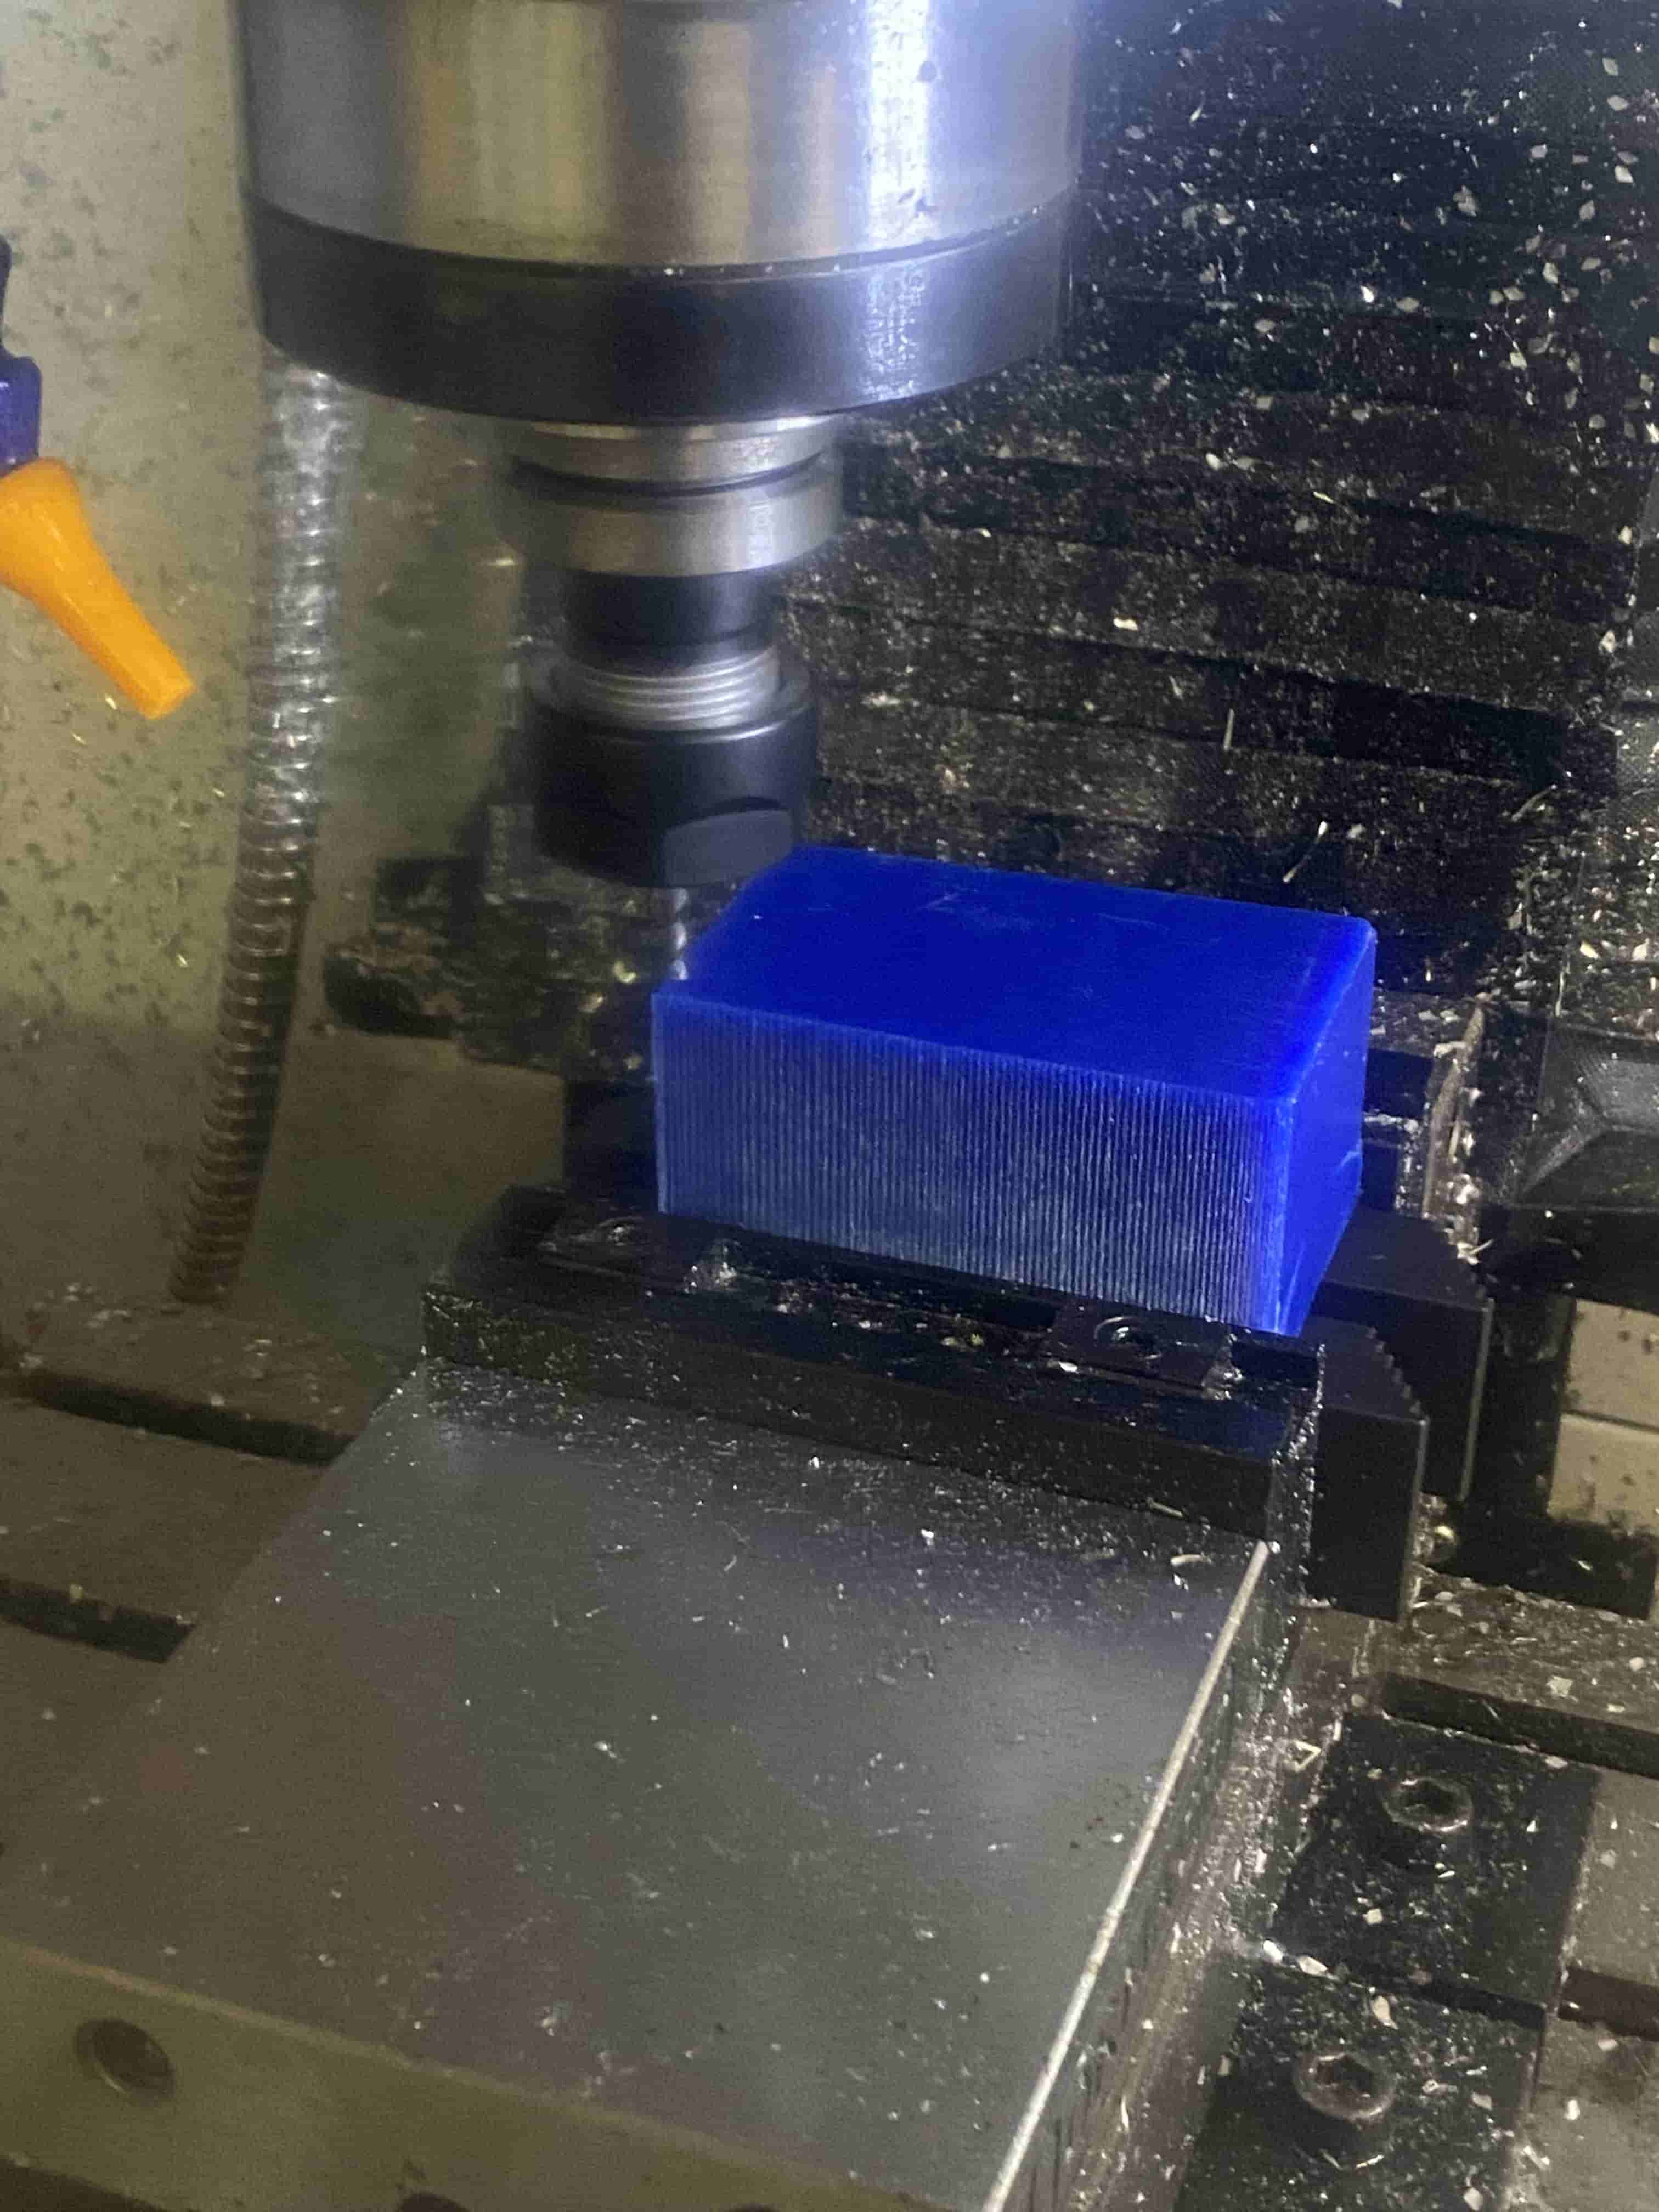
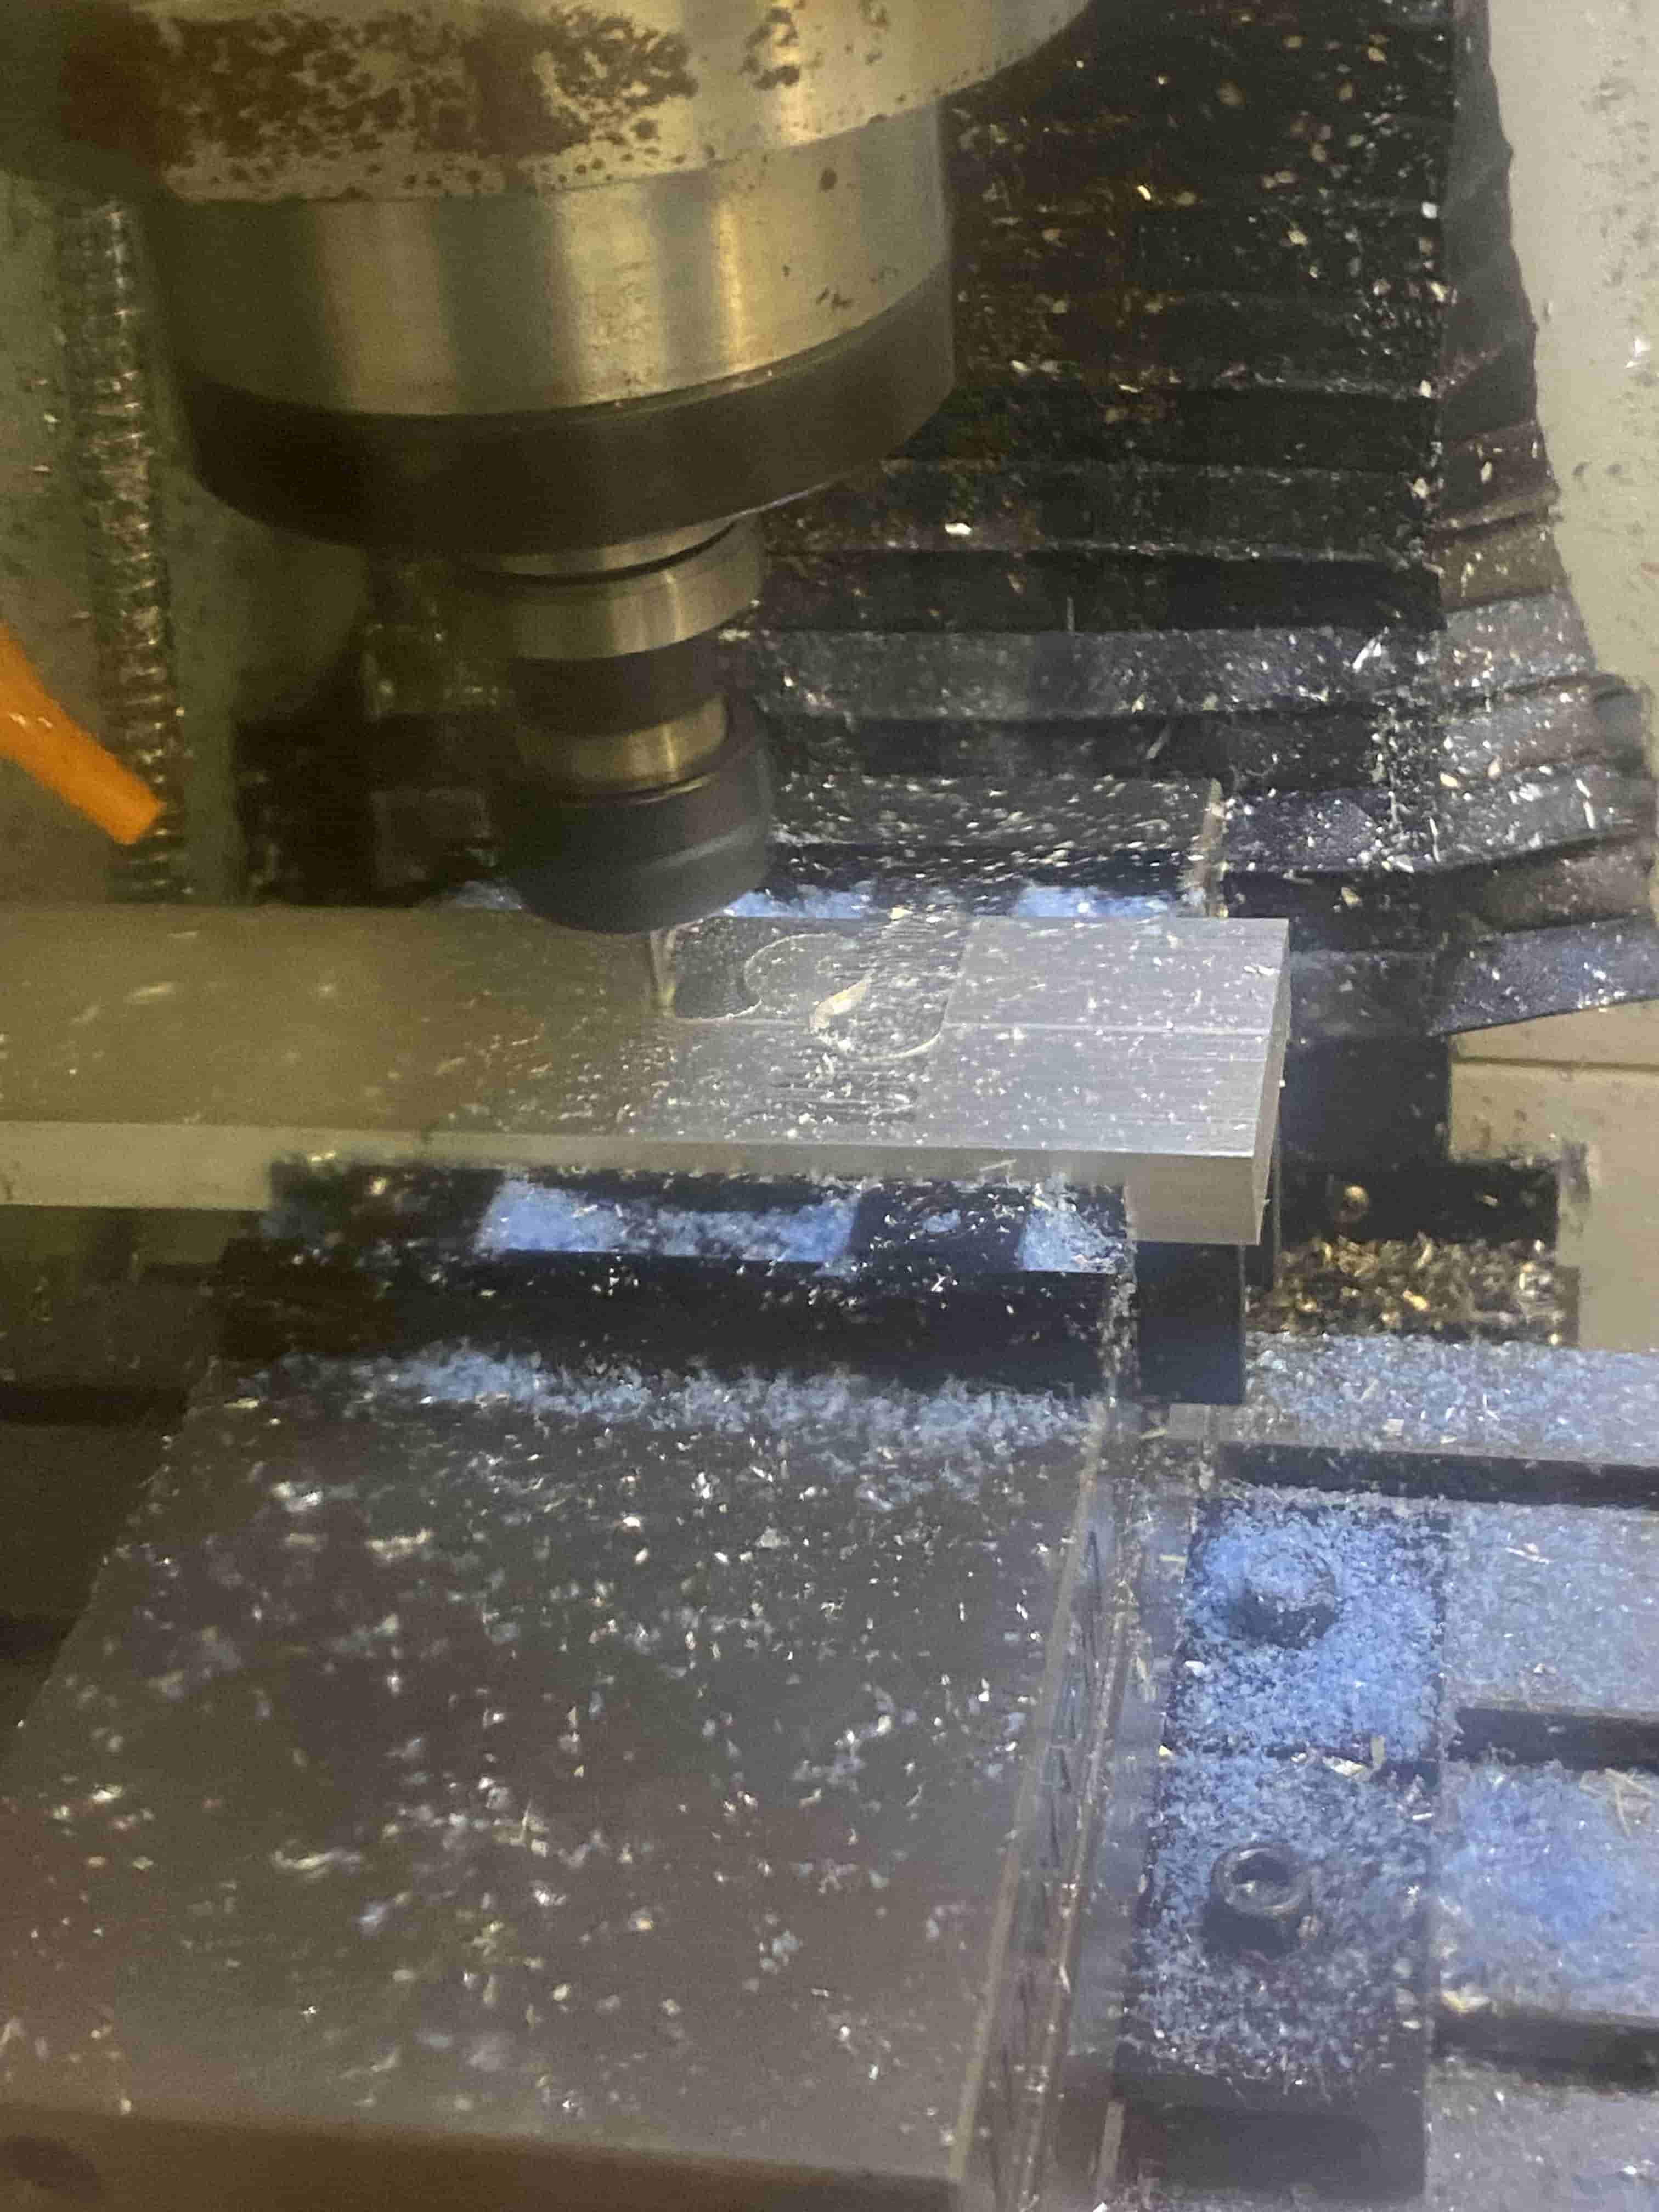
After everything is ready and the home is set. We have started our first test cut on the machinable wax.
As you can see the endmill is moving really fast, that will comeback to haunt us in a bit.
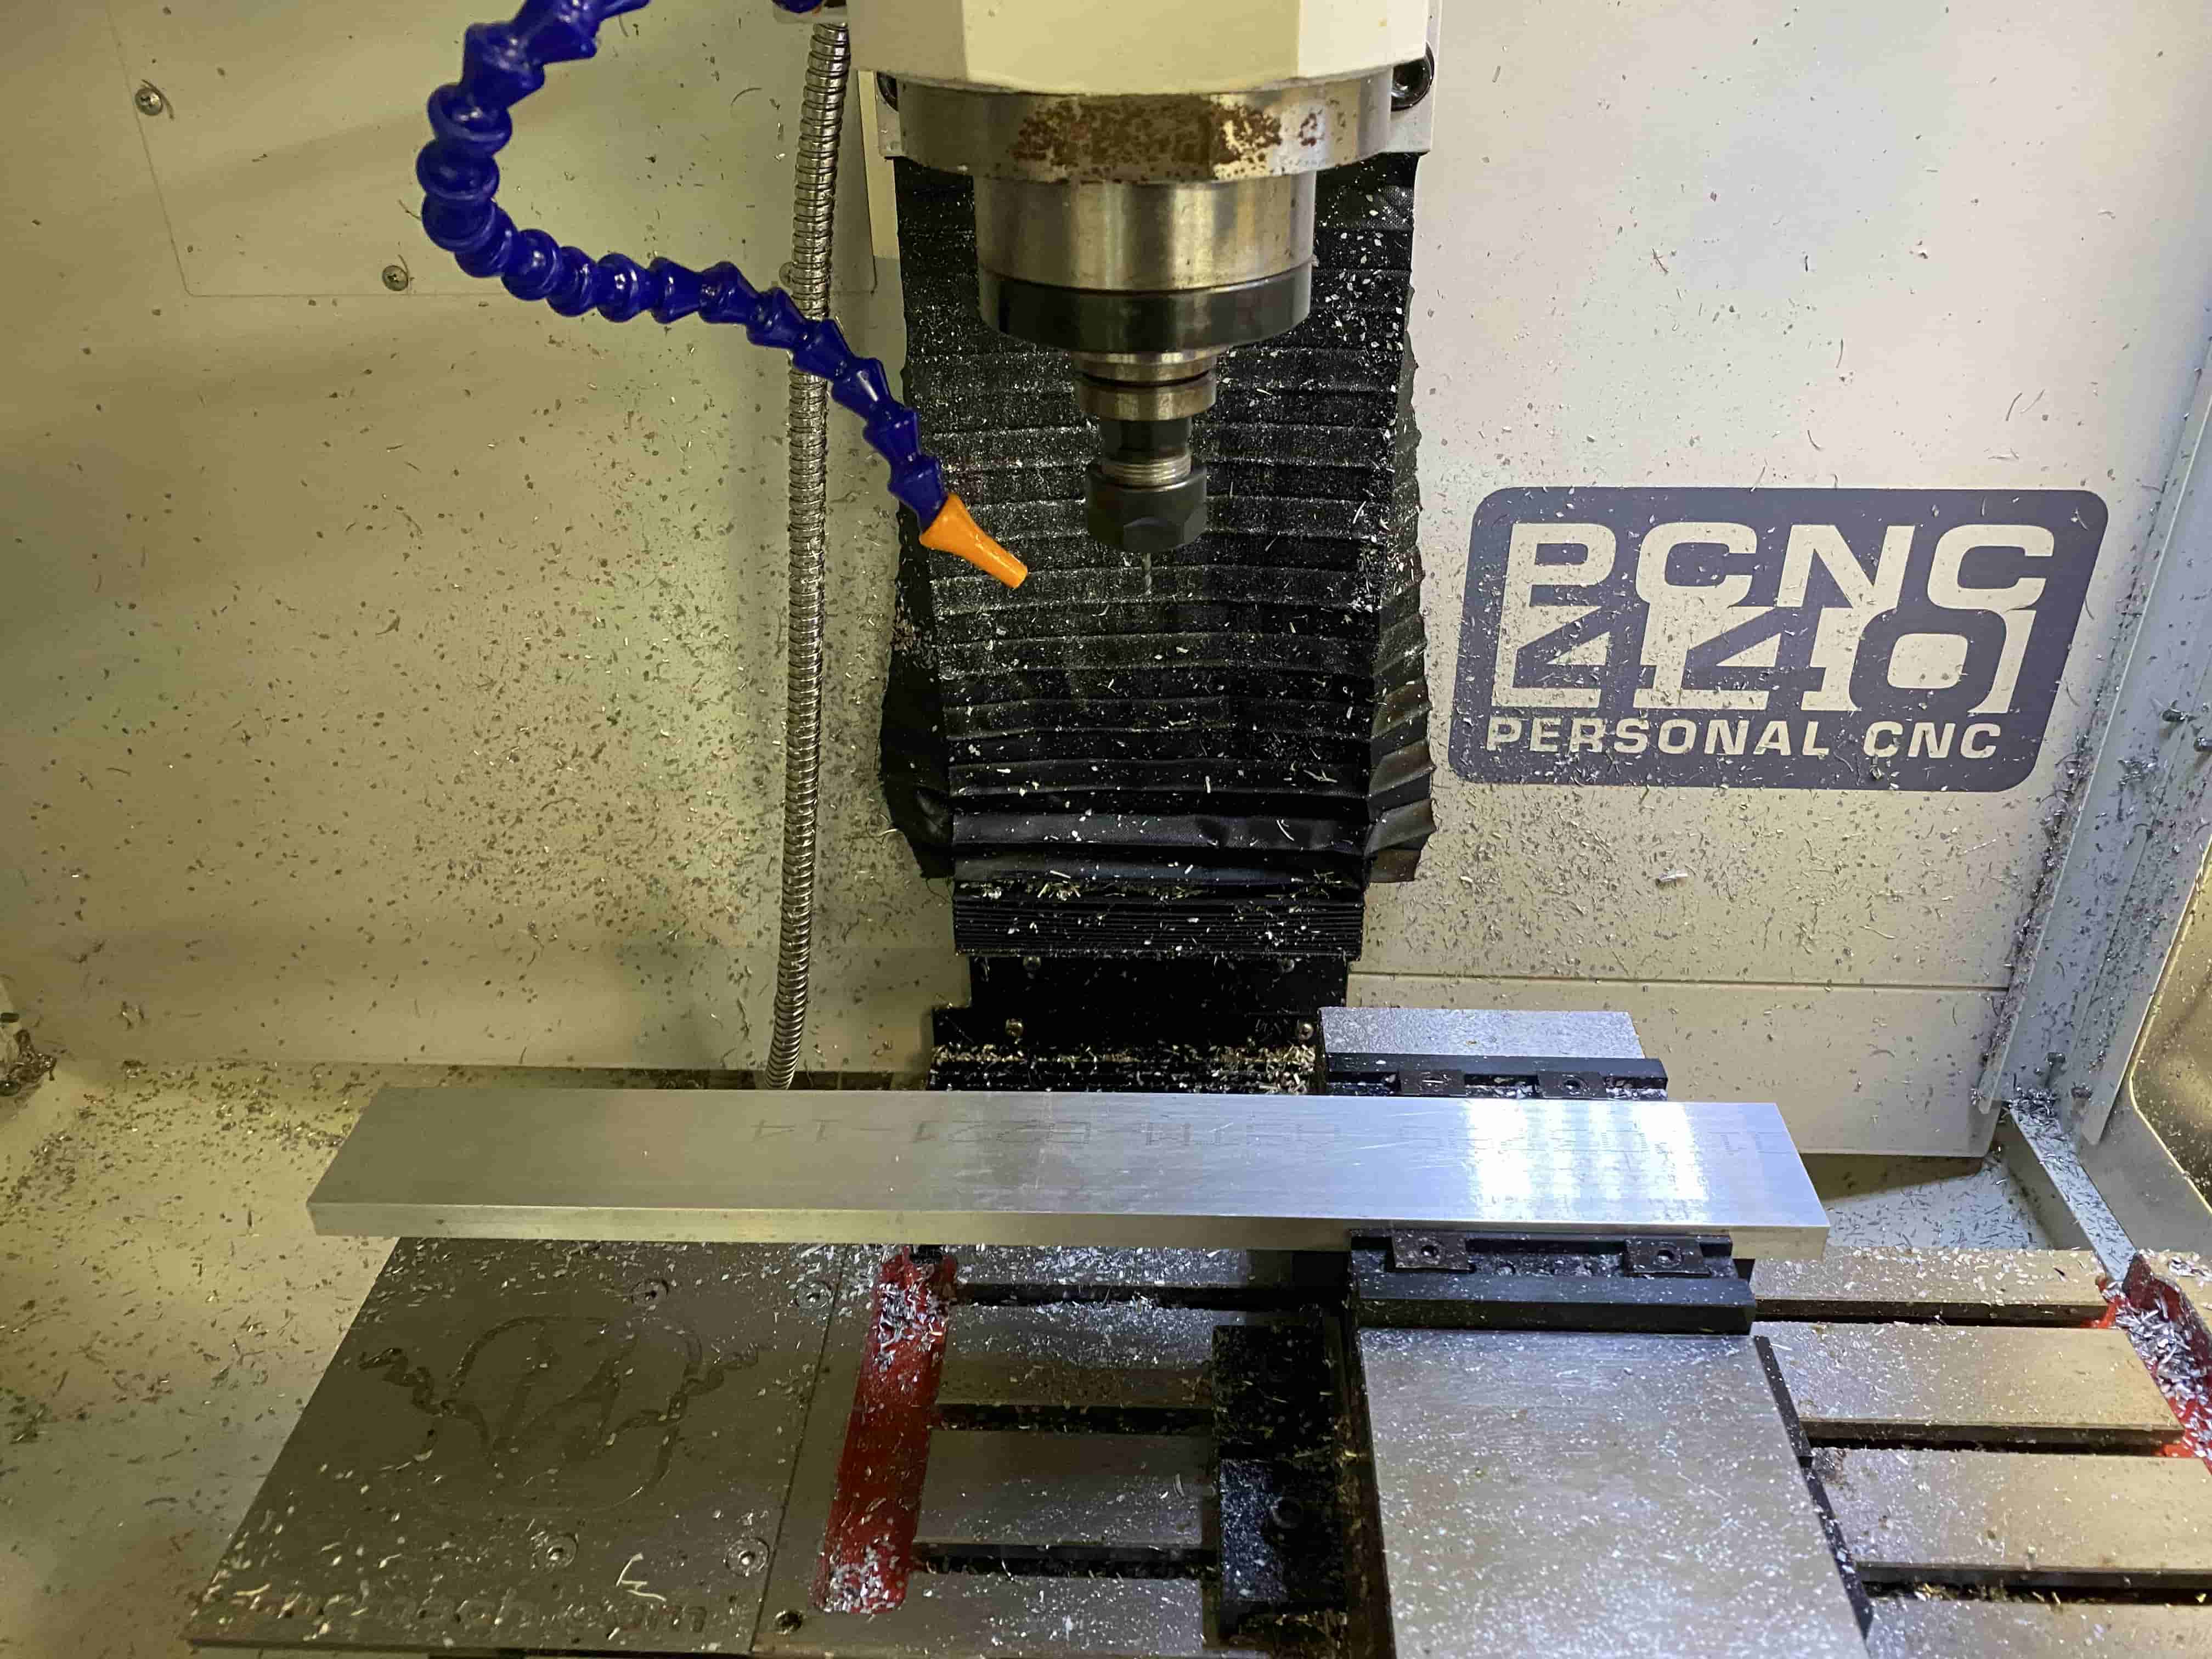
After having a successful run with the Wax we moved on to using Aluminium. Kevin put the Aluminium in to the vise and started running it.
However, apparetnyl Kevin forgot to tighten the vise after putting in the Aluminium, so while cutting the Aluminium started moving foward and back. Thankfully, we were able to stop it before breaking anything. But don't worry, we also did that too.
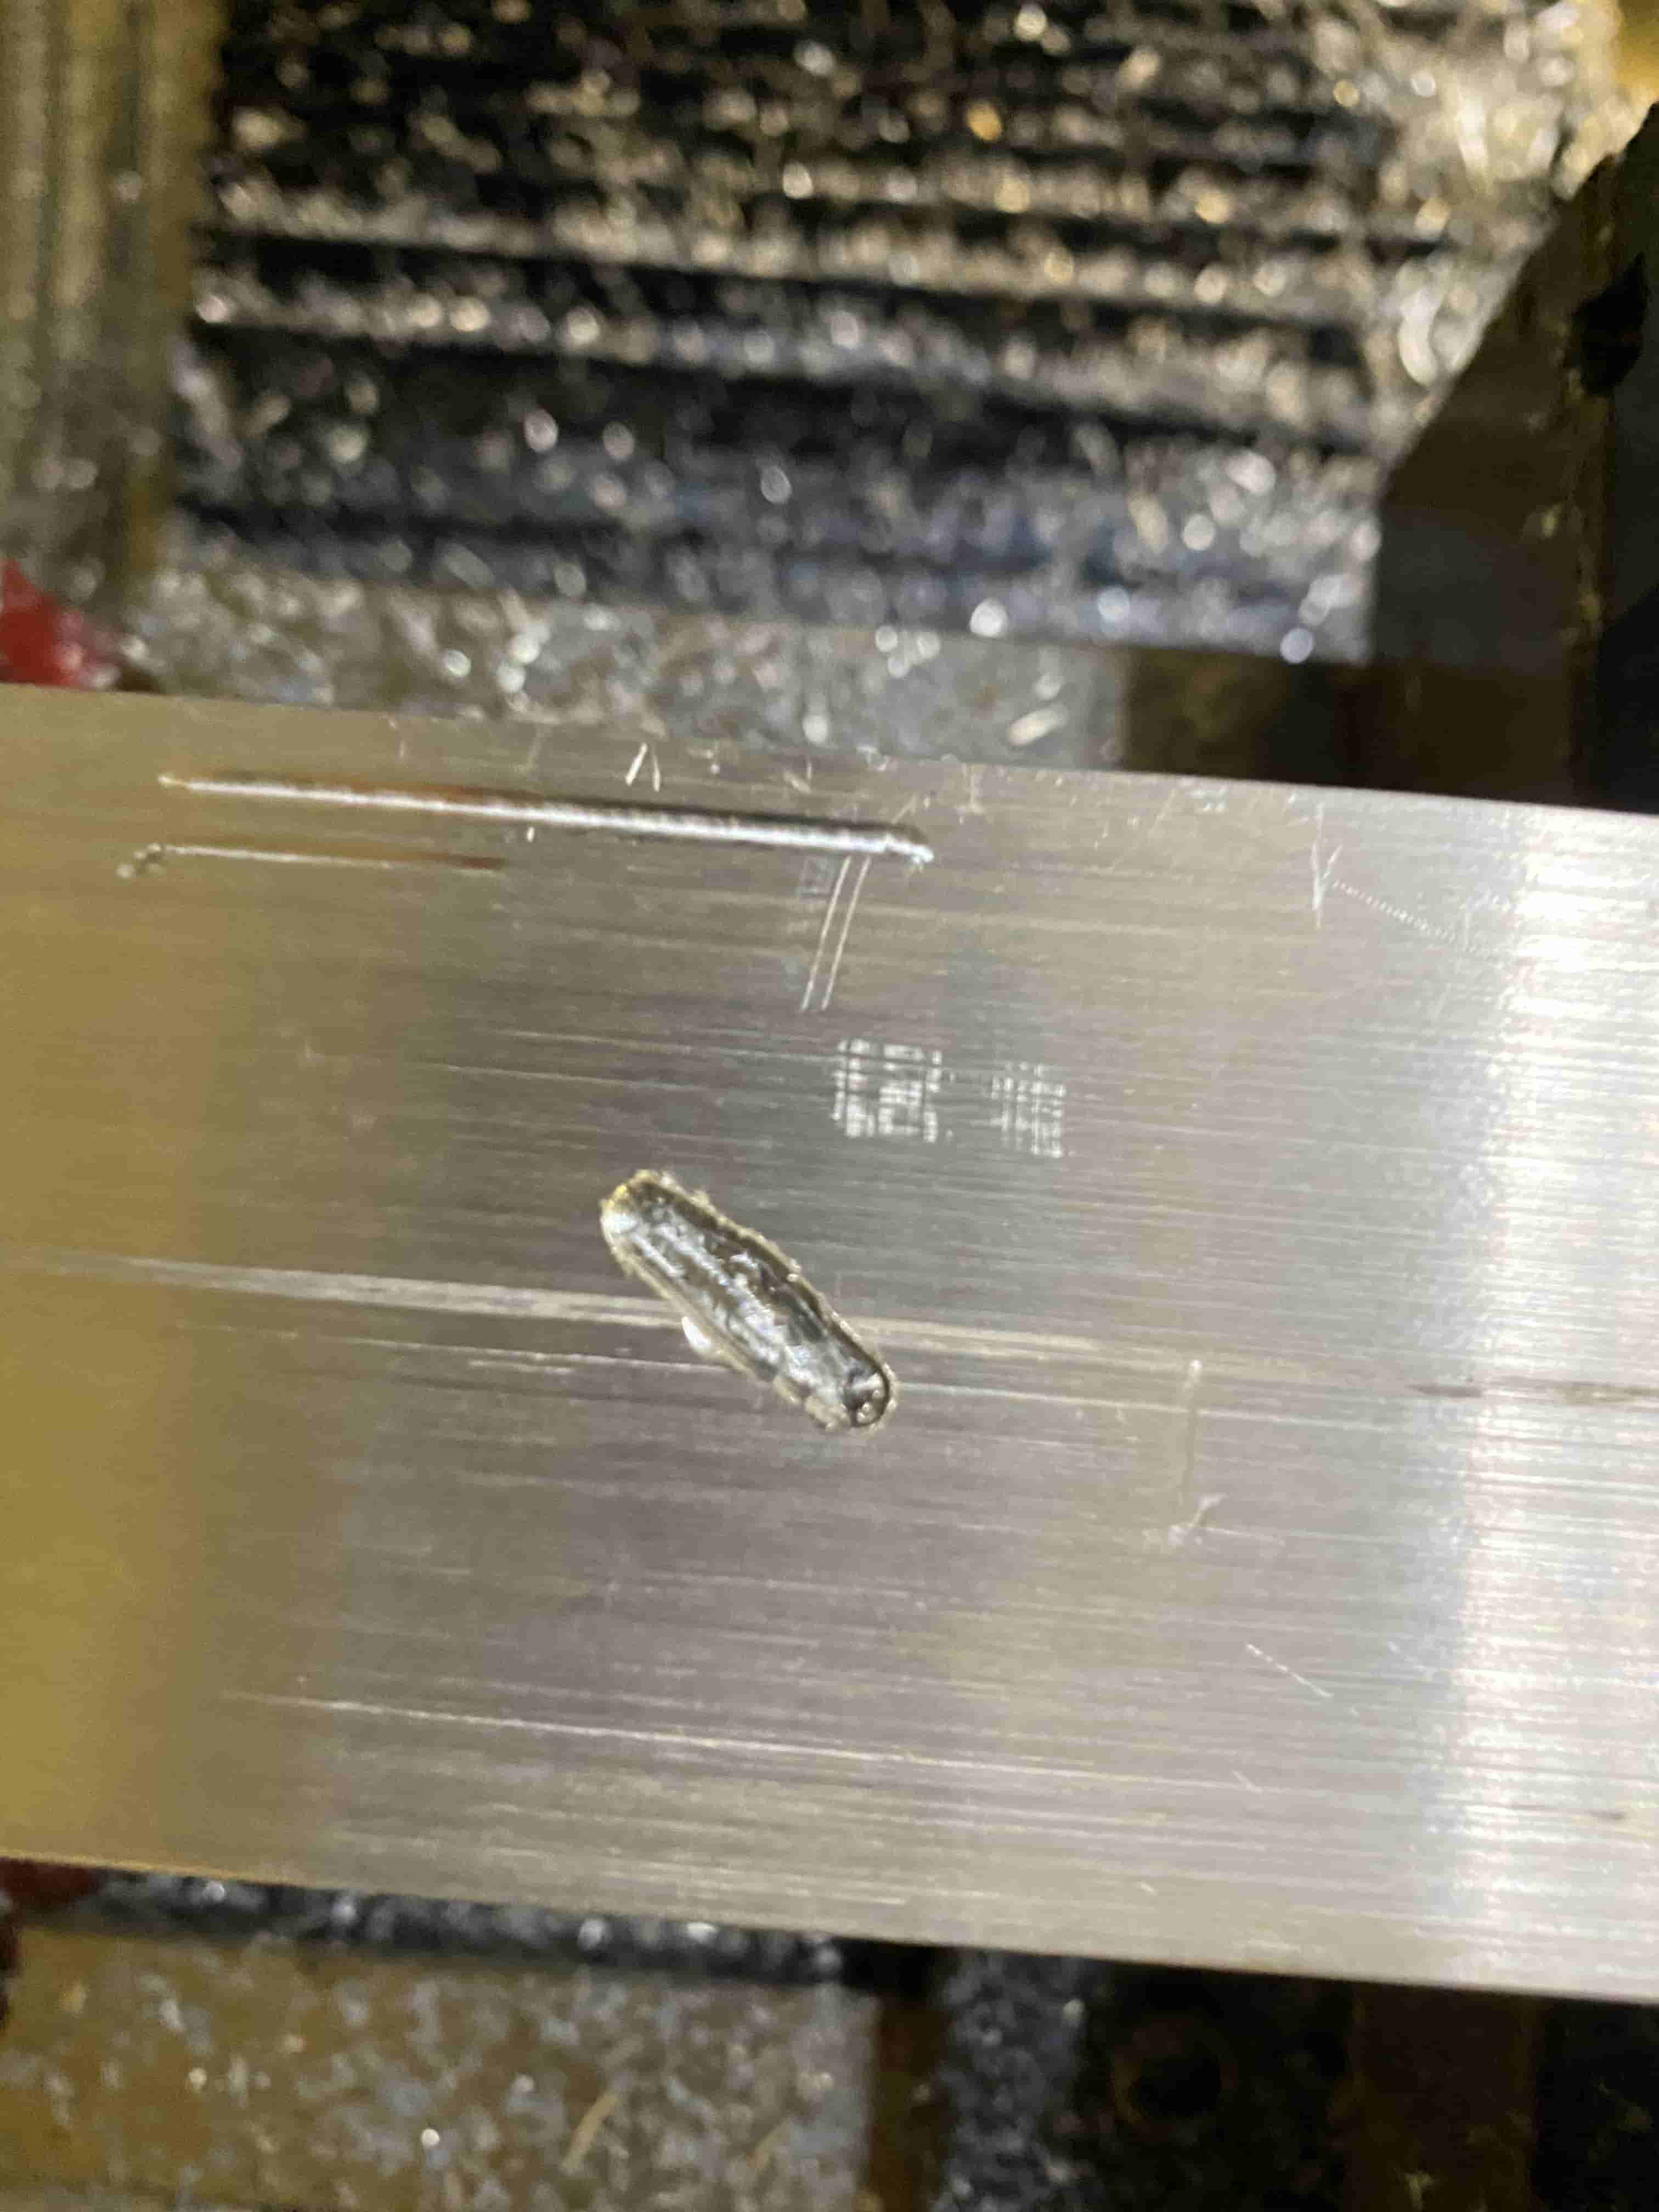
After this fail, we moved to a different location and this time made sure that we thigntenned it enough. At first it went well, but in one instance, the endmill shattered and broke.
As you can see we went really far in to the block, and then the endmill broke. That is probably because our feed speed was too high (1 m/min) and the 1/8" endmill couldn't hold it.
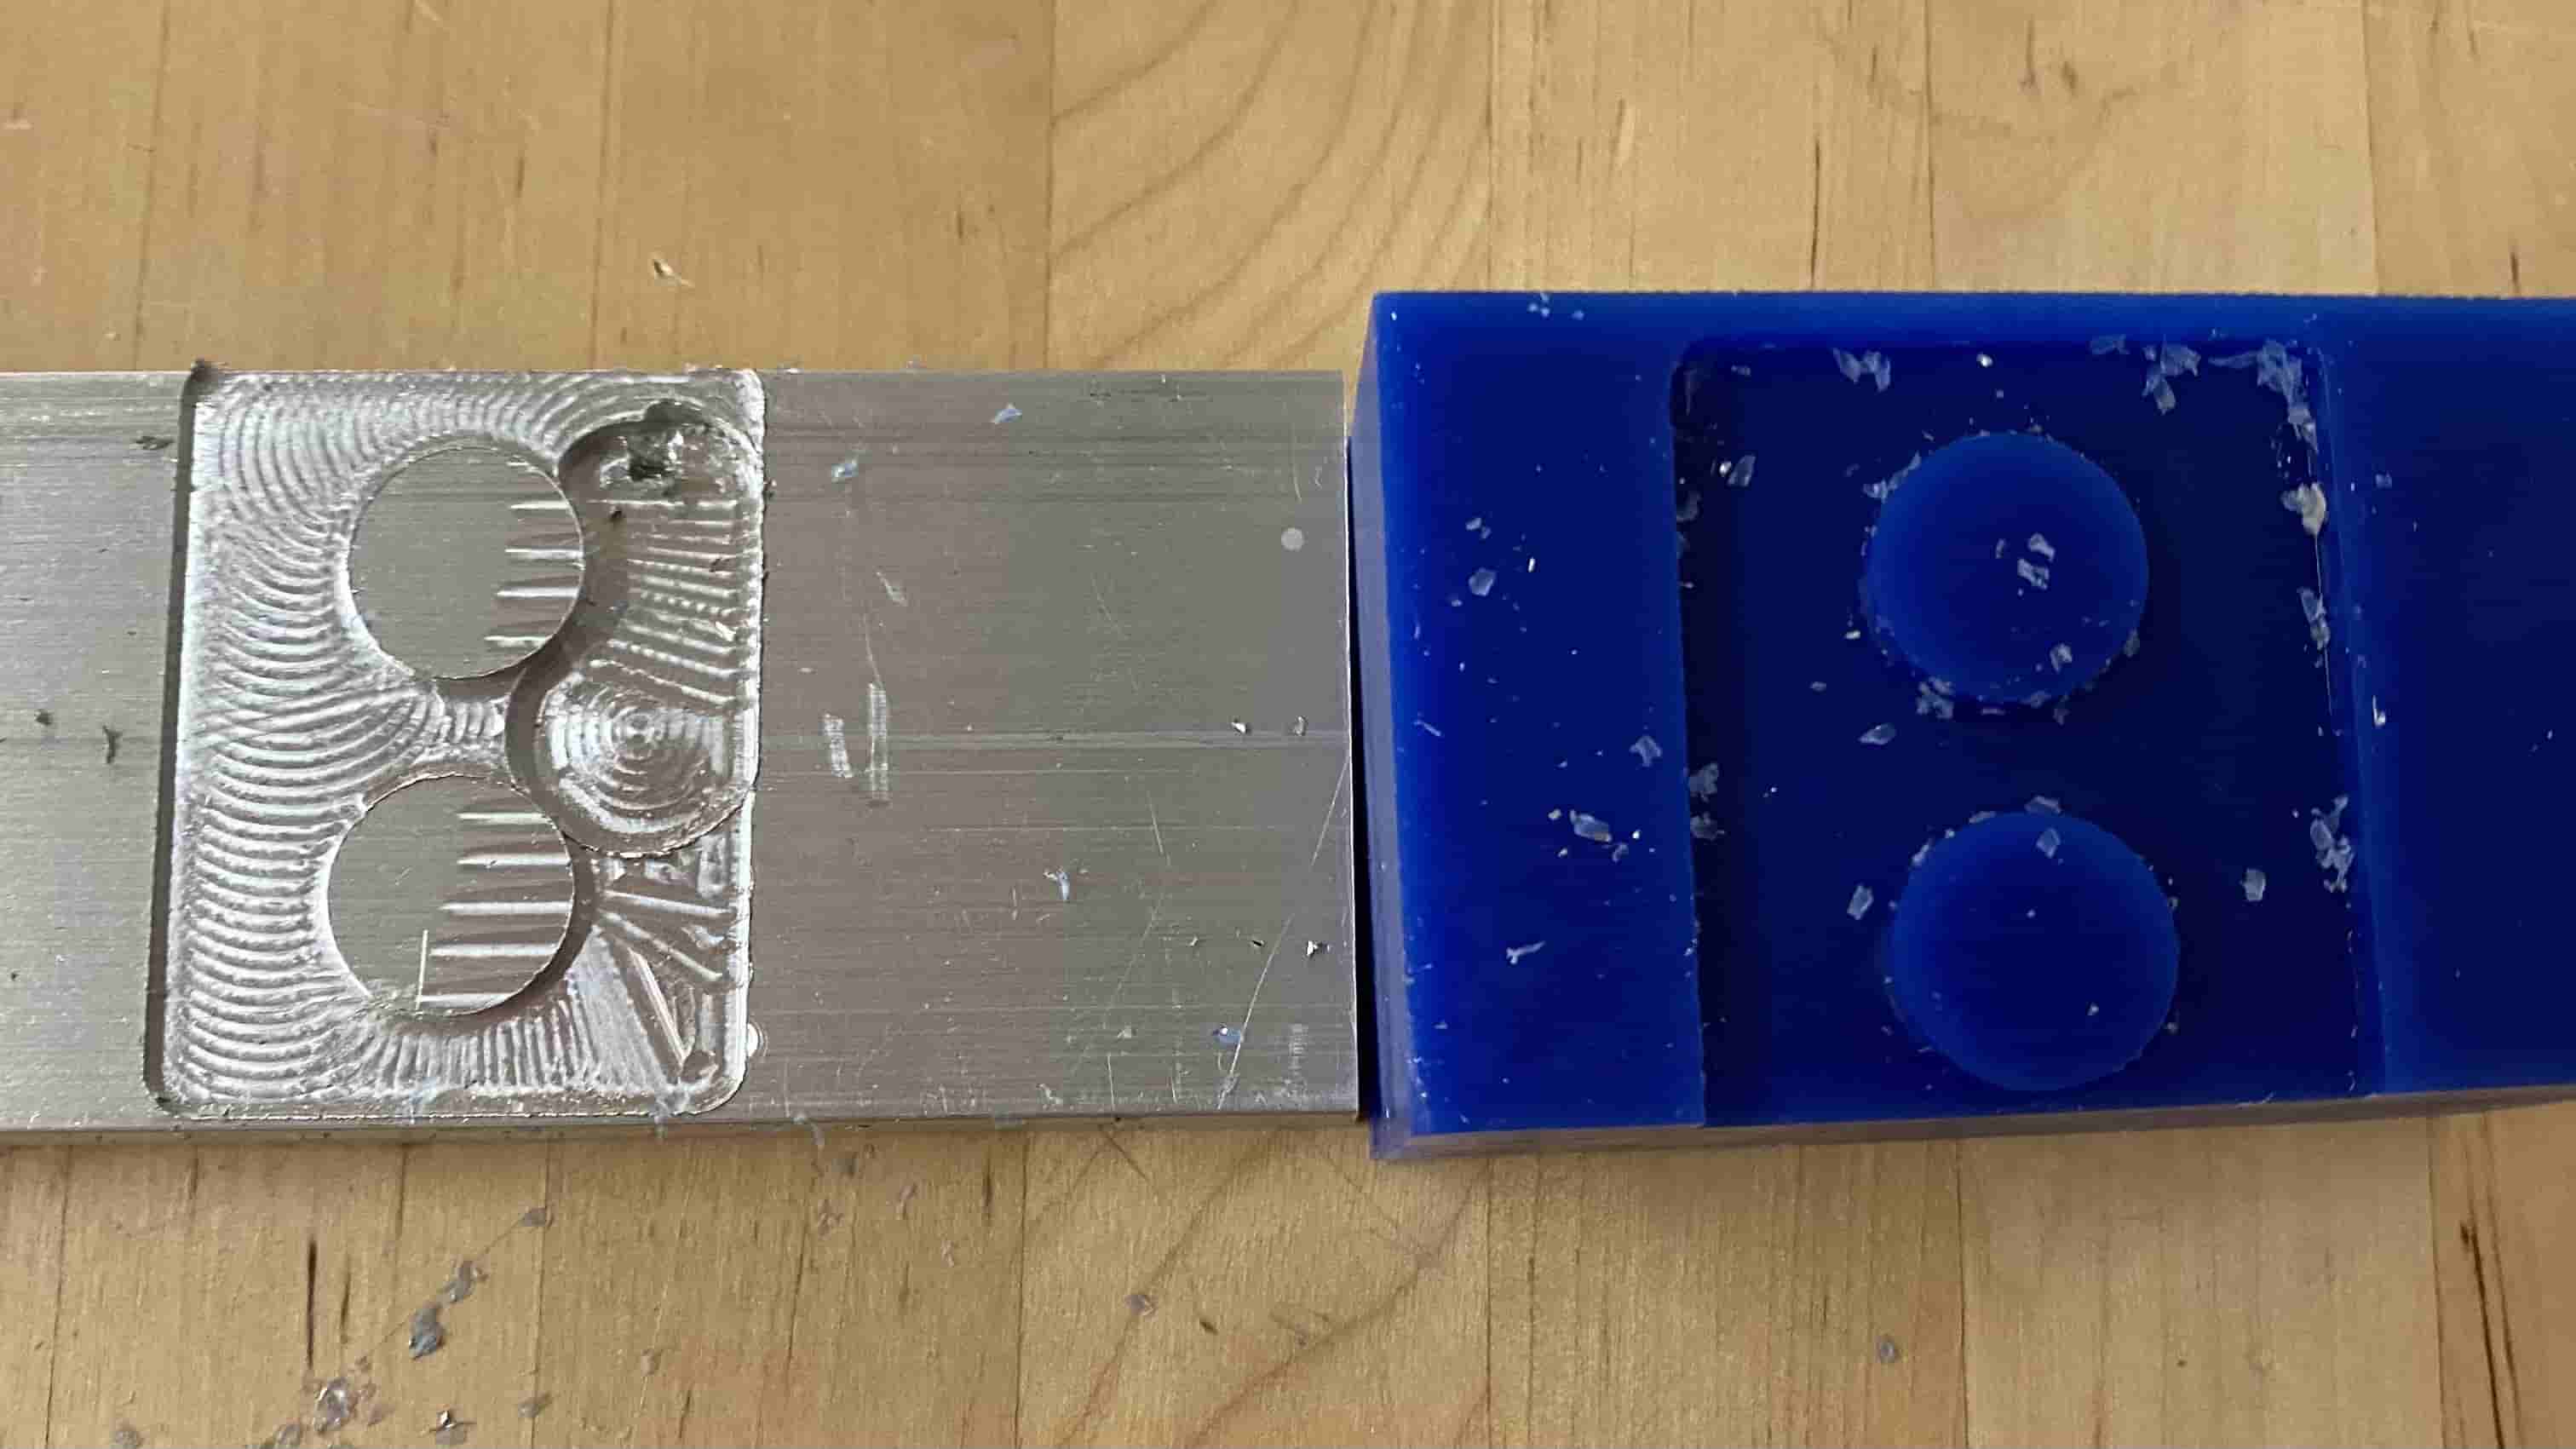
At the end, the end results looked like this^^