
WEEK 8
Embedded programming
Group assignment: compare the performance and development workflows for other architectures.
Individual assignment: read a microcontroller data sheet program your board to do something, with as many different programming languages and programming environments as possible
I have developed a weekly work plan that I describe in the following calendar.

1. Group assignment
Go to the Sedicupct website
2. Individual Assignment
2.1 ATtiny44 data sheet
Attach the microcontroller (ATTINY44-SSU). Datasheet
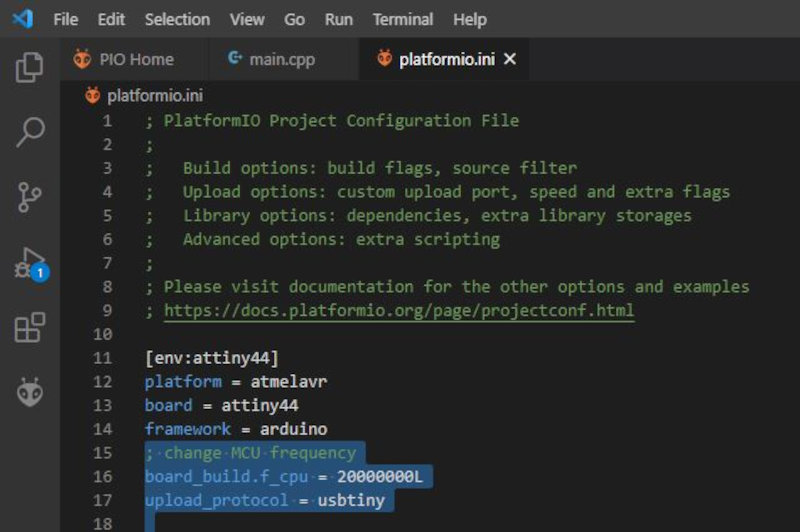
The Atmel® ATtiny24/44/84 is a low-power CMOS 8-bit microcontroller based on the AVR enhanced RISC architecture. By executing powerful instructions in a single clock cycle, the Atmel ATtiny24/44/84 achieves throughputs approaching 1MIPS per MHz allowing the system designer to optimize power consumption versus processing speed. In the diagram, the PA port (0-7) appears in blue and the PB port (0-3) is green, I also identify the VCC (Supply voltage) and GND (Ground.), The SRAM and EEPRON memories, the 32 registers (General Purpose Registre) connected to the arithmetic logic unit (ALU) and the ISP interface. Port B (PB3...PB0) Port B is a 4-bit bi-directional I/O port with internal pull-up resistors (selected for each bit). The Port B output buffers have symmetrical drive characteristics with both high sink and source capability except PB3, which has the RESET capability. To use pin PB3 as an I/O pin instead of RESET pin, program (‘0’) RSTDISBL fuse. As inputs, Port B pins that are externally pulled low will source current if the pull-up resistors are activated. The Port B pins are tri-stated when a reset condition becomes active, even if the clock is not running. Port A (PA7...PA0) Port A is a 8-bit bi-directional I/O port with internal pull-up resistors (selected for each bit). The port A output buffers have symmetrical drive characteristics with both high sink and source capability. As inputs, Port A pins that are externally pulled low will source current if the pull-up resistors are activated. The port A pins are tri-stated when a reset condition becomes active, even if the clock is not running. CRYSTAL OSCILLATOR: XTAL1 and XTAL2 are input and output, respectively, of an inverting amplifier which can be configured for use as an on-chip oscillator, as shown in Figure 7-2 Either a quartz crystal or a ceramic resonator may be used. The optimal value of the capacitors depends on the crystal in use, the amount of stray capacitance, and the electromagnetic noise of the environment. if we don't want to use the internal clock but an external clock, as we do with our ATTiny board, page 25 describes how to connect an external clock and what kind of external clocks you can use. When choosing an external clock, you must set the CKSEL fuses to 0000. On my Atiny44 board I used a resonator as shown in picture 8 resonator connection. One of the differences between crystal and resonator is that a resonator has build in capacitors. See this pic and focus on the electronics symbol: resonator has crystal symbol and on both legs capacitors: the communication pins: MISO pin 5 and MOSI pin 6, which we use to program our ATTiny using our USBTiny. I used my ATtiny45 programmer from week 4 "Electronic Production and connected it to the USB port of the computer. Connect the ATtiny44 helloboard FROM week 6 "Electronic Design" to 5vdc using the FTDI connector. Through the ISP connectors I connect my programmer with the helloboard. Program using ARDUINO IDE. In tools I select the ATtiny24 / 44/84 board, the ATtiny44 Chip, the Clock: "20 Mhz (external)", Port: COM3. Burn Bootloader. I have created a basic program in Arduino, to turn a led on and off using a button. Initially I used arduino pin = 2 but it didn't work, I found it to be an alternate pin. Use main pin = 8 and it worked. PlatformIO is a development environment designed for IoT applications, which runs on the Atom editor or Microsoft Visual Studio Code. It is compatible with more than 400 development boards. PlatformIO installation is very simple, you just have to download the Visual Studio Code, which is the Microsoft IDE, the free version. I have followed the following manual Install PlatformIO for VSCode / Get started Download and install Microsoft Visual Studio Code. . PlatformIO IDE is built on top of it . 1.Open VSCode Package Manager. 2.Search for the official platformio ide extension. 3.Install PlatformIO IDE. I find an error in the installation. Clic Check avaliable solutions I have used solution 3. Python installation runs. Reset VScode, close and reopen the program. Verify that the platformio icon exists. To create a project using ATtiny44 I have followed the steps of Josephus-vanderbie-Fabacademy2019 PlatformIO Click on plaformIO: Home. Clic en + New Project. Select the Board (Generic ATtiny44 (Atmel). When a project is generated, the necessary folders and basic files are created, in some cases we will not use all of them. In this case, for the platformIO, the following will be generated:. In fact, the main.cpp file is the main file of your program and if you open it you will see that it is ready to be compiled with the necessary includes. If you are used to * .ino files you will see that it is the same only that a header #include To compile and upload the program, some icons will have appeared in the lower left to be able to work more comfortably. They are like the ones in the Arduino IDE, in addition to more advanced functions. I leave you here the most common ones. Configure the platform to upload the code to ATTiny. Open the platformio.ini file. Next open the main.cpp in the src folder and write the following code to create a new blink sketch. Copy the following code. Enter the platformio.inio and modify the code. Finally, we can compile and load our code. I have followed the tutorial of Adrian Torres ADRIANINOto mill, soldering and program the ATtiny1614. Download the .png images of the traces and contour. I opened the fabmodule.org and uploaded the images and configured the parameters to use the SRM-20. Use a template to organize electronic components. First solder the ATtiny1614, the smaller components and lastly the FTDI, UPDI connectors. I have followed the following tutorial SpenceKonde/megaTinyCore for the installation of Boards Manager in Arduino. Open Arduino IDE. Use Neil / Adrian's Blink program, on pin 8 on Arduino the LED and button on pin 10. The connection that Adrian uses needs the FTDI-USB and connect the UPDI + VCC module to the board, in this case to the Adrianino that has the three pins (UPDI + GND + VCC). I am going to use another configuration using the FT230X adapter. I have connected it directly to the UPDI connectors of the Adrianino. When I compiled I get an error message. In the Regional Review, Nuria and Adrian tell me that the FT230X had to be hacked (change the order of the RX and TX) and that the connection of the FT230X adapter must first be connected to an FTDI / UPDI Adapter and then to the Adrianino. I have verified that a track of the FT230X Adapter has been damaged so I use an FTDI232 cable instead of the FT230X. I have compiled and it worked. This week was a little easier than the previous ones, since I only had to use the programming. At first I was not sure which programming language I would use, but in the end they recommended that I try using the platformIO which is very similar to the Arduino IDE. Programming with the Arduino IDE was straightforward. Using platformIO is easy to use, you just have to perform a few previous steps, the advantage is that it allows me to use different microcontroller structures. I liked using the ATtiny1614 and the experience following Adrianino's tutorial was simple and easy to use. I would like to try other programming structures and software to expand my knowledge and compare the pros and cons of each of them. Blink_Button_Gustavo ATtiny44 (.ino)ATtiny44
Features
Pin configurations


2.2 Programming ATtiny44 with Arduino IDE


2.3 Programming ATtiny44 with Platformio


2.4 Programming ADRIANINO (ATtiny1614) with Arduino


4. Conclusions of the week
How was the week?
What went wrong ?
What went well?
What will you do different next time
My files
Electronic board design in Eagle