
WEEK 7
Computer-Controlled Machining
Group assignment: do your lab's safety training test runout, alignment, speeds, feeds, materials, and toolpaths for your machine.
Individual assignment: make (design+mill+assemble) something big (~meter-scale).
I have developed a weekly work plan that I describe in the following calendar.
1. Group assignment
Go to the Sedicupct website
2. Individual Assignment
I have made two designs, the first is designing a motion platform for my final project and the second is building a designer chair.
2.1 Design + mil + assemble (movement platform - final project)
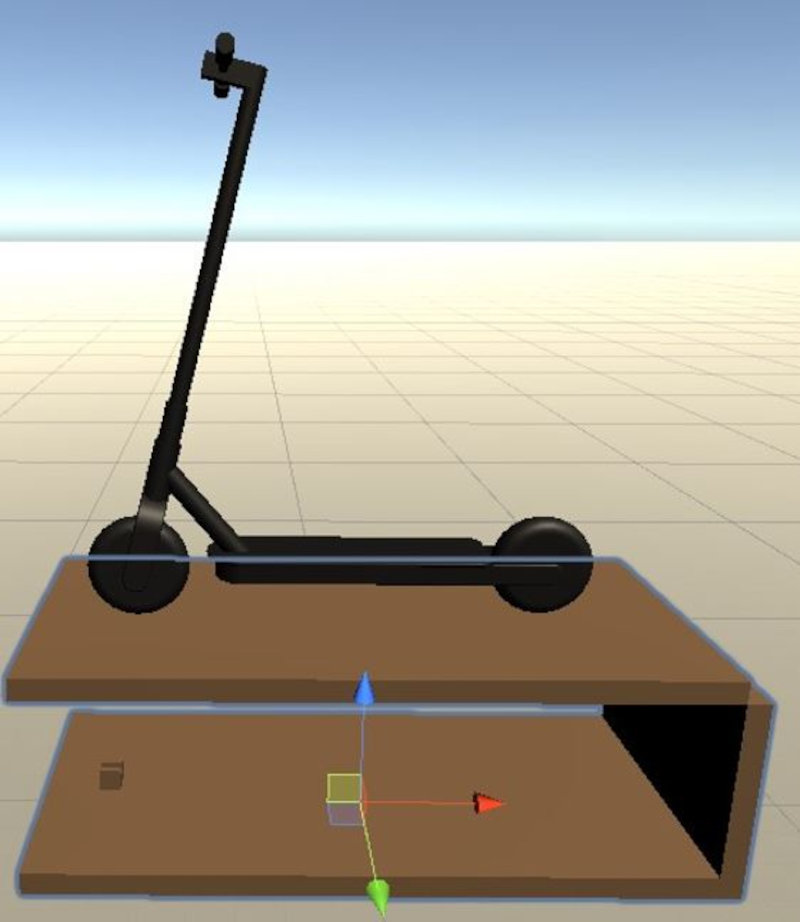
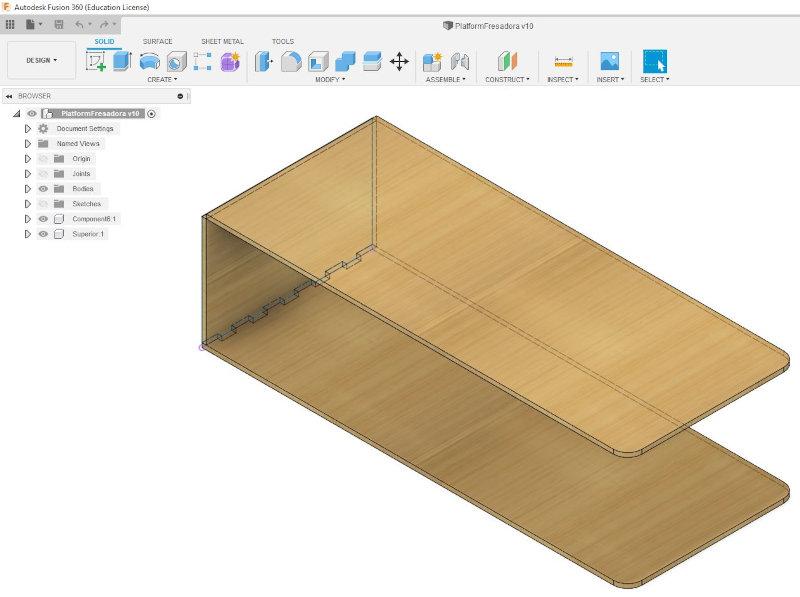
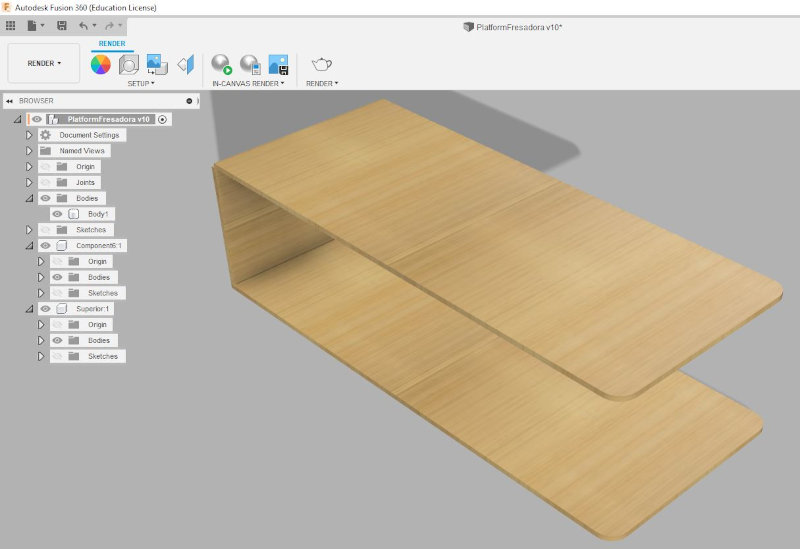
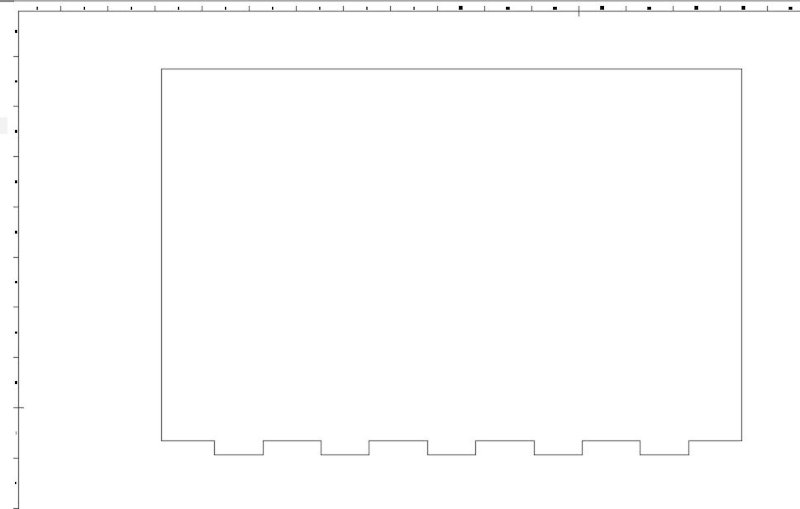
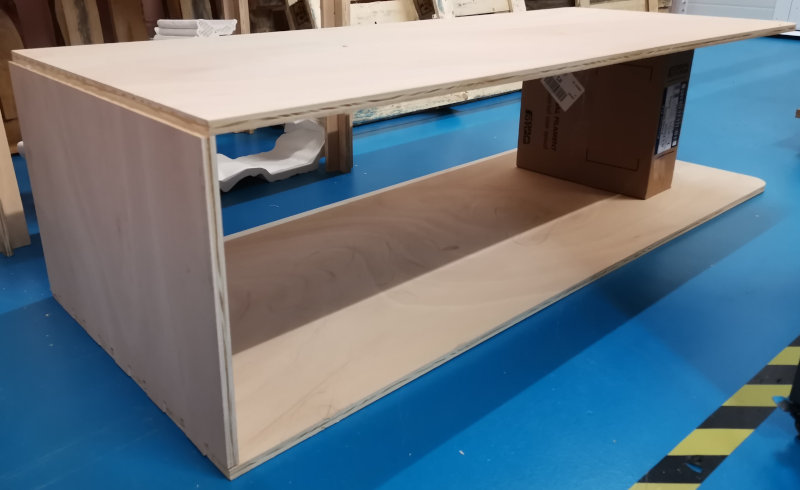
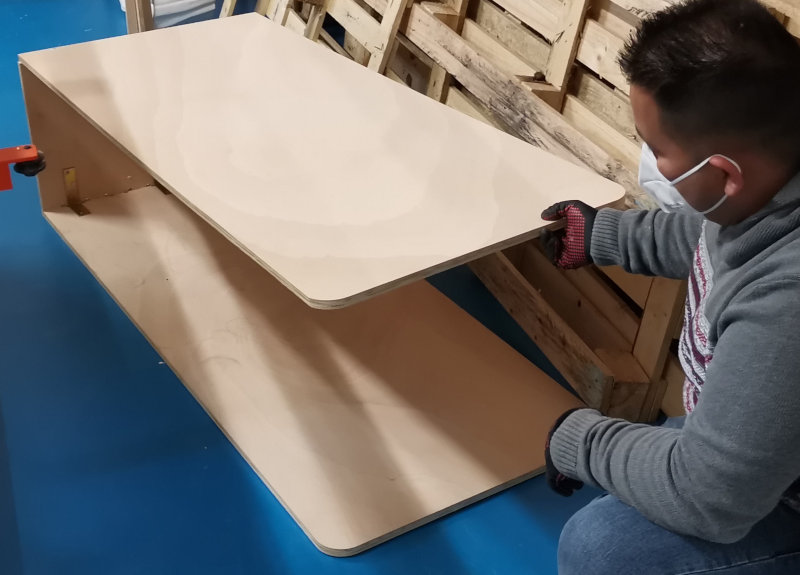
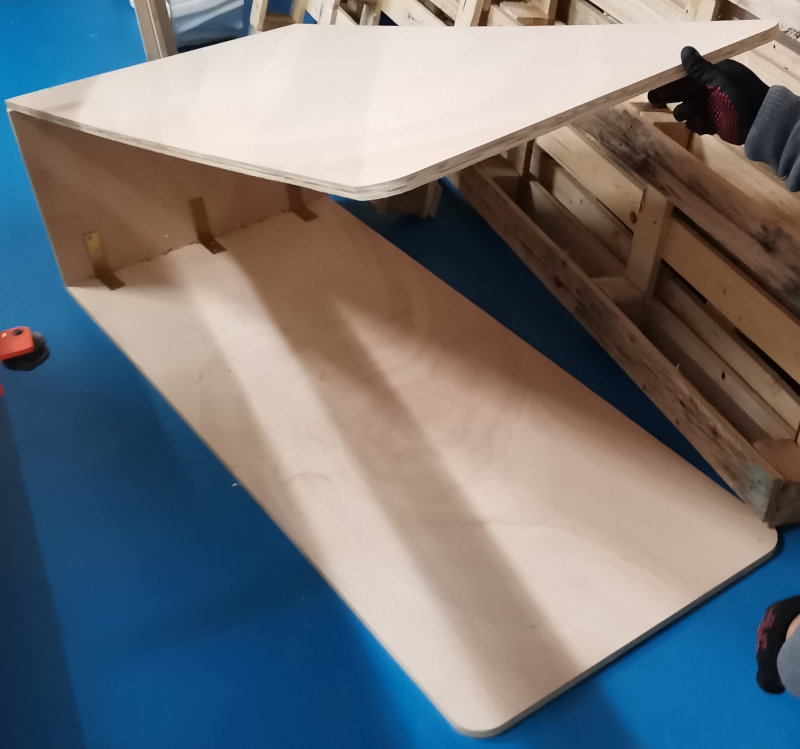
I have designed a wooden motion platform to generate pitch motion. Design in fusion360 the three parts (bottom, side and top).
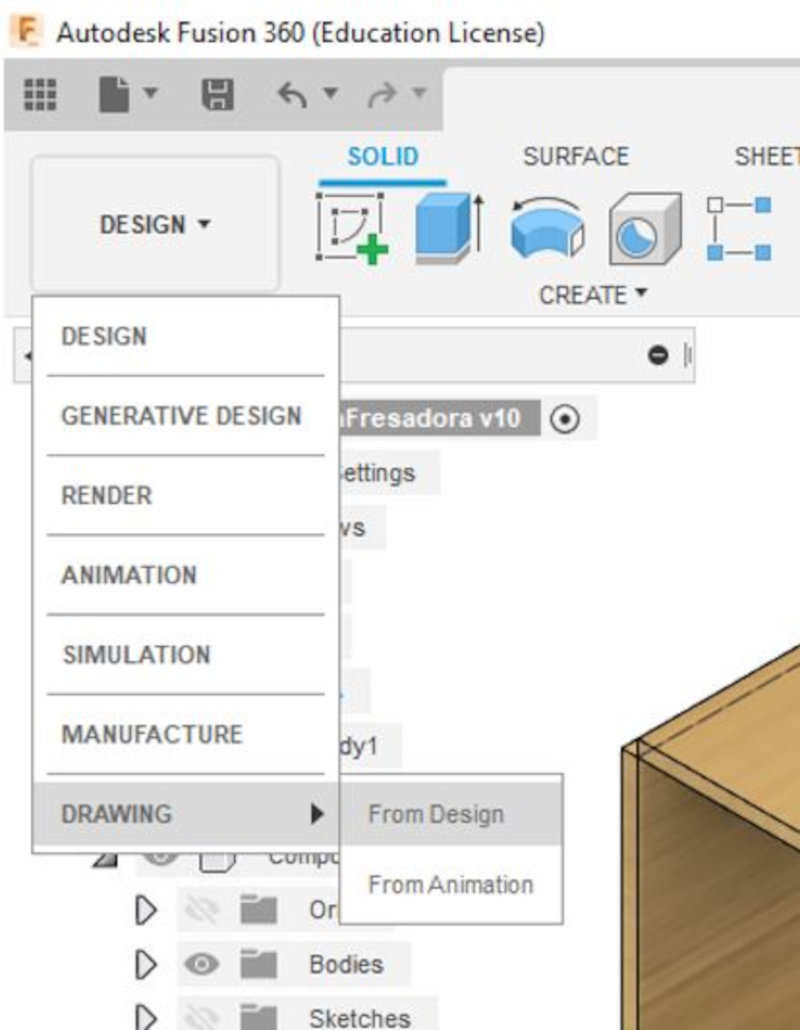
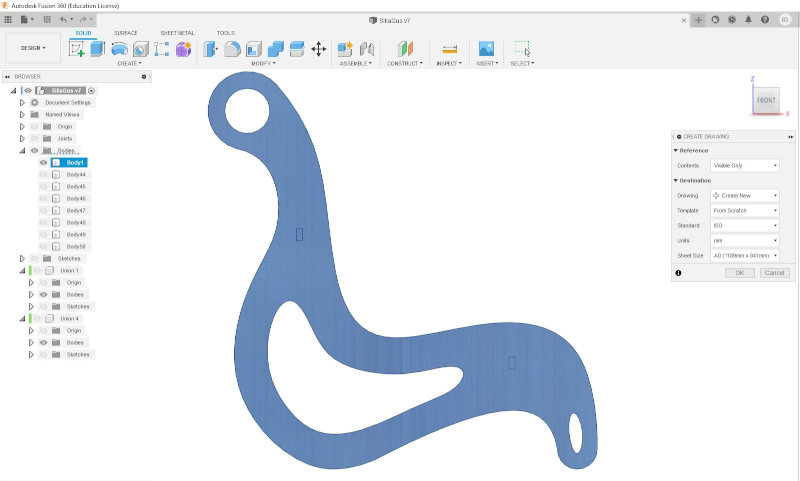
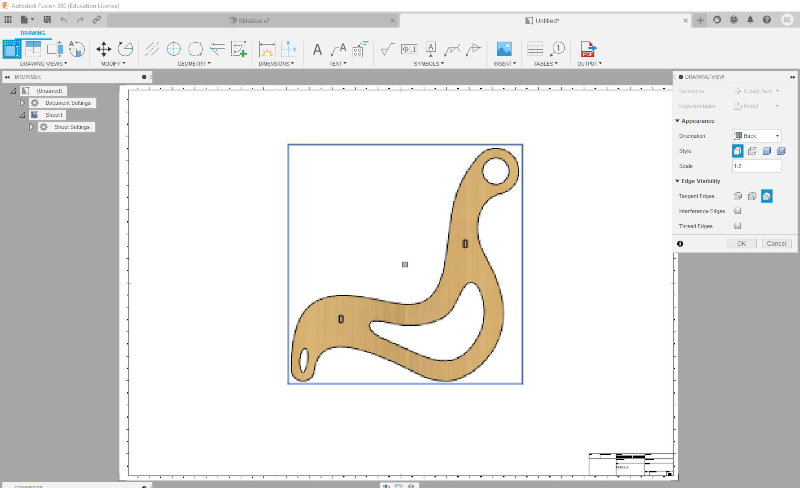
Open Drawing (from Design) to display the image of each element in a template.Fusion360 only has the formats (A4 to A0). Select units in mm.
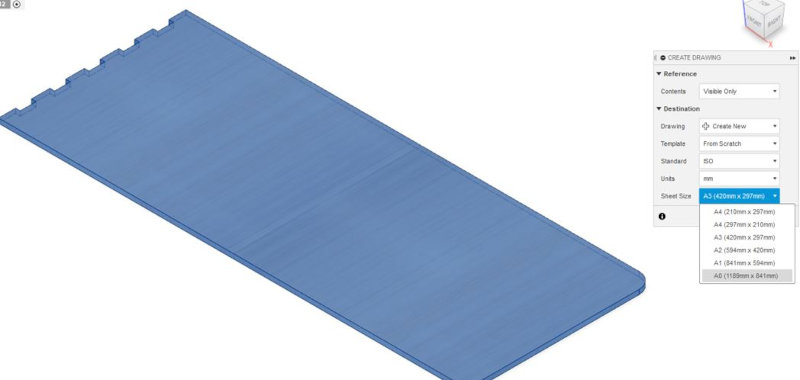
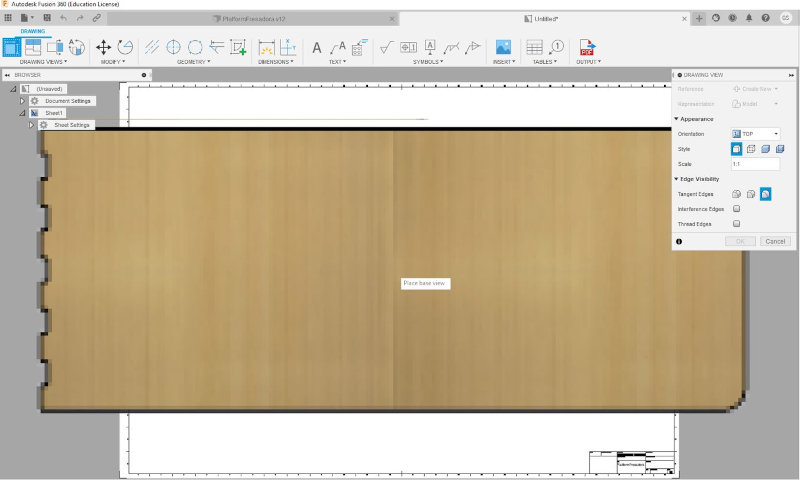
When selecting 1: 1 scale, the model is too large and falls outside the template frame.
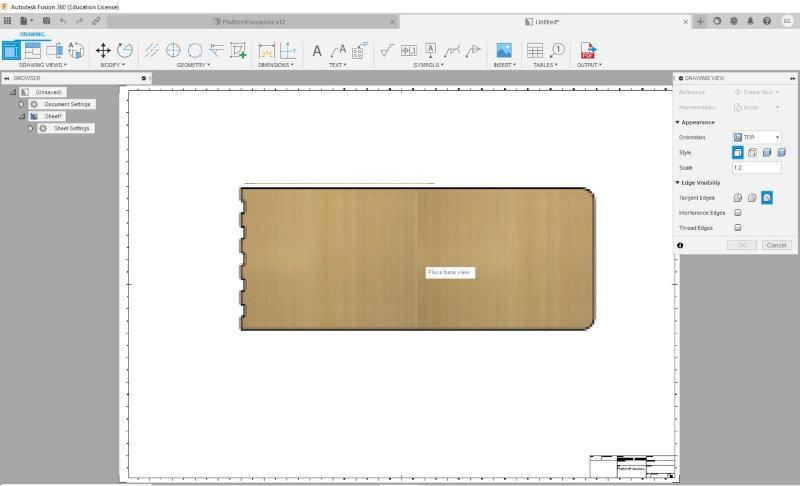
Change to scale 1: 2 so that the piece enters the template.
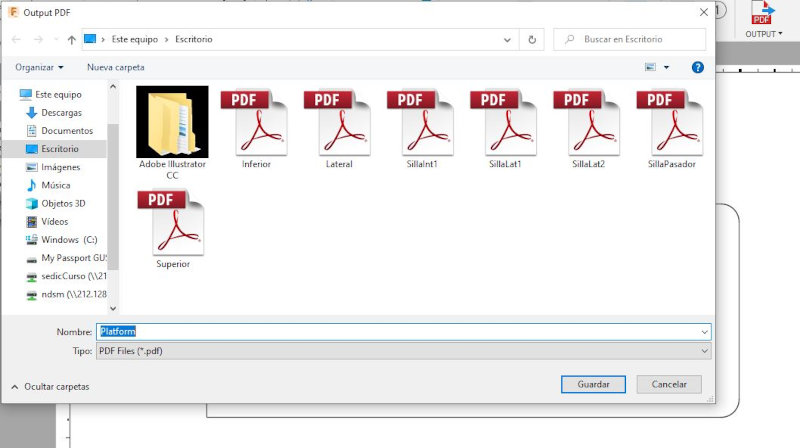
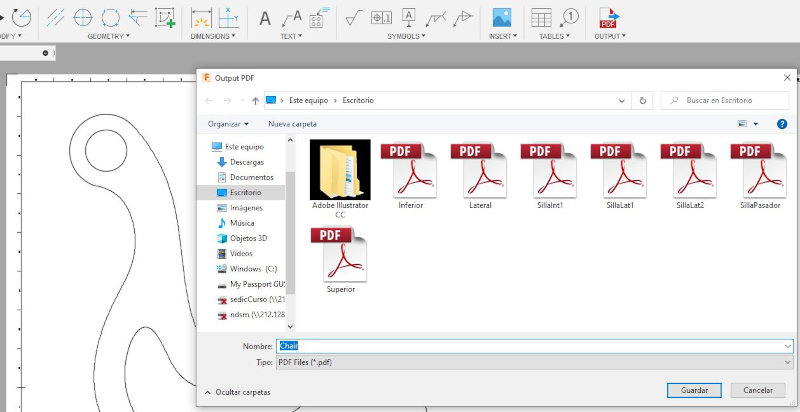
Then the file (OUTPUT - Output DDF or Output Dwg) is exported.
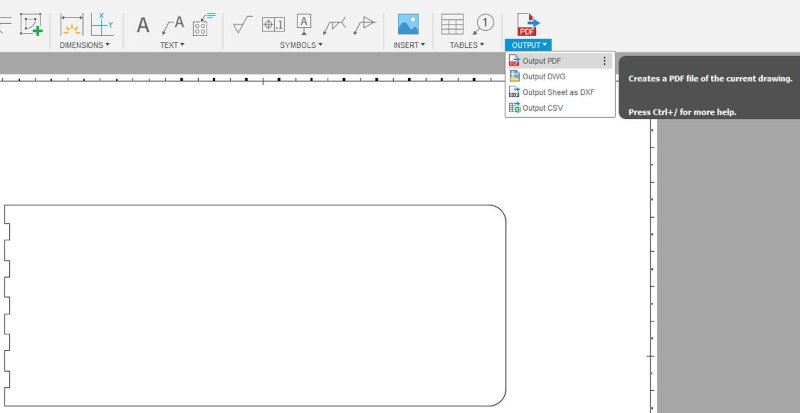
I recommend doing it in .pdf to open it in Adobe Illustrator.
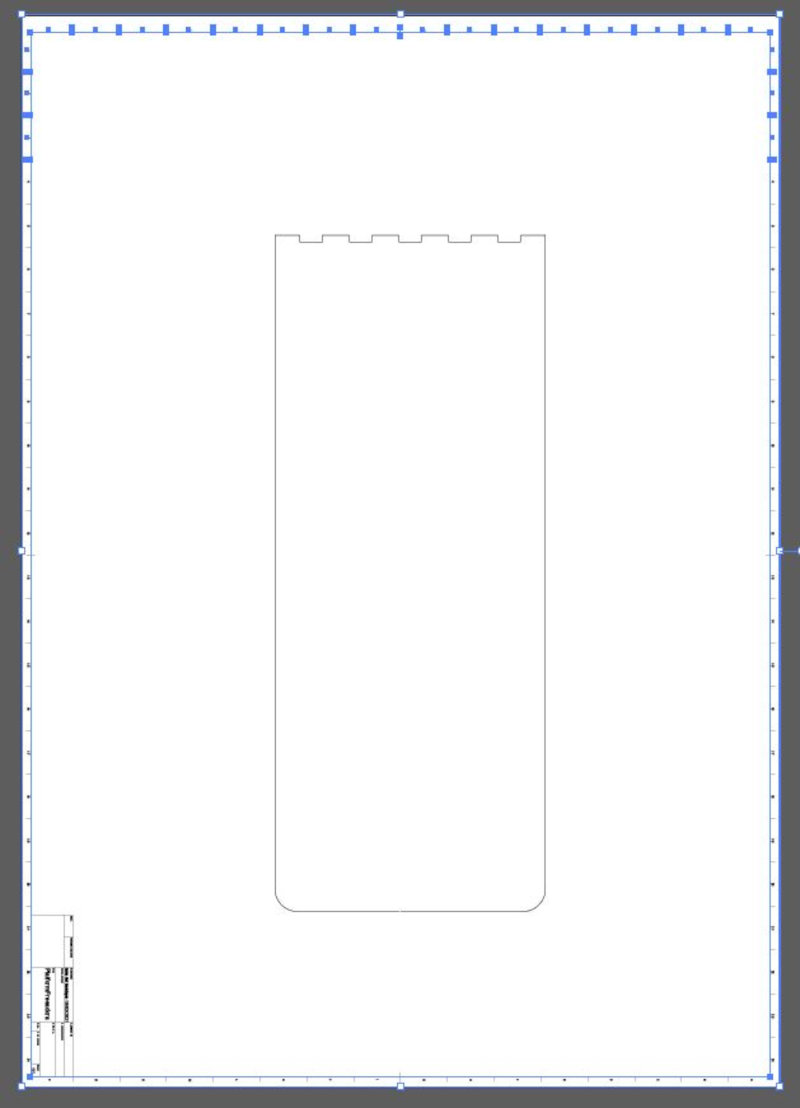
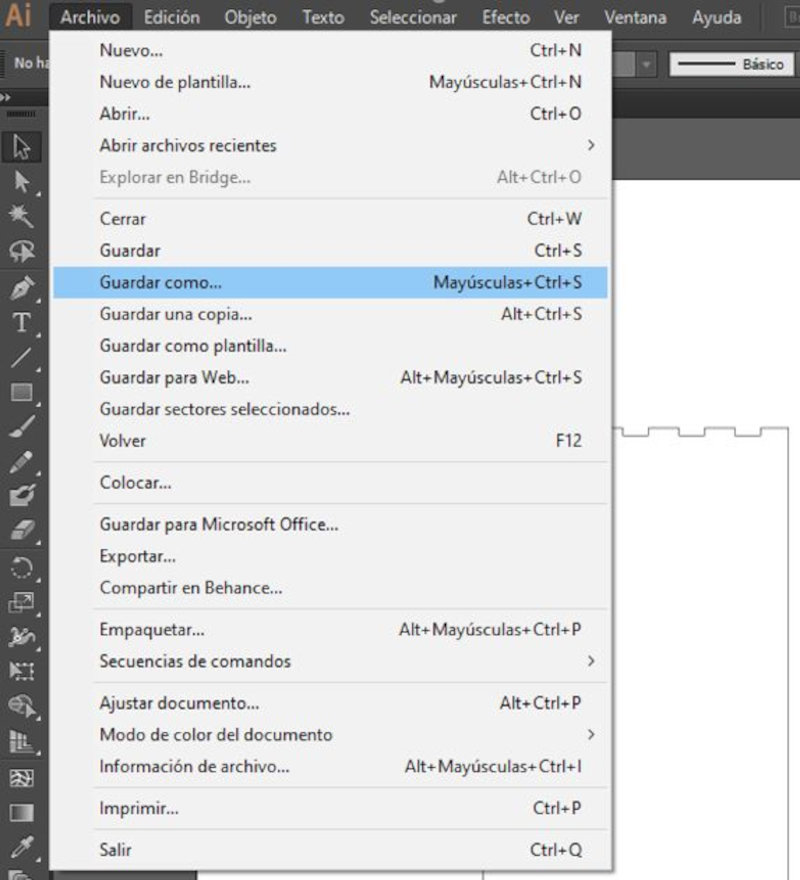
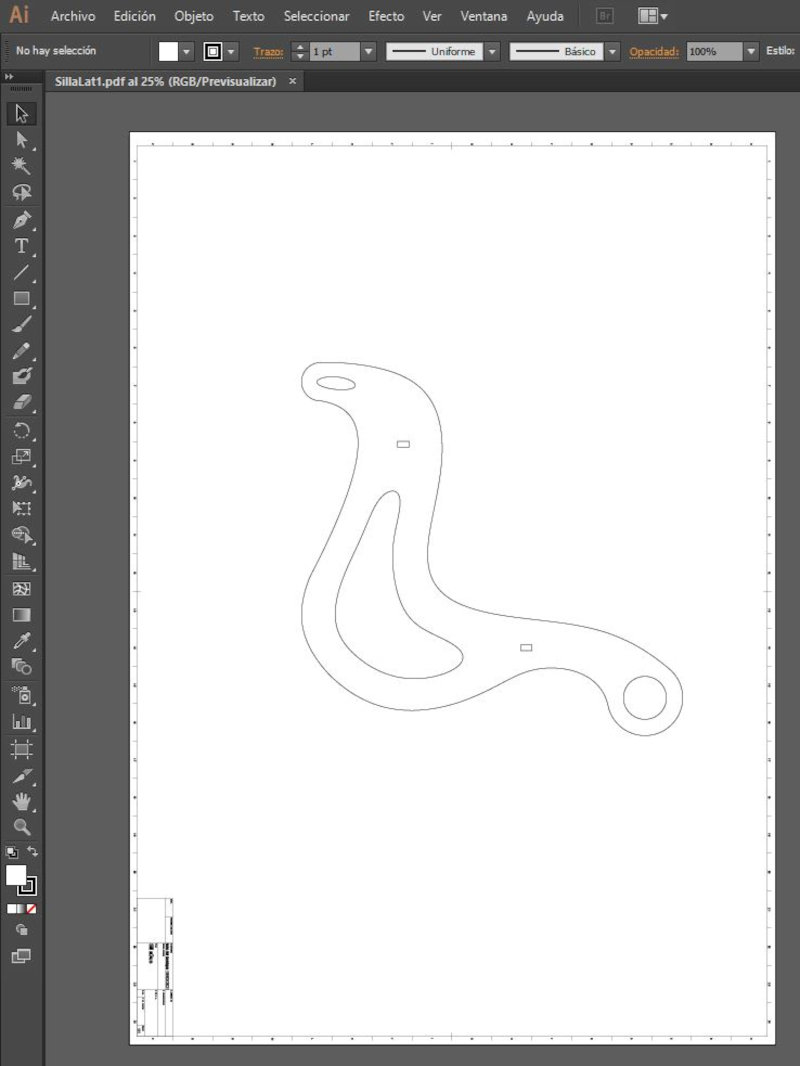
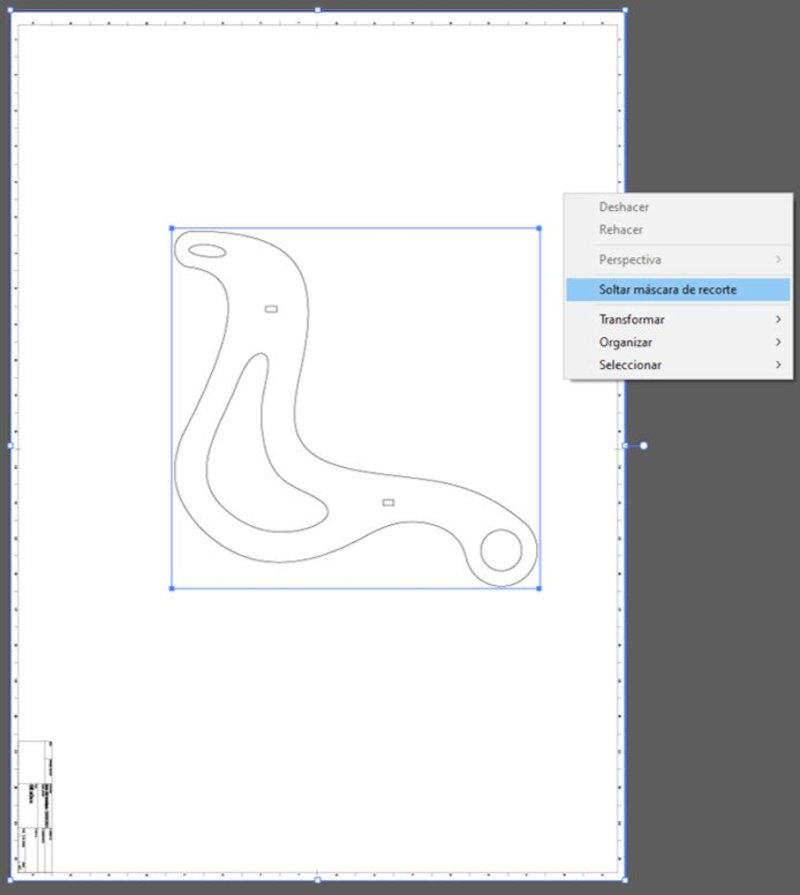
Open Adobe Illustrator and load the .pdf file to generate the vectorized image. Then right click on the entire model and click on (drop clipping mask).
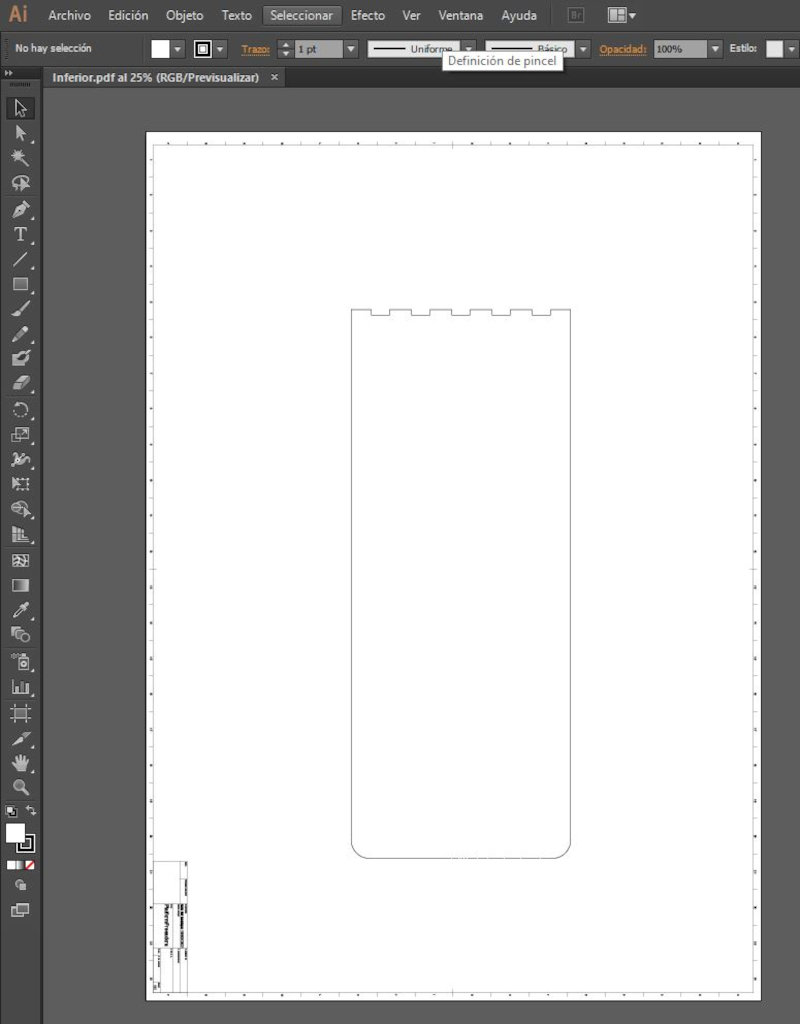
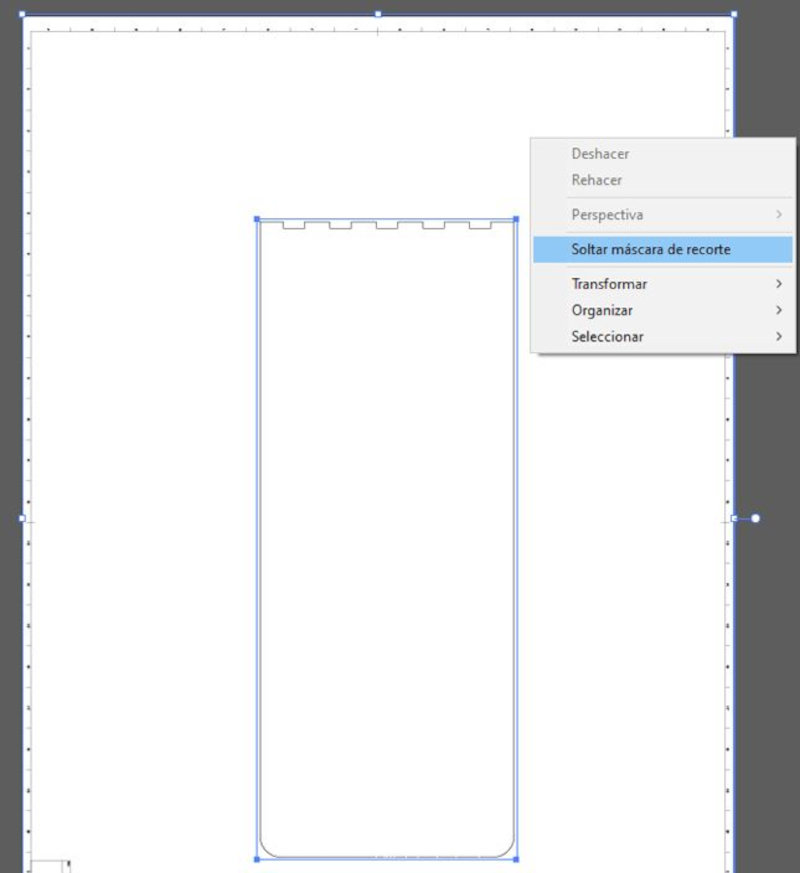
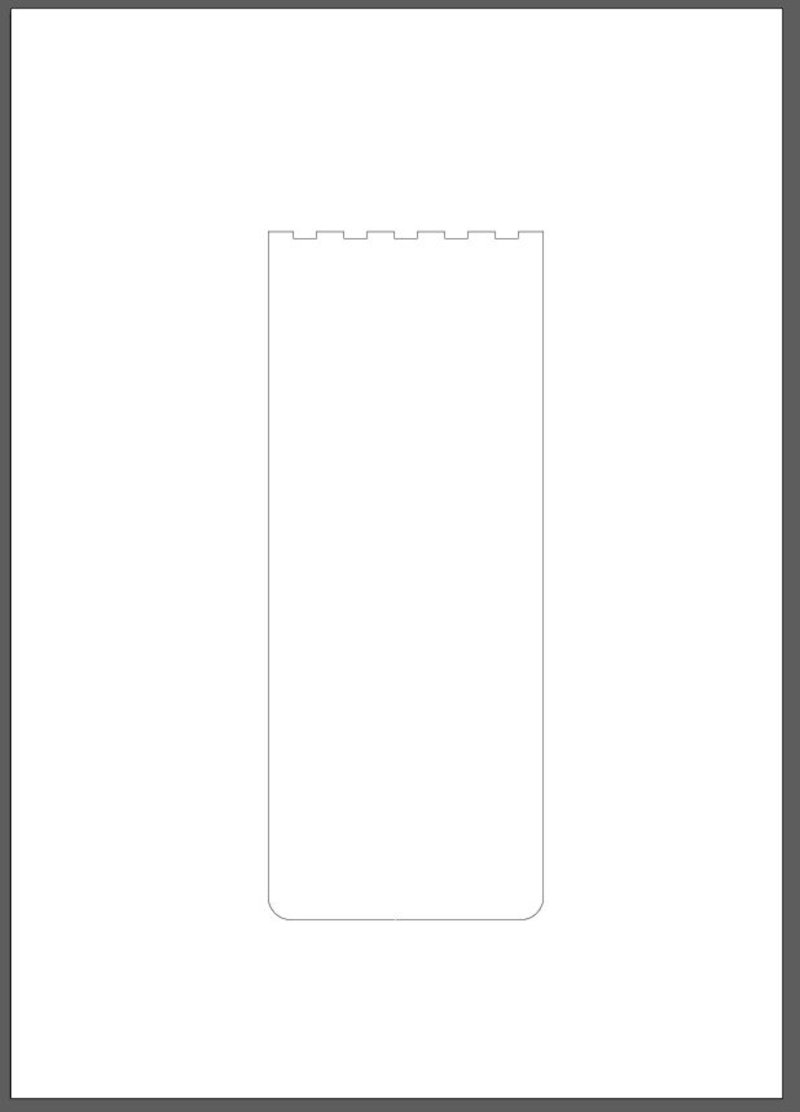
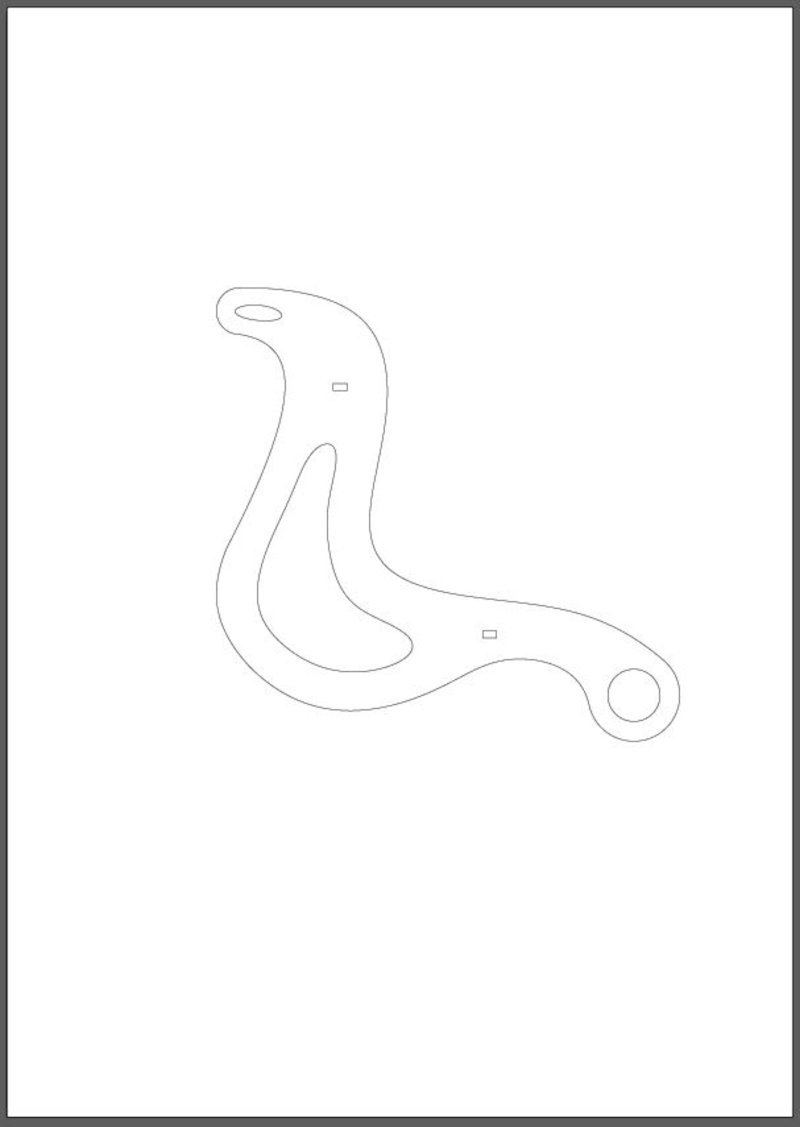
Delete the model from the template and leave only the part model. Select (Join) to join all the lines in the image.
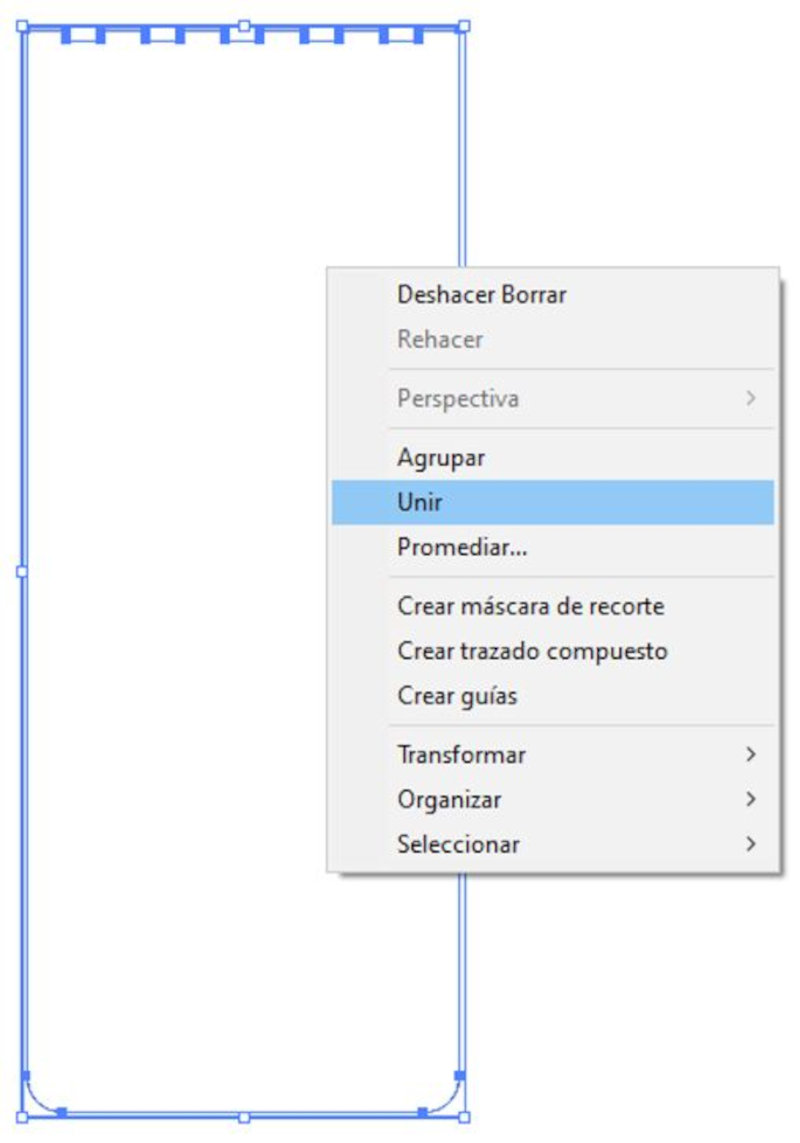
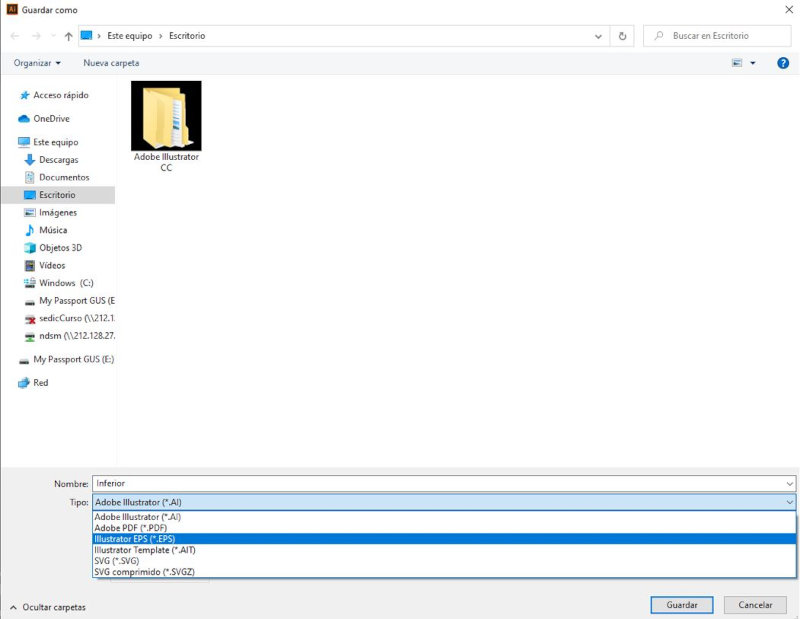
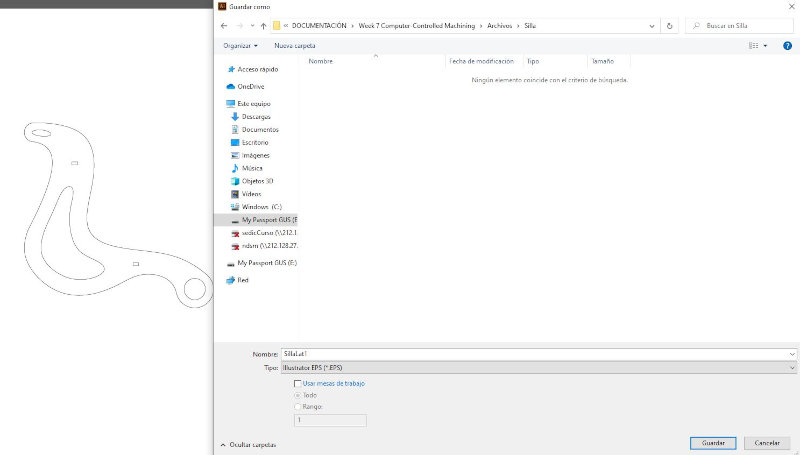
Save the file (Save As…) in Encapsulated PostScript (.eps) format.
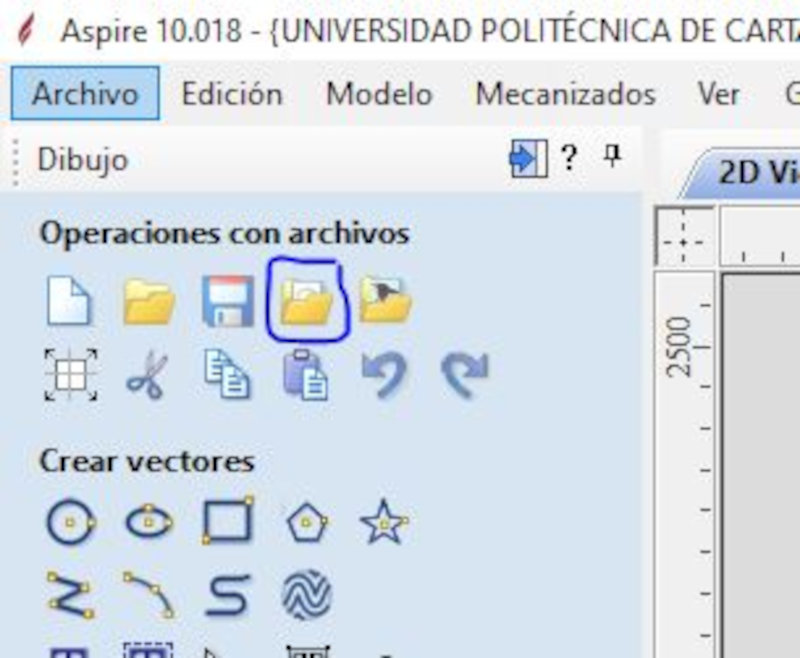
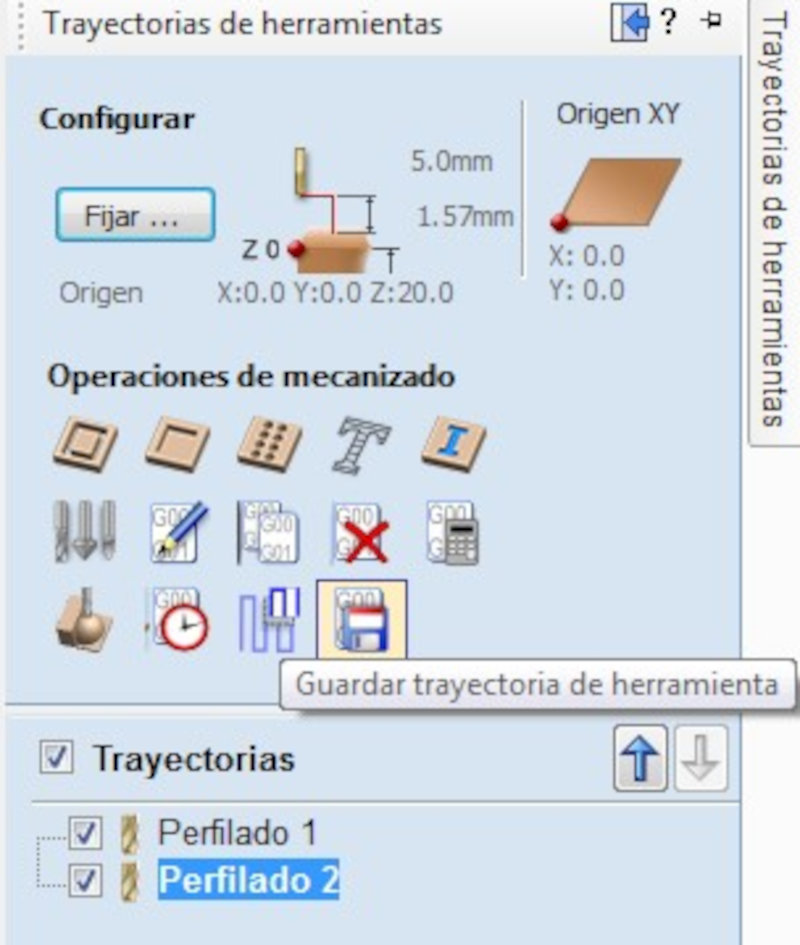
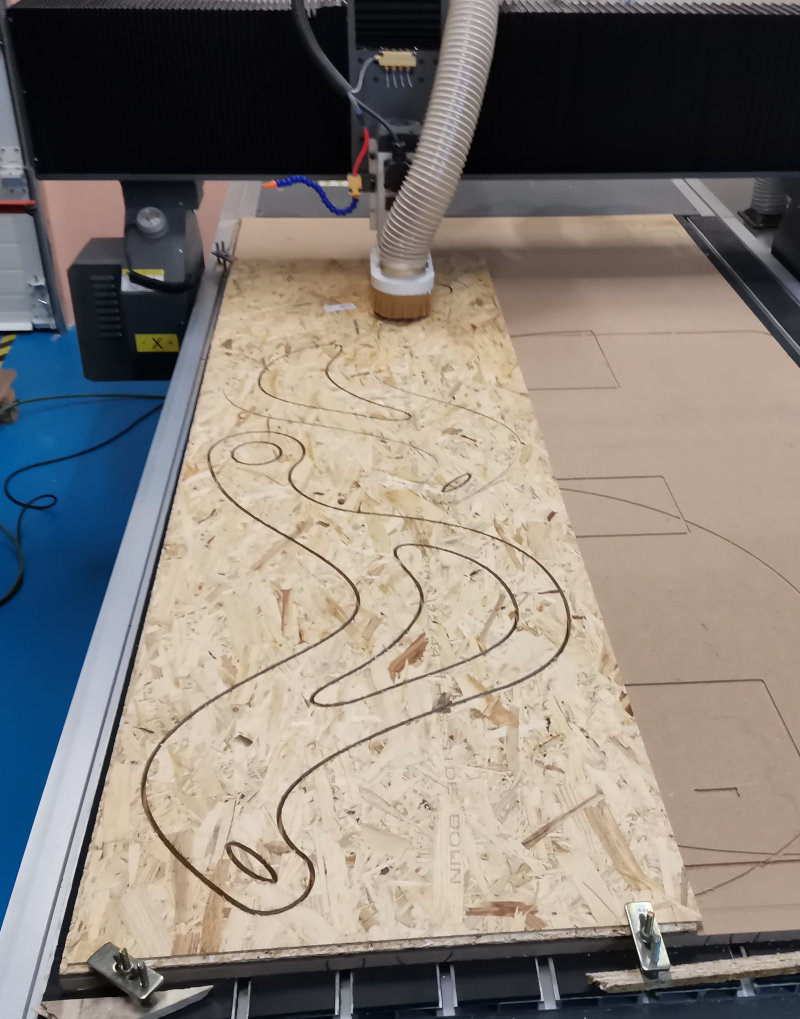
Open the milling machine program (Aspire 10.018).
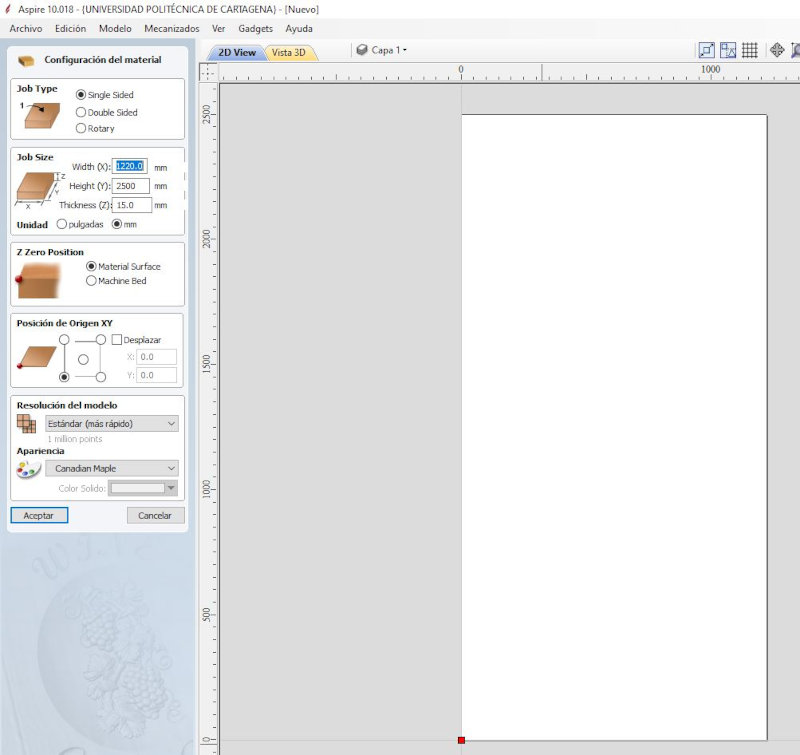
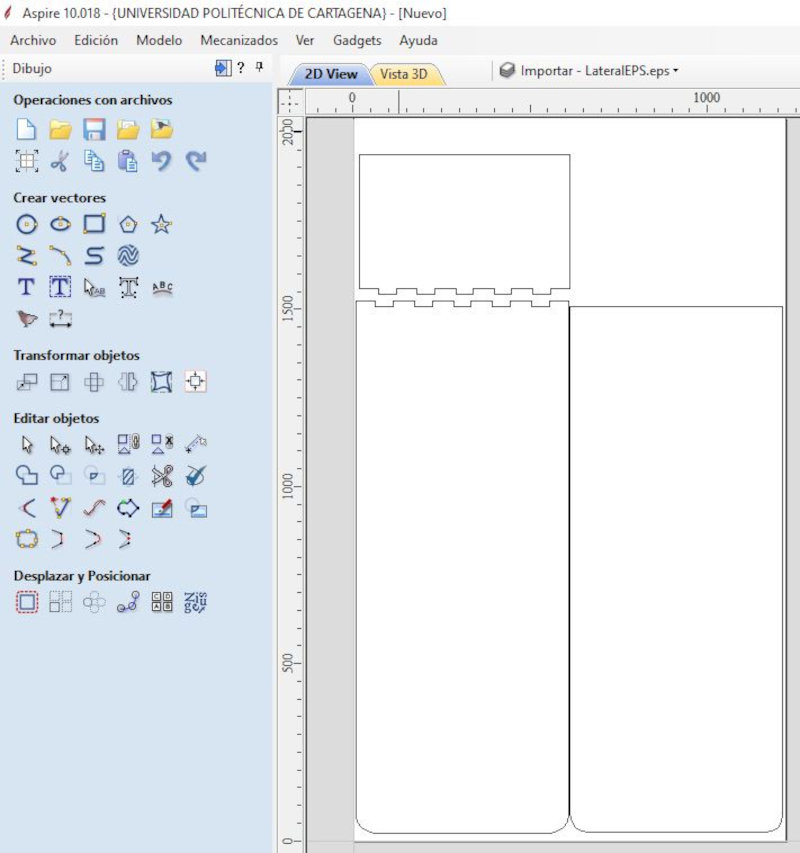
Edit the "Material Settings" values according to the dimensions of the wood you are going to use. In my case it is a DFM wood (1200 x 2500 x 15 mm). Click OK.
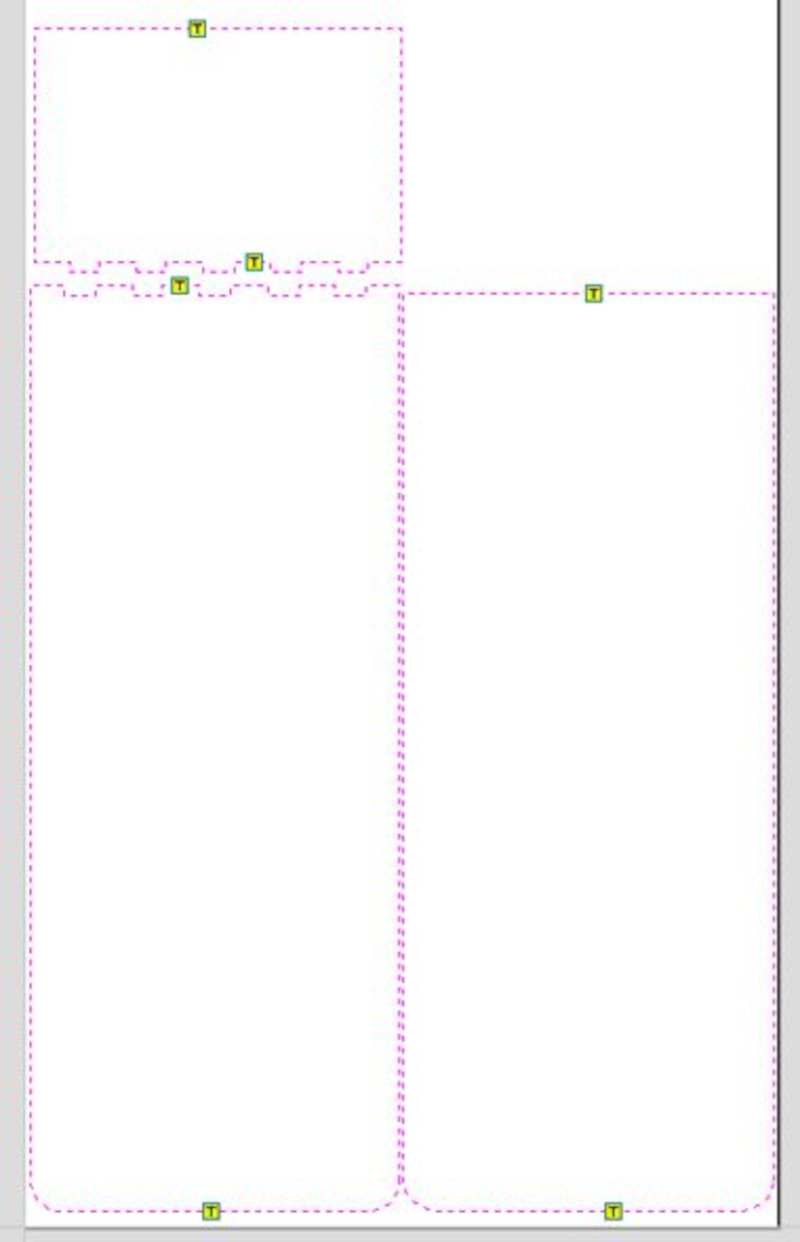
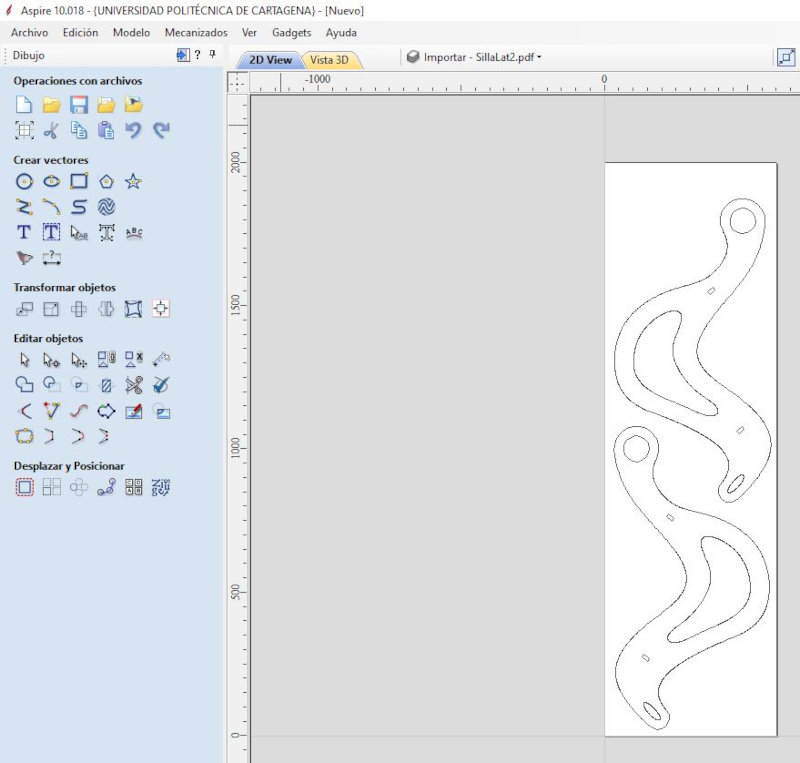
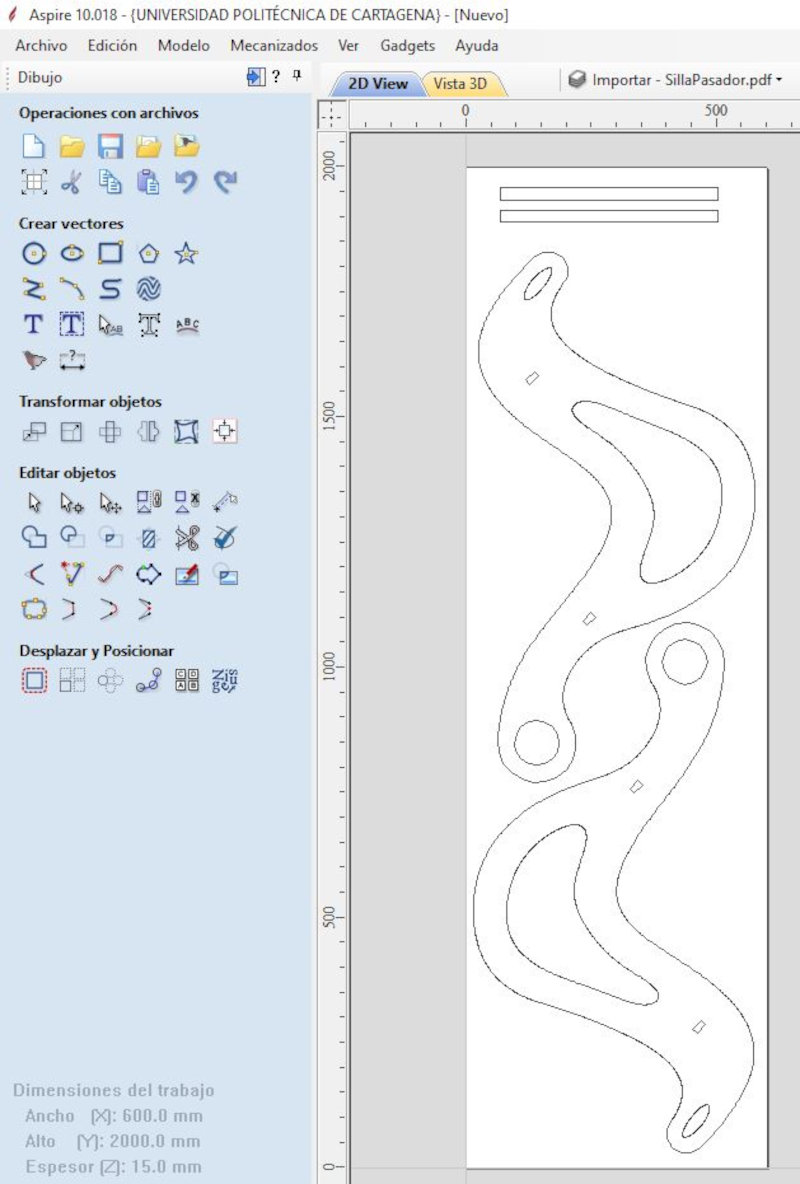
Select the icon (Import vectors from a file) and select the files (.eps).
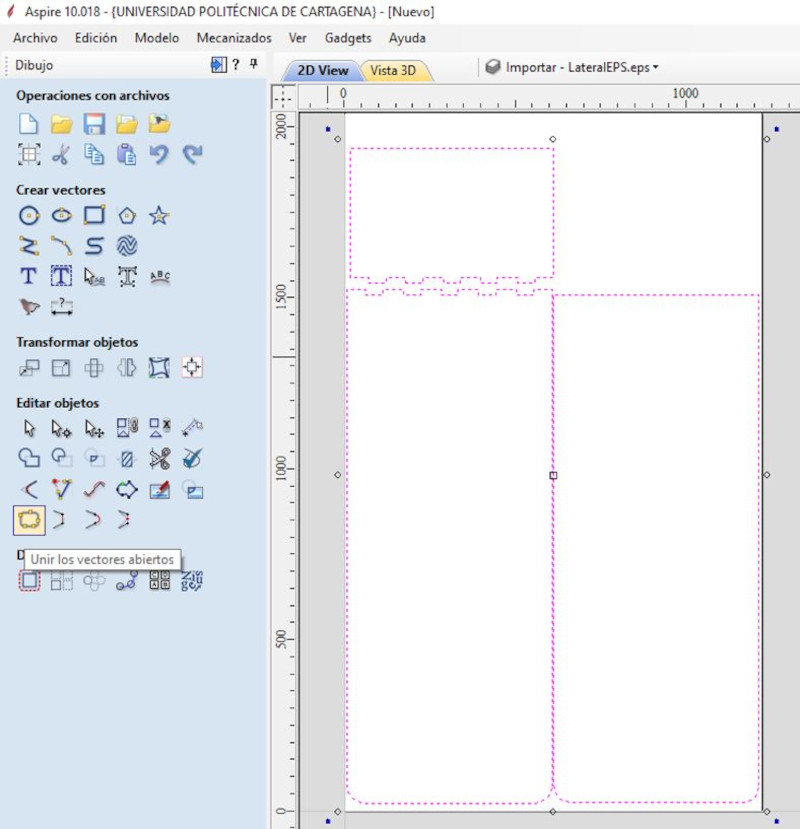
Join the open vectors.
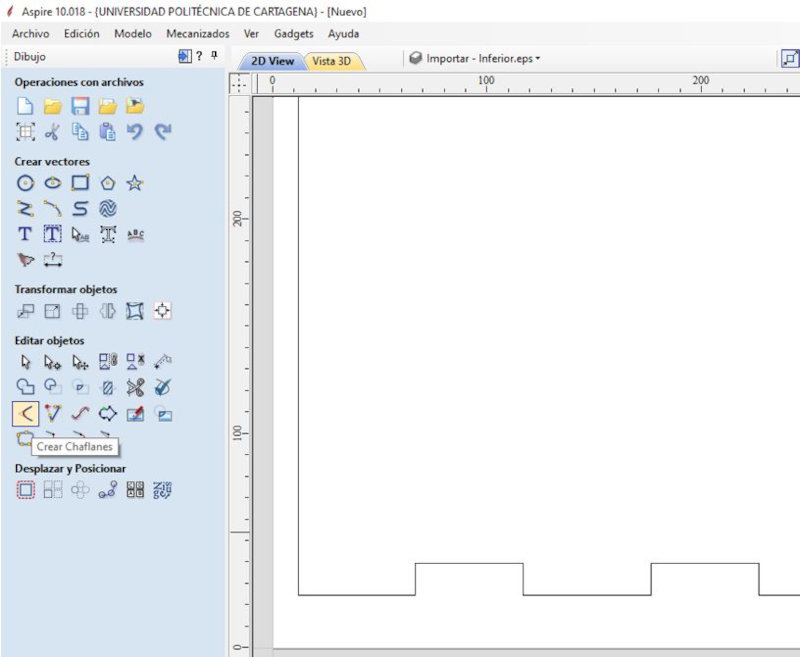
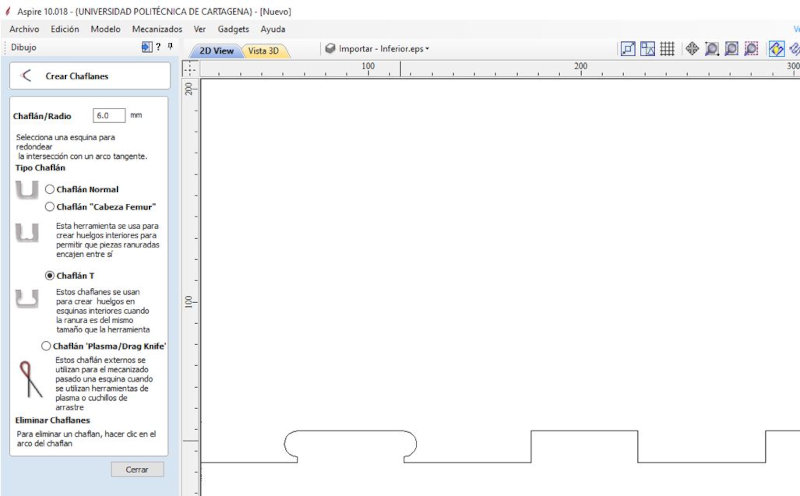
Select the (Create Chamfer) icon.
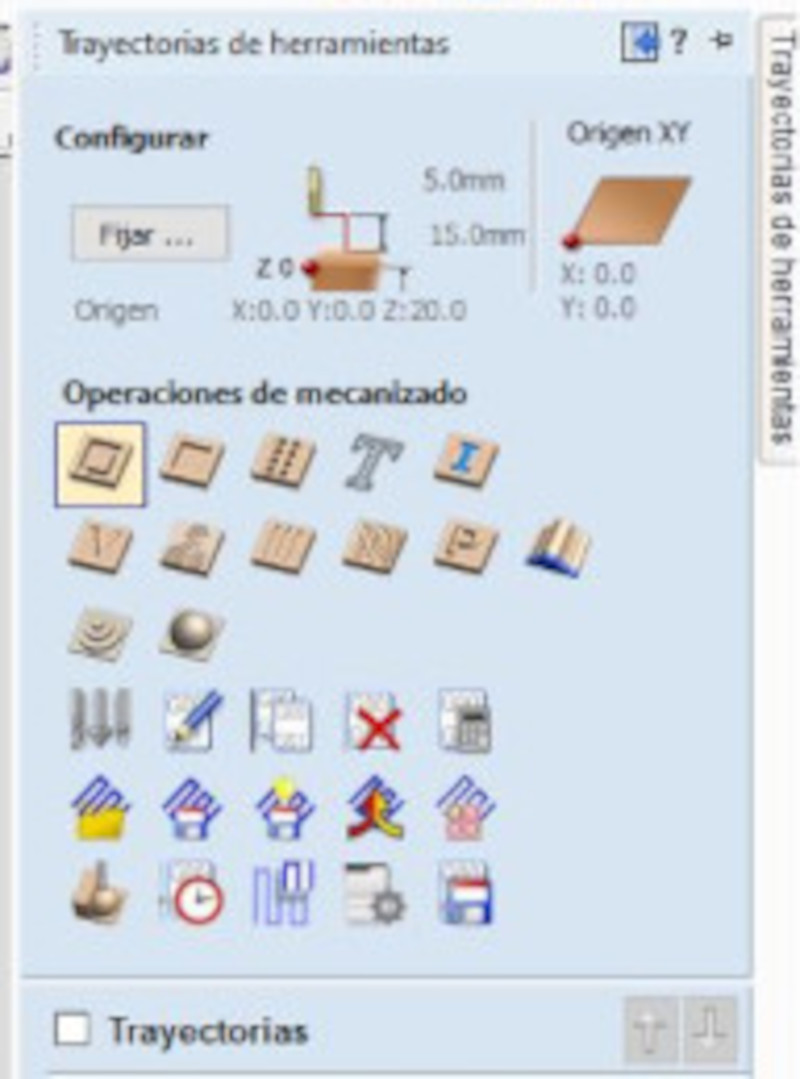
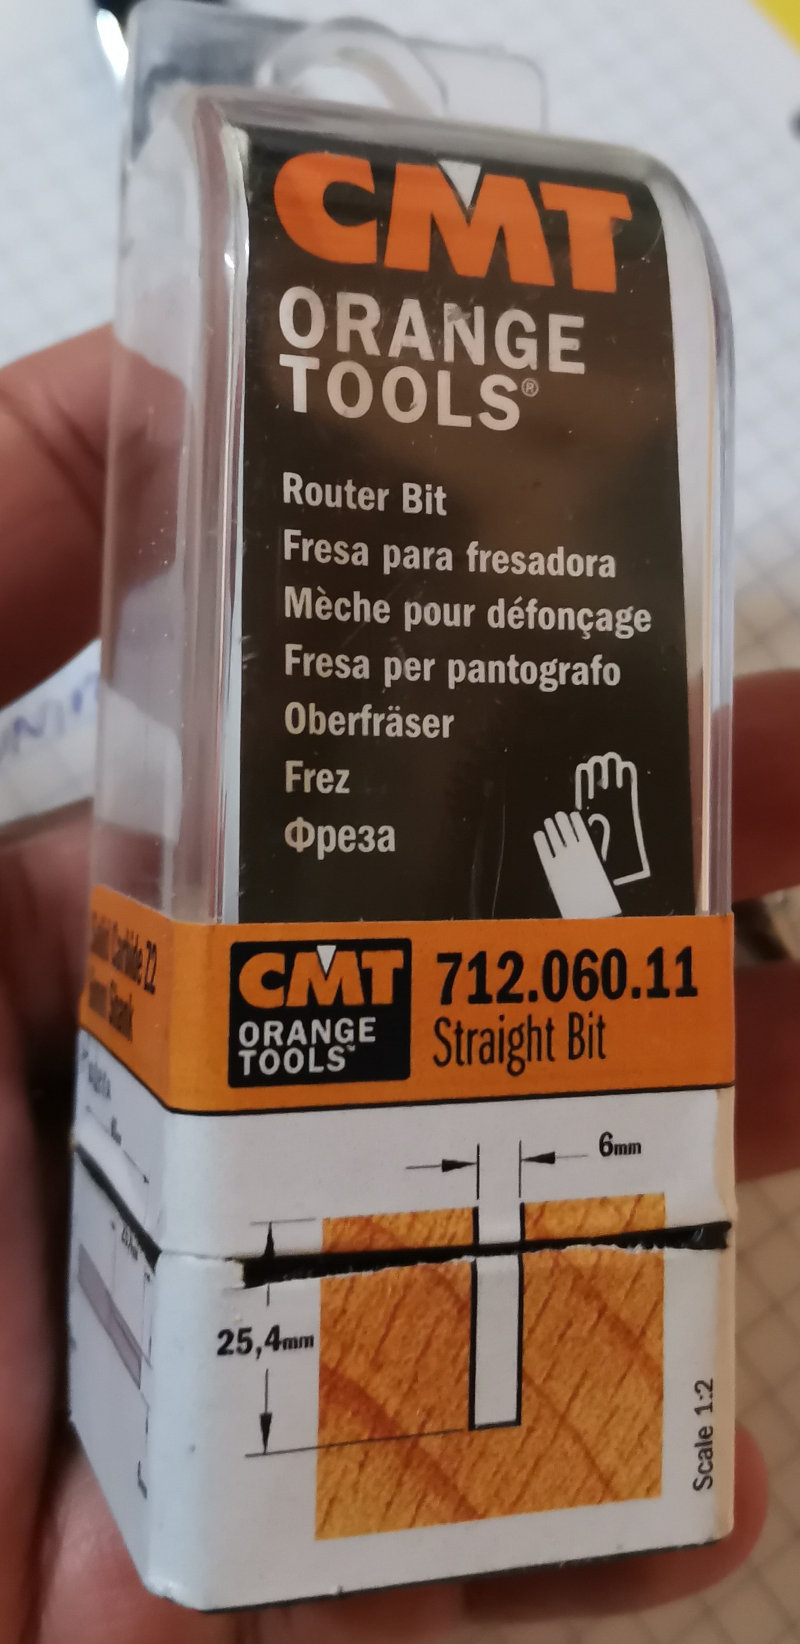
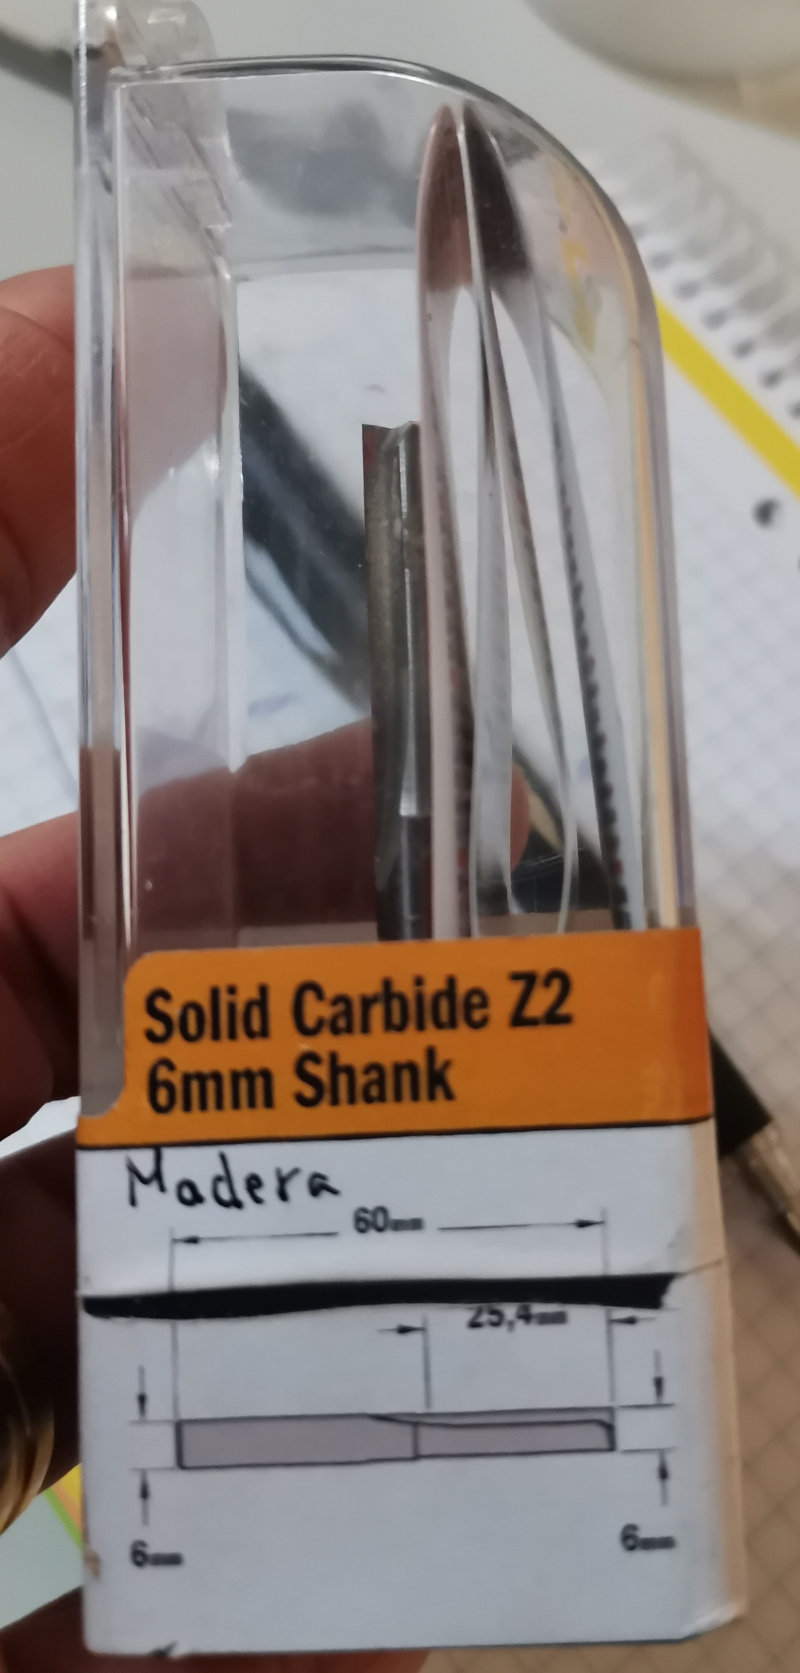
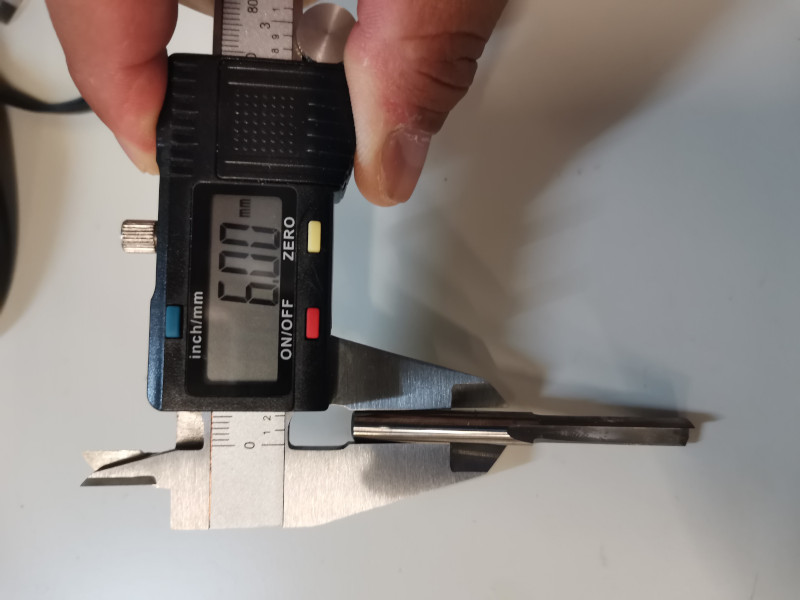
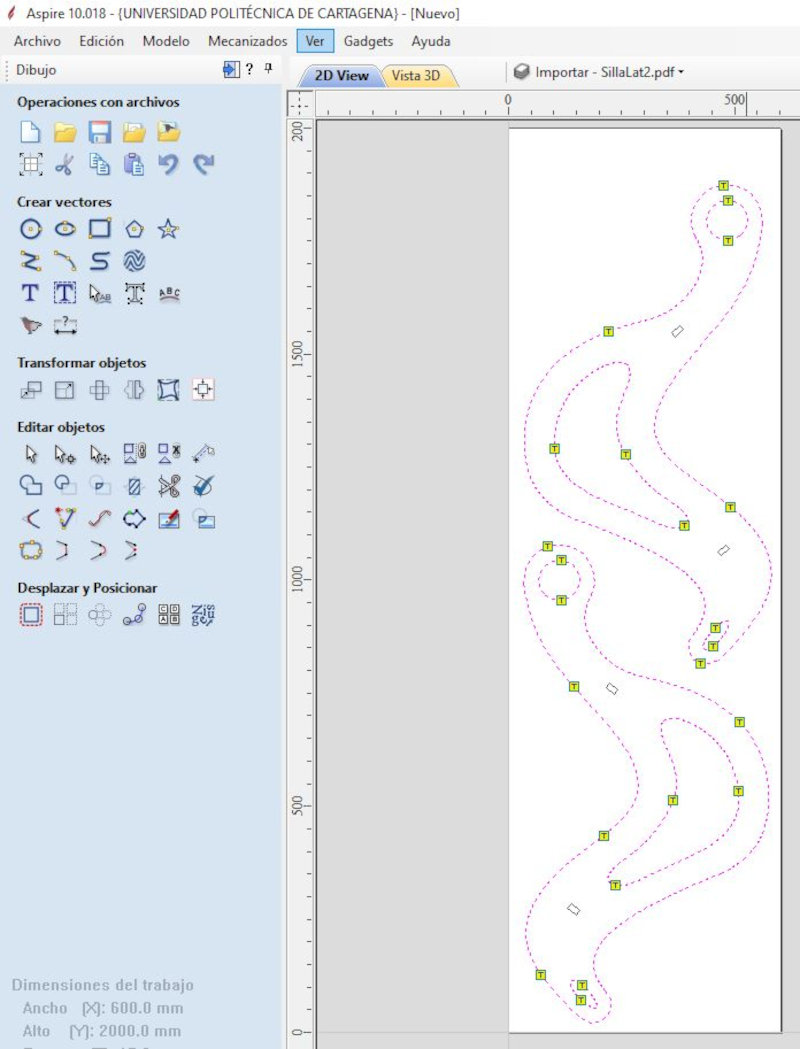
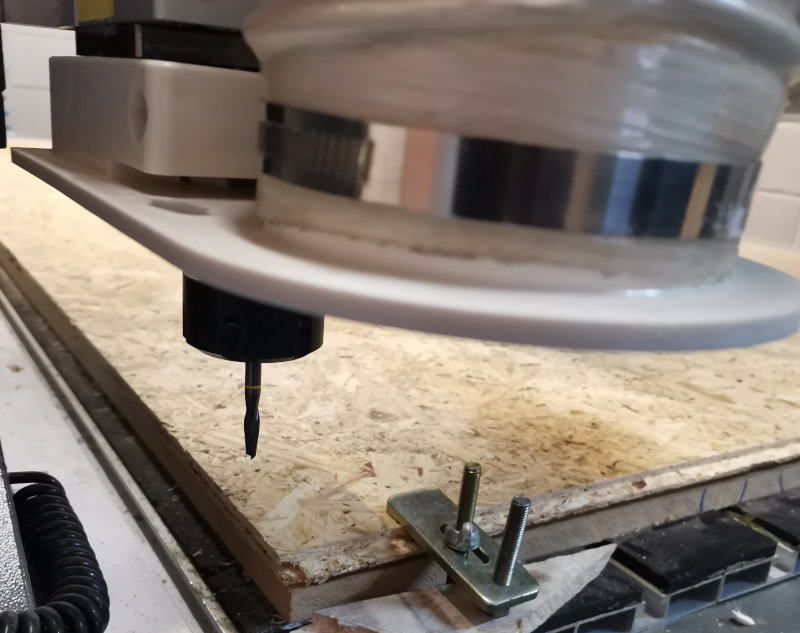
In Toolpath, select from the Machining operations the option (2D Profiling Strategy). The thickness of the wood is 15mm (I select 18mm to go through the wood until it reaches the sacrificial material) and the milling tool is 6mm for wood.
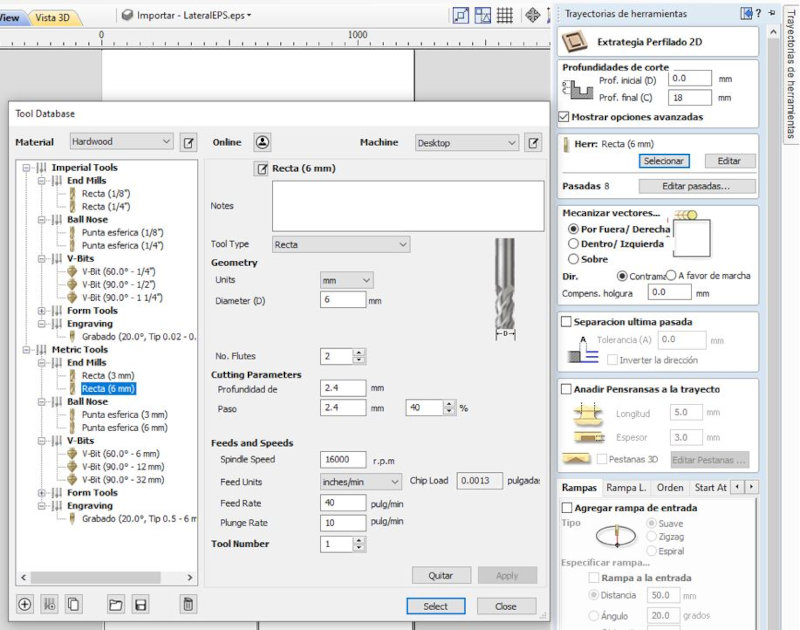
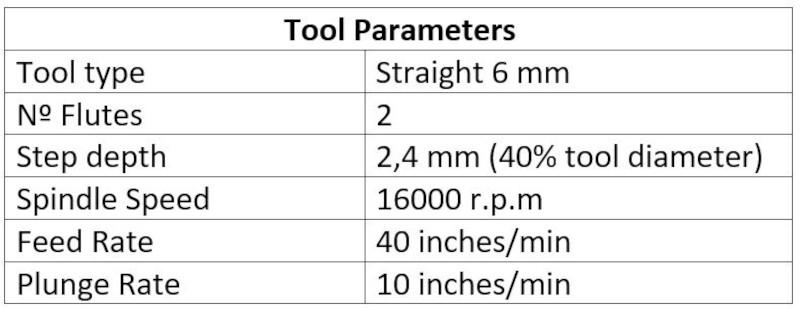
Use a 6mm wood drill/router bit.
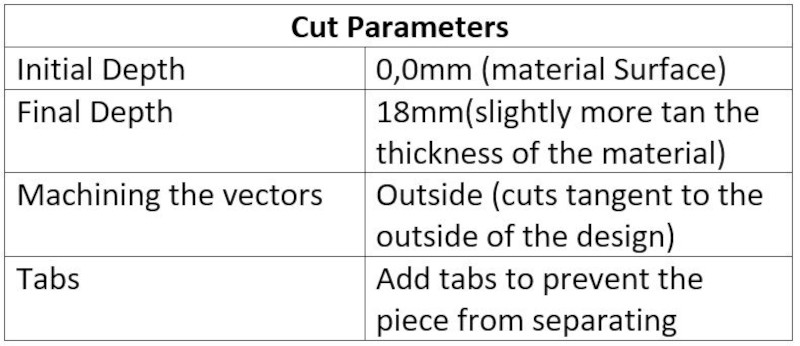
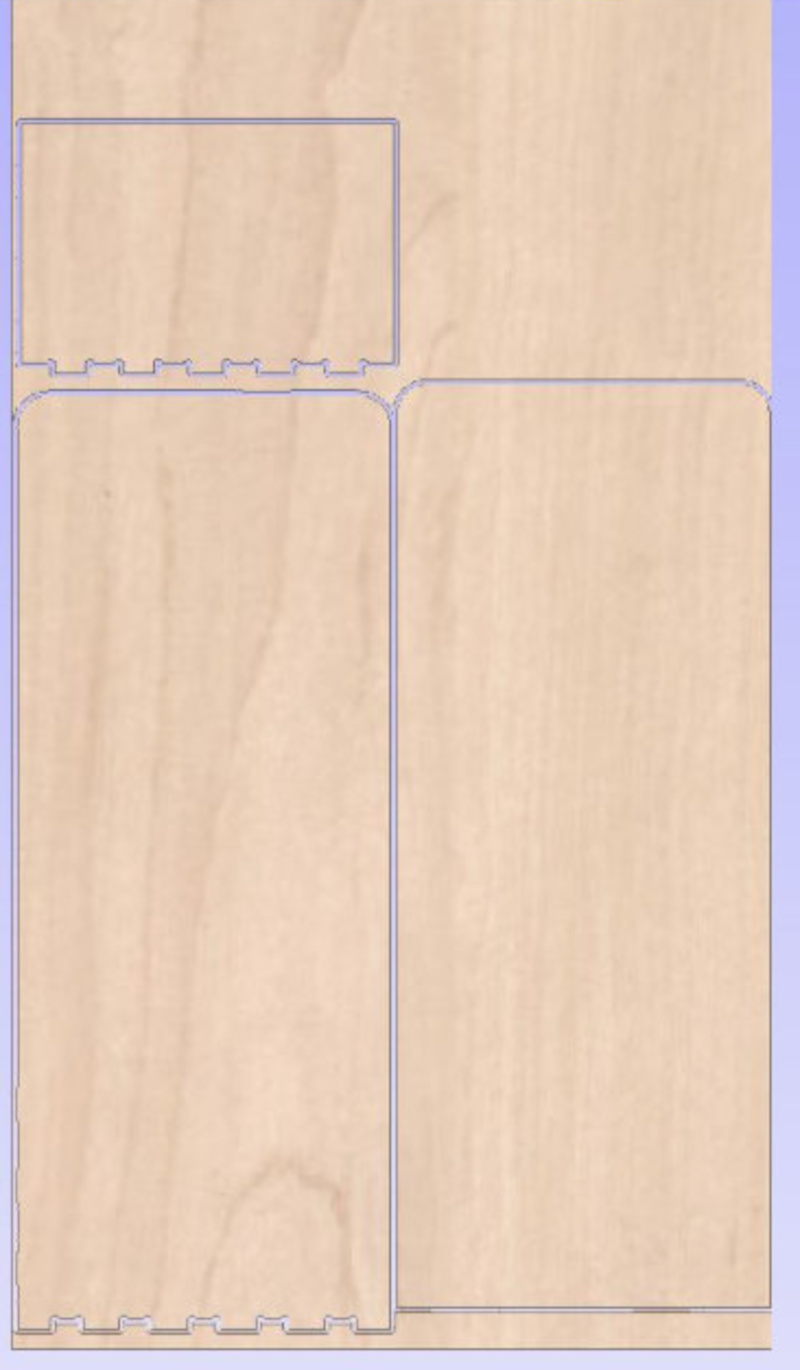
In (Machining vectors ..) select “Outside / right” and Add Tabs "Pensransas" to the Path. Add “smooth” entrance ramp at a distance of 50mm.
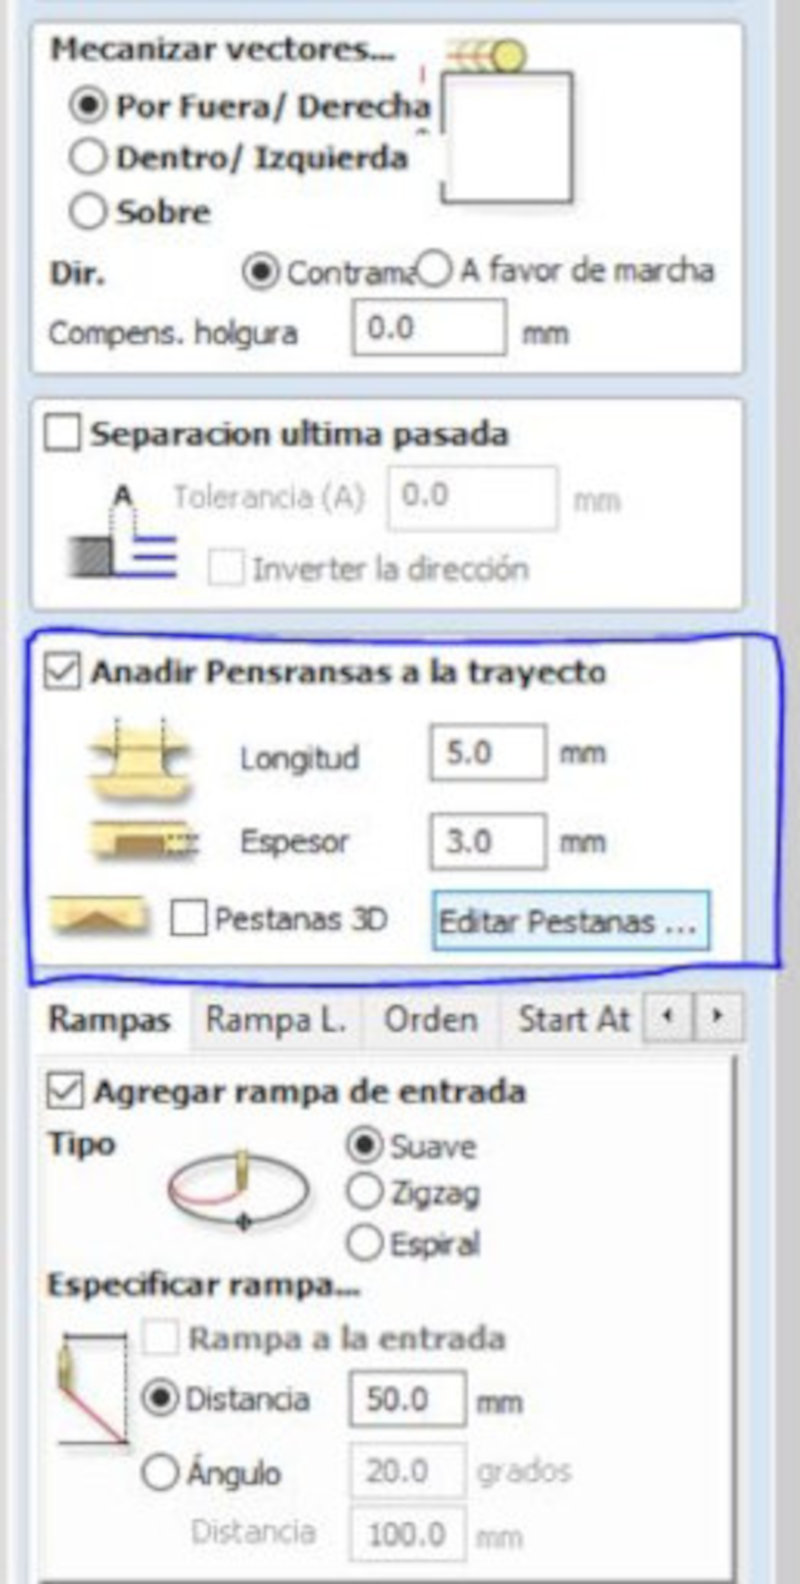
Simulate all paths.
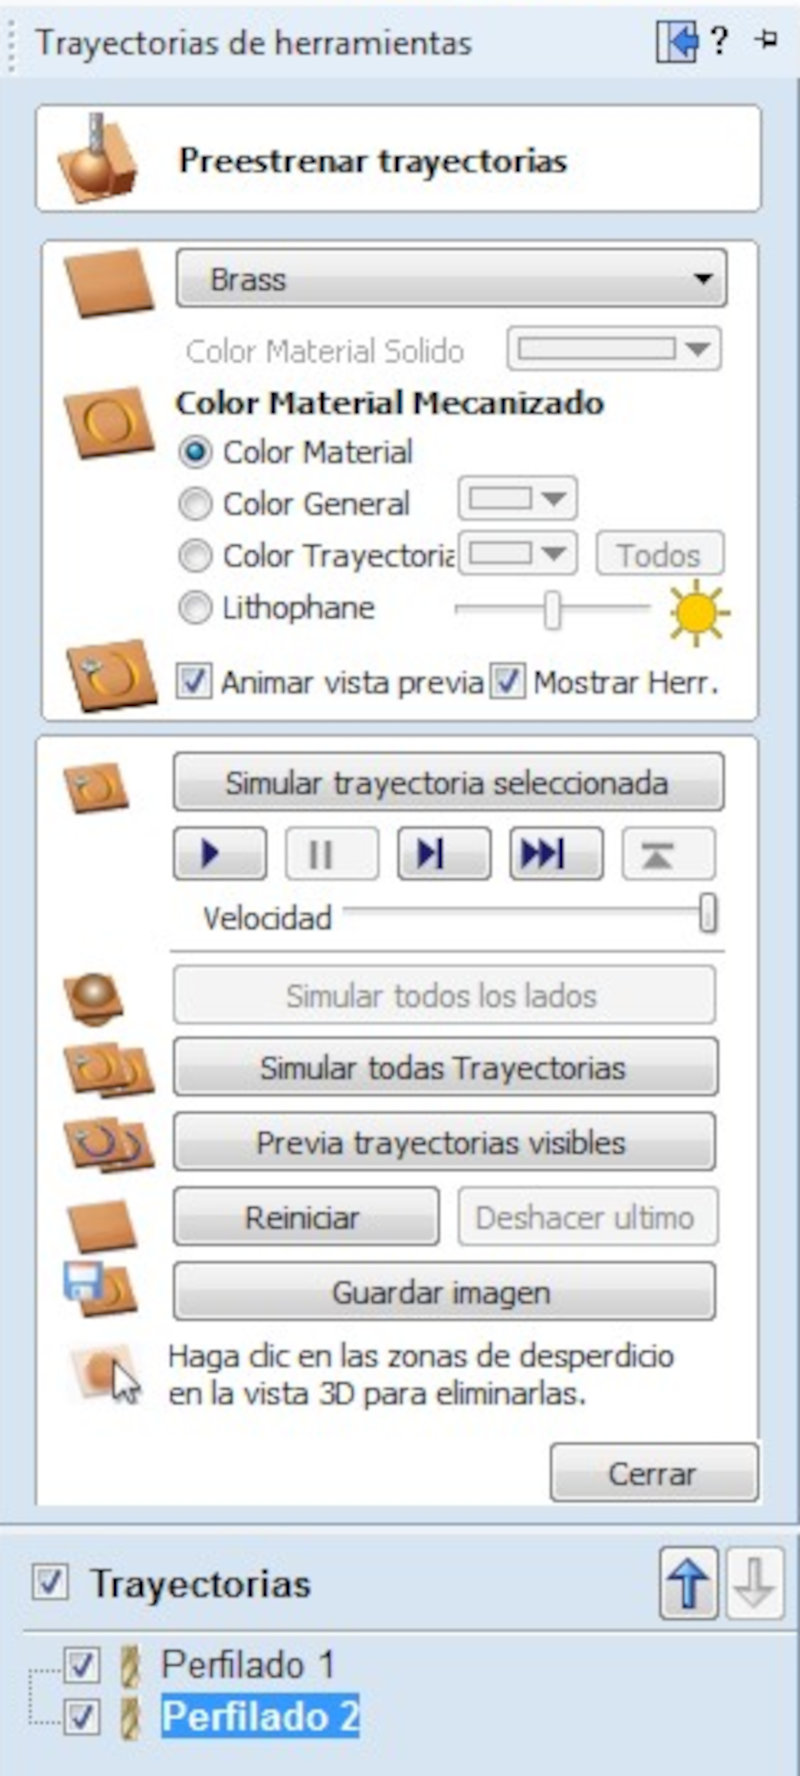
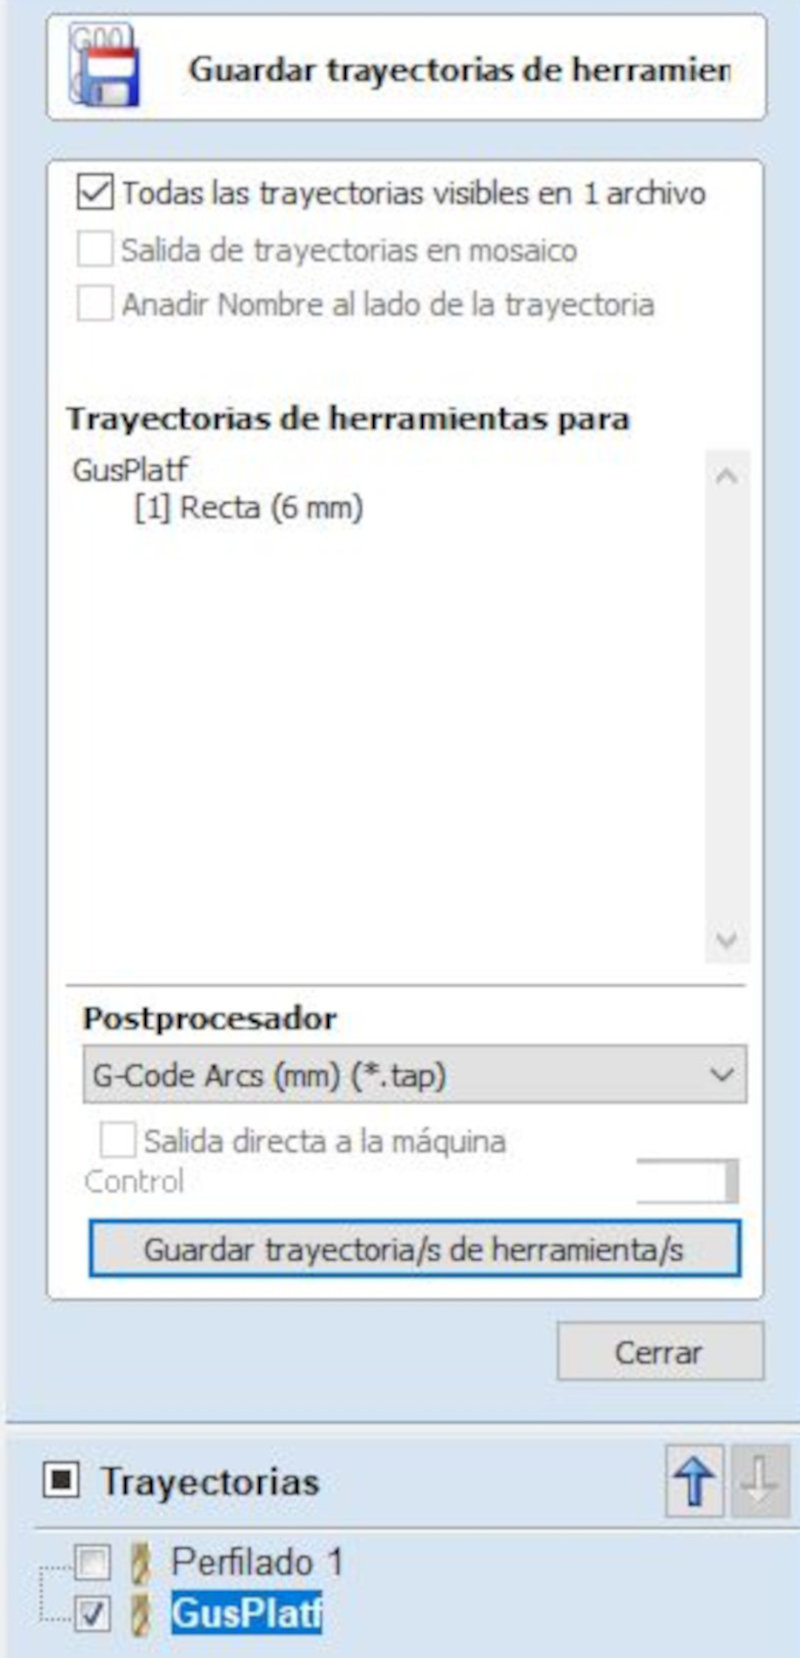
Save toolpath. Save to usb memory in (G-Code Arcs (mm) (*. Tap) format.
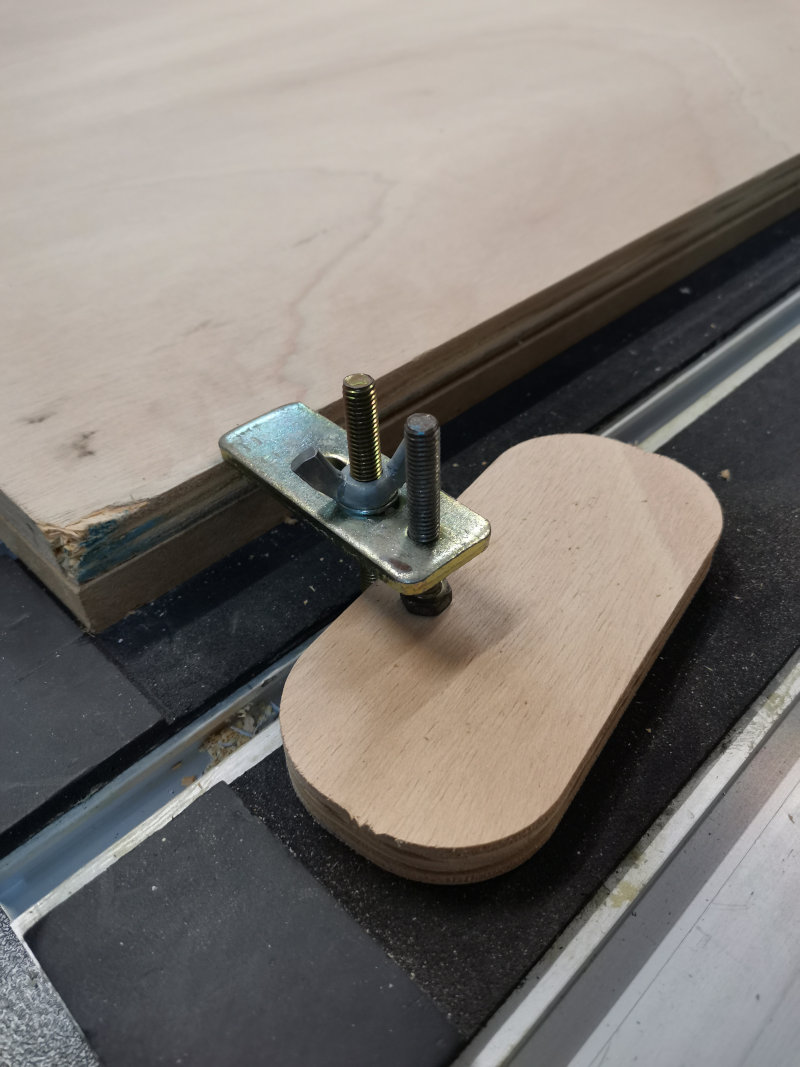
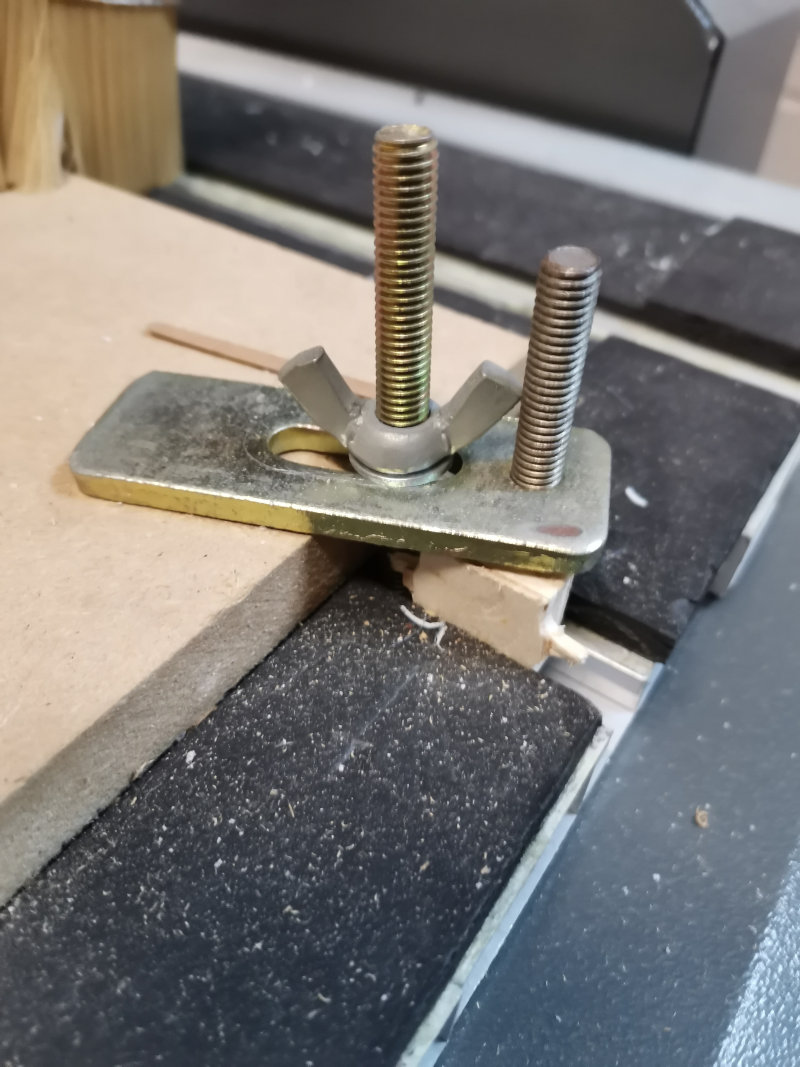
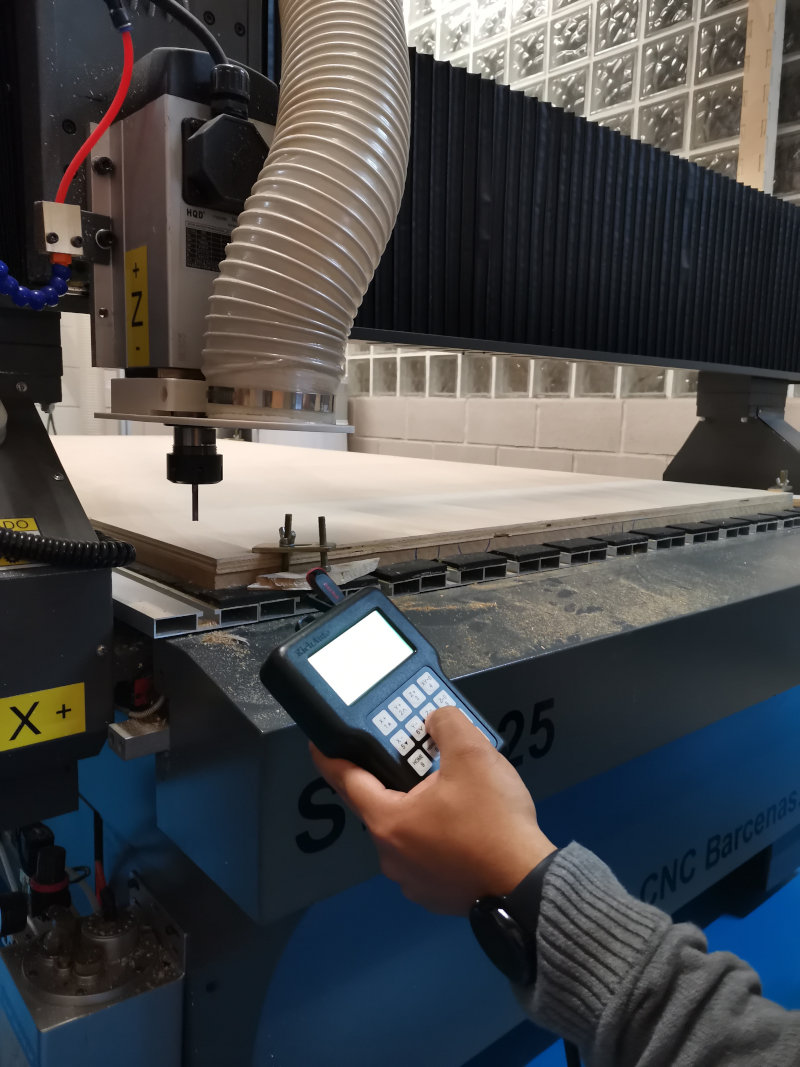
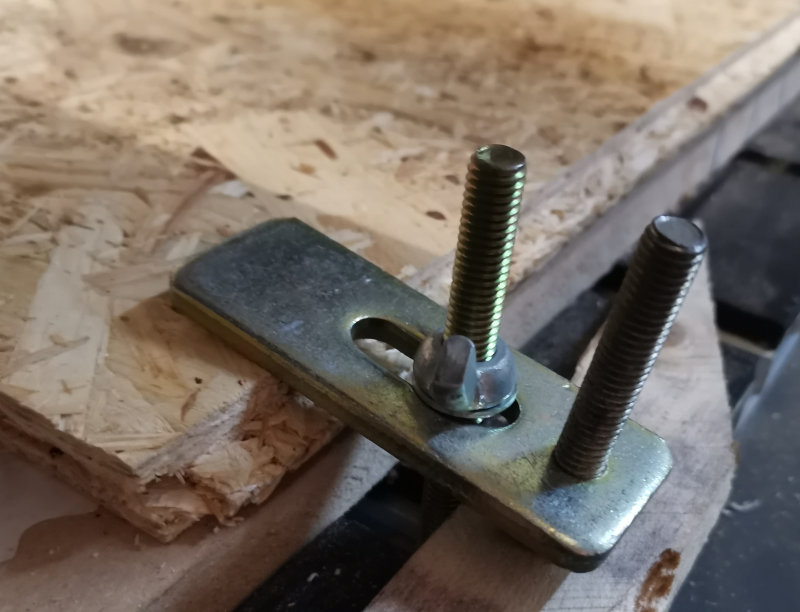
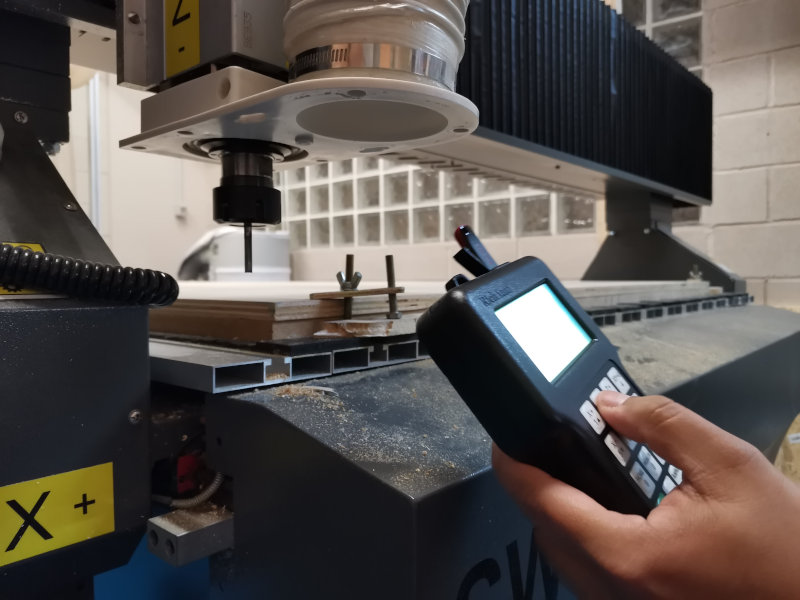
Place the wood in the Barcenas CNC Milling Machine. Put the wood fasteners.
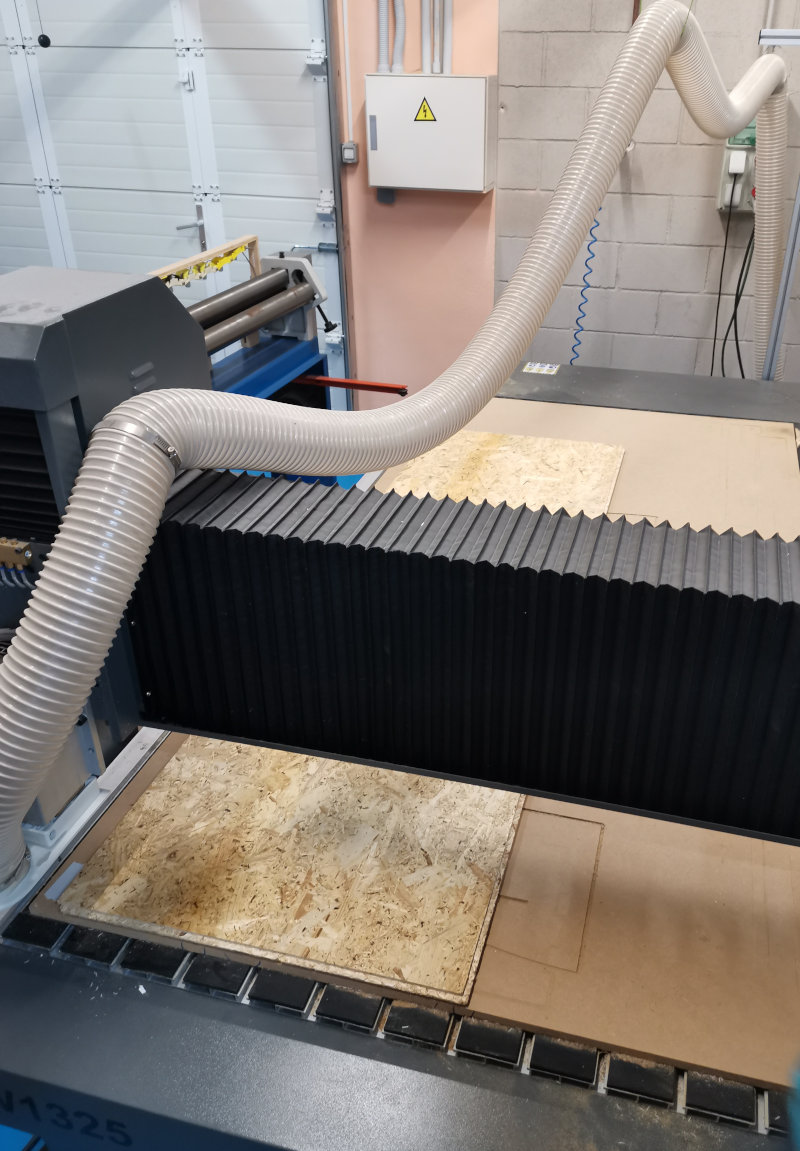
My colleague Álvaro Macian fabacademy 2020 made the calculations of the feed and RPM speeds of the BCNBarcenas with the wood material. Taking these speeds as a reference, I increased the values without finding differences in the result of the cut finish. The values they used were: RPM speed = 18,000 RPM and feed speed = 10,800 mm / min.
Move the router head to the home axes (X, Y, Z) and adjust the X = 0, Y = 0 and Z = 0 axes according to the location of the wood.

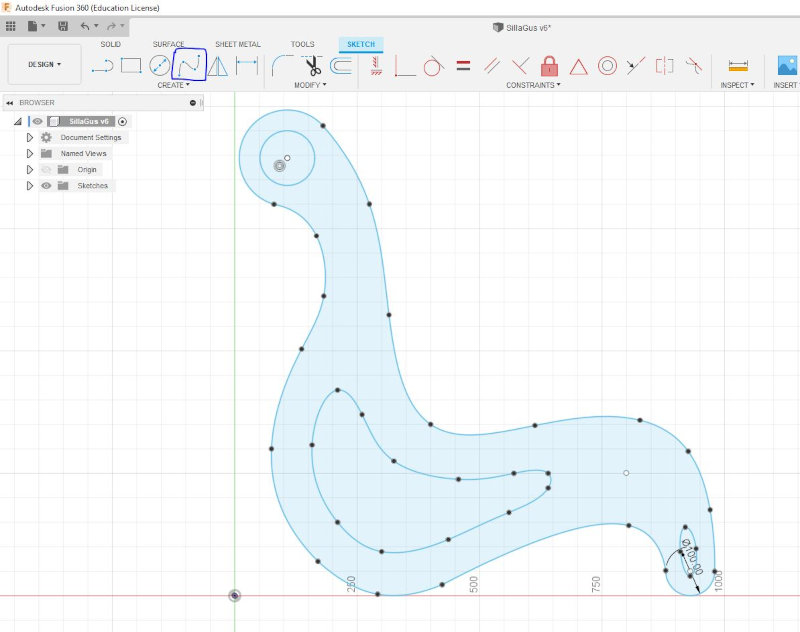
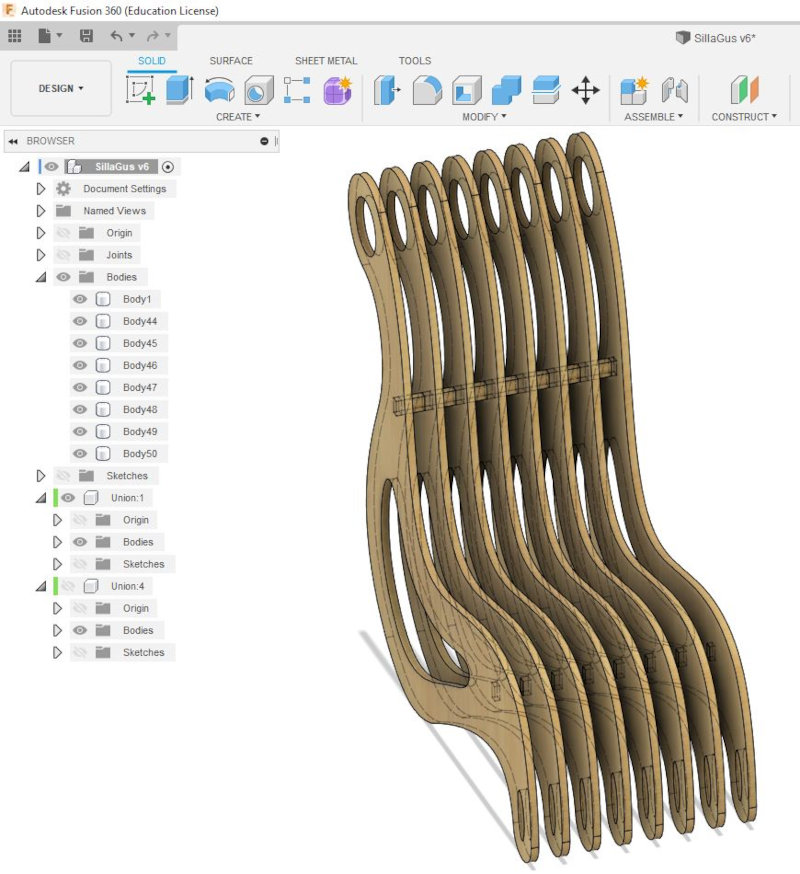
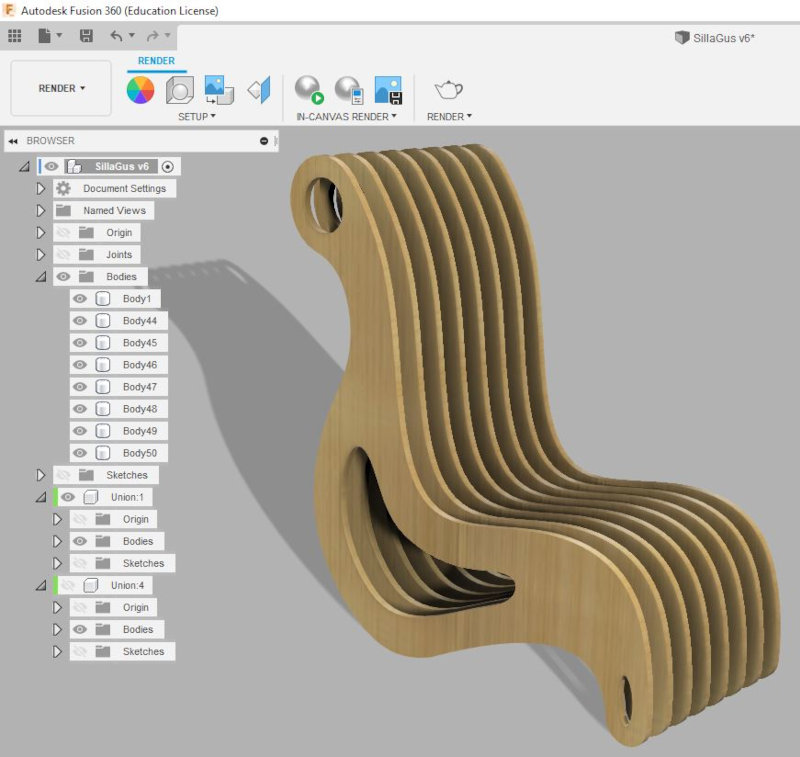
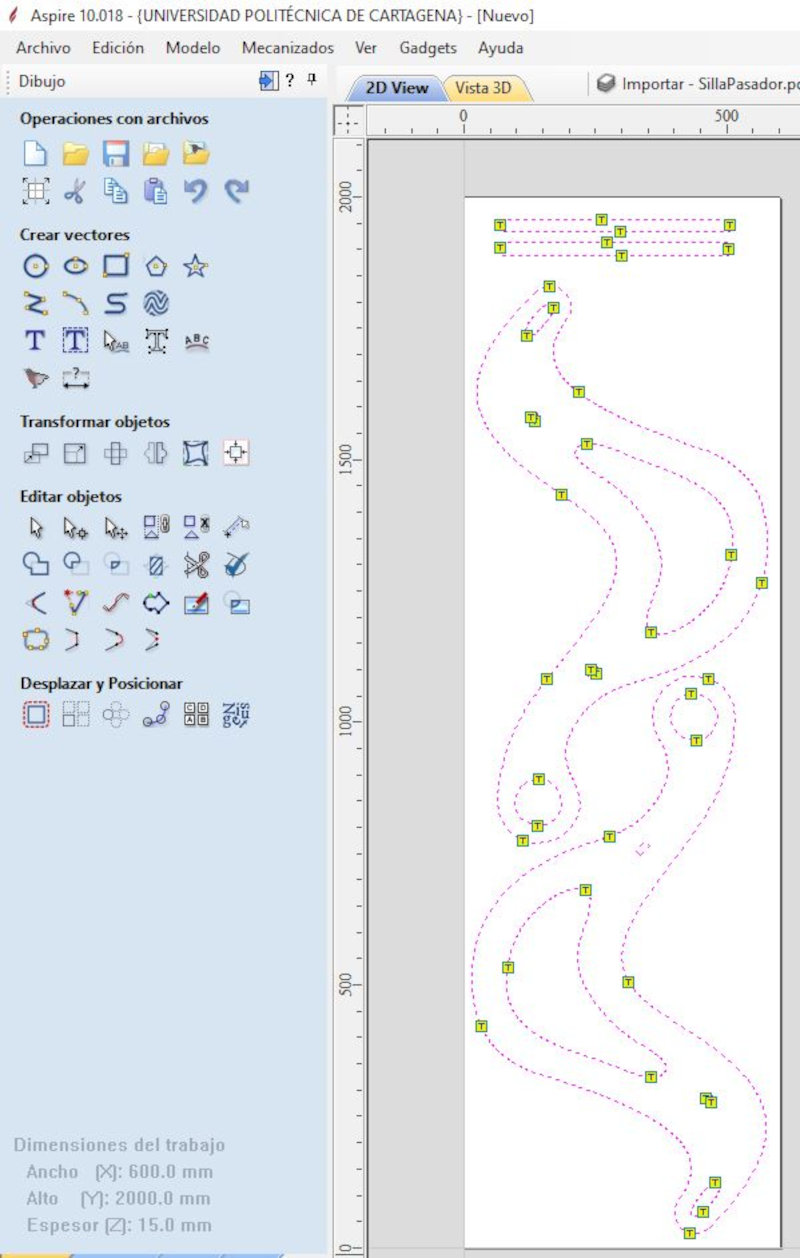
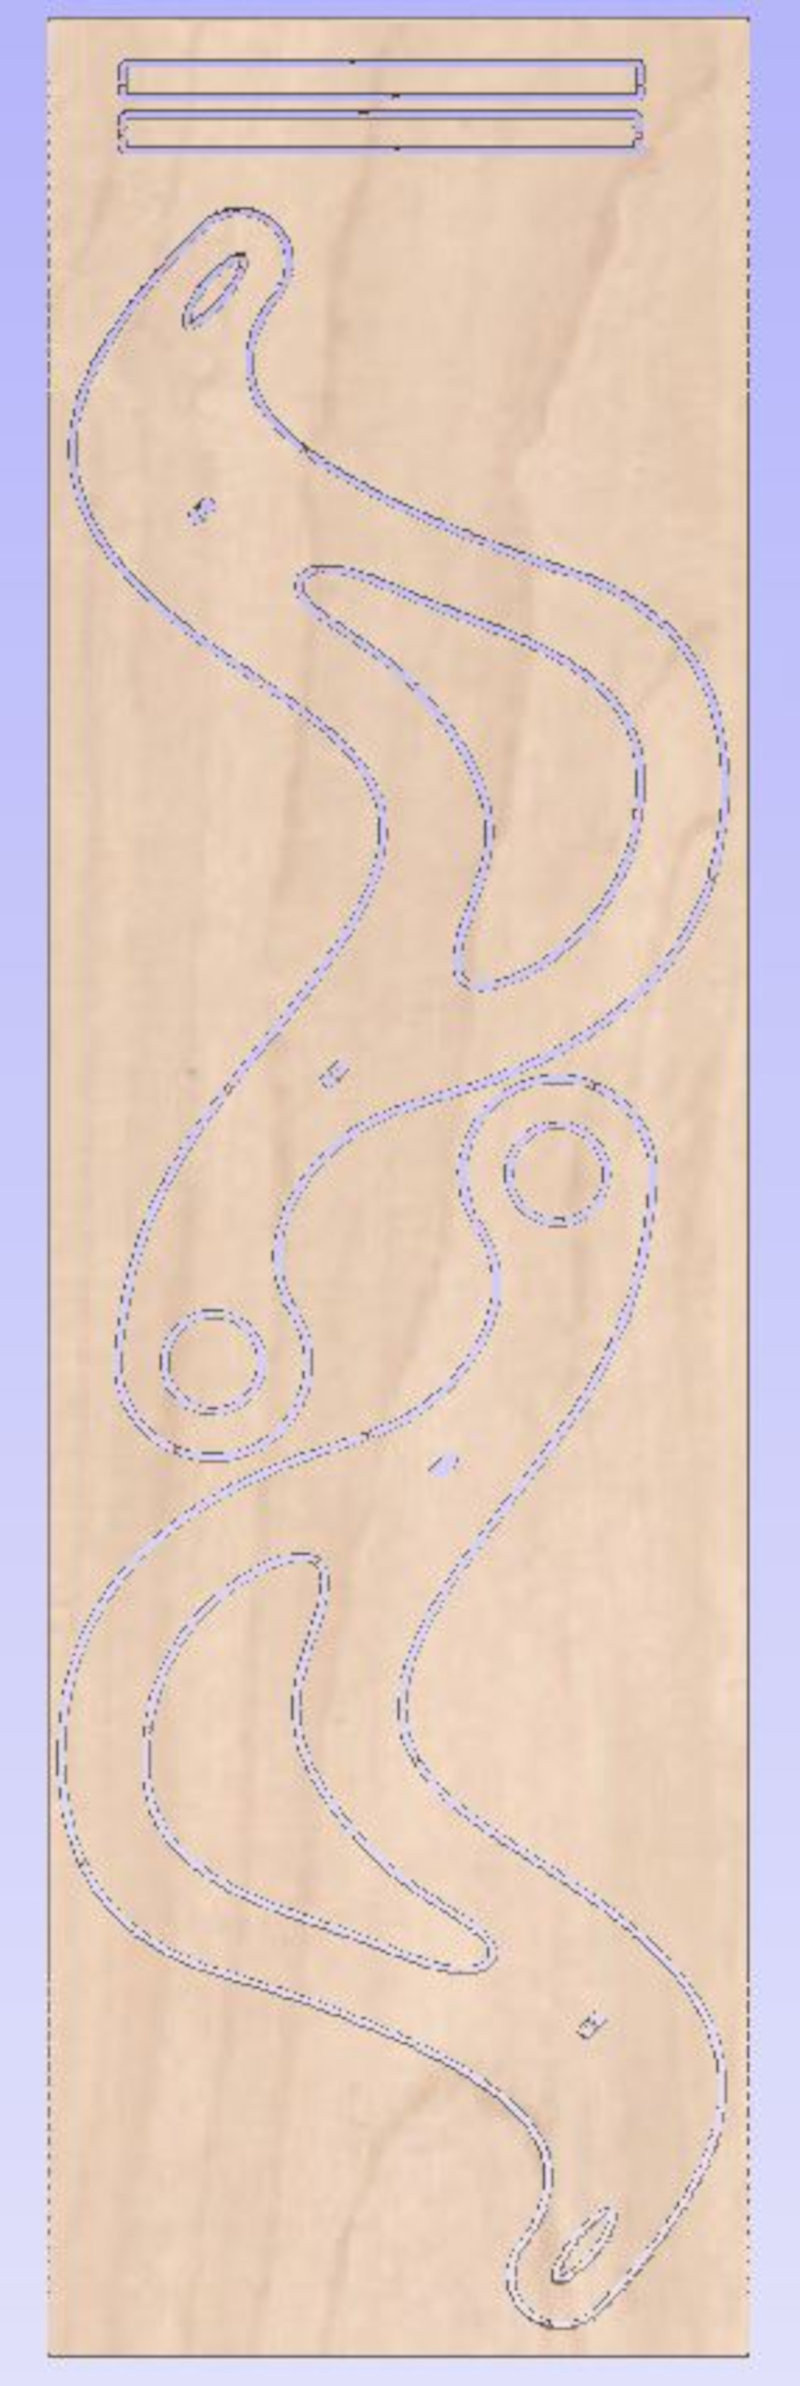
2.2. Design, milling and assembly of design chair
Design in Fusion360, create 2D sketches.
Extrude according to the thickness of the wood (15mm).

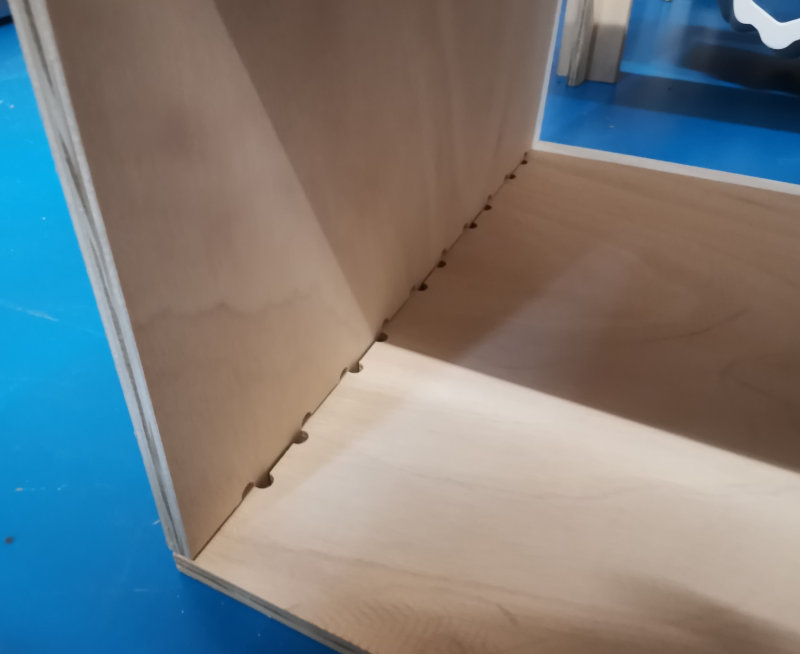
Create the interior parts and assemble.

Open Adobe Illustrator and load the .pdf file to generate the vectorized image.
Open the milling machine program (Aspire 10.018).
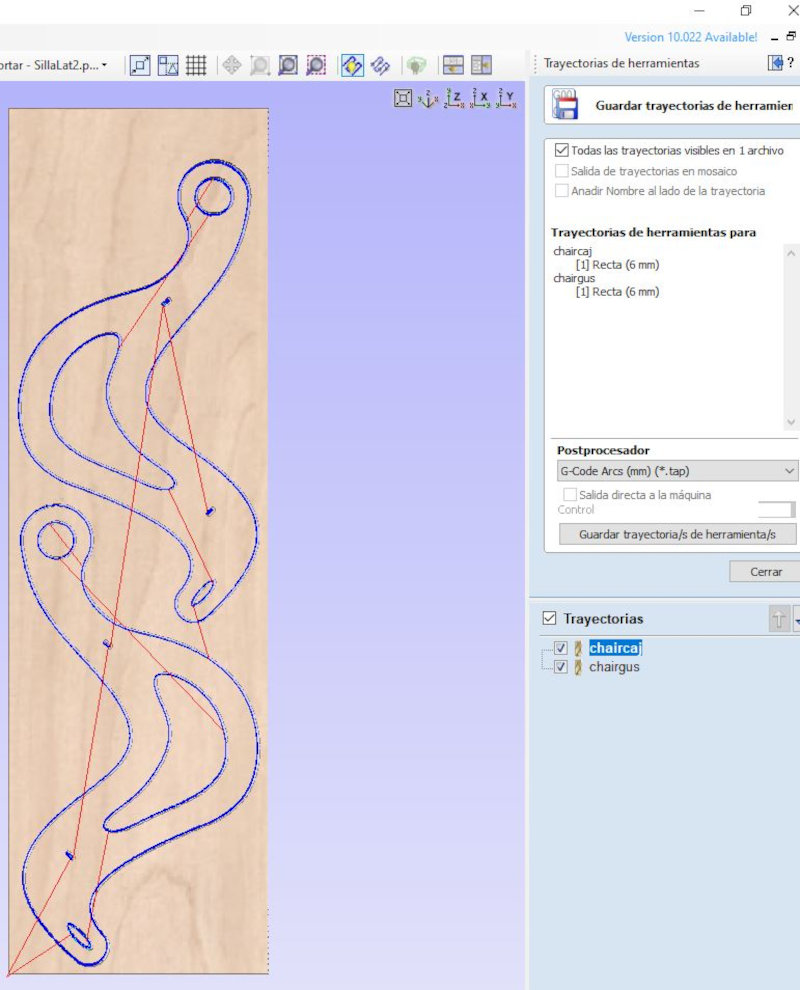
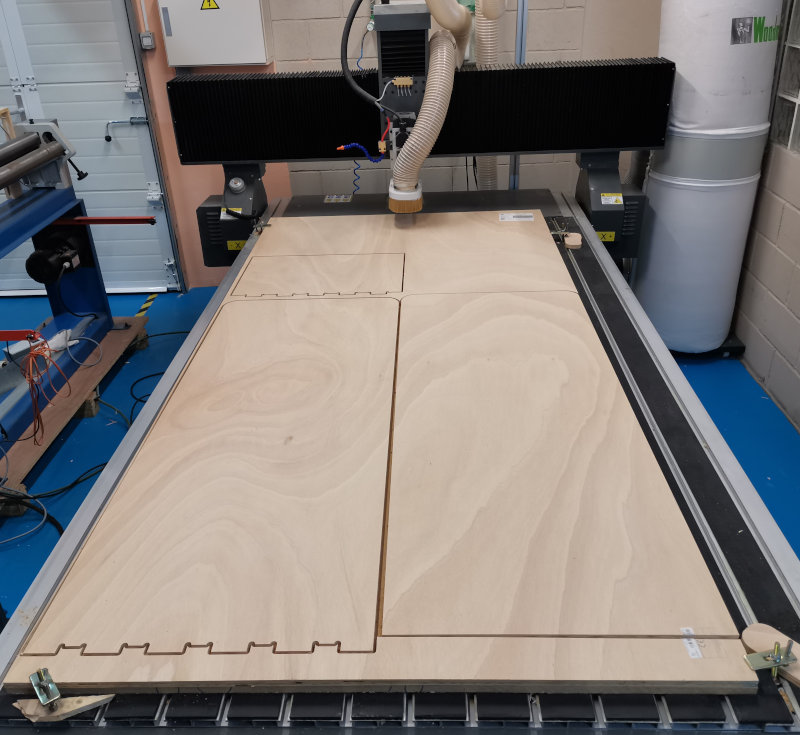
Milling with the Barcenas CNC milling machine.
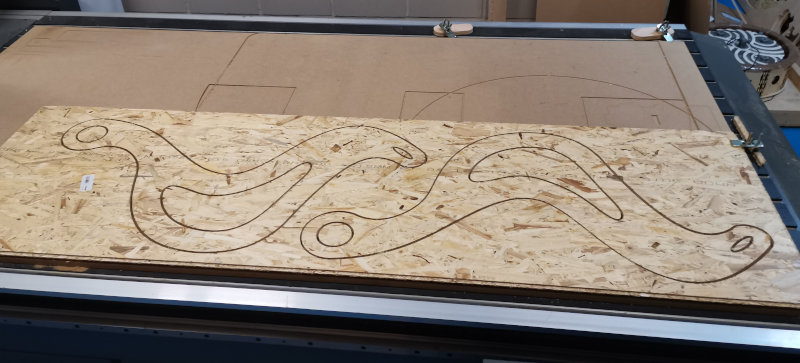
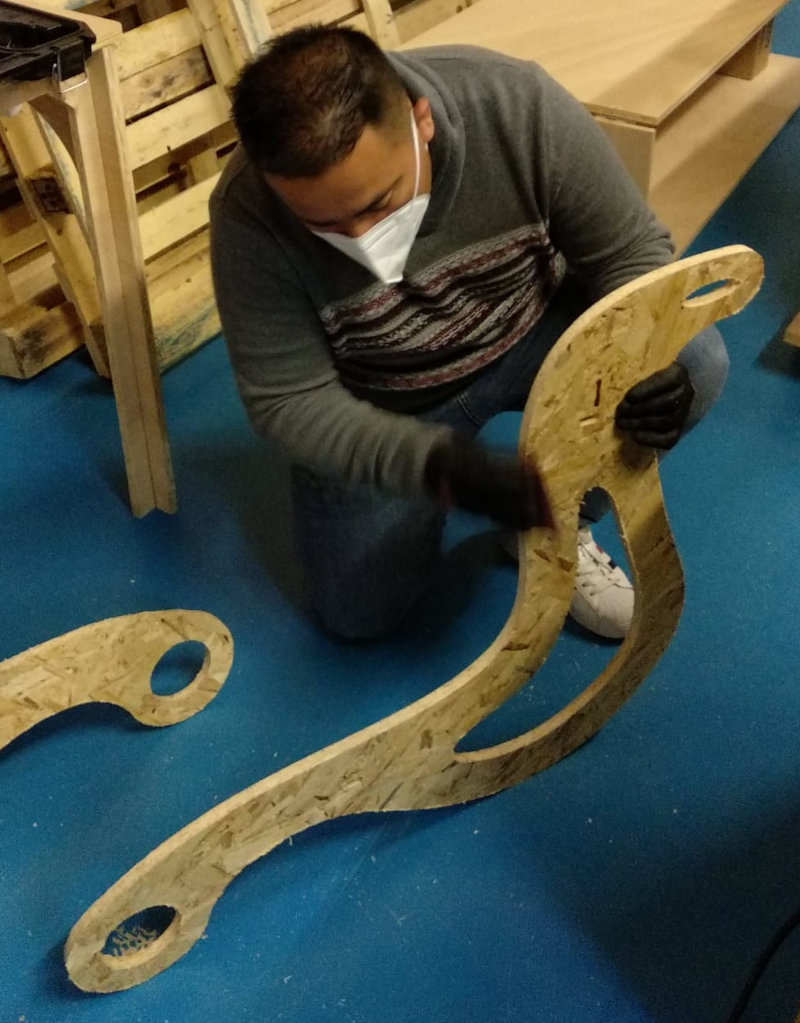
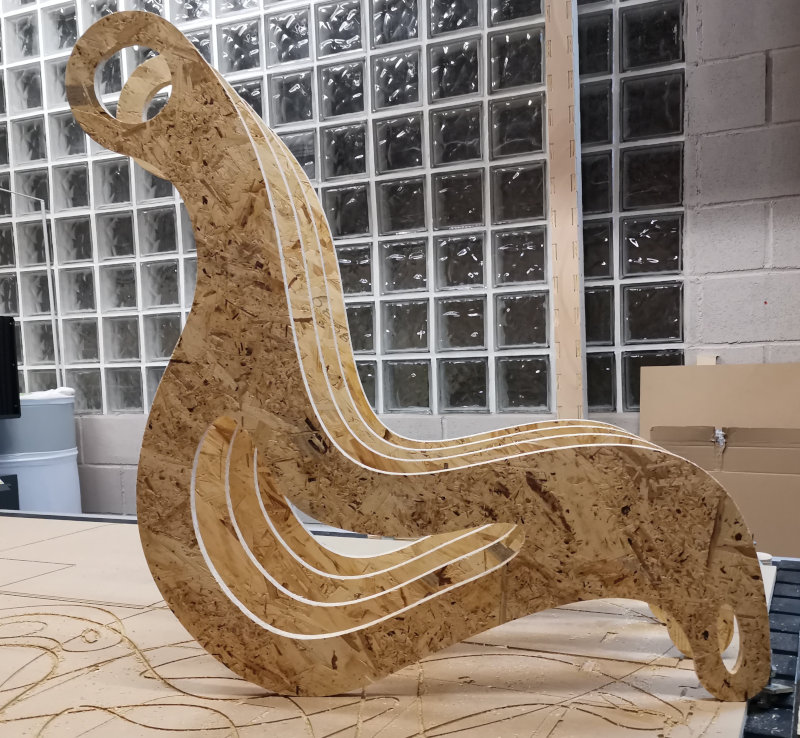
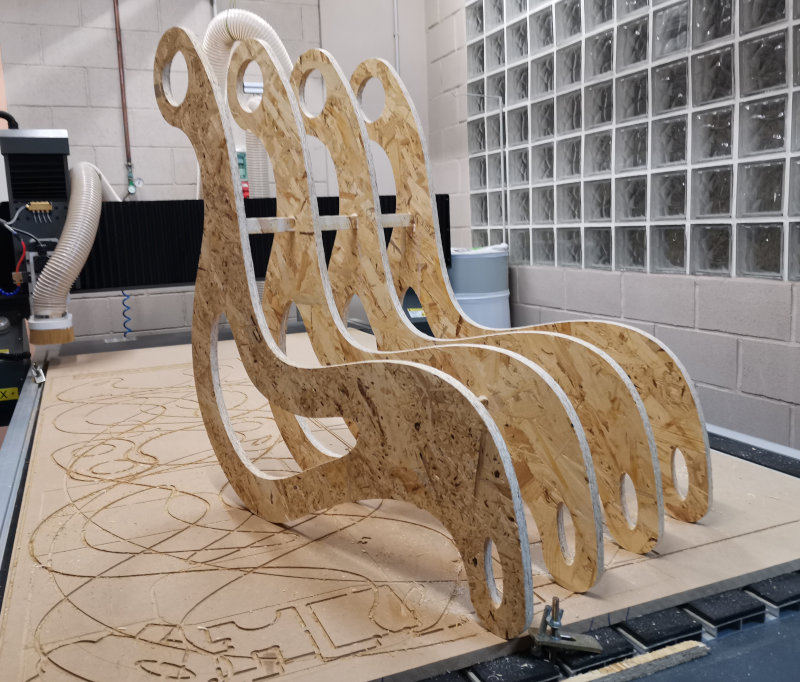
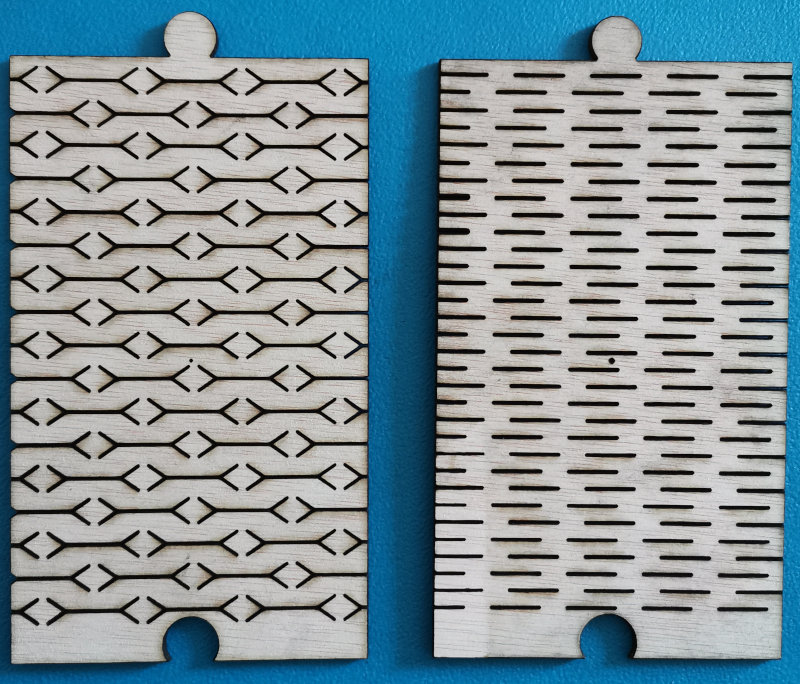
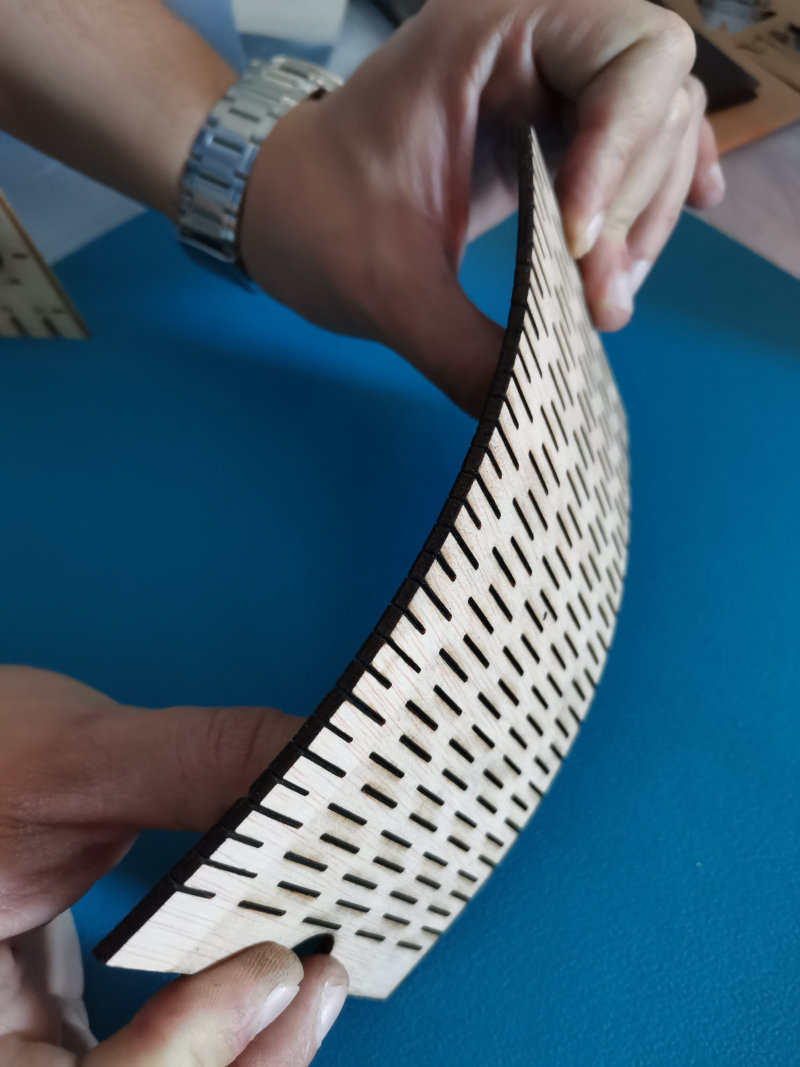
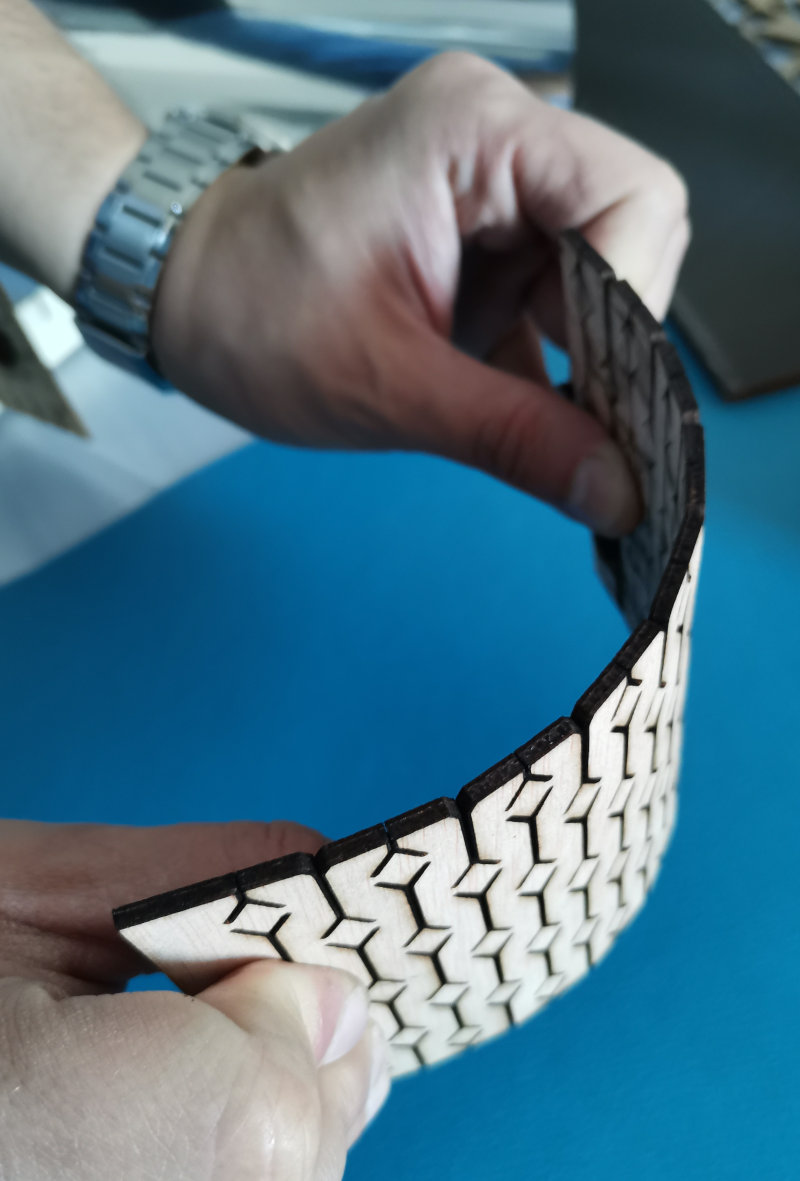
The initial model has many internals and a lot of wood is used. I have decided to mill only 4 sections and save on material. I am going to design a flexible cutting section out of recycled wood that will be used to flatten when sitting down..
4. Conclusions of the week
How was the week?
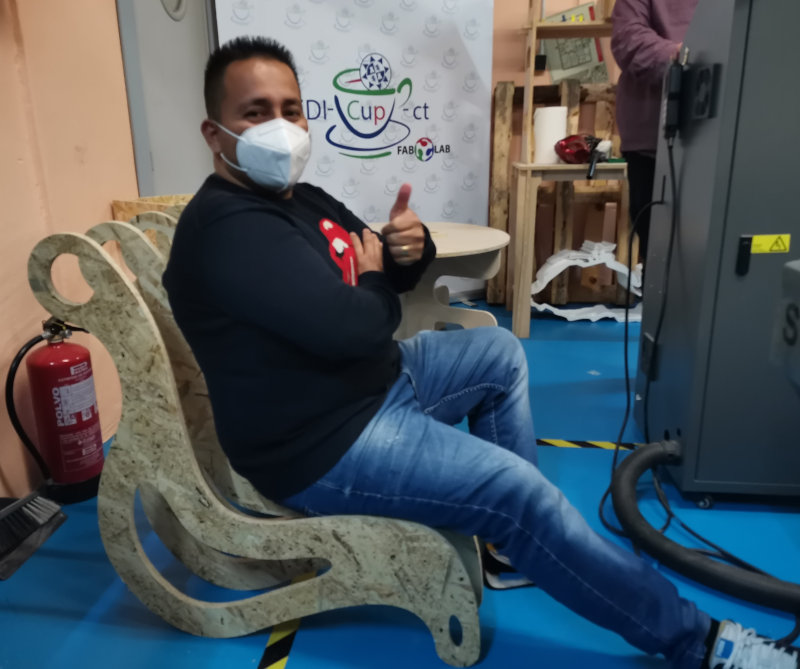
This has been very short for all the work I had, I have built the structure of my platform for the final project and also built a designer chair. I have ended up exhausted but it has been gratifying to see the result.
What went wrong ?
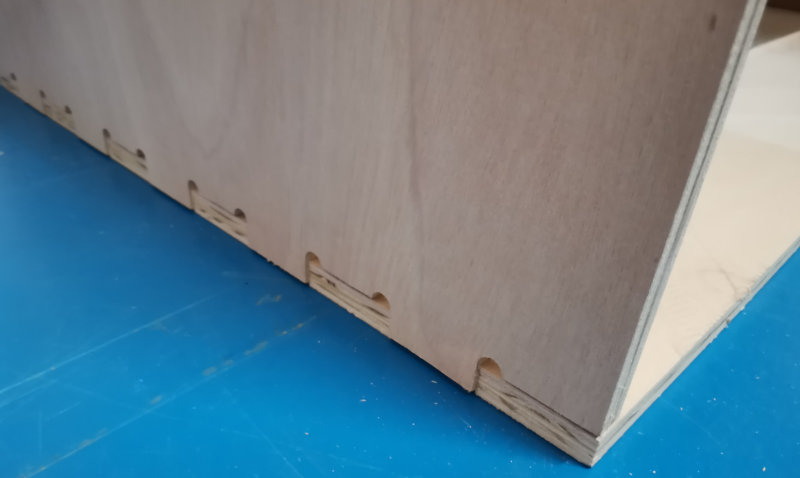
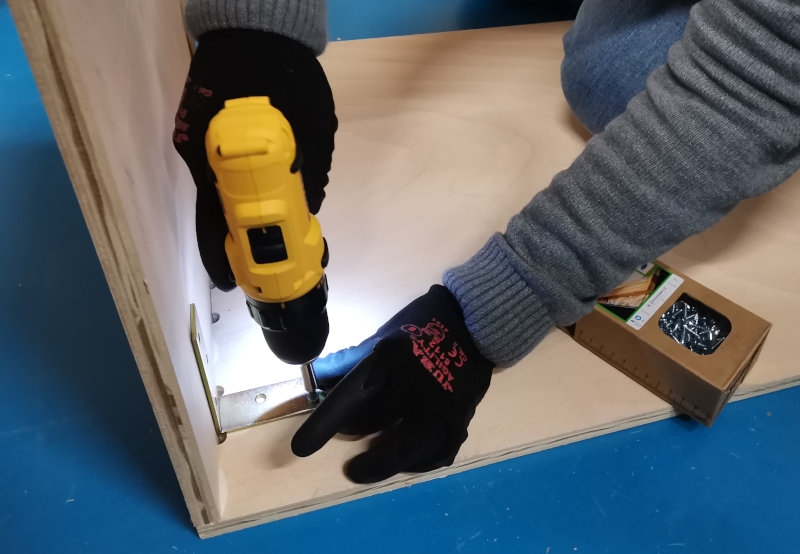
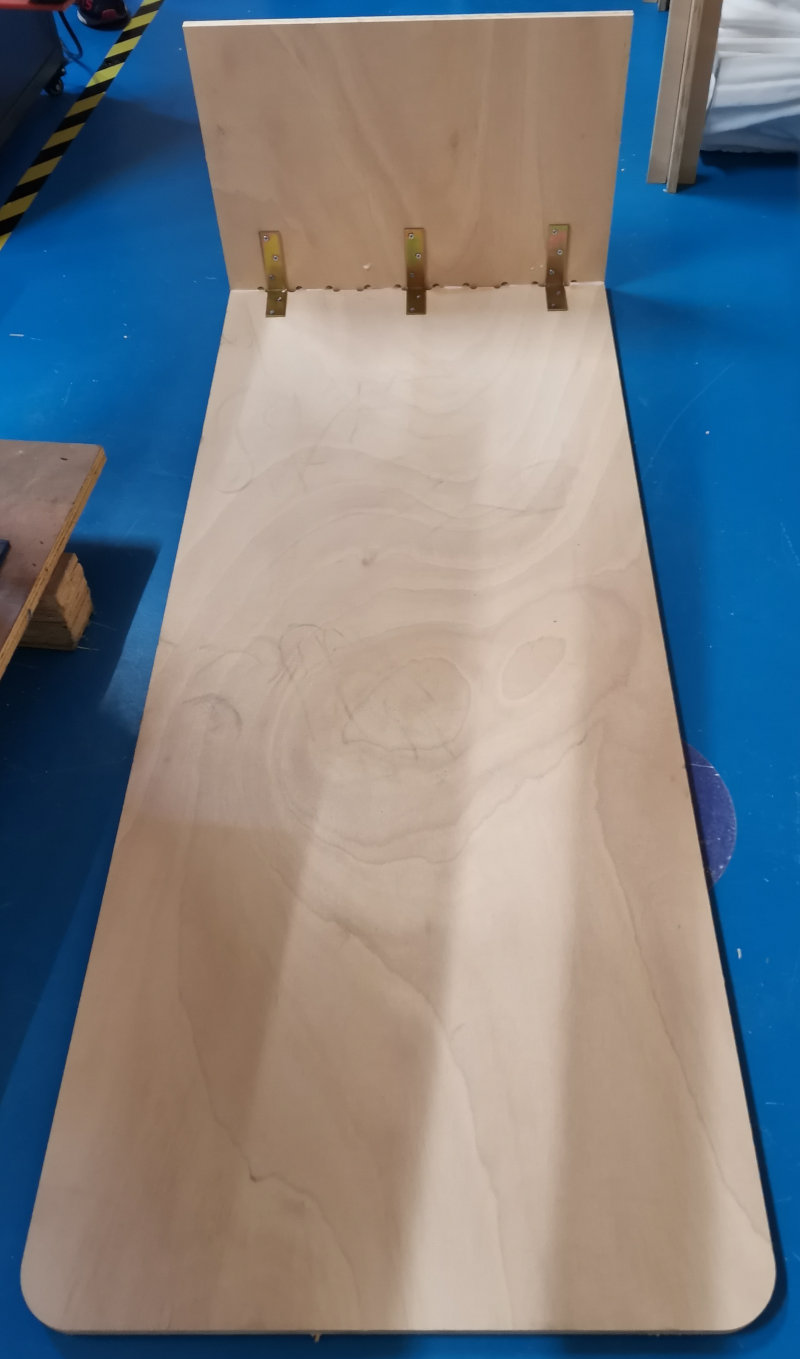
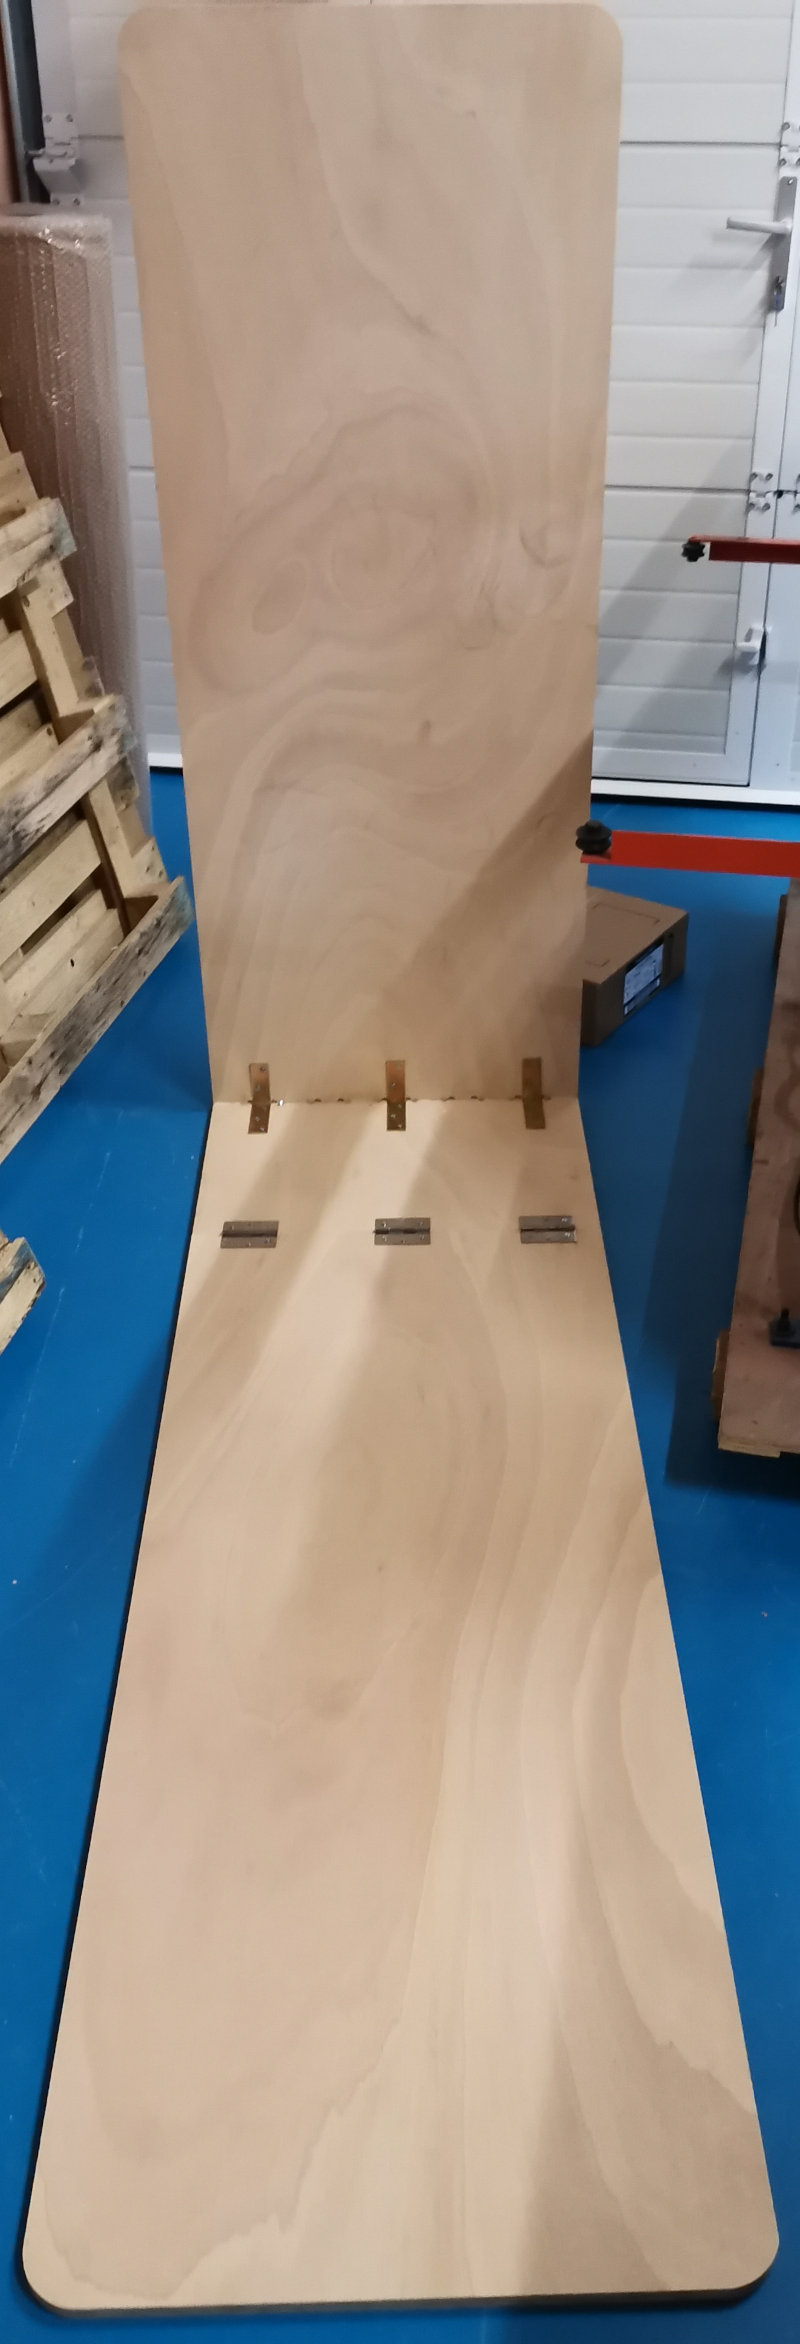
- On the platform I wanted to make the pressure joints of the bottom and side of the platform, although they were fine, I realized that this system would not support the movements and additional weight of the platform, so I had to reinforce those joints with metal brackets.
- In the construction of the design chair I did not take into account the amount of wood you would need, I only used 4 interior sections of wood to reduce the cost of material. For this reason I had to redesign the chair to give it a flexible surface. This process is pending and I hope to finish it for this vacation.
What went well?
The BNCBarcenas milling machine is easy to use and the Aspire program is simple and I had no problems. The platform I built I used in the final project.