Group Project:
Machanical Design
Machine design
Link to Mechanical Design and Machine Design Group Page
We decided to make a marble run as I found this video on reddit of a marble run attached to a fridge which was very interesting and fun.
We went through what would be fun to make and find out what we could actually make and who would do what?
We thought as Jonny had more knowledge about the mechanics of the machine he would be the best bet for get this sorted and I would design and make the marble run itself.
We had a white baron which found very very useful during this whole assignment as I would change drawings about and Jonny could add or subtracted ideas as we went along.
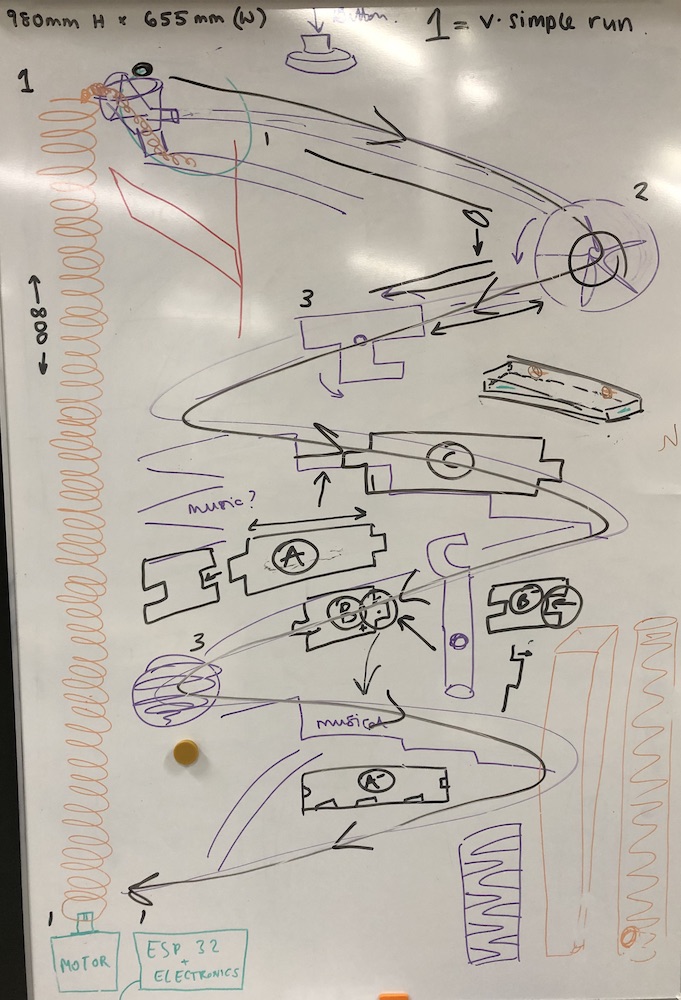
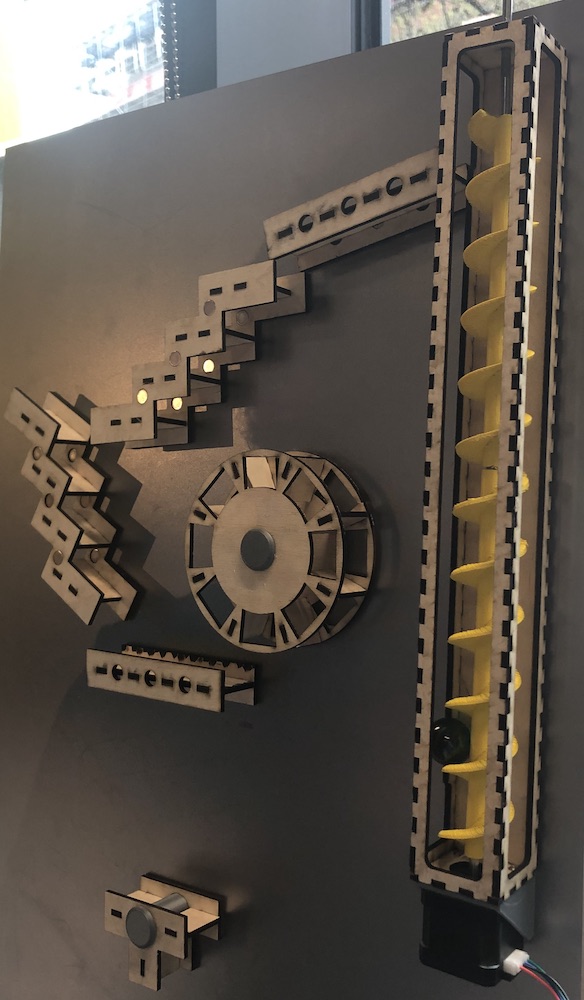
In the image you can see our initial drawing of what we thought we could make our marble run work and how it would get from the top to the bottom and back into the spiral.
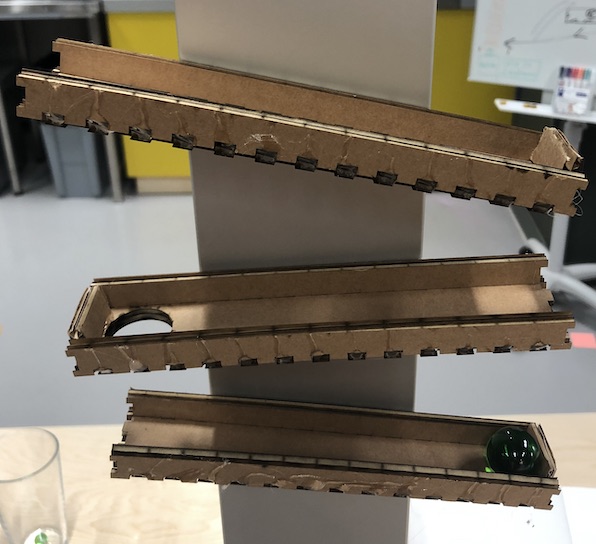
The first thing I actually did was get a finger join box generator and thought I would use made a box to see what the outcome would be by adding my own wholes to fit the marble in stick it to the wall and see if it works. I did work very well but I did end up having to glue it was the kerf wasn't added to this specific generator but I think others you can add kerf. This did work was and overall it was a very satisfying outcome we were very pleased with this, now to make it more complicated and out of wood oh and add a spiral for the mechanics.
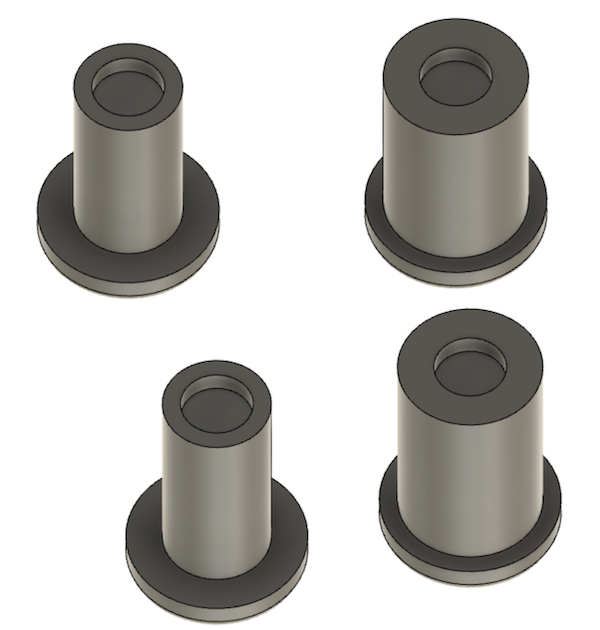
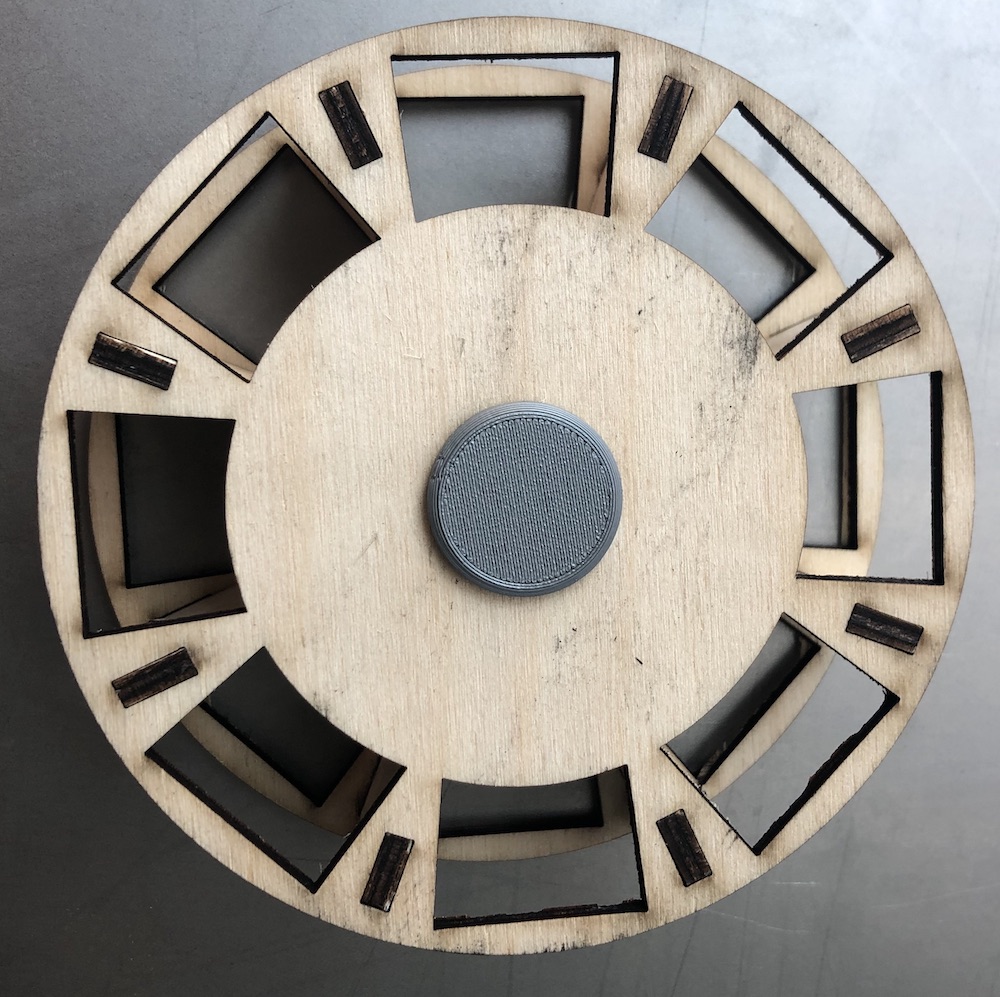
I started by going into fusion and designing the dowels for the wheelie peelie design. These would be nice and simple I just had to make sure they fitted the magnet inside the gap and would move smoothly around the gap in the wheel middle.
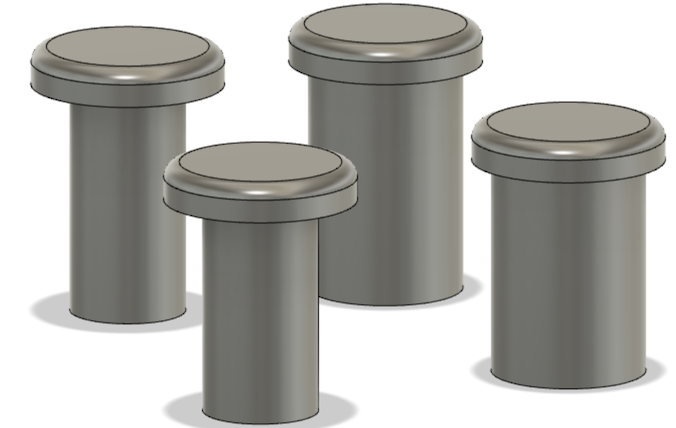
I then 3d printed them which worked well there was abit of stringing but I ended up fixing that later down the weeks after 3d printing week I kept having the same issue, see week5 to prevent stringing.
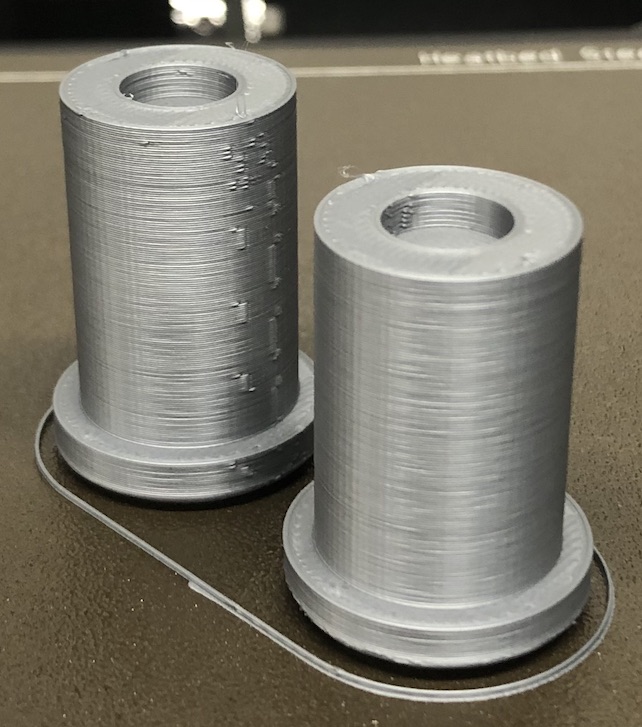
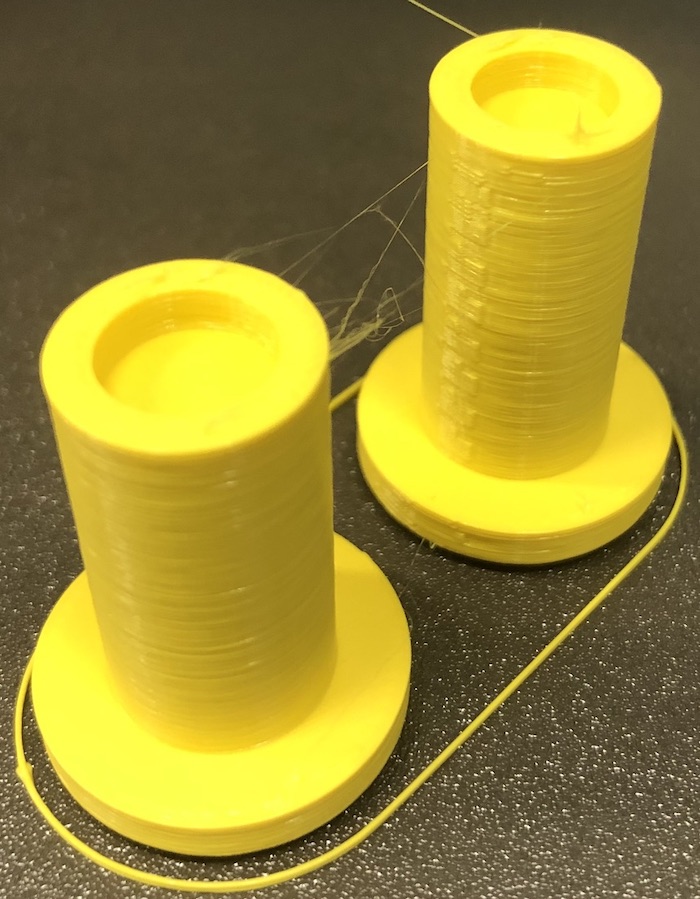
The magnets fitted very well into the wholes I had designed and I was very pleased how they didn't come out to that they weren't slightly over with was a concern of mine when I was printing them, as the 3d printer like I said does string abit.
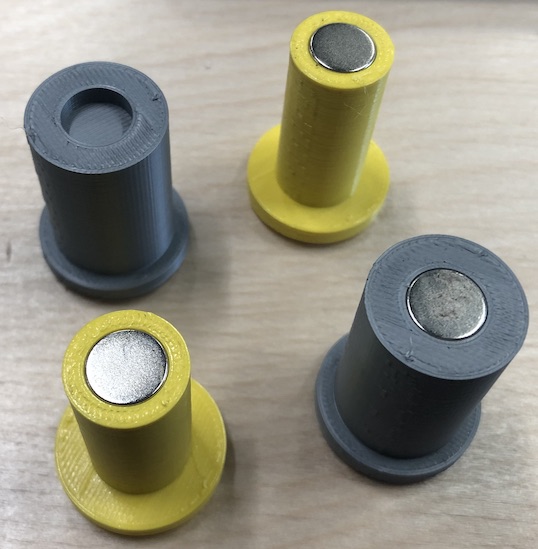
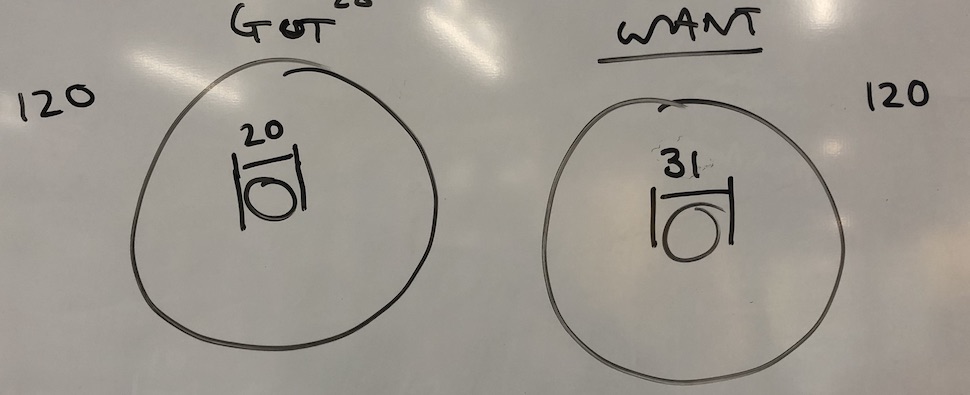
I then placed them inside the wheel whole and erased they didn't spin very well so I went back to the white board and draw up what I had and what I wanted as the outcome. This really helped my brain understand the issues that were coming to light as I was making this game.
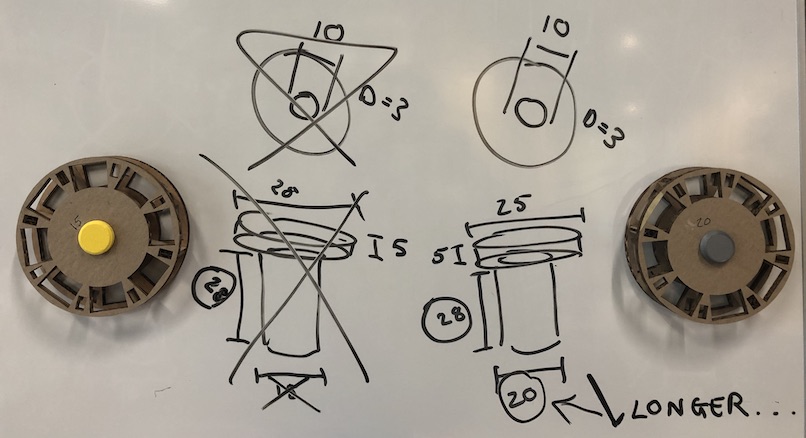
I also needed to change the length because the dowel was just getting in the way of the wheel spinning. In the end the dowel needed to be 25 mm at the top part, 20 mm in the bottom where the magnet goes and 40 mm long.
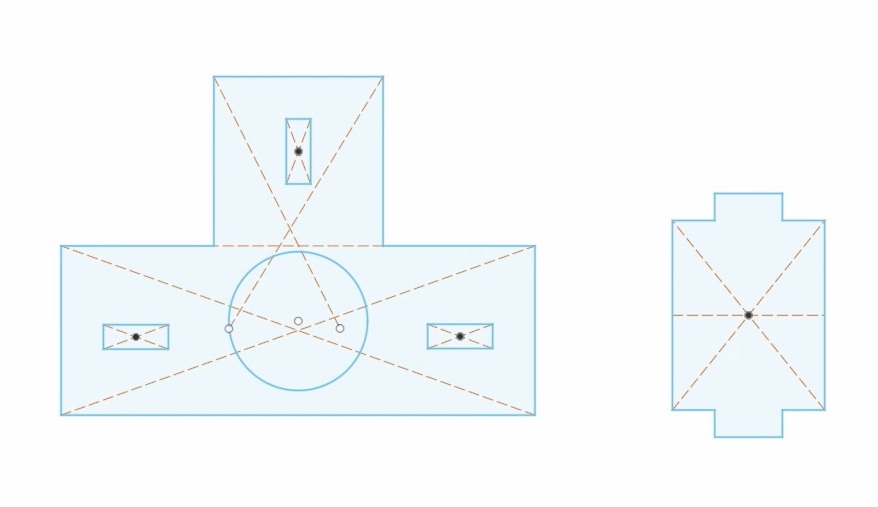
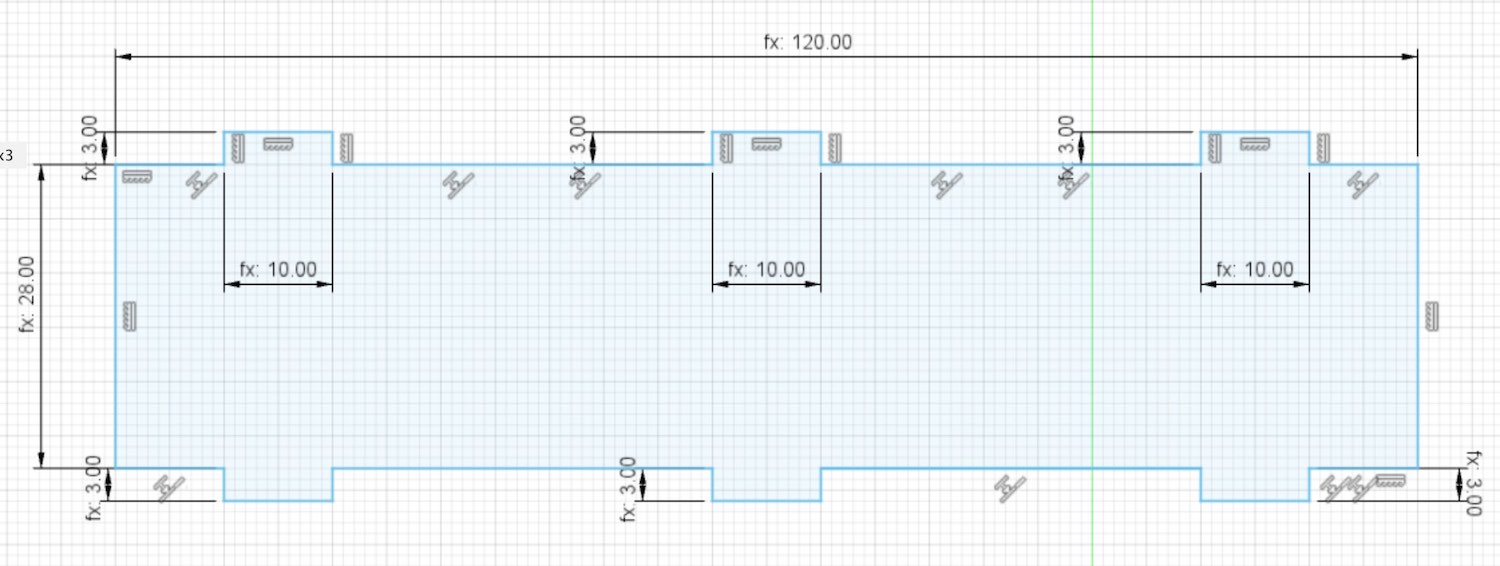
As learnt in computer controlled cutting week I started off by making the parametrics for the individual parts, I started off with the wheelie peelie.
Drawing up what I was wanting to design on the white board to see what would be the final outcome of the design and how everything would come together

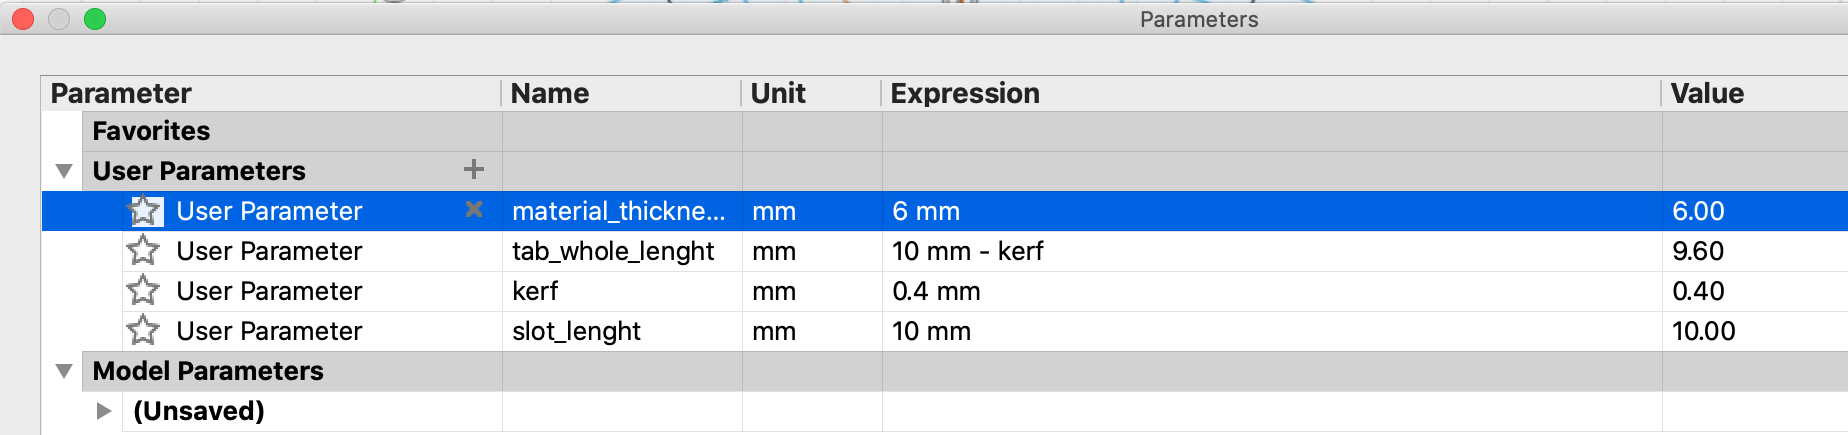
As you can see I used the parametrics a lot in my drawings to make sure I could go back and change them if I made mistakes (I did) which made it a lot quicker and easier. I did find it difficult at first as this was a lot more complicated than what I had made during the computer controlled cutting week.
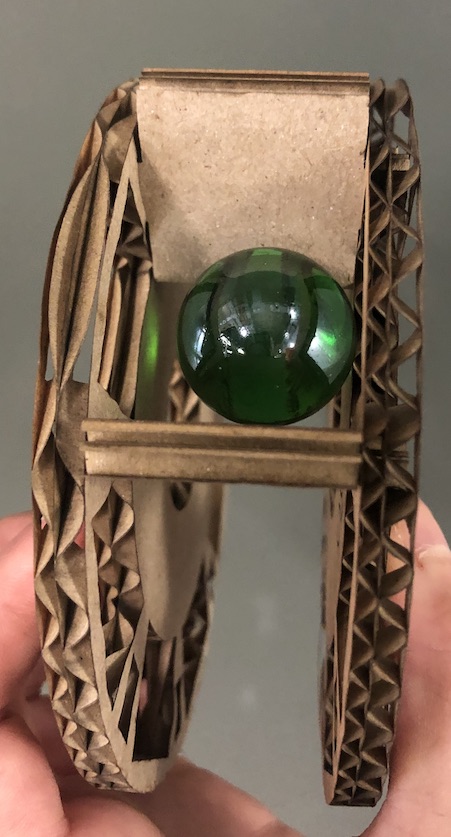
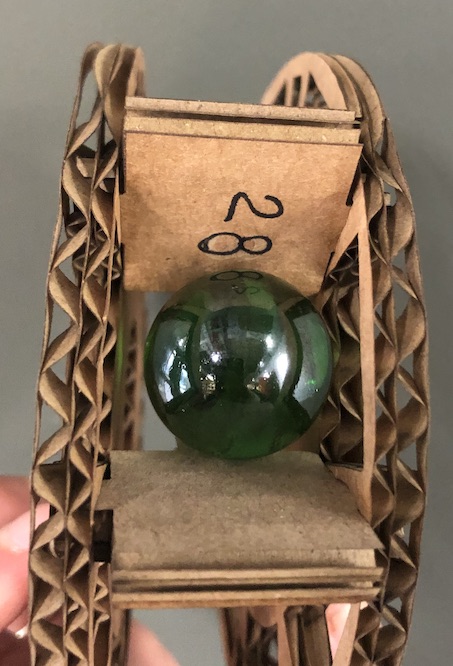
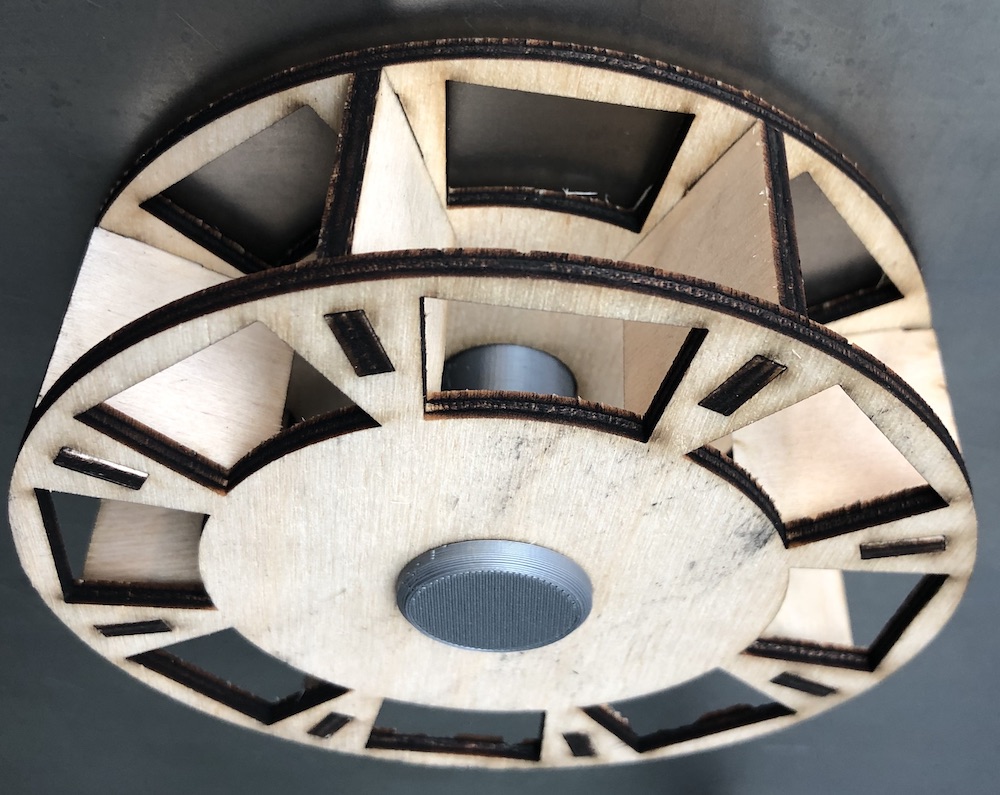
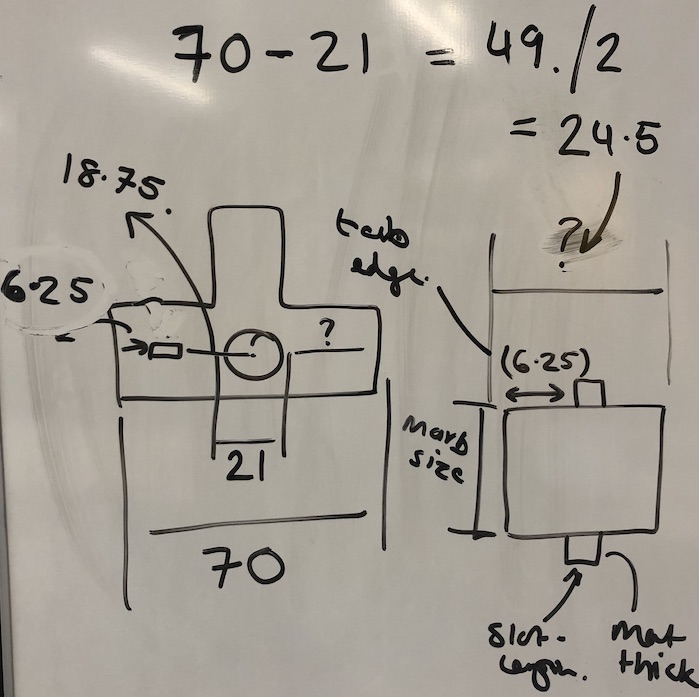
I cut out two circle and two dividers so I could test out the overall shape. When I placed them together I realised I had made a huge mistake and hadn't taken into account for the tabs therefore the marble did not fit.
I went back to the whiteboard and draw up what I was looking for and what I had to decide I needed to get this all to work. In the drawing I needed to add the material thickness onto both sides so that the marble would then fit into the gap.

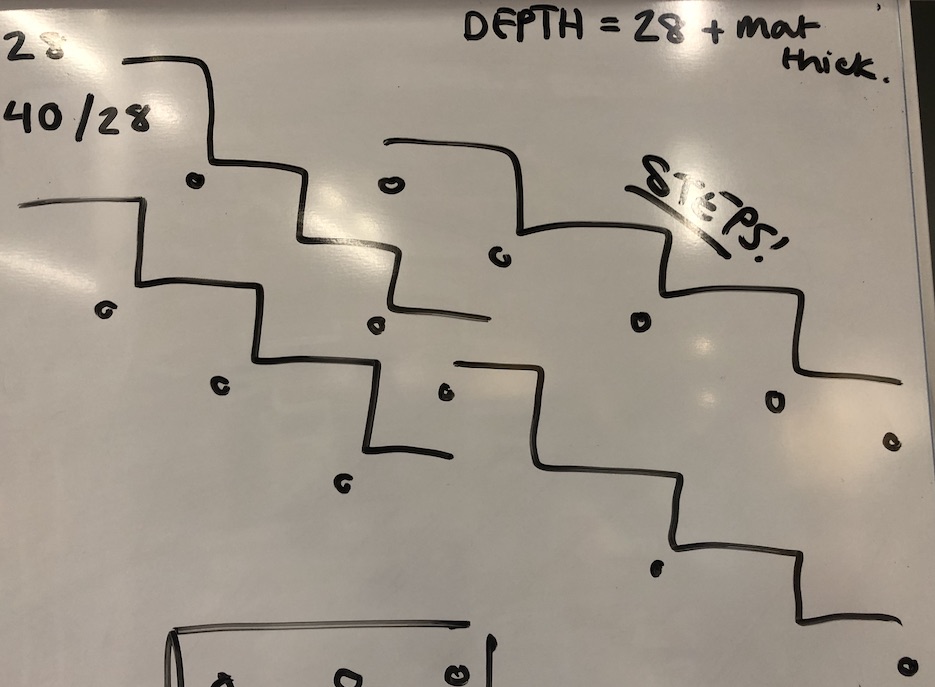
I made two 1. That was 28 mm and another that was 30 mm to see which would work best with the large marble we had.Overall the 28 mm gap worked much better as this meant the marble couldn't bounce around too much when it was in the space.

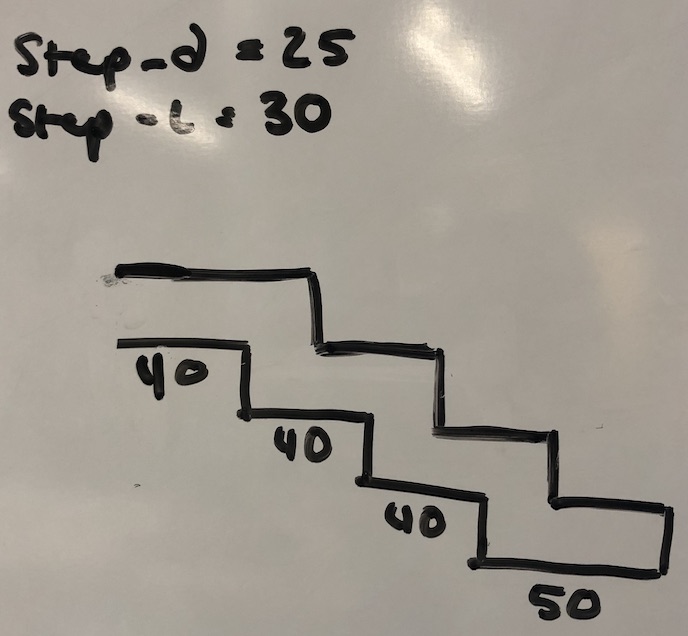
I then cut it out in wood to make sure that everything fitted well together and then moved onto the steps which I knew were going to be the most difficult.
With the seesaw I first had to design it which didn't take long at all as this was the most simple design of all of the parts. Just making sure I don't do what happened with the wheelie peelie.
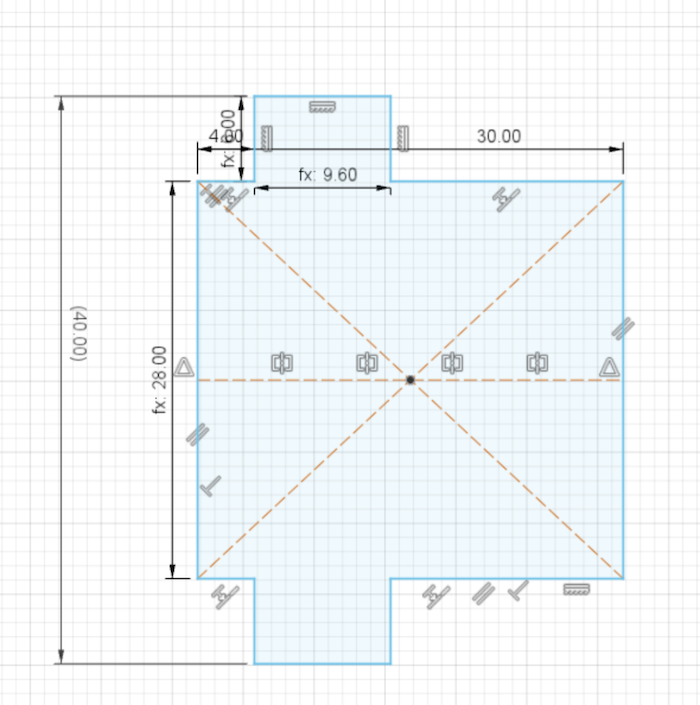
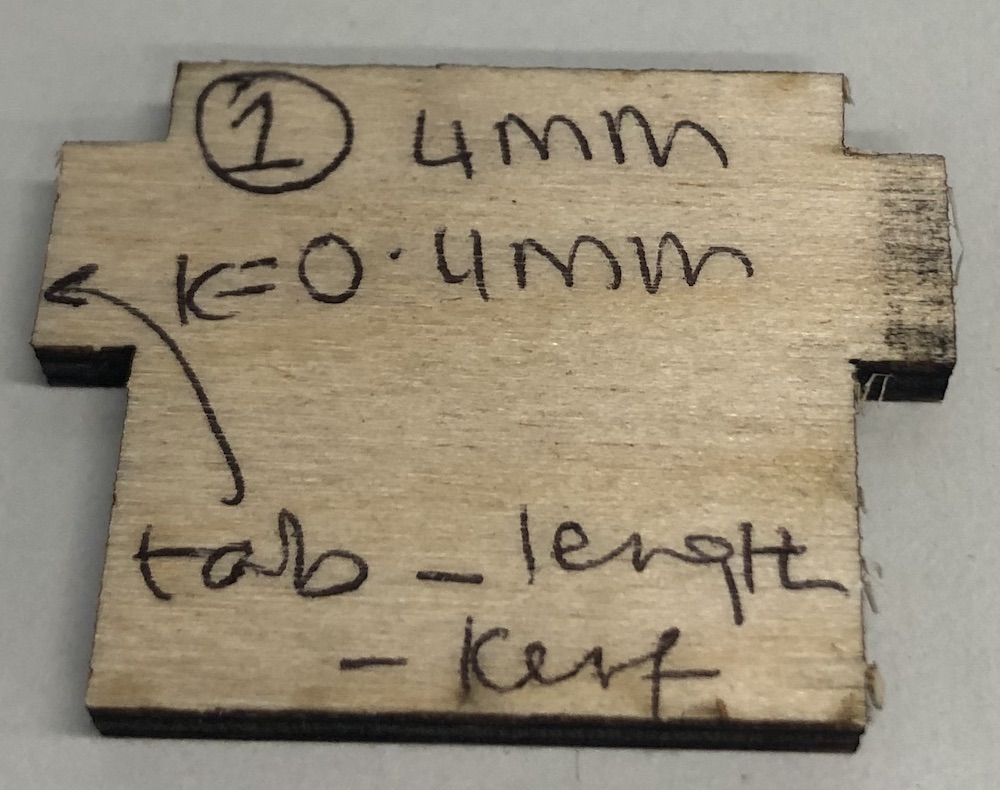
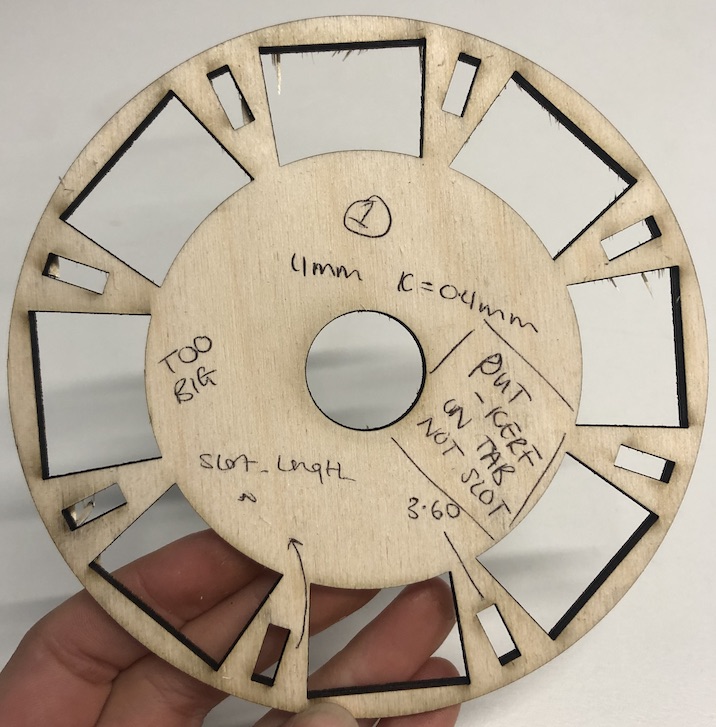
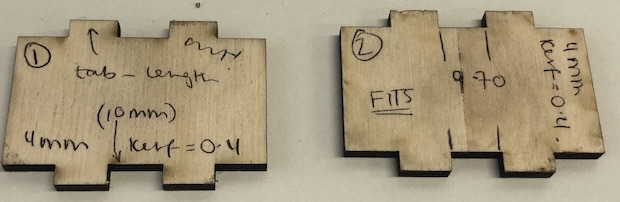
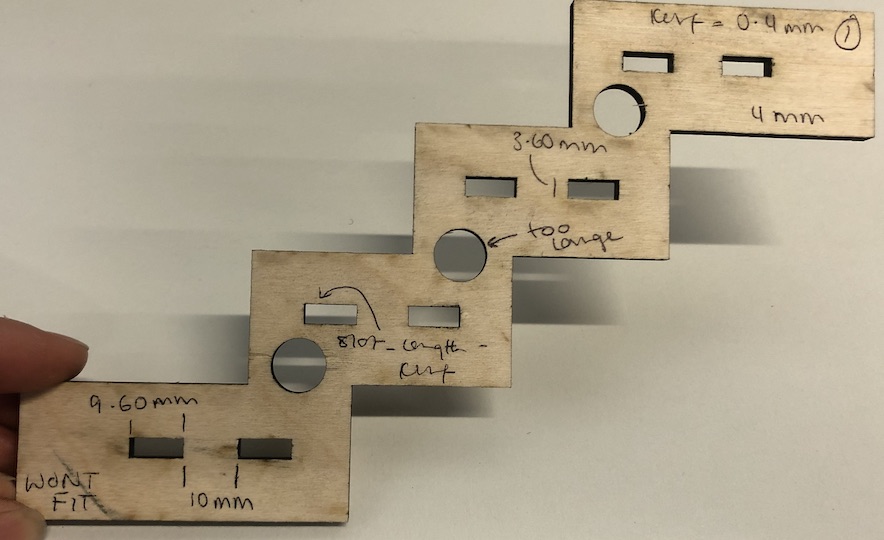
I had struggled to get the kerf correct on the wheel so I thought I would just double check it on the seesaw and because the parametrics were there I could just change it out and they would alter without be worrying. The really helped and as you can see overall checking the kerf was a good idea otherwise the parts would not slot together correctly. I also used the same dowels for the wheel on these so that they would spin correctly as mentioned before.
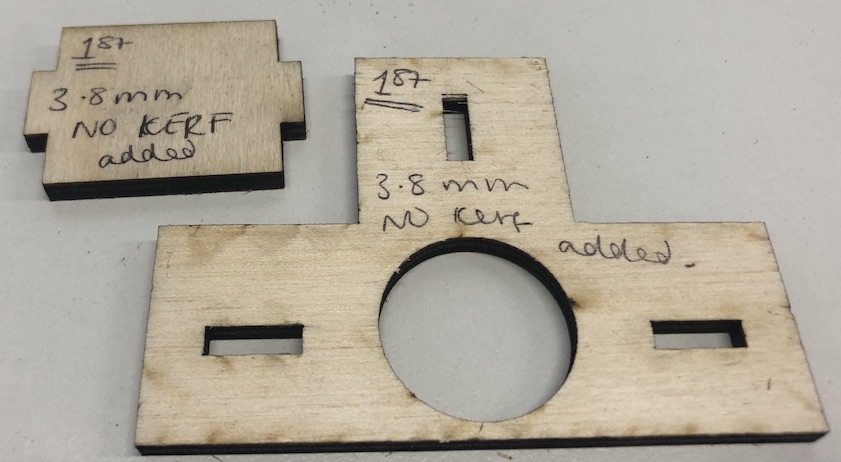
I tried out different kerfs for each one to see which would work the best as we were also using different plywood that was found in the building which was great as it was a lot cheaper.
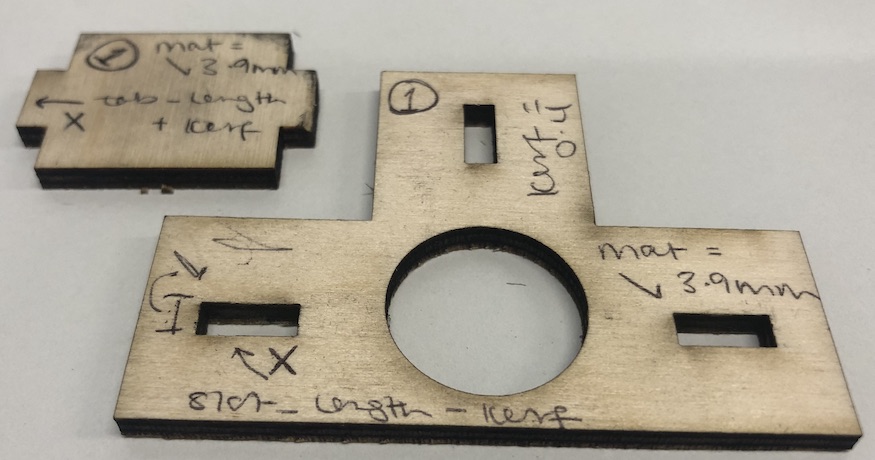
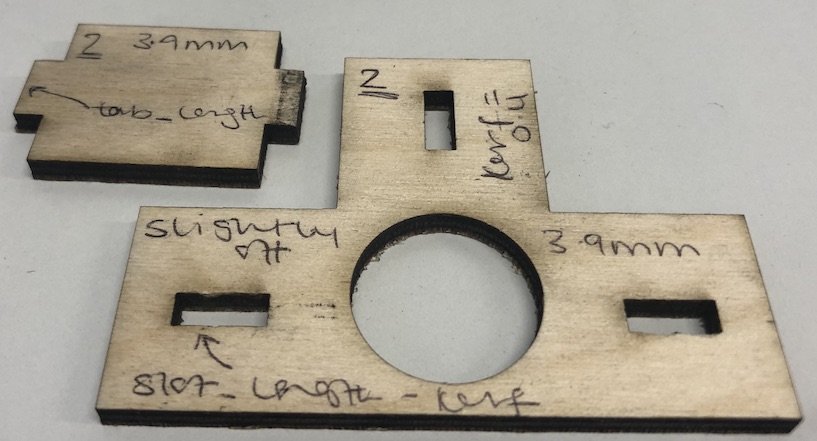
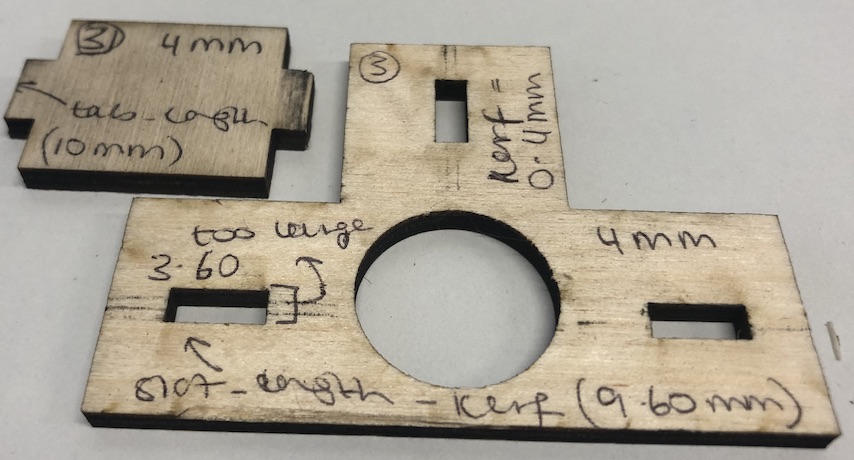
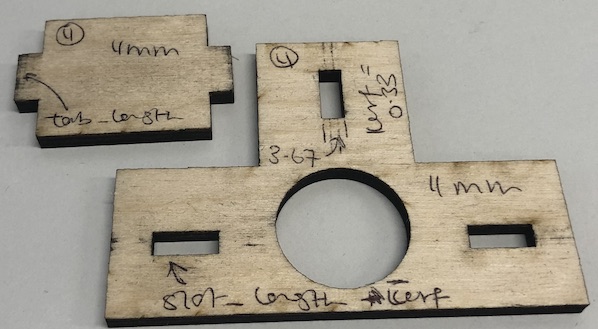
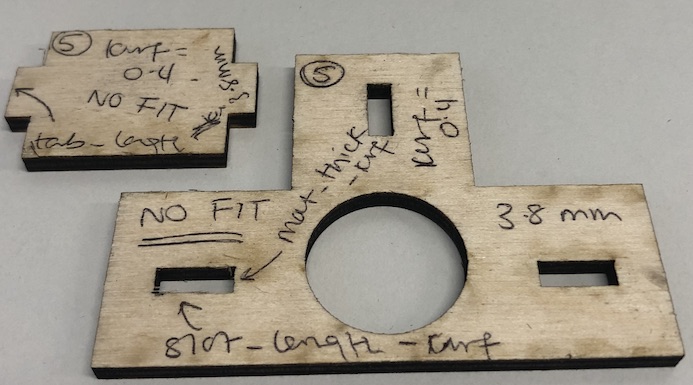
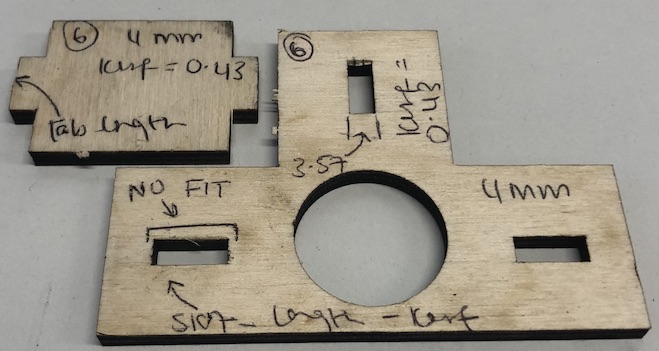
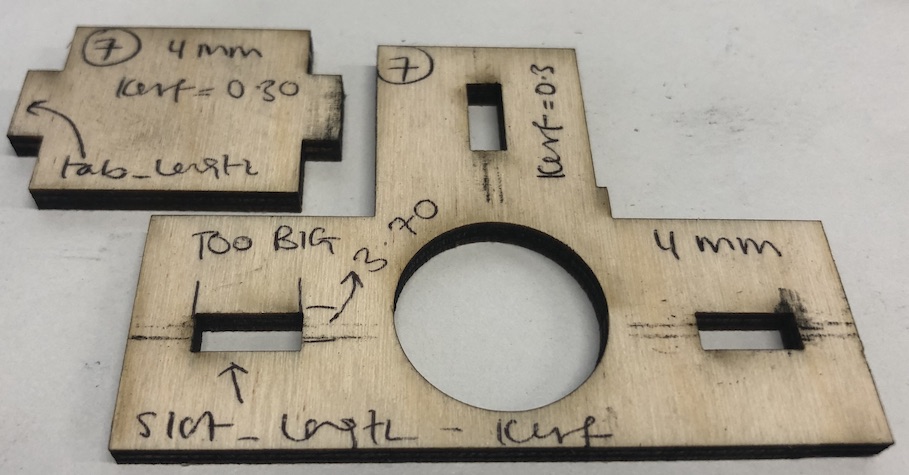
Overall in the end the 8th one worked the best as you can see the measurements and the parametrics are written on so that my brain wouldn't struggle so much as I did find it confusing after a while.
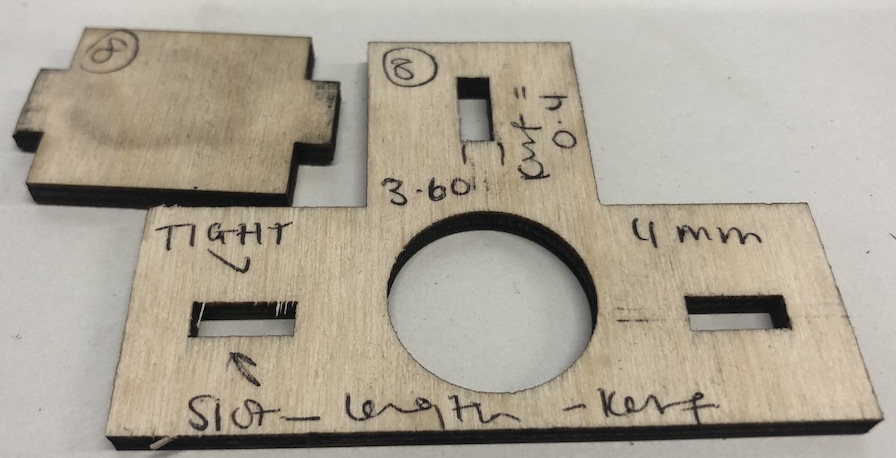
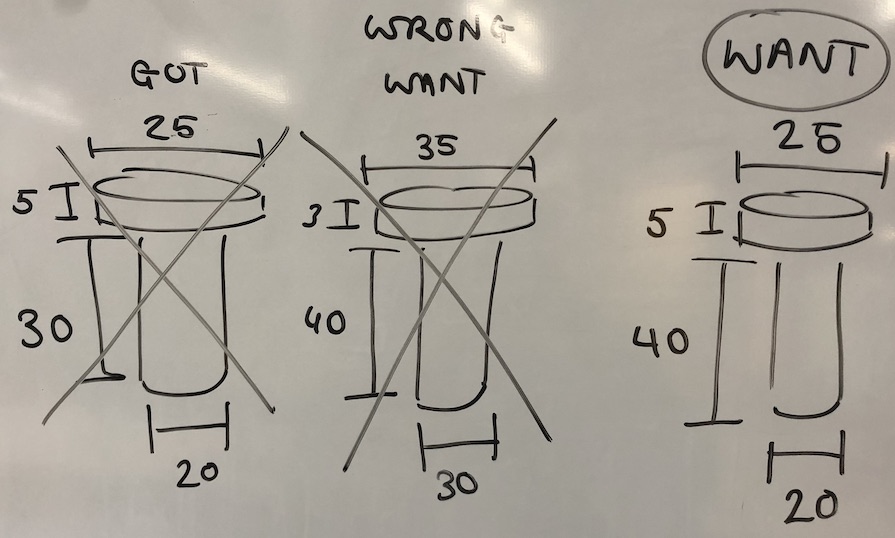
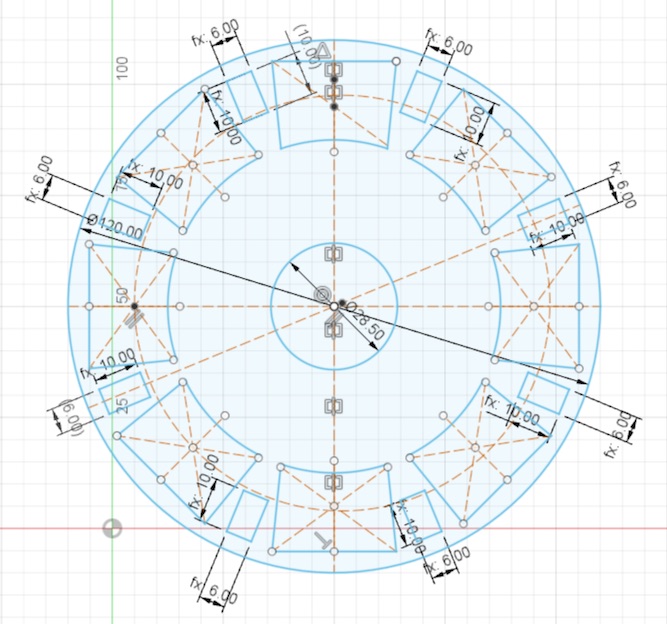
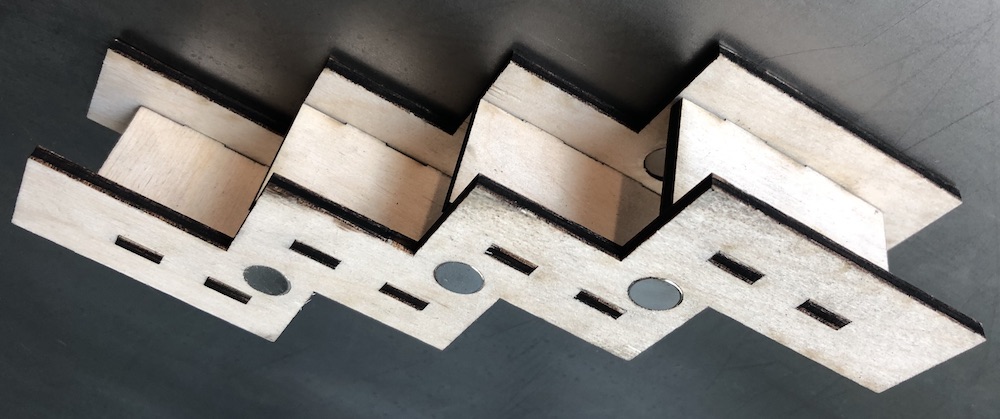
Now the were the hardest to design out of all of all of the parts, as you can see from the drawings I made sure to make it parametric as well as making sure everything would slot together with the marble moving down it smoothly.

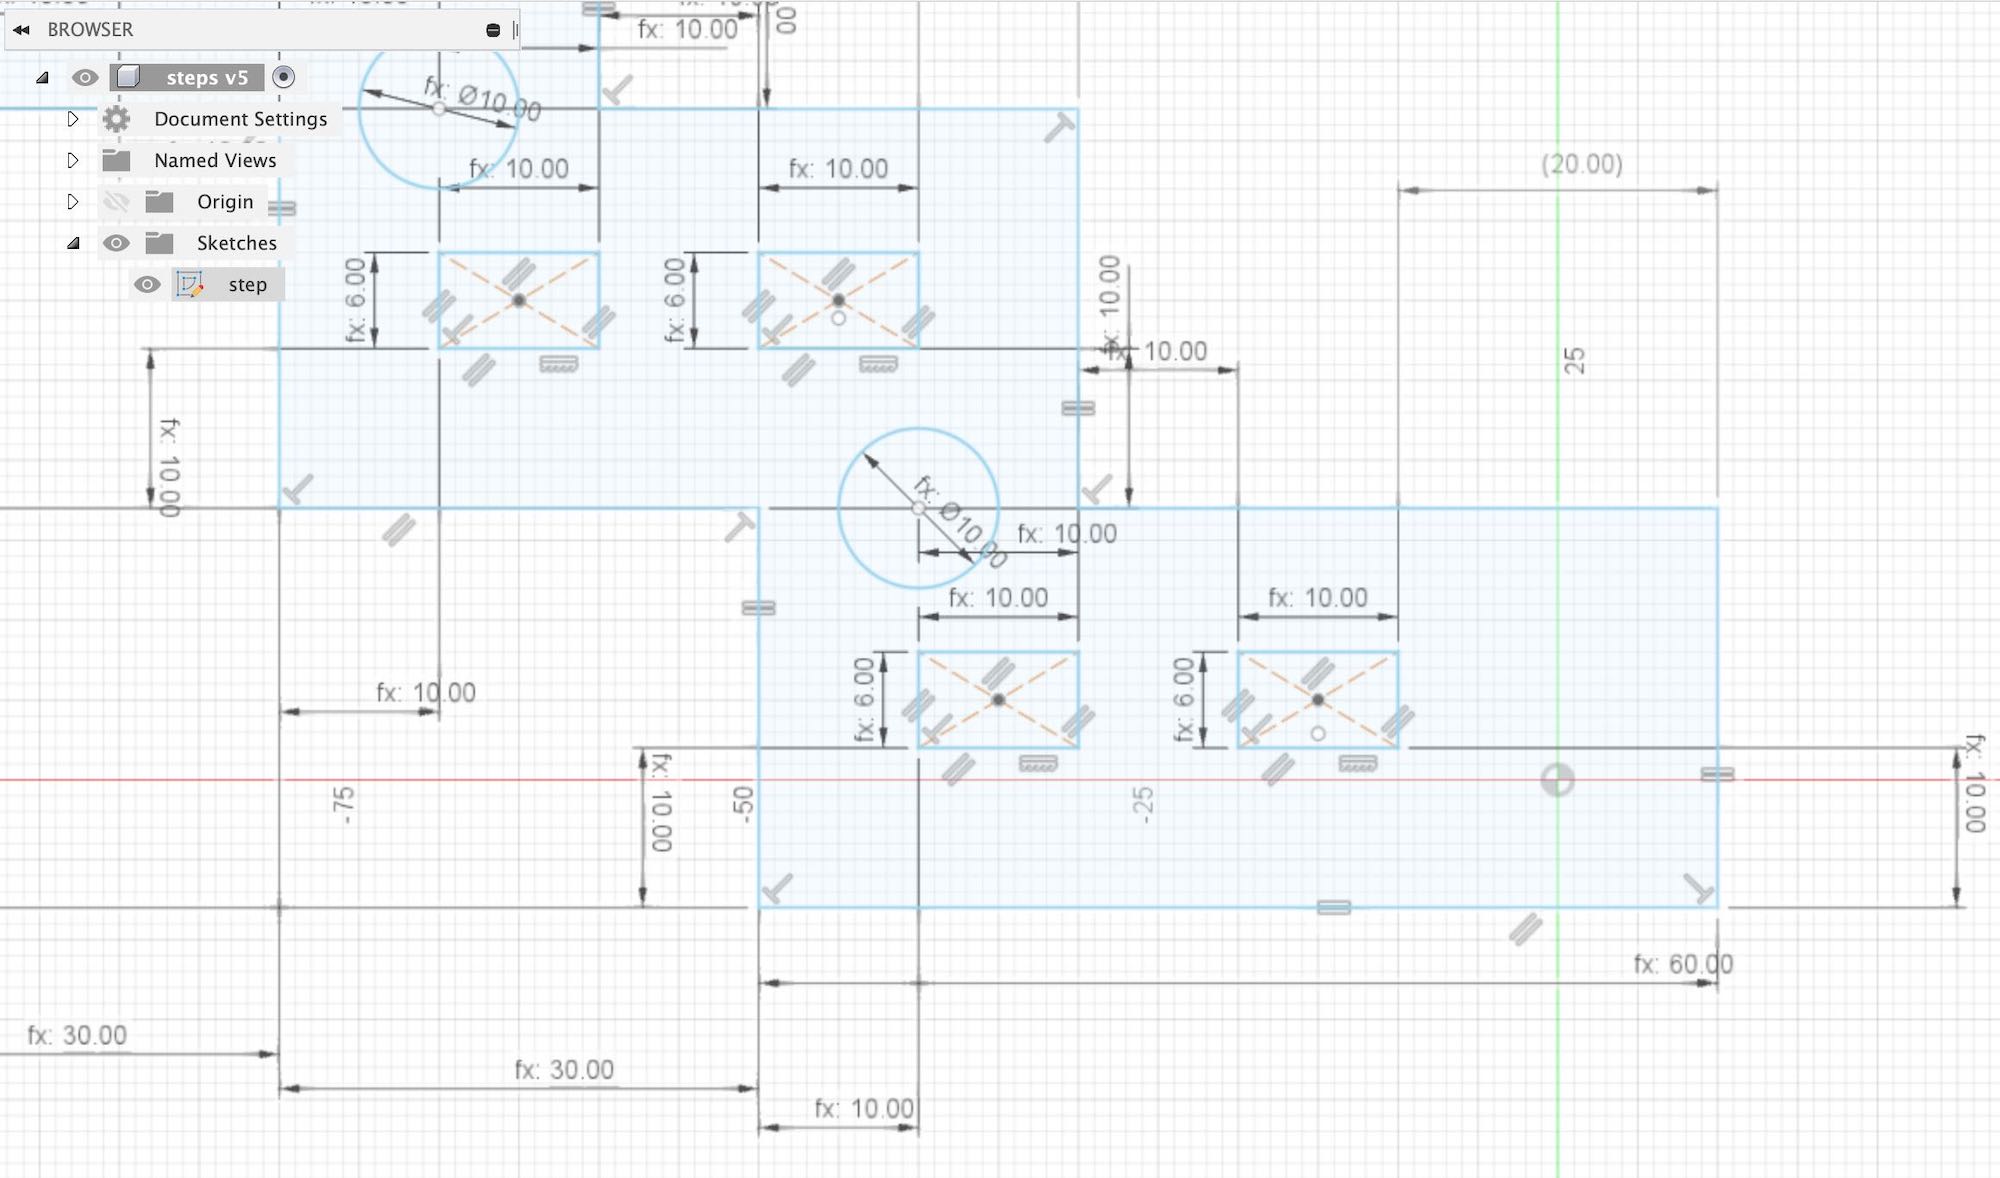
Drawing it on the whiteboard also really helped just like the other ones to make sure I was getting it correct, by drawing it on the whiteboard then in fusion this meant I could see the correct measurements in fusion to see if my brain was getting it correct.
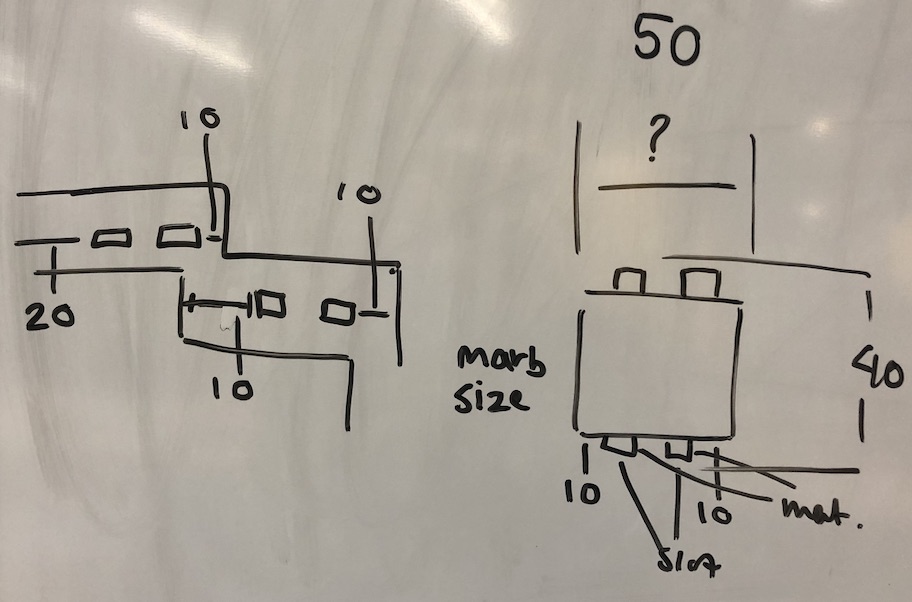
I also had to think about where the magnets were going to sit on these steps as I wasn't sure they would be ale to take the weight of the marble if there wasn't enough but I also didn't want too many as this would make them too solid and we wouldn't be able to get them off easily.
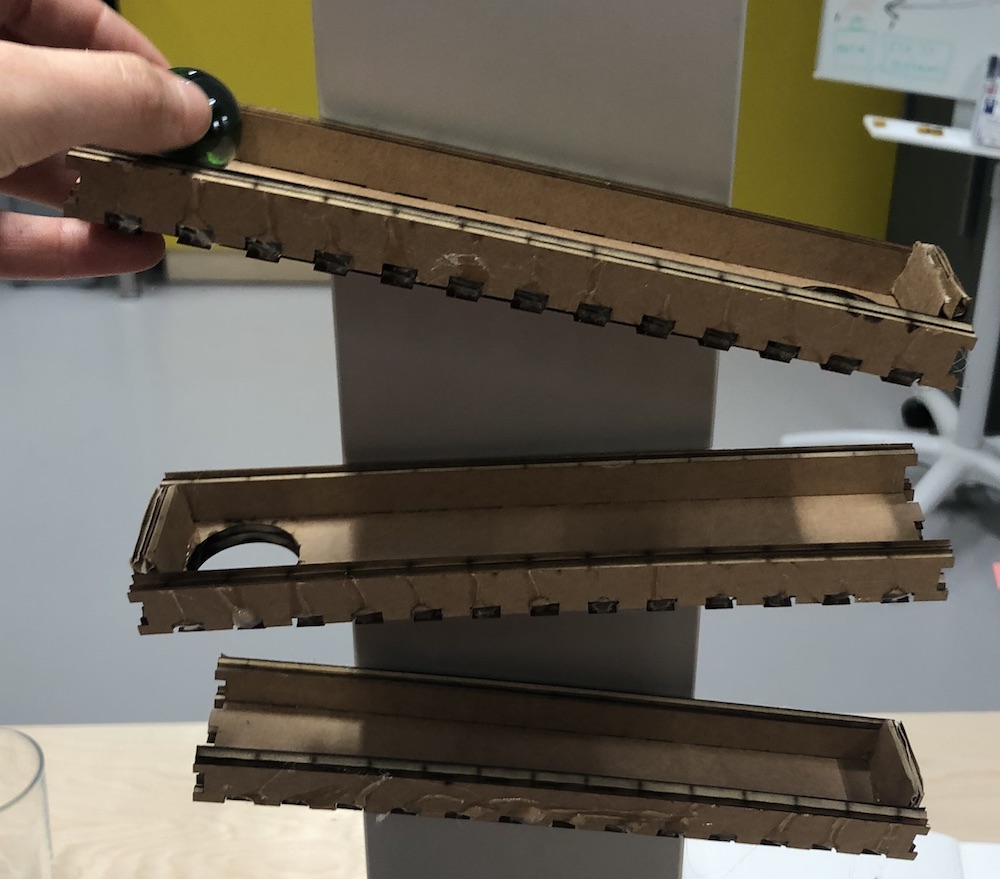
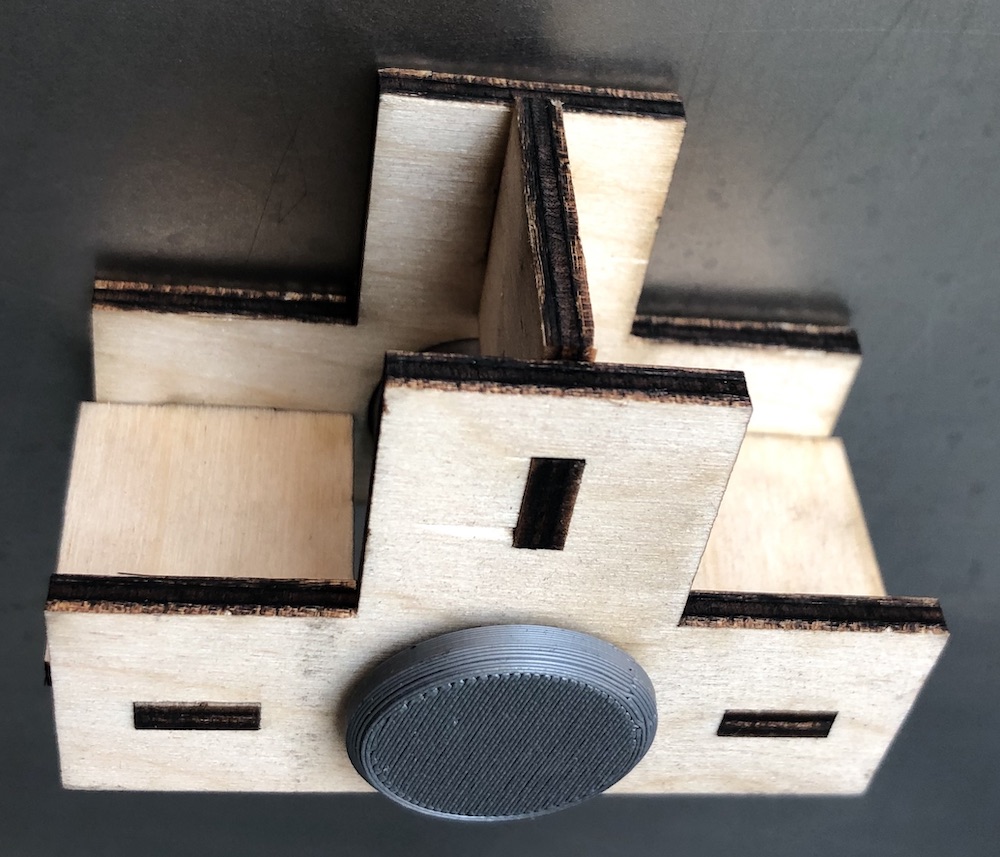
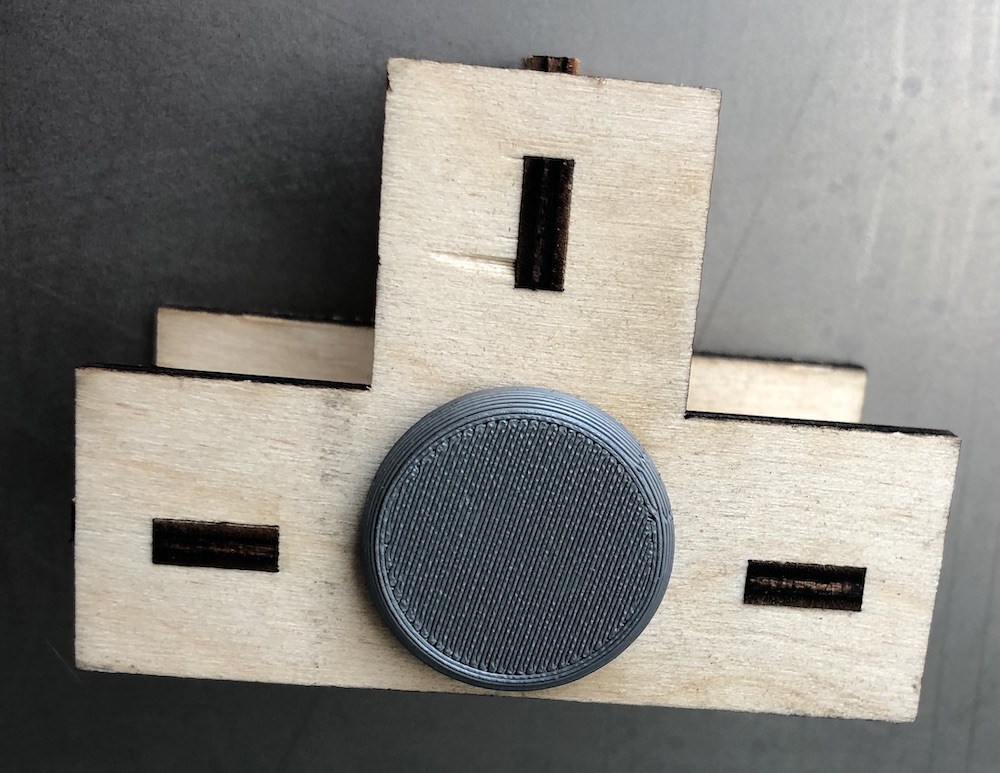
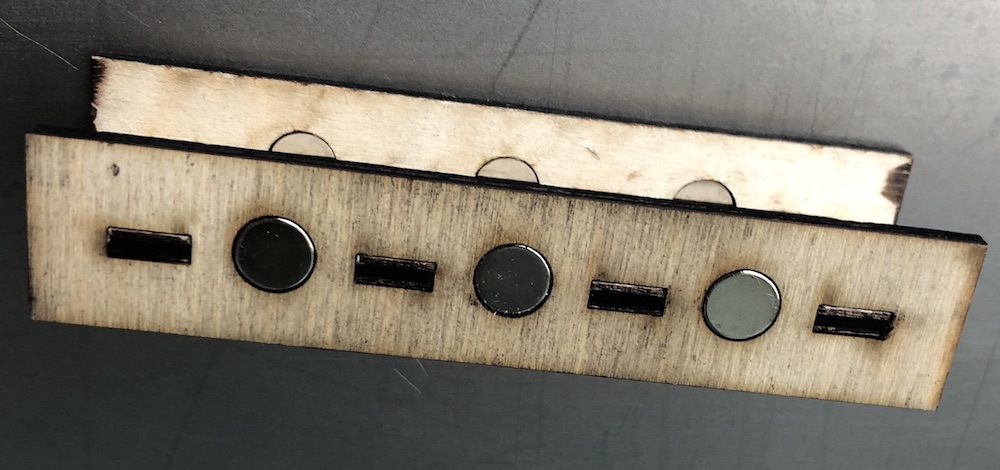
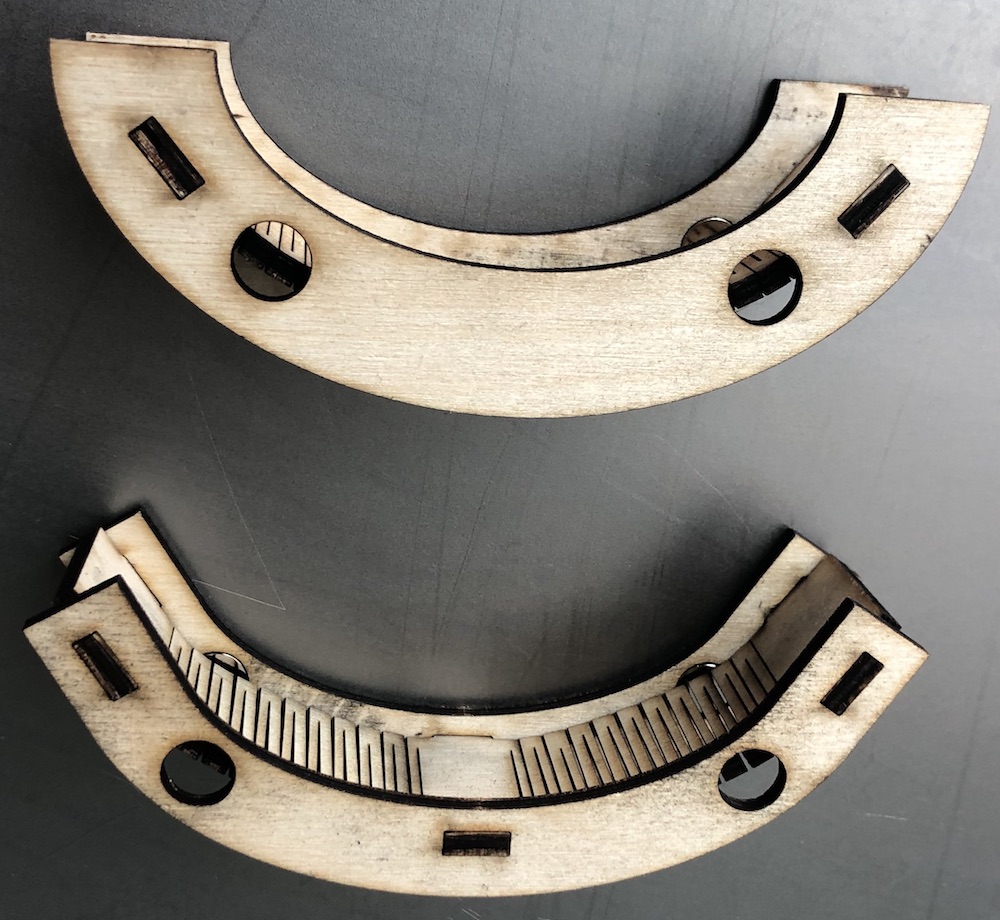
These are the wooden cut outs of the parts that I ended up using, I also used the same kerf from the seesaw which was very helpful in the end as it worked on all the pieces of wood and parts I ended up cutting.
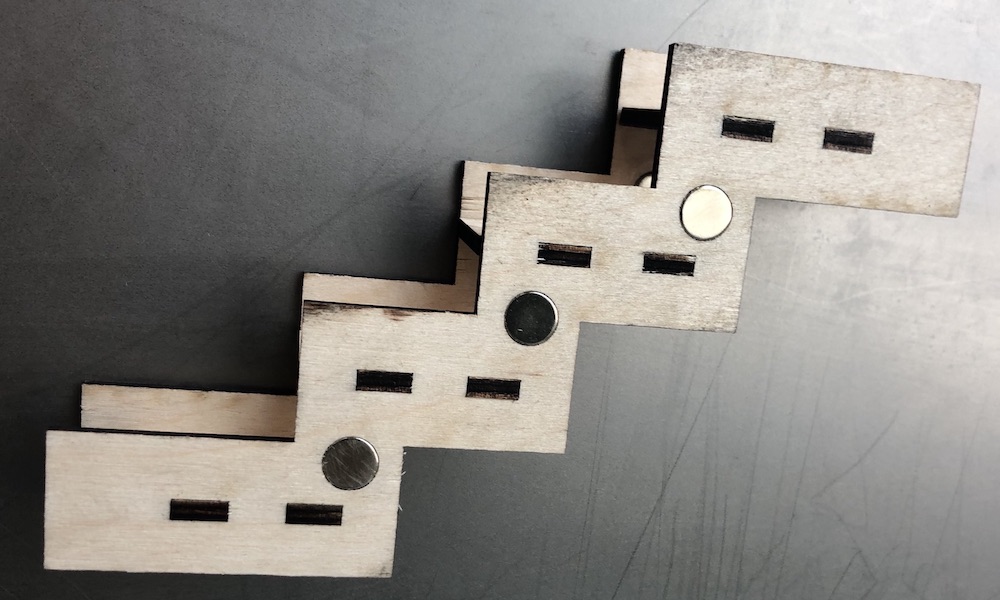
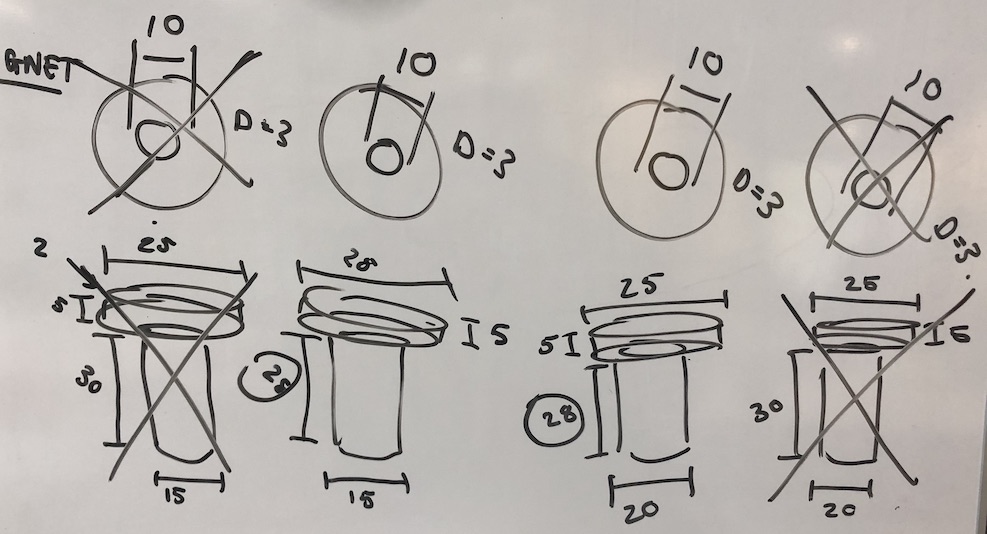
The troughs I made them so that It wouldn't matter way way around you placed then onto the wall this meant that you could have any configuration you wanted. I made a new sketch added the correct parametrics and started designing. Again adding the magnets and the tab in the correct spacing to see which would work the best.
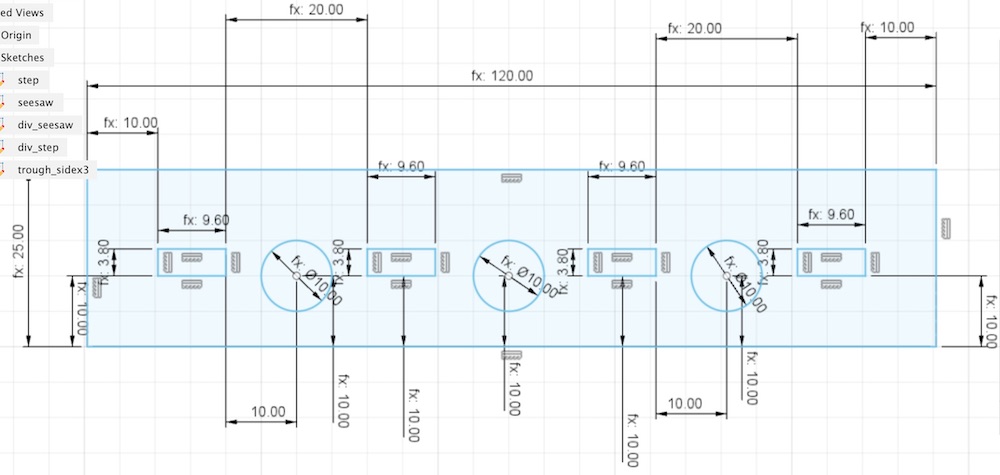
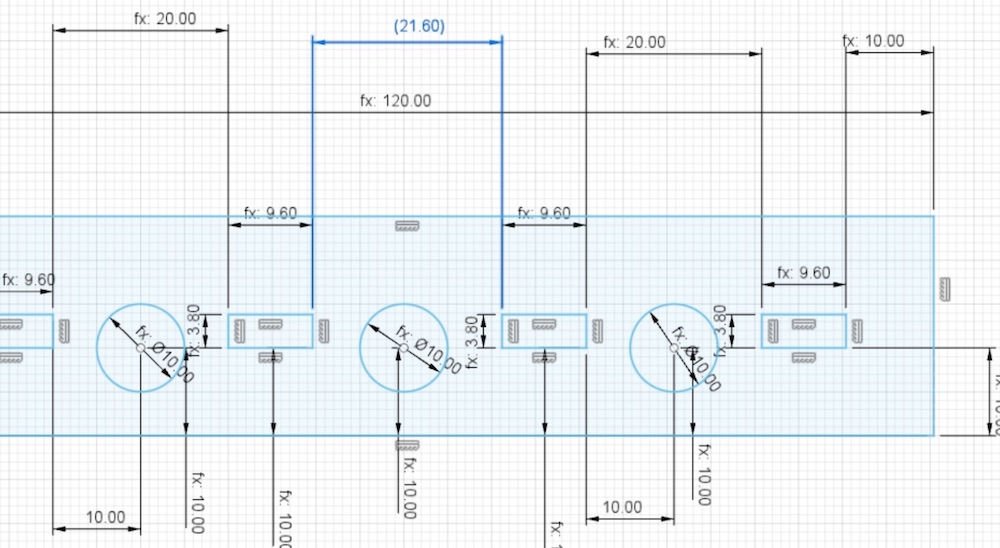
Trying to find out which placement would be best for the magnets to fit the marble and so they wouldn't fall down just like the steps I didn't want them to move when the marble hit them. In the end the top one was the best because it wasn't over loaded but also it did hold it very well.
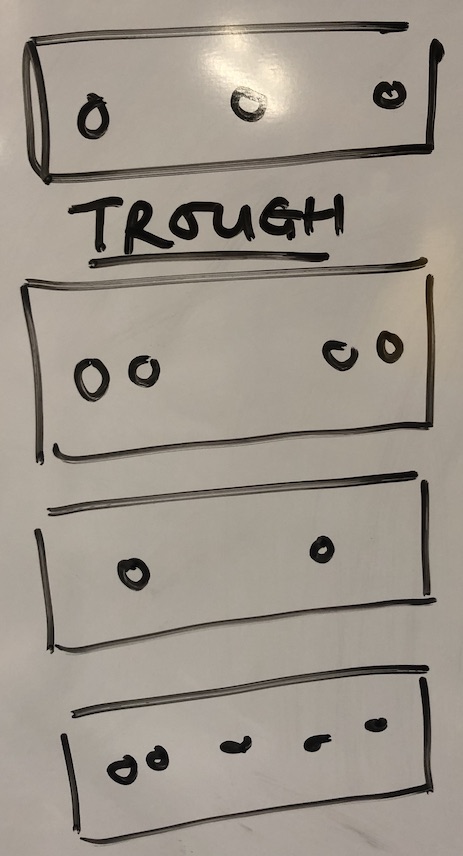
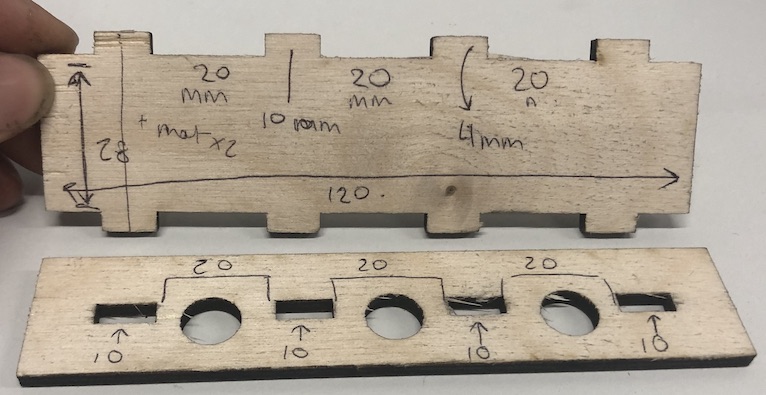
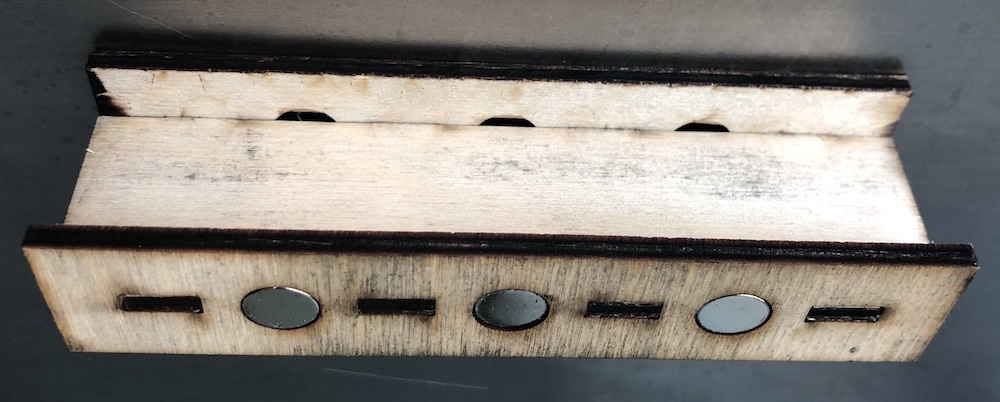
The final wooden cut out of the trough, the final design didn't have the whole like the one at the beginning in cardboard as we realised that by having it at the end the fall wasn't so harsh for the next part to take the force. It also means more items to pair up with the trough being open at both ends.
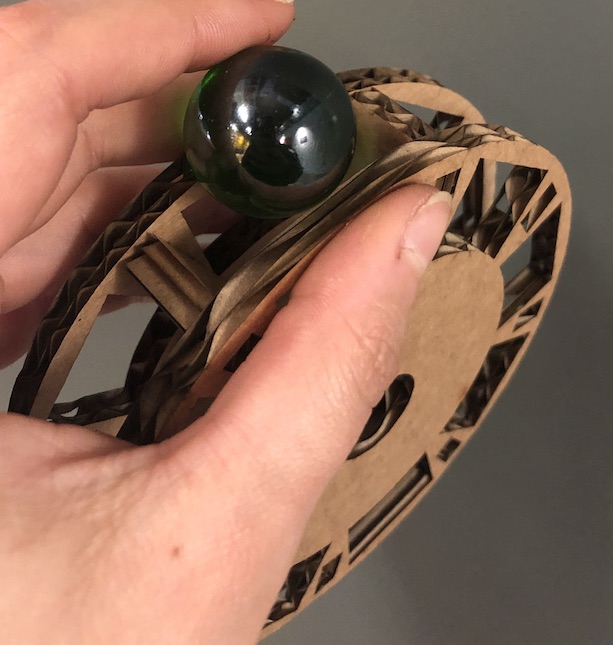
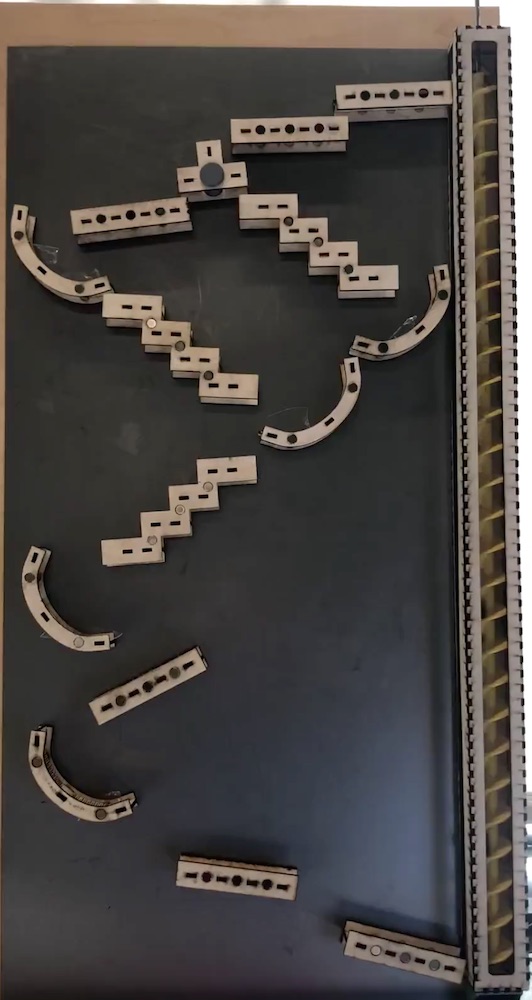
Once everything had been cut and placed onto the metal board we realised that actually the marble was a little too heavy for the parts I had made, this meant that we didn't have a large and light enough marble. Andrew then suggested that we 3d print some marbles.
I then proceeded to make the marbles in fusion and made them on the 0.8 mm nozzle so they would be a lot quicker, I also changed the infill of the marbles to see how they would change compared to each other.


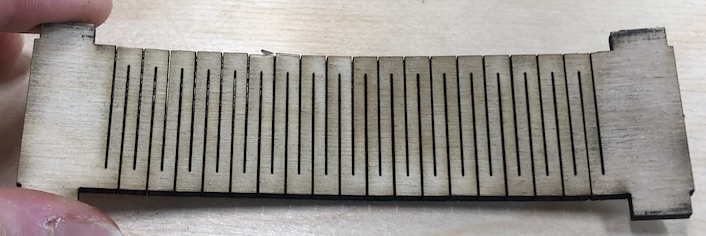
We also realised that when we were trying pit the marble run we needed something to take some of the speed that the marble was picking up on its route down the run. I realised this is when I could learn how to make a live hinge and and a little scoop so that the marble could roll through it and take a little of the force of it. This did actually work very well and making my own live hinge was very fun!

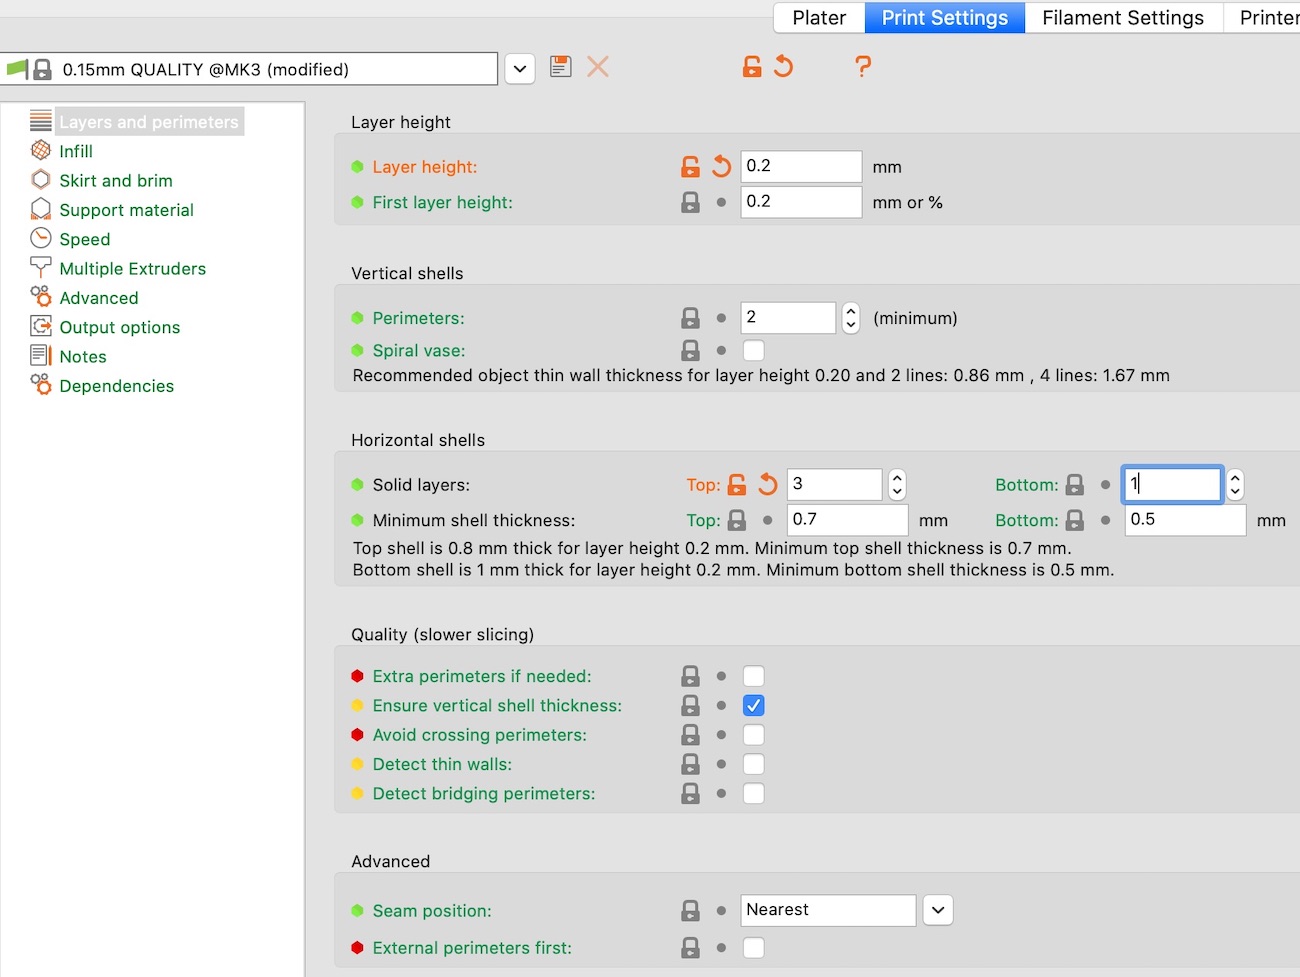
The first one I made was way to close together which ended up breaking as I was bouncing it around too much as you can see below.
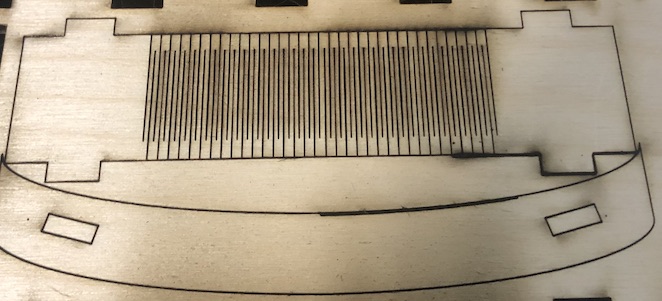
I then made I future apart but annoyingly the laser cutter didn't quite cut through the wood which was odd as this wasn't happening before when I was cutting the other parts.
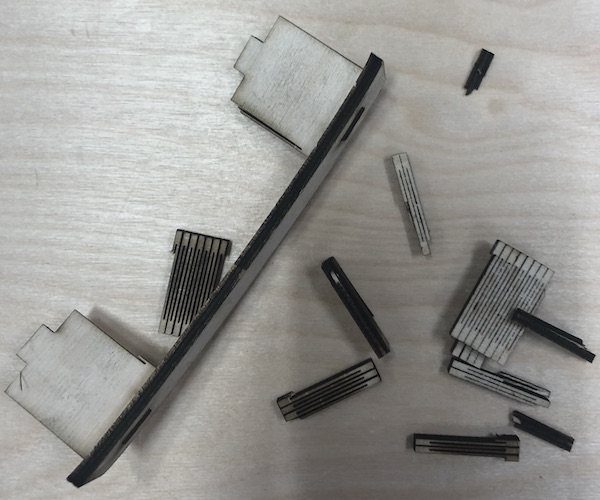
I then tired again and this worked perfectly! It worked very well on the run to help the marble to move down slower but also gave us another exiting part to add to the run to play with.
