Link to 3D Scanning and Printing Group Page
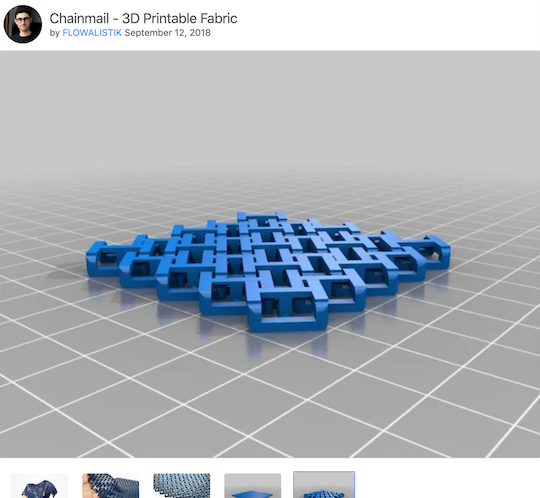
From Neils talk with us I was veyr interested in the chainmail that you can make on the 3D priinters. I straight away went onto thingiverse and found a chainmain someone else had made and got it on our machines to see what it looks like. Personally the print wasn't great, the way it moves on your skin didn't work as fabric it was as smooth because of the sharp corners that came out when places on a round surface.
Here is the link to Agustin Flowalistik Chainmail from thingyverse
The licencing that he uses is 'Chainmail - 3D Printable Fabric byFLOWALISTIKis licensed under theCreative Commons - Attribution - Non-Commercial - Share Alikelicense.'
I then went on to design my own chainmail which I actually found pretty hard. Trying to see how it was going to work on fusion made the whole designing pretty hard as I wouldn't quite get used to how it is going to work in real life. I wanted to make a doughnut shape and then curve it to use this but in fusion I couldn't get it work.

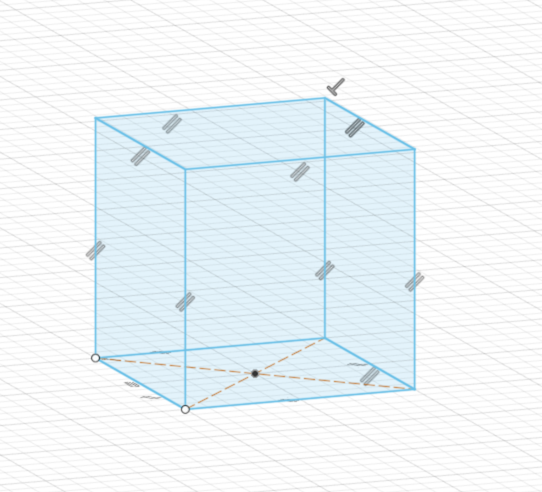
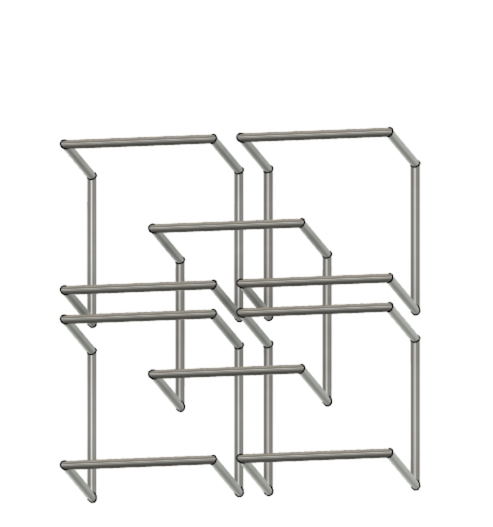
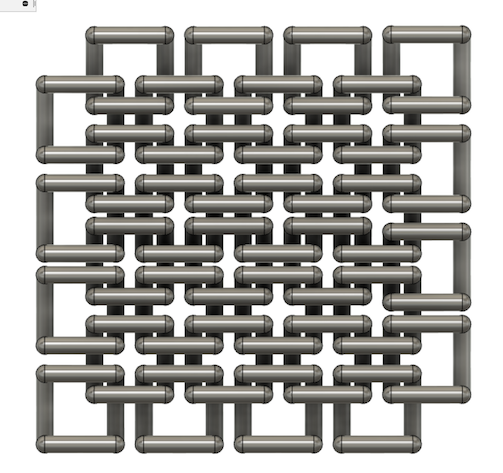
This is when I decided to just make a square one, this worked a lot better especially as I'm still getting used to making in fusion. I started by making a cube then cutting away the lines that I didn't need. Then used the pipe tool to extrude it out to get the tube around the lines that I had made.
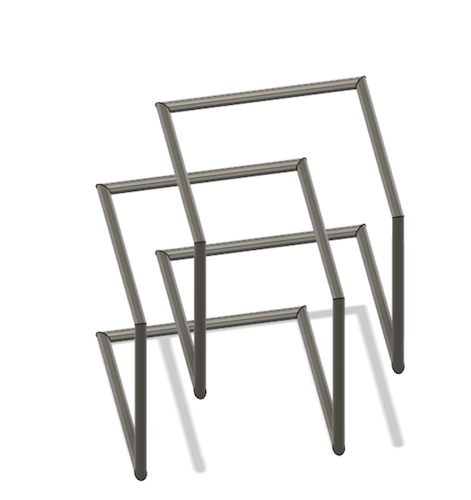
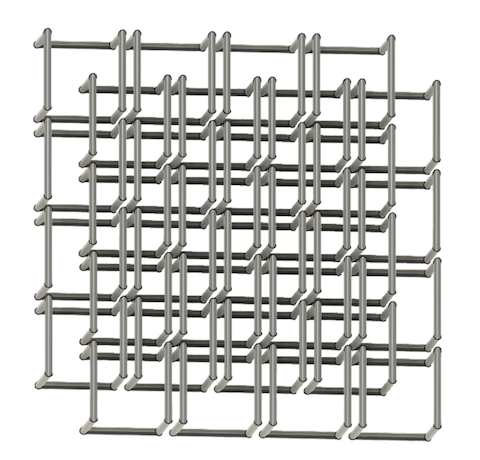
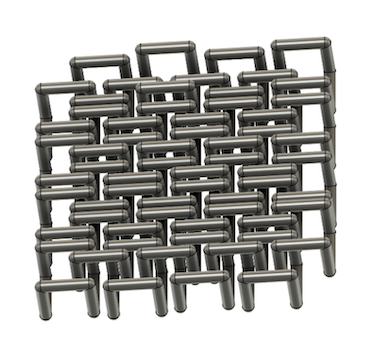
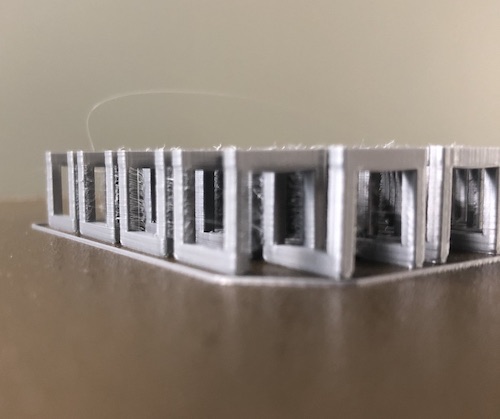
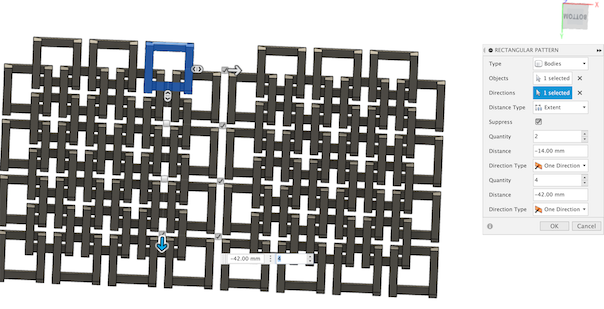
I then proceeded to copy and move the design I had made over and over until it was the correct size I wanted to make as a test. I realised that moving it was quite hard because I couldn't get it to be beside it evreytime, I didn't realise this untill I had to print it as it wasn't flat on the bed. I also got my measurements very wrong, the reason these are so skilly was I made the pipe 0.3 mm rather than 3 mm so later on you can see me change this.
The next day I showed Andrew my idea and that I couldn't get fusion to allow me to make a doughnut shape and then manipulate that. He then showed me on blender how this could be done in there quickly, I'm not sure how it should curve and would have play aorund to get this correct. I think if I was going to do it again I would get this shape perfect to then work. I think I would like to learn blender at some point just need to find the time to get my head around it.
This is point where I realised I needed to make the tubing thicker as it was way way too small.
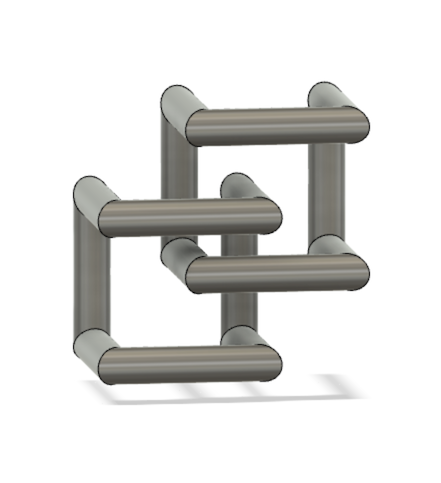
I also made it so that the corners got rounded over so it was so sharp, I wanted to make it more curved compared to the pther design I got from thingiverse.
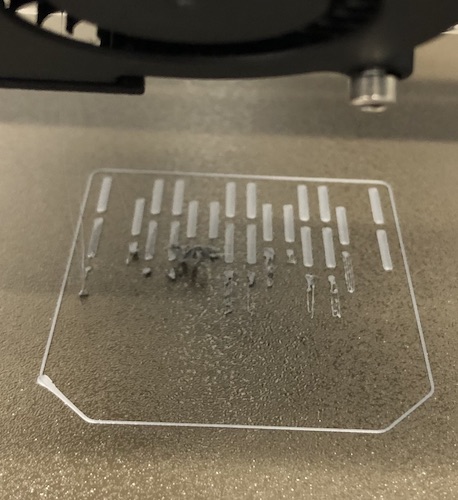
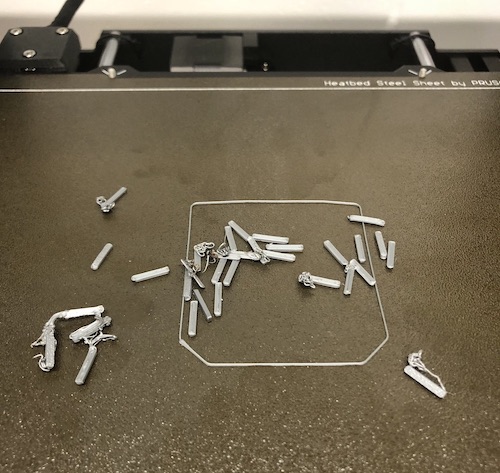
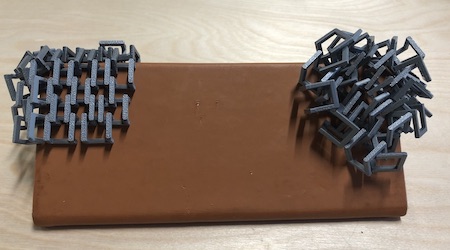
This was a huge fail!
This was because the design I had made was round, this does not give it enough surface on the bottom to stick to the bed of the machine. I also noticed that the machine was coming out fine at the top and then when it was coming to the bottom of the bed it was very thin and striggy. This probably means the machine needs to be recalibrated so that the bed is level.
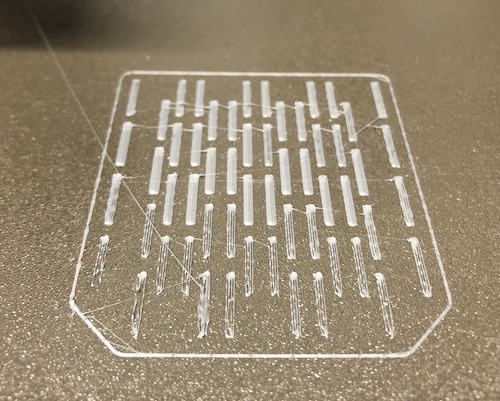
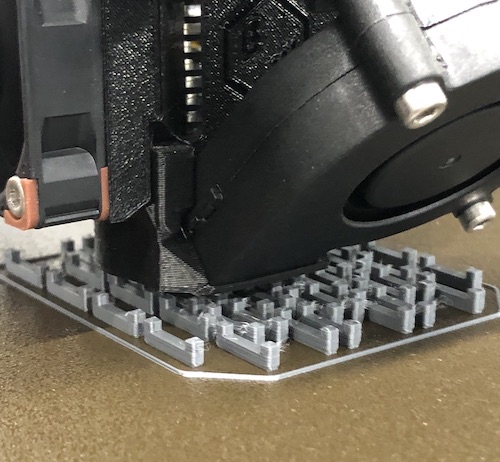
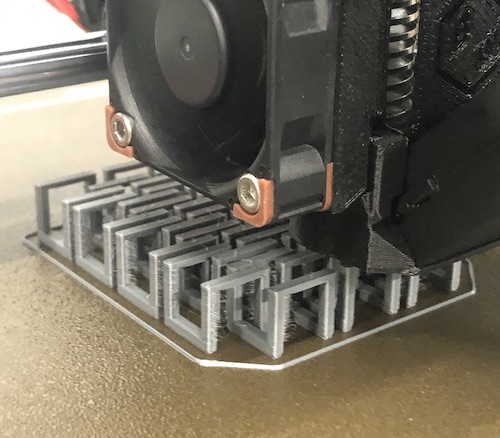
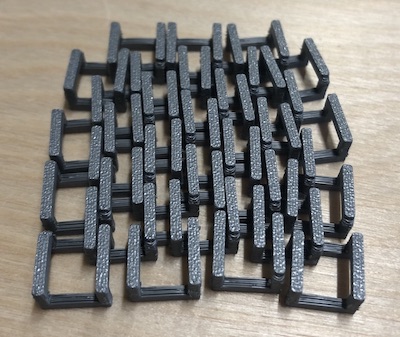
So I changed the round pipe into a square tube and this helped a lot and made more sense when looking at the design as nothign was really sticking to the bed as it is such an open deign.
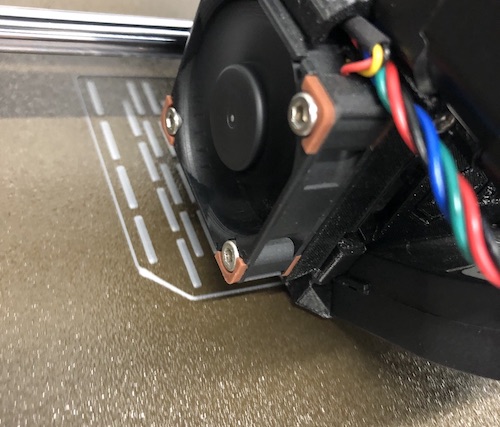
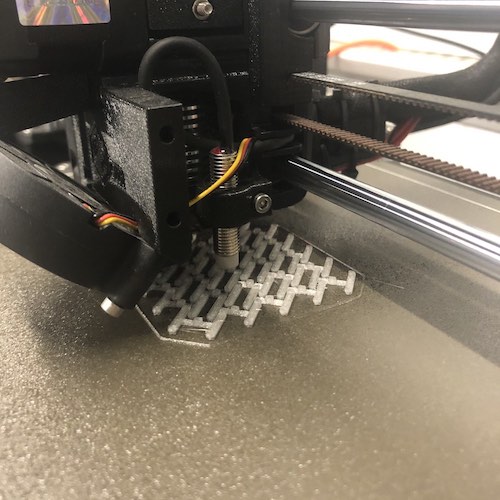
I then did another print it it was fine up until somethign must have gotton court or I didn't spray the bed to help it grip. It ended up getting court on the nozzle and got stuck, this is very very bad and can really damage the machine in the future. You have to clean it complety off and makesure the nozzle doesn't have any gunk around it because it can happen again.

I really like watching the piece come together and seeing how it grows as it is being made on the machine. I need to leanr how to get rid of the stringing as it always seems to be on my prints when I make them.
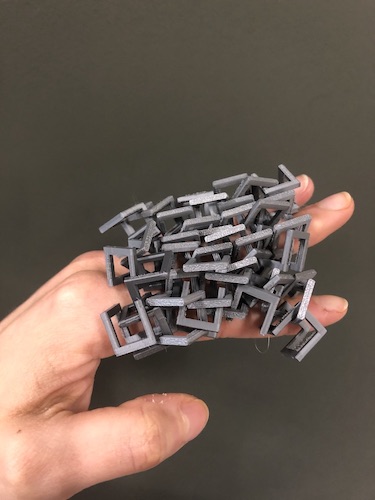
Once it was done I had to be very careful to get the peice off the bed as it was very delicate and could break easily.
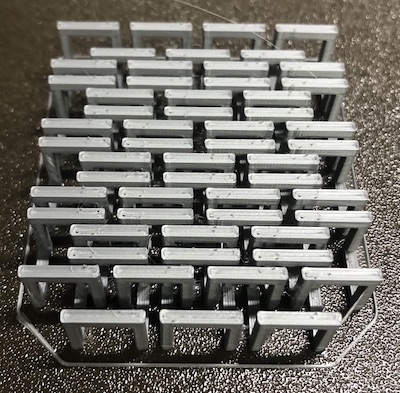
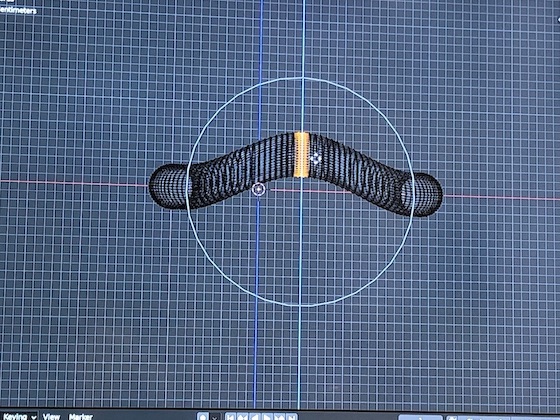
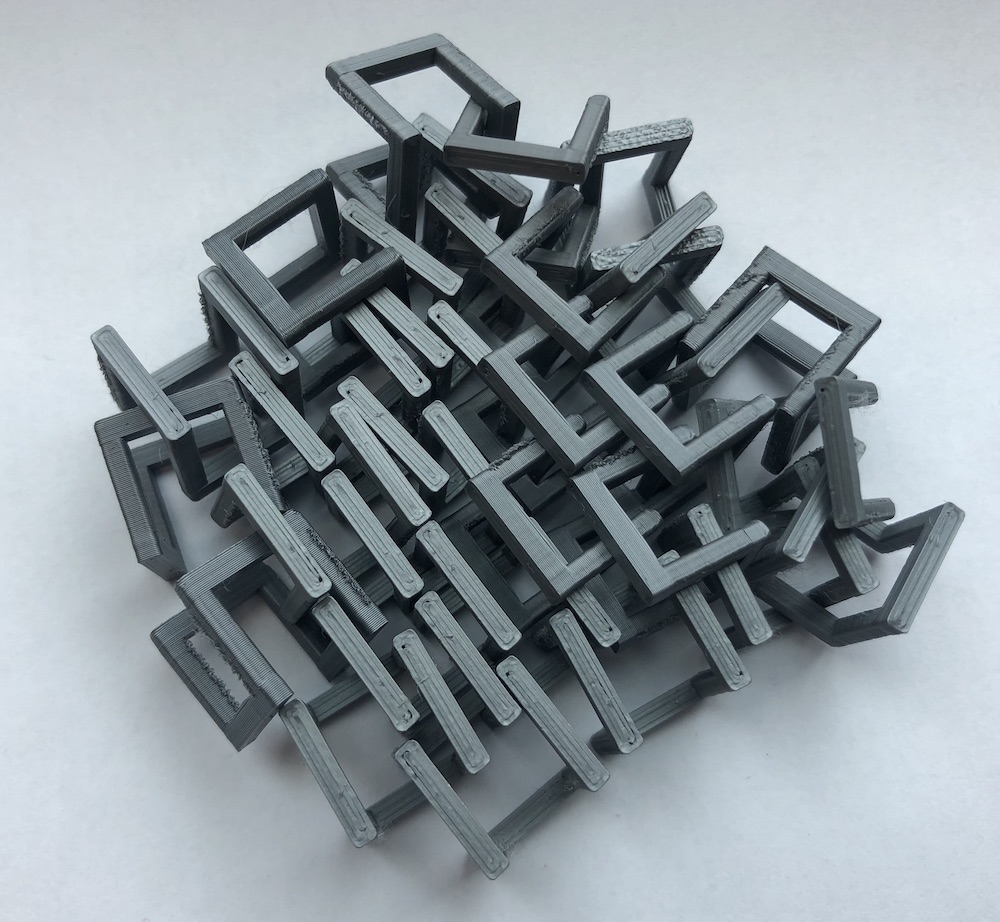
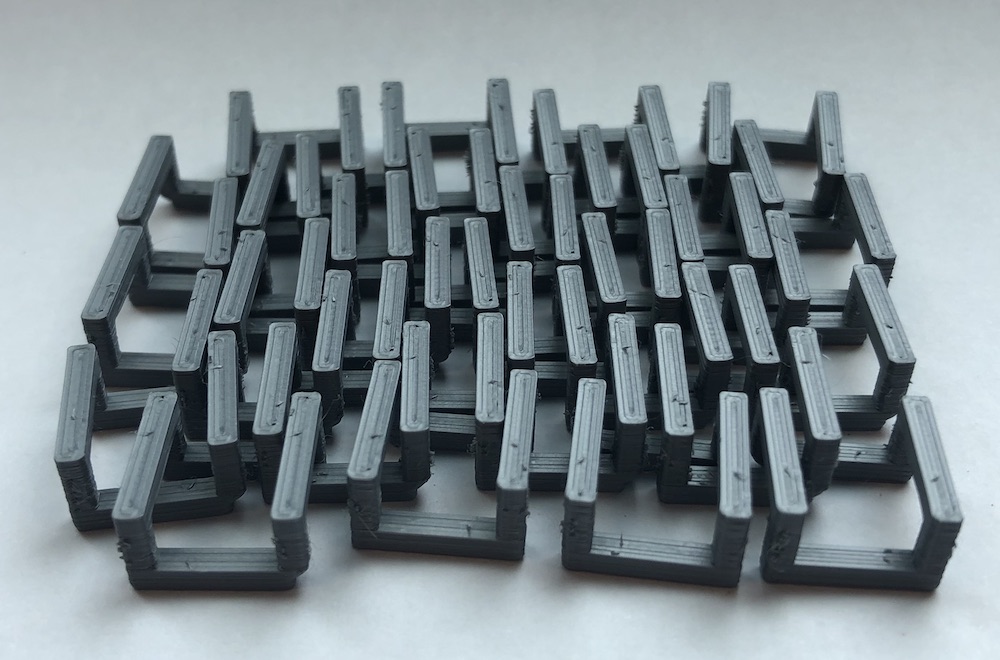
The print was great, it was a little tall and wchi meant the whole chain didn't work as a fabric at all. But I did like how it moves and felt on my hand, it was so satisfying I could use it as a fidget piece. I did get told to stop by my manager as it was quite an annoying noice.
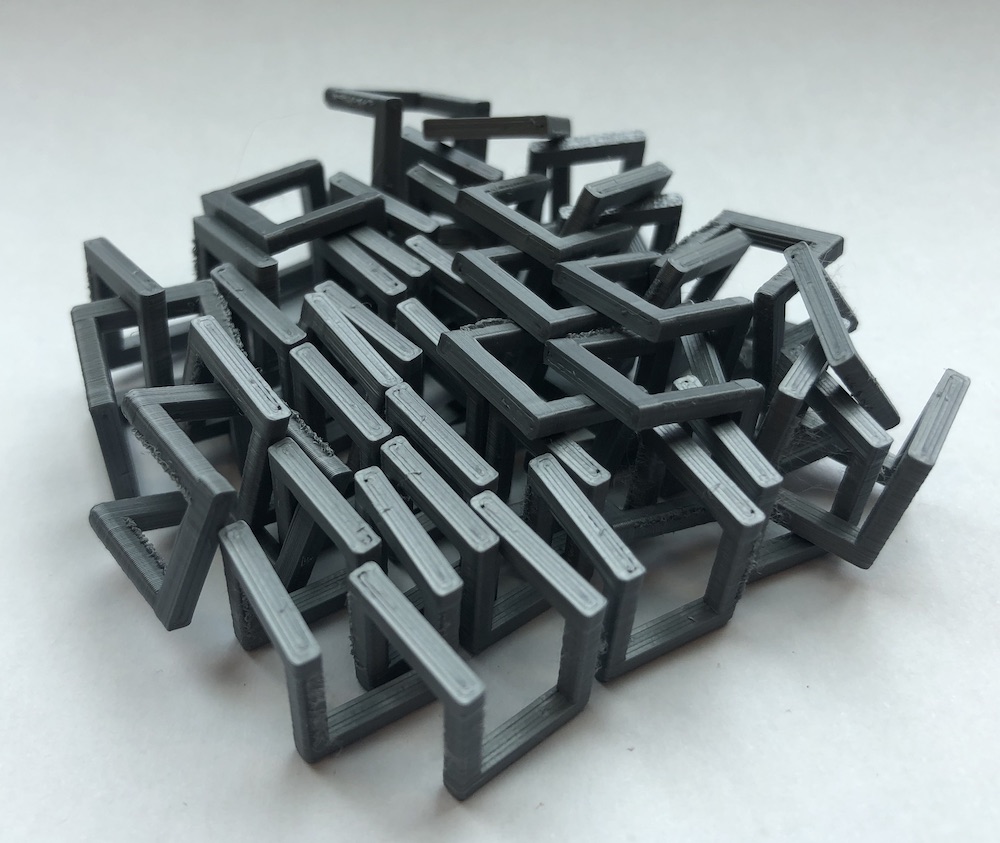
This is when I made the machine shorter so that it wouldn't move as much when it was in one like the other one. This was easy to do as I had placed contraints on the parts so when I changed one line the other one changed and stayed all together.
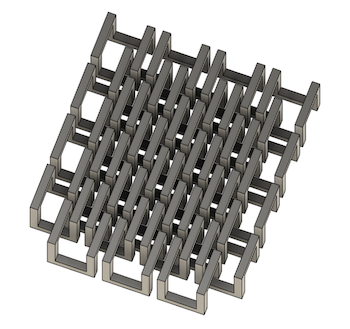
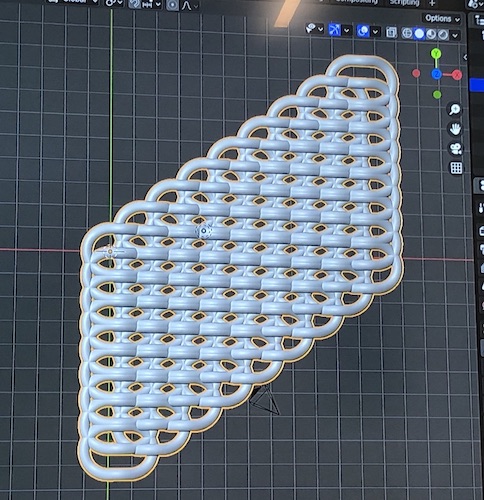
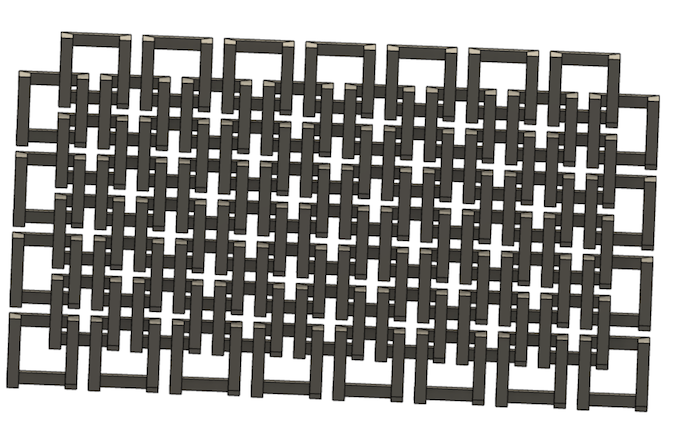
Using the pattern tool to get the chains to lock together, this was such a useful tool to use after I realised that it wasn't flat so this really helped them stay in line and was much quicker!
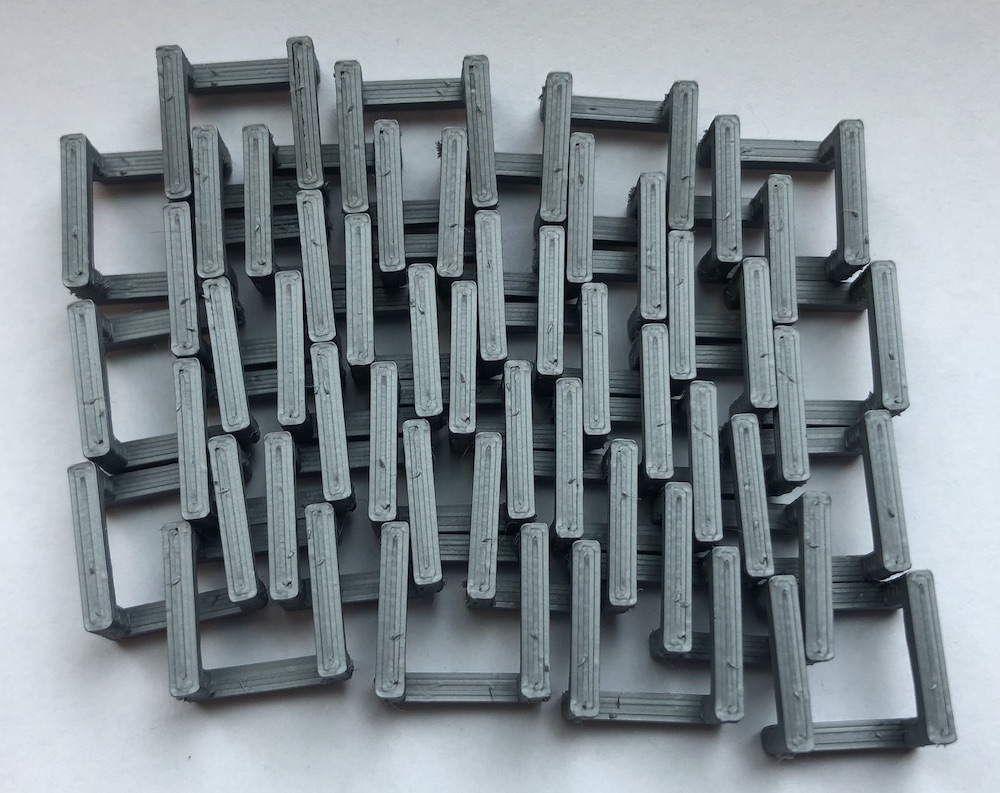
Both the short and tall chain on Prusa slicer, the best part about making it short was that the time for the print went from being 3 hrs to 1 and a half!
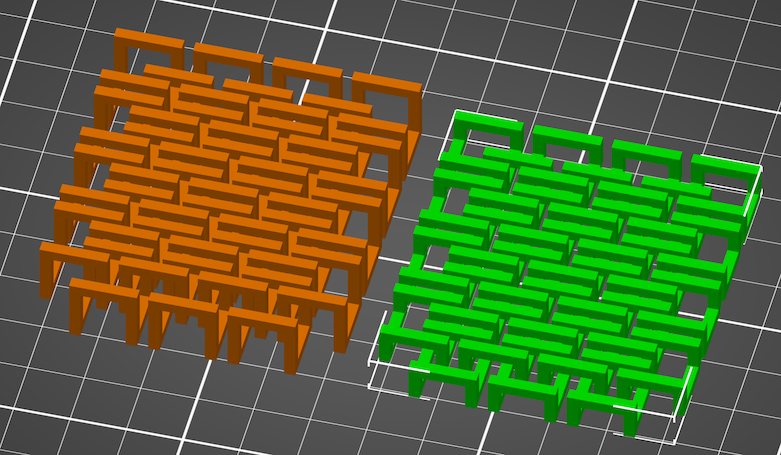
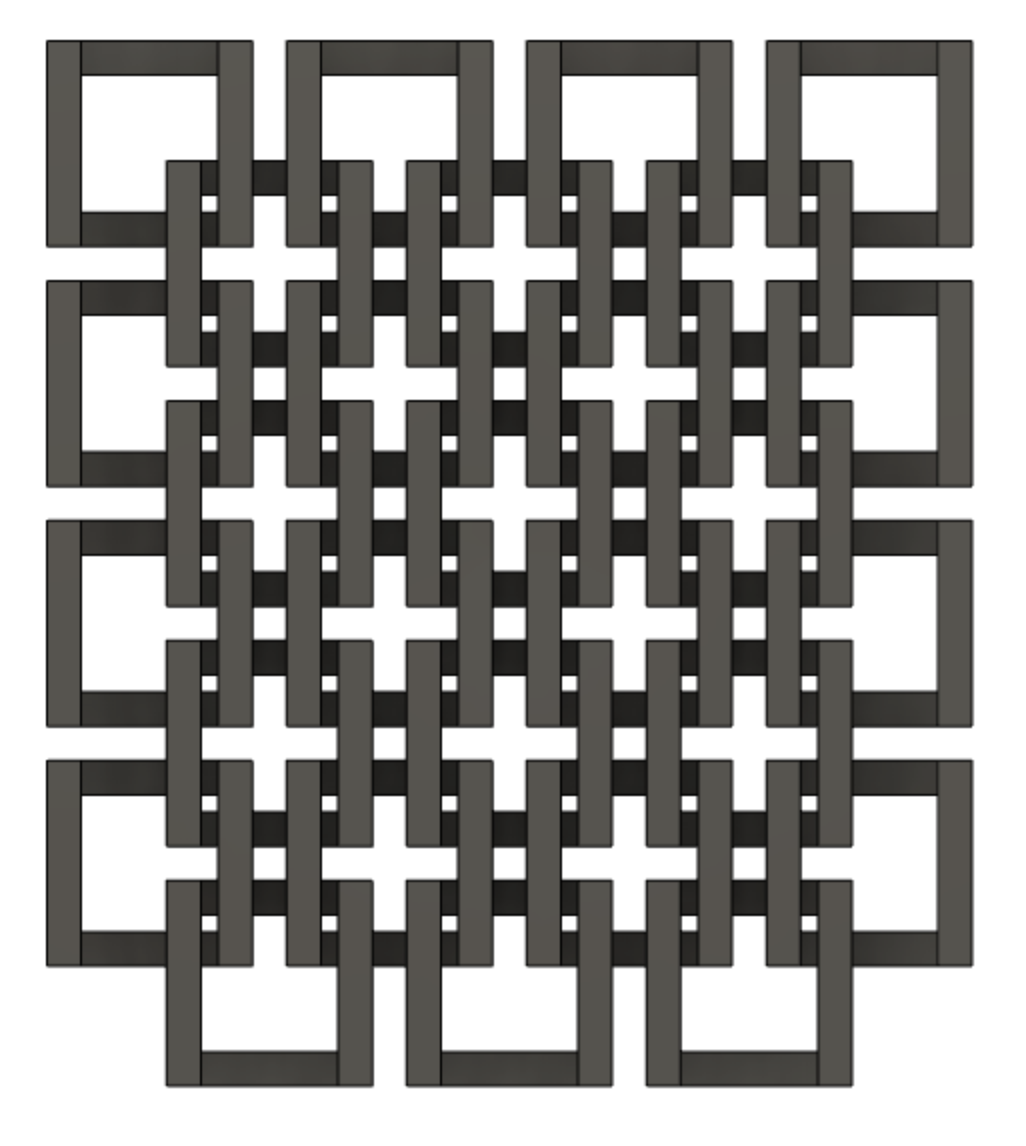
In the end copmaring the shorter chain to the taller chain it does come out very different just by changing that one area. From the images you can see that the shorter chain holds its shape a lot better, I can not seem to get the taller chain to lie flat again. I personally like the feel and the look of the taller chain over the shorter but if this was going to become a fabric I don't think this would work as it is very sharp on the edges.
The reason chainmale is a great item to make on the 3D printer is because you couldn't actually make it any other way unless you had each ring seperate. This would mean you would need to have a slice in that ring just like a jump ring in jewellery. By doing this it makes the whole process a lot quicker and a lot less fiddly.
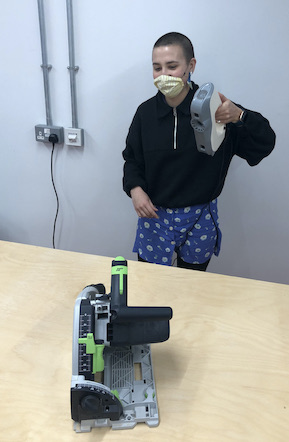
We have a Artch Eva light 3D scanner, I had never used one of these before nore had I ever seen one in use before. On the Thursday we got shown how to use the 3D scanner by someone via zoom so that they could show us the software as we only recieved it Tuesday.
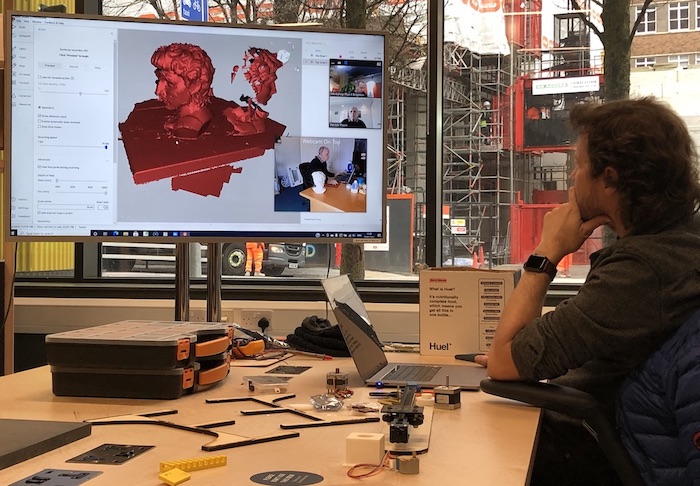
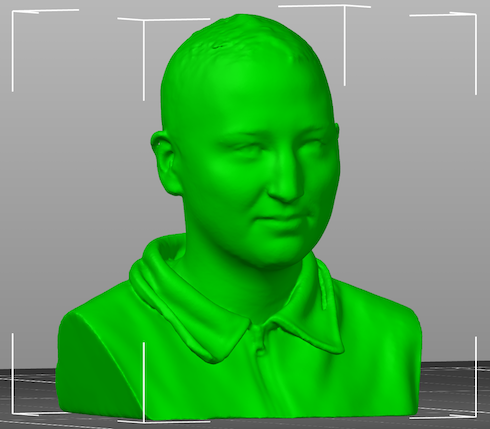
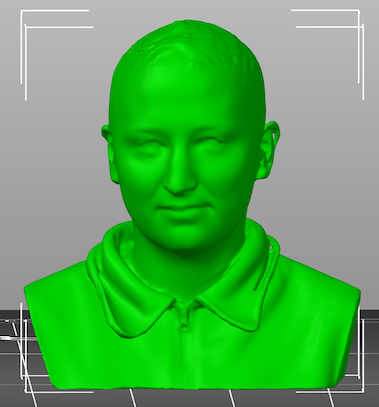
On the Tuesday I was shown how to set it up and what to do and what could be done, Patrick the trainer scanned my head as a deomstration and then edited it in the software that comes with the machine. It was amazing how it all came together and that it really did look like me!
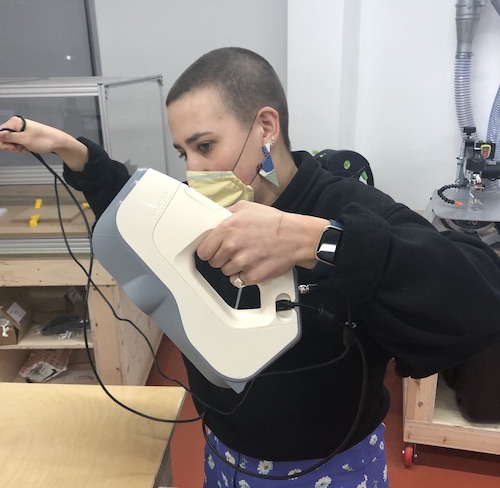
I stared by scanning a circular saw or rail saw this did not work very well because there are so many wholes in the machine. So when placing it into the software it was mostly just wholes and that was very hard to edit.
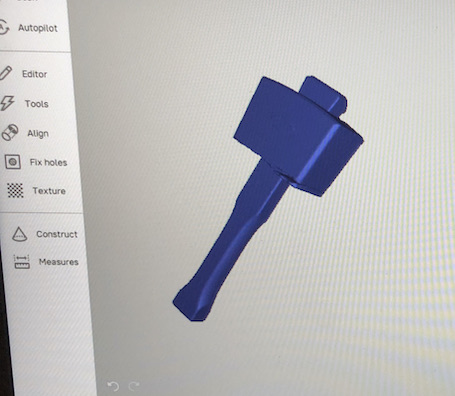
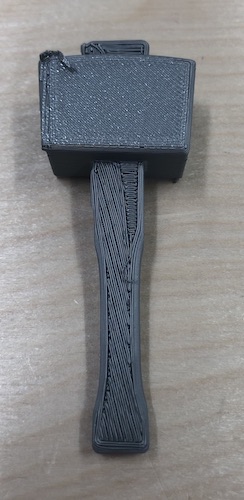
I then thought a hammer was pretty simple and would be nice and simple to connect if I did a couple of scans on the hammer. I found it much easier to get everything in the correct place, get the laptop in an easy place so you can see the screen. What you should be doing is following the screen to see when it get from red to green to blue. Blue means you are too far away, green is perfect and red is too close, just like temperate so that is how I remembered it.
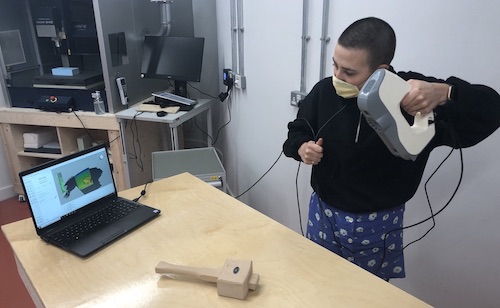
Once this was complete and I like the amount of scans I had and they were all easy to understand which took me several tries I then went to software and started editing. I found editing quite fun as you are just getting the perfections correct on the piece you have just editied. I did find it quite hard to get rid of all the imperfections which you will then see later in my print. But I think because I am still new ot this I will find out a way to get rid of those faulty bits later on when I undestand it more.
It was great when you place the points on the two seperate objects and then they just come together and make the shape that you had previously scanned!
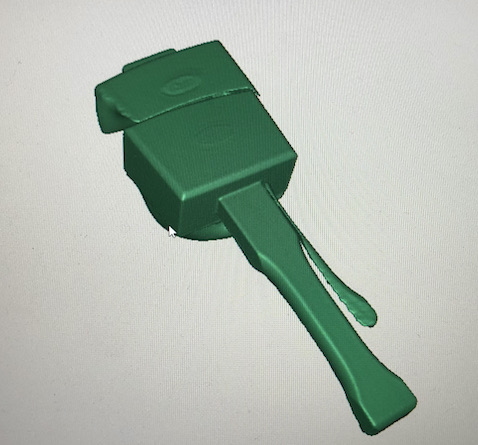
I then couldn't help myself and had to print the hammer so that I had a little tiny hammer which kinda reminds be of Thors hammer but sadly it is nothing like it really. I have an idea that I am going to scan some more objects print them and make then into earings.
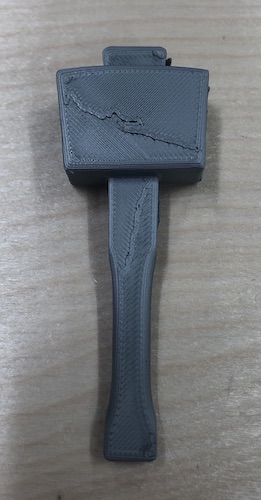
As you can see the inperfections that came up in the file came out in the print but as my first attempt I am very pleased!
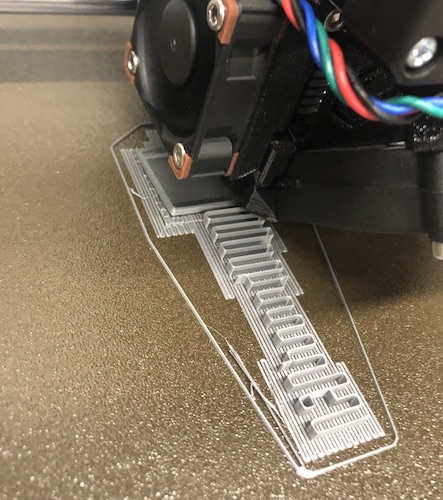
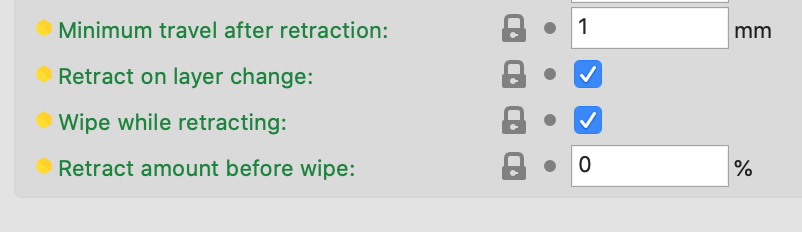
I was having a few issues with stringing when it came to getting a good print. This has been a issue I have been dealing with with our machines the whole time. Prusa Stringing and Oozing Link which shows you what to do to prevent this happening.
The settings that I made sure where set correctly was as seen bellow in the image and was advised on the Prusa website that I have linked above.
The outcome was not great as there was still stringing happening but seems to only happen at the end when the cones get thinner.
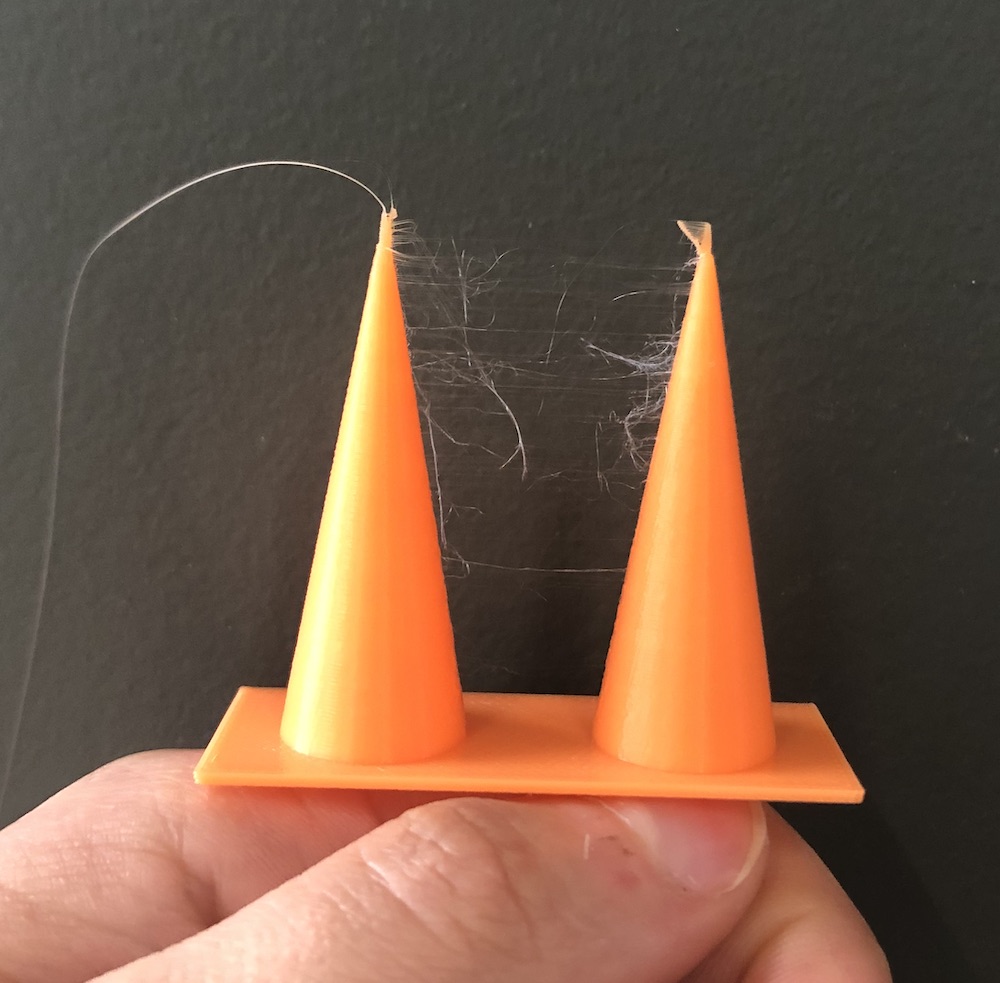
So I have looked at the suggestions above and have turned down the nozzle temperate to see if this will help the stringing stop.

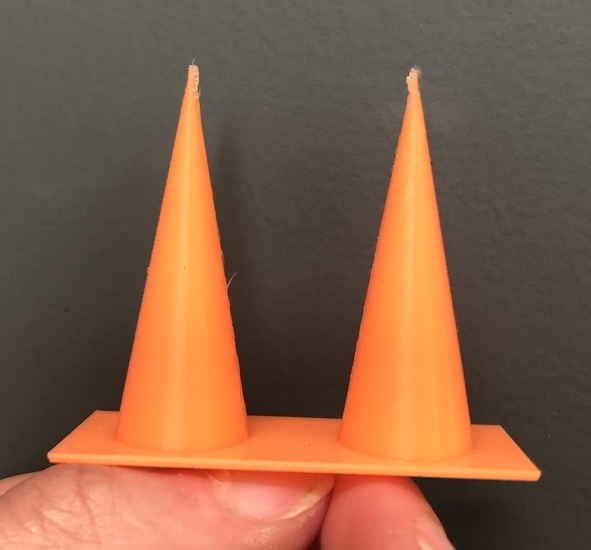
Second one was alot better, there still is abit of fluff at the top from where the nozzle I don't think quite cleaned it well enough but this is A LOT better than the first one which is good processes.
This week was been fun and relatively easy compared to last week, it was still interesting as last week. I now understand the 3D printers more and having the opportunity to use teh 3D scanner is amazing!