Link to Moulding and Casting Group Page
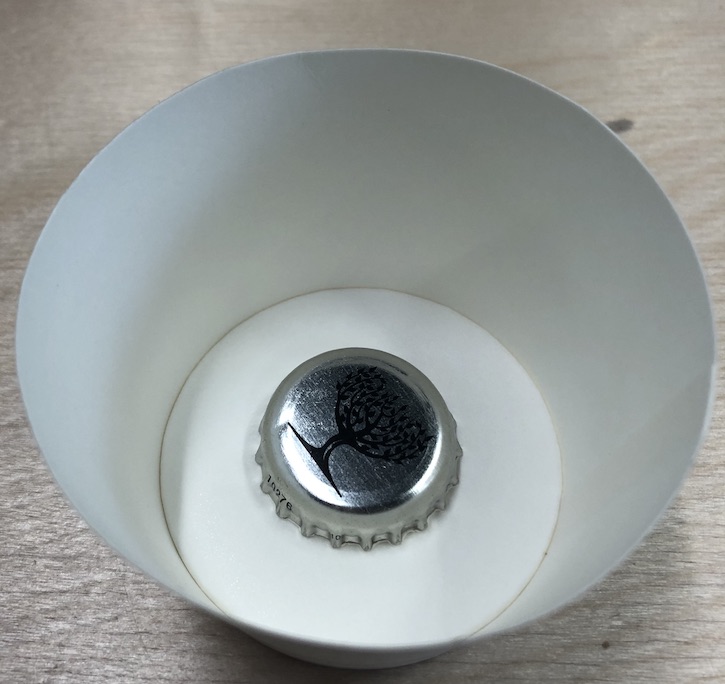
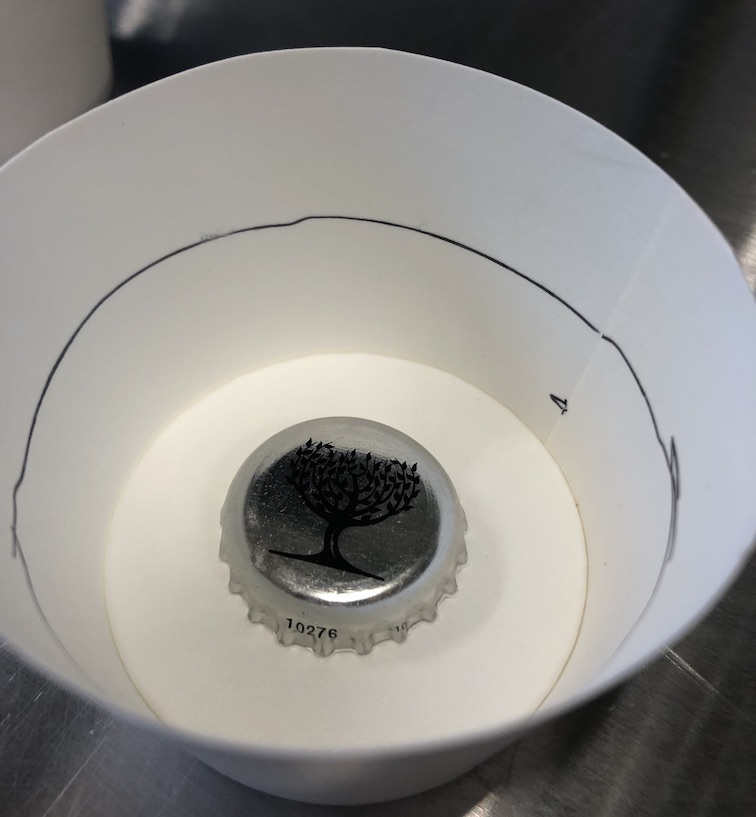
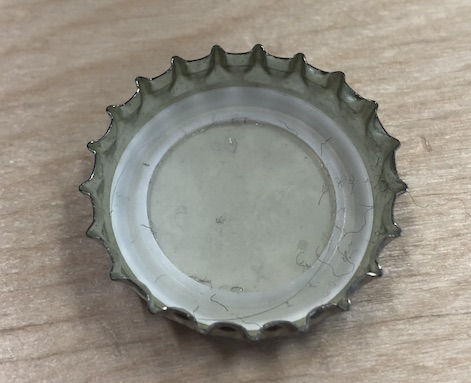
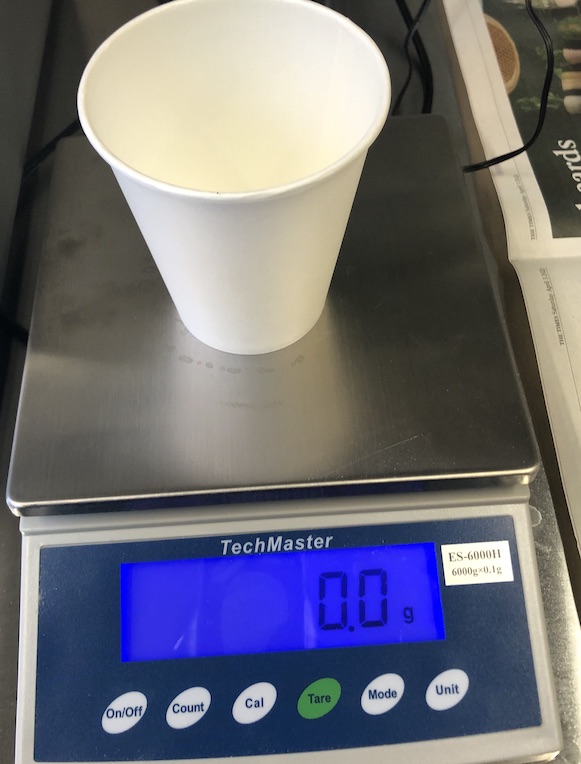
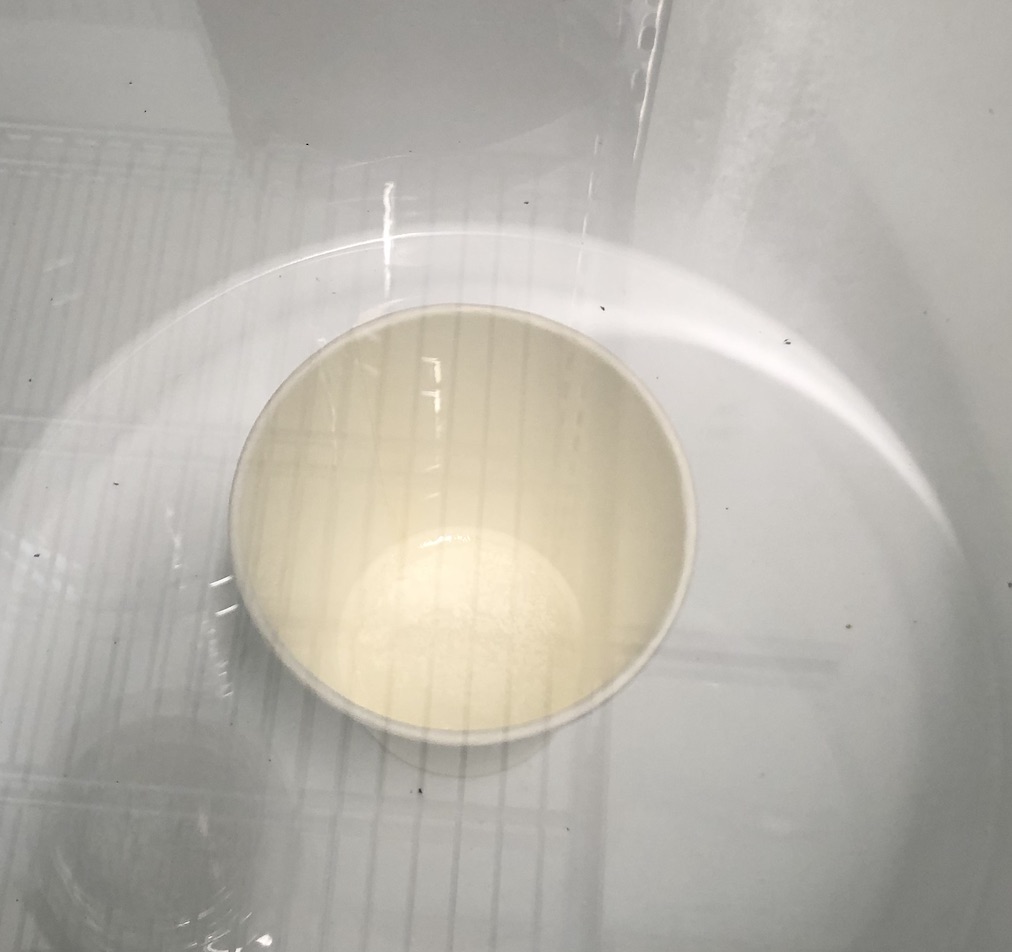
After Niels meeting I jumped straight into making a mould from a bottle cap. I got a small paper cup which is smooth and has a plastic coating so that the silicon won't stick to it. I then cut the cup down to a suitable size, drew a line so that I could see what height I should be aiming for.
To get the cap to hold well and not allow the silicon to go under I used white tac to fill in the cap and then stick it to the base of the cup, this worked very well.
Learning about silicon
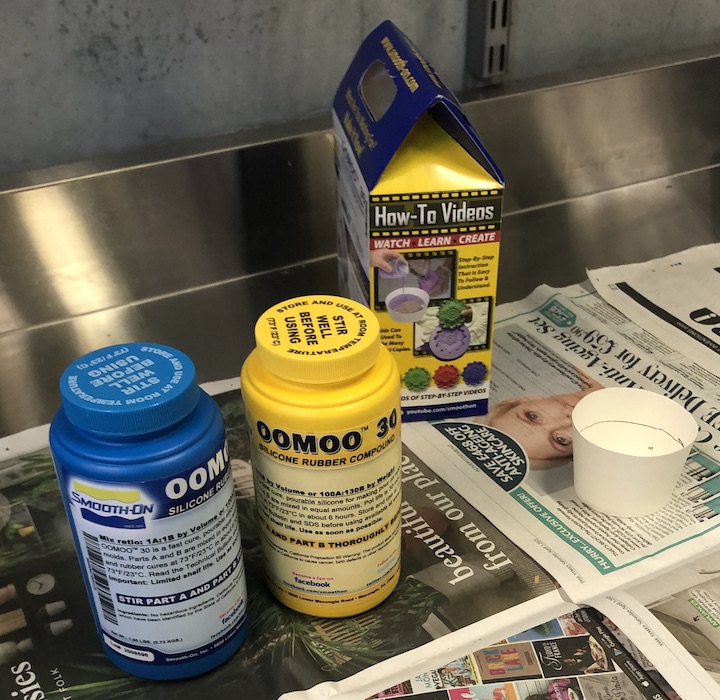
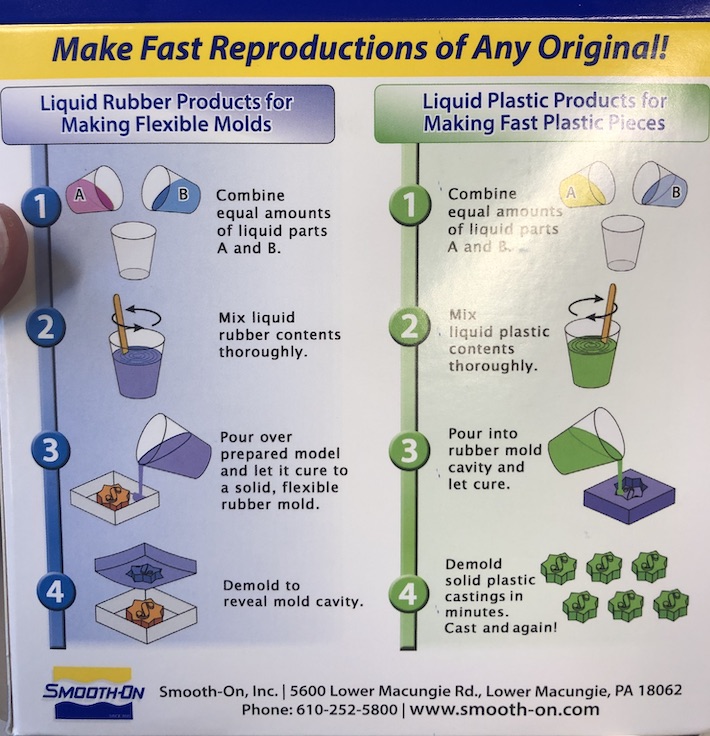
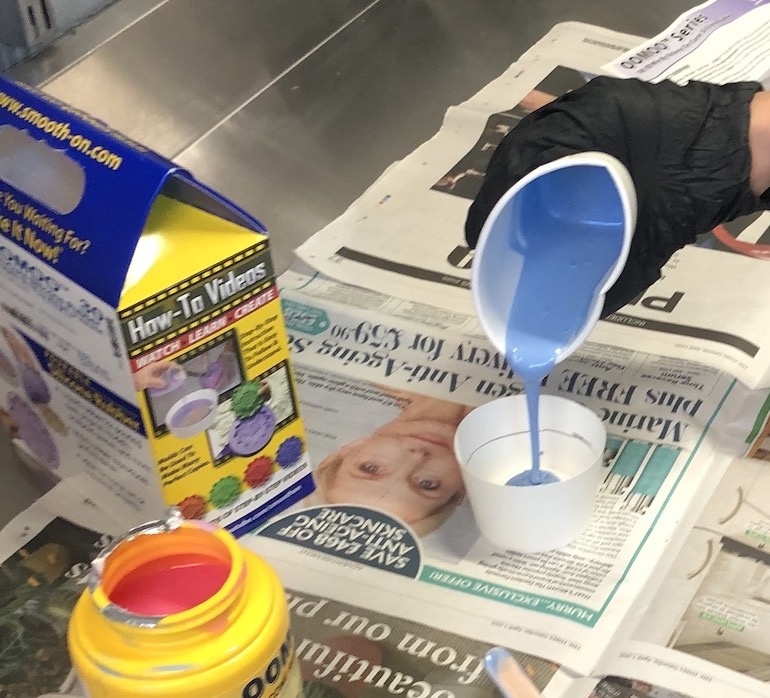
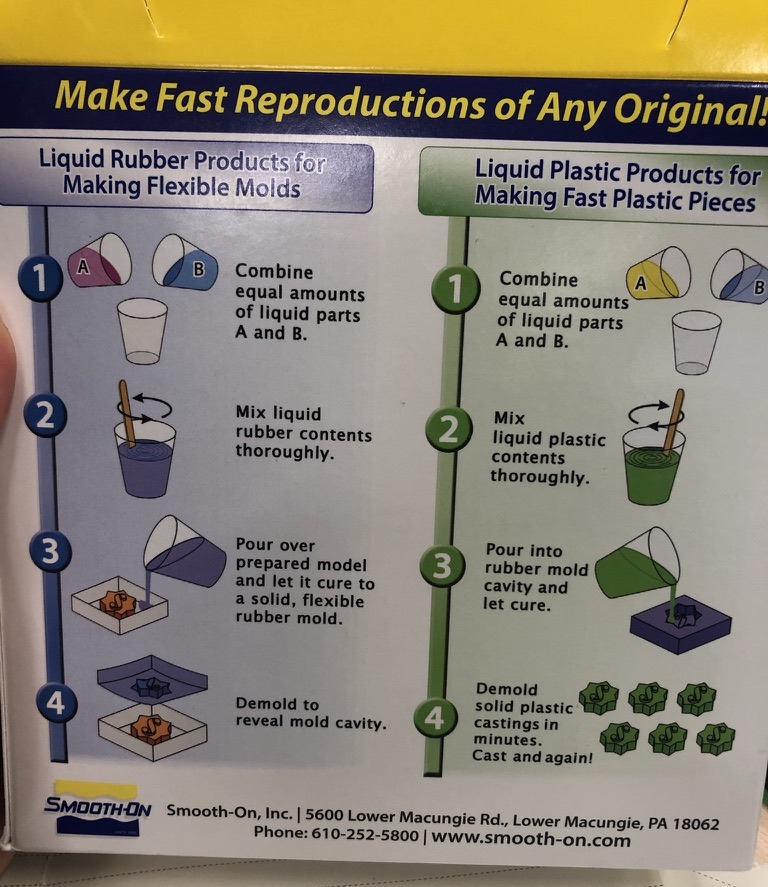
I then checked I had the correct material to start with which is silicon or oomoo 30, after reading the data sheet and checking I had the correct safety items on I started to measure out the silicon. On the back of the packaging it also tells you how to use the material which was a very useful reminder of what to do.
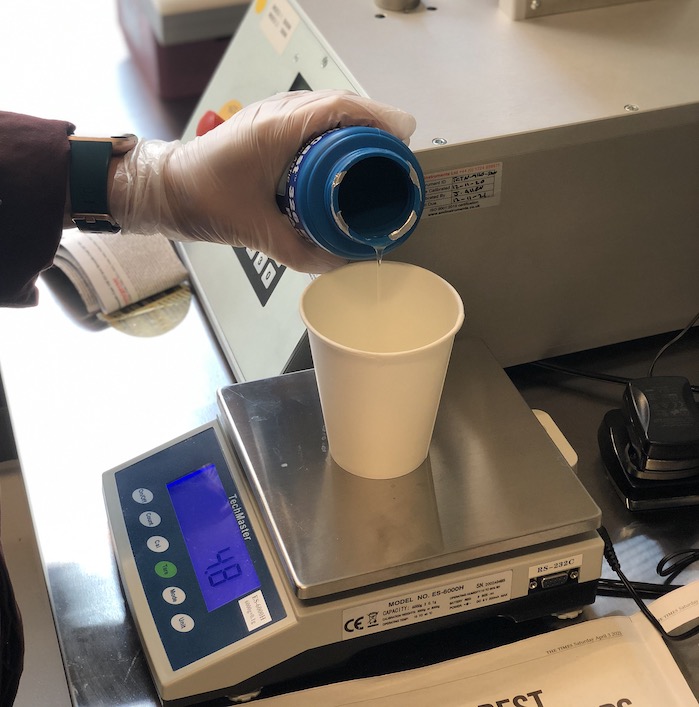
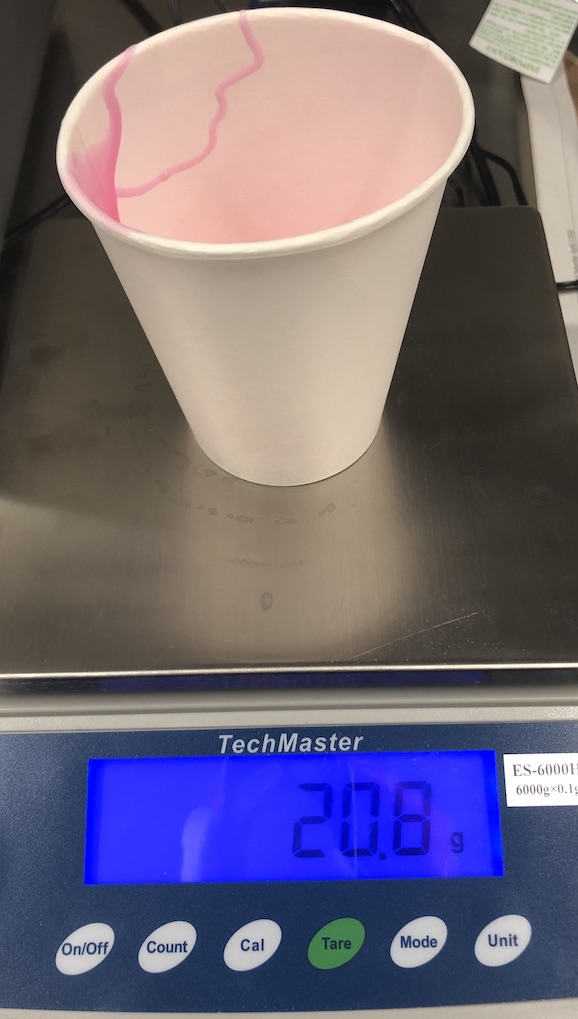
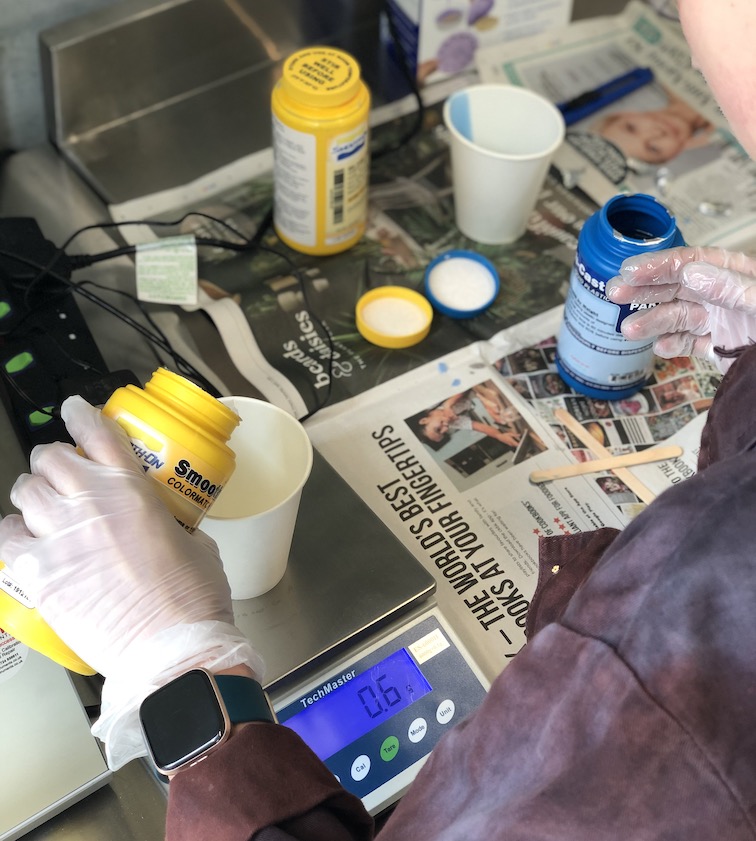
Measuring out the silicon on our scales, check out the data sheet to see the correct ratio for your material used. Ours was A 115: B 100 for this size mould I made 50 gram all together, this is something that is a good to get right so you aren't wasting material as it is expensive.
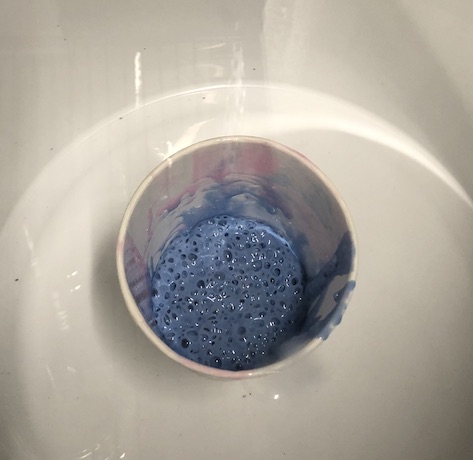
I then poured the silicon on top of the cap making sure to get under each groove so that it would then pick up the details needed in the cast later. I had 30 minutes of mixing and pouring for this silicon which was plenty of time as we hadn't been shown how to use the vacuum changer yet.
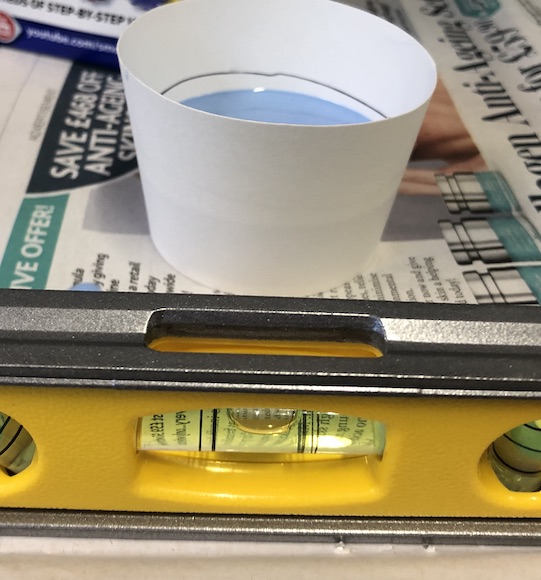
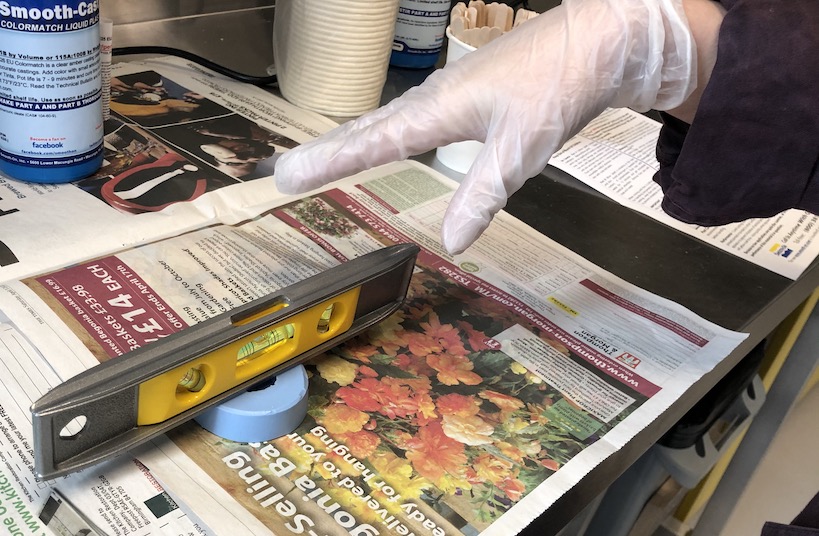
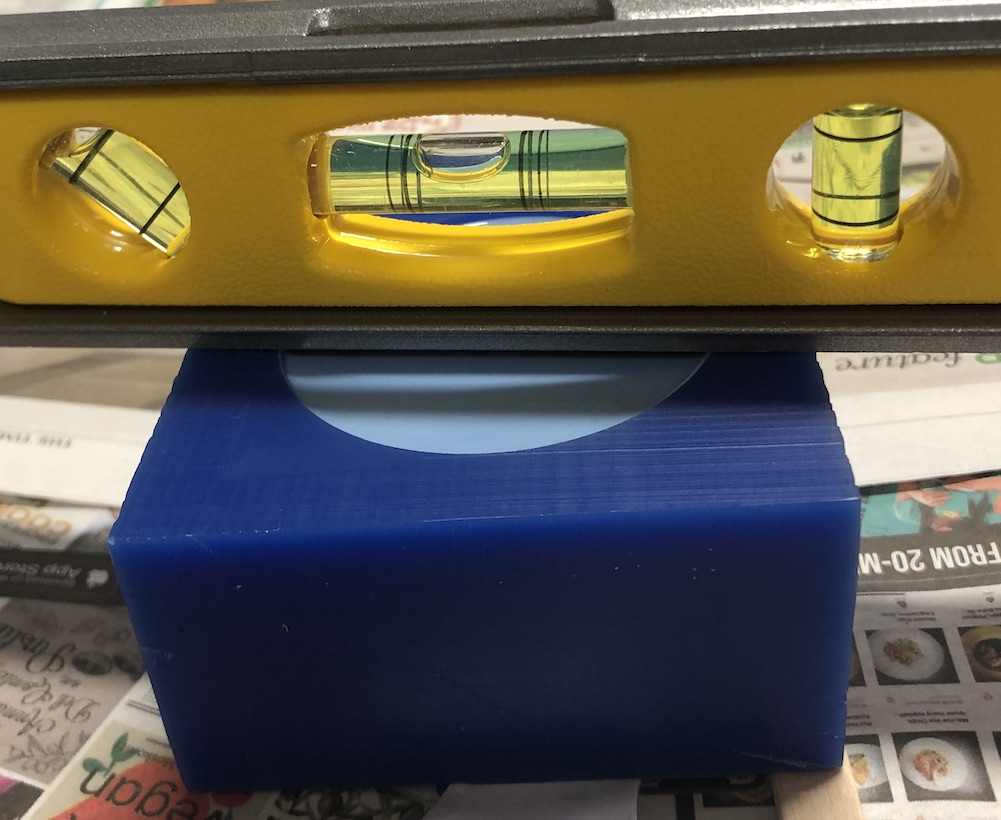
I then double checked the pot was level and as well as the table it was on, and I then left it for 6 hours over night to harden as this is the recommended time for this silicon.
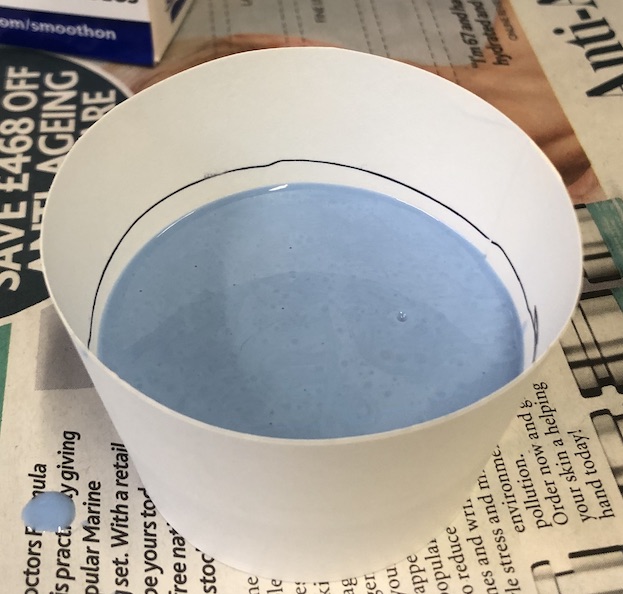
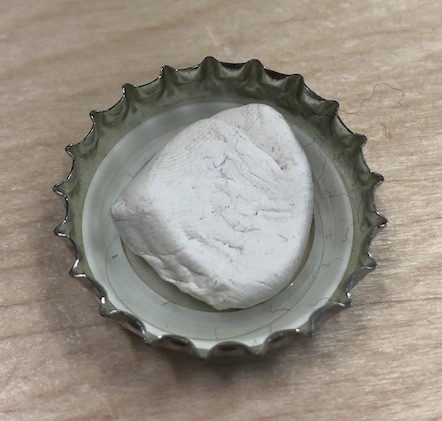
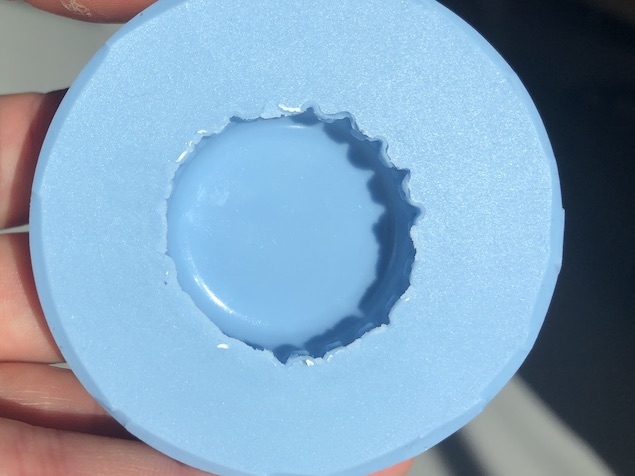
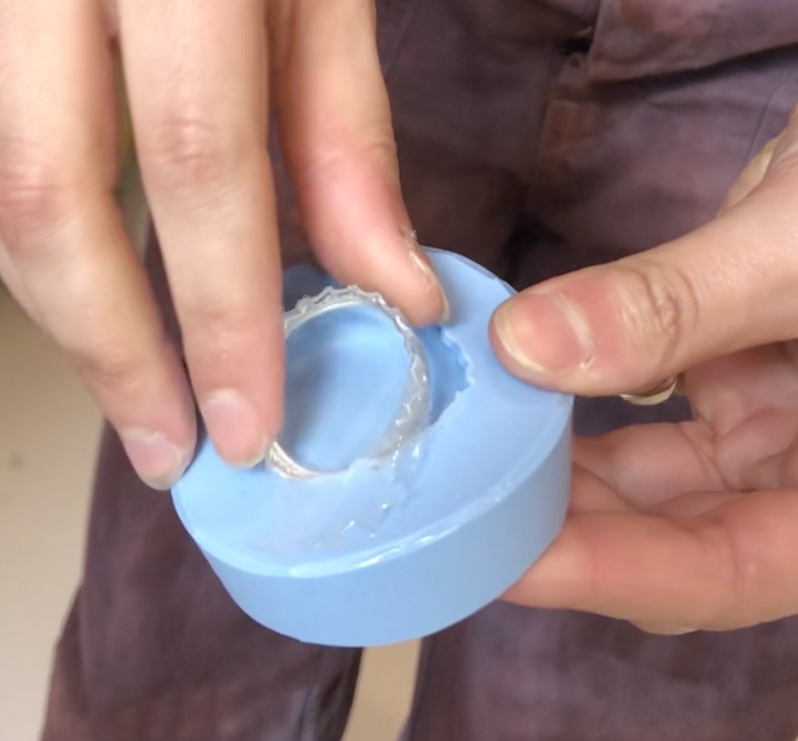
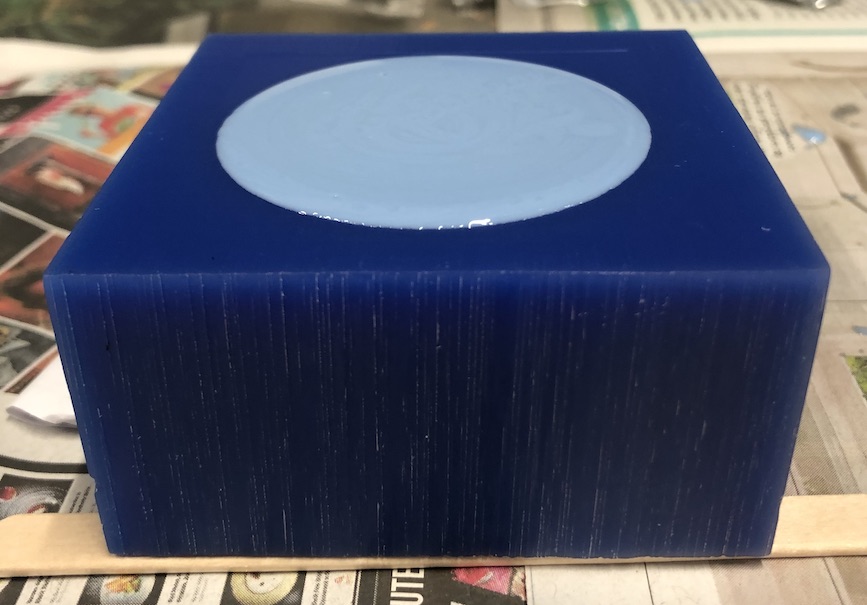
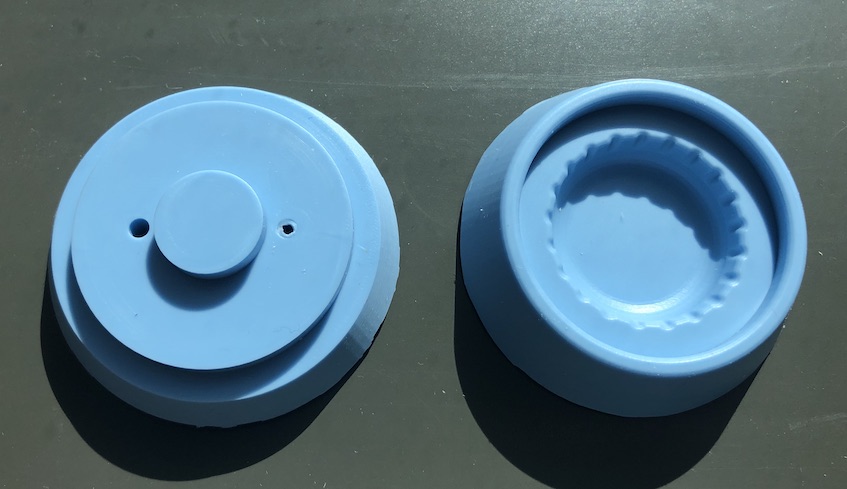
It came out very well as a mould for me to cast with and compare to the milling two part mould I will be making in the future for this project. It even picked up the image of the Fever tree tree not he cap if you look in the right angle in the light.
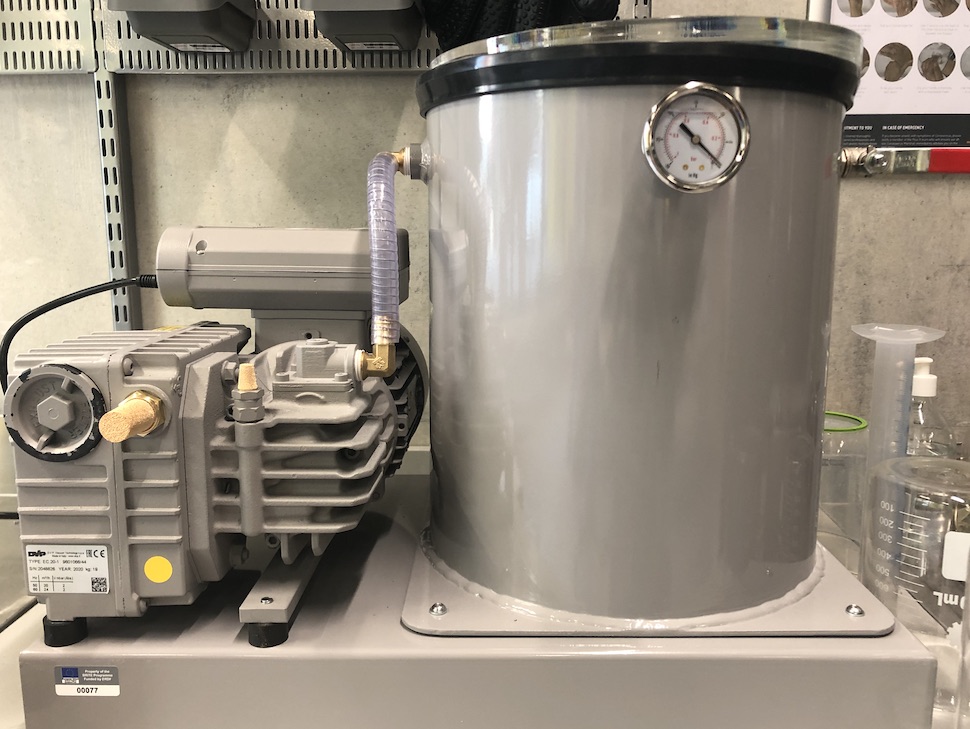
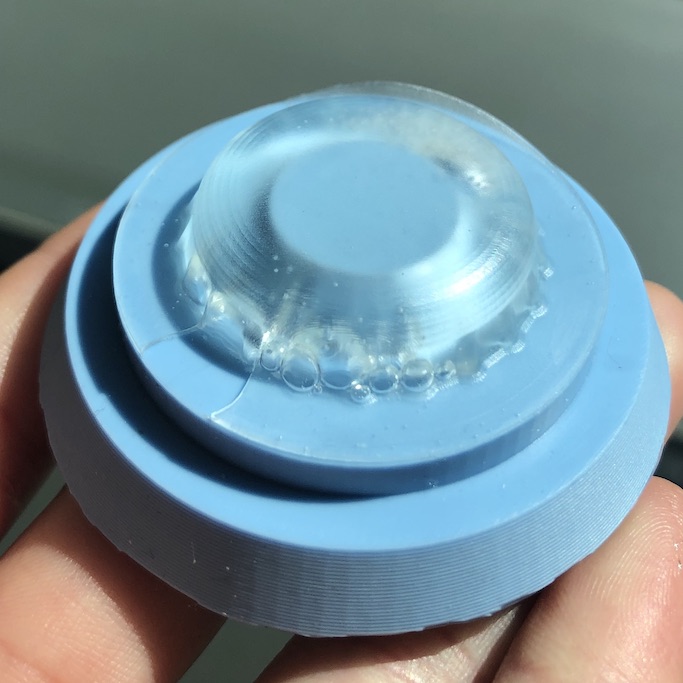
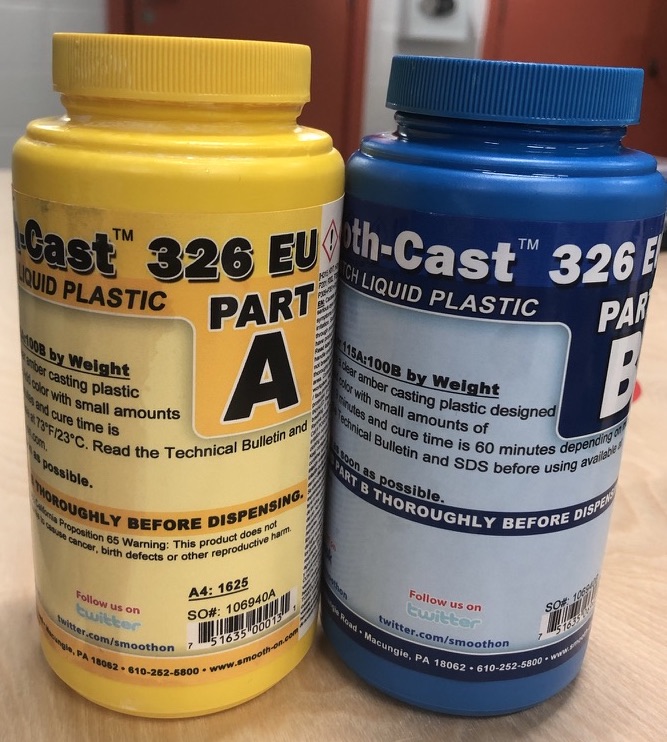
I then started to weight out the resin which has a working time of 6-8 minutes so this one is a little more stressful! I also used the vacuum chamber this time so that there would be no bubbles in the resin.
Pouring out the resin into the mould was very simple because it is all one level I just needed to make sure there was no over spill and that there was no air bubbles which I couldn't see. I then made sure it was level and left it for 1 hour as this is the curing time for this resin we have, again already check your data sheet for your material.
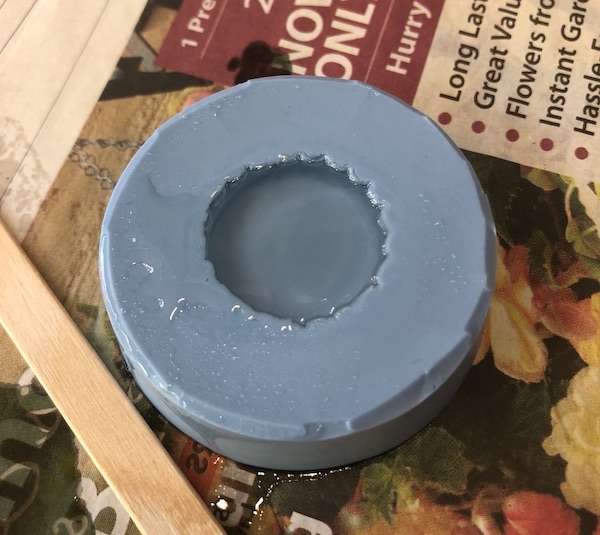
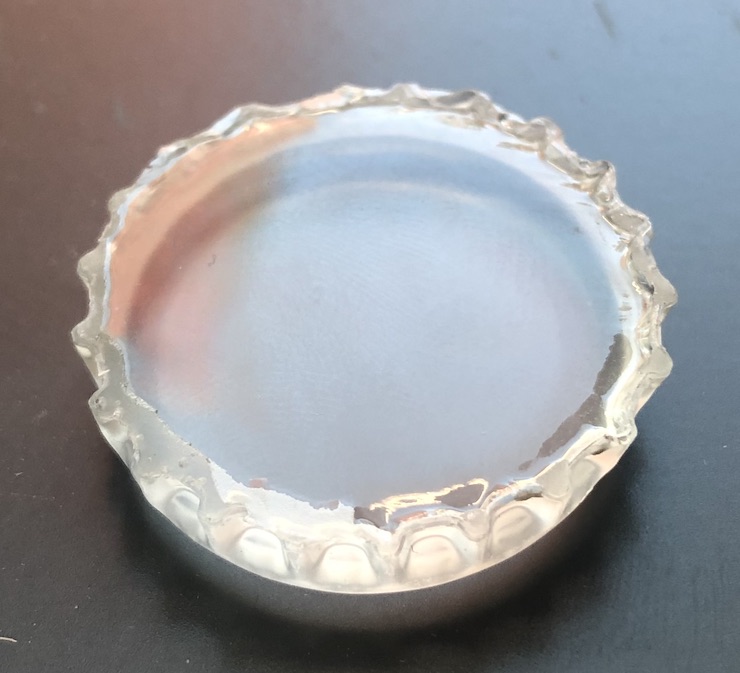
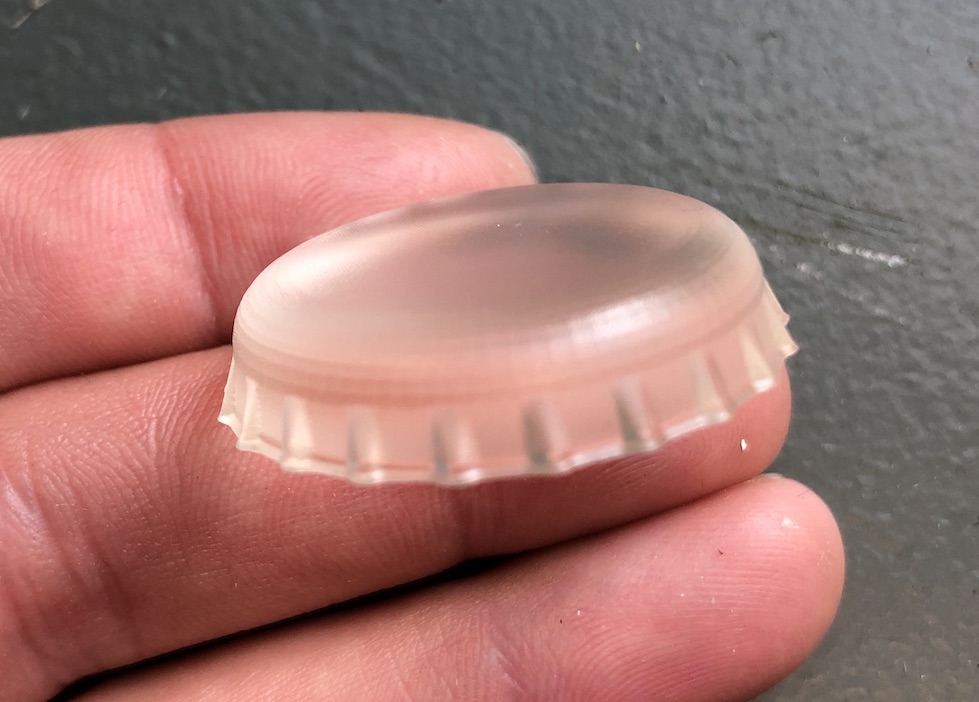
Once it was done I took it out of the mould and took a look at it, the result was amazing!
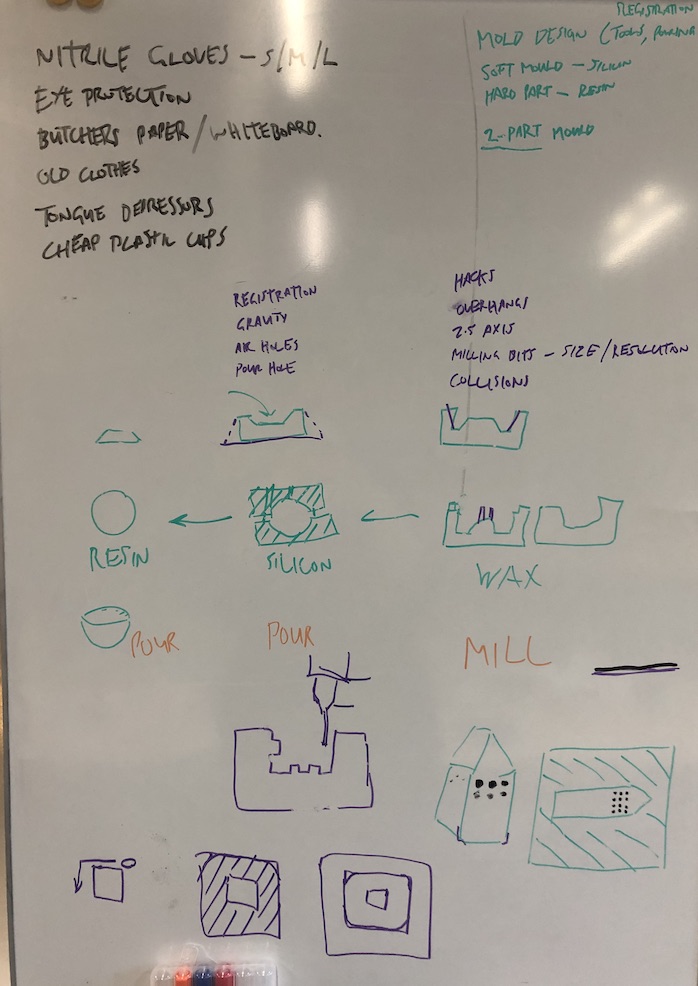
Andrew started by describing what we would need in our mould for it to work, and how it is best to start by thinking about the final outcome which would be your cast. I was going to make a bottle cap which would then link to my final project, I could make just a simple 1 part mould.
The way it works is that if your final cast is going to be hard your mould needs to be soft and therefor the material you will be milling out will need to be hard as well. I chose to use was as this is what Andrew suggested as well as is gives a very smooth and detailed finish.
Throughout Fab Academy I have felt out of my comfort zone but when this week came about this was going to be my week. During my degree this is what I did, we used to make moulds and then cast as many materials in it as we could get our hands on! I loved it just the hands on factor made the whole degree a fantastic experience and tied nicely into this week.
On my course we used to make the item out of plaster on a lathe or you would sculpt it by hand rather than using a milling machine to get the item made. I had never used our MDX-540 before and it was perfect timing as I was training someone on it this week.
I decided to make a two-part mould, this would help my piece be flat on the base as well as not having as much material to make it lighter.
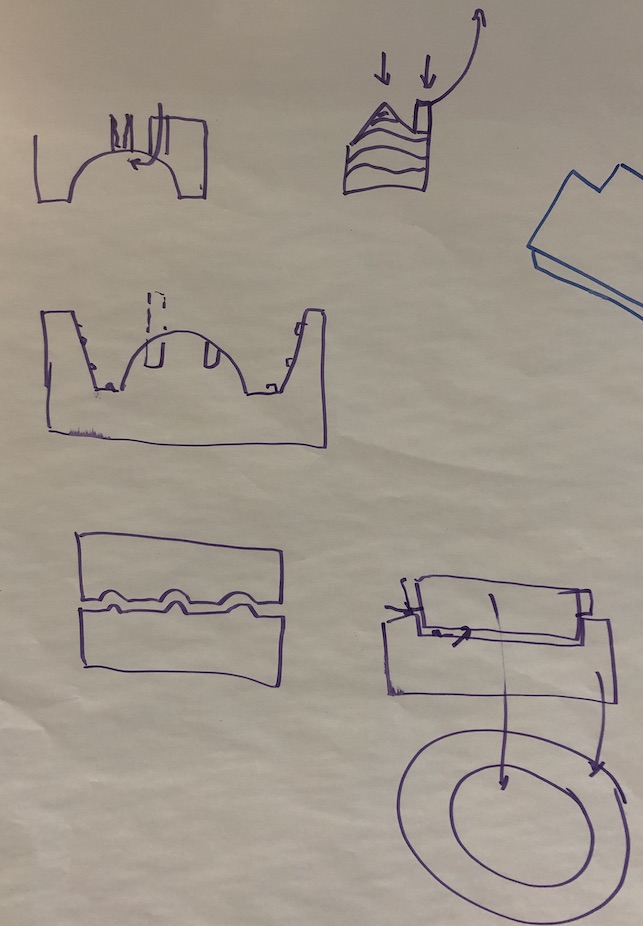
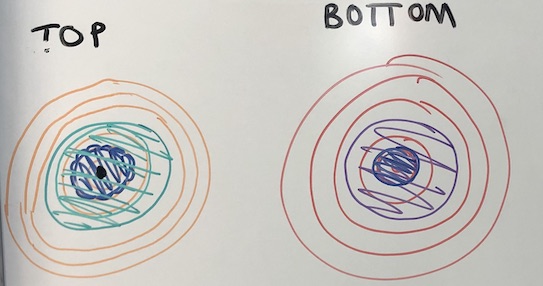
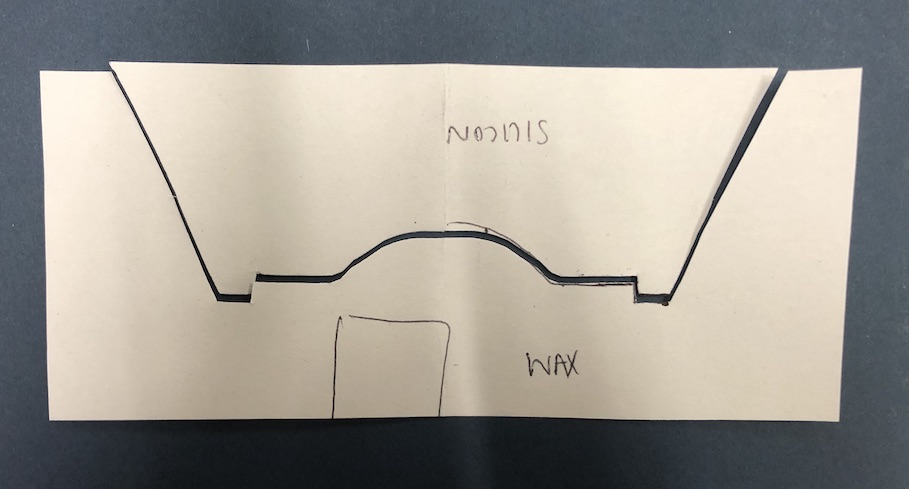
I started just by getting on the white board and drawing out what I thought it was going to look like in silicon and then I would invert it into the wax mould.
This was me having all the components together to understand how this would end up becoming one form but in a 2D drawing.
I then added the air and our wholes after Andrew pointed out I hadn't added them yet. It was a very confusing processes but made the whole thing more exciting as I was about to do something I had not dome before when it are to mould making.
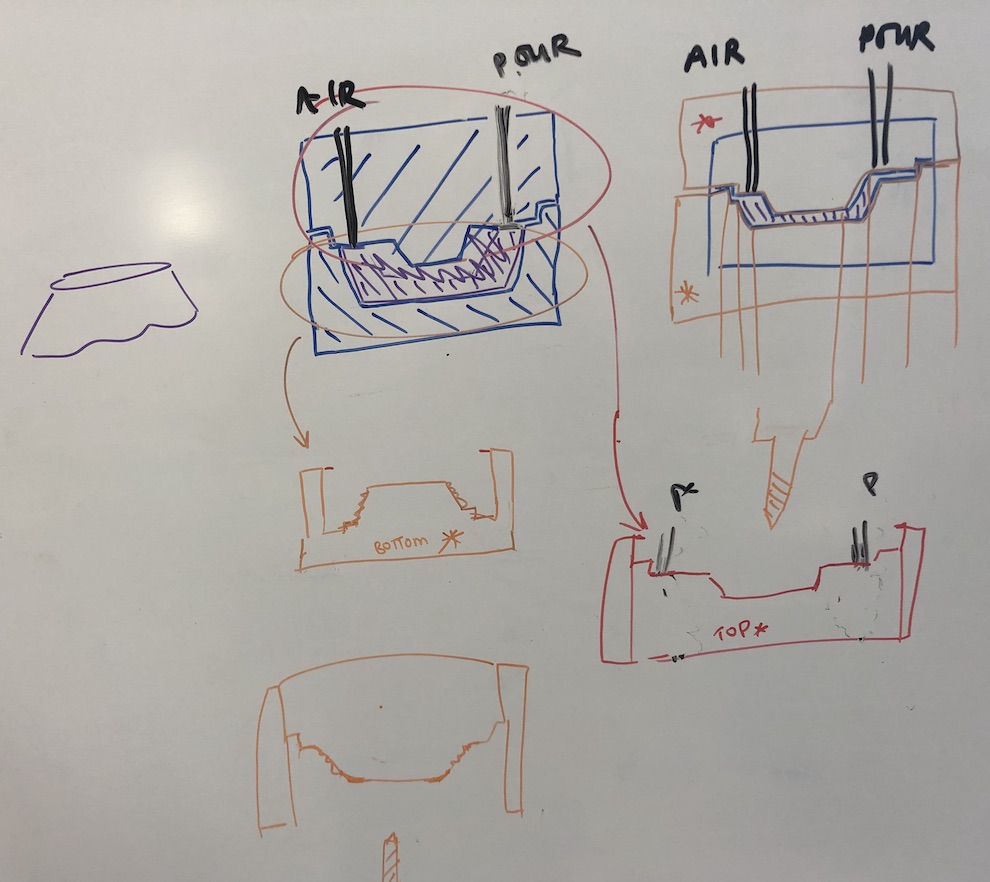
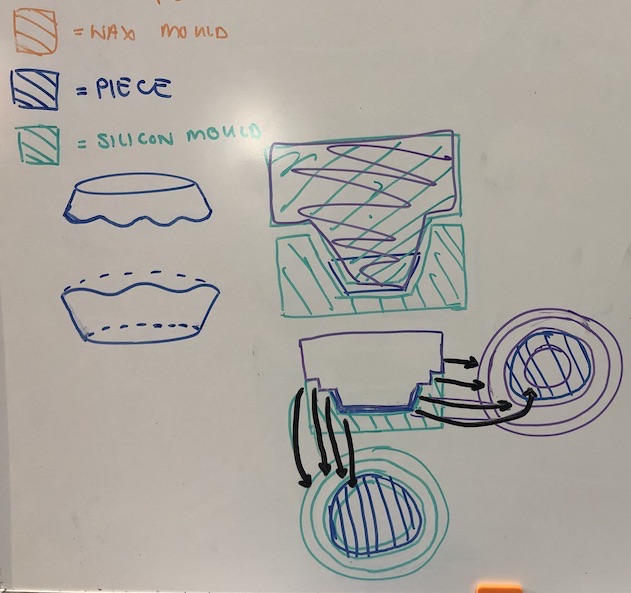
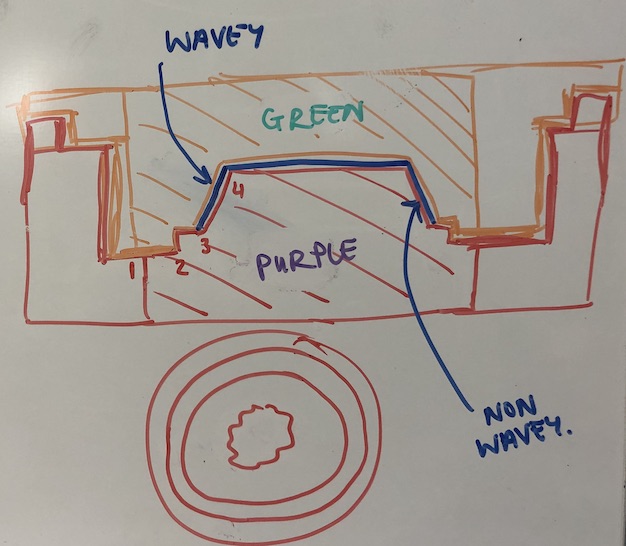
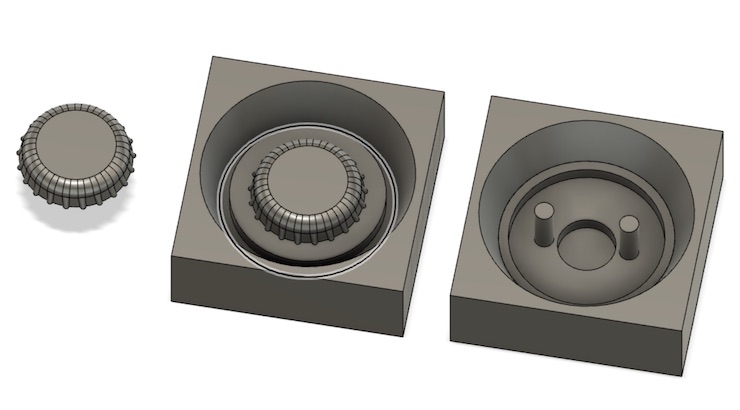
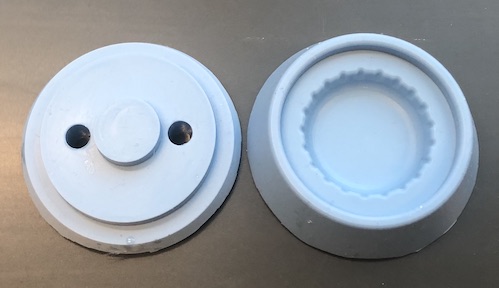
So I was struggling with understanding how the two moulds were going to connect together, so I thought I would make a paper cut out of what the silicon moulds would look like when they slotted together. These two are the outcome I want my silicon moulds to look like...
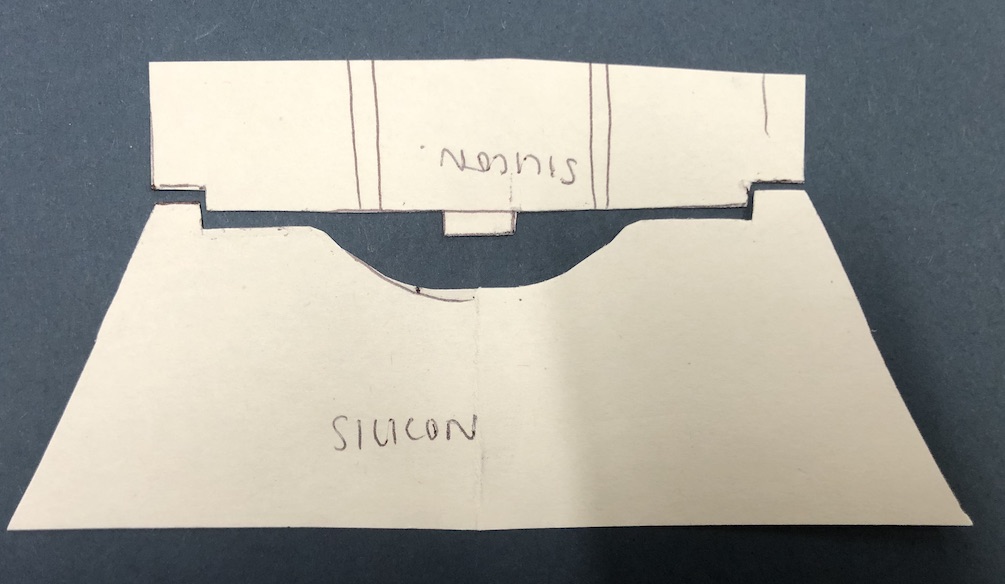
I then added them to a piece of paper and marks out how they should look in a wax for and added the measurements which I thought would be correct. This was a hugely hugely helpful idea that I came up with and helped me so so much with the fusion file I then made.
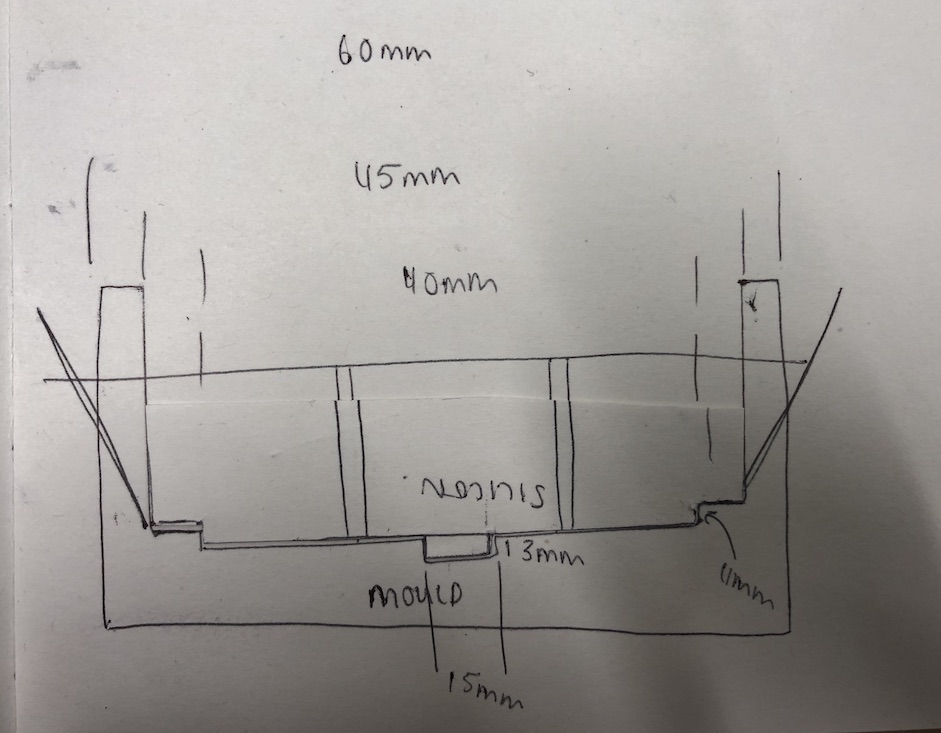
This is the silicon and wax of the bottom of my mould, draw onto a piece of paper and then added so that it all works in the final mould in fusion.
I started by making a cap in fusion 360 by following this tutorial, the measurements aren't the same. I adapted them so that they would match the cap that I had previously used but I followed how to get to these steps that they did in their tutorial. It was very very useful and saved me a lot of time.
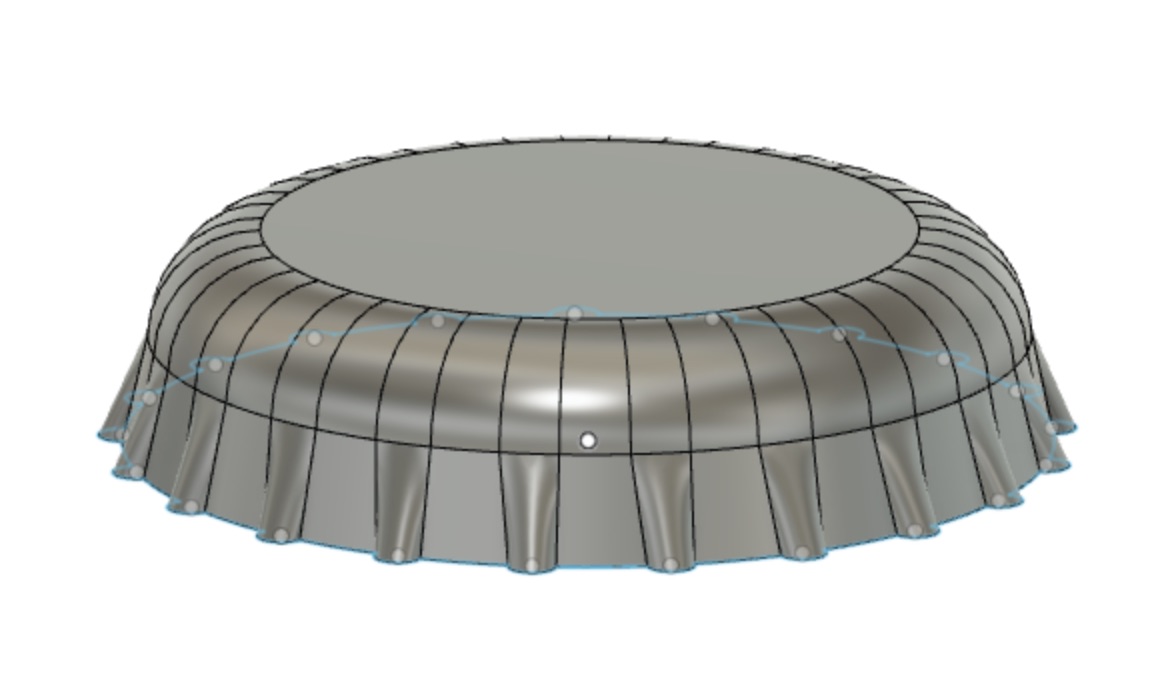
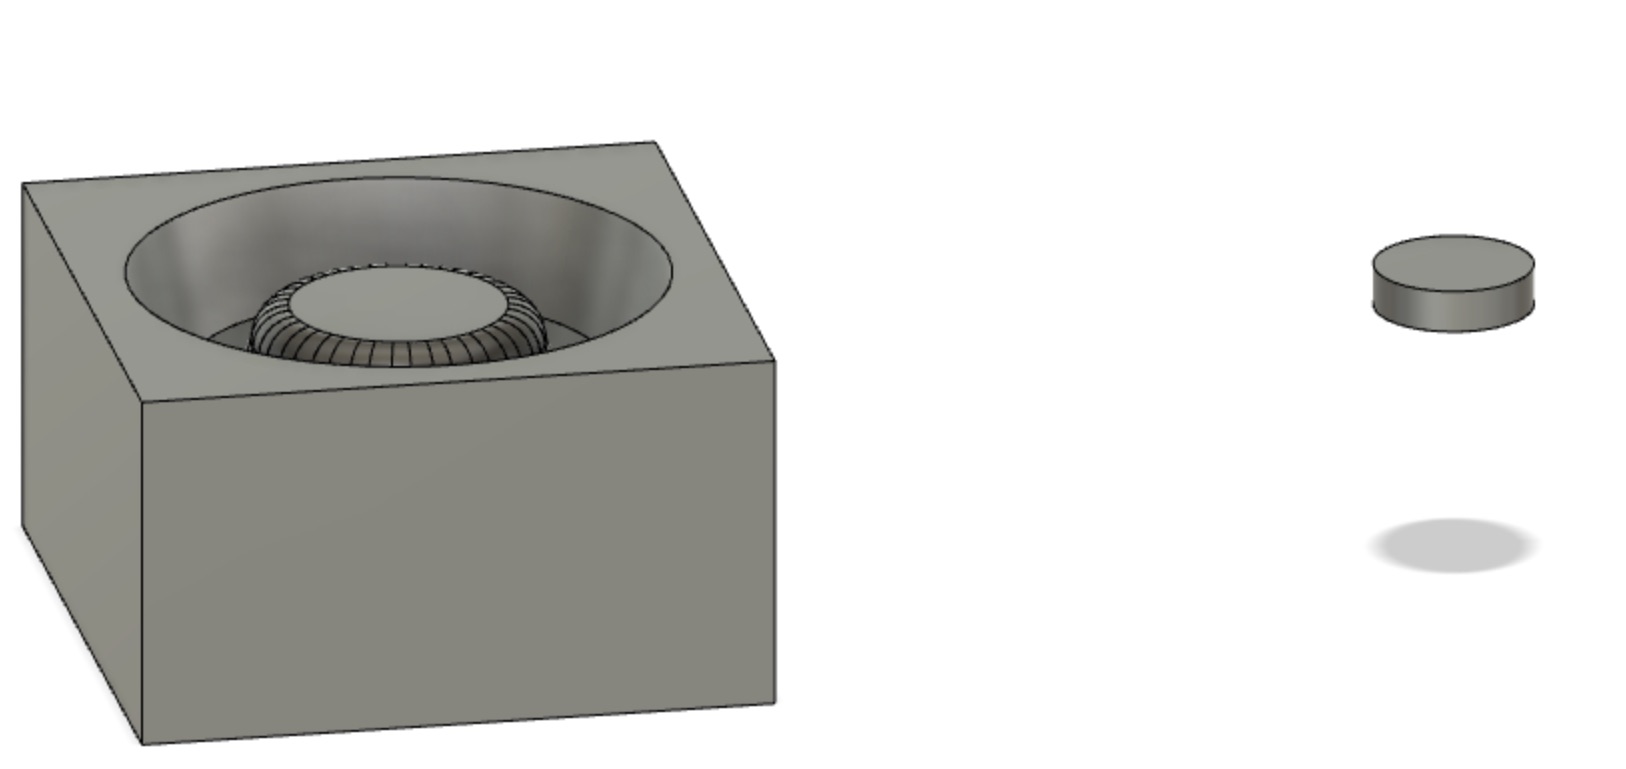
I started by making the silicon mould I wanted from this mould and then I placed a cylinder around the drawing and combined them and cut out the the shape that was the silicon so I ended up with a cap, walls and coves that needed. This was a very quick and easy way of getting the mould I needed to mill out and was great to see it coming together.
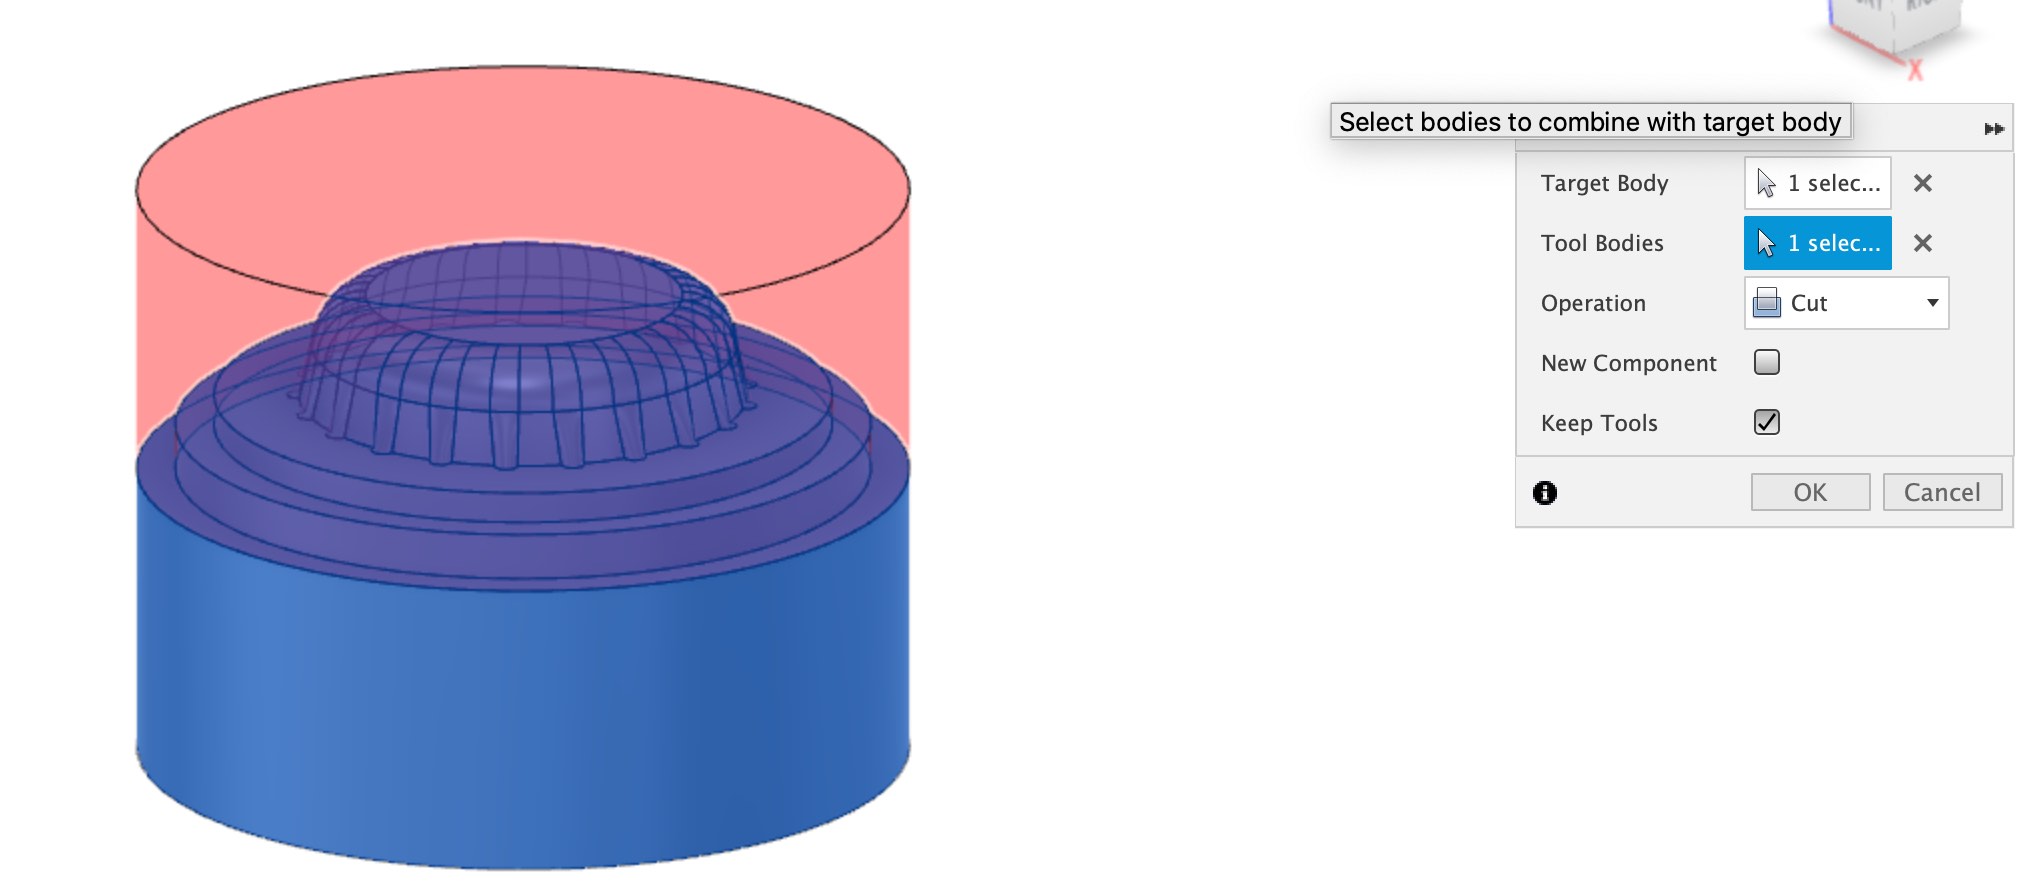
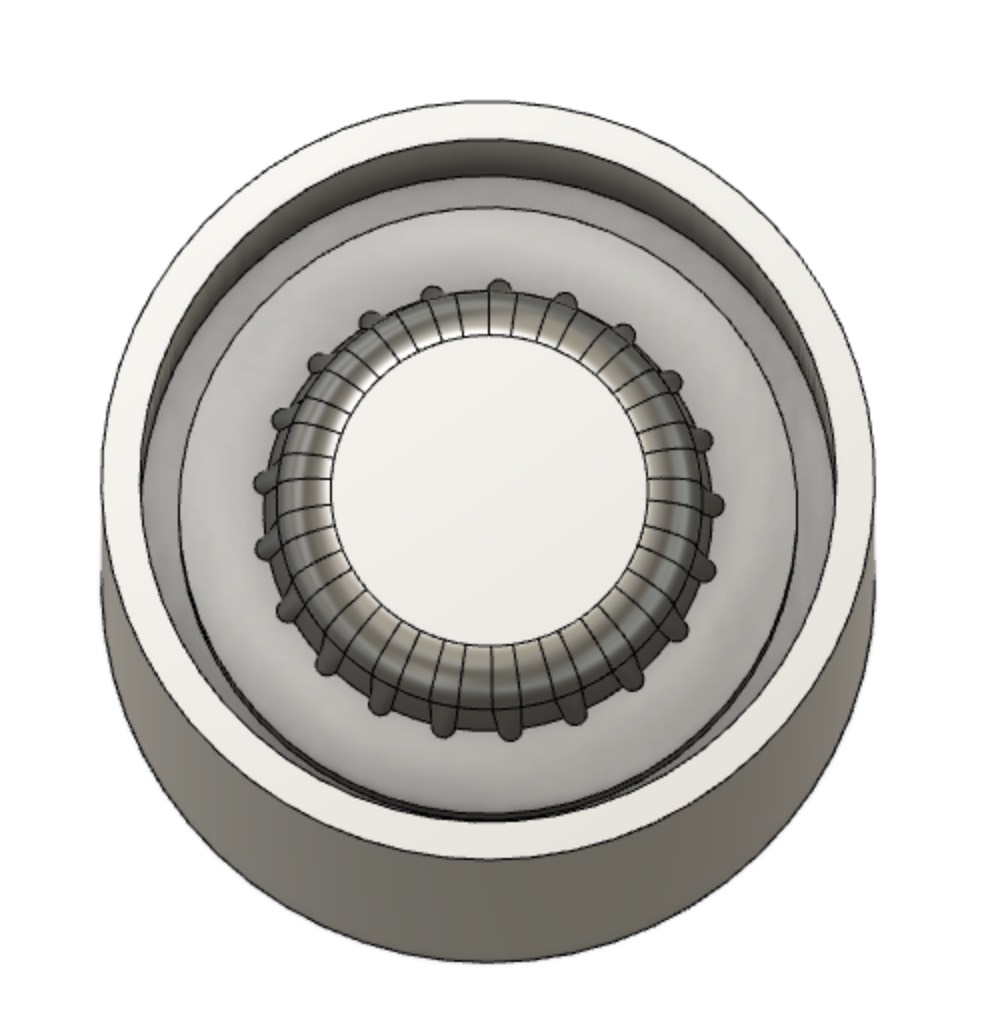
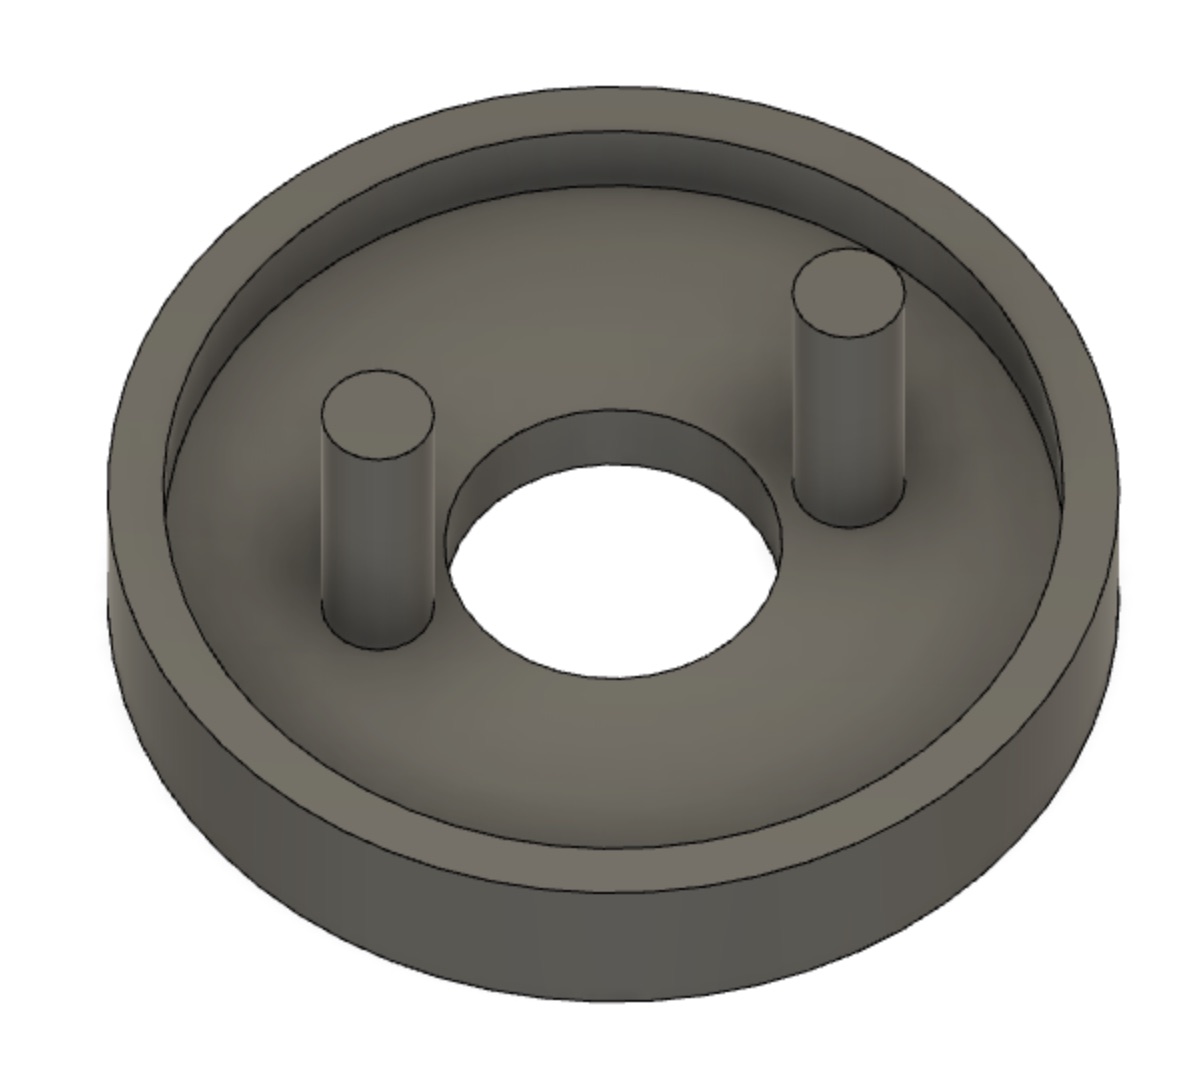
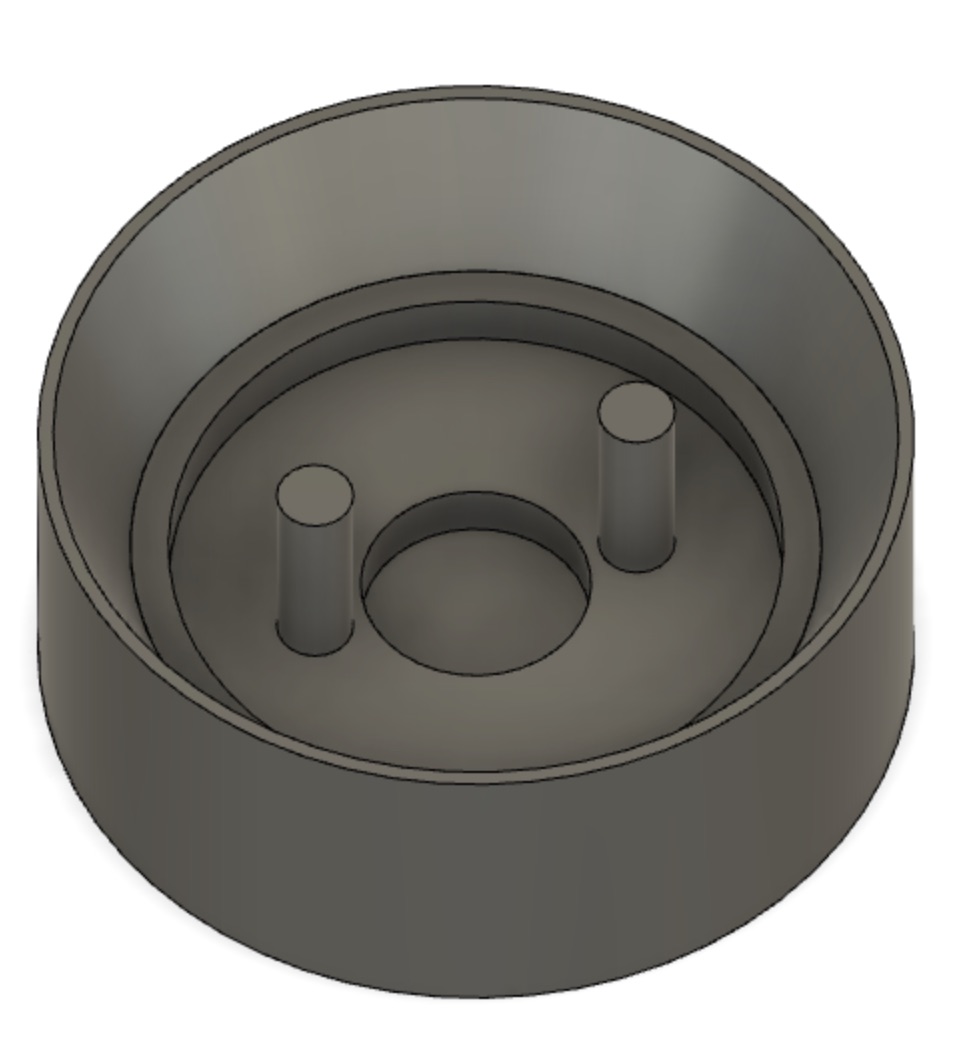
What I needed was the part of the cap that was going to leave a whole in the bottom of the cap when I would make the cast. I copied and moved it to another sketch and then proceeded to do the same processes of making the silicon mould I would need and then placed a cylinder around it to combine and leave me with the wax I needed in the end.

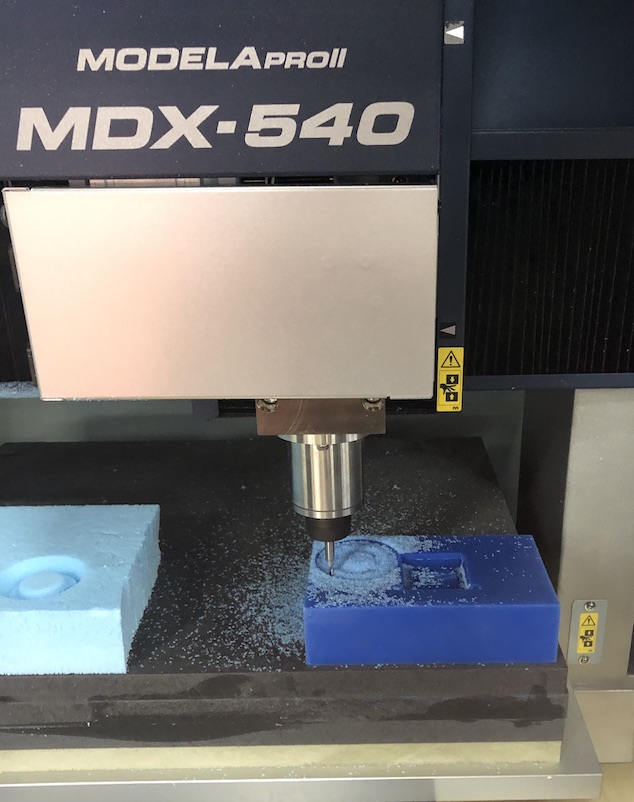
I then moved to the MDX-540 to mill out the my moulds and used the SRP player so that I could follow the instructions that we have to use with our Roland Machine.

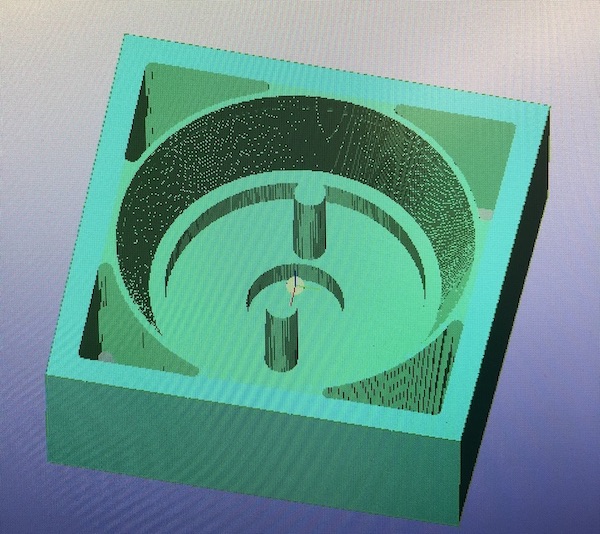
I imported the fusion model into the software and moved my way down the software which was very simple, telling it the size and dimension of my piece and the piece of material or stock I would be using. I then told it the type of material I was using and explained where it would be on the piece for example mine would be milling the 'centre' of the material so that it would not mill off lost to begin with.
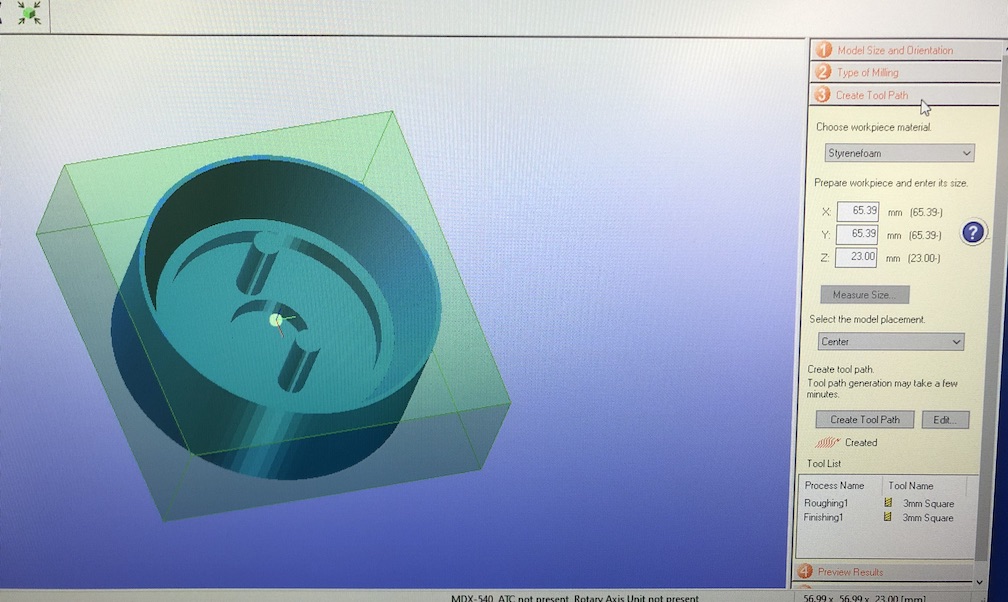
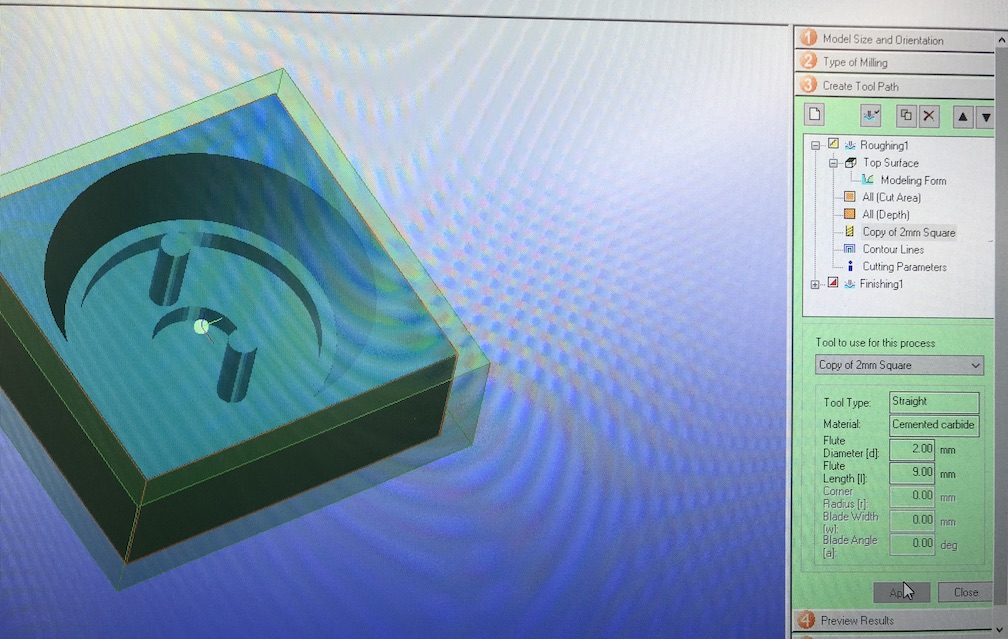
I then moved onto the too path, making sure to choose the correct milling bit which was I was was the 3mm square bit we had to start with. I then was trying to figure out how to get rid of the margin around the piece but I don't know how to do that till on. It was very simple I just had to unblock it in the box. I come into issues later on before I realise I can get rid of this margin barrier.
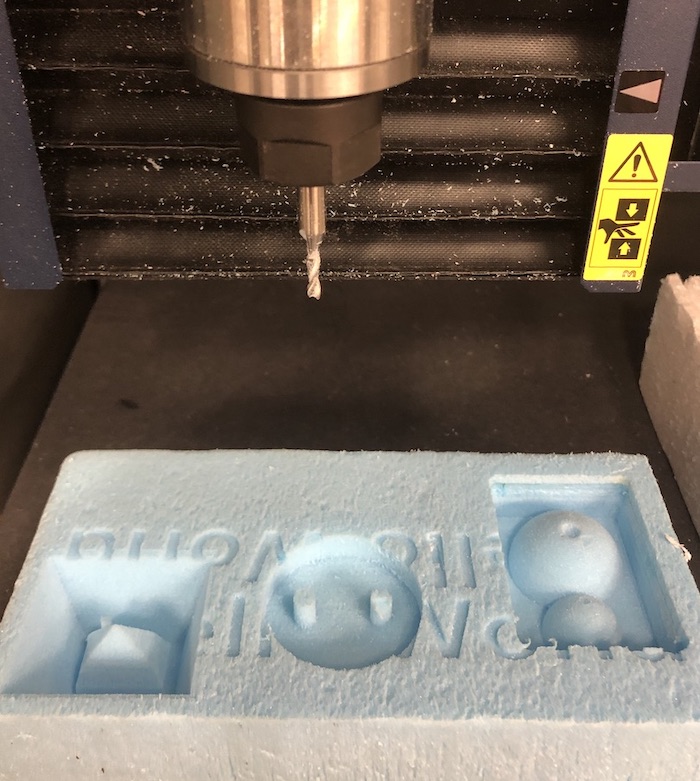
As you can see it is taking away a lot of material that doesn't need to be removed and would take more time than needed.
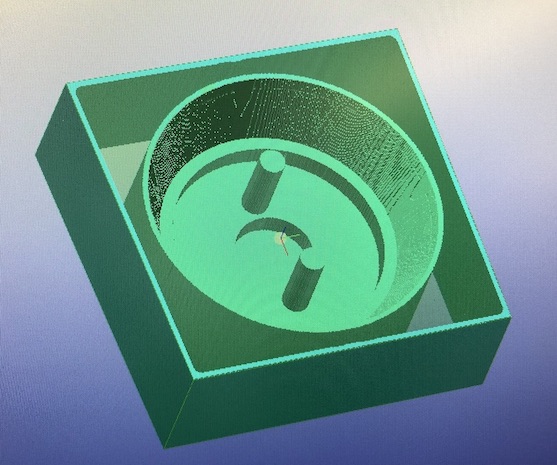
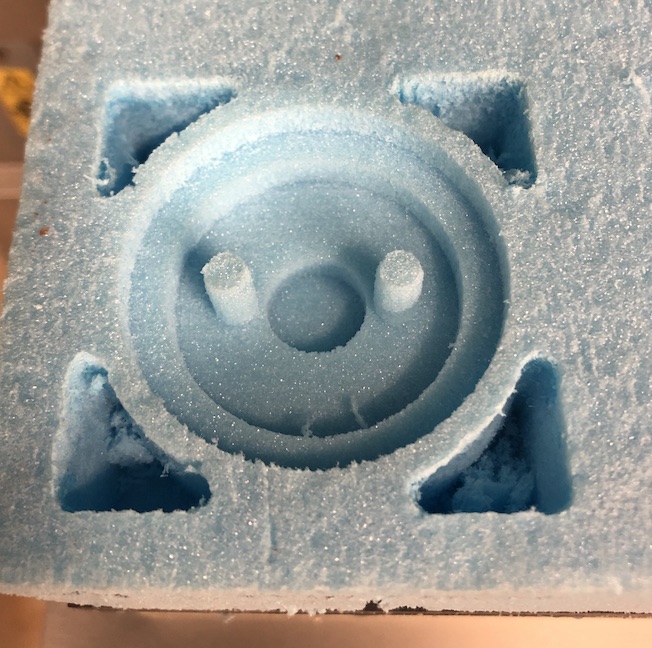
I did it anyway this is the beginning of the cut which worked well and I thought this was a good amount removed from the roughing pass, what I now know is that you need it to take as much off as possible so that it isn't bad later...
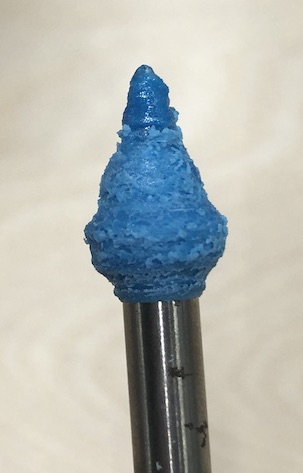
I left the machine and 20 minutes later I came back to this! The whole milling bit had gotten very hot and the foam had gotten stuck to the bit. This was very dangerous. Also the amount it was plunging was very dangerous with no chamfer if this was another material the milling bit would have been very damaged as well as the machine.
I went back to the machine and changed around the drawing so that less was being cut out, I thought that by making the mould round it would take away the area being cut out but this didn't help at all.
I did recut it changing the settings so that I was using a 2mm bit for both passes rather than a 3mm bit for both.
This did help but still cut out the edges, it also didn't do the chamfer which was in the final cutting which was weird.
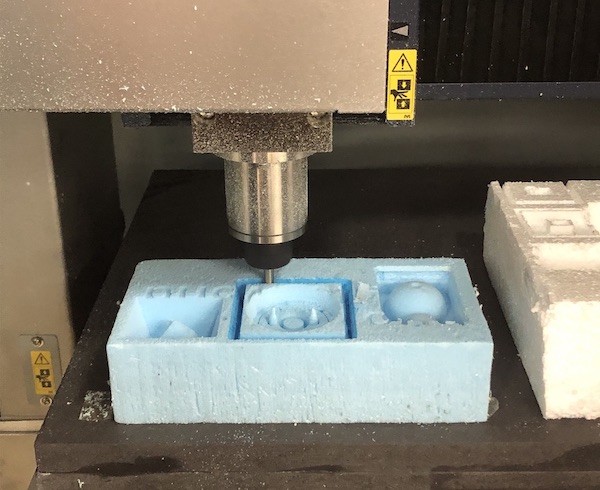
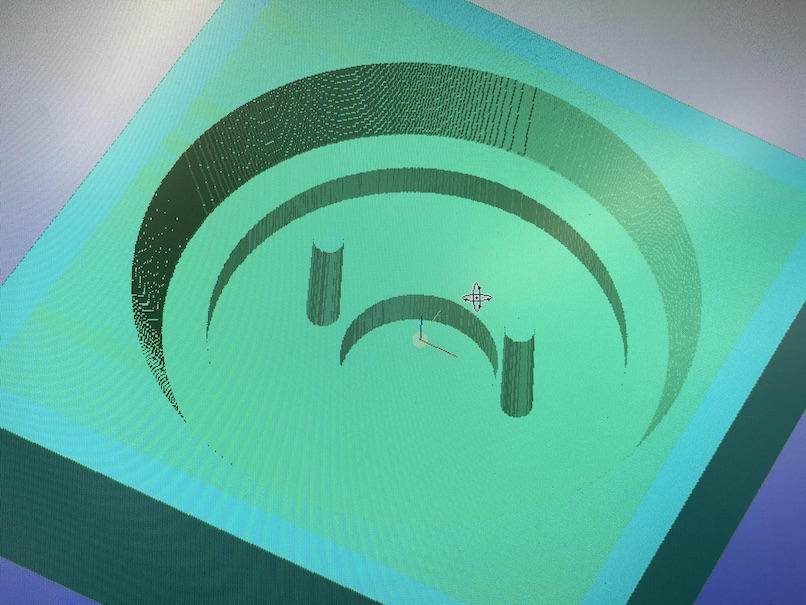
So I changed the model again so that it was in a square and cut this which worked very well, I was very pleased with this outcome and thought that the only thing I needed to change was the thickness and the placement of the poles for the air and pour wholes in the silicon mould.
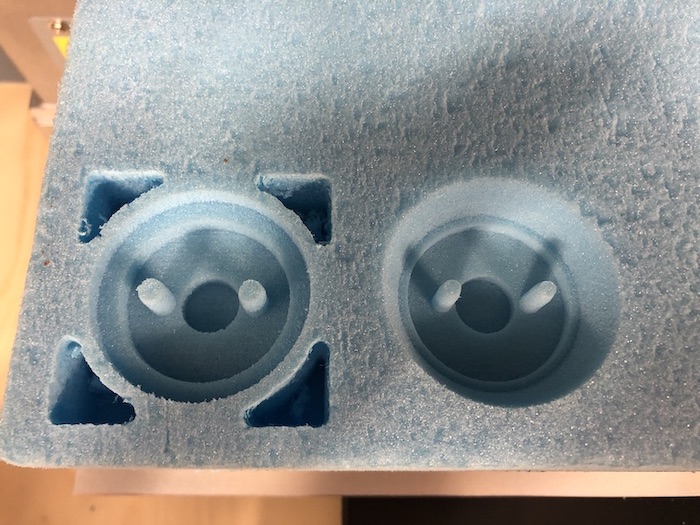
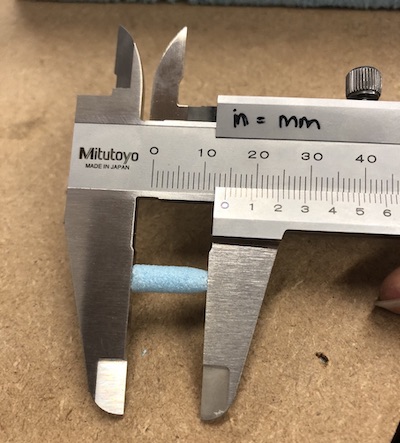
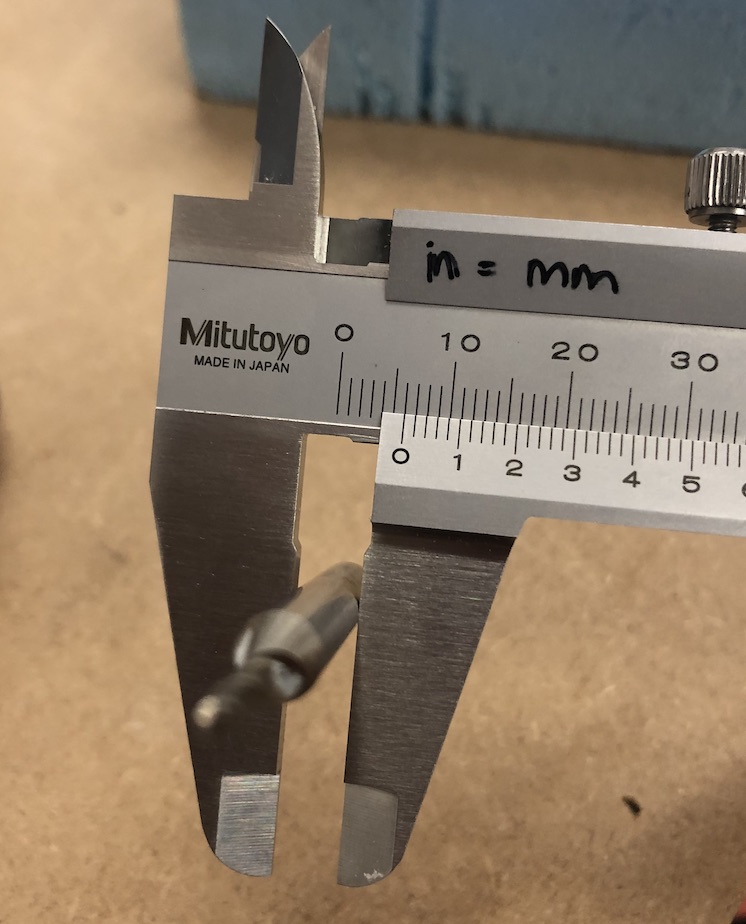
I took one of the foam mould and measured it out, as well as checking I had measured the milling bit correctly as I had designed it for the 3mm bit on the 2 mm bit.
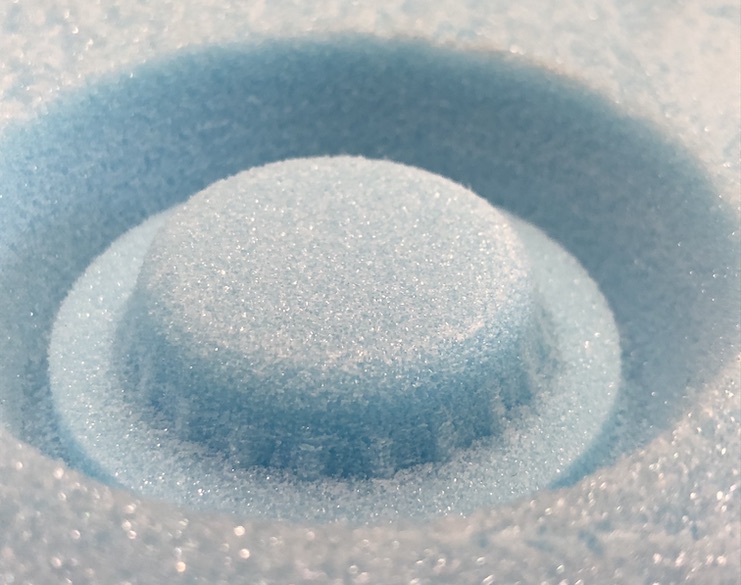
I then moved onto milling the cap part of my mould which came out very well first time but using a 2mm square end mill bit which comes out very nicely in this foam but in the wax it doesn't come out as nicely as you will see in abit.
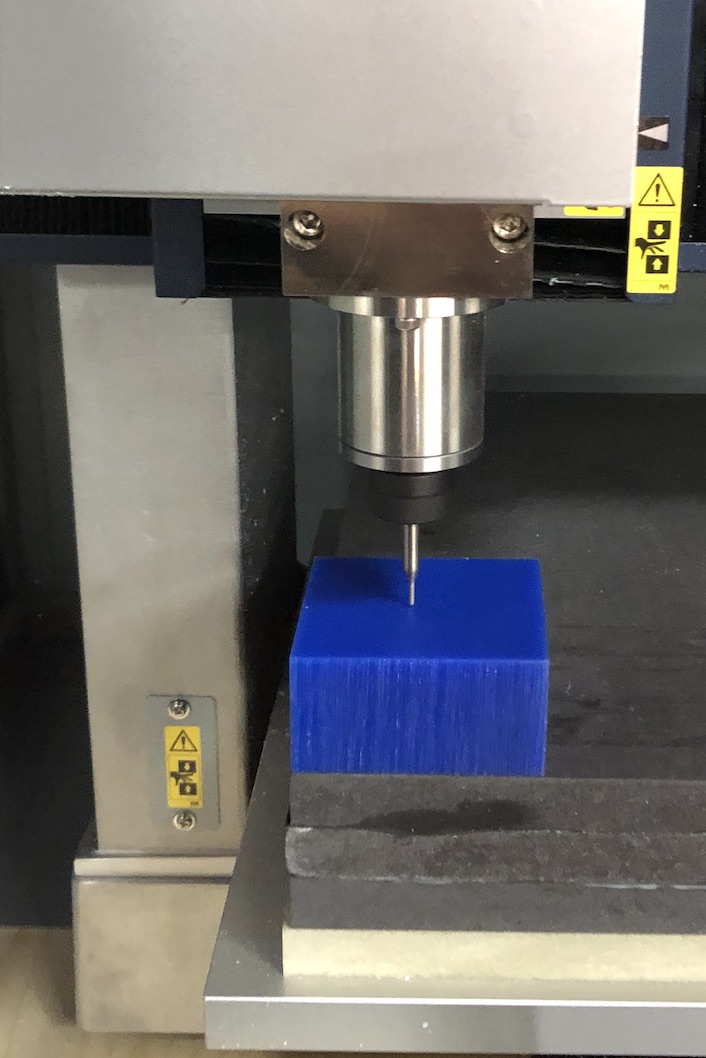
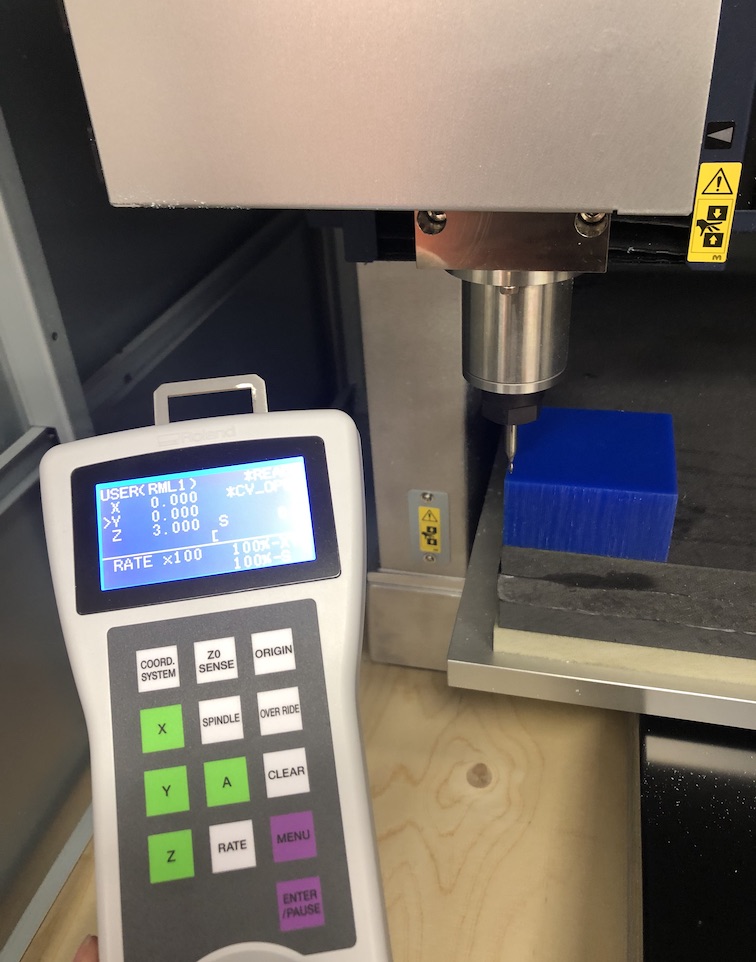
Now it was time to cut into the wax piece I had, I used the exact same settings as the foam in the wax. This was the moment I was doing my training for one of our members and it was a very exciting moment as I had never used the wax yet and the members had never used this machine before so we were both very excited.
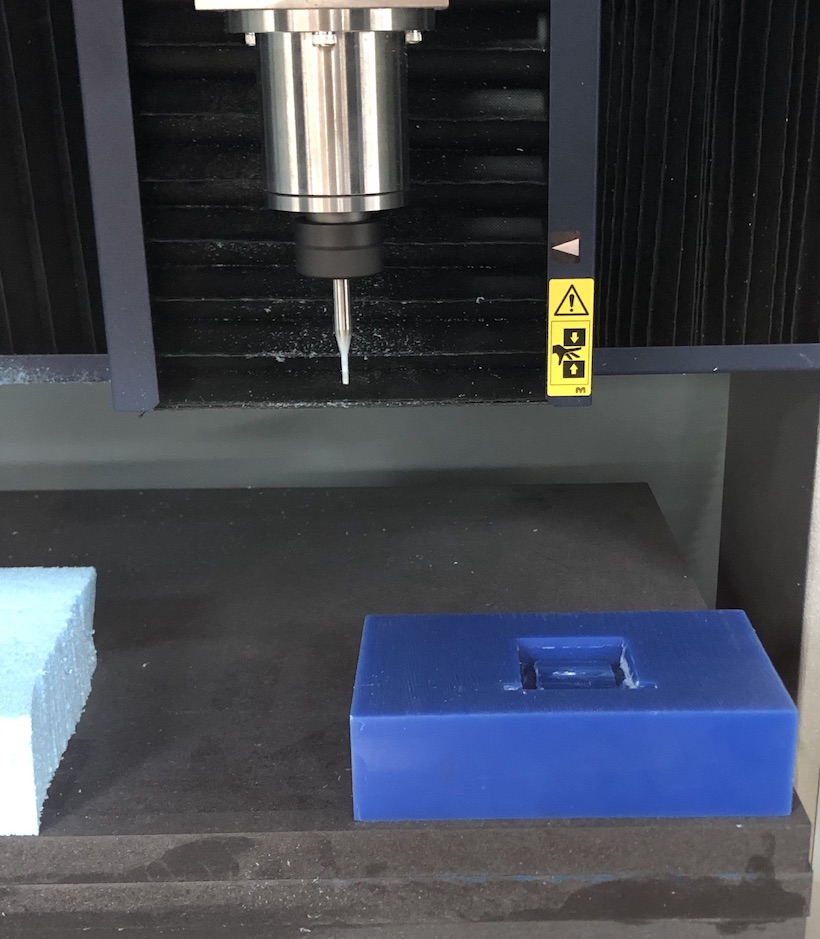
Watching it to make sure it was all going well during the milling, the wax made a lot less mess than the foam which I would have not guessed.
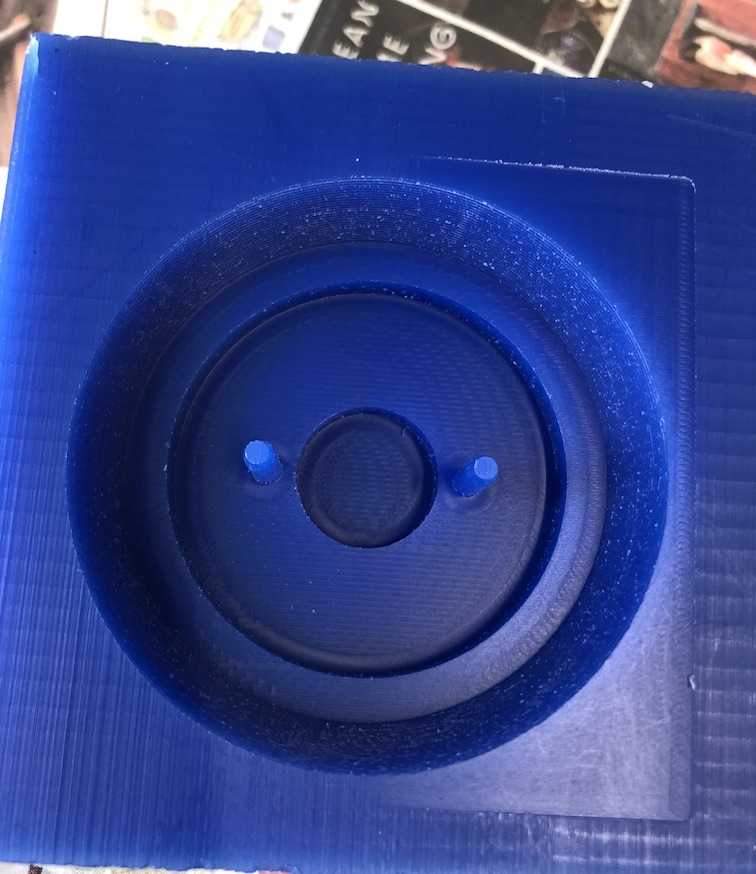
The outcome as not as smooth as I was looking for, I knew that you could get a lot better results as I could see what Andrew had done on his own moulds.
I then decided to make the milling bit, a round 2 mm bit, I used the exact same settings as before and the outcome is amazing!!
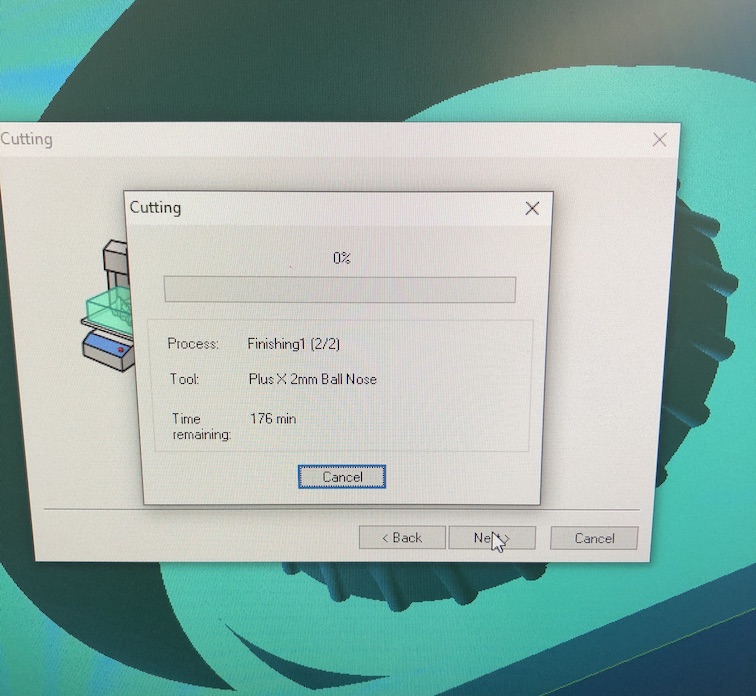
Now that I am using wax I needed to makesure there was a roughing pass that would go over the wax first with a quick and 'rough' as described in the name that would get rid of the majority of the material before it does the finishing pass.
I used the same milling bit for both the roughing and finishing pass as this was easier for my piece as it was so small and intricate. The roughing pass only took about 17 minutes and I could not get a photo as if I stopped between the two passes the whole processes would get cancelled.
But it would gets rid of the bulk of the material quickly and then moves onto the final pass...
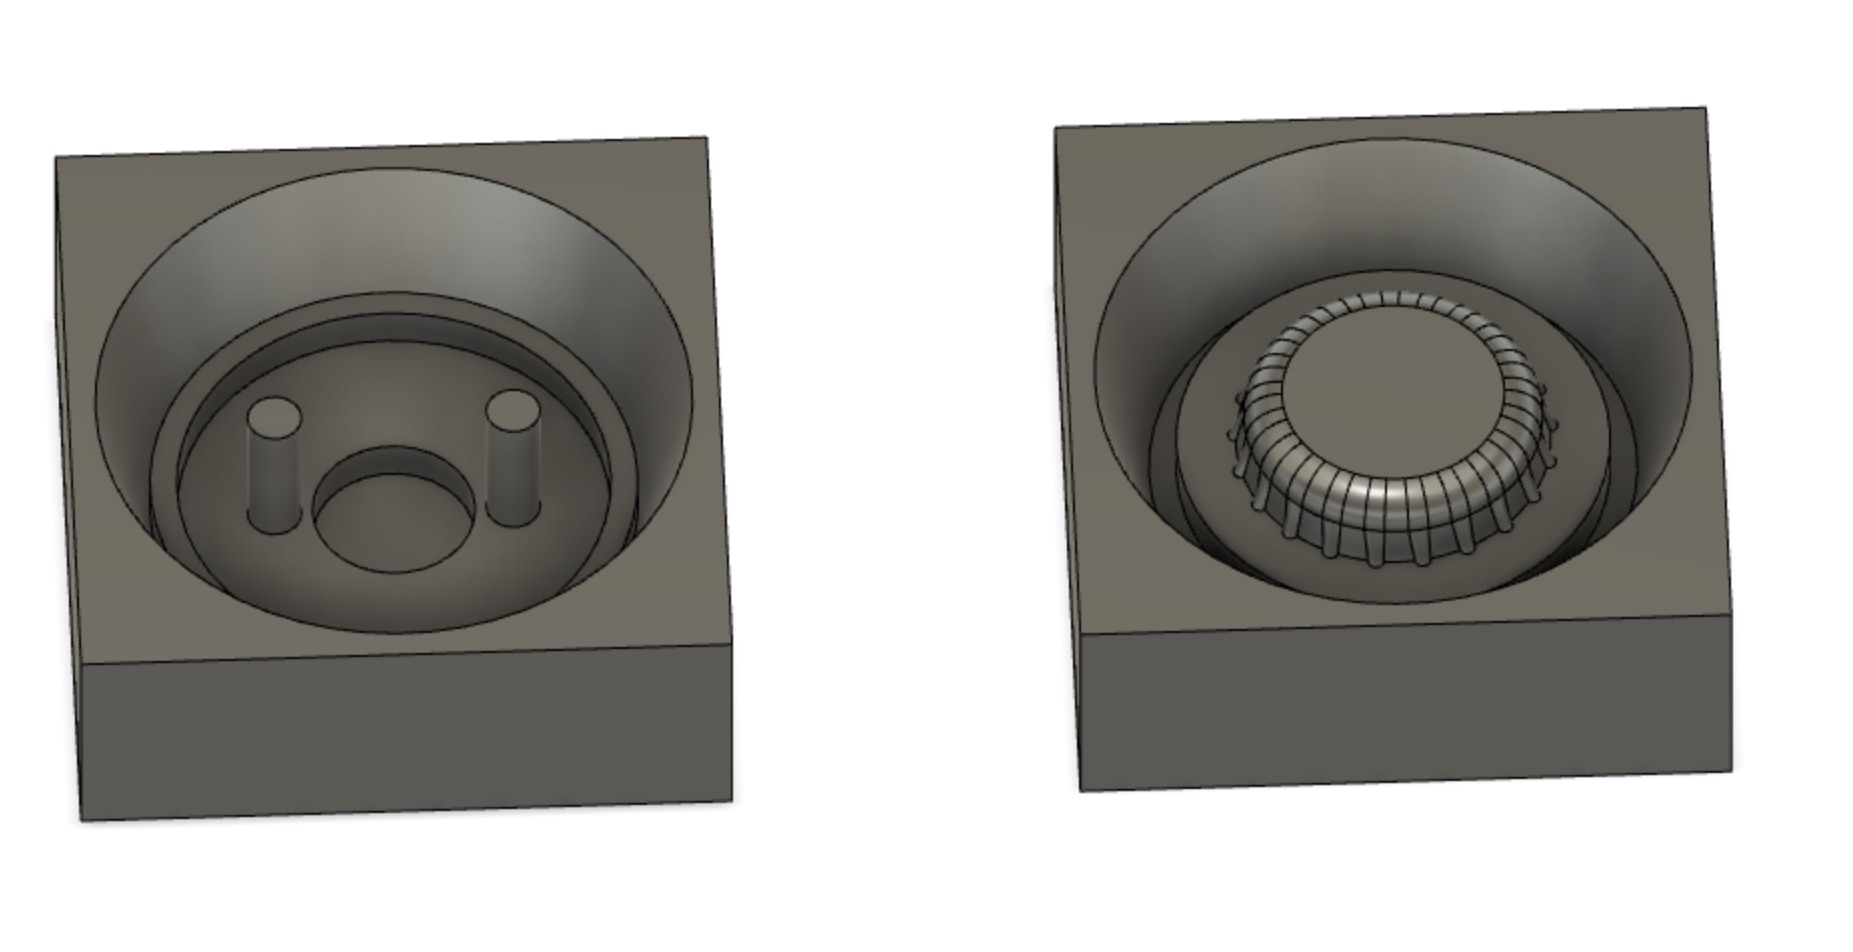
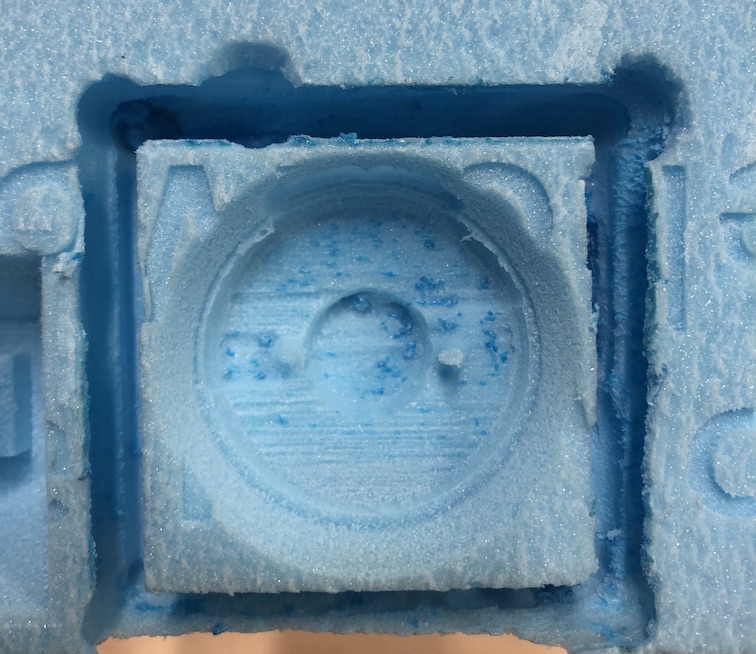
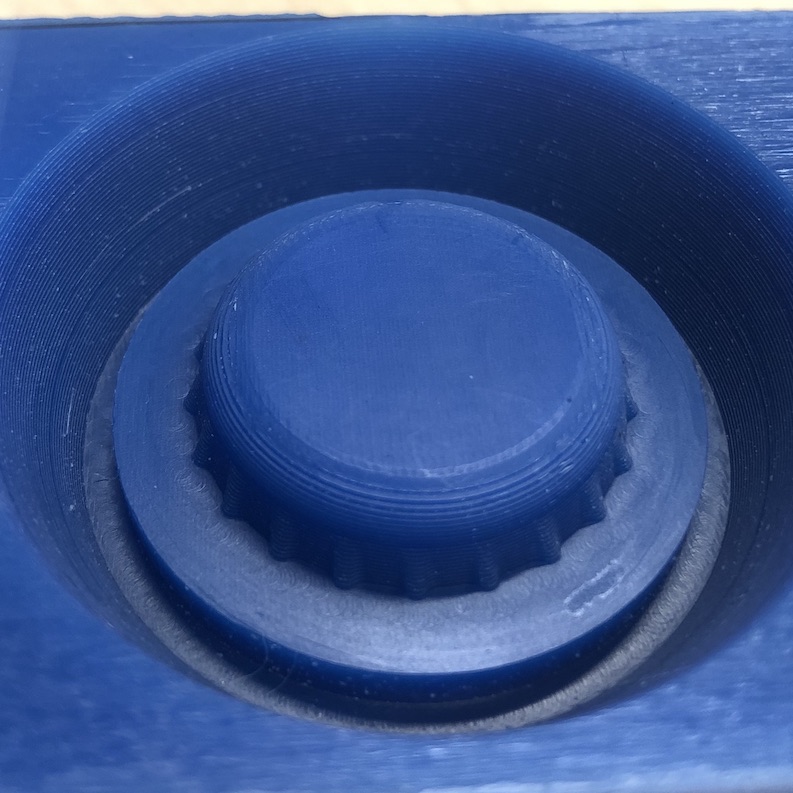
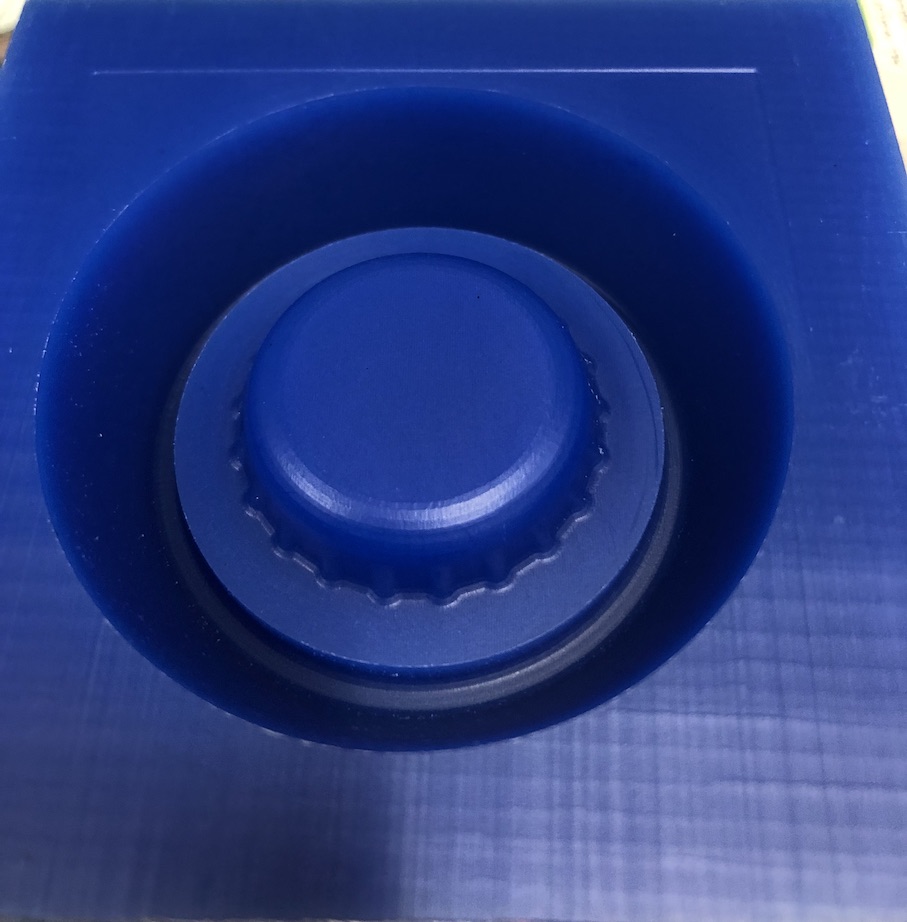
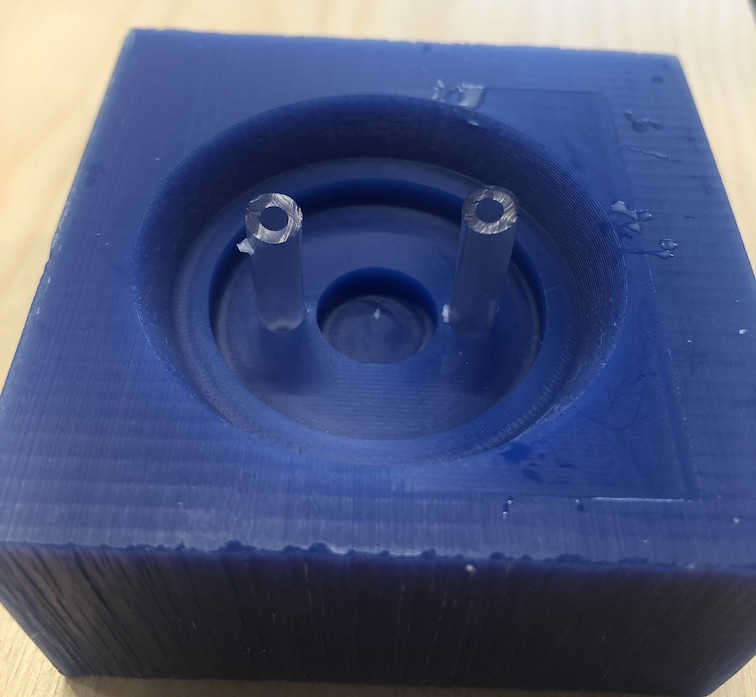
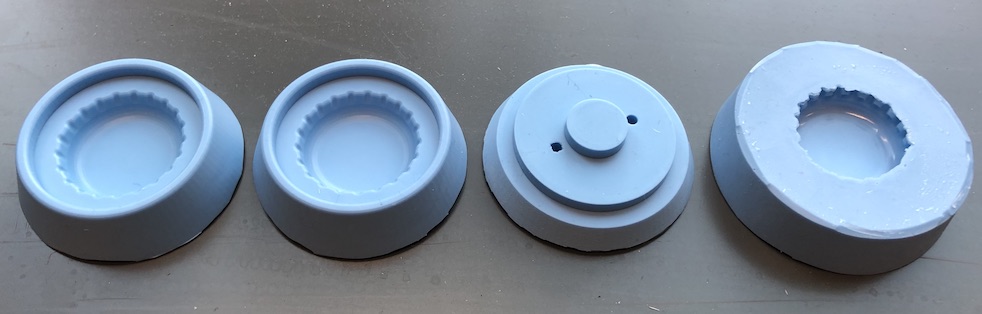
The final pass took 3 HOURS!!! But this was because I was using a 2 mm round milling bit which goes left to right over the wax and then back to front to get the perfect smooth texture you can see in the final mould as shown below.
I would not have guessed this would be the final result from just changing the milling bit. I then cut out the top mould with a square milling bit as I did not want to roundness of the other mould.
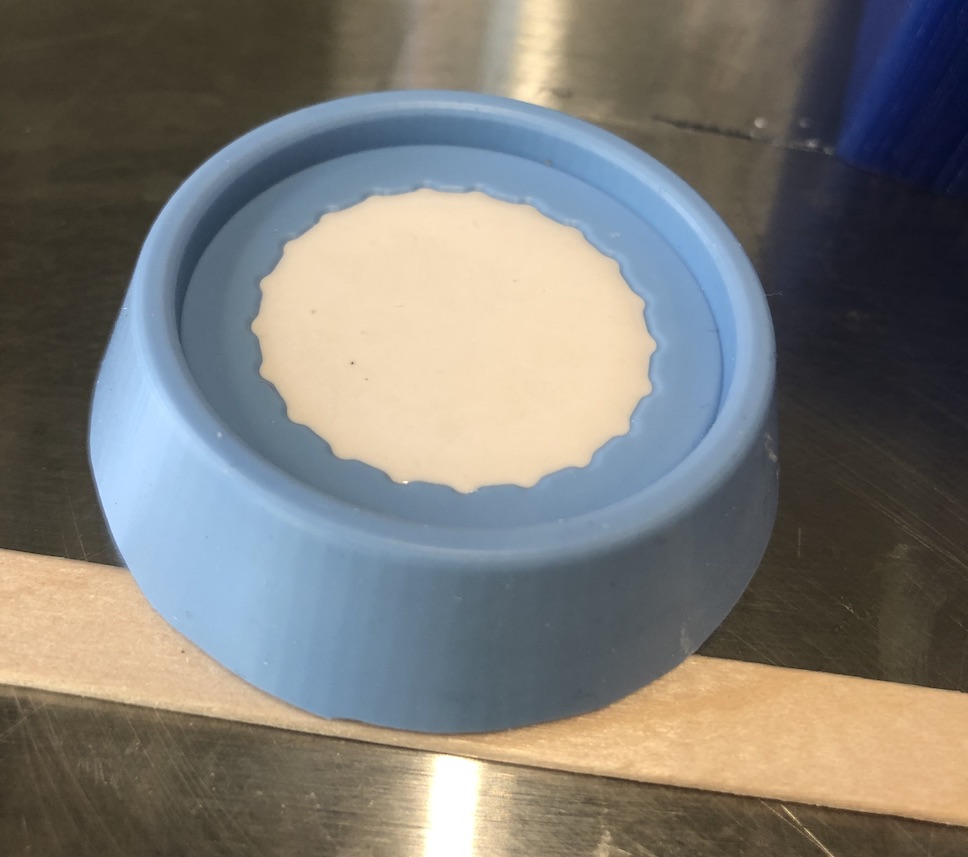
I measured and poured the mould for the main cap in the evening so that it would cure over night, I used the same silicon as before so followed all the same steps.
I used Oomoo 30 for my silicon as I did in my first mould with the paper cup at the very beginning.
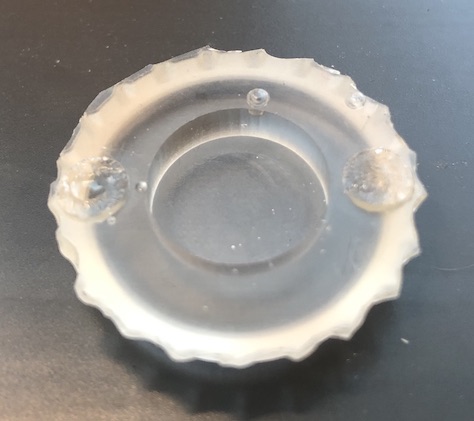
I then made cast the other mould but had a little mistake as one of the pour whole supports broke off during cleaning so I used a piece of masking tape to hold it in place as I was pouring the silicon.
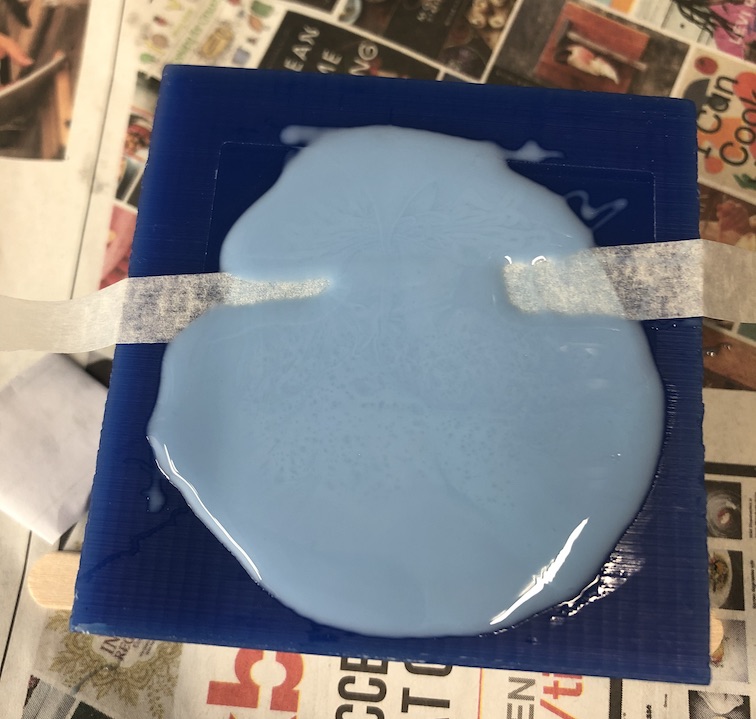
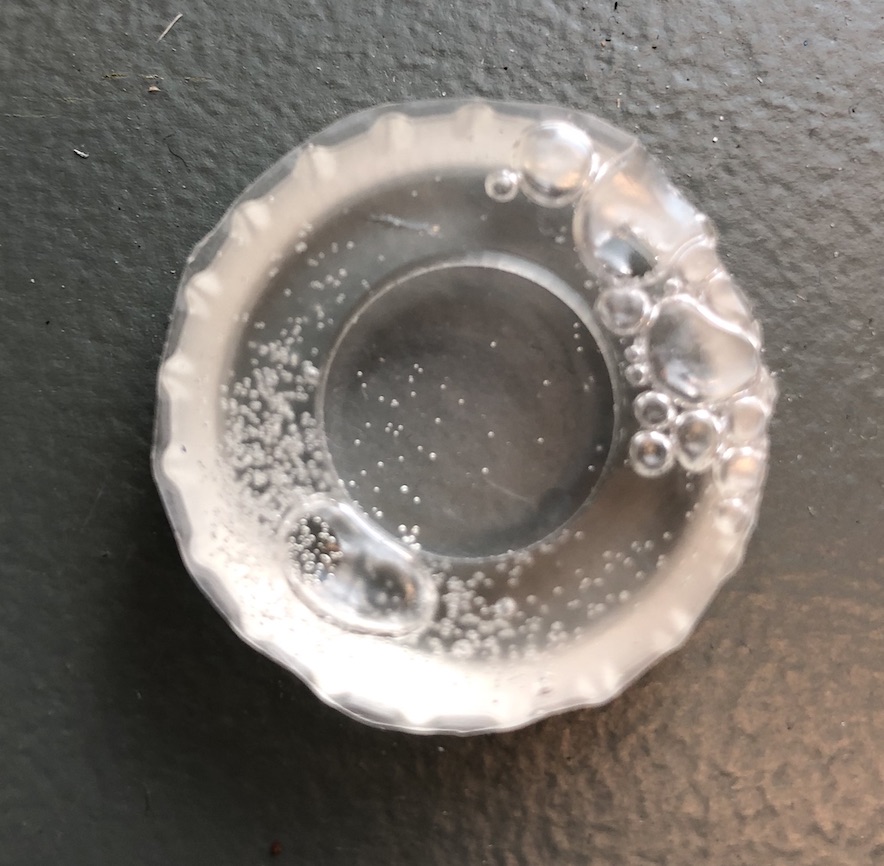
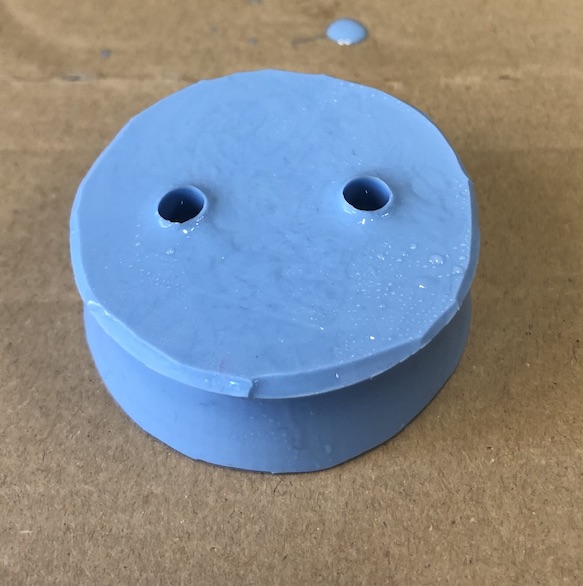
These pour wholes ended up not working very well as they were too small, so the resin wouldn't go in very well and coursed a lot of bubbled in the resin even after putting it into the vacuum chamber.
I then decided to just scrap the pour whole I had made in the original file so I just used some tubing I had lying around to use when I cast the new mould.
This ended up working very well and the outcome of pouring was actually a lot easier and made a lot less wholes.
I placed the mould at an angle to help the air escape the mould to prevent air from being trapped in the mould.
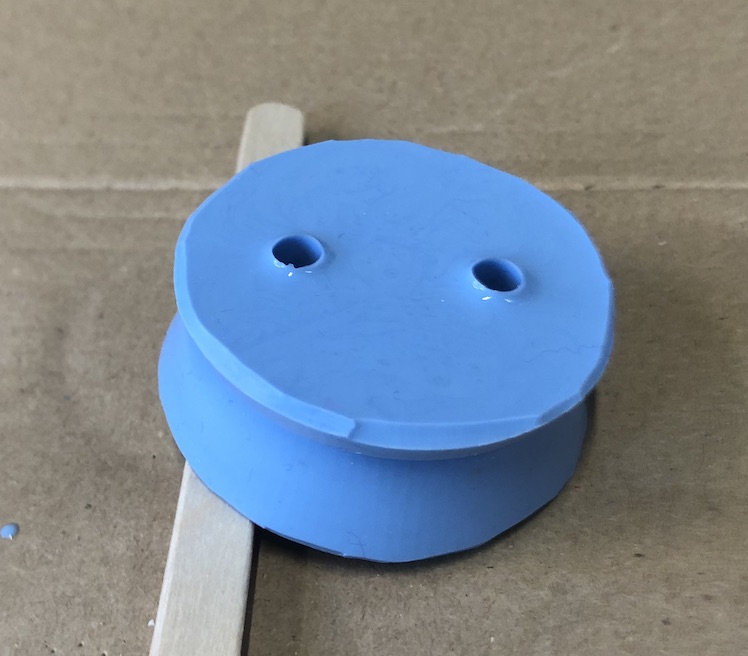
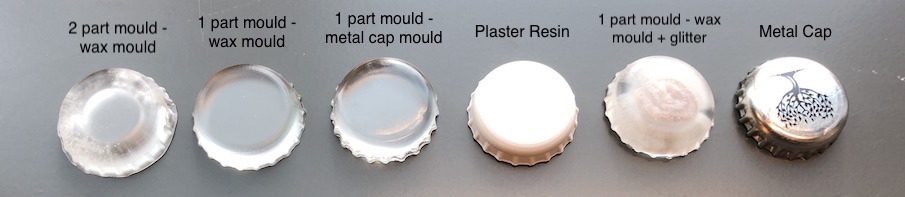
The outcome was better than before but think the gap between the two moulds are too far apart so there ends up being resin leeking. I am going to try one to see the exact amount of resin needed, but I think the one with the one part mould from the milling wax works very well if i makesure not to over fill it. This is easier to do with the 1 part mould as I can see what I am doing.
Cure time 1 hour
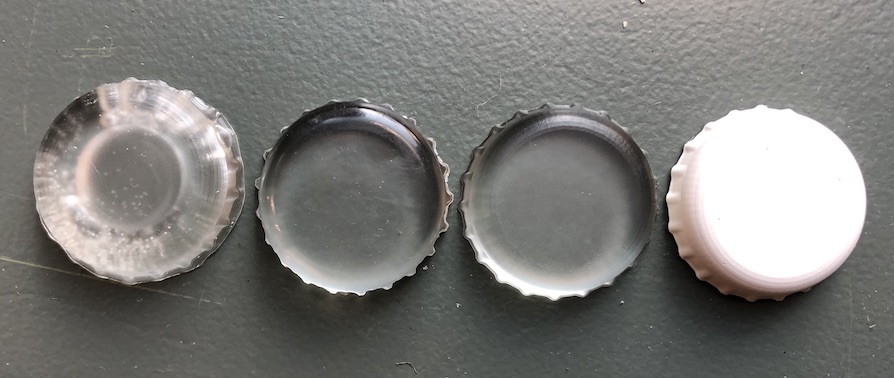
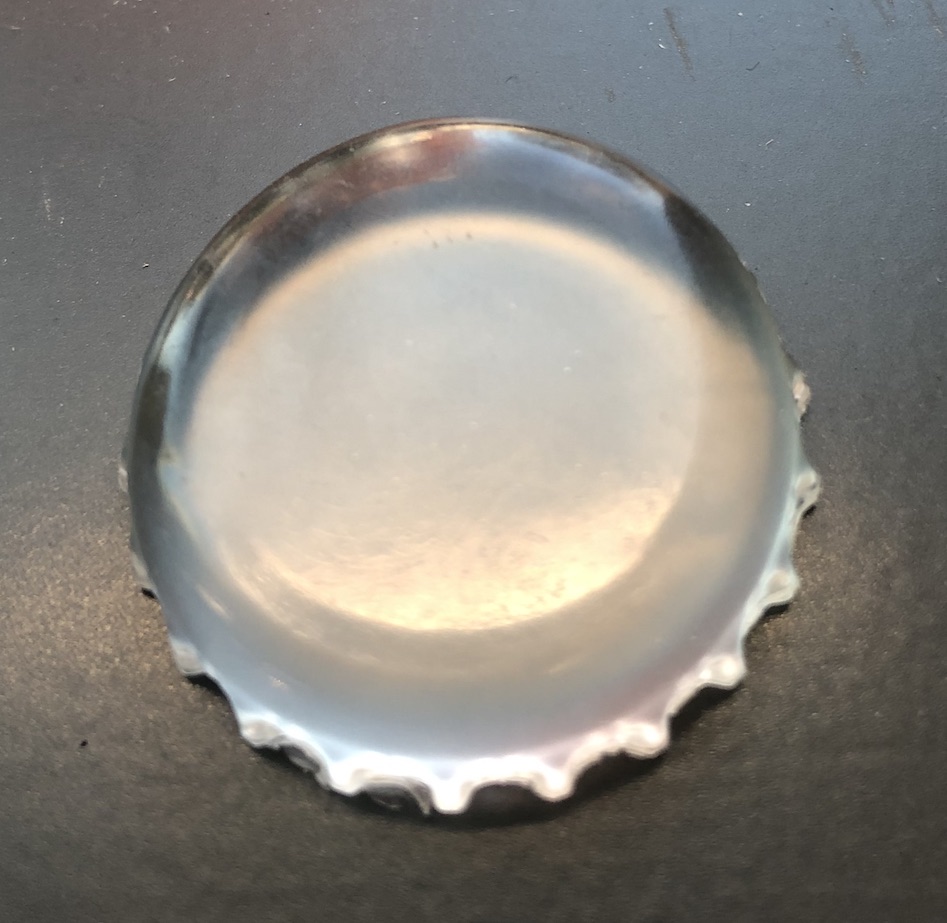
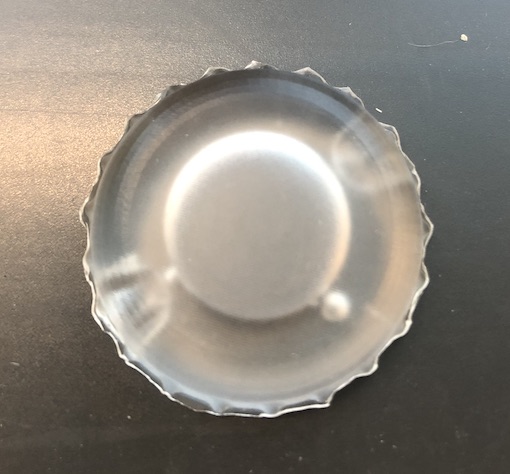
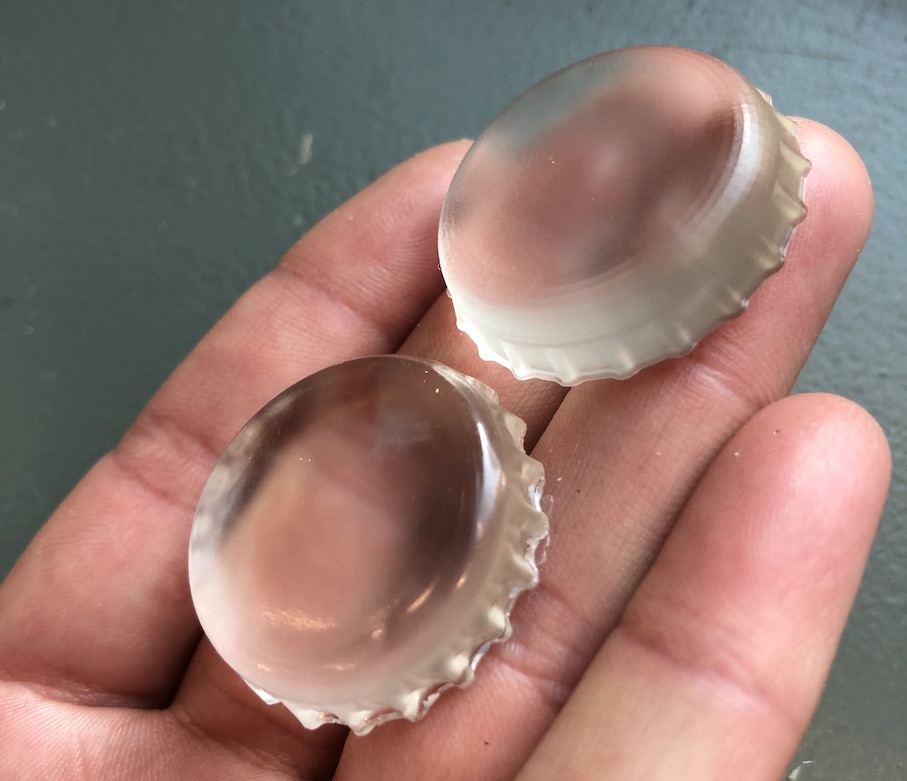
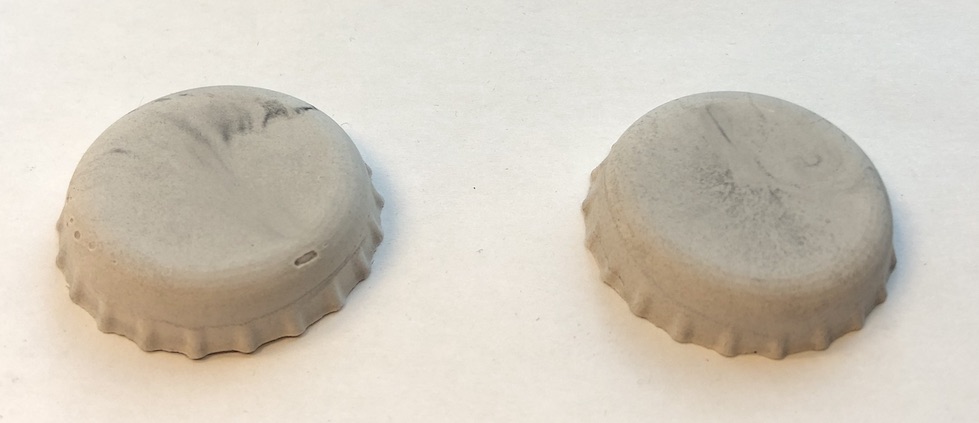
These are the two 1 part casts compared, the one on the left is the firs tone from the metal cap and the one on the right is the one with the milling machine mould.
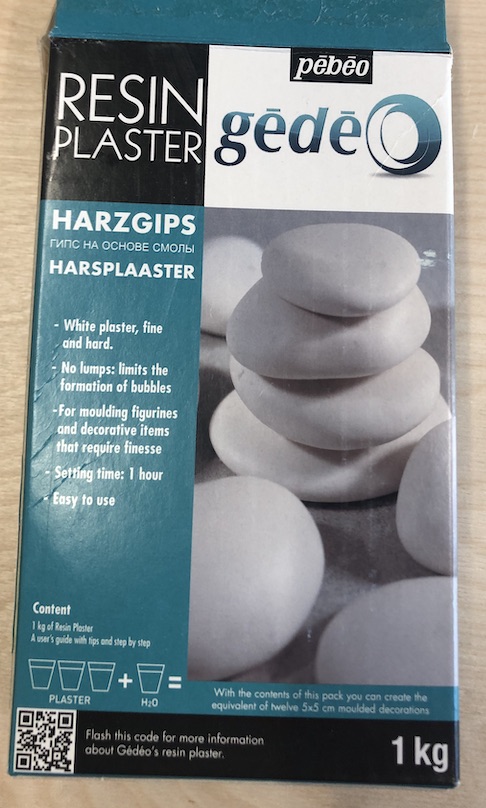
I then played around with this resin plaster it was very hard to pour and very very thick, so think I will try out different measurements to see if it would still pour better with more liquid added. Please check the instructions and safety instructions for every new material tired.
It wasn't very flush on the bottom and it was very brittle so the edges would very easily break.
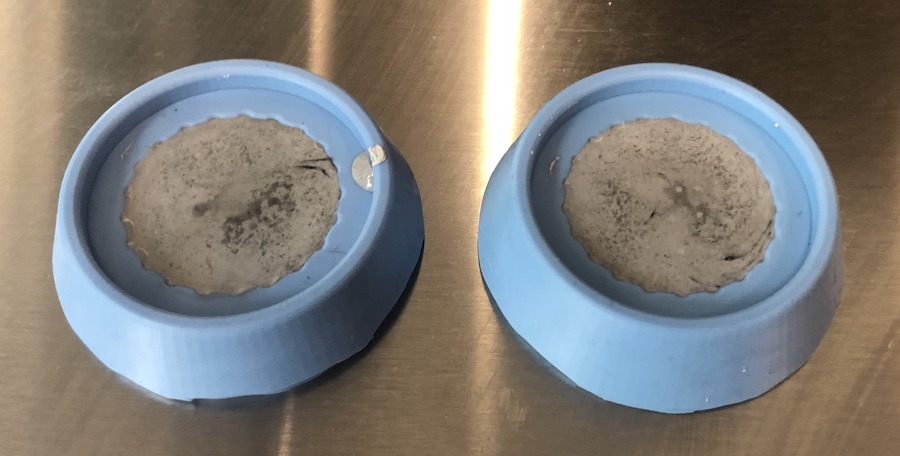
I ended up using some more plaster in week16 and made too much so added some to my cap moulds and this was the outcome, I added some black water based acrylic to make it grey.