12.04.2021
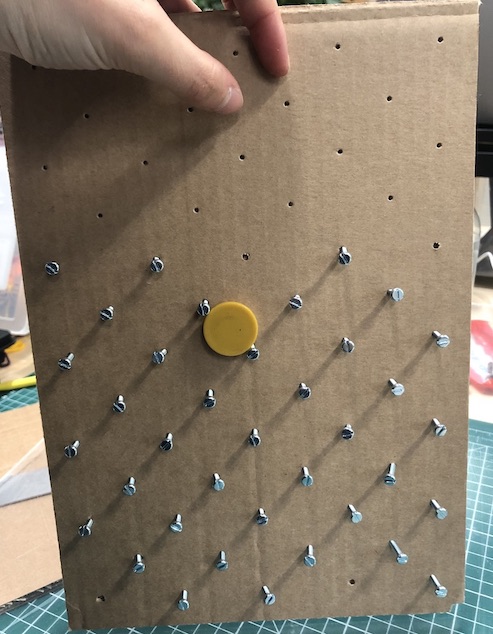
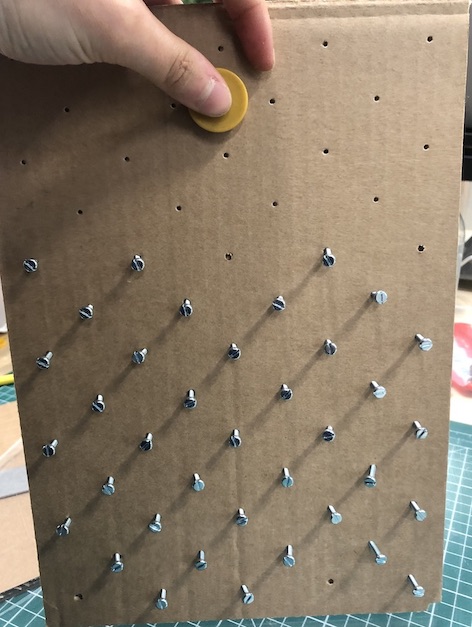
I thought the easiest one to see if it will work would be the pins coming out of the wall and the cap moves down them. I grabbed a piece of cardboard, made a fusion file of the separate dots and then printed it out and marked it on the board using screws. This didn't work that well as I didn't have a bottle cap and the wholes were too close for the 'cap' that I used was too big.
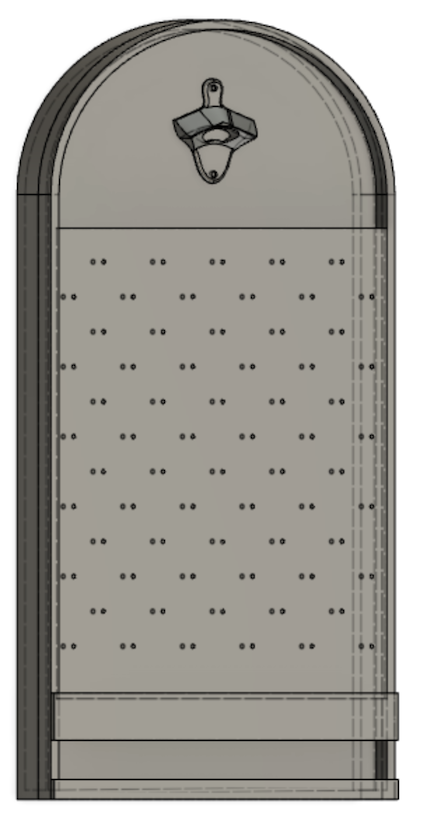
Using my fusion file to see what I need to make my final project as this really helps me visually see everything rather than always making it from scratch.
I then printed off the wholes in the fusion file so that I could get the correct measurements as when I was doing it myself I was getting it wrong. This really helped with the dimentions and made the whole processes alot easier in the long run when marking out the wholes.
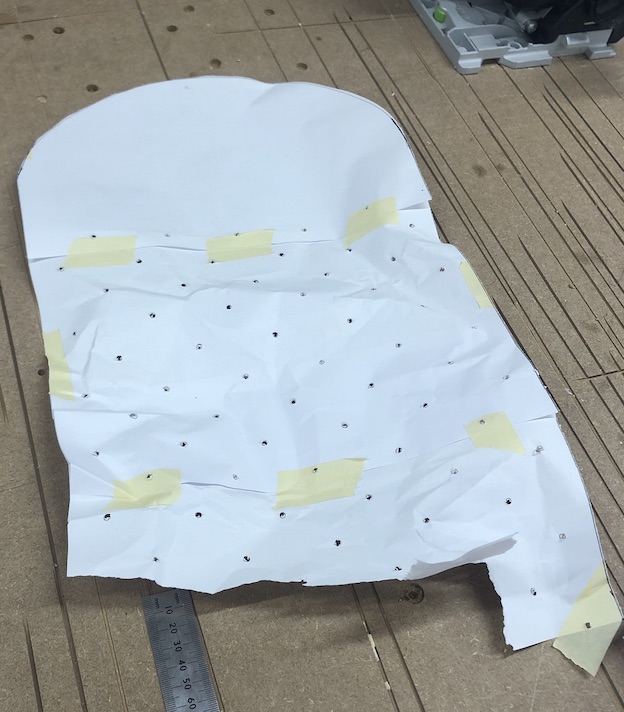

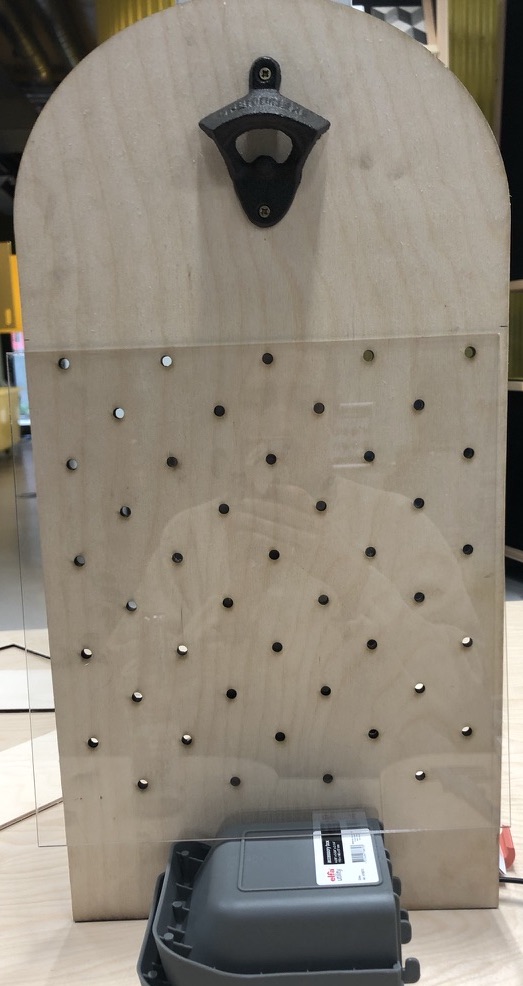
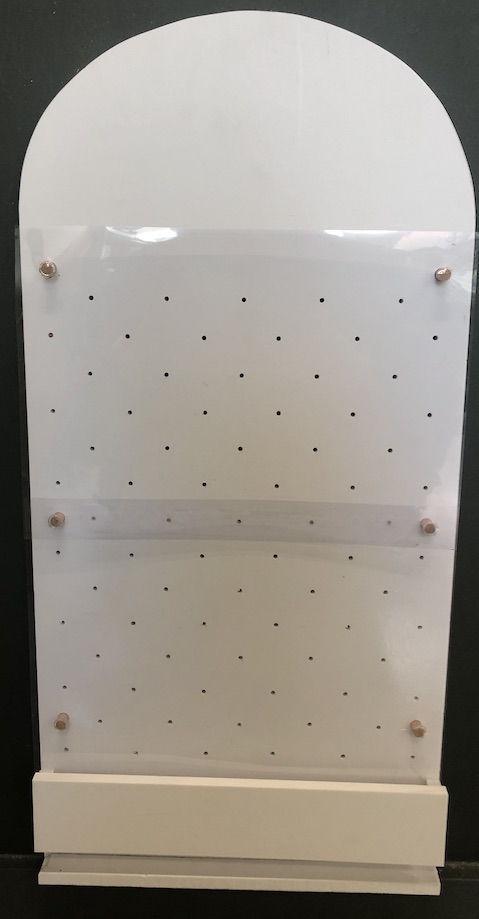
I then moved onto placing it on the board and drilling out the wholes by using the paper template, because my initual idea was to have it with dowel as the framing this is what you will see at this stage of prototyping to make it quicker.
This did work well as you can see in the video below but I was having issues with the cap getting stuck as it was moving down the dowels. It would get stuck between the back board and the front acrylic as the spacing was smaller that the circumference of the cap.
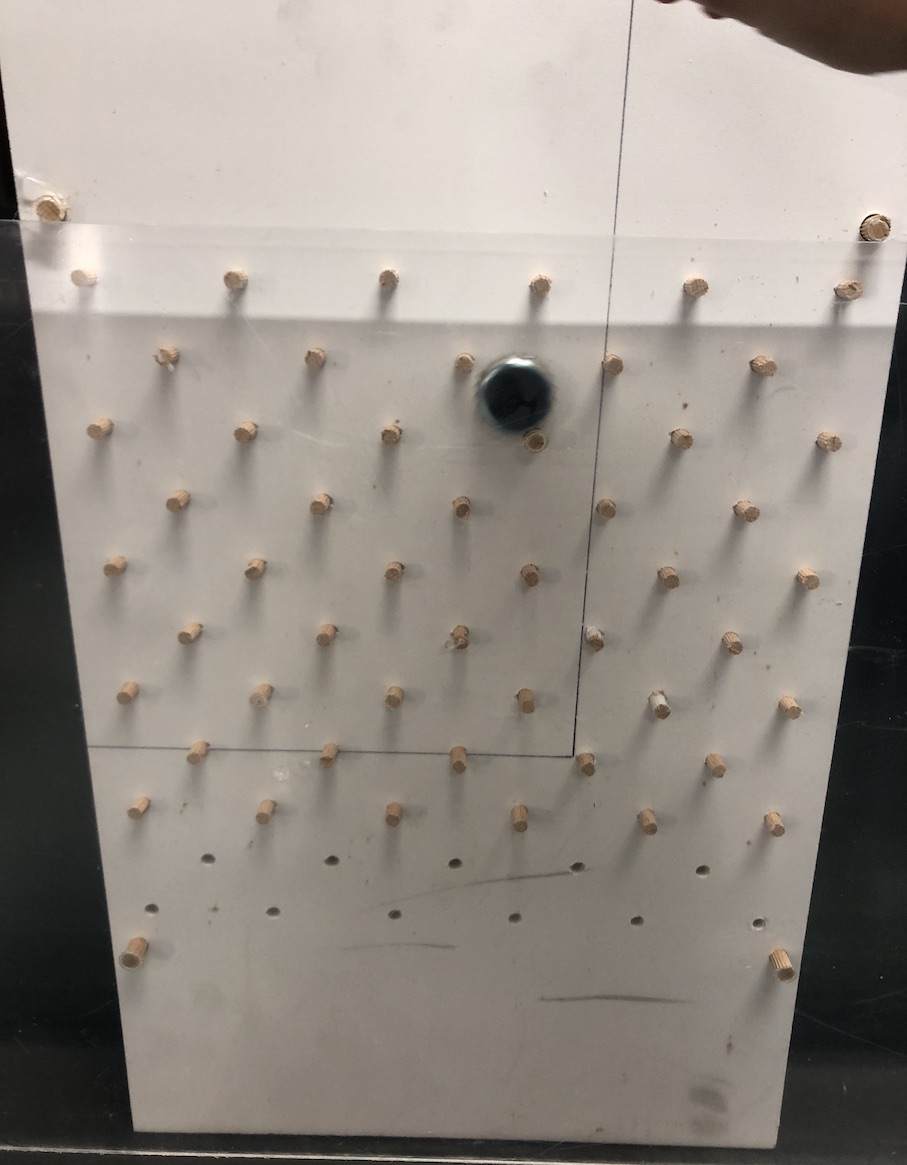

It did work well as you can see and the sound is great but because they were getting stuck I think I need to rethink the spacing of the dowels and the lenght on them to prevent the cap getting stuck.
(put sound on)
As I was doing this I realised it would be a good idea to get an idea of what the overall shape and look of the game I was going for. I started by using this white craft foam we had so that I could quickly mock it up.
I used the fusion file I had made and cut out the wholes for the dowels, I started with a thin whole as I wasn't sure what sizee I needed. I went and pick up some plastic tubing and slotted that in the wholes as this worked better than the wooded dowels. As you can see from the two photos with the clear tubing it works well and you can't really see it which is great!
The overall look I do think would look better with the frame ut for now just testing out scale, the movement of the cap, the spacing for the dowels, where the bottle cap needs to be and the bottom catching area.
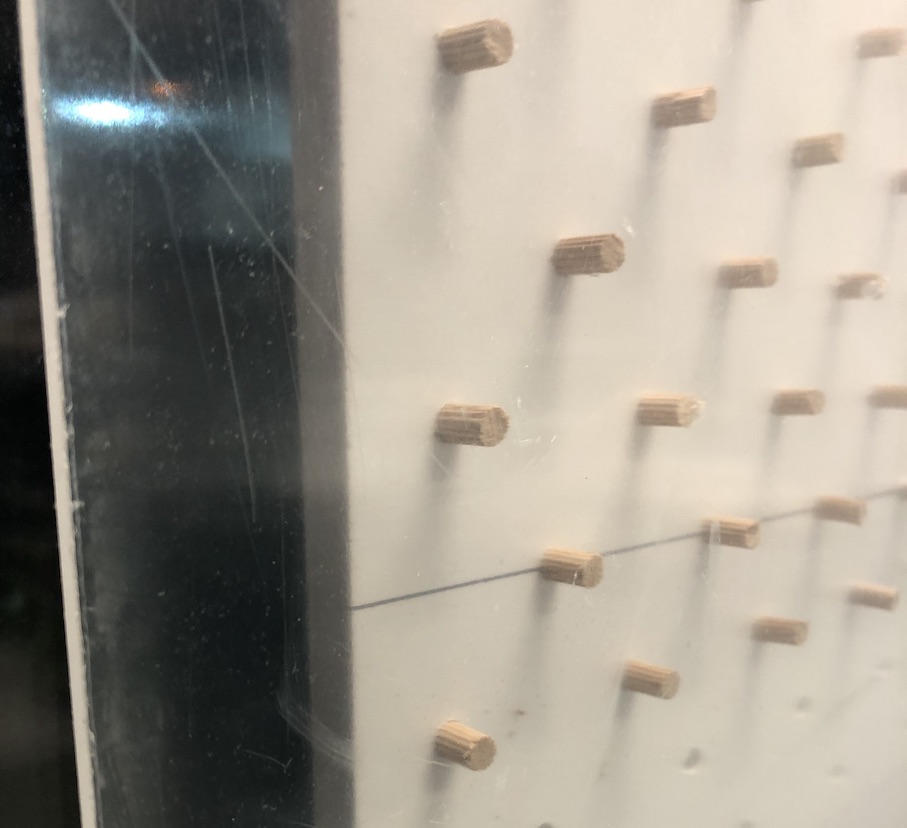
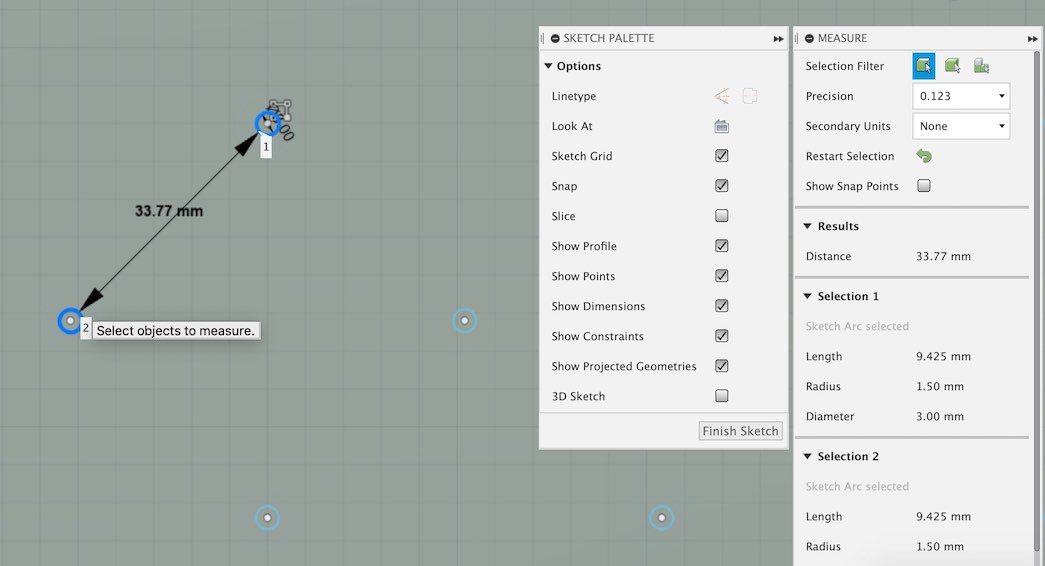
Even though the previous dowel distance did work they did get court a few times between eachother and the back board and the acrylic. I then tried it so that the distance between the wholes was 60 mm apart. As you can see this did work well in my test and with the plastic tubing it also showed how it would move down better.
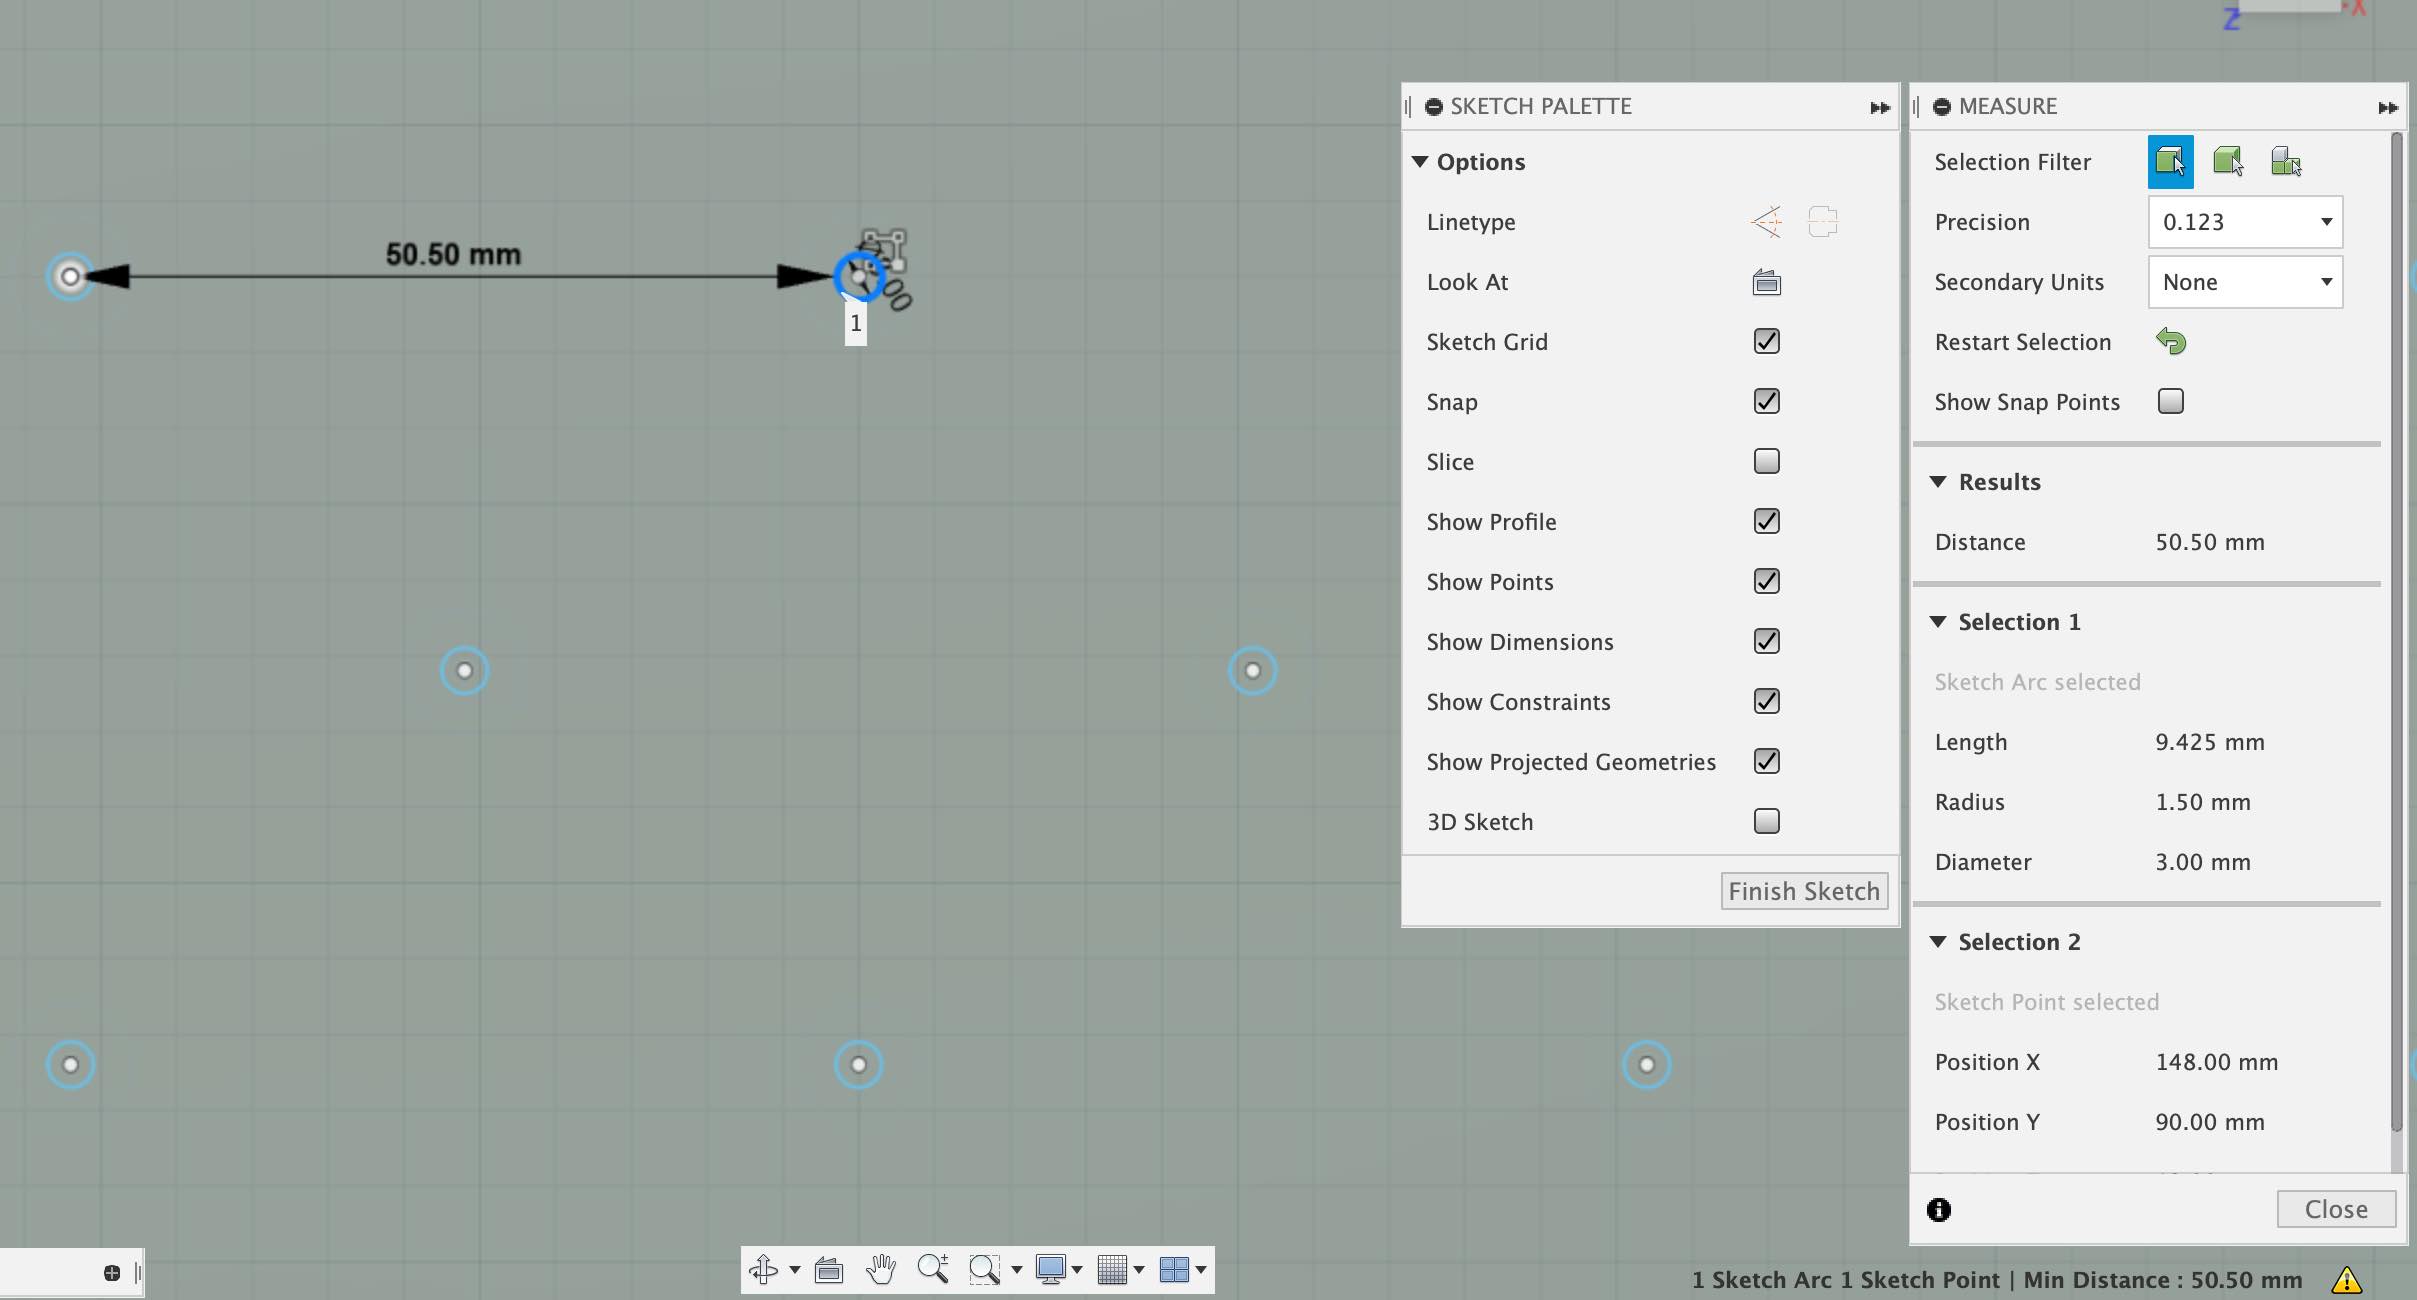
I went back to fusion and spaced the wholes our future so that the cap betweem the wholes on the angle was 33 mm which is large than the cap itself measureing it at 30 mm.
Video of cap falling down with the distance changed between the dowels as discussed above.
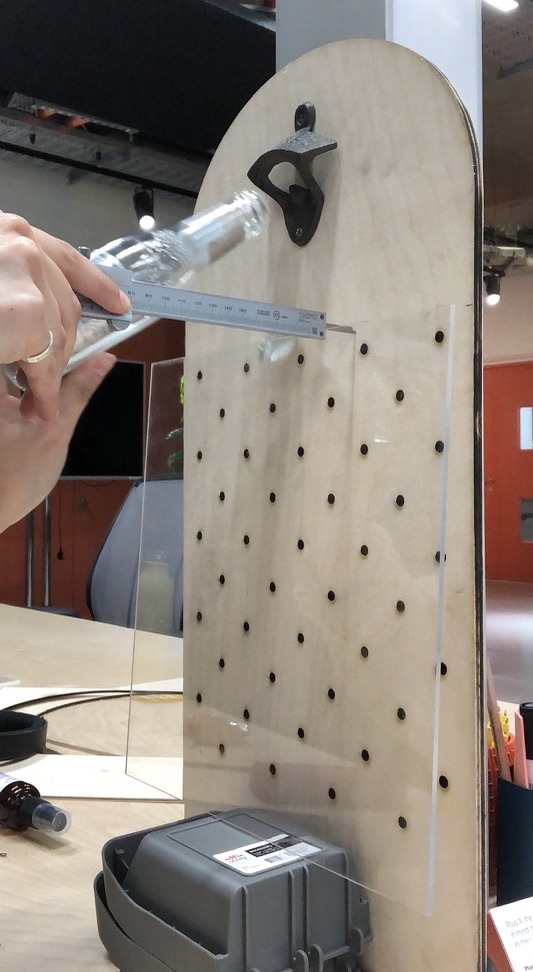
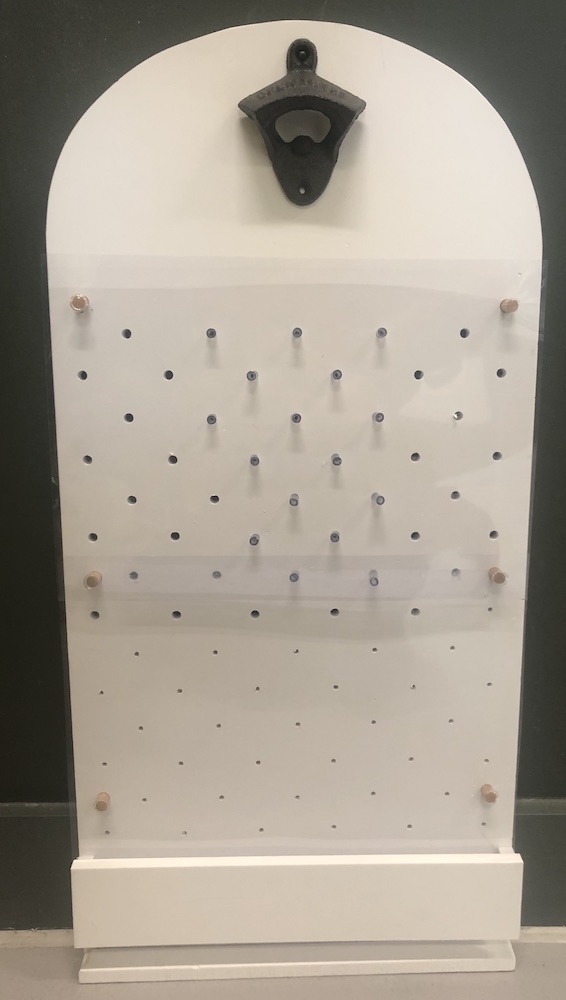
Using the distance of the dowel as shown above I then laser cut the shape of my piece to try it out with the acrylic to play around with the distance. By attaching the bottle opener to the piece and using a bottle to get the distance this will help me understand the correct spacing for the back board and the acrylic.
I used calipers to get the correct spacing at the top to see how close the acrylic needs to be so that the cap can fall down nicely.
I will still do some more test when I have placed the frame around the board but for now when testing 30 mmm was a good distance to allow the cap to fall.