14. Interface and application programming
Programming seems to me like a daunting task; I know the answers are right in front of me, but often times I just miss them... I have very little programming experience, most of what I have done before Fab Academy is scripting, so even Neil strongly recommended learning Python and Javascript, I will step down a bit and start by getting something done in Processing.
Processing
After downloading processing, in the terminal, I ran tar xvzf processing-3.5.4-linux64.tgz, and once extracted, installed with ./install.sh. Once finished, I watched a recitation by Marta Verde, diving right into Processing.
I found out that there is a huge amount of material to learn this language. I also watched an introductory video by Daniel Shiffman. I followed up and went to the library and got access to the on-line version of the book.
Very much like in Arduino, in the Processing IDE window, we will use two main functions: void setup(){} and void draw(){}. The setup function will be used to define whatever needs to happen just once, whereas the draw function will be looping for as long as the sketch runs.
One very neat feature of the Processing interface is that help on any item typed is accesible just by right clicking on it, with detailed descriptions and sample code. Really great for noobs!
So, in the setup, the first thing we can do is set the window size. Default units in Processing are pixels, and the origin is set in the upper left corner of the window. Then, I played around with some basic objects and methods, such as background(r,g,b); point(x,y); strokeWeight(w); line(x1, y1, x2, y2); ellipse(xc, yc,x dia, y dia); rect(x, y, w, h);. There are system variables that can be accessed anytime, such as width and height, that gets the window size. Also, mouseX and mouseY gets x and y coordinates of the mouse cursor, so the graphic is interactive right away!
Transformation methods, such as translate(x, y); or rotate(rad); affect all the code in draw, since it is a loop. But portions of code wrapped between pushMatrix(); and popMatrix(); act independantly of the rest of the sketch.
Inside the draw function, another function can be called. This can be handy when you draw different objects. One of the tests I did was to use a function that would draw a n-gon inscribed in a circle, using a for loop.
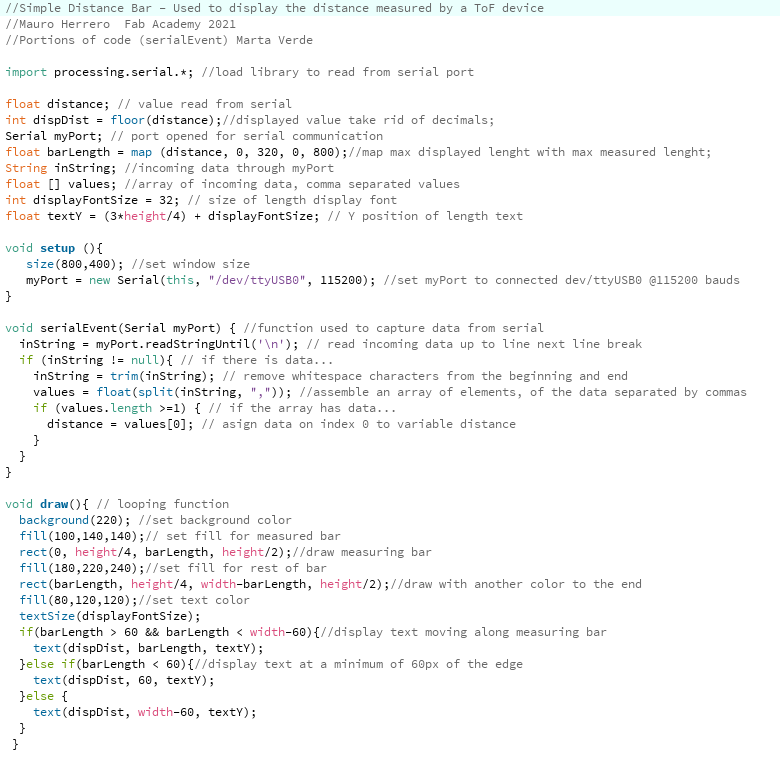
In order to represent incomming data in the screen, it is necessary to map the incoming values to the range of the displayed object. Maybe the easiest way to picture it is with the length of a rectangle, and the instruction used is map(value, start1, stop1, start2, stop2);.

After quite a lot of trouble with FDTI to TTL conversion, including a cable with a non-functioning chip, I was finally able to retrieve easily usable data from a VL53L1X sensor. The board was one of the designed and made during networking and communications week. I did spend some precious time puzzled with Neil's code: hello.VL53L1X.py worked just fine, displaying correct distance and the bar moving, but in any terminal I would see nonsense characters. Then, I realised that he would set three bytes to 0, flush, find framing, read data and do the math to finally get the distance in numbers.
Next I went through Processing tutorial on electronics, by Hernando Barragan and Casey Reas, which was indeed worth reading, since explains in plain English concepts from previous weeks, that I am still struggling to grasp. There are a few examples that are concise and clear, such as how to turn on an LED.
I want to make the stepper turn remotely, so I practiced with it, using the net.bi.stepper board that I made last week. At first, I wanted to use just Arduino code, to keep everything simple. But no matter what parameters I used for Stepper.h, Stepper(steps,pin1,pin2,pin3,p4) or setSpeed(rpm), that I always had a clumsy movement, as if it lost some steps.
So I took courage and went on using Neil's hello.stepper.bipolar.44.full.c. It took me a while to get it to turn the stepper just one turn. Of course I understand very little of it, but I enjoy looking into it and trying to figure out how it works. As a note for further reading, I found quite thorough the explanations on an H-Bridge by Javi Buron, student in the 2017 cycle. Finally, I ended up mixing Neil's code and the SoftwareSerial.h library, and got it working.
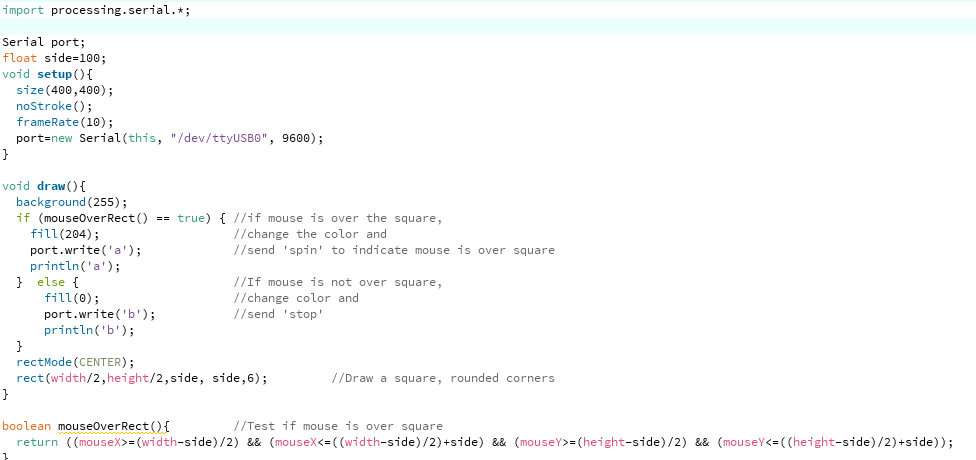
For the Processing code, I used the code from the Example 3B of the Processing tutorial on electronics, changing it slightly to practice a bit more.
Bits and values for analog to digital convertors

Mouse over rectangle to turn motor Processing code
I also made the board to send data, the step number, so Processing would print it, to have feedback. It took me about one hour to figure out how to do it properly, so the format of the data sent would be the expected. I finally used println(i), and Marta's snippet to retrieve data in Processing. To connect Tx and Rx were switched in both serial and board.
I also kept experimenting with more Processing features, so I mapped the incoming value to a range and used it to vary the color of the square and the text. I also used createFont() to change the default display font. It is important to note that, if the font is not installed in the system, then the font file needs to be in the skecth's folder.
Mouse over rectangle with counter
Group assigment: compare as many tools options as possible
I trully wish I had more knowledge in this area, but it is quite short... Really, I liked the way the assignment went with processing, since it is very simple to setup and get up and running with it. My intuition tells me that with a few extra days, I could achieve similar results using p5.js. It is a javascript library, instead of a contained programming enviroment, as Processing. But it is mantained with support from the Processing Foundation.
Another tool that I would like to test is Lehni's and Puckney's paper.js, which is another javascript library to allow for vector and user interaction. I would need to use vanilla javascript to retrieve the data, and then manipulate it with this library.
Finally, I took a look at Neil's Python examples. Honestly, I feel for now they are out of reach, and there is no way I am going to fix it in a week. But since he mentioned it is worth learning Python, that item goes to my growing to-do list.