BACK TO HOME PAGE
WEEK 11
MOLDING AND CASTING
WEEK ASSIGNMENTS:
Tasks for a week
Group assignment: review the safety data sheets for each of your molding and casting materials,
then make and compare test casts with each of them
Individual assignment: design a mold around the stock and tooling that you'll be using, mill it (rough cut + (at least) three-axis finish cut),
and use it to cast parts
What Are Molds & What Are They Used For?
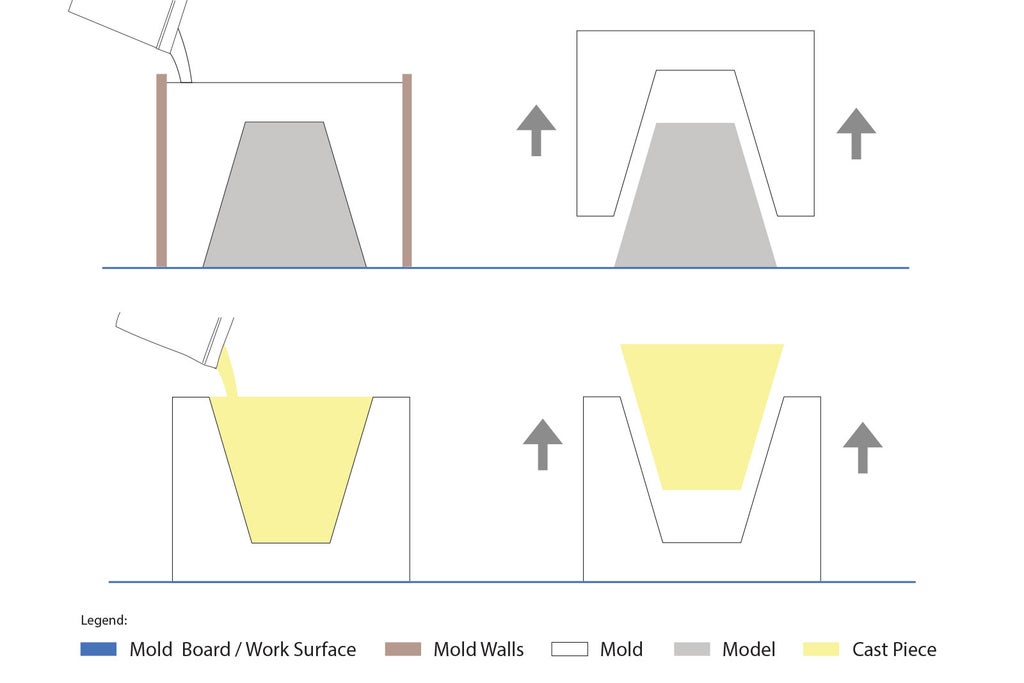
Molds are negative forms that are used to shape casting materials, creating duplicates of the model (object) the mold was made from.
The resulting cast will be an exact likeness of the shape of the hollow mold form.
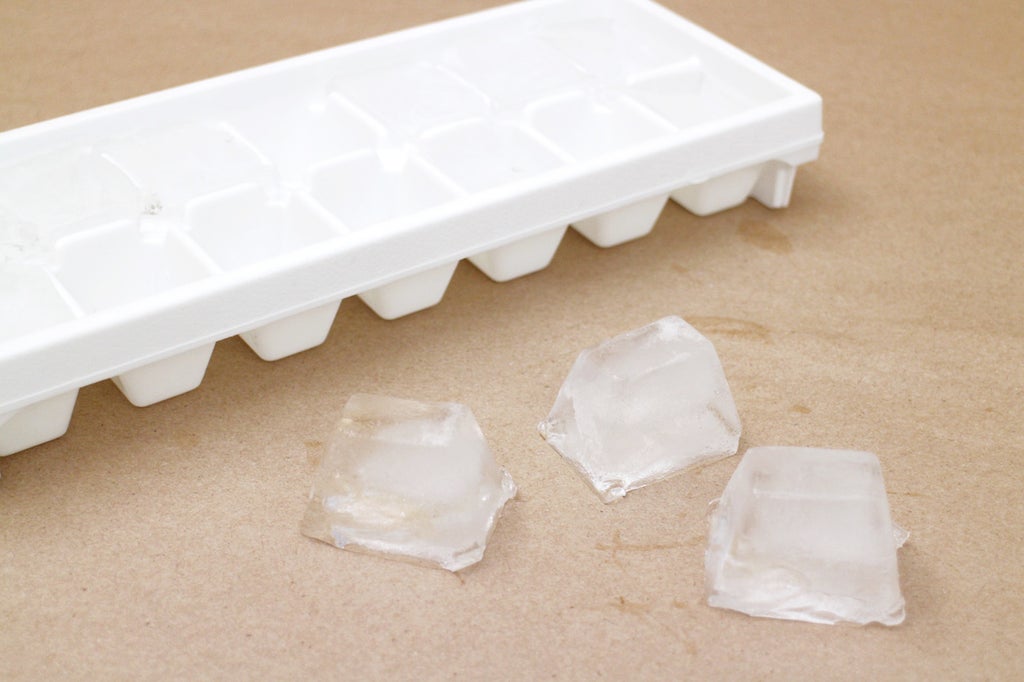
The easiest example of what a mold is, that almost everyone has used before, is an ice cube tray. The hollow forms of the mold get filled with water (the casting material) to produce ice cubes.
The cubes are released from the mold and voila! Finished cast pieces. (Iced teas rejoice!)
There are 3 basic types of molds:
One part
Two part
Multi-part (advanced)
As this is a foundation class, we will be focusing on one and two part molds only.
What is the Difference Between Molding and Casting?
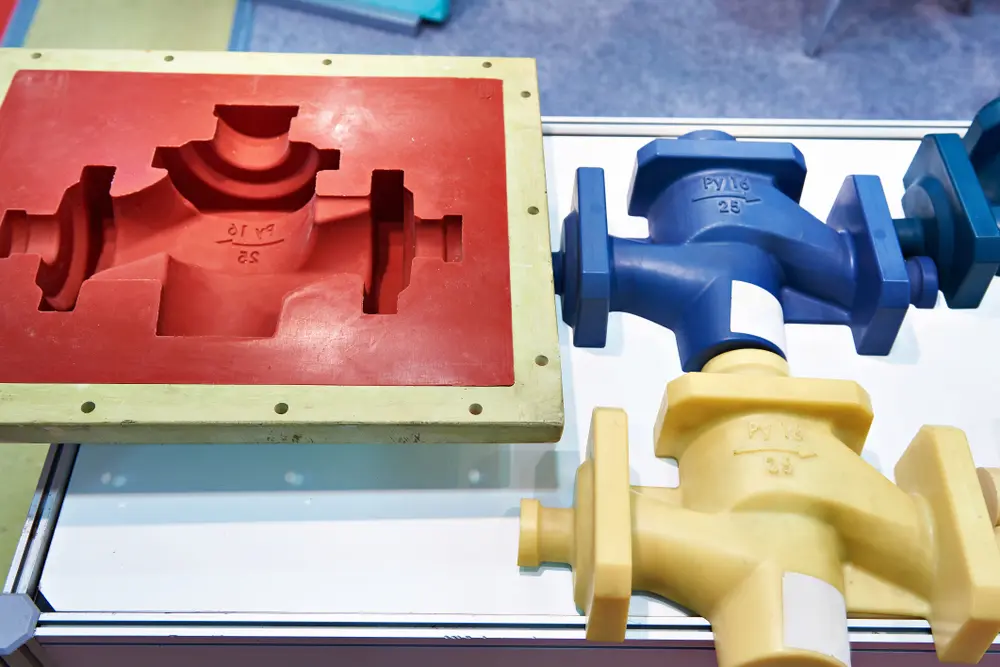
The main difference between molding and casting is the use of the material in the process. Casting will typically involve metal, while molding focuses on plastics.
In both cases, the melted material goes into a die or mold to create the final form.However, some other key differences in the process will change the final product.
In molding, the material is injected into a form typically made of metal.
There are a few different options in injection molding. Common types include:
Thin wall molding:This process centers on making the wall of the part as thin as possible to create a lighter, more flexible piece.
Typically, the width of the wall itself is under .025 of an inch.
Gas-assisted injection molding:In some injection molding cases, materials can shift, leading to distorted end products.
Gas-assisted injection allows the creator to blast a hole or hollow point into the mold and ensure it does not distort as it cools.
3D Printing:While it’s a category in and of itself, 3D printing is a type of injection molding frequently used in prototyping for its relatively
low cost and wide availability.
In casting, the liquid metal is poured into a form made of silicone rubber or a similar material. Die casting has two primary types:
Hot chamber die casting:This is the more common form of die casting. In this, the material is heated inside the casting chamber, hence the term “hot chamber.” As it eliminates the need to melt the metal elsewhere,
it’s the preferred method.
Cold chamber die casting: Cold chamber die casting involves liquefying the metal first and then putting it into the cold chamber for funneling into the die. This is typically a process completed for metals with high melting points.
Machine used:
Roland SRM-20
Software:
Solid work
Cura
Modela software for milling.
Task:01 Design a mold in whatever shape you choose.:
Mold design in solidwork:
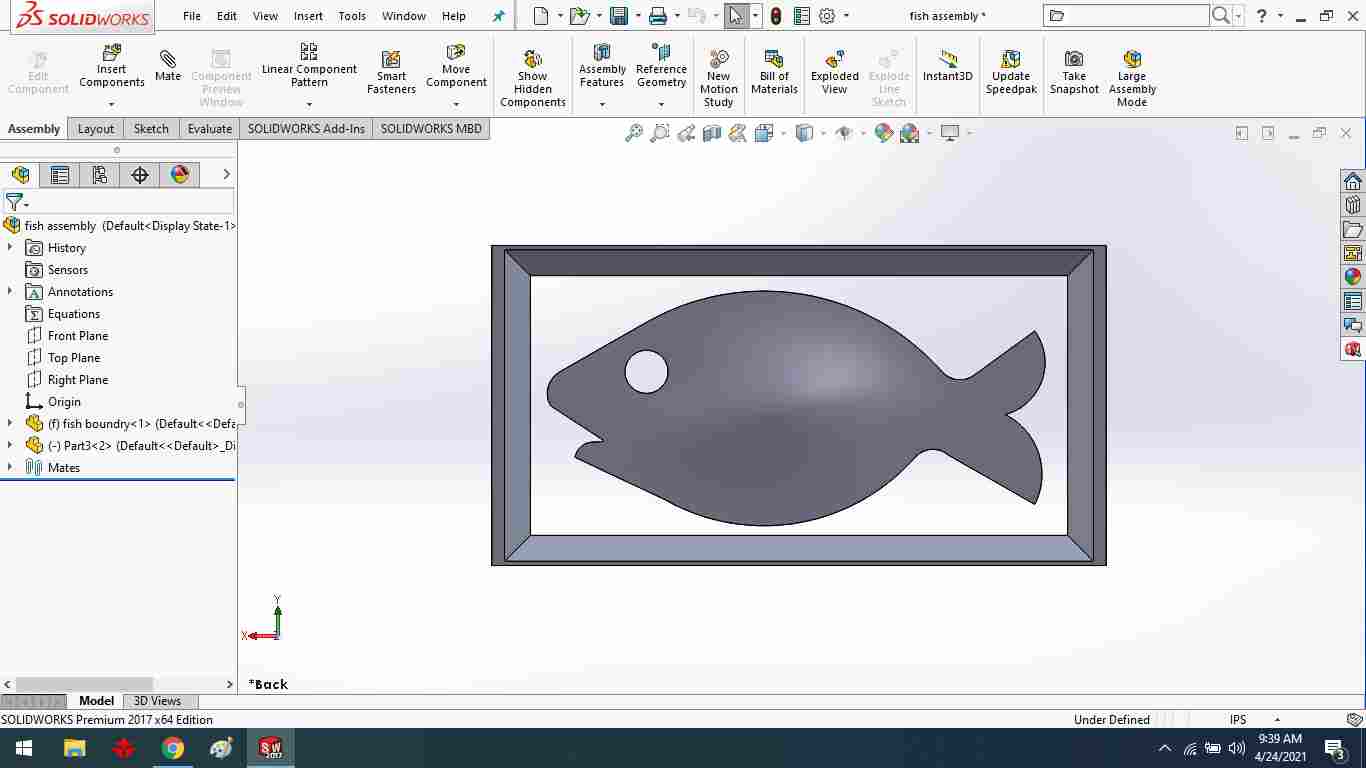
After looking at the archives from previous student molding and casting weeks, I decided to design a Fish.

Create a fish sketching.
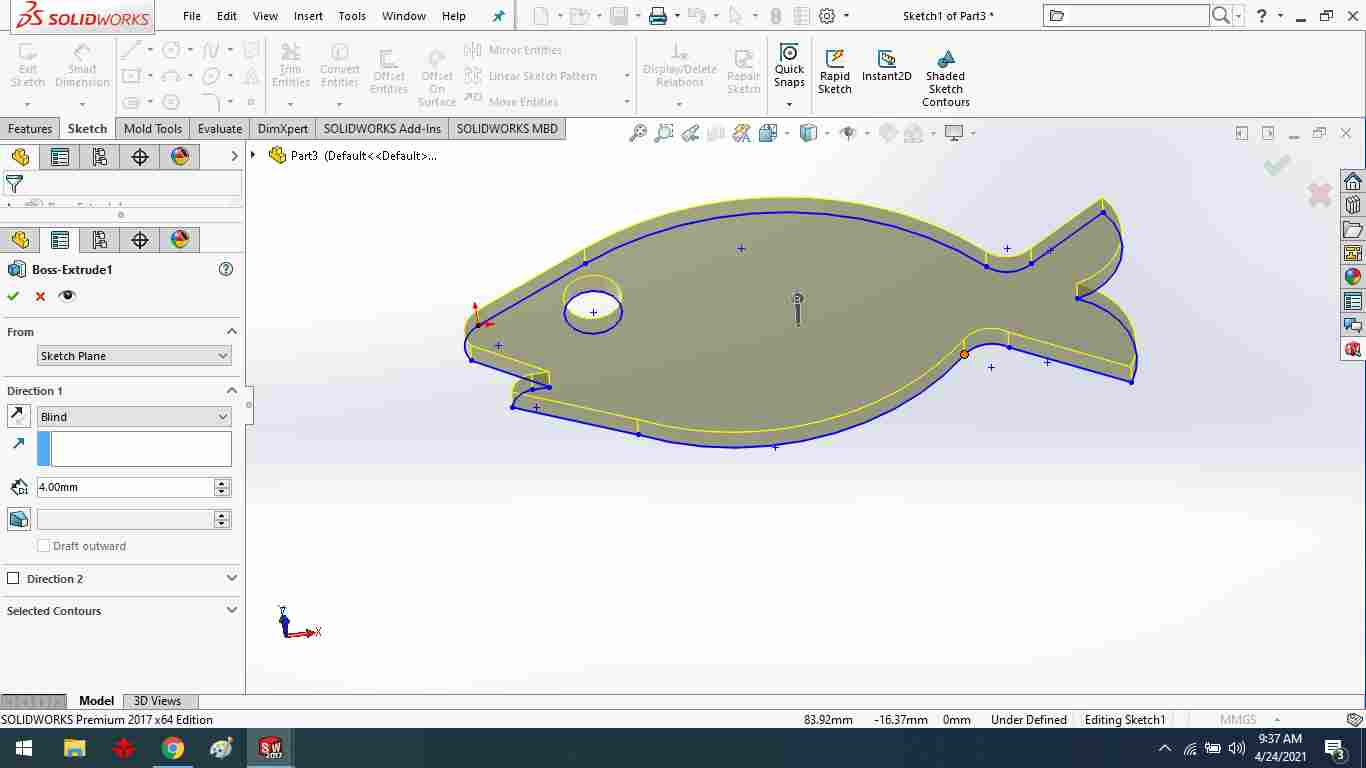
Using the extrude boss command, extrude the fish.
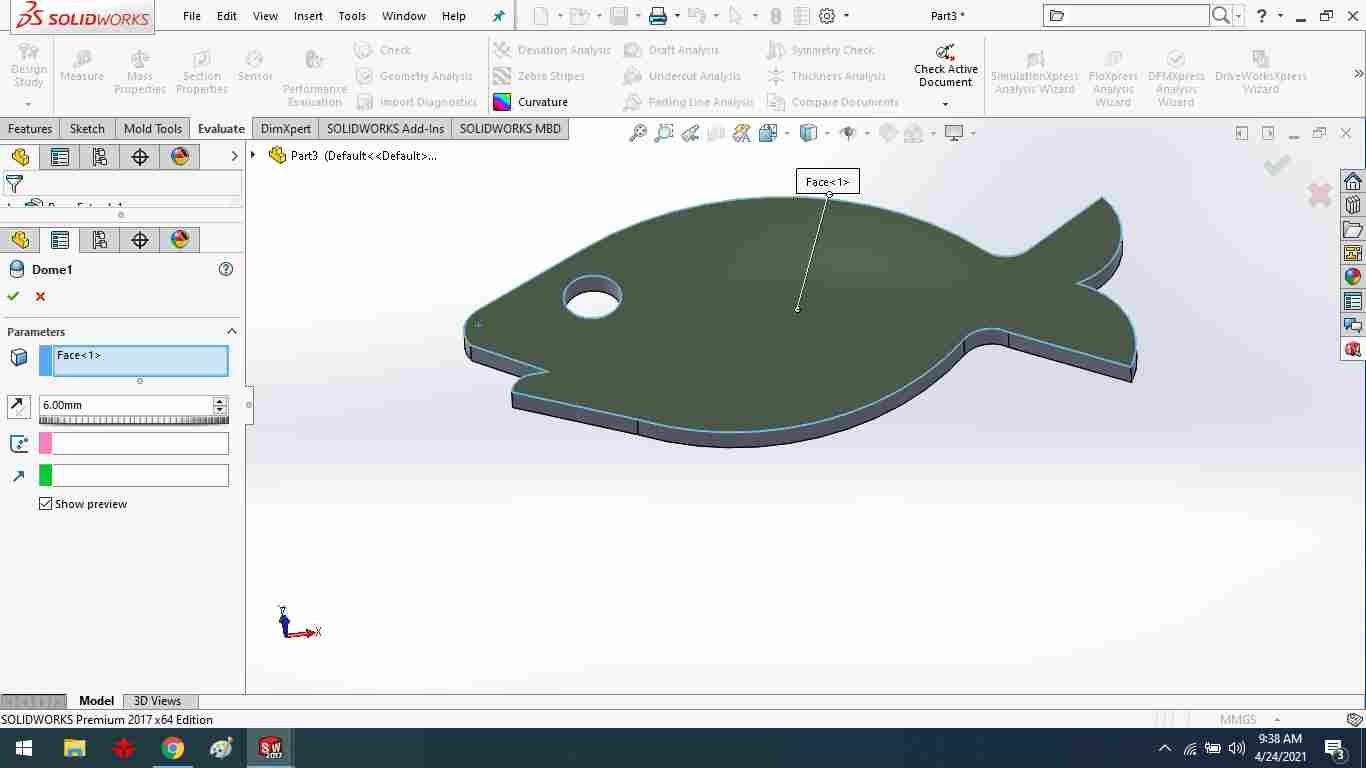
Using the dome command, create a dome feature.
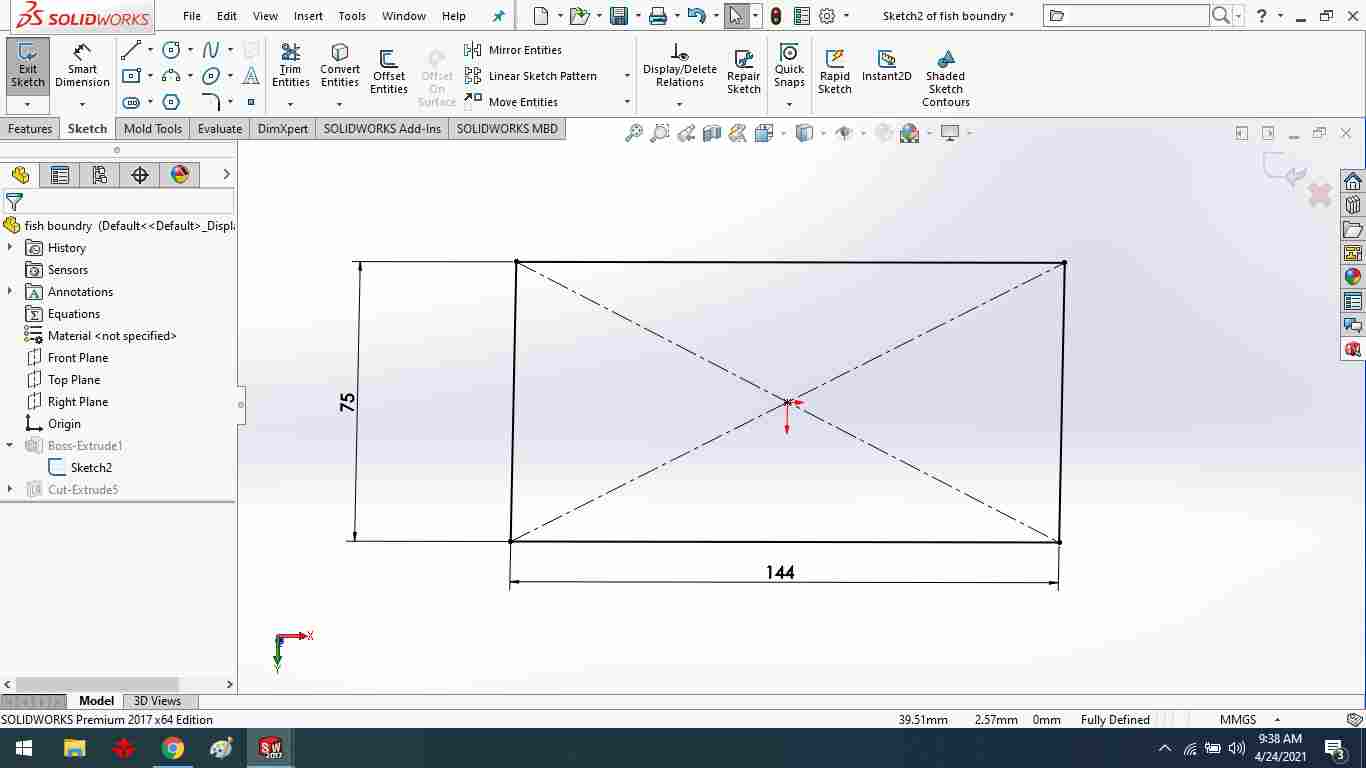
To draw a fish boundary.
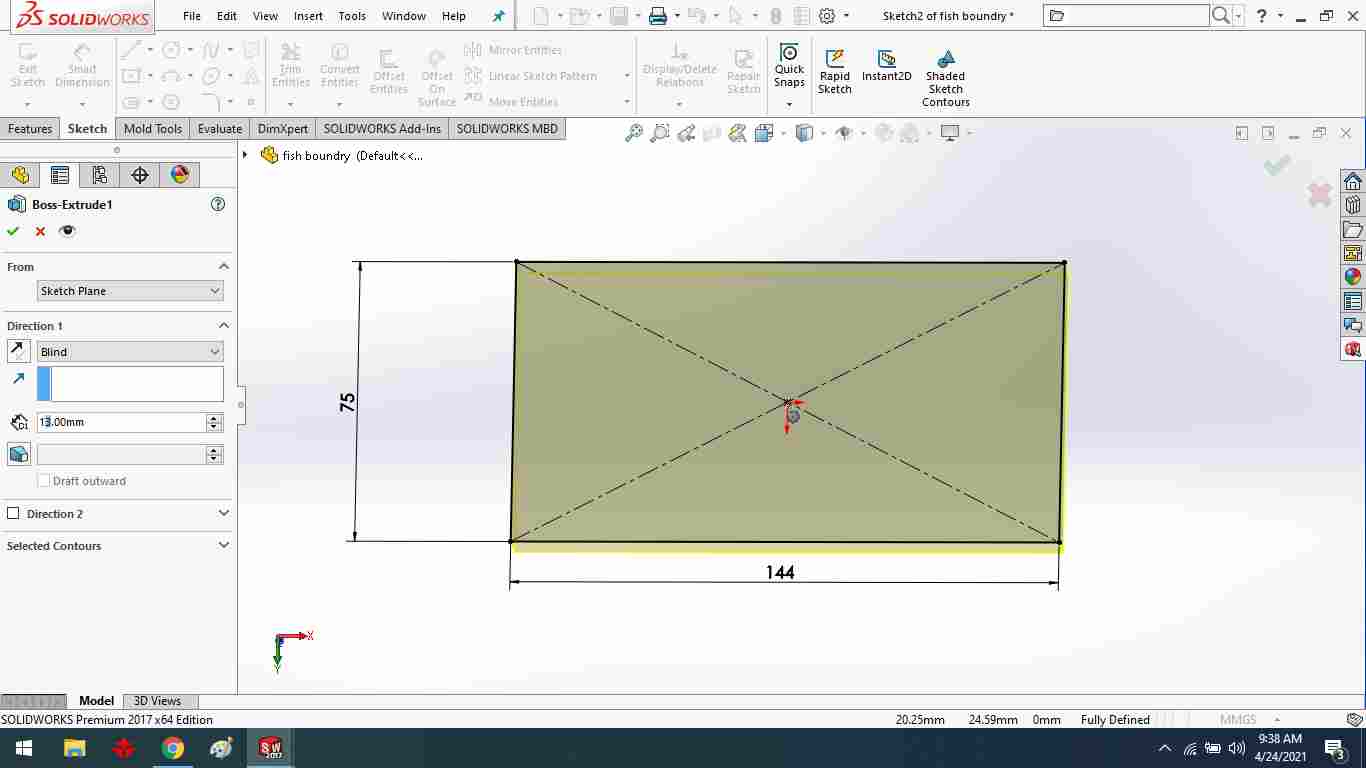
Using the extrude boss command, extrude the boundry.
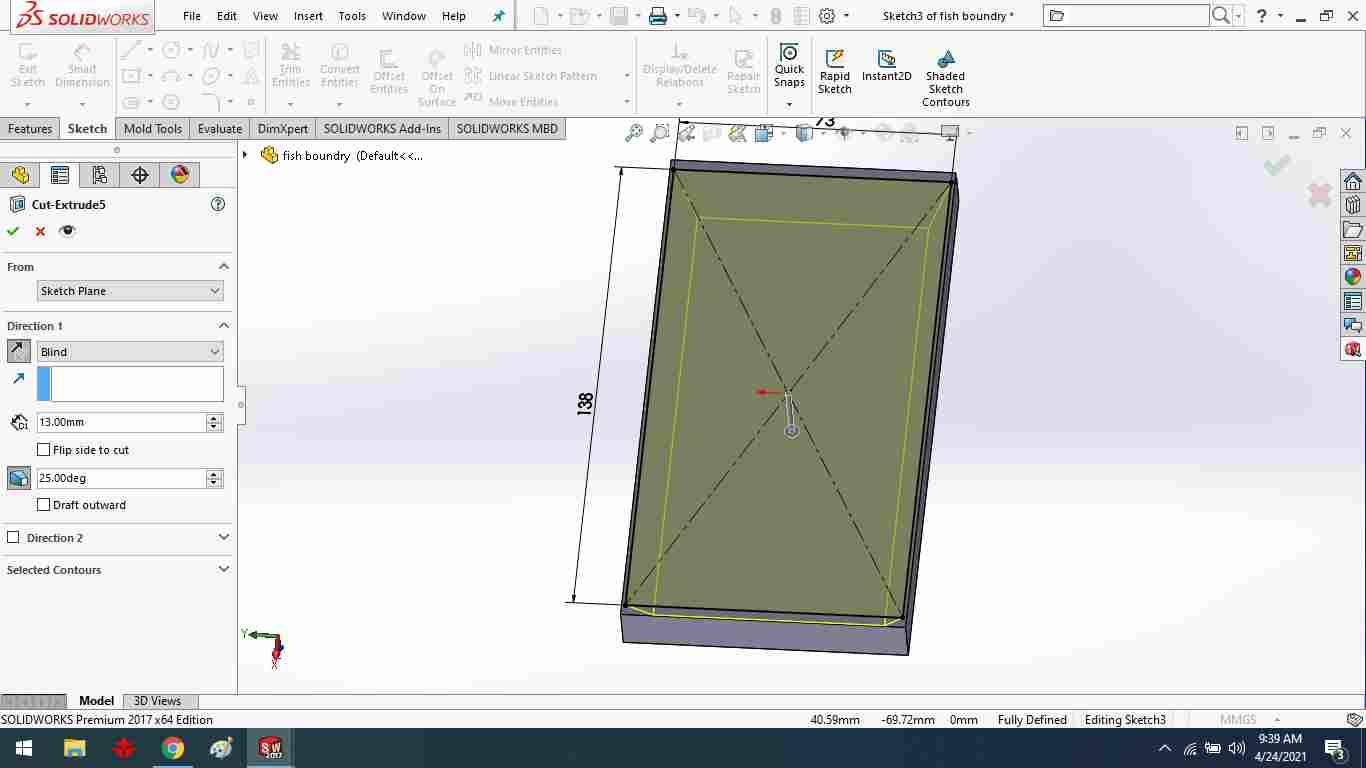
To make a slope of boundry, add an internal rectangle.
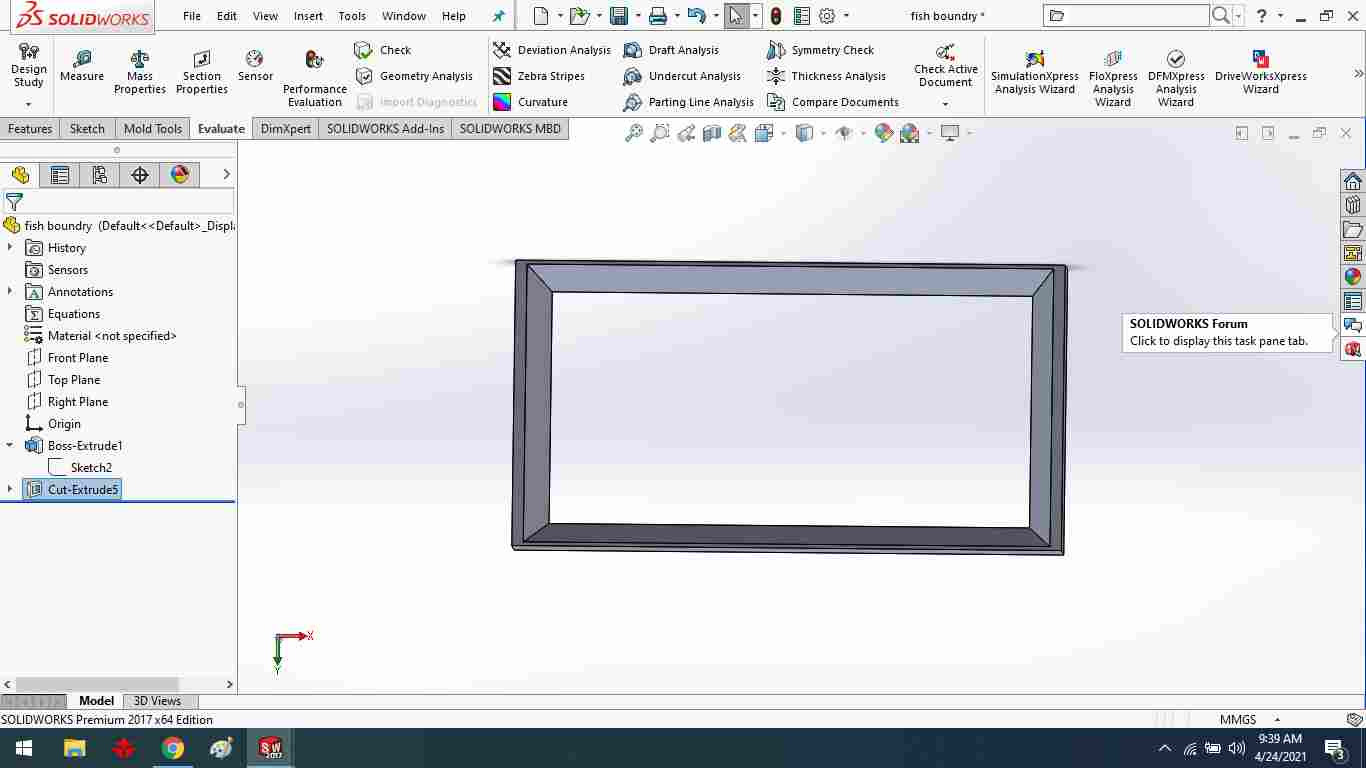
The final result of the boundary
After the mate file has been converted to a stl file,
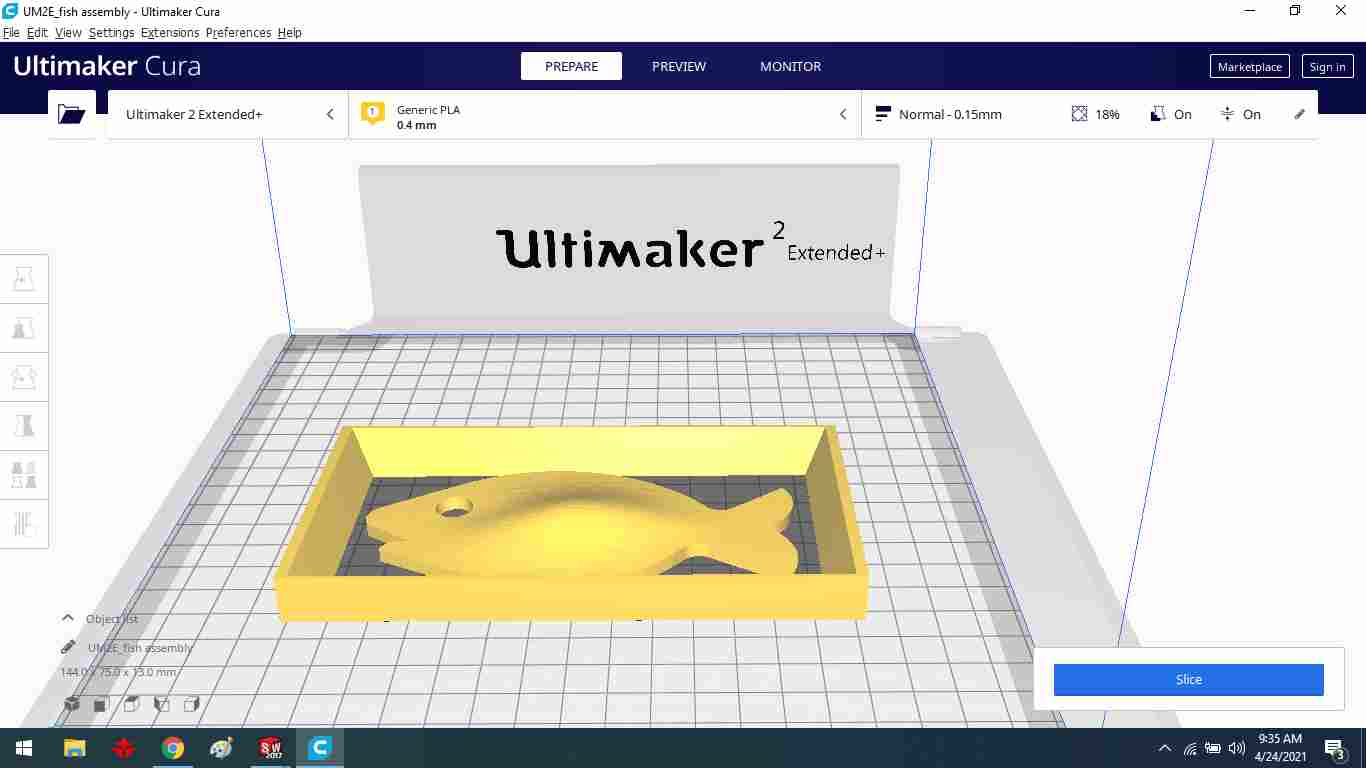
The final result of 3D design at cura software.
Software setting & machine operation:
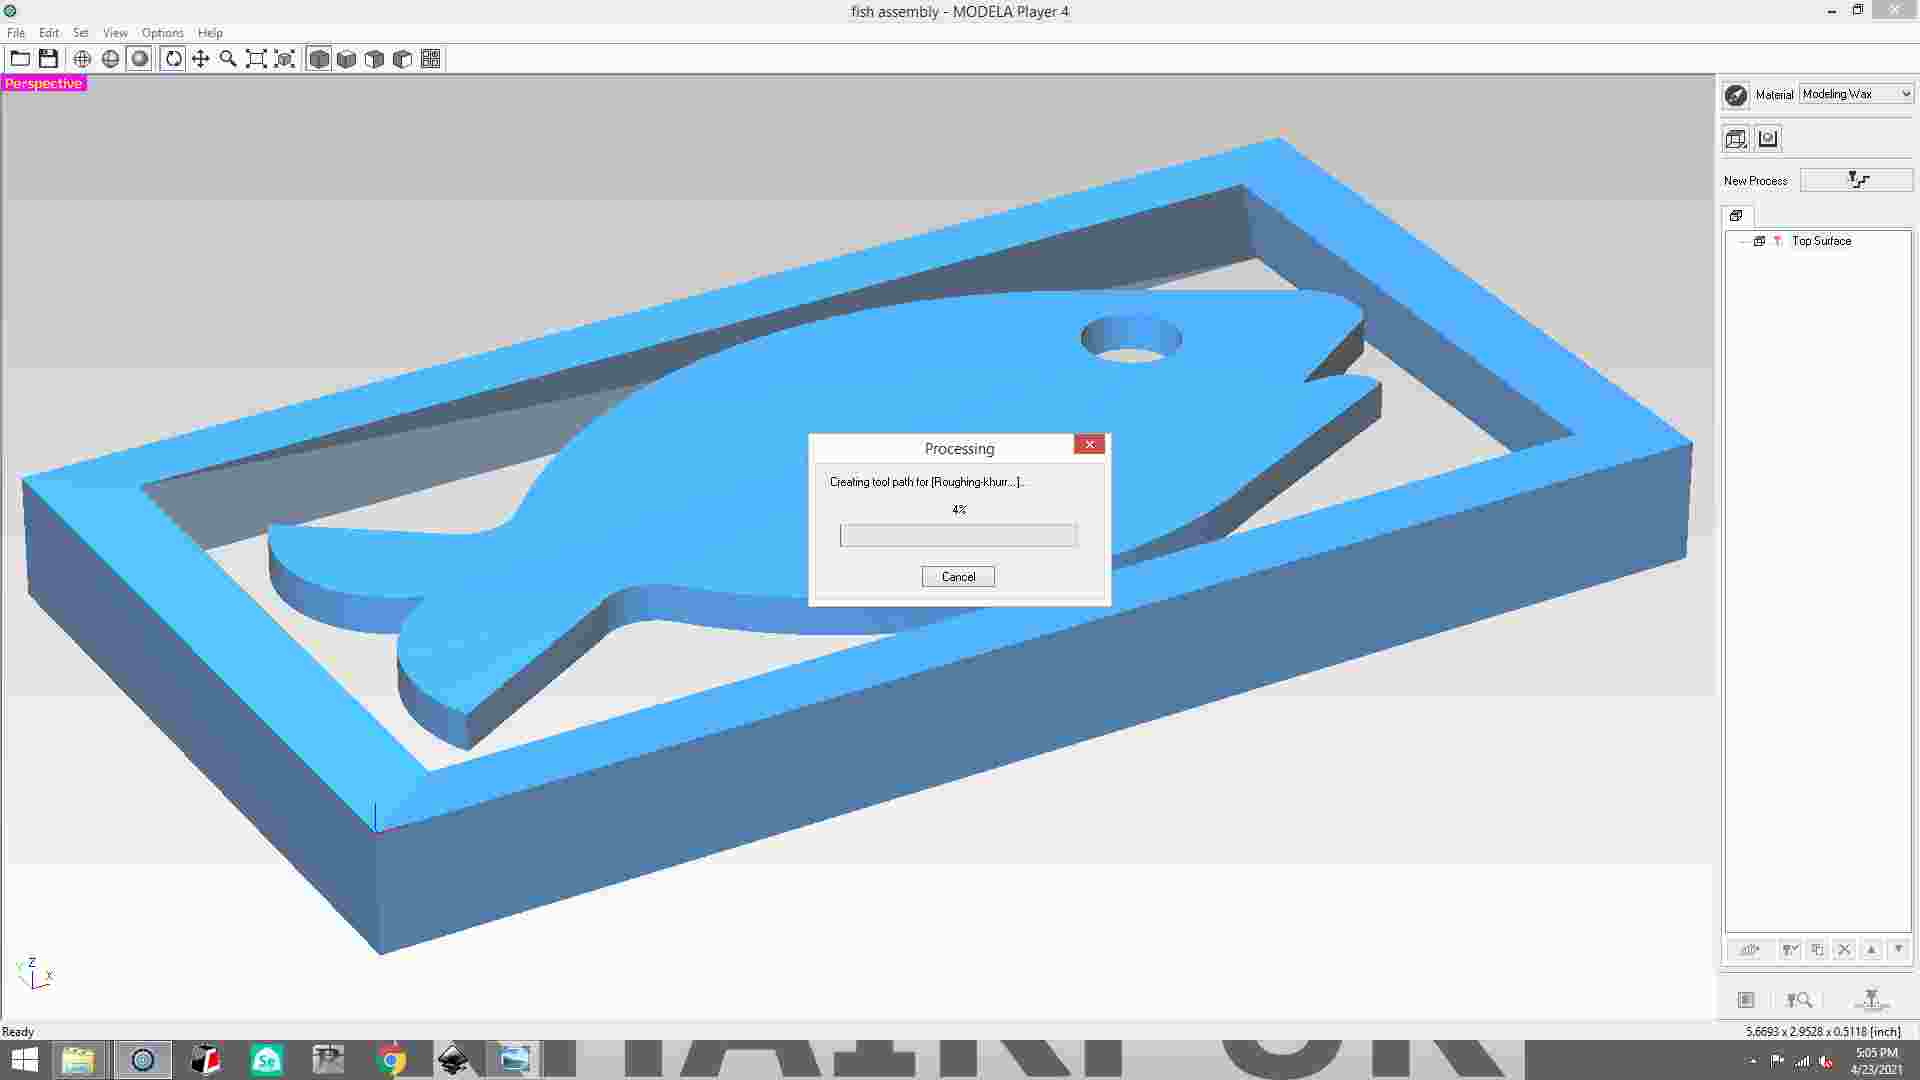
And then I used Modela Player 4 to create tool paths for milling. For the detailed steps,
I’ve already listed above. Here I share some screenshots of the process.
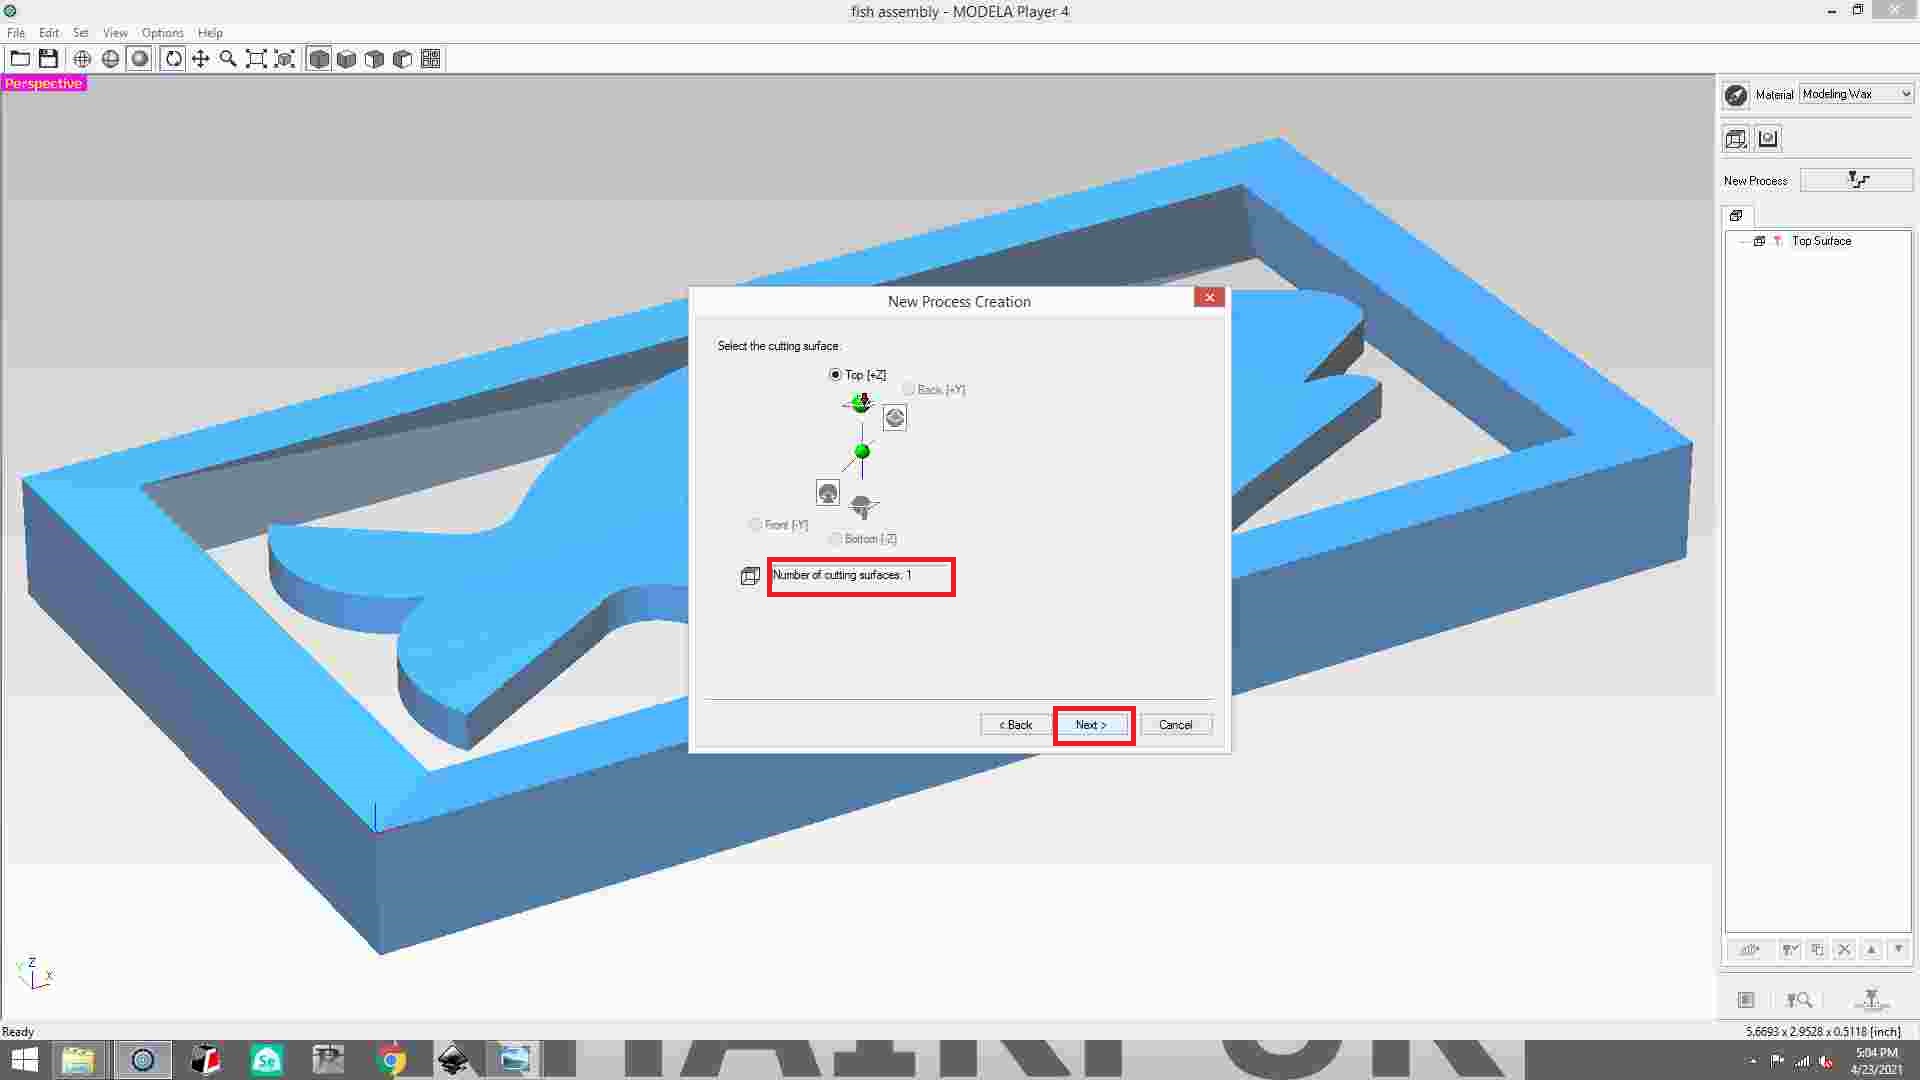
1- Open the file, please note even though when scroll your mouse and the shape seems to be lying flat,
the orientation is not correct.
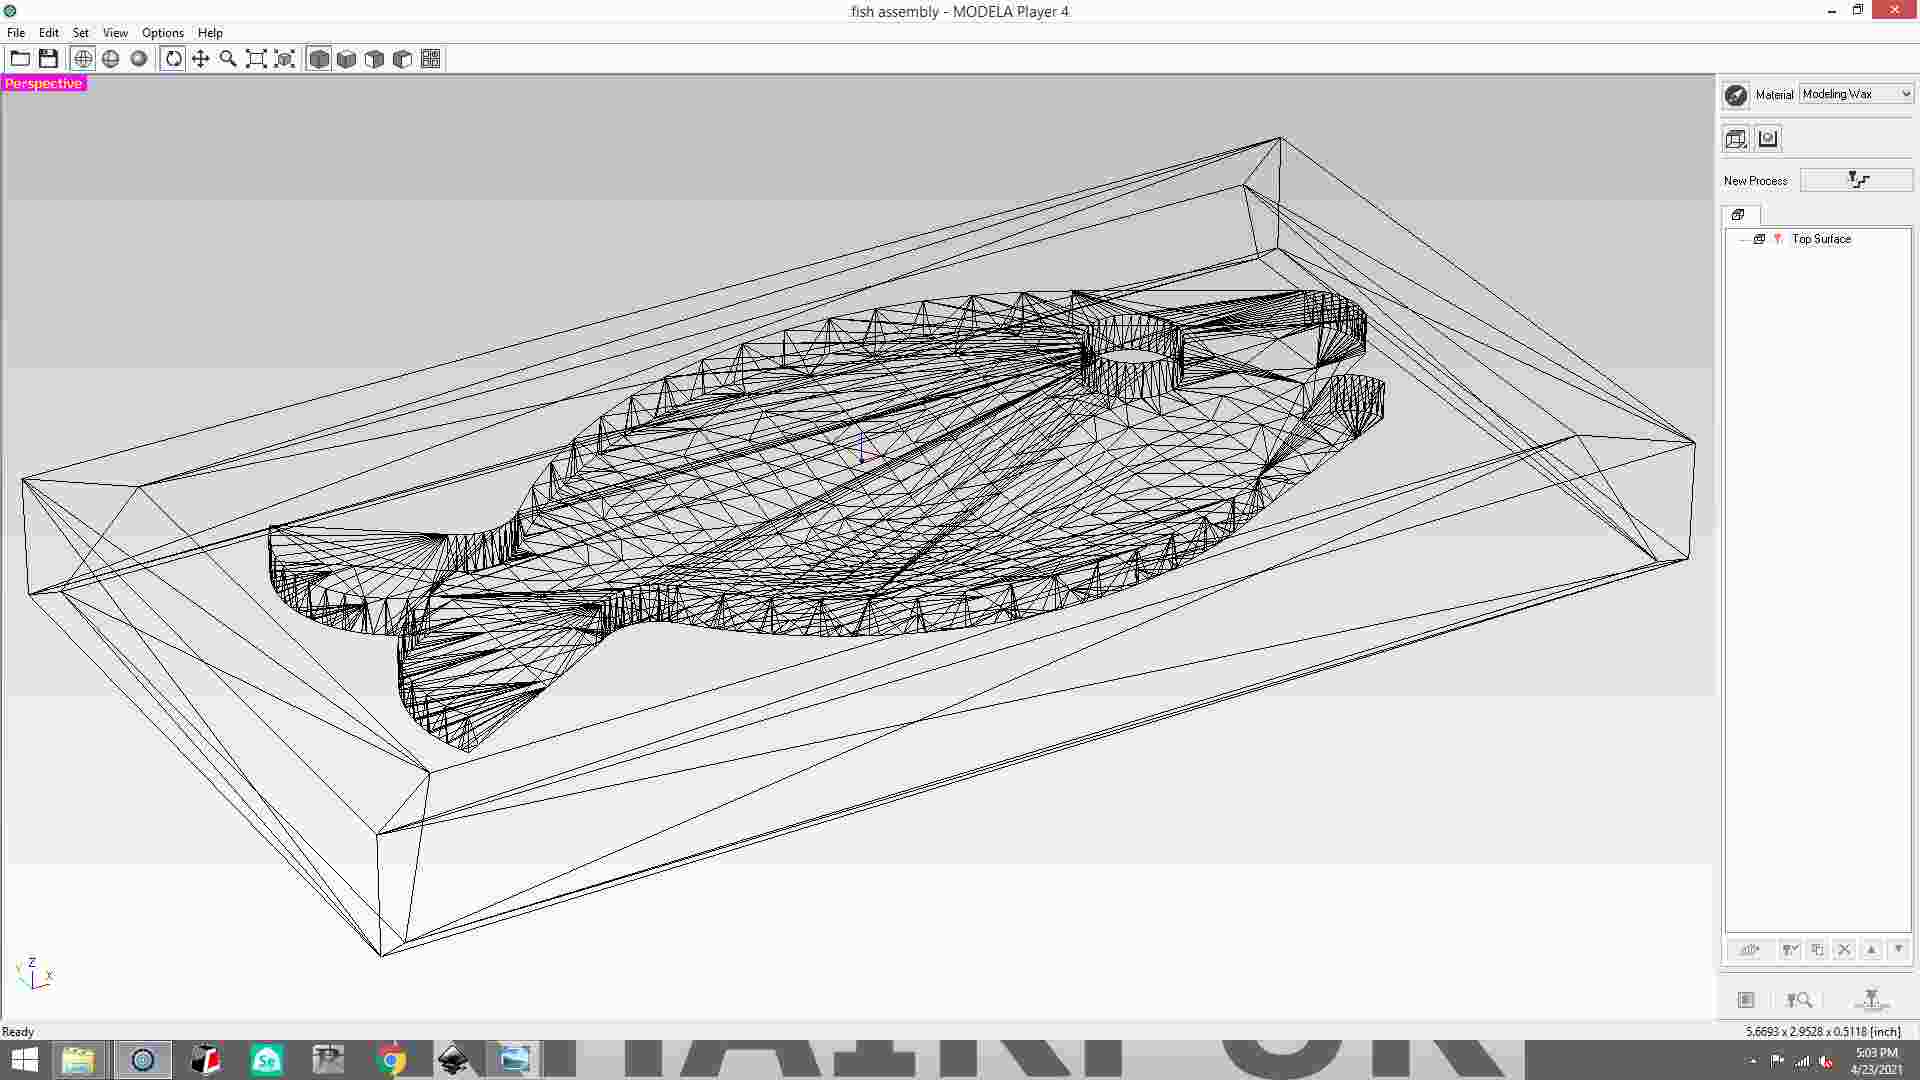
In Modela, open the stl file.
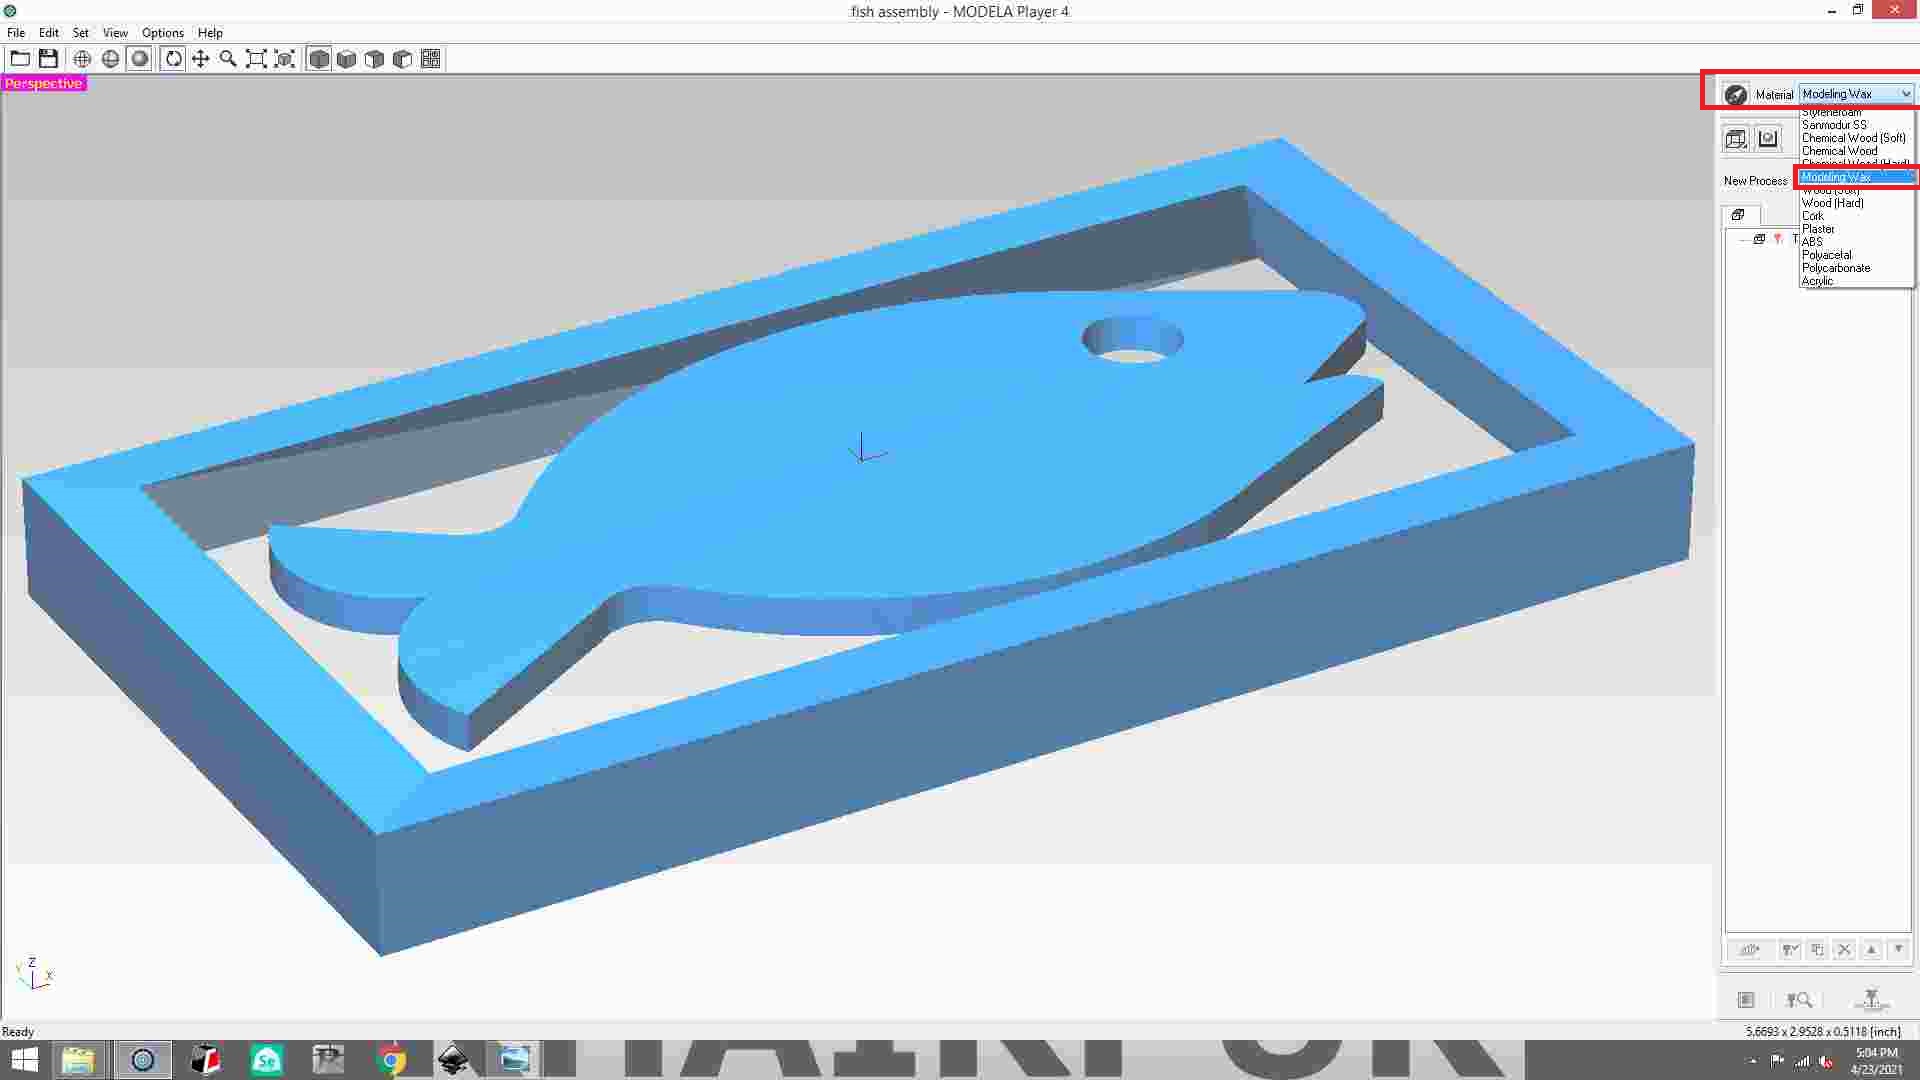
Then select molding wax material on the right side, which is highlighted in the picture.
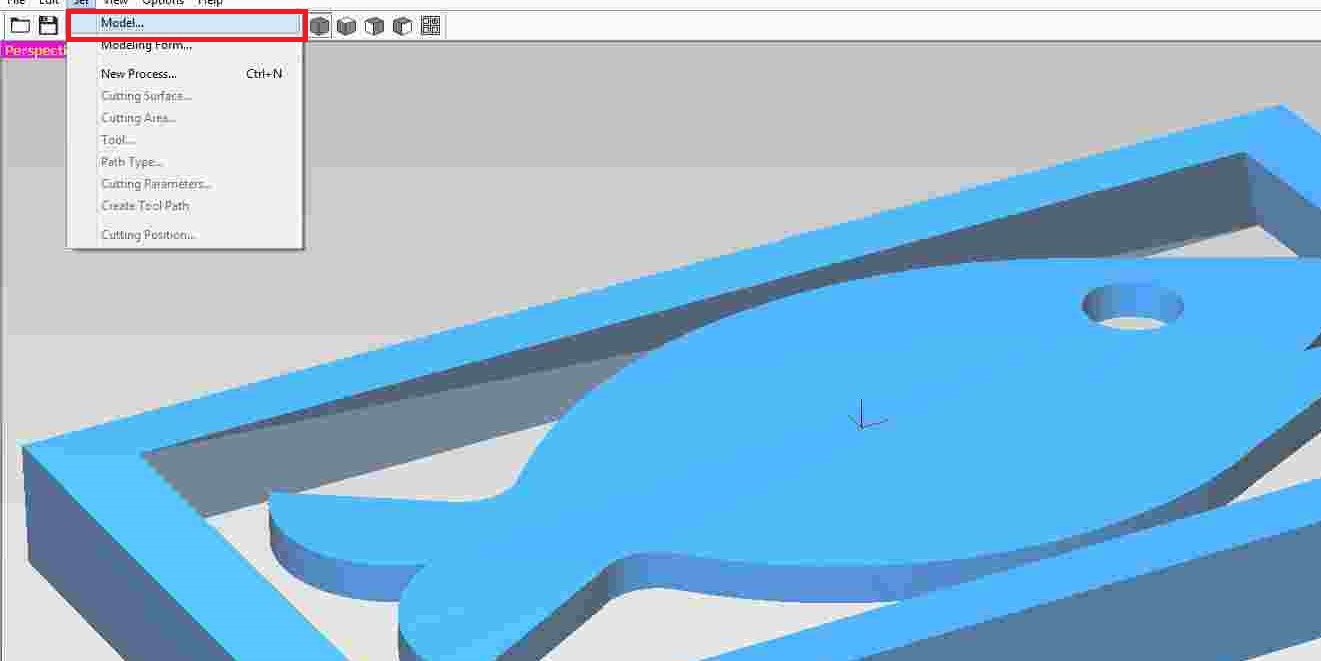
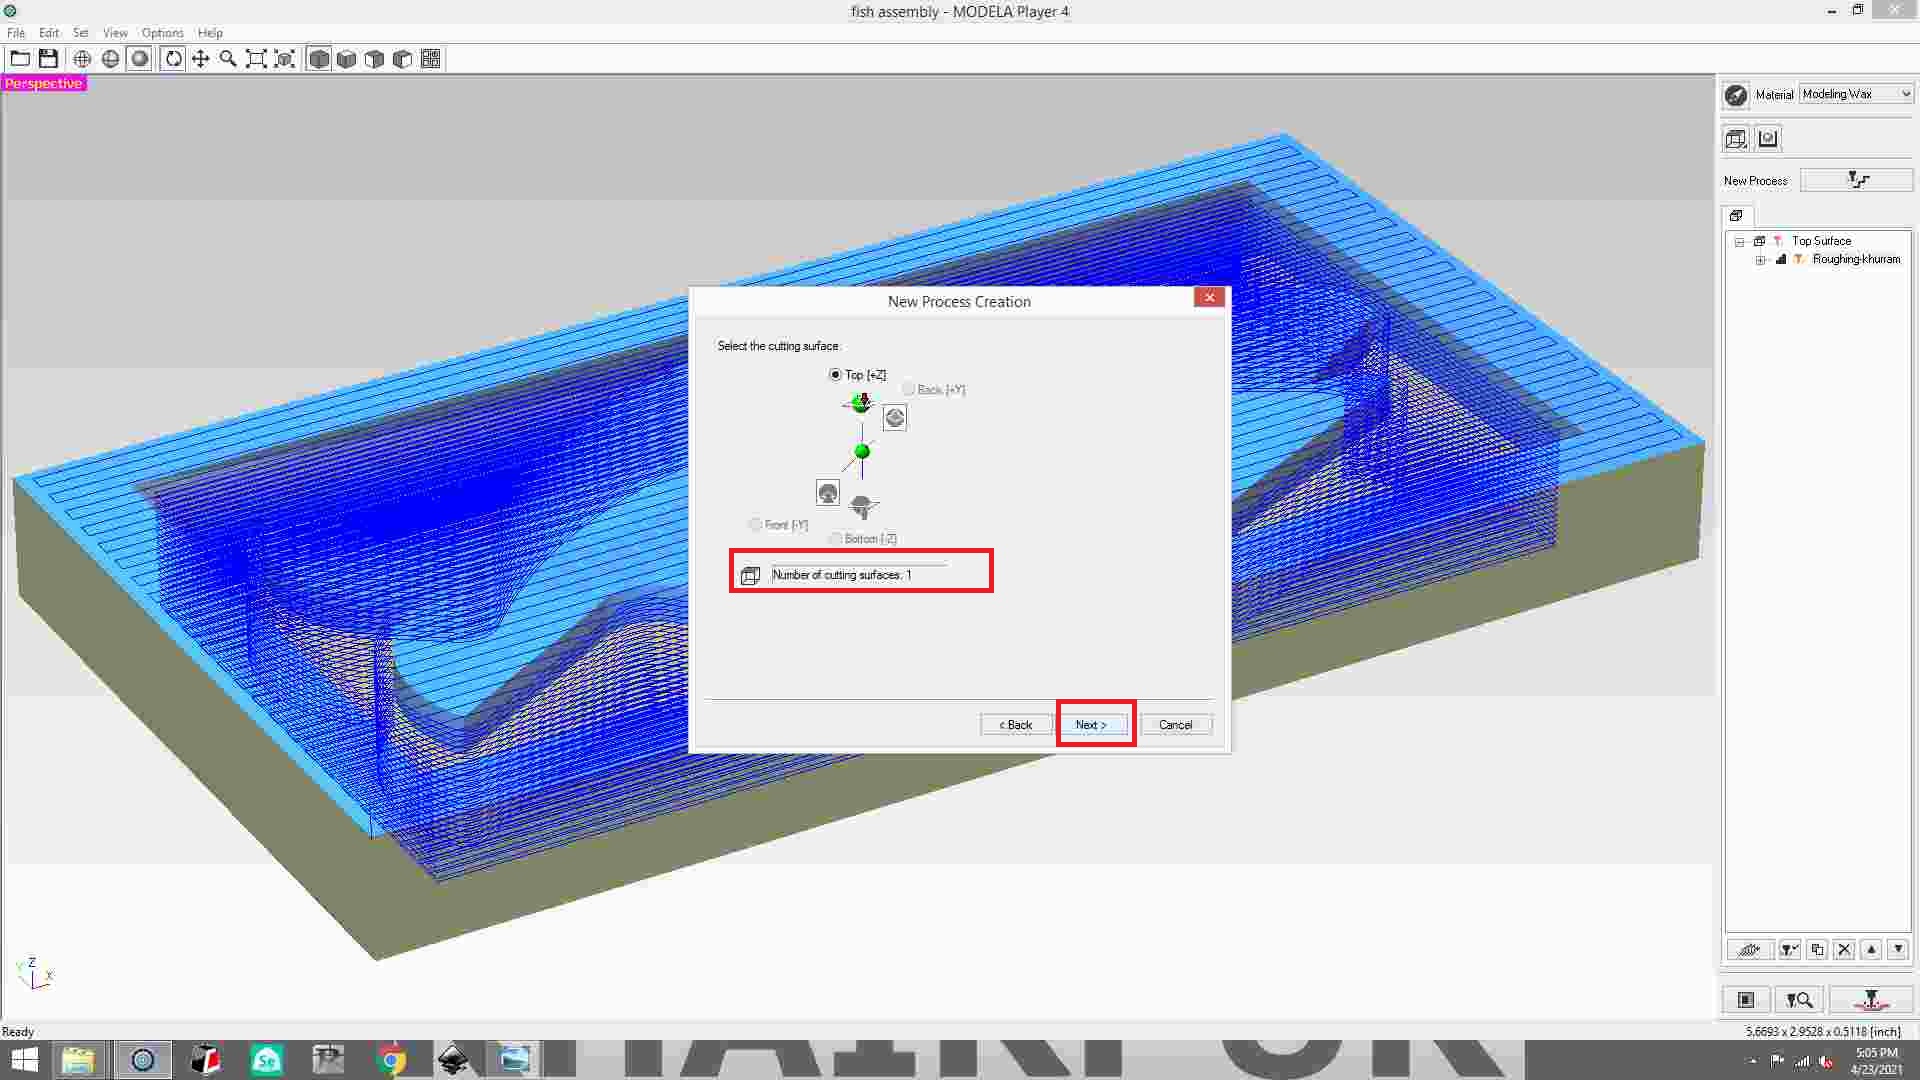
After that, choose the set option and then click model.
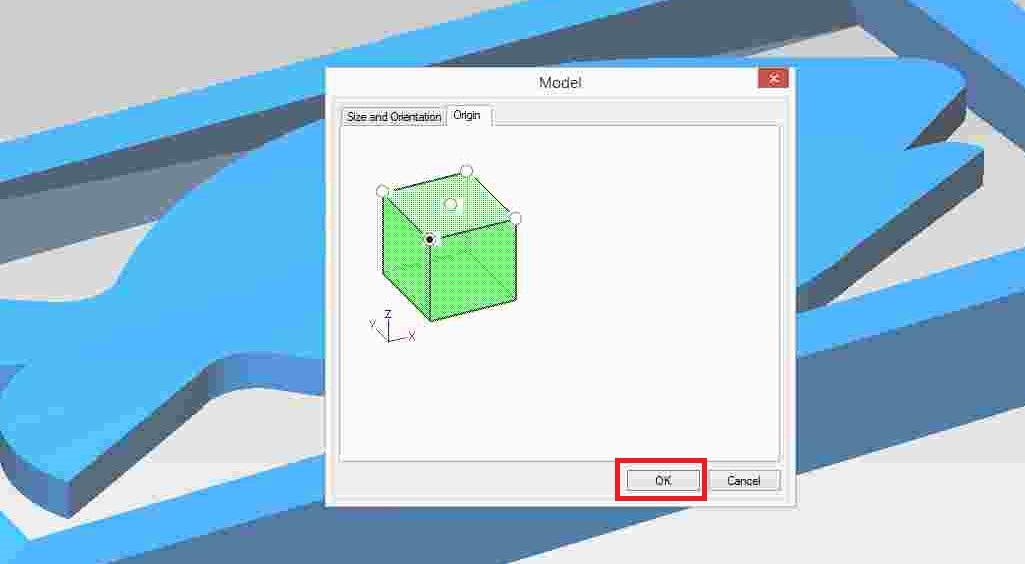
Set the origin, then press the OK button.
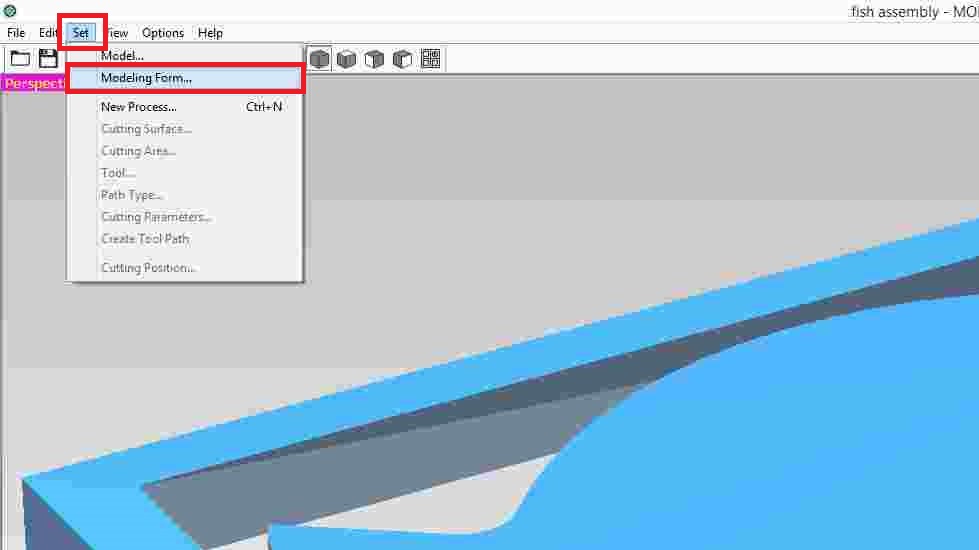
After that, select the option to set and then choose modelling form.
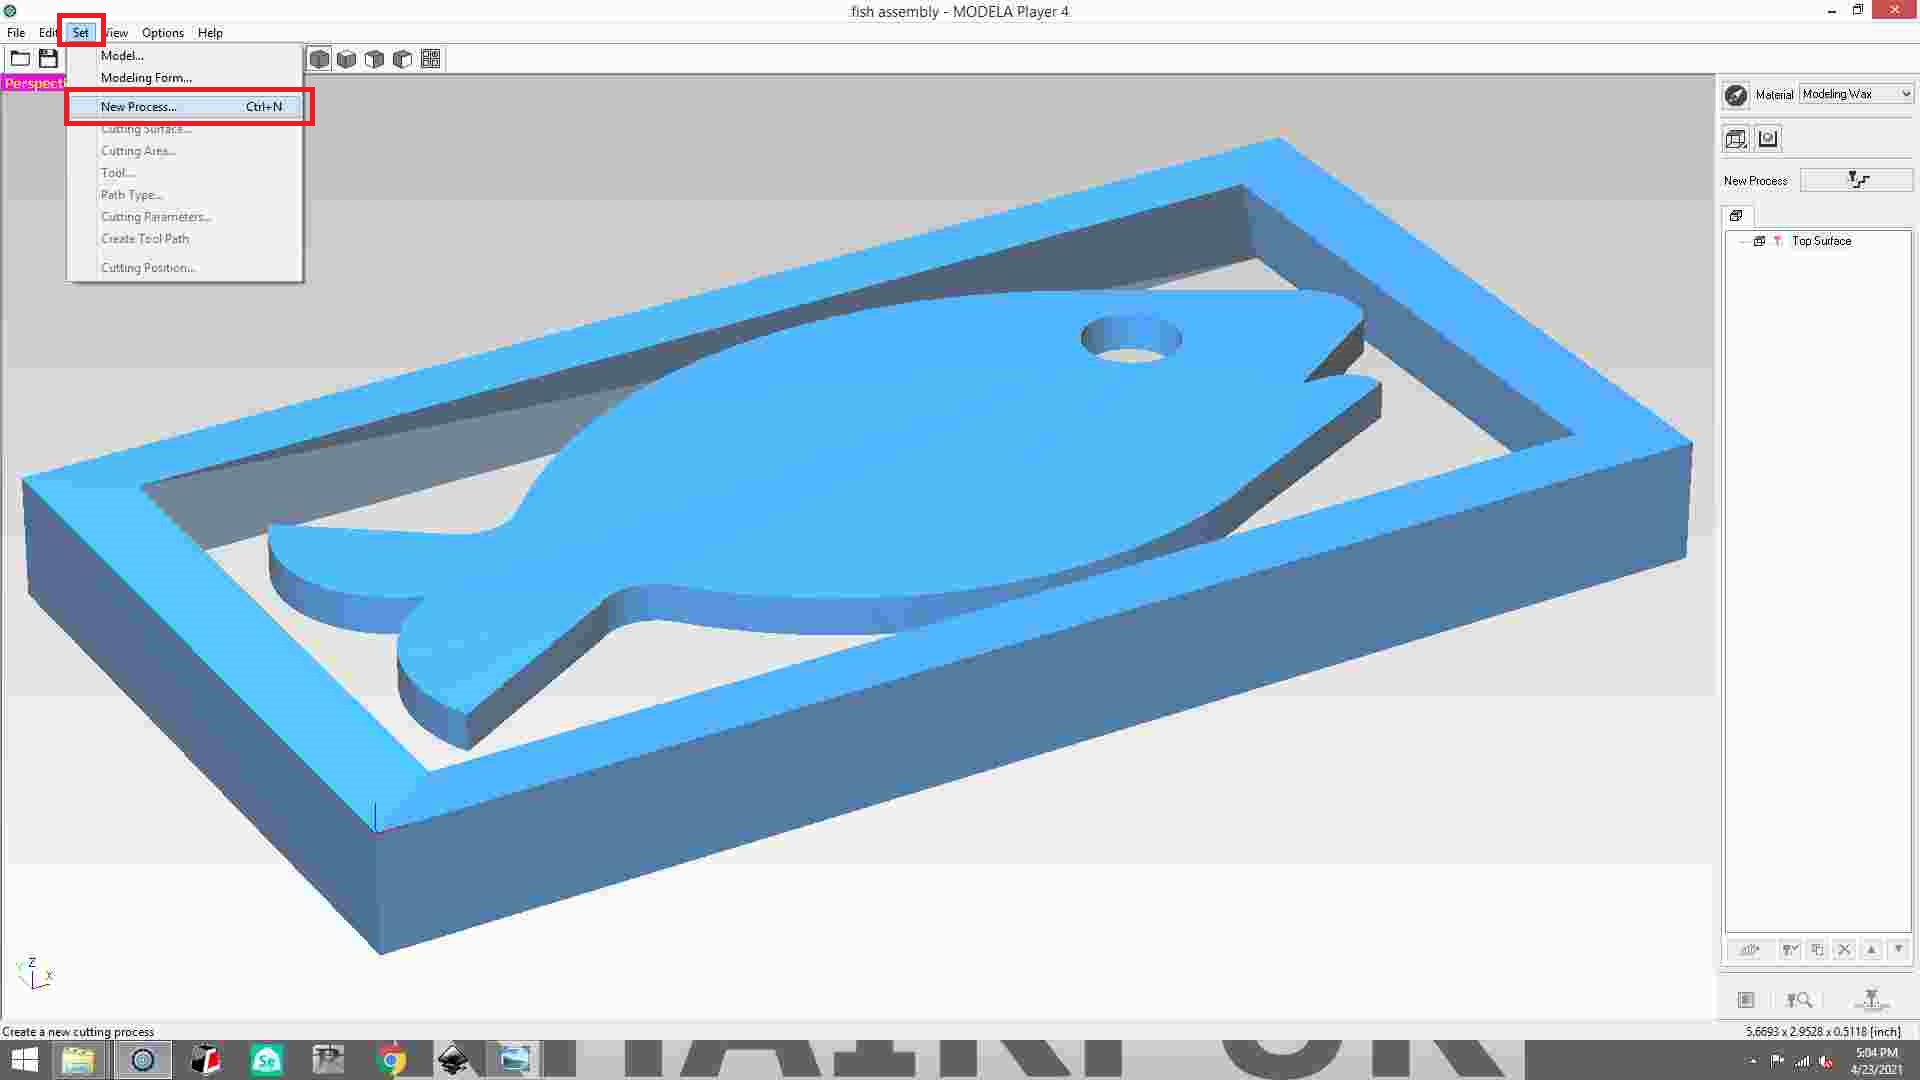
In the set option, select new process.
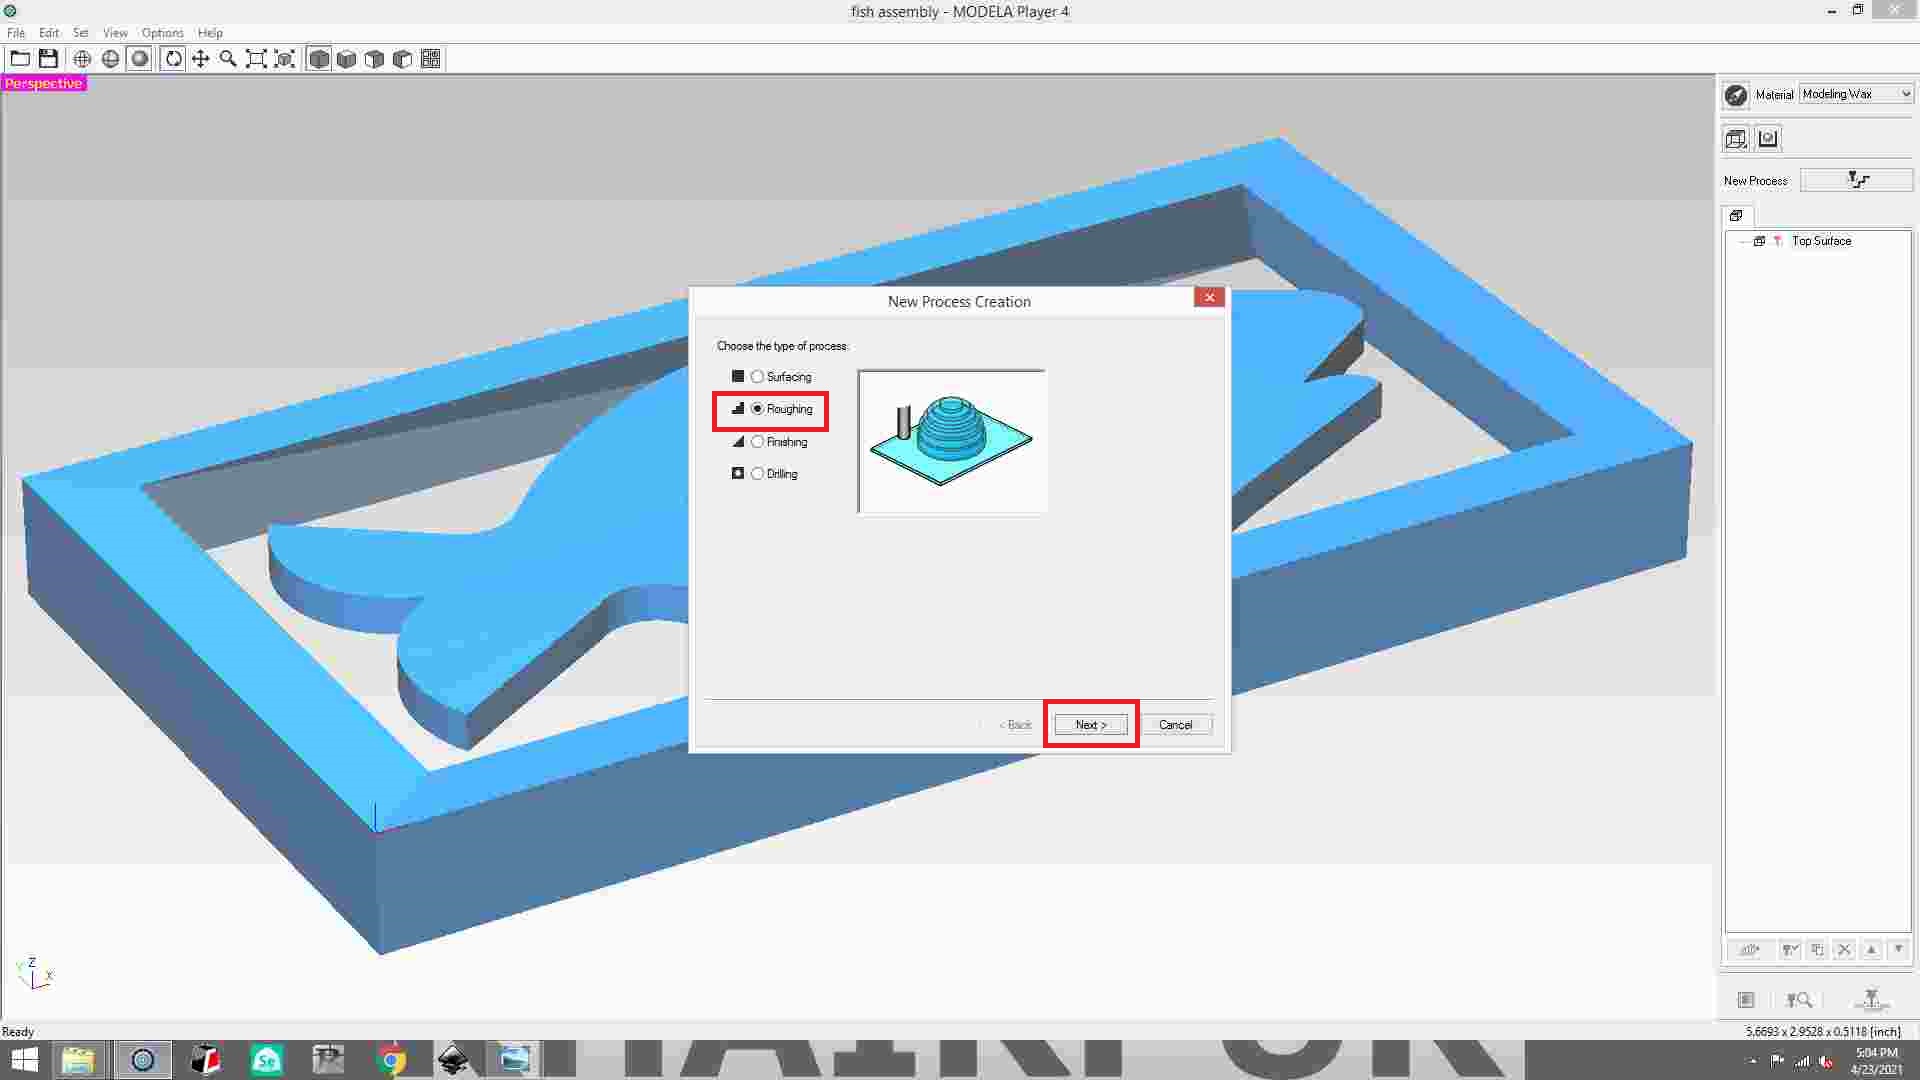
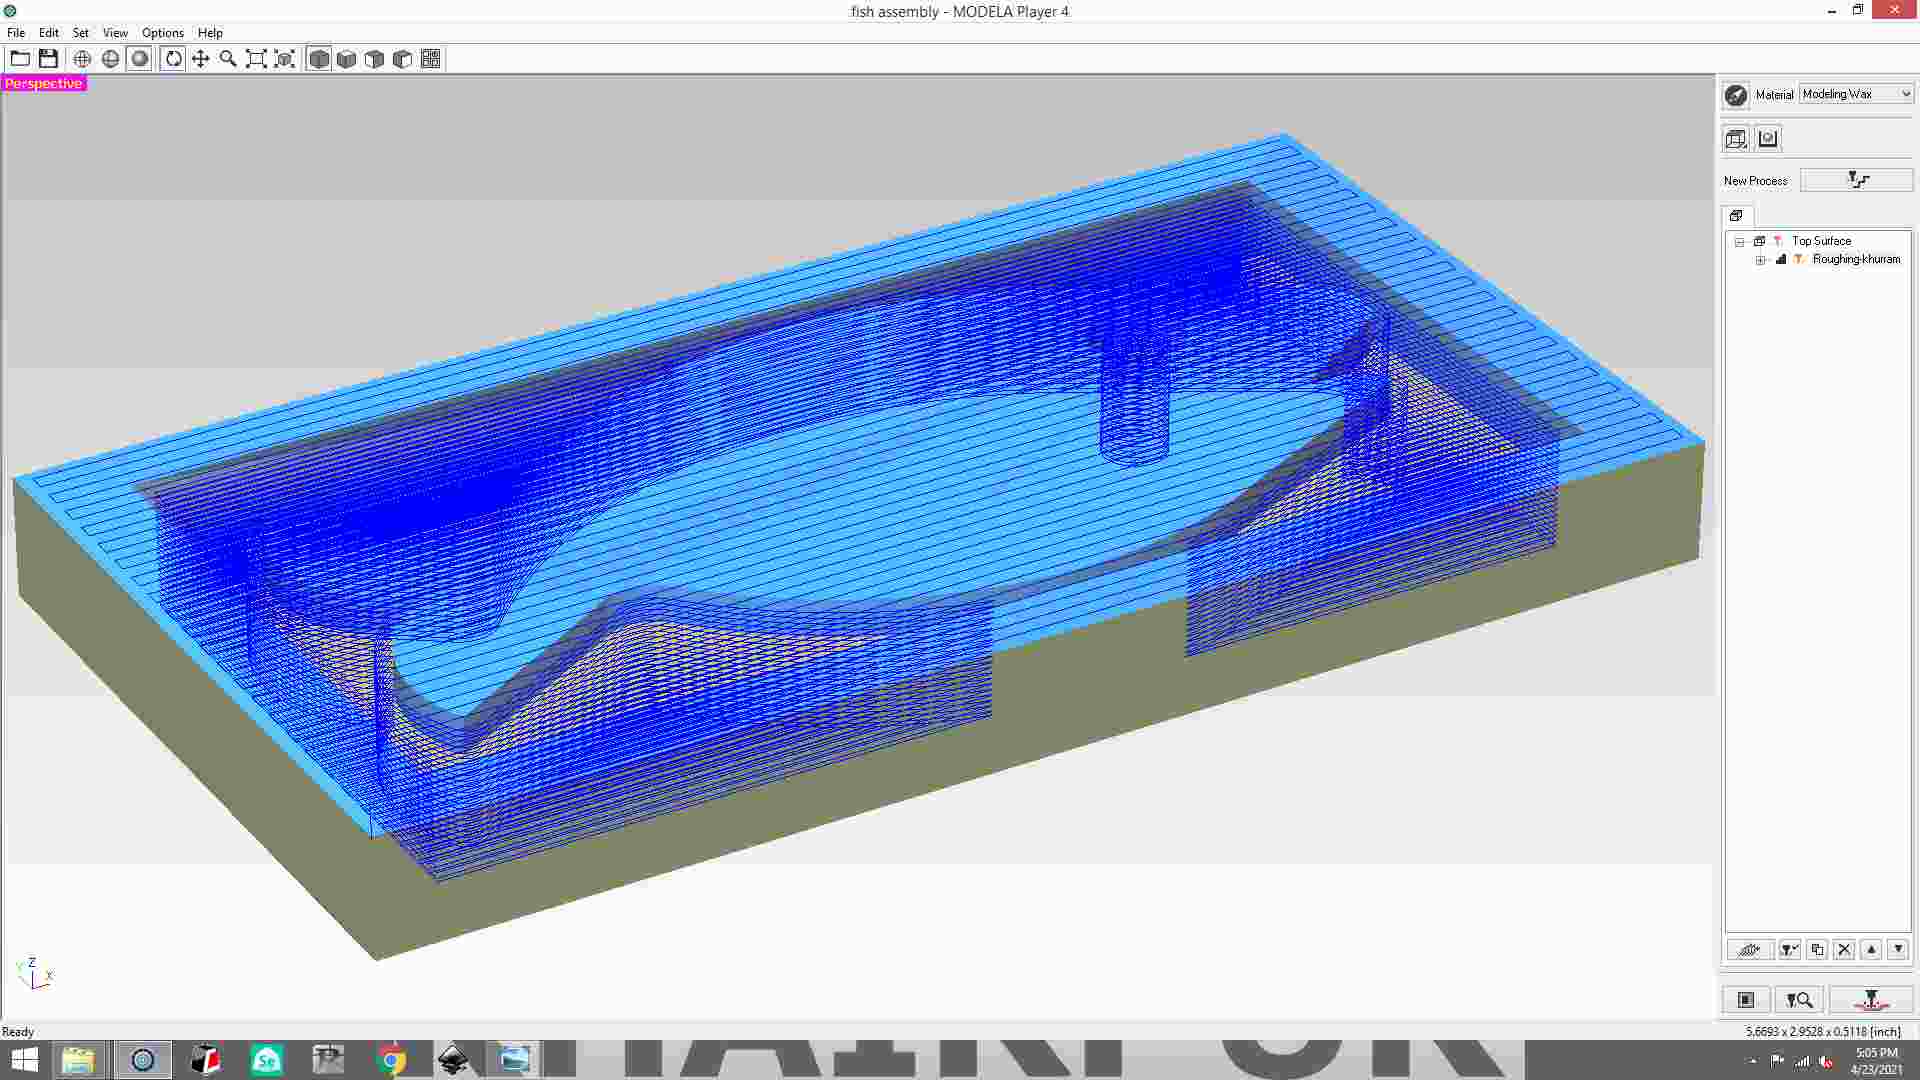
Select roughing and then click next button.
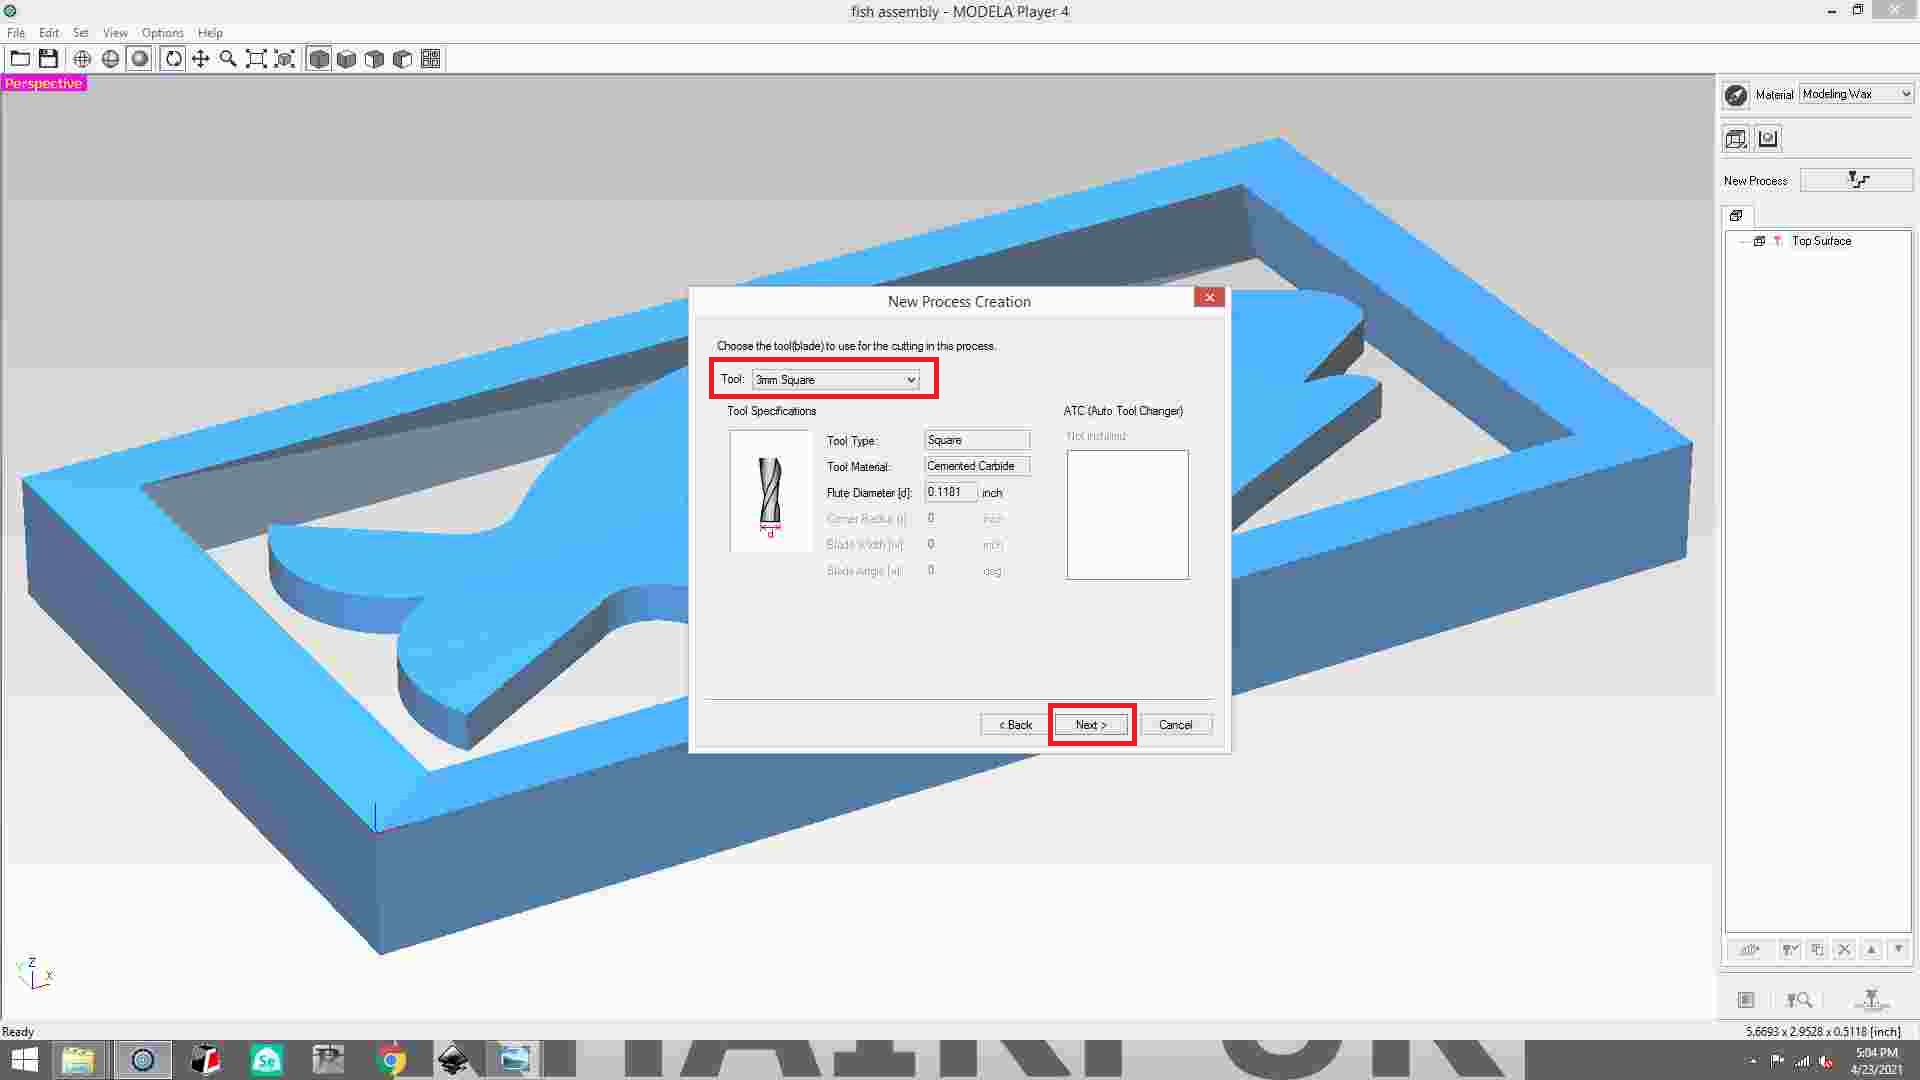
Select the 3mm square tool, then click Next.
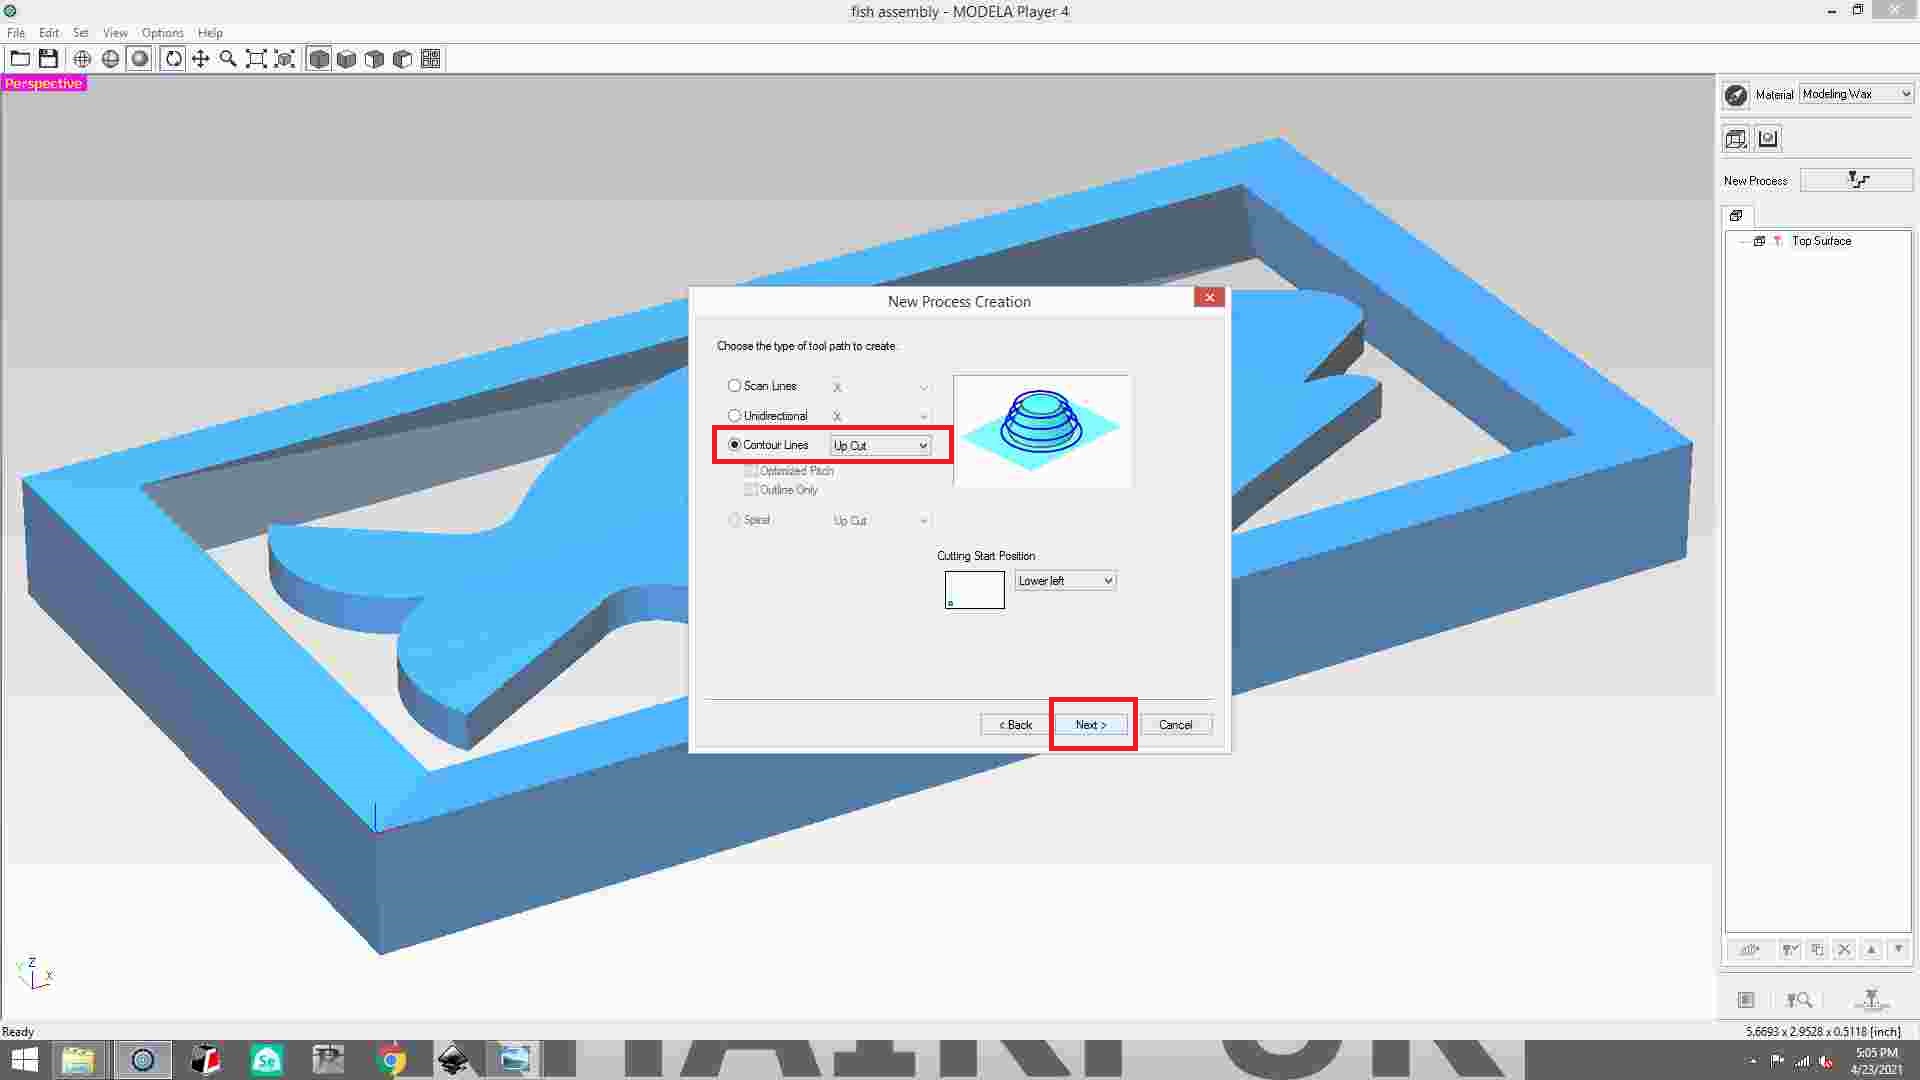
select contour line and click next.
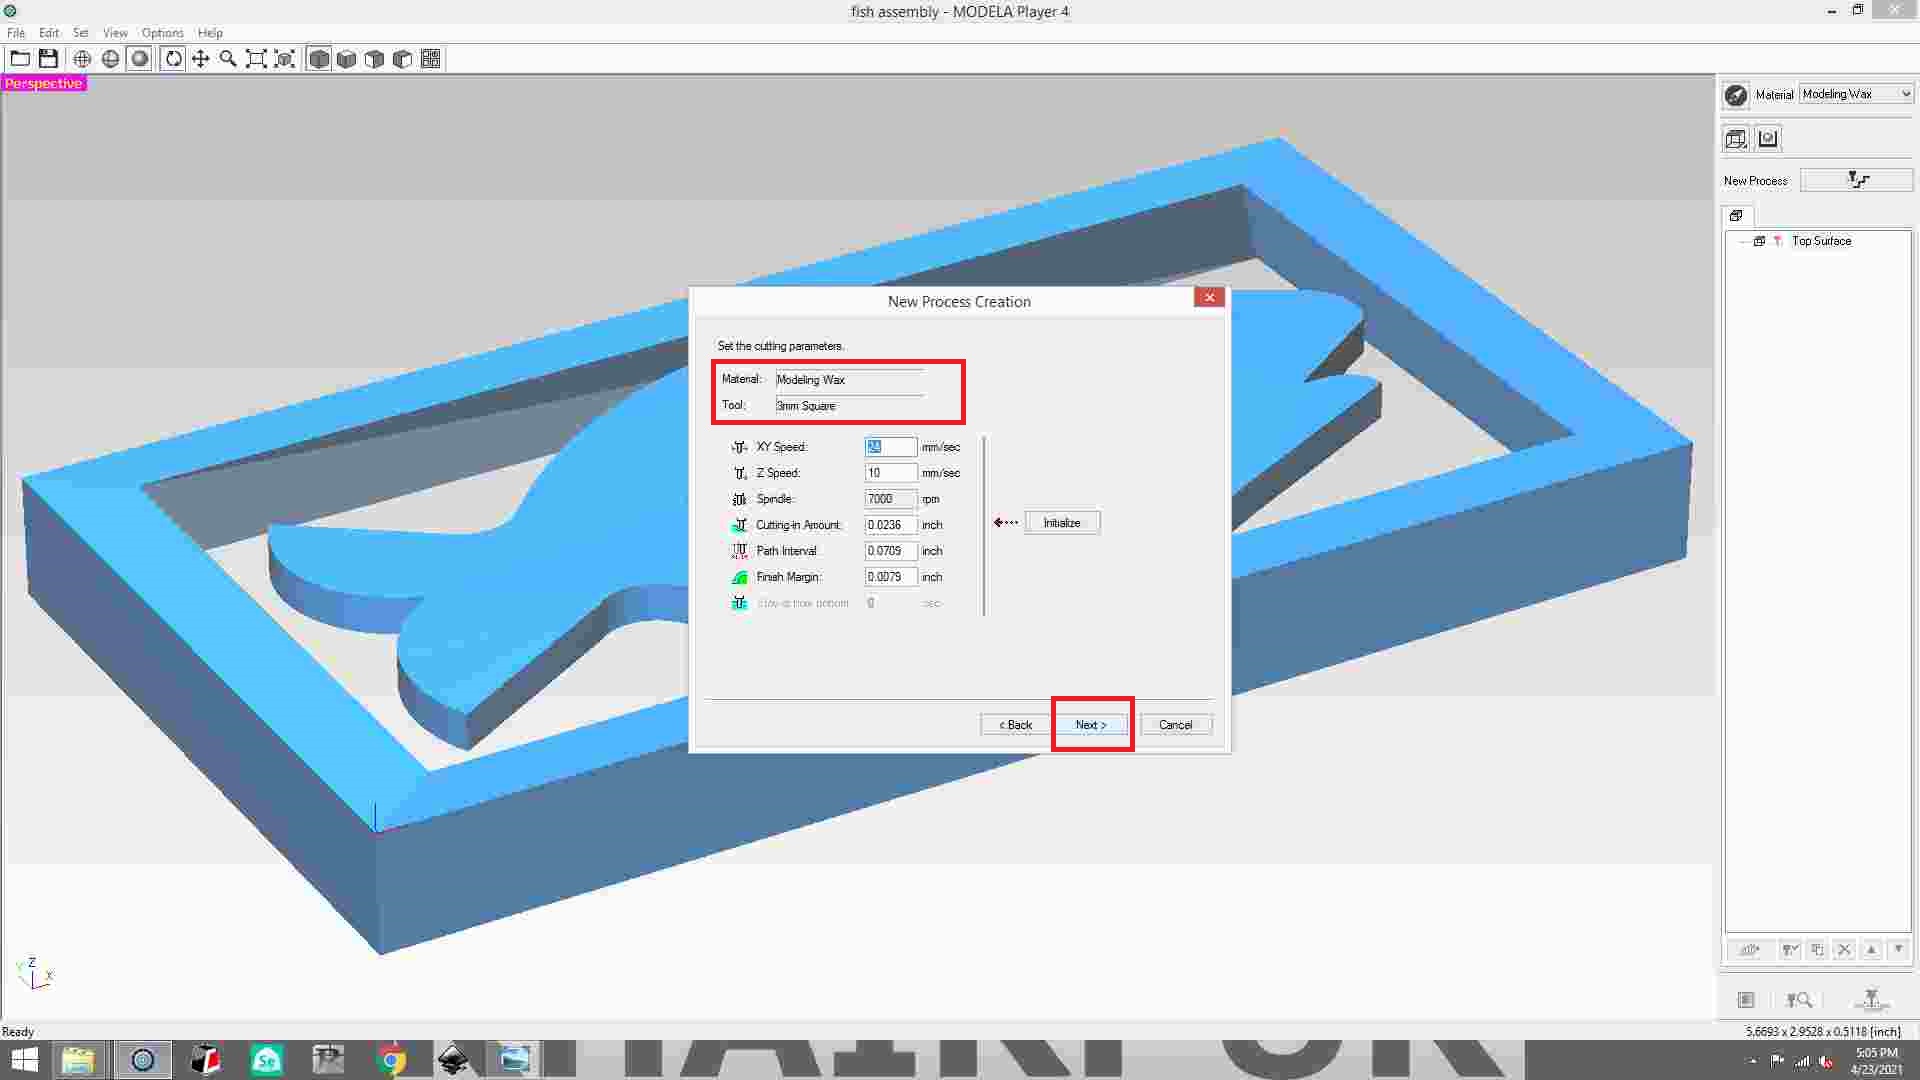
set the cutting parameter.
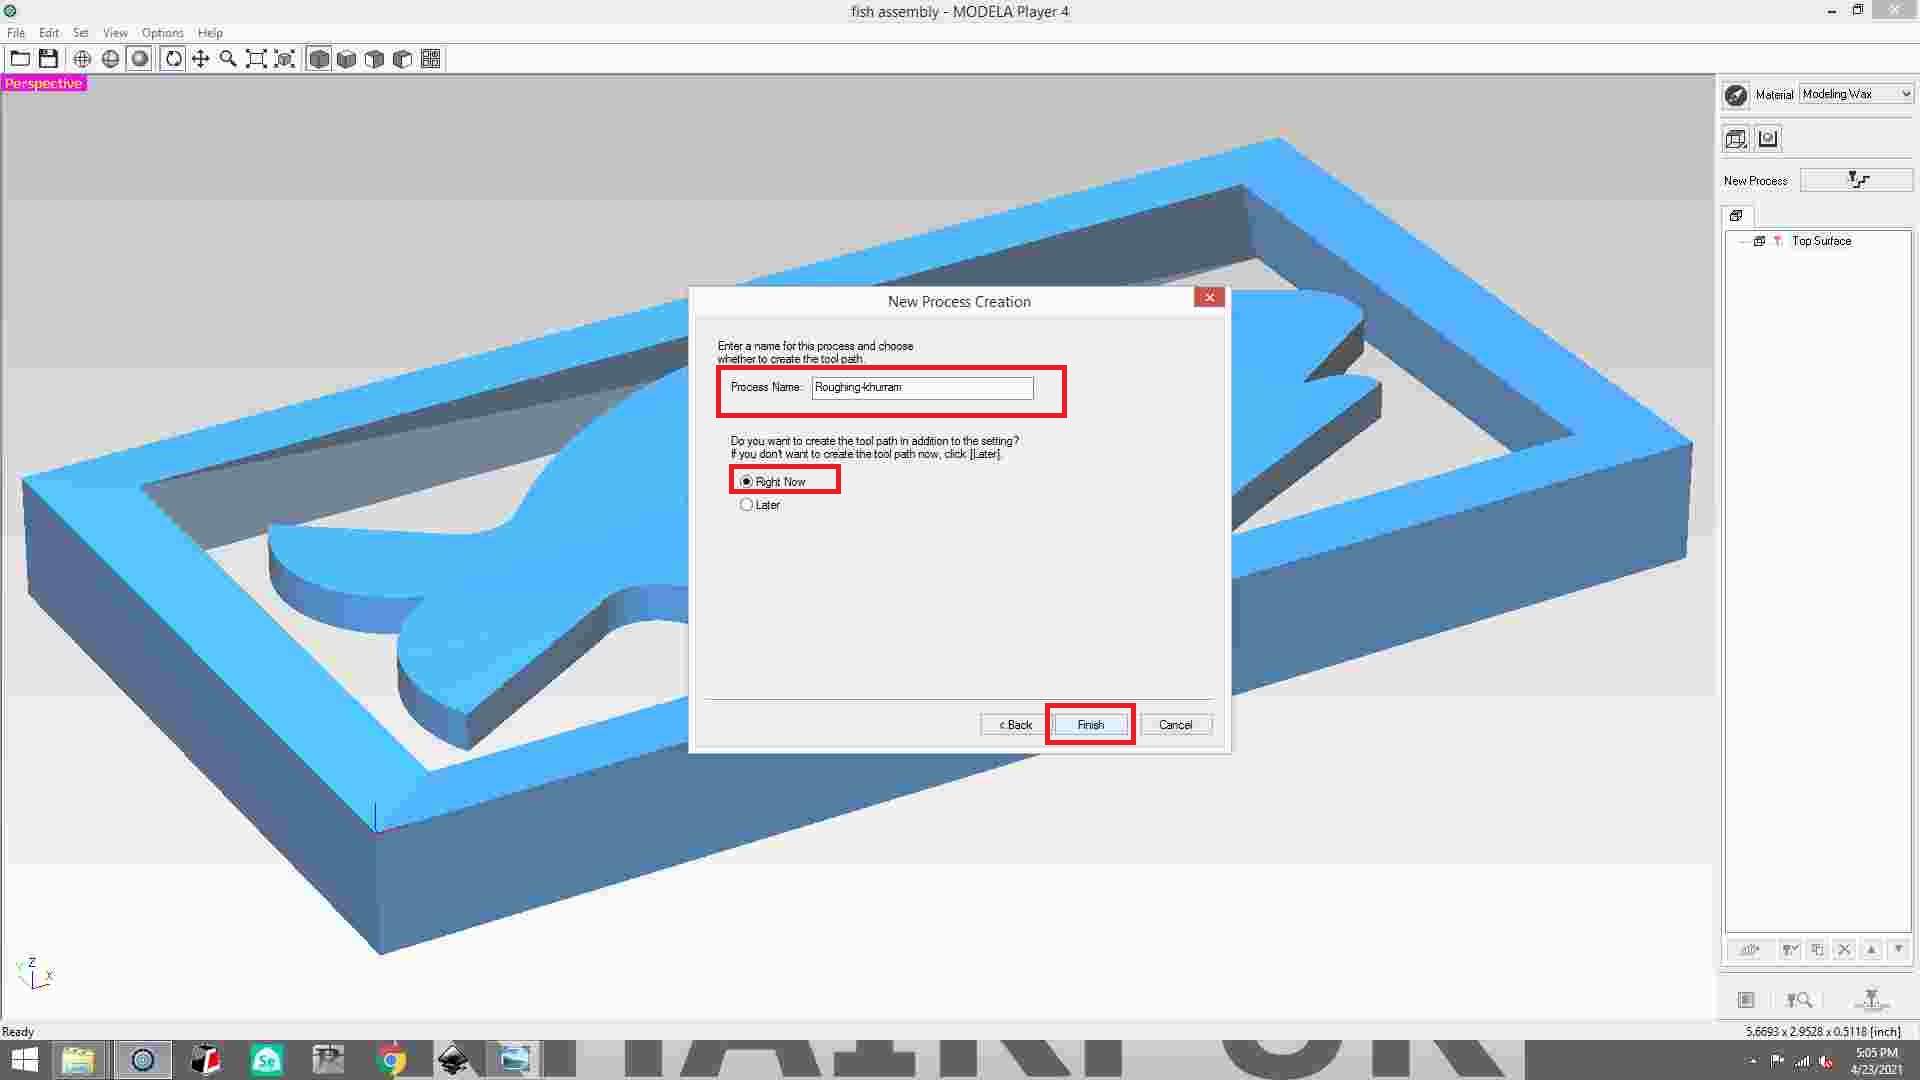
save the file of roughing process and then click the finish button.
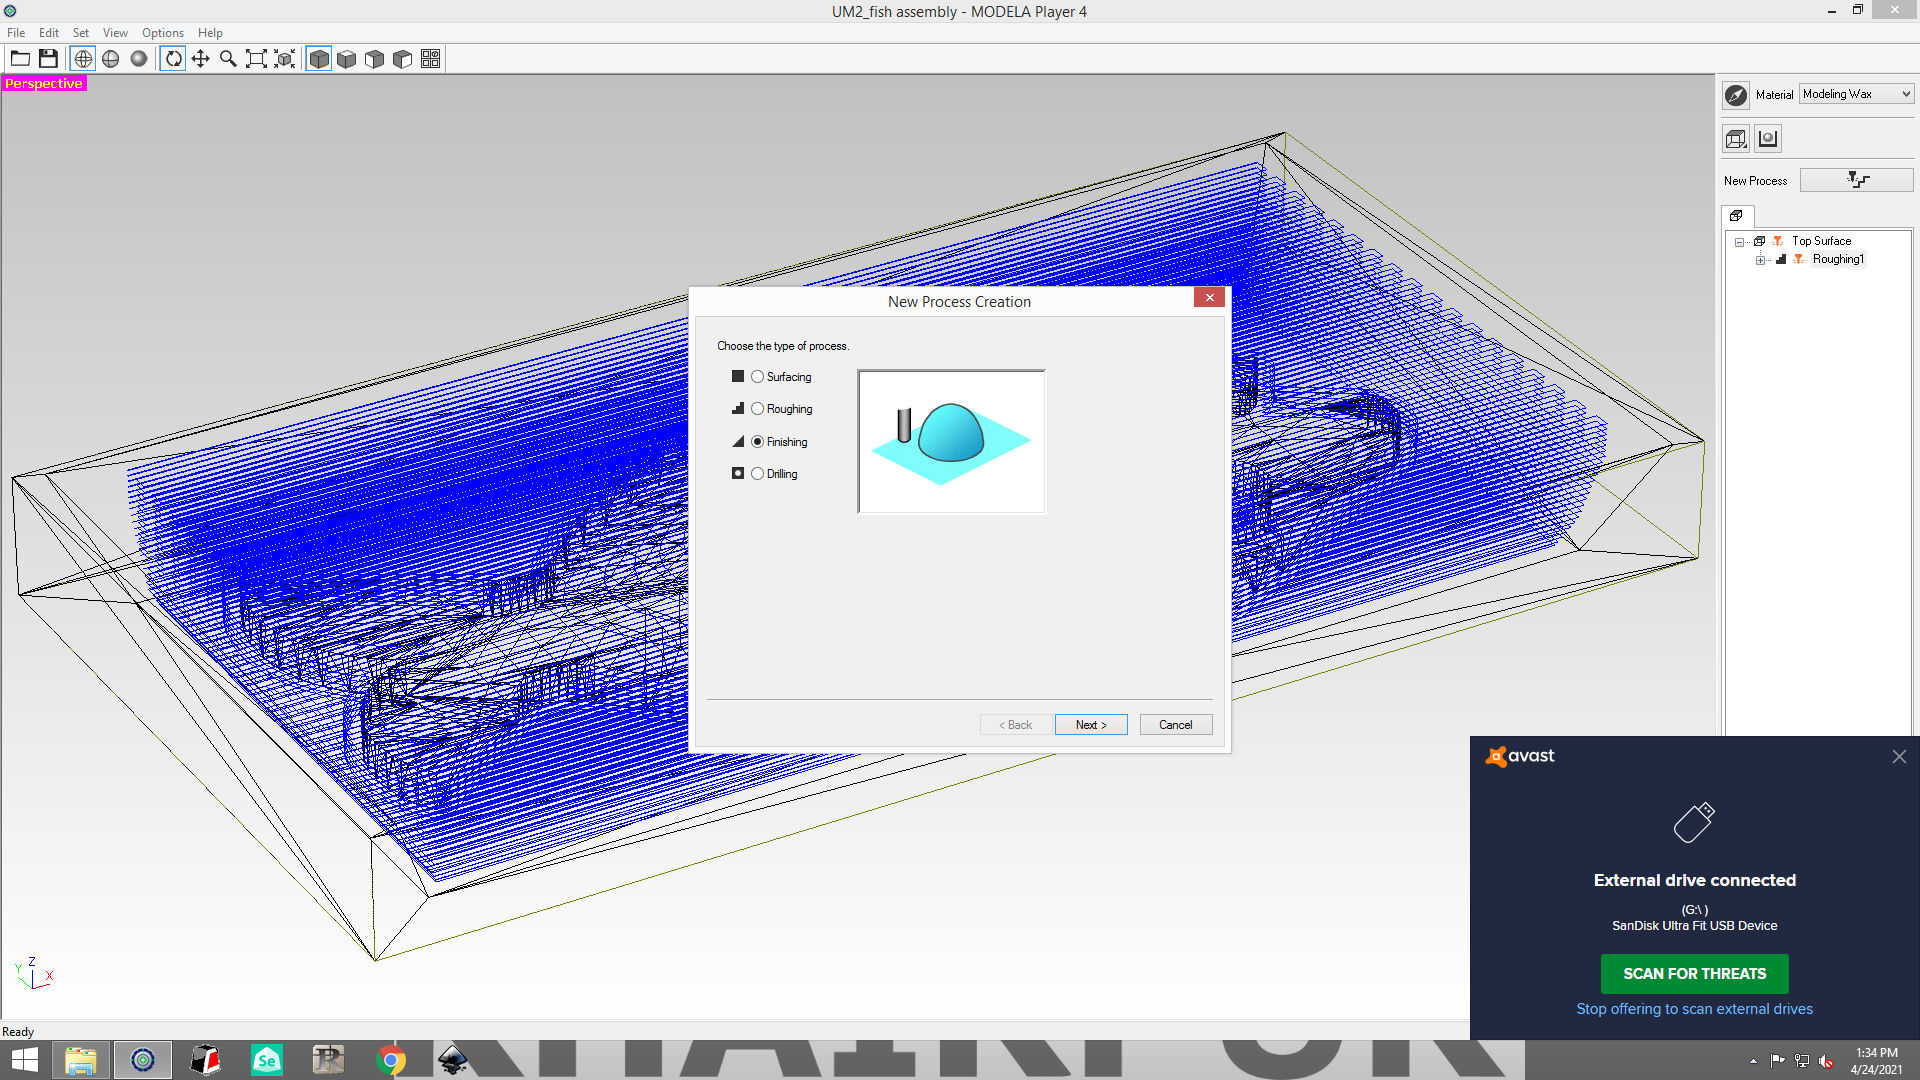
first, go to the new process creation window then select the finishing option.
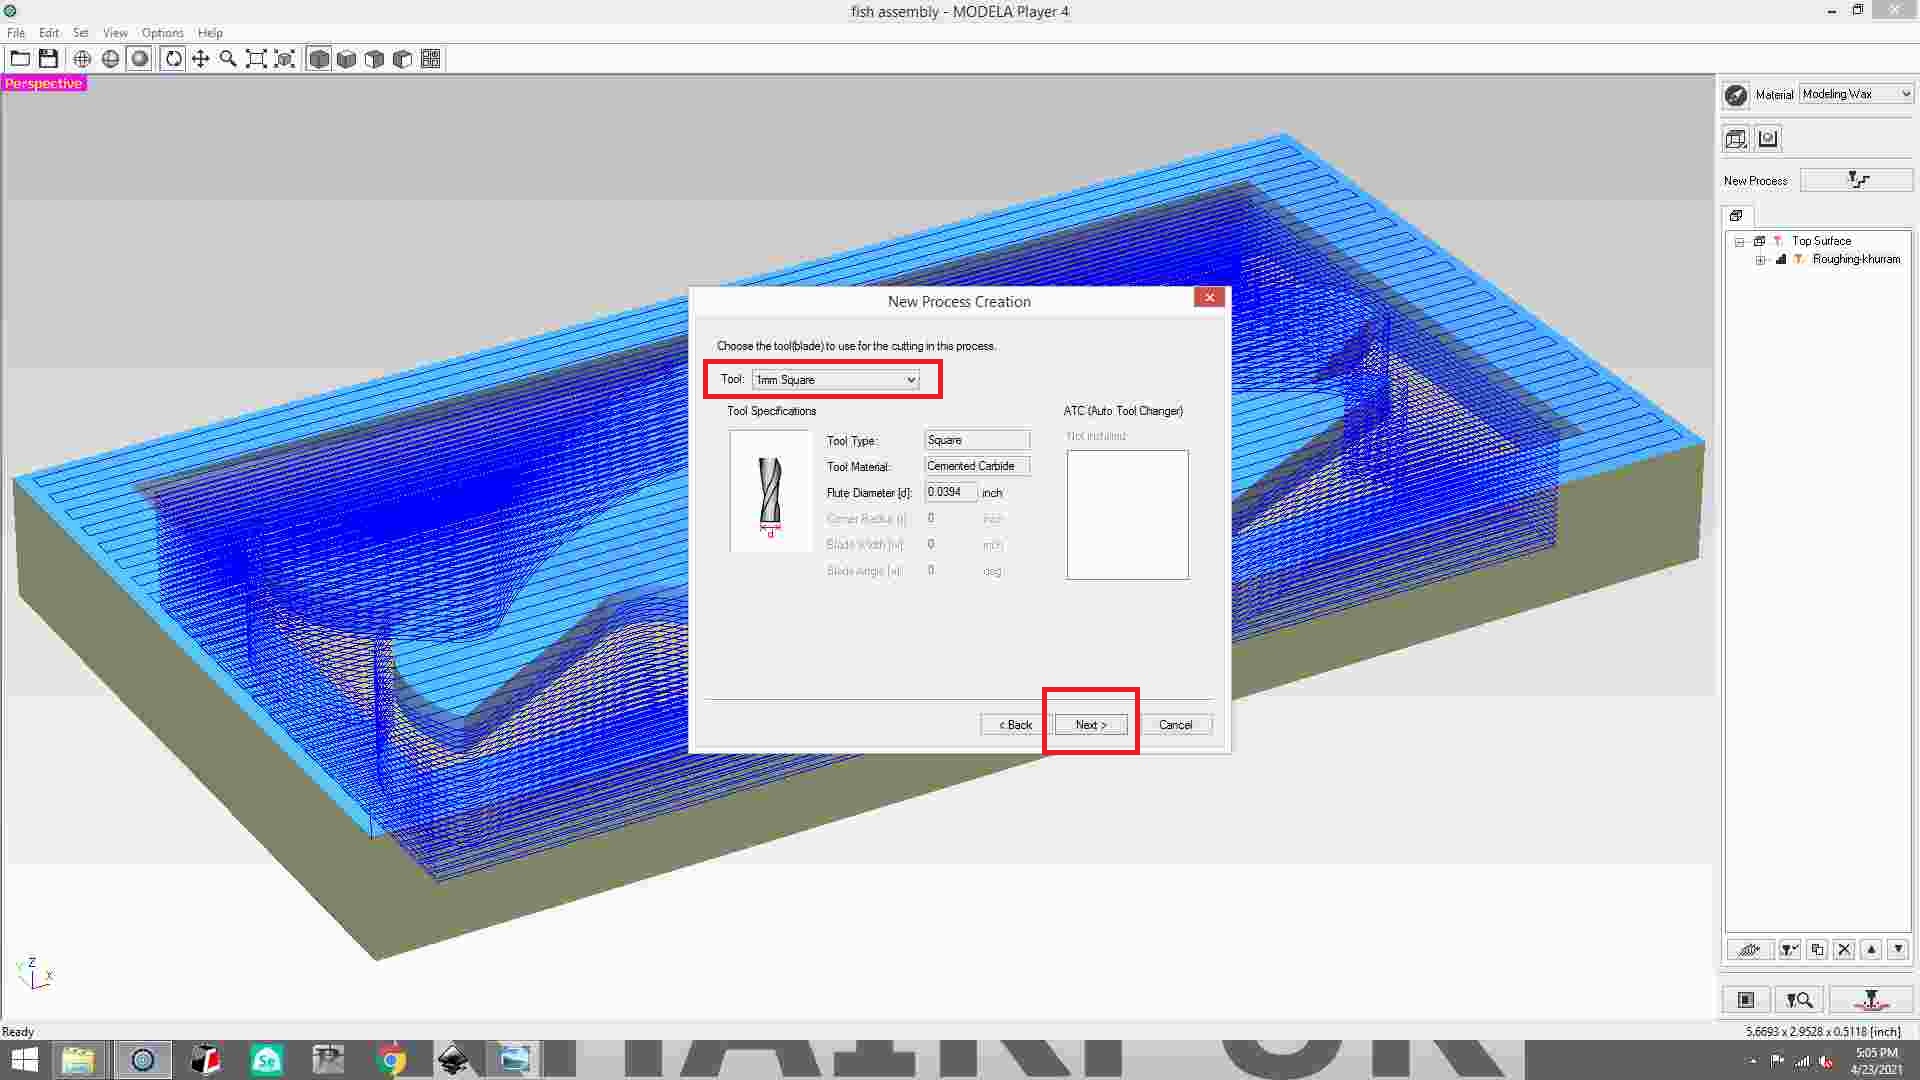
Click the next button after selecting 1mm square..
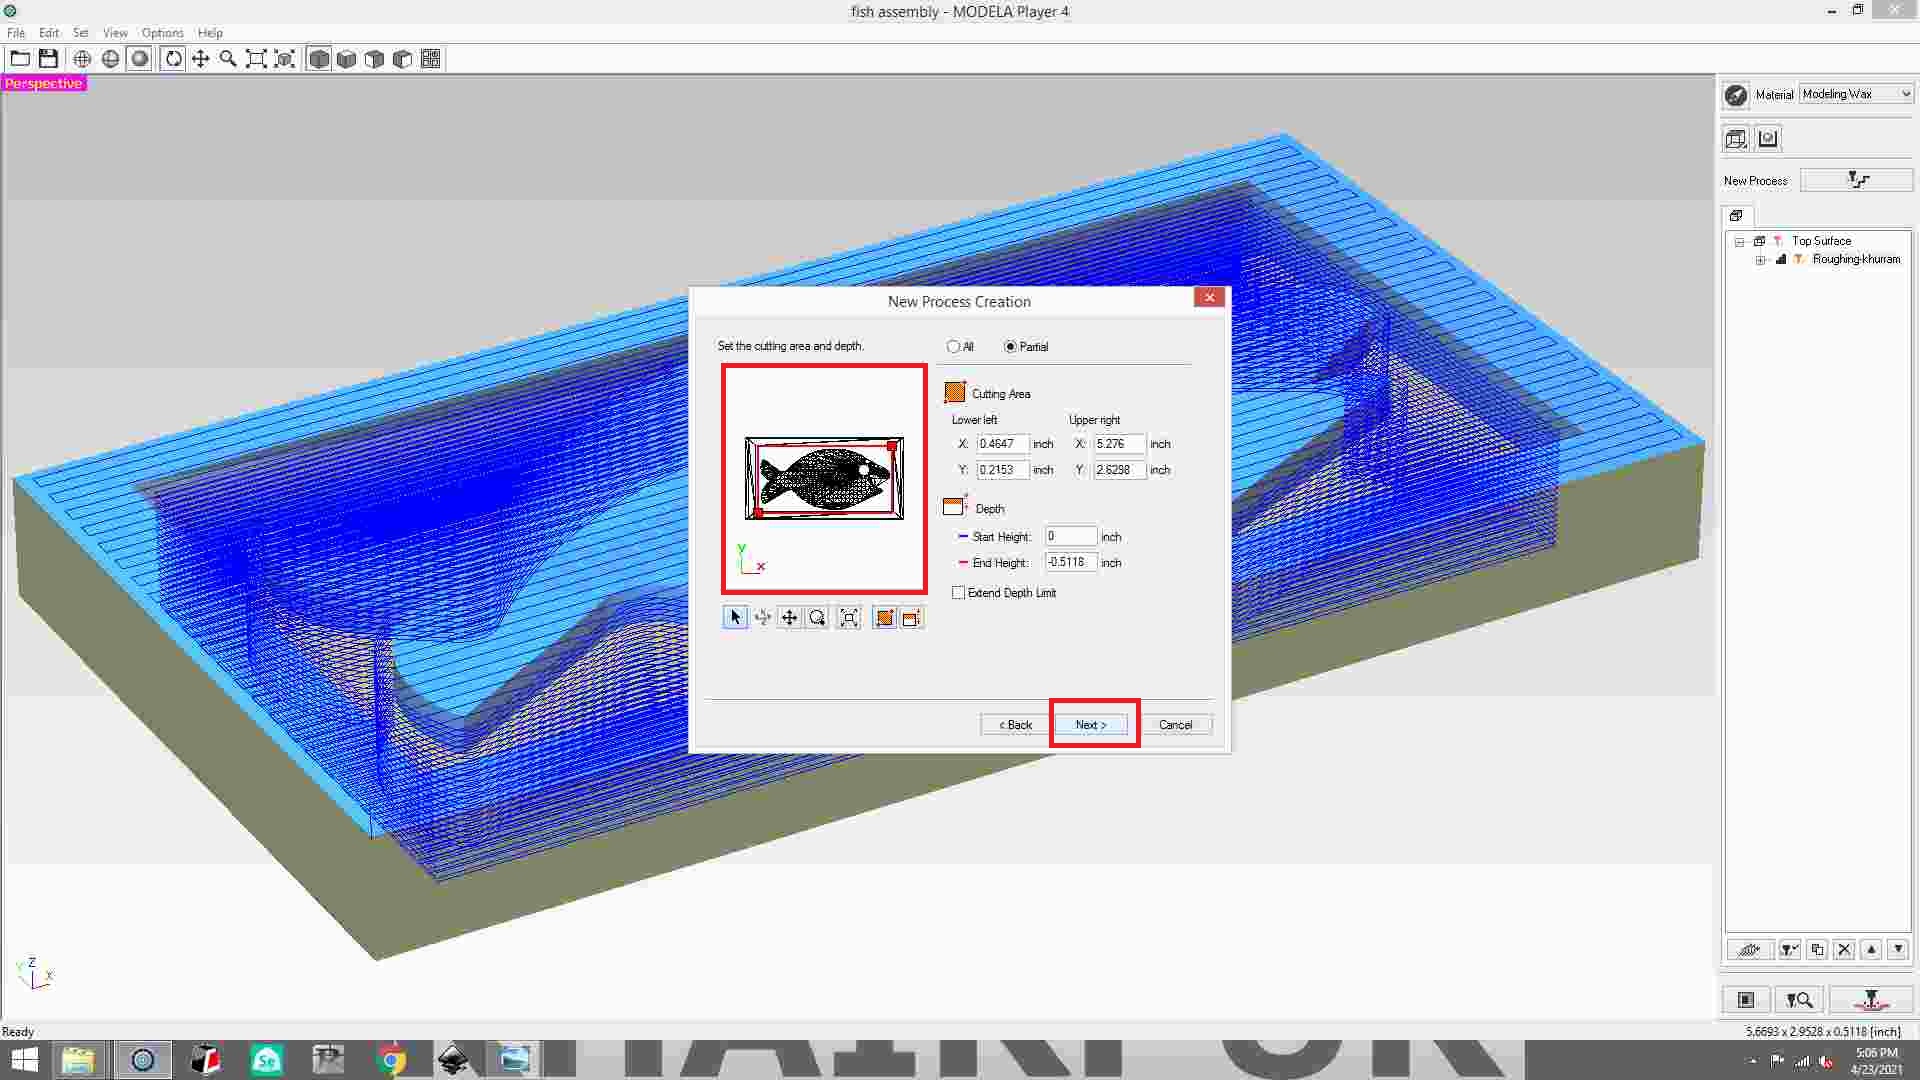
adjusting the boundary.
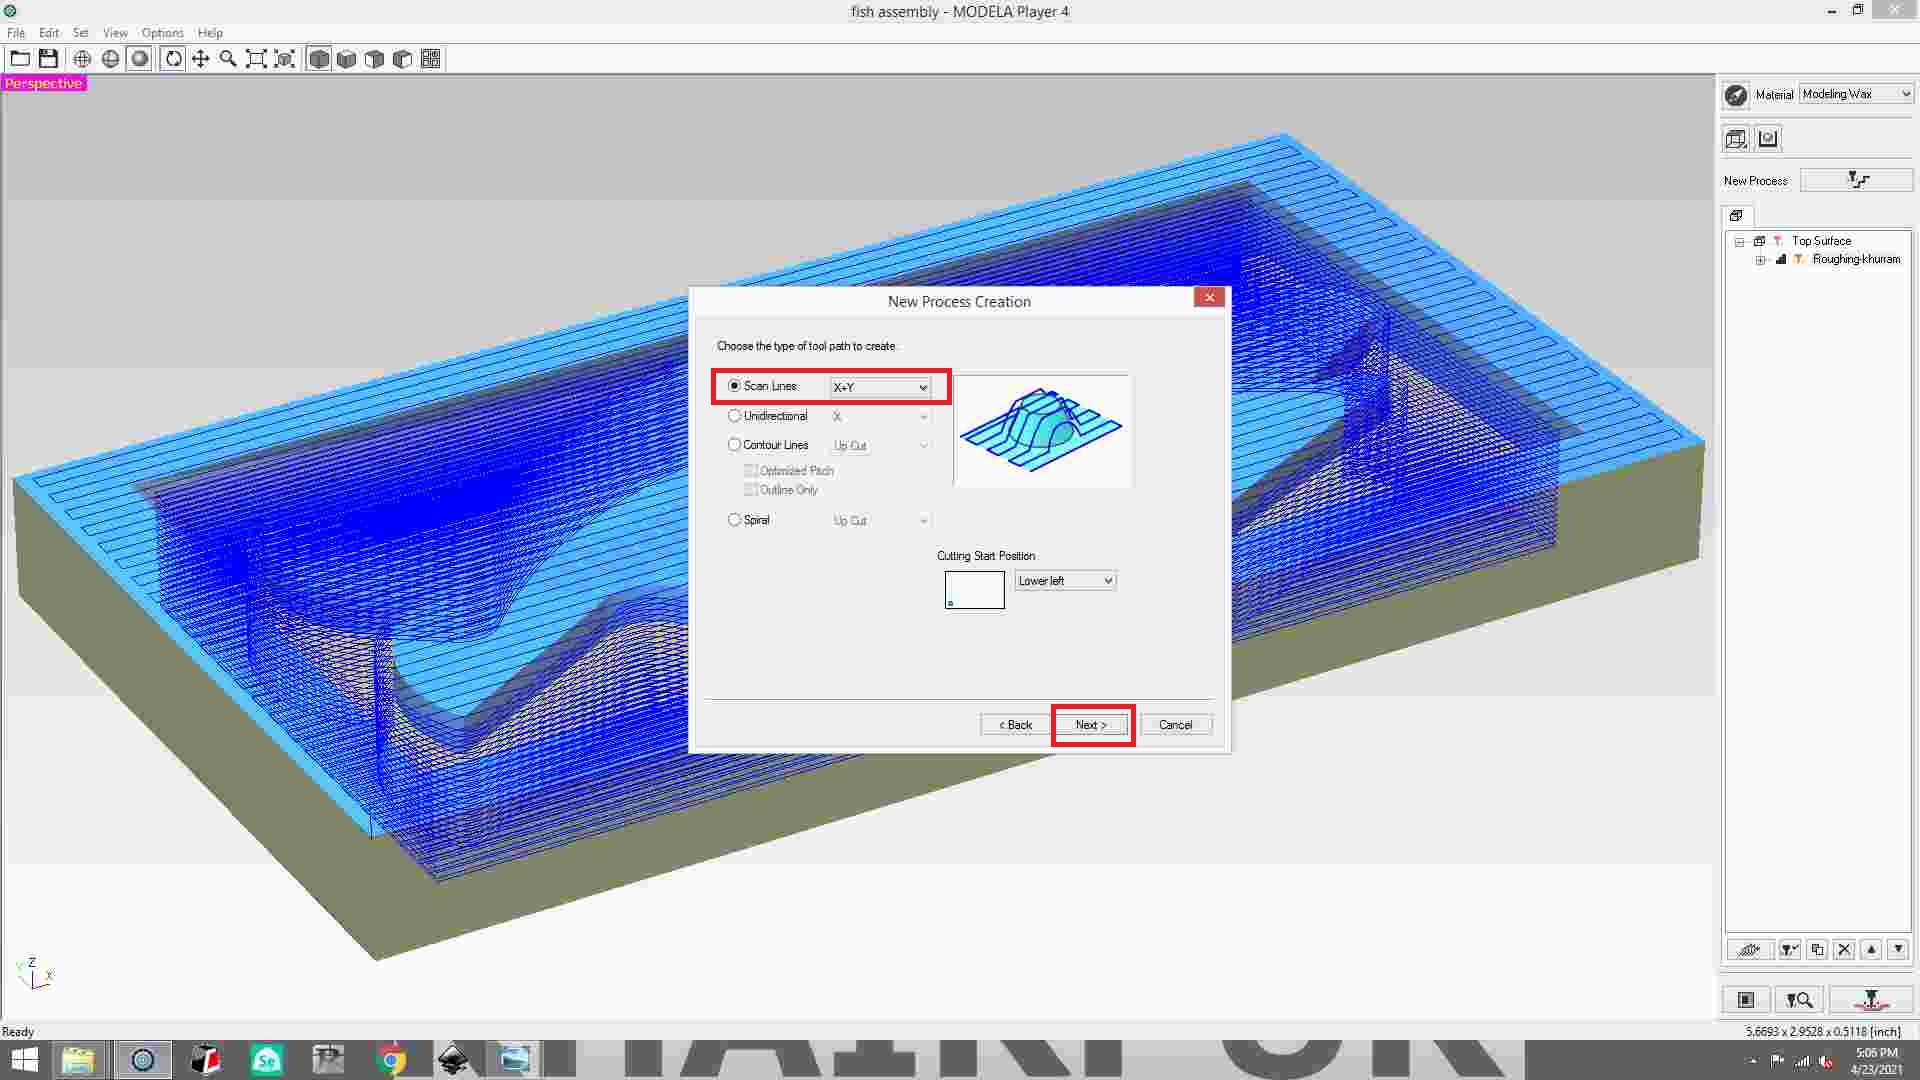
After that, choose the scan lines.

Then select the material is molding wax and the tool size is 1mm square.
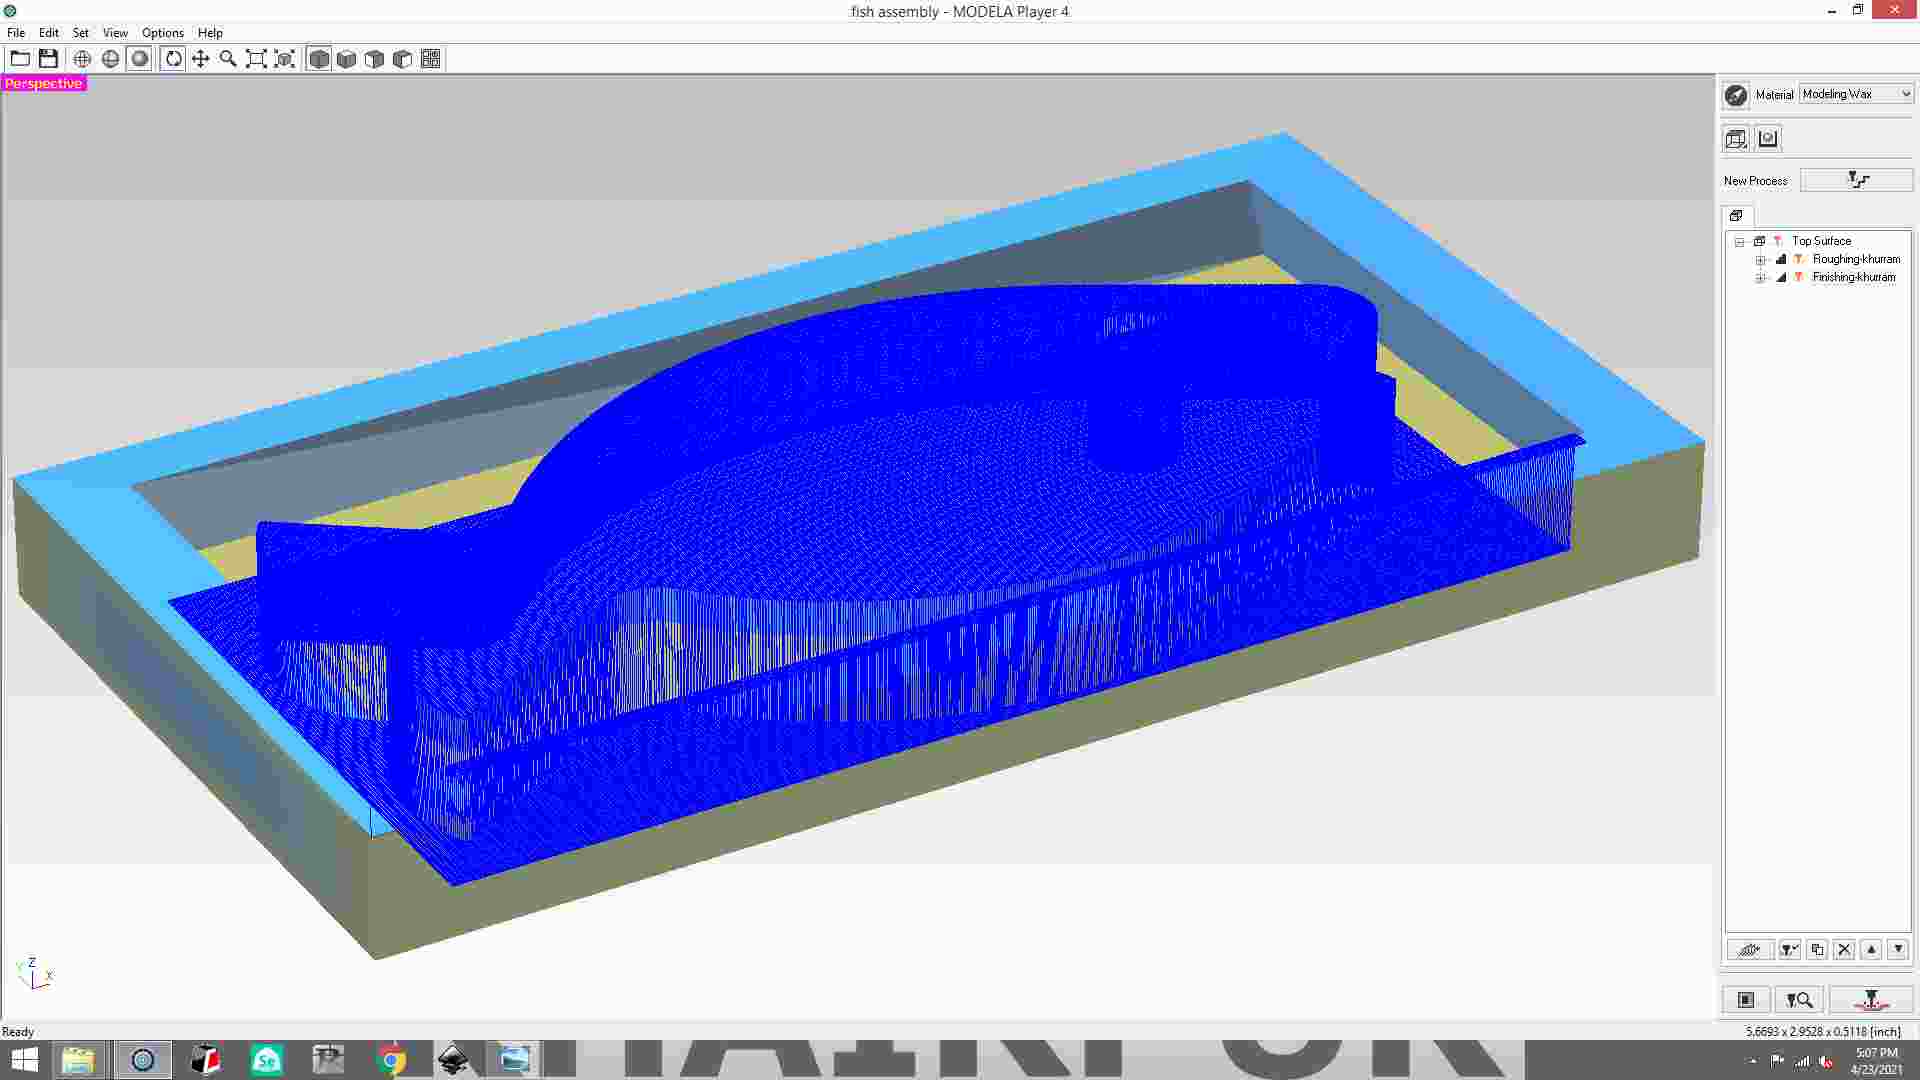

simulation process.

save the file of finishing process.
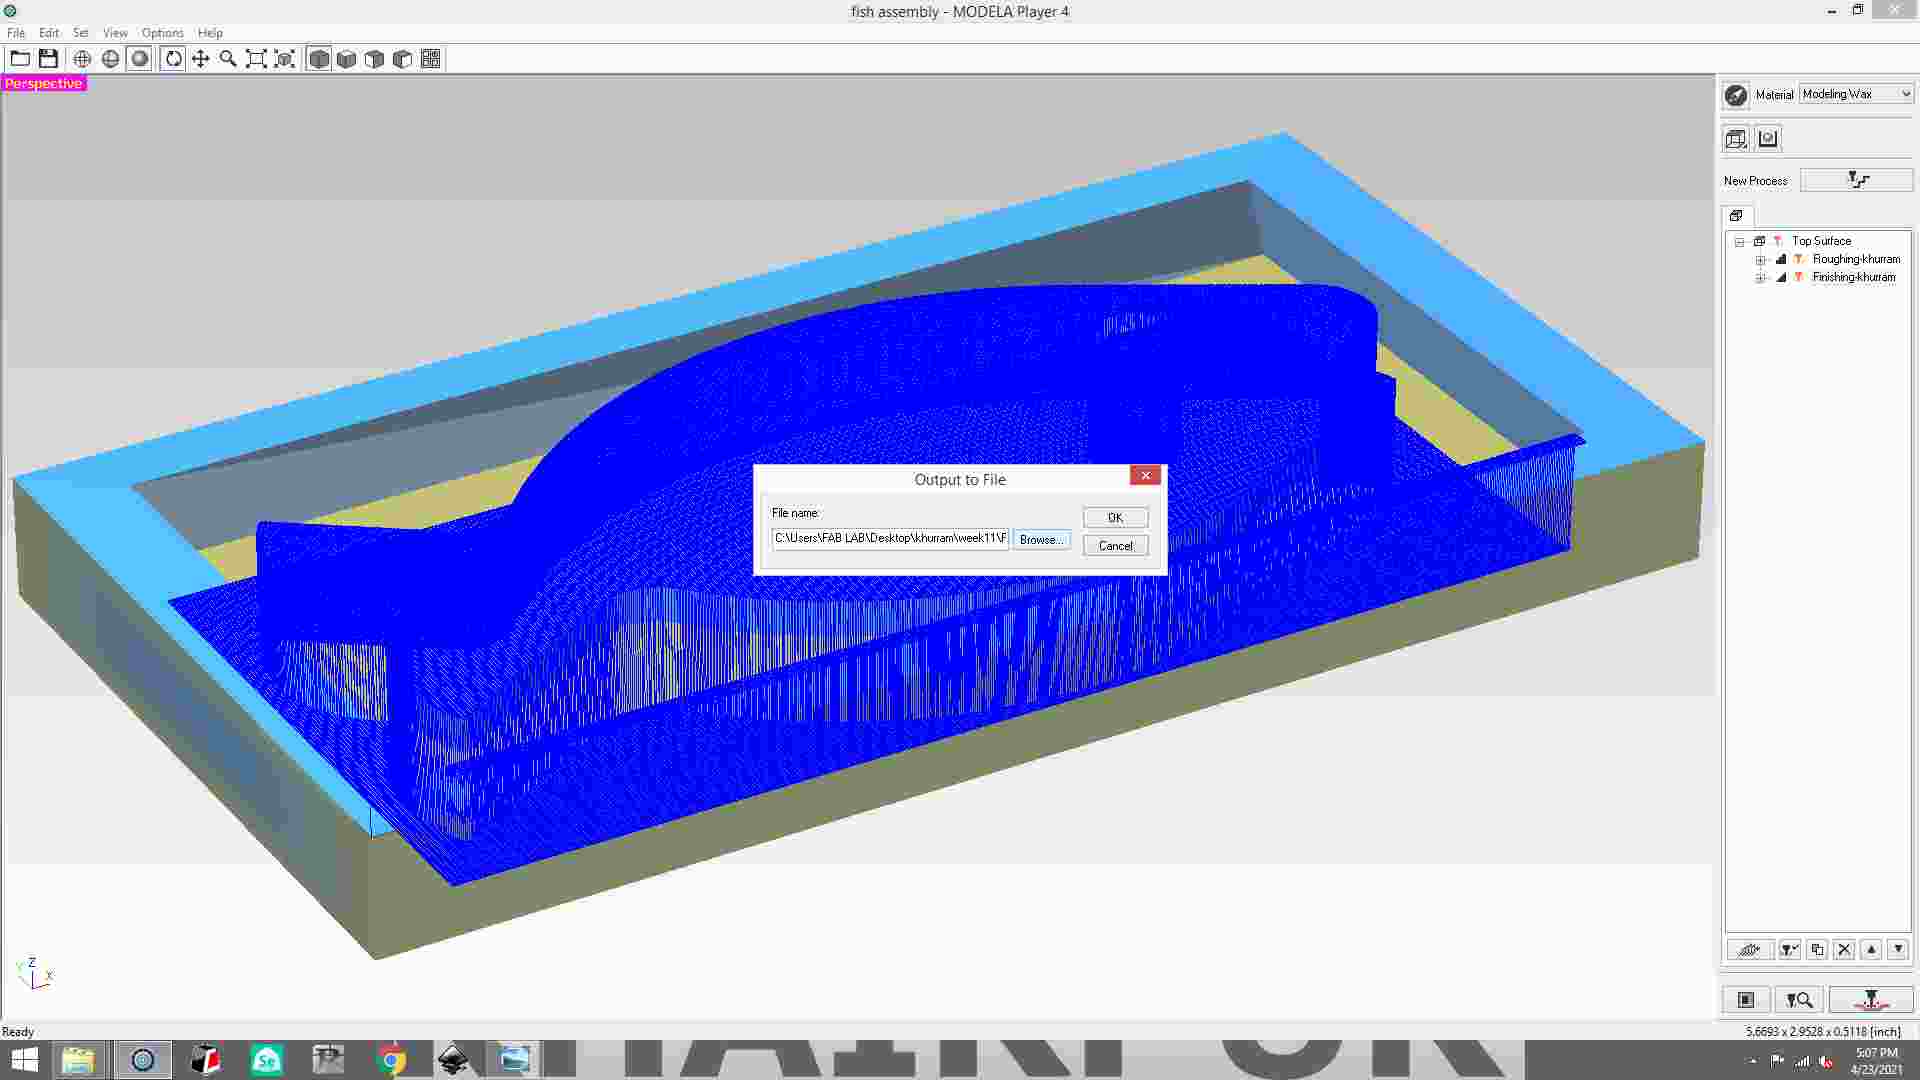
Choose a location for the file and save it.
Milling Process:
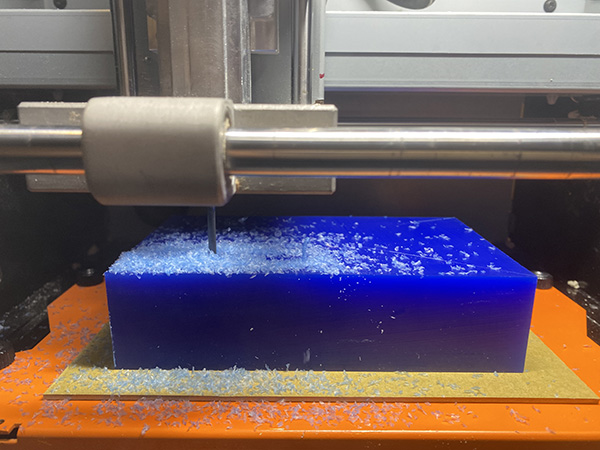
Milling for Finishing process.
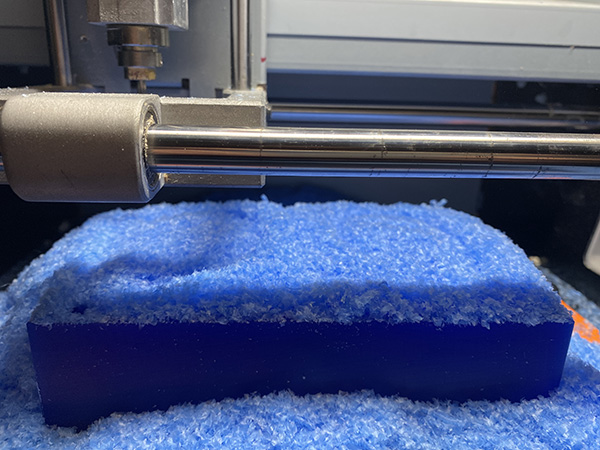
Roughing process.
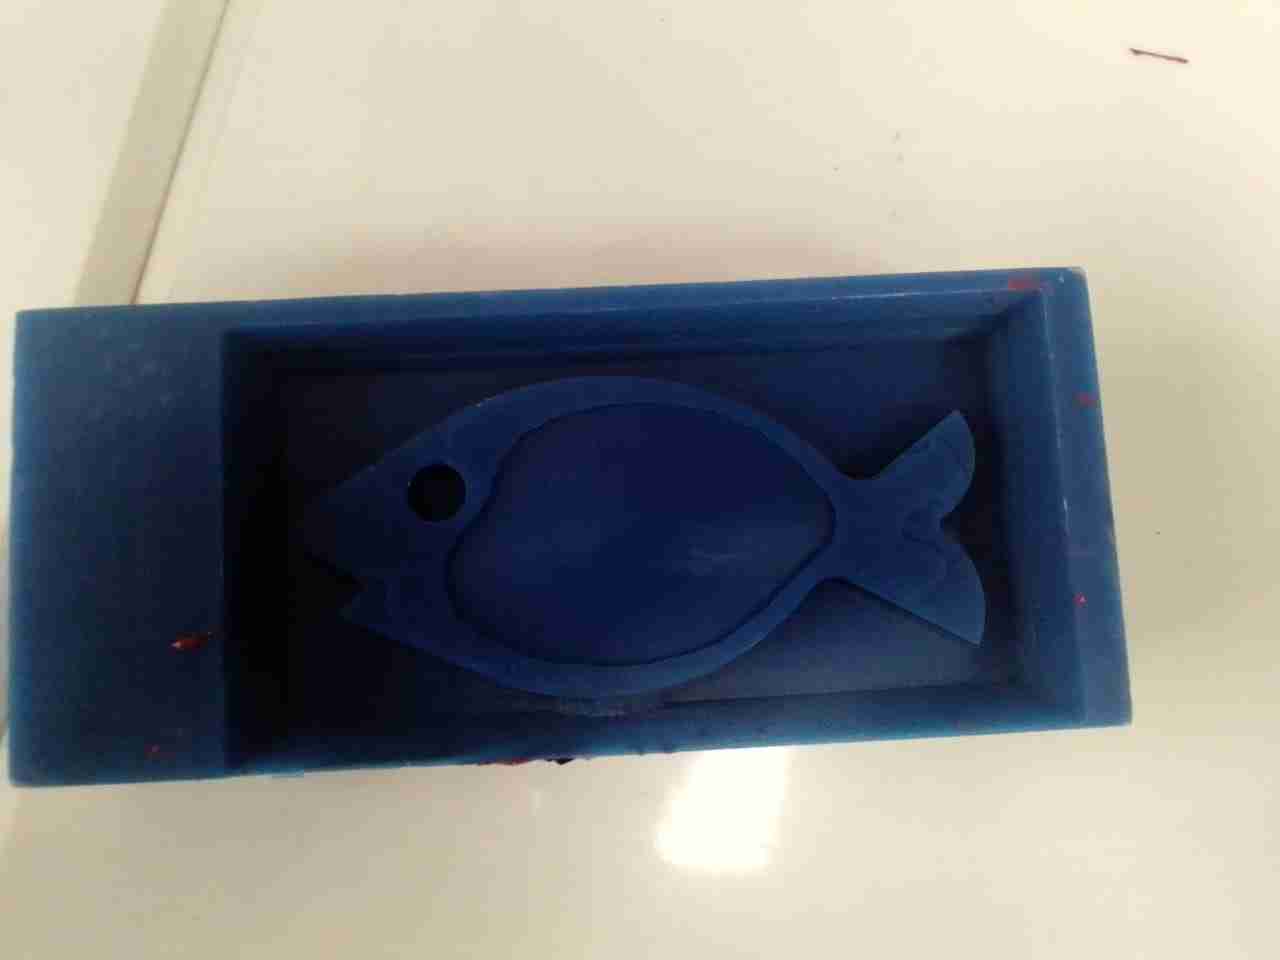
Final Result.
Casting the Negative Mold:
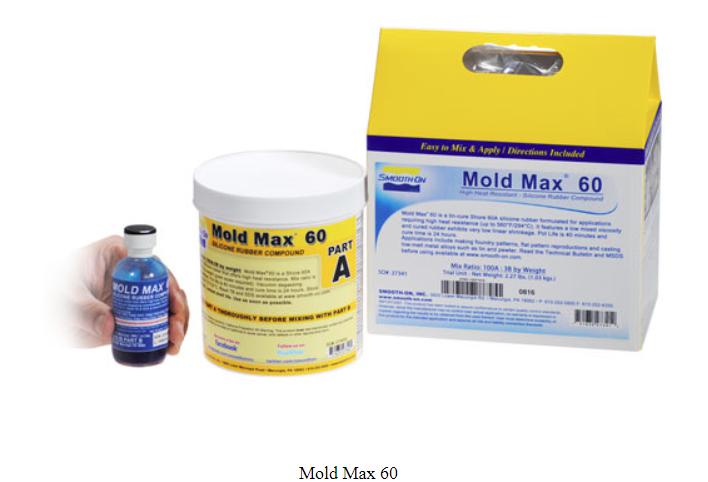
I am using Mold Max 60 which is used to cast both metal and plastic. The procedure to make mold is define below:
First I need to measure the quantity that how much material is needed. For this I poured water in my mold, and weight an empty glass. Then I put water into glass from mold and measured it.
Mixing Part A and Part B with 1:0.03.
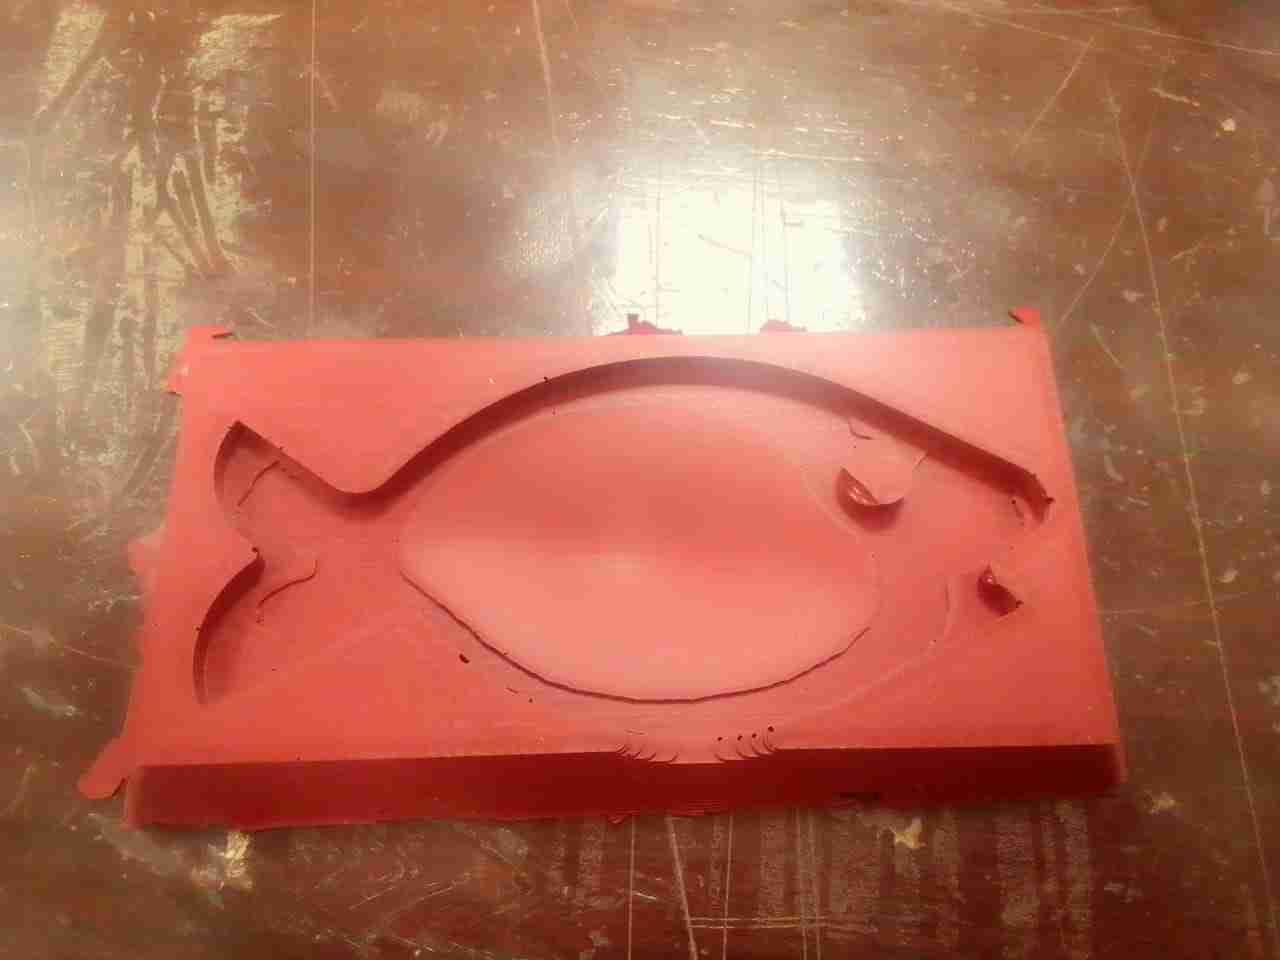
Making Silicone type:
Safety Measure
When making a silicon mold, it is necessary to maintain a working environment due to the characteristics of the material.
Provide adequate ventilation in the room
Prepare rubber gloves to prevent direct contact with the material
Wrap the scale
Lay vinyl sheets on the table and floor
In order to make a silicone agent, it is necessary to mix two types of liquids A and B with 1:0.9 ratio.
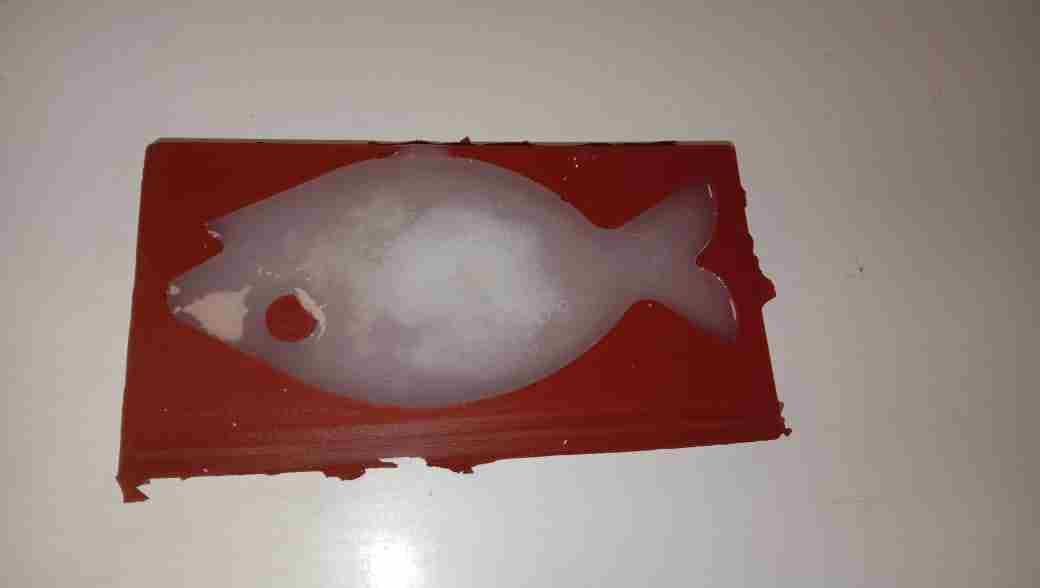
Final Result:
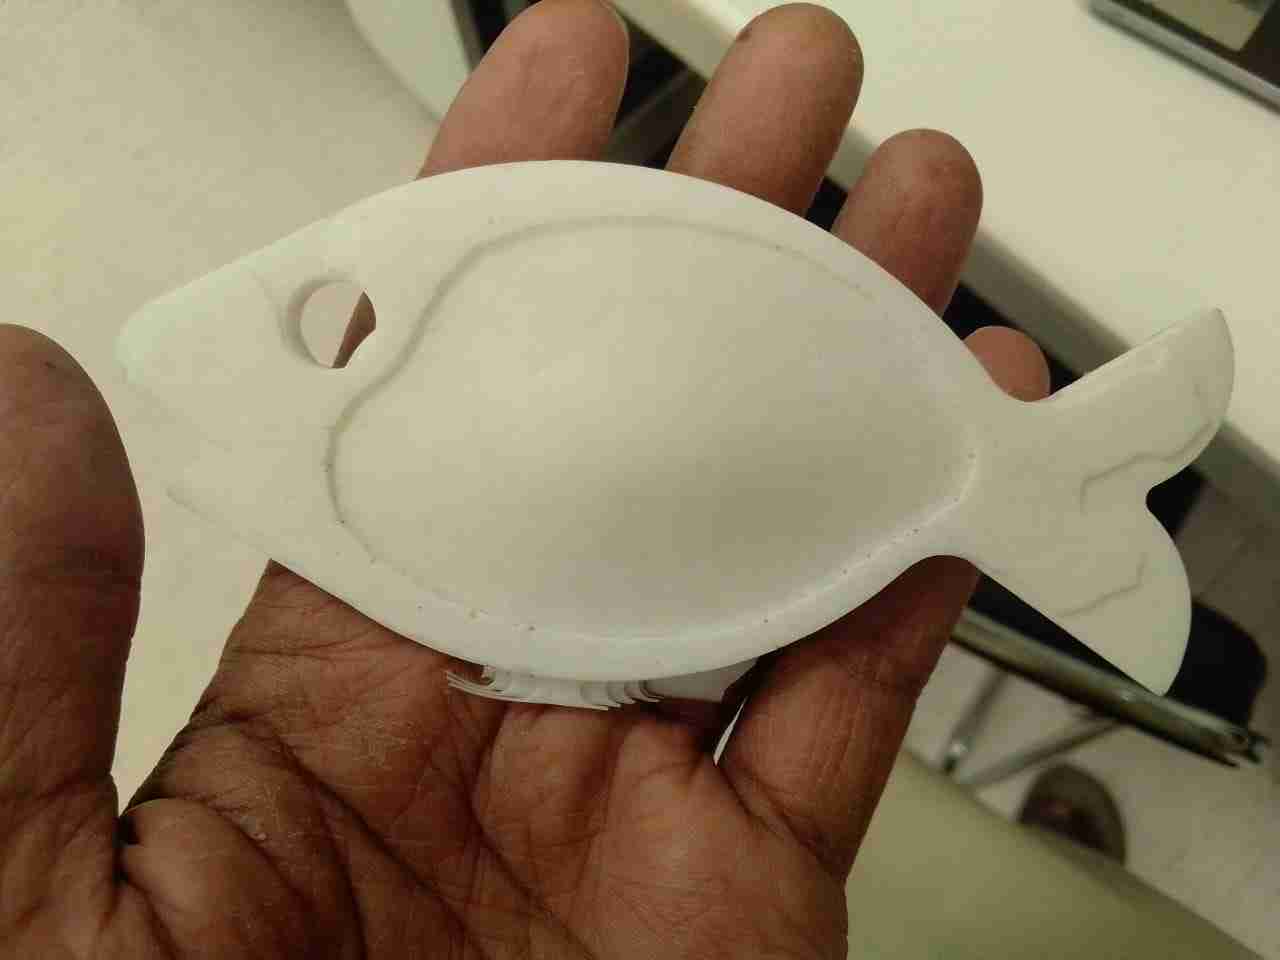
Task:Group assignment:
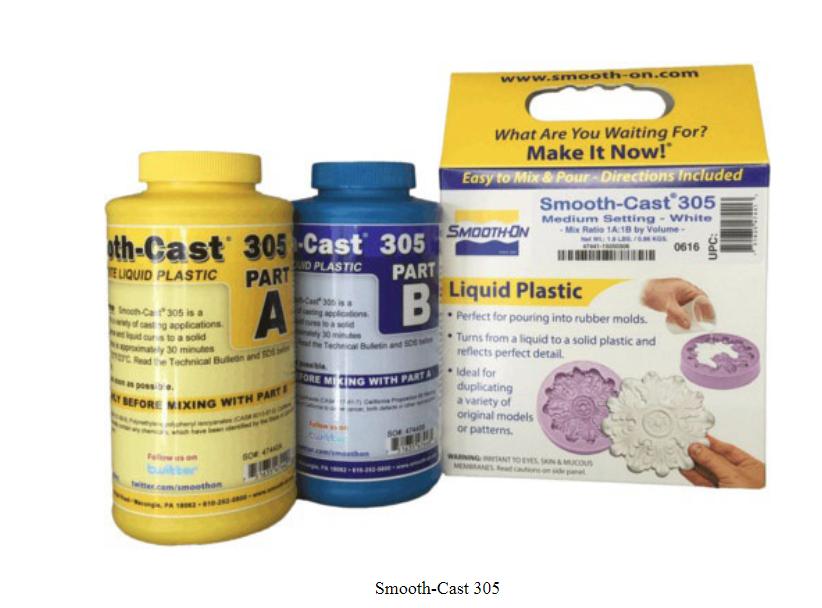
This week group assignment is to review the datasheets of the materials we are using in making mold and cast. Below we are sharing some important points after reviewing safety datasheets of Mold Max 60 for molding
and Smooth-Cast 305 for casting materials.
Mold Max 60 Safety DataSheet Review:
Product/Chemical Name: Mold Max 60 Part A:
Hazards Identification - Not hazardous according to United States Occupational Safety and Health Administration (OSHA).
Inhalation - Remove source(s) of contamination and move victim to fresh air.
Eye Contact - Flush eyes with plenty of water. If irritation persists, seek medical attention.
Skin Contact - In case of skin contact, wash thoroughly with soap and water; remove contaminated clothing and launder before reuse.
Ingestion - Do not induce vomiting unless instructed by a physician. Contact physician immediately.
After first aid, get appropriate in-plant, paramedic, or community medical support.
Flash Point - 300 °F
Handling Precautions - Minimize breathing of vapors and avoid prolonged or repeated contact with skin. Wear proper protective equipment. Use good general housekeeping procedures.
Storage Requirements - Store in cool dry, well-ventilated area
Protective Clothing/Equipment - Wear chemically protective gloves to prevent prolonged or repeated skin contact. Wear protective eyeglasses or chemical safety goggles, per OSHA eyeand face-protection
regulations 29 CFR 1910.133 and European Standard EN166. Contact lenses are not eye protective devices. Appropriate eye protection must be worn instead of, or in conjunction with contact lenses.
Toxicological Information:
- Eye Effects: Irritation
- Skin Effects: Irritation
- Carcinogenicity: None Determined
- Mutagenicity: None Determined
- Teratogenicity: None Determined
Product/Chemical Name: Mold Max 60 Part B:
Hazards Identification
- Harmful if swallowed.
- Irritating to eyes, respiratory system and skin.
- Harmful to aquatic organisms may cause long term adverse effects in the aquatic environment.
Inhalation - Remove source(s) of contamination and move victim to fresh air. If breathing has stopped, give artificial respiration, then oxygen if needed. Contact physician immediately.
Eye Contact - Flush eyes with plenty of water. If irritation persists, seek medical attention.
Skin Contact - In case of skin contact, wash thoroughly with soap and water; remove contaminated clothing and launder before reuse; seek medical attention if rash develops.
Ingestion - Do not induce vomiting unless instructed by a physician. Contact physician immediately
After first aid, get appropriate in-plant, paramedic, or community medical support.
Flash Point - 150 °F
Handling Precautions - Minimize breathing of vapors and avoid prolonged or repeated contact with skin. Wear proper protective equipment. If ventilation is not sufficient, wear proper respiratory equipment. Reseal
partial containers. Use good general housekeeping procedures.
Storage Requirements - Store in cool dry, well-ventilated area
Protective Clothing/Equipment - Wear chemically protective gloves and aprons to prevent prolonged or repeated skin contact. Wear protective eyeglasses or chemical safety goggles, per OSHA eye- and face-protection
regulations 29 CFR 1910.133 and European Standard EN166. Contact lenses are not eye protective devices. Appropriate eye protection must be worn instead of, or in conjunction with contact lenses.
Toxicological Information:
- Eye Effects: Irritation
- Skin Effects: Irritation
- Carcinogenicity: None Determined
- Mutagenicity: None Determined
- Teratogenicity: None Determined
SMOOTH-CAST 300
Hazards Identification
- Harmful by inhalation.
- Irritating to eyes, respiratory system and skin.
- Limited evidence of a carcinogenic effect
- Harmful; danger of serious damage to health by prolonged exposure through inhalation environment.
Inhalation - Remove source(s) of contamination and move victim to fresh air. If breathing has stopped, give artificial respiration, then oxygen if needed. Contact physician immediately.
Eye Contact - Flush eyes with plenty of water. If irritation persists, seek medical attention.
Skin Contact - In case of skin contact, wash thoroughly with soap and water; remove contaminated clothing and launder before reuse; seek medical attention if rash develops.
Ingestion - Do not induce vomiting unless instructed by a physician. Contact physician immediately.
After first aid, get appropriate in-plant, paramedic, or community medical support.
Flash Point - 262 °F
Handling Precautions - Minimize breathing of vapors and avoid prolonged or repeated contact with skin. Wear proper protective equipment. If ventilation is not sufficient, wear proper respiratory equipment. Reseal
partial containers. Use good general housekeeping procedures.
Storage Requirements - Store in cool dry, well-ventilated area
Protective Clothing/Equipment - Wear chemically protective gloves to prevent prolonged or repeated skin contact. Wear protective eyeglasses or chemical safety goggles, per OSHA eyeand face-protection regulations 29 CFR
1910.133 and European Standard EN166. Contact lenses are not eye protective devices. Appropriate eye protection must be worn instead of, or in conjunction with contact lenses.
"Click here"to download all files of this week