Week 15 : Wildcard Week
☛ Assignment
☐ 1. Design and produce something with a digital fabrication process (incorporating computer-aided design and manufacturing) not covered in another assignment, documenting the requirements that your assignment meets, and including everything necessary to reproduce it.
☛ Bio-sourced Materials
I decided to make my Wildcard Week about bio-sourced materials. I am interested in sustainabilty but my knowledge remains pretty poor about it, this week was experimental, yet I try to describe as precisely as I can the processes I followed, the sources that were useful to me, and what I learned through this.
The materials I will use are all bio-sourced, and can all be found easily around us.
Materials I will use :
- Rice
- Wheat flour
- Milk
- Seaweed
- Pine fibers
- Walnut fibers
- Corn starch
- Charcoal
- Agar Agar
- Glycerol (vegetal)
- White vinegar
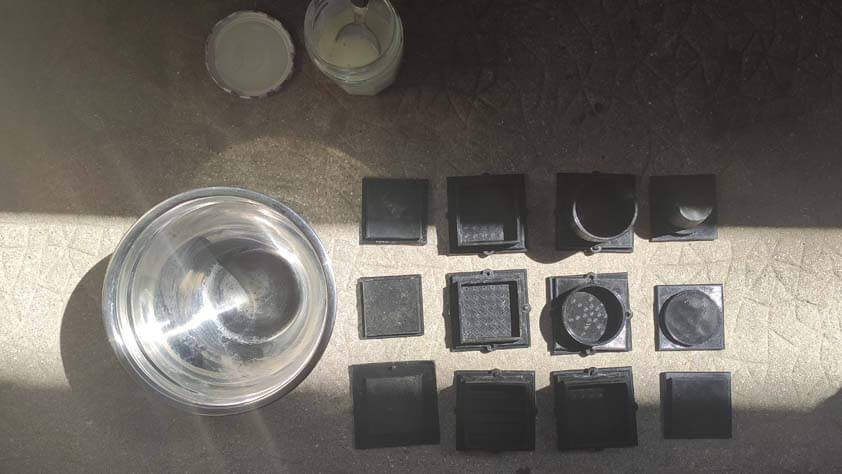
▸ Sampling molds
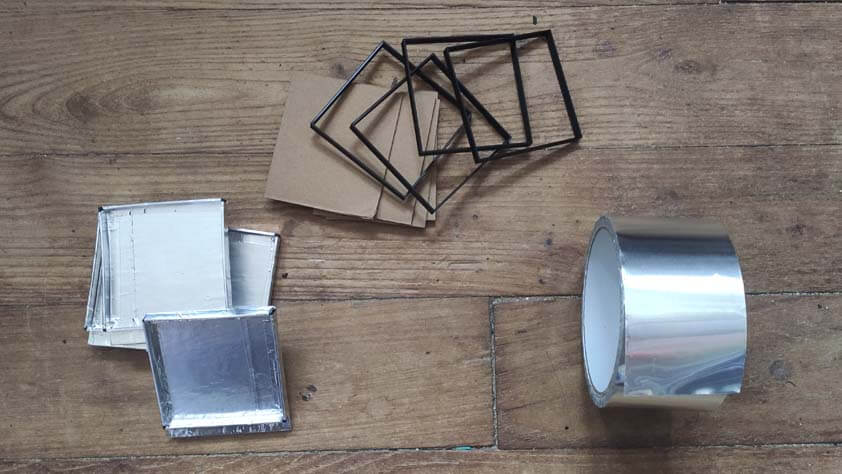
I made 6x6 cm 3D printed molds in order to make samples of the materials I will make. Here is the Zip fil fot these molds in STL format.
As recipes I would use were recommanding to pour the mix on Aluminium, I taped aluminium on a few molds to make sure the liquid will not escape from it and that the surface will allow me to take the result off the mold.
▸ Seaweed preparation
I have the chance to work with seaweeds this week ! Quick story : my sister went to the beach for a week-end and I asked her to bring me seaweeds from there. In order to use it, I put it to dry on my balcony after washing most of the sand out of it.
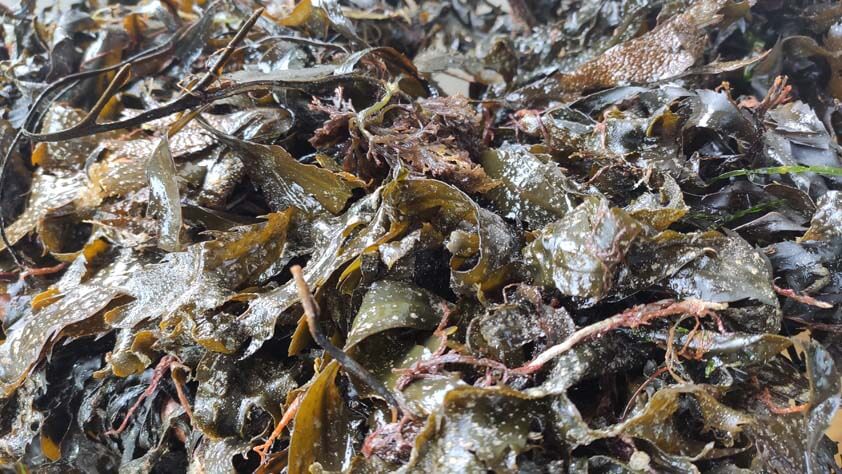

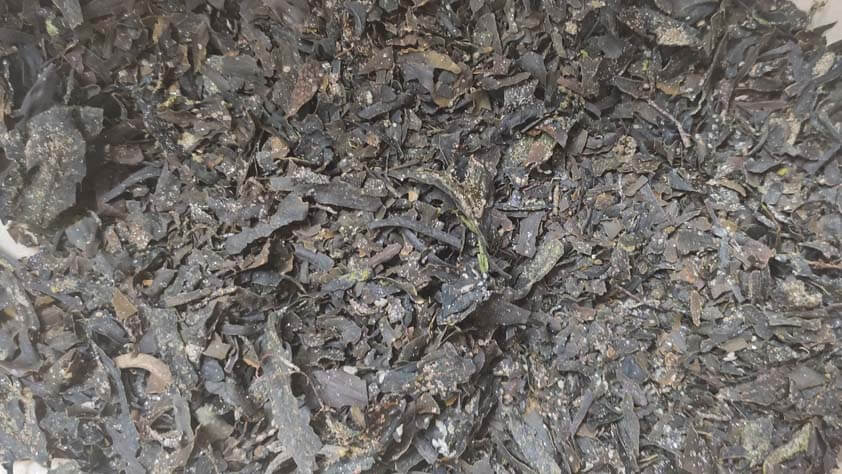
I need to dry it to make a powder out of it, it took several days to dry a little bit as the weather was not realy helping, so I decided to put some of it in the oven. I want to dry it only, so I put it at 100°C for 15 min.
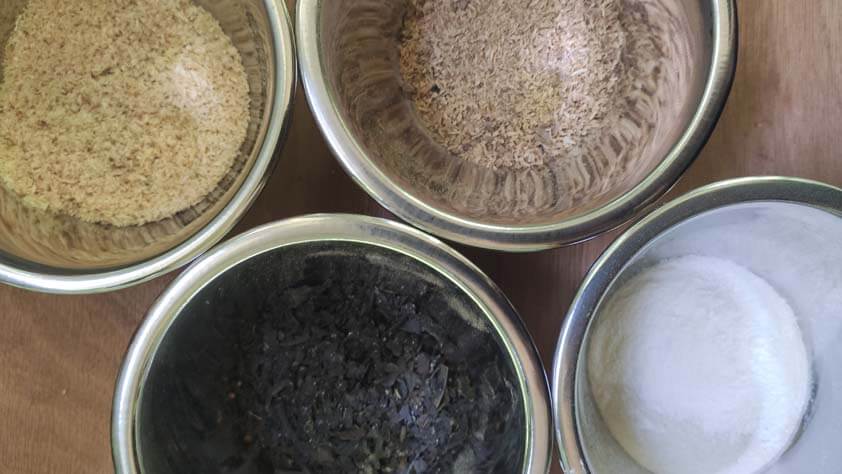
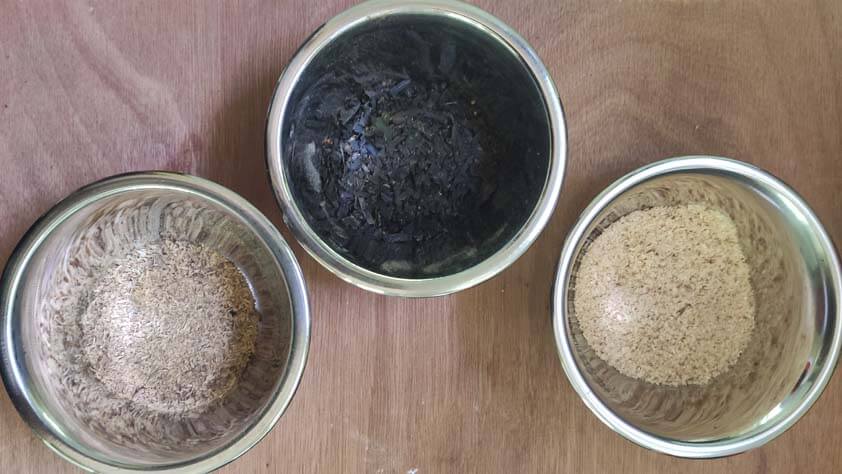
These are some of the ingredients I need, ready to be used : pine sawdust, walnut sawdust, seaweeds and Agar Agar.
☛ Bio-sourced glues
During the Pre-Fabacademy, I had the opportunity to experiment with casein glue and sawdust. Here is a documentation about molding sawdust with casein glue that I wrote. I reproduced this experiment in Week 11 by using Walnut sawdust. As I discovered several ways to make glue with natural ingredients, I decided to try some of them, the result with casein and wood fibers were pretty impressive (to me) so I wanted to compare with rice glue, and wheat flour glue. For casein glue, the mixture of milk and vinegar separates the casein protein from the rest of the milk. When preparing rice and flour glues, water and heat help bring out the starch in these ingredients.
▸ Casein glue
As i wrote just before, the casein glue is milk-based, the process to mke it is described below. Casein glue is known for being efficient with wood fibers.
Here are the indredients needed :
- 1L of Milk
- White Vinegar
- Sodium bicarbonate
- Thermometer
- pH meter
- Containers
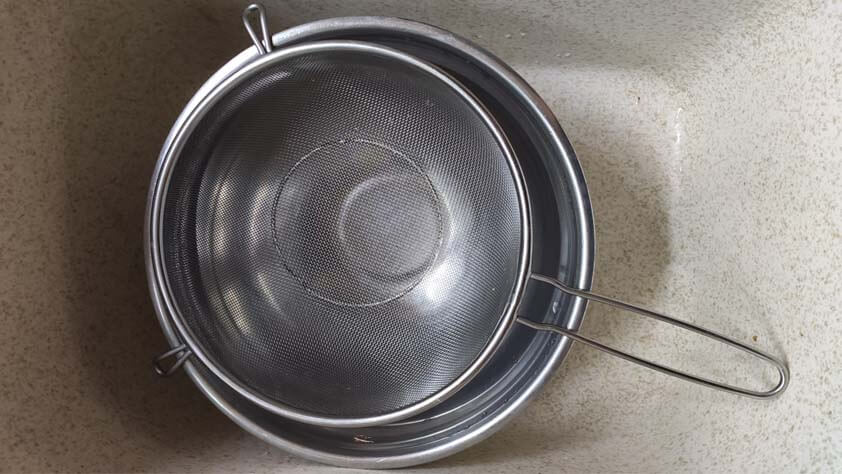
- Fine strainer
- Stirrers/spoon
Here are the tools needed :
Here are the step to follow :
- Heat the milk up to 40/50 degrees
- Stop heating the milk and add vinegar in order to obtain a pH of 4.6.
- When the vinegar is added the casein precipitates, let it separate for a few minutes.
- Sperate the casein from the milk using a fine strainer
- Add a spoon of sodium bicarbonate or baking soda in order to degas the casein
For a better documentation about casein glue, I would recommend to read the documentation I linked earlier. This week I wanted to mix casein an charcoal.
I wore a mask, gloves and glasses when working with charcoal powder, I also did it outdoor to make sure it was ventiled enough. It is very volatile and it is not safe to breathe it.
Casein and charcoal alone does almost nothing, the mix has a shape, but not resistance at all when it dried.
▸ Rice glue
Rice glue is made by heating rice for a pretty long time to extract the starch from it. It is use mostly for paper craft and paper art in Japanese culture.
- 200g of Rice
- 350ml of water
I "cooked" rice for almost an hour and used the thick liquid that it had formed in the pan.
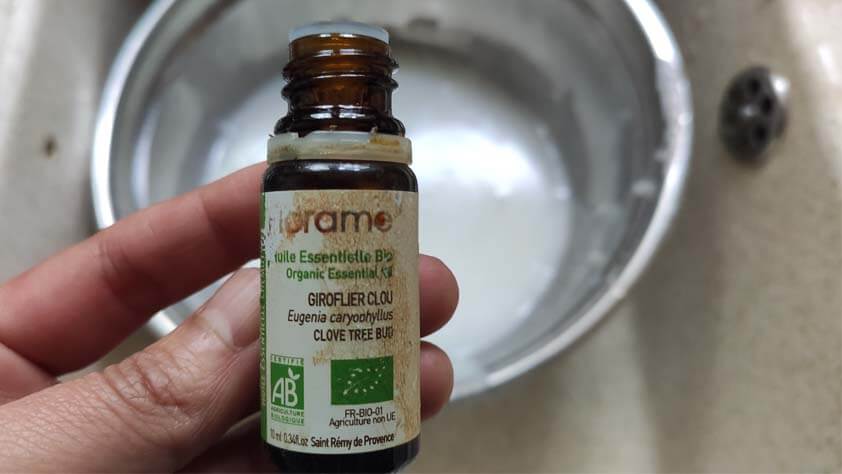
I added clove essential oil in the rice glue as it has bactericide properties, so I can keep it longer in the fridge.
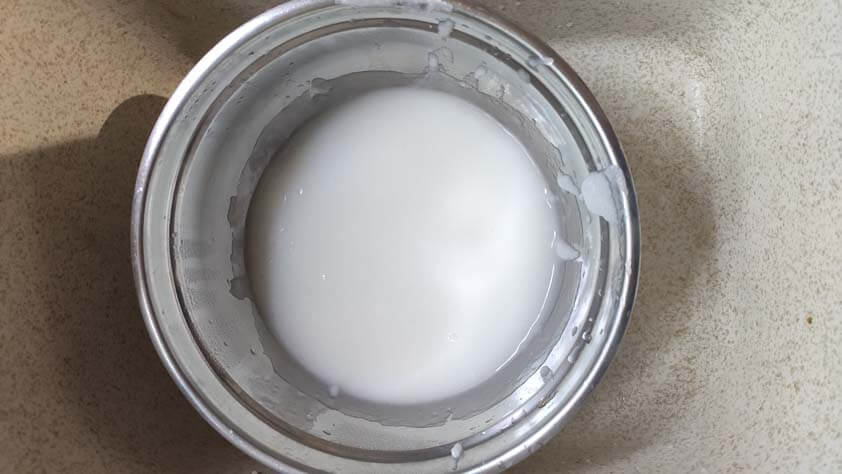
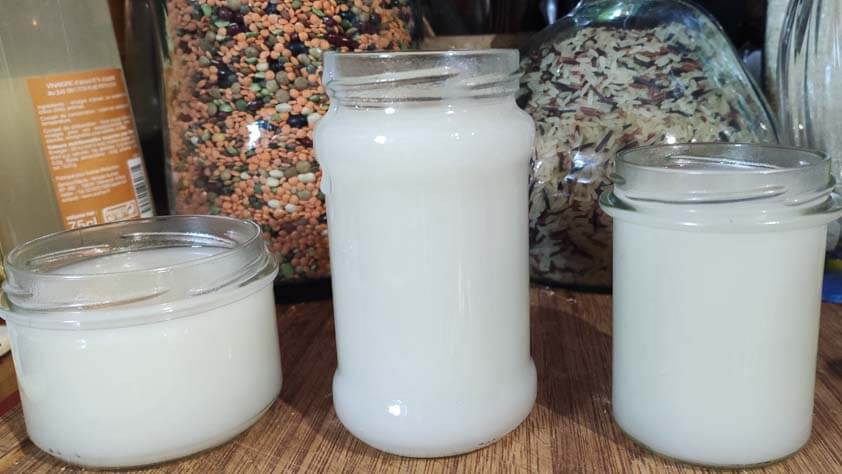
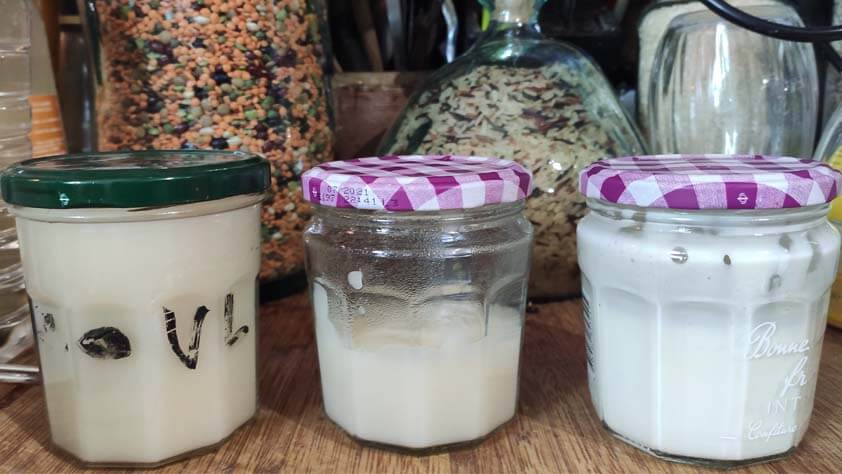
Here is the rice glue I made.
Here are the materials I will mix the rice glue with. Pine fibers, seaweed powder, and walnut fibers.
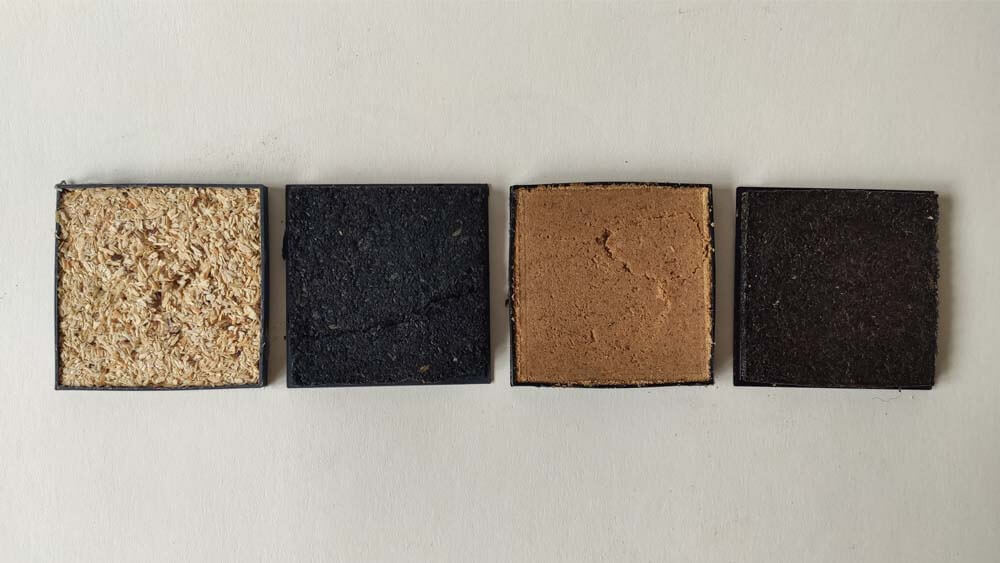
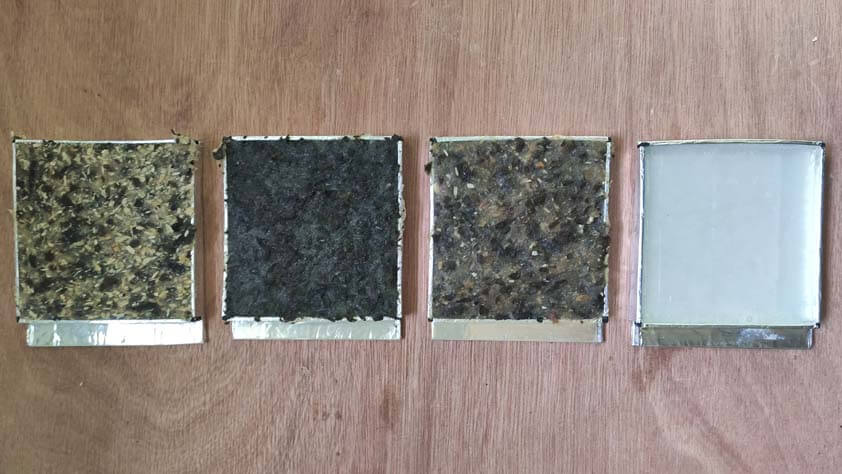
Here are the samples 48H after pouring the mix into the molds. From left to right : Pine swadust + rice glue, Charcoal + pine fibers + rice glue, Walnut fiber + rice glue, seaweeds + rice glue. The sample are not dry yet, but already wood fibers and rice does not seeam to bond a lot. The result of the seaweed and rice glue mix seems to be more promising.
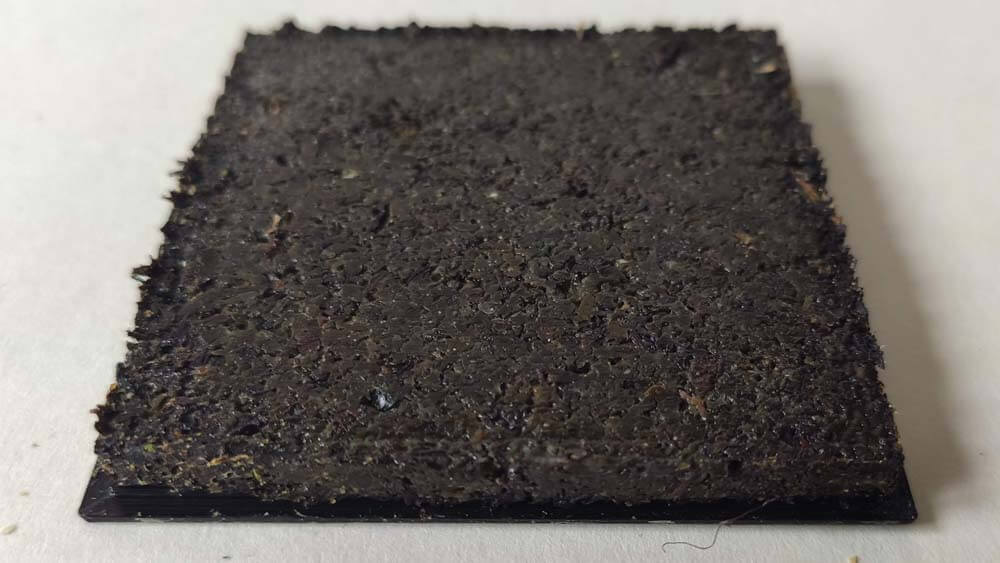
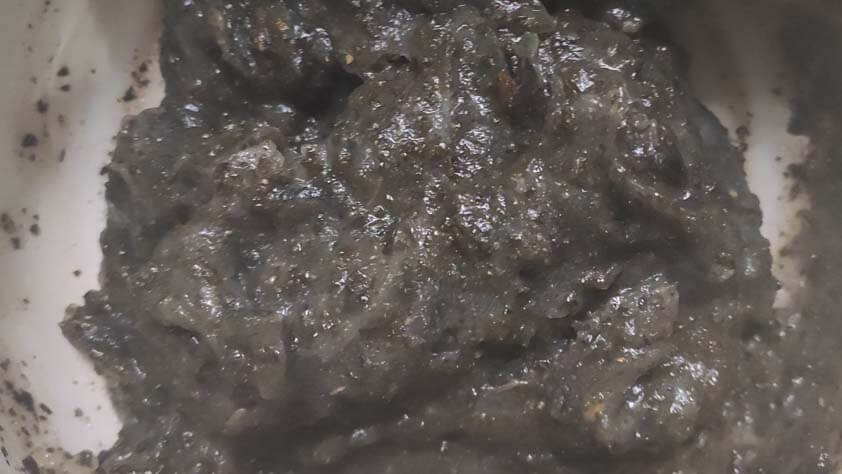
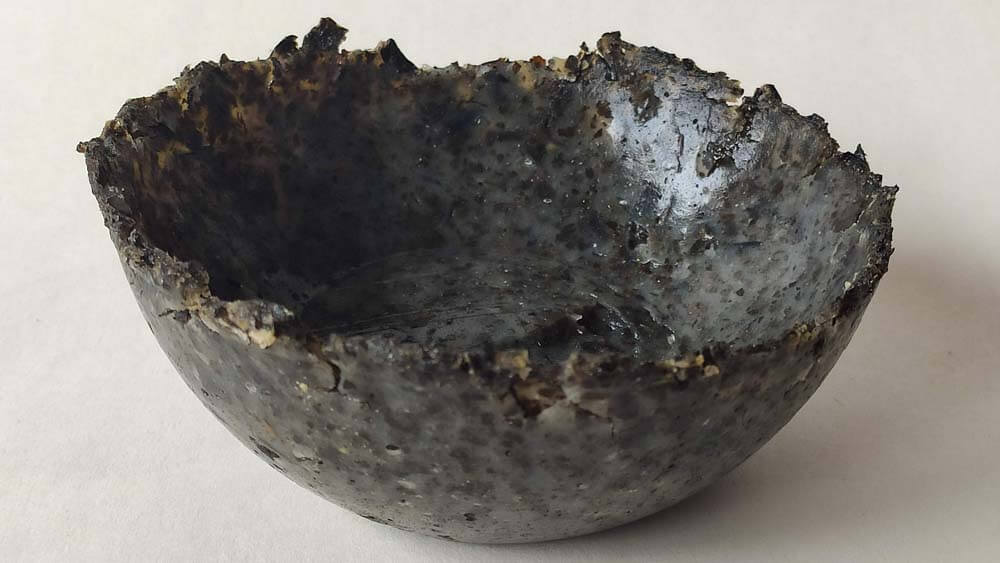
Here is a close up on the seaweed and rice glue mix, 48H after molding it. It has dried on the edges only.
▸ Wheat glue
Another glue that is for paper craft, or papier maché, efficient with paper. But I will try to use it with other materials to see what is the outcome. Similarly to rice glue, the process of cooking it is to heat it to extract the starch out of it.
- 2 cuilleràsoupe of Wheat flour
- 1 cuillereacafé of Sugar
- 10 ml of Water
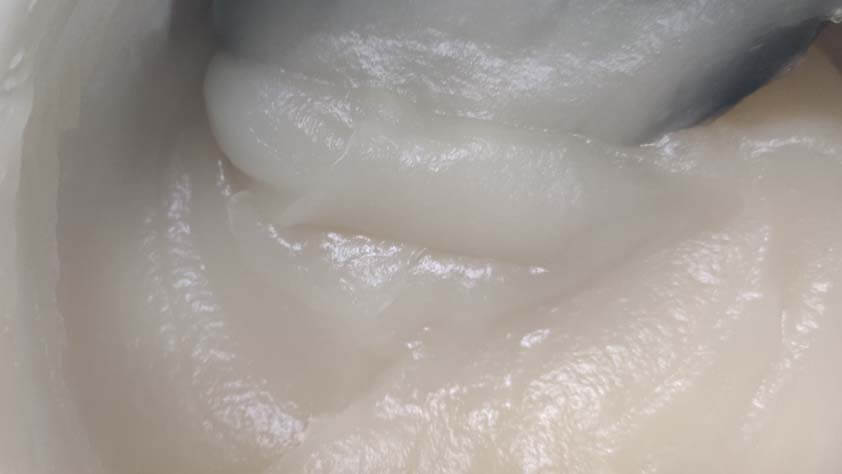
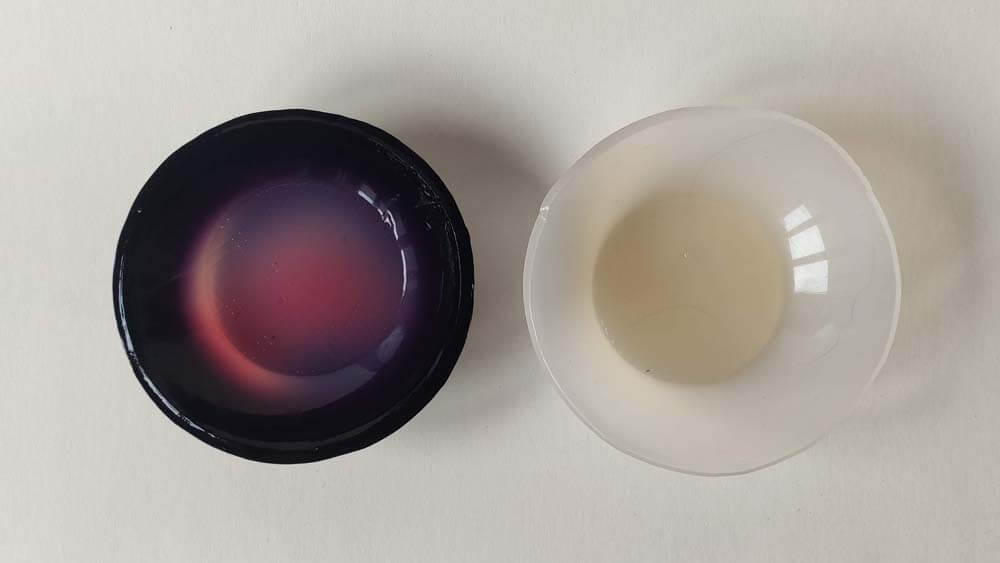
This recipe takes 20 minutes, here again I added clove essential oil for its bactericide properties. The images below shows the flour glue on the left, and the casein glue on the right.
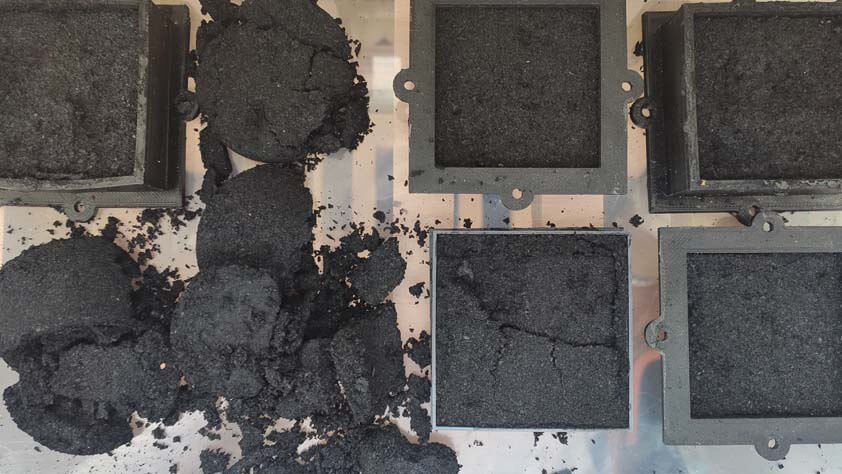
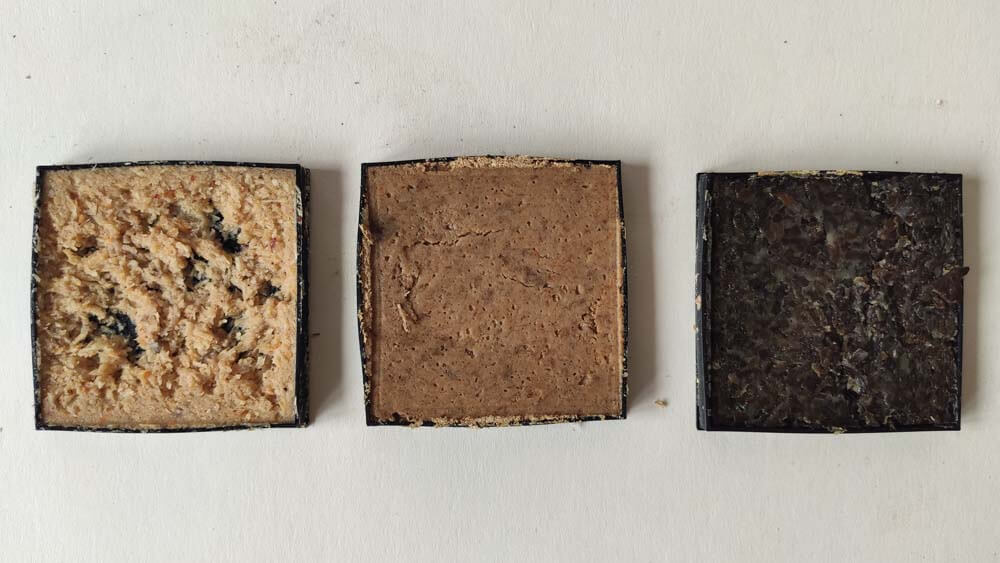
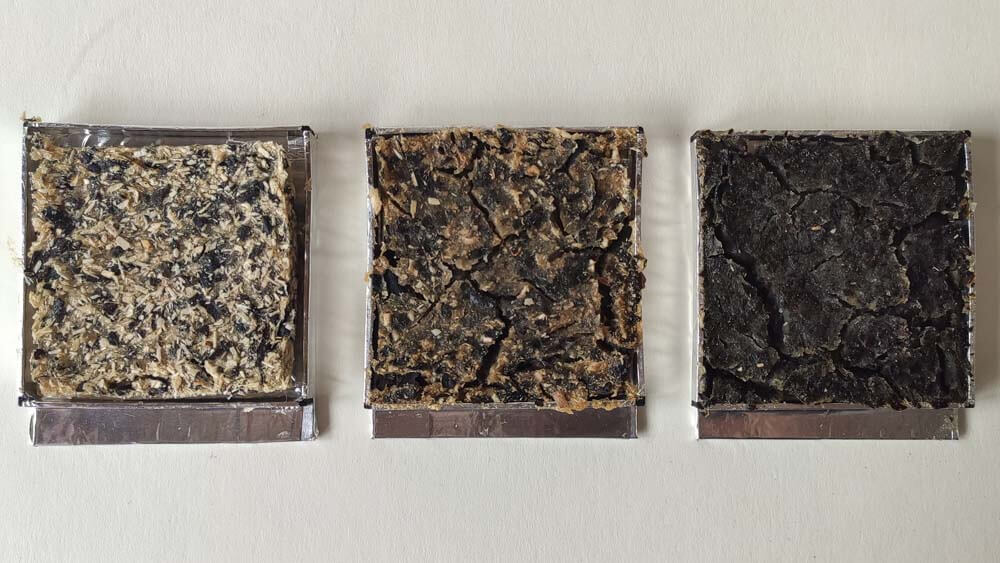
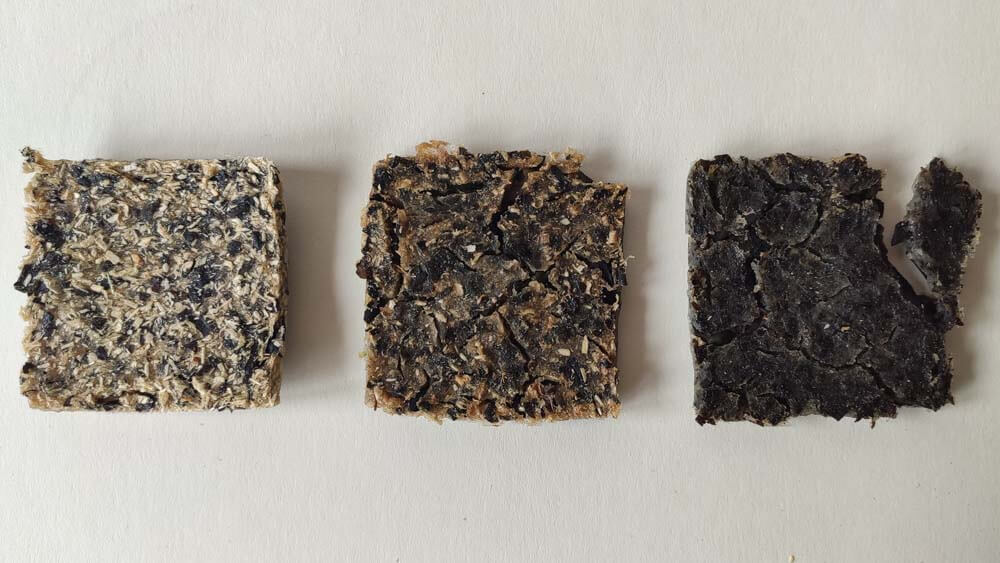
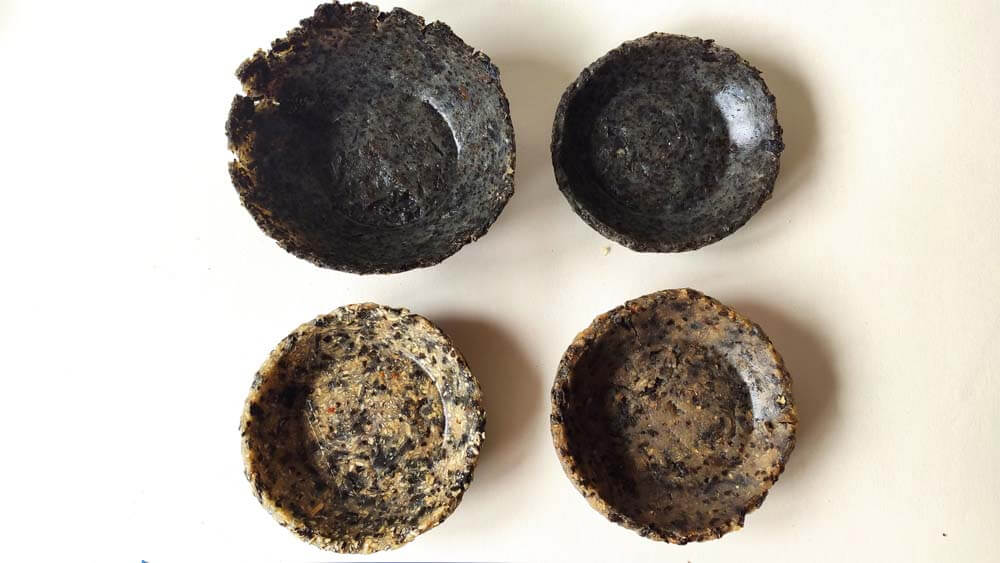
Here are the demolded samples, pine and flour glue did not showed great results, walnut is better but doesn't seems to be very resistant. I broke the seaweed sample by trying to put it out of the mold while it hasn't dried completely, but from these three samples, the seaweed mix seem to be the better. To be updated when it has dry.
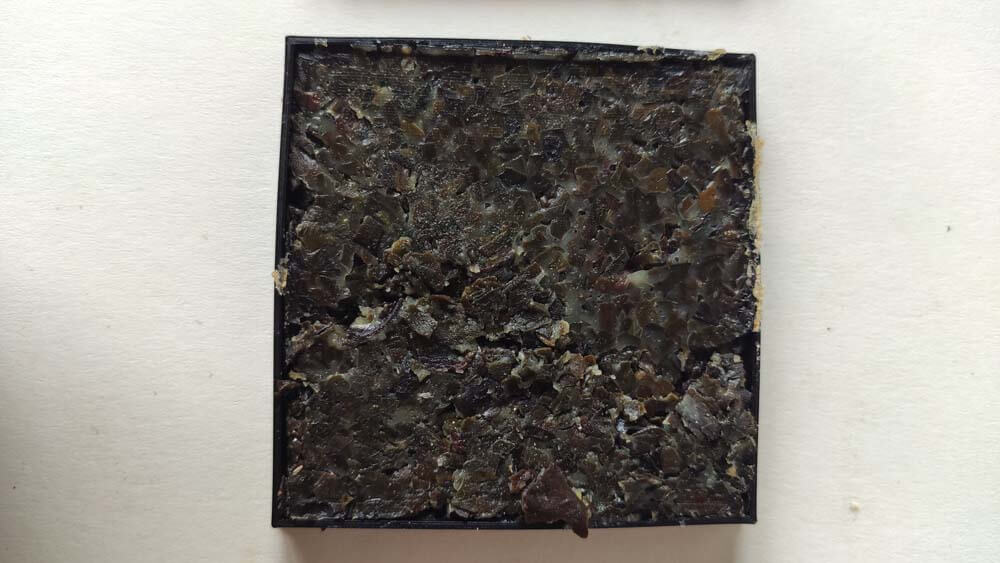
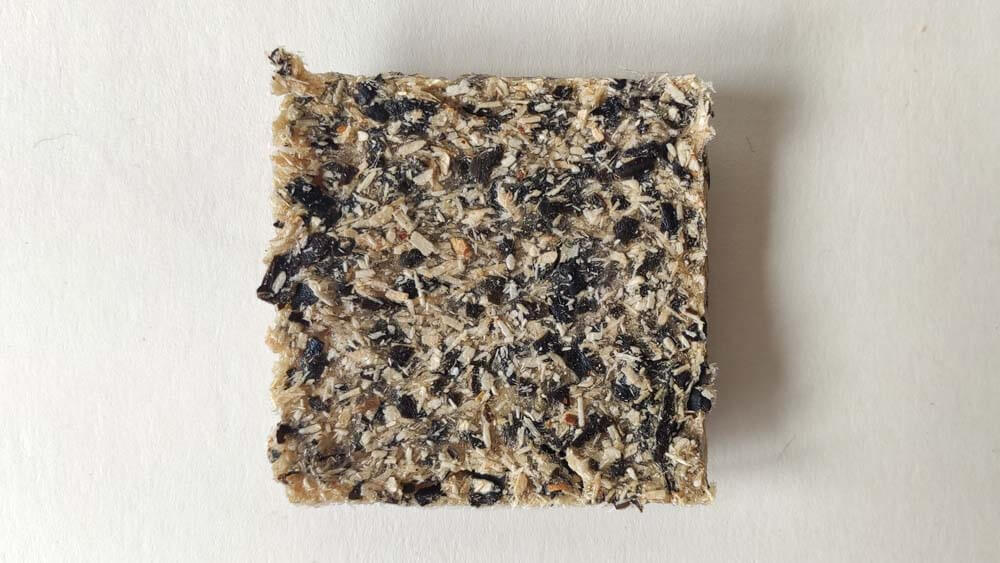
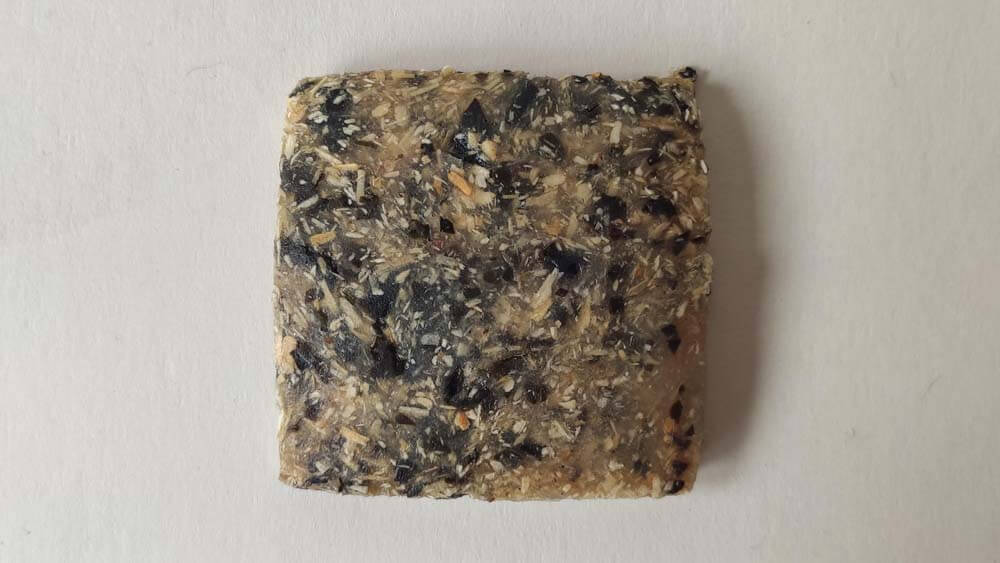
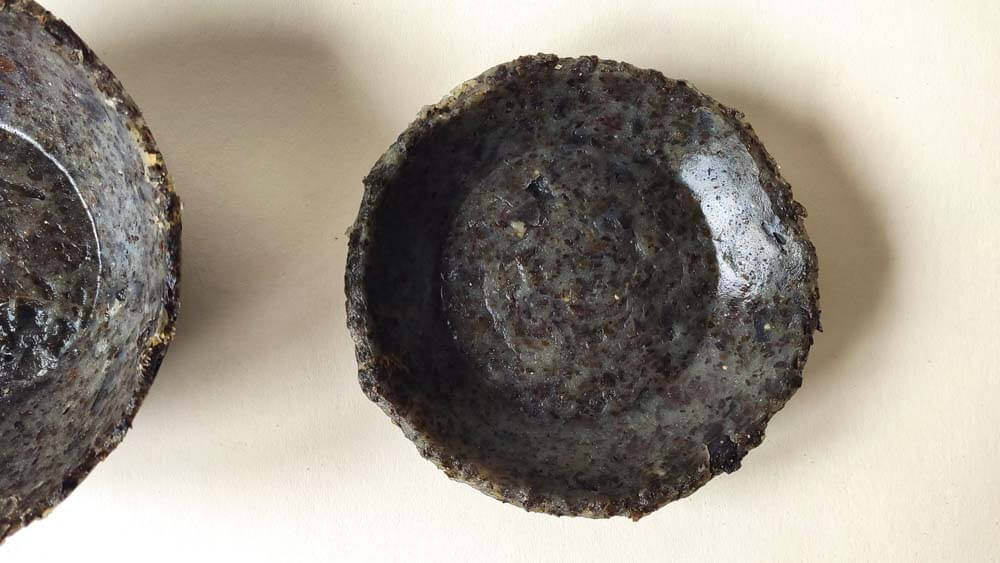
Here is a close up of the flour glue and seaweed mix :
☛ Sea-based Materials
As this whole material field is pretty new to me, I spent some time to read about bio-materials, to look for recipes that were easy to make, with affordable ingredients that are eaasy to find as well in nearby gorceries.I began to look for recipes on Materiom, then I found other sources and recipes book on Issuu. I found this SYMLAB recipe book on Issuu, and it is where I found the recipes for the Agar plastic, and the starch leather.
▸ Starch Leather
Recipe by Talisa Dwiyani
- 10g of Agar powder
- 200g of Water
- 30g of Seaweed powder
- 30ml of Glycerol
- 30g of Corn starch
- 20ml of Vinegar
Ingredients :
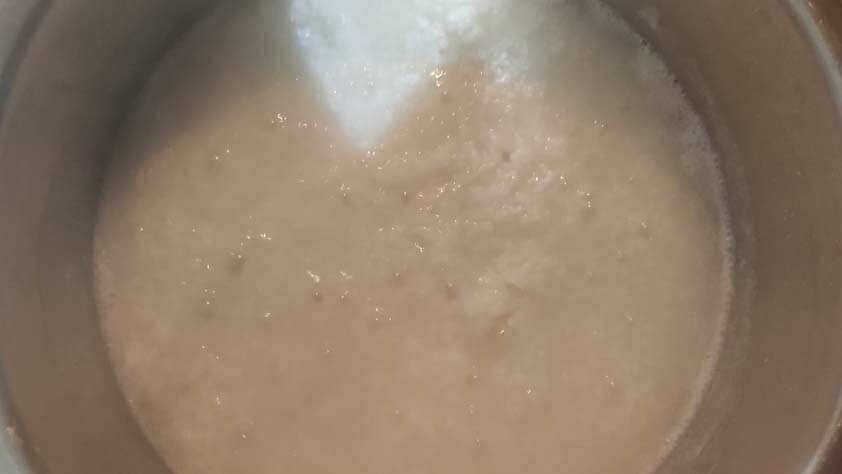
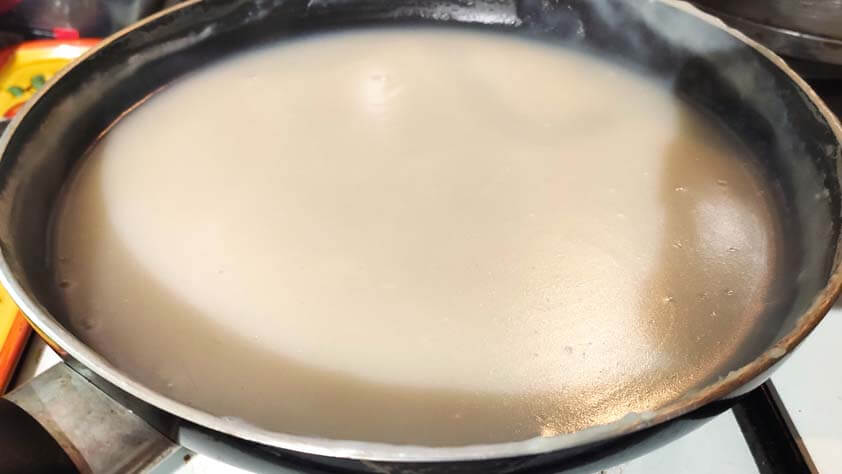
This recipe was surprising to cook, at first, when mixing all of the ingrdients but seaweed powder, it look like milk. While the mix is heat and stirred up, it becomes thicker in a few minutes, in less than 4 minutes, it becomes a thick gel.

The next step is to add the seaweed powder and to cast it into molds.
I tried two other variations with the sawdusts I had. I reproduced the recipe and separated the gel in two equals parts, in whiwh I added 7.5g of seeweed and 7.5g of sawdust in each part.
The images following are showing the molds right after the pouring part, and 48H after on the right.
Here are the samples demolded. The pine mix is more resistant than the two others. An hypothesis to explain that might be the amount of resin that is higher is pine sawdust ? The seaweed result broke into pieces, this was specified to be a possible result when using agar agar, but I think it might be related to the size of the seaweed fibers I used.
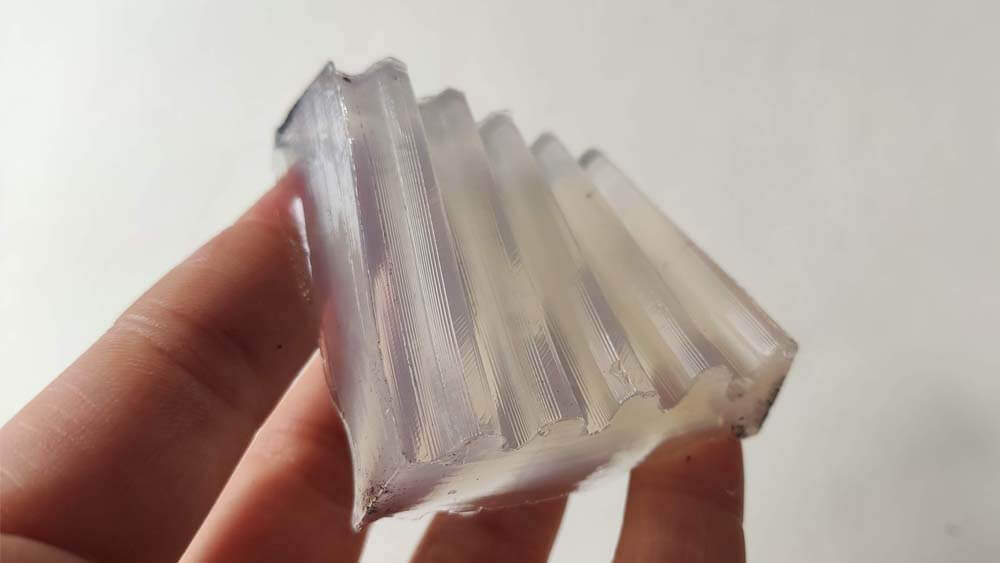
Here are close-ups on the Starch leather with pine sawdust from both sides. There is a deformation, the sample has retracted of almost 1.5 mm on each side, it is also curved. Gravity also structured the sample, the liquid came to the bottom of the mold.
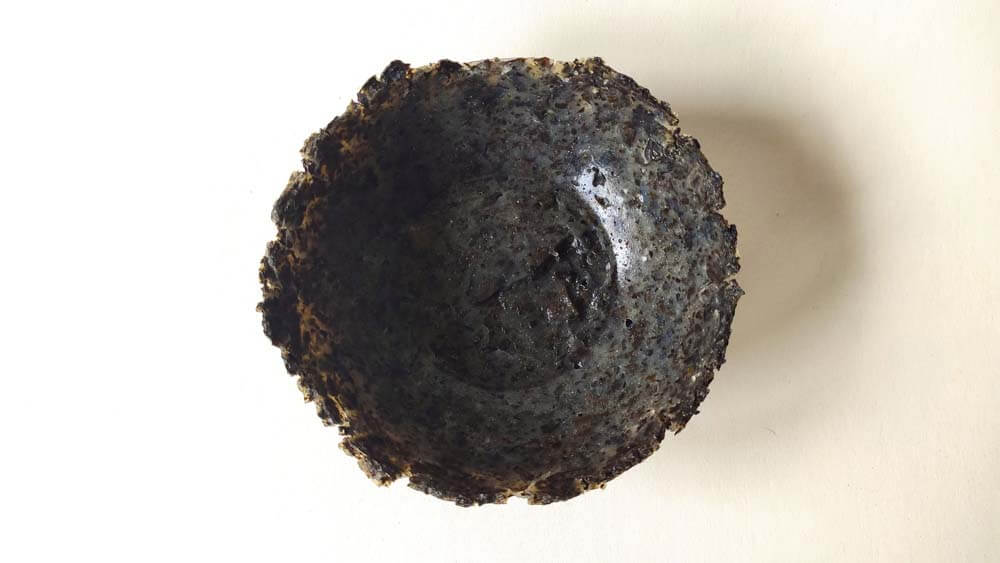
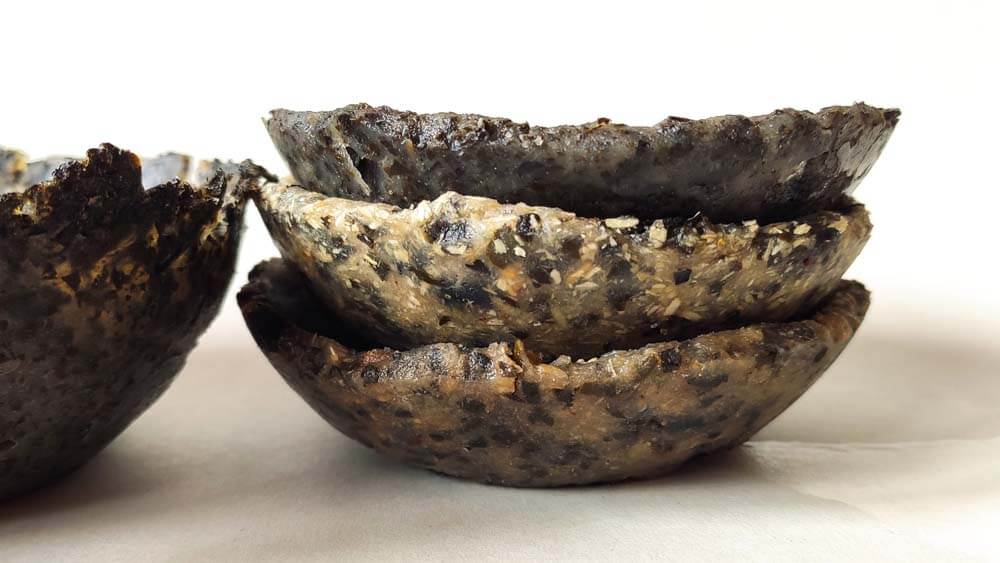
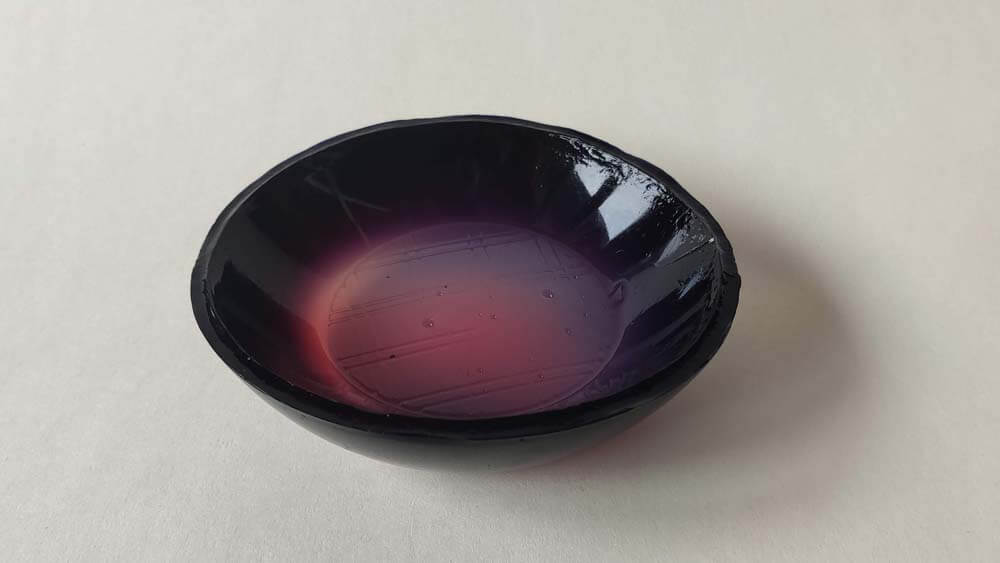
I poured the mix into bowls to mold them into ones. Here is the result for the original starch leather recipe 48H after preparing the mix.

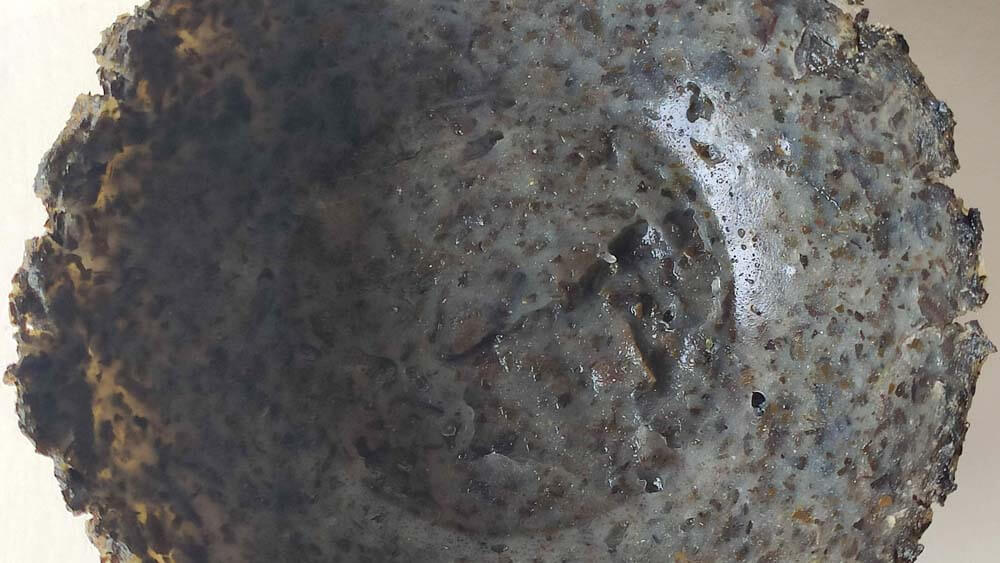
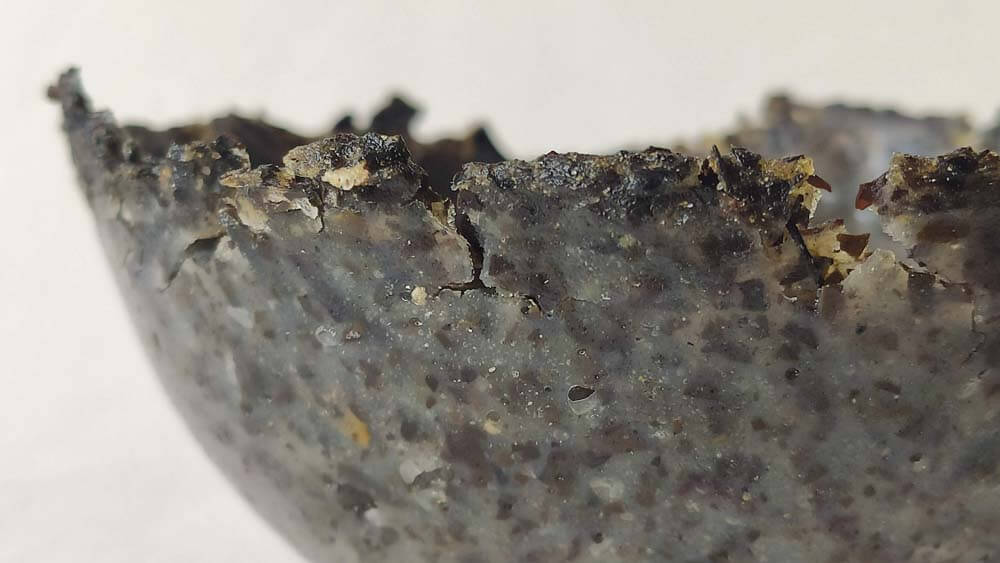
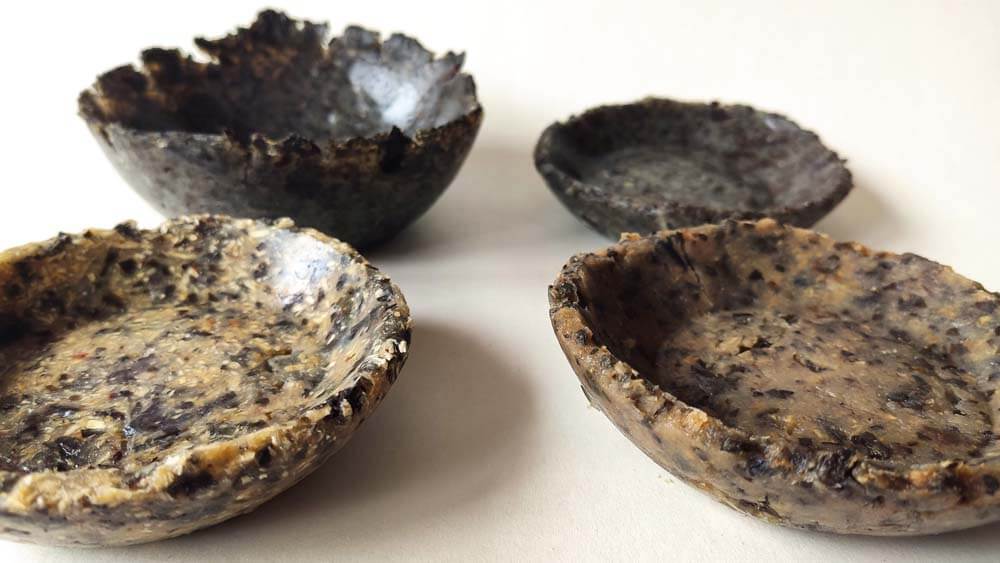
It doesn't semm to be totally dry yet. Here are all the tests I made using the starch leather recipe with seaweeds and wood fibers. The more resistant result for now seems to be the pine mix, I will update this documentation in a few days.
▸ Agar plastic
Another surprising recipe is the Agar plastic. It is made with three ingrdients, that are listed below, and the result was unexpected.
Recipe by Alysia Garmulewicz
- 4g of Agar powder
- 25ml of Glycerol
- 420ml of Water
Ingredients :
The recipe's steps are the following : Mix all the ingredients, and heat them up slowly. The liquid should become a little bit thicker, but it should not be boiling. I had to remove it from the cooker and let it cool down several time before the liquid behaved as described in the recipe : with little bubble inside, thicker. When this state is obtained, and that it begins to boil, it is ready to be skimmed, then poured into molds.
I added food colorant at the very end, as specified in the recipe.
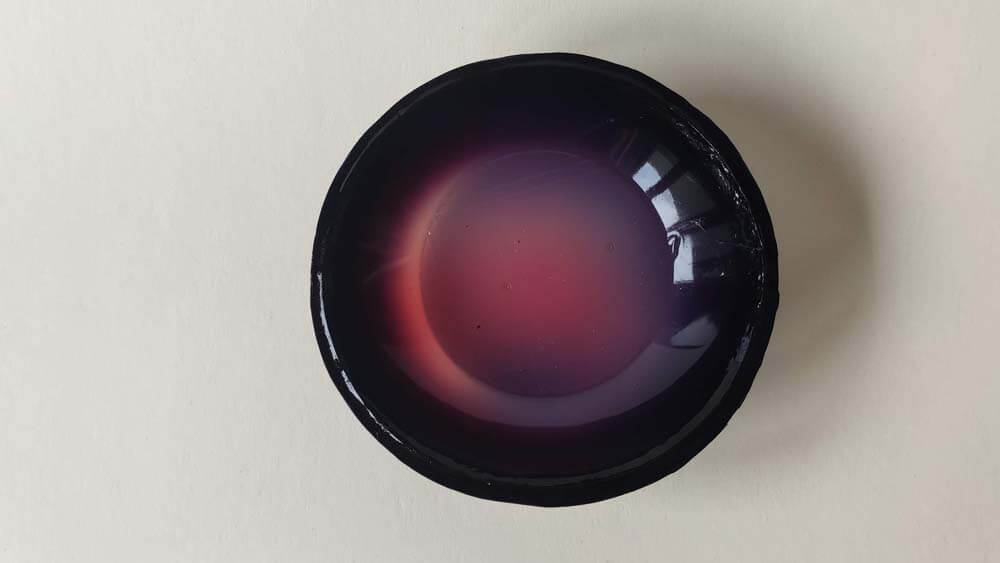
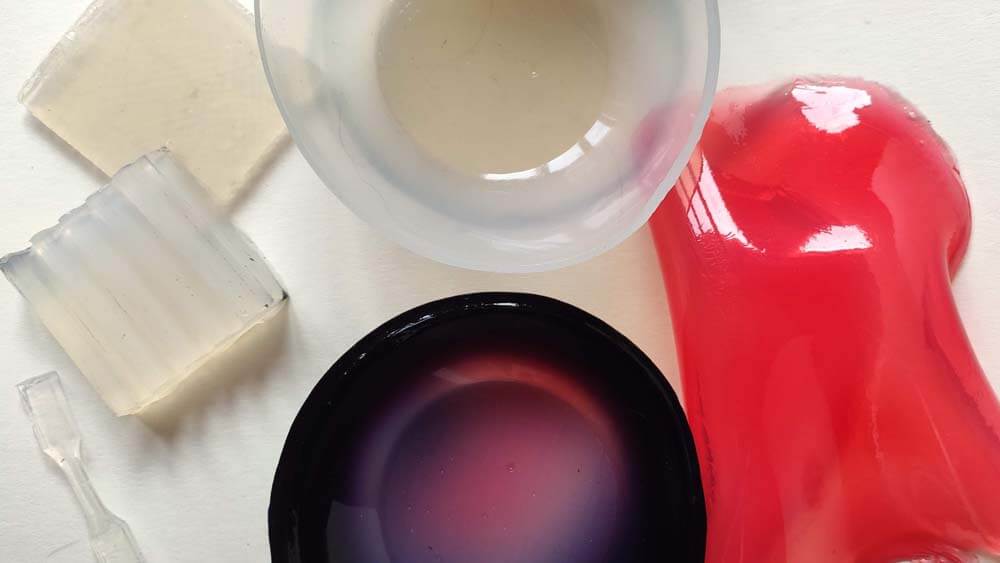
The image below dhows the result for the agar plastic preparation :
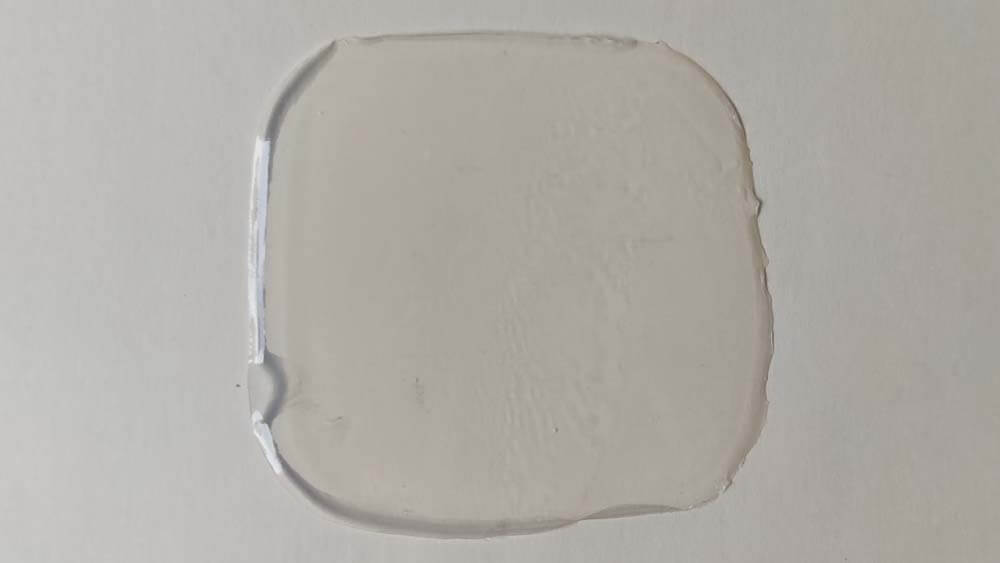
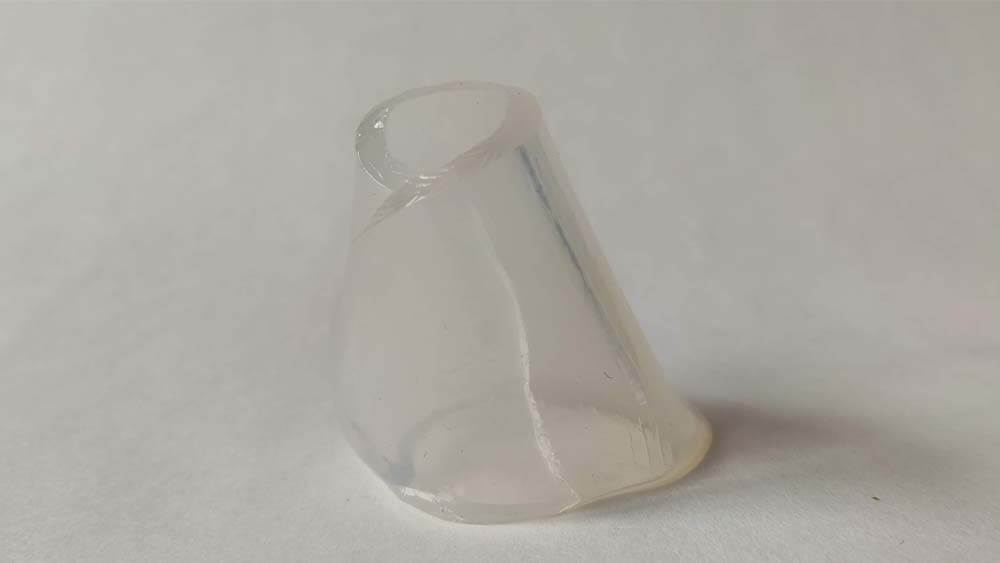
I also poured it in the 3D printed molds and here is the result. The recipe sais that it has to dry for 2 to 3 days, in a few hours it has already dry, in surface at least.
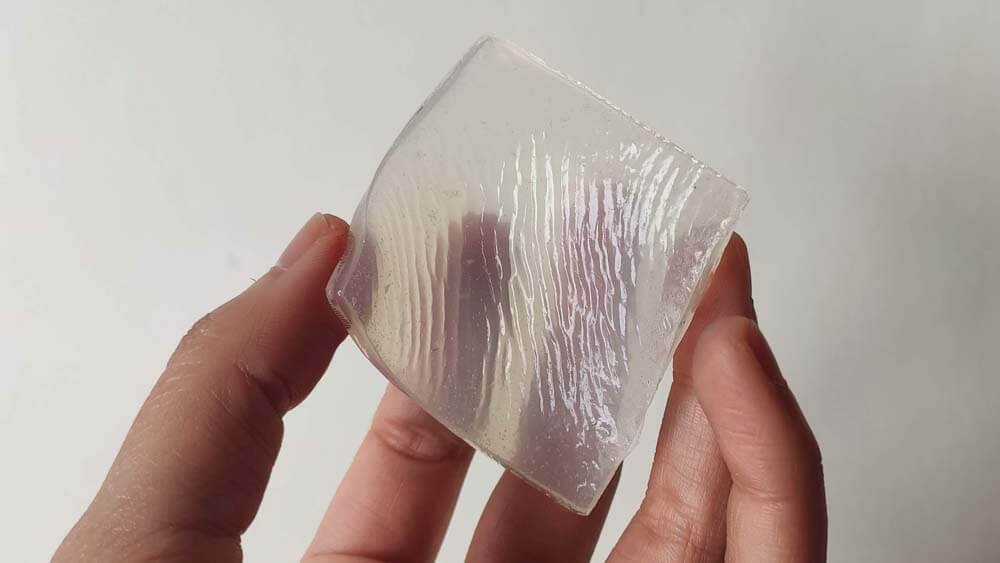
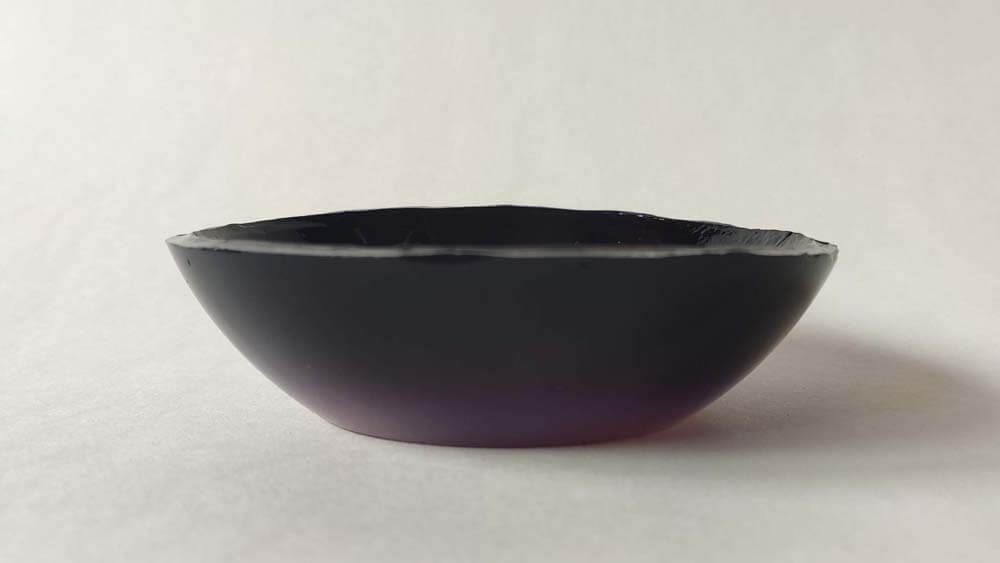
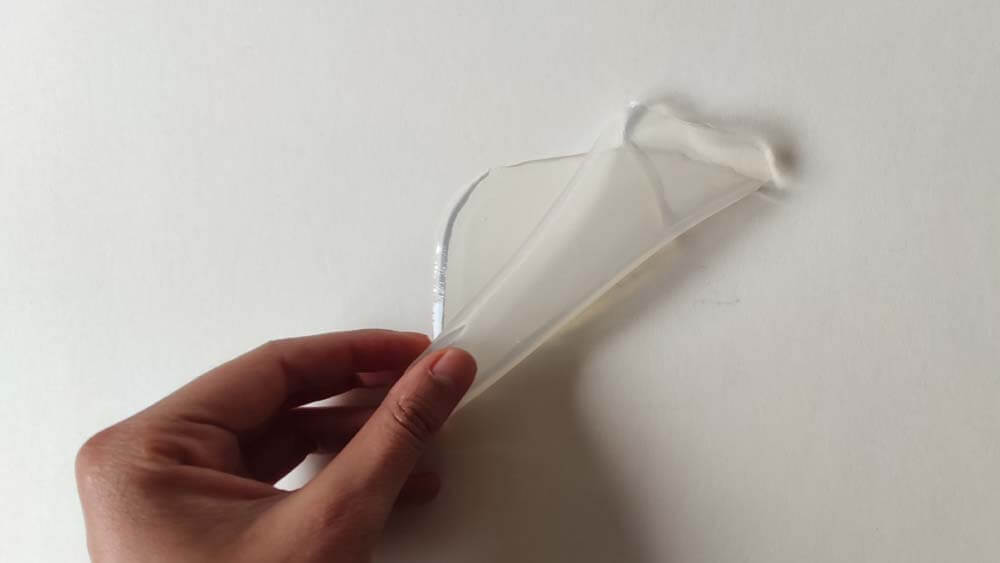
It makes a material that feels similar to the silicones from week 11, and it moght make molds actually, but what could be poured in it ? I also poured it in a mold I made for my casein tests initially. The material is alsmot transparent and efficient to "print" a surface.

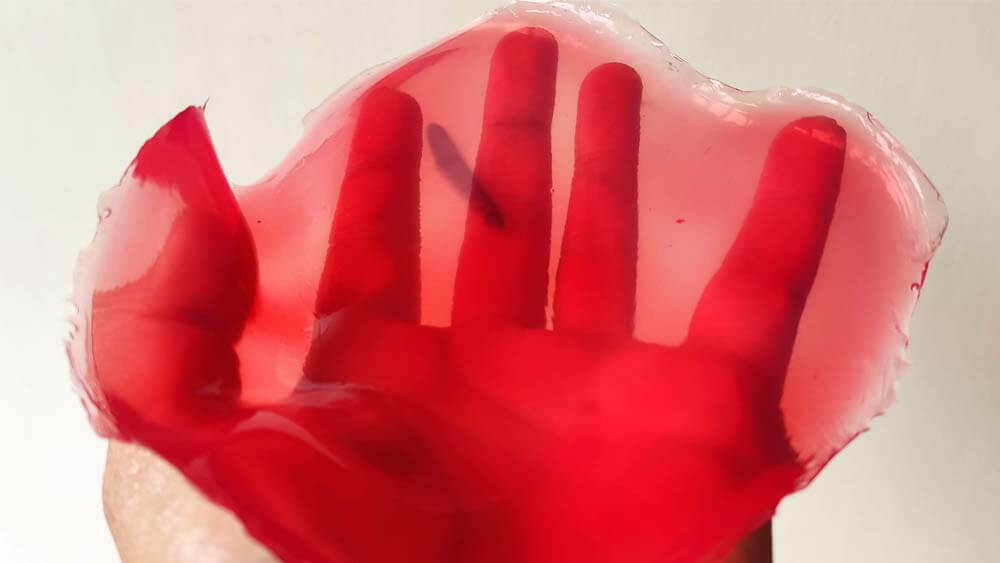
I poured it in plates to have a plane surface, it could have been acrylic with a frame. I added food colorant at the end alt="g"in, here are the results 15H after pouring the liquid in the mold.
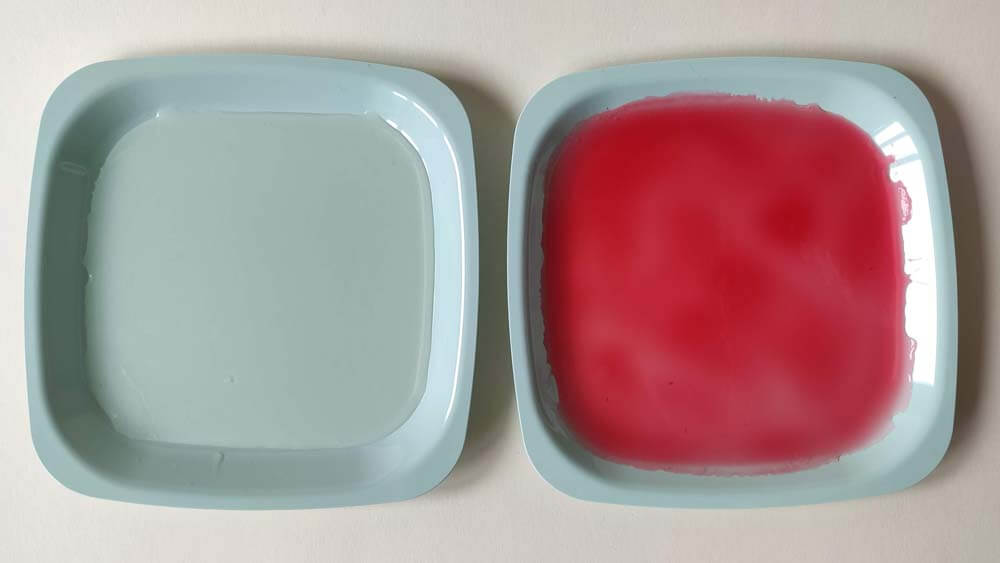
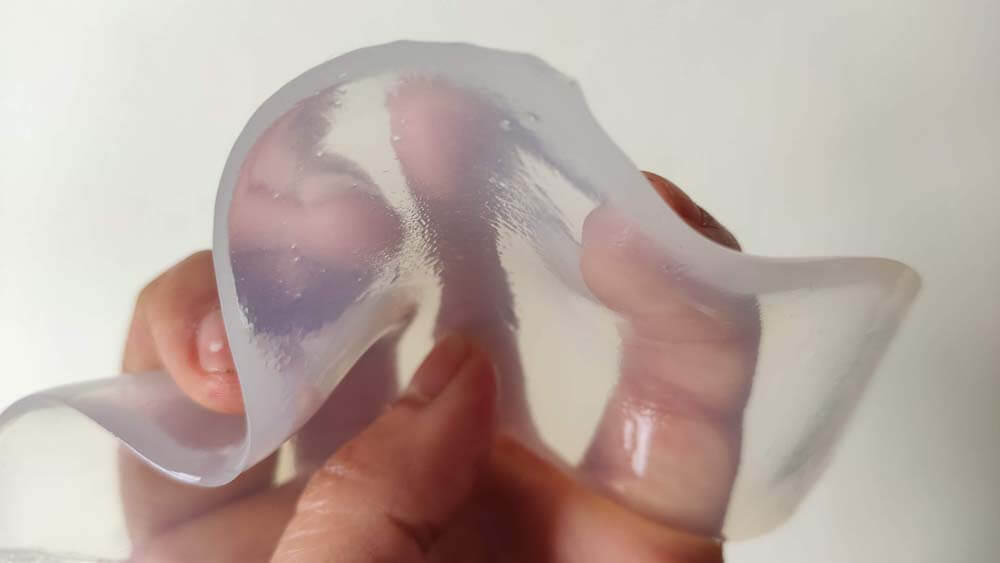
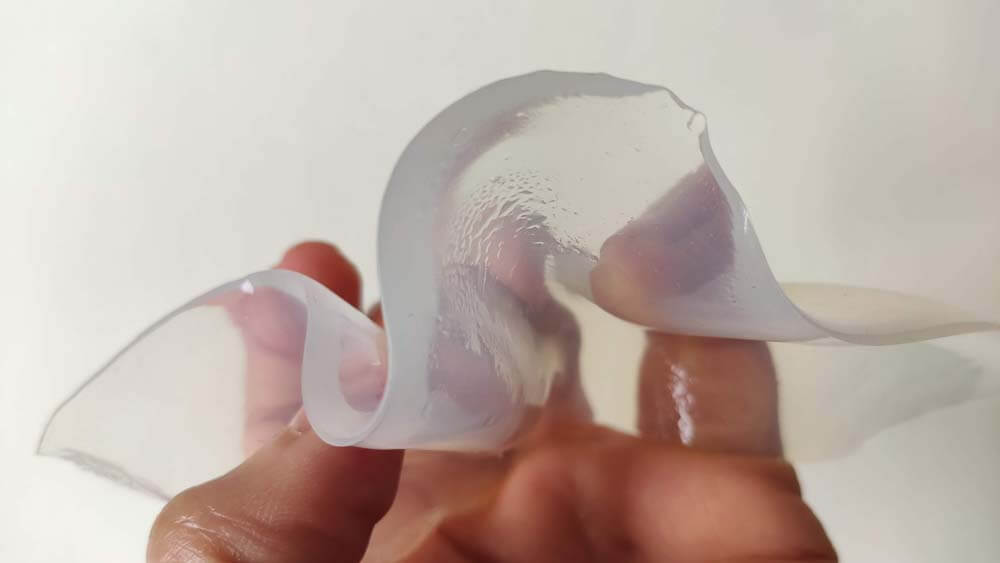
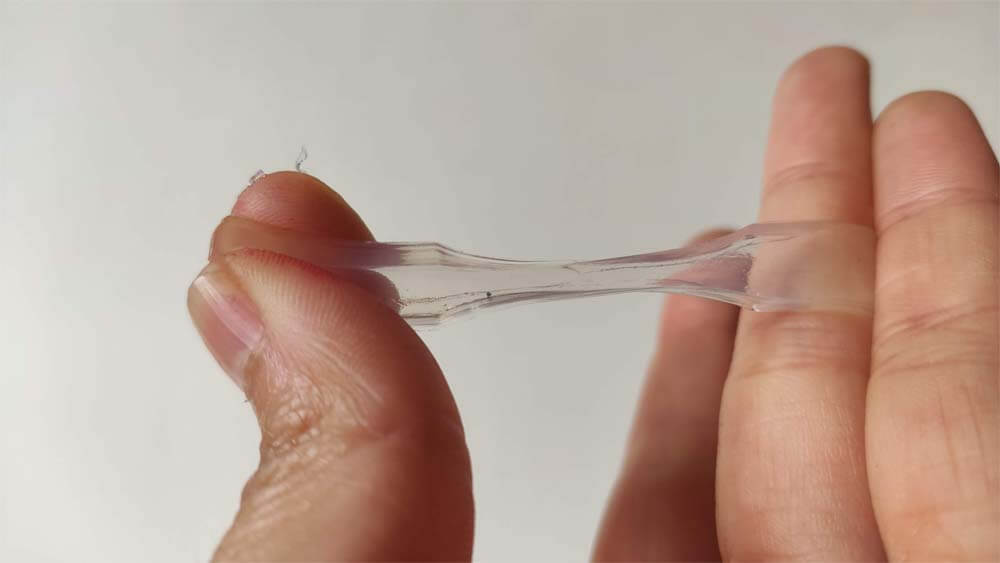
The material obtained is flexible, and seems pretty fragile. But I will have to wait longer to see what it looks and feels like when it has dried.

Here are almost all of my results with agar plastic, I let most of the dogbones and a few tests in their molds, to wait for them to dry completely.
☛ Testing Materials
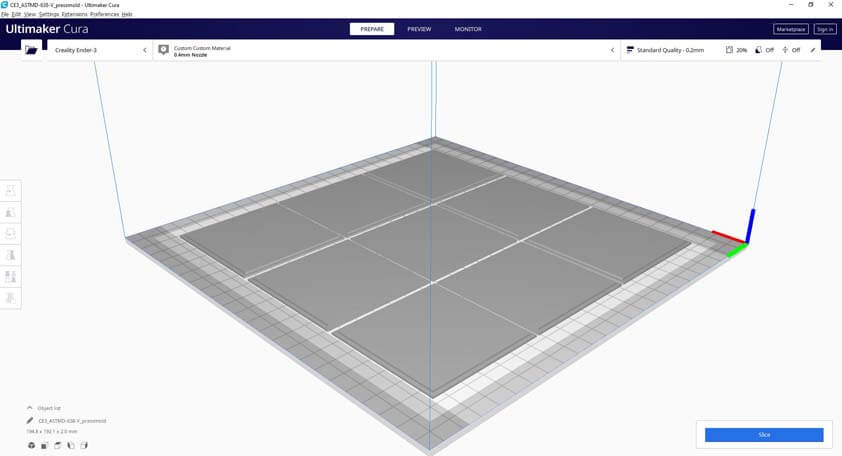
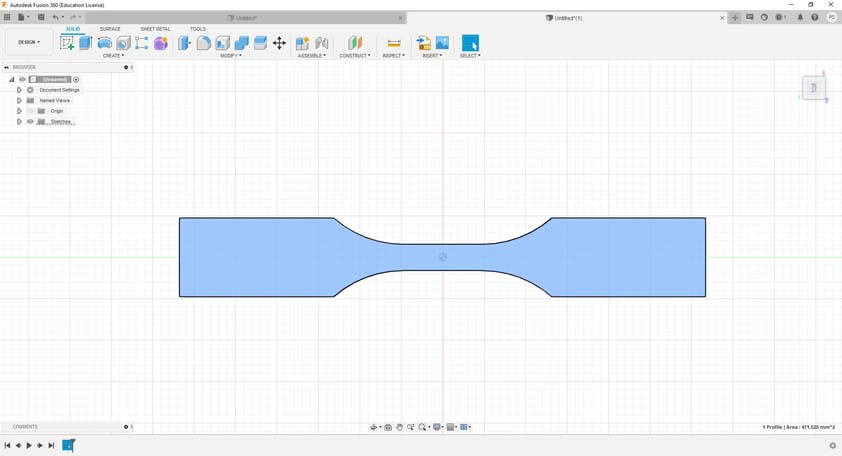
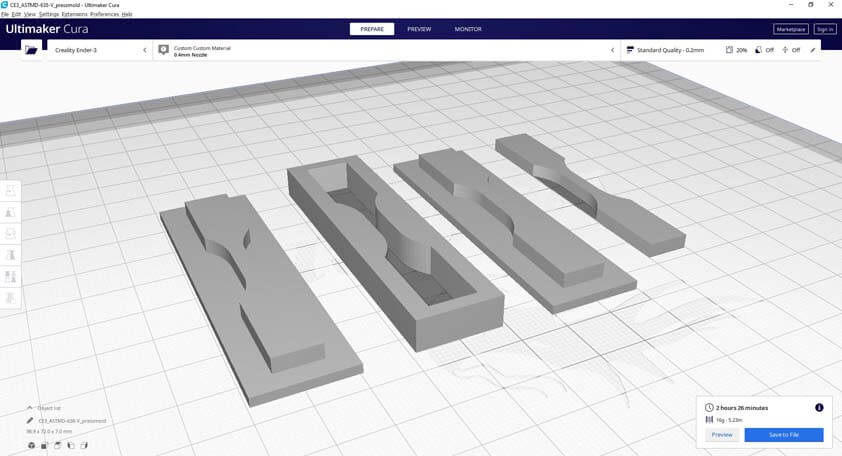
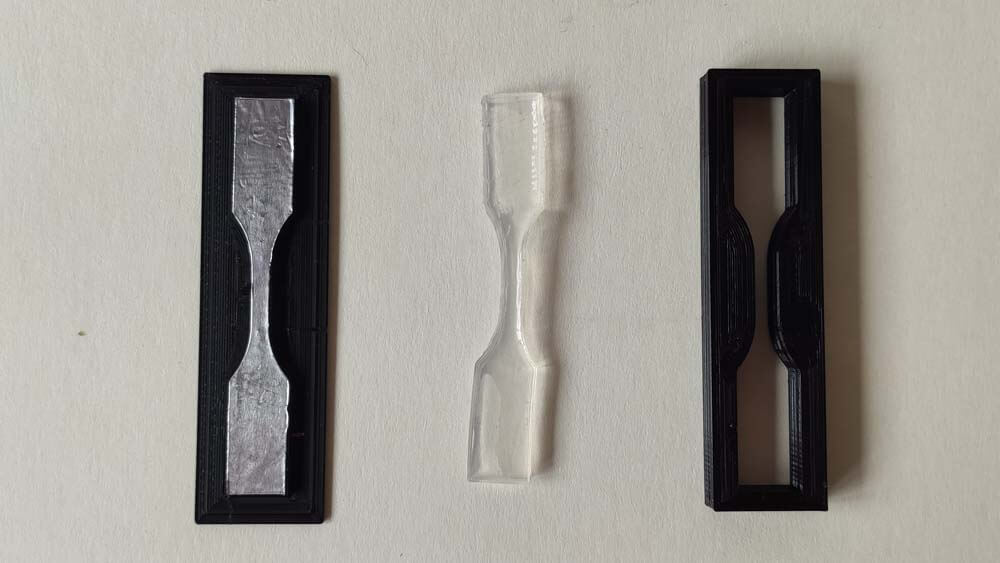
At the Fablab Digiscope, students are making Jake Read DEX machine, as it interests me a lot I decided to try to make dogbones that will be uselful to test the tensile strengh of some of these materials (hopefully). These tests are standardized, and I will used the ASTMD 368 V standard in order to test the Agar plastic. Here are the files I made for quick prototyping ASTMD 368 V dogbones 3D printed molds.
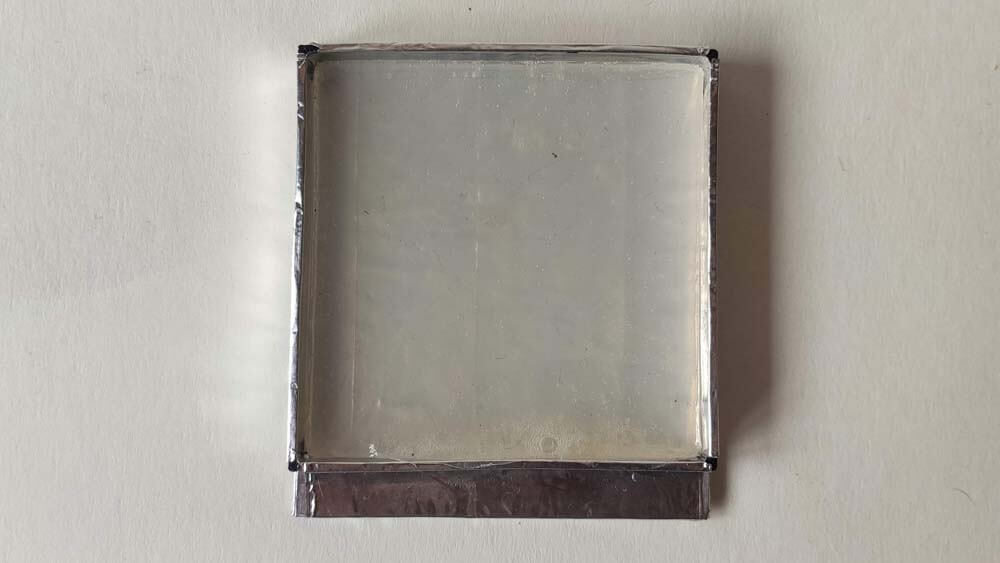
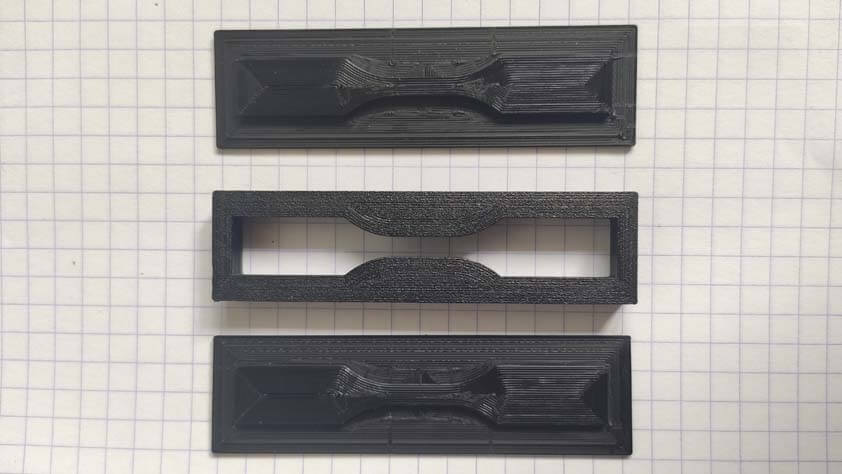
I taped aluminium on the molds in order to make sure that the surface would be plane.
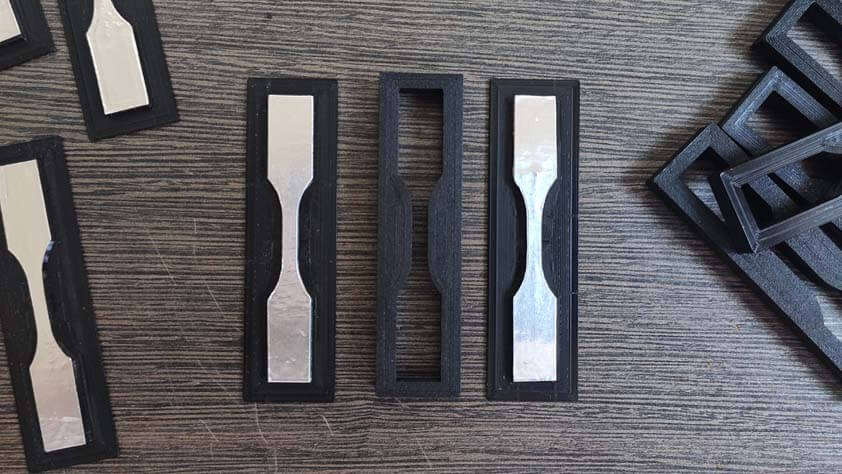
Here is a first result. I will have to discuss this method with someone that knows this subject better. From what I understand, the plastic for these tests are generally injected. It is not a process that I know or that I can reproduce, still, I need these dogbones to have a precise thickness, that is 3.2mm +/-0.2.
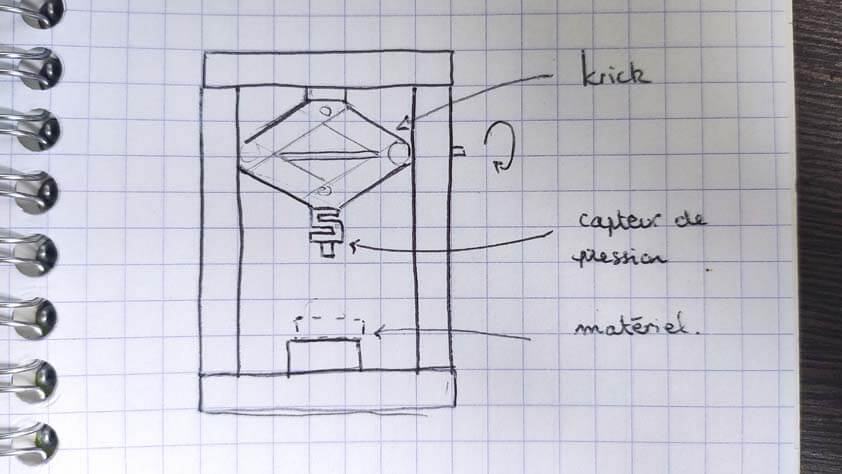
I don't think casein tests would be resistant in this structure, and tin this thickness. What I would like to test about this material would be the resistance when the material is compressed. For this, I will need a machine of this kind.
☛ Milling testin with Casein and Wood bio material
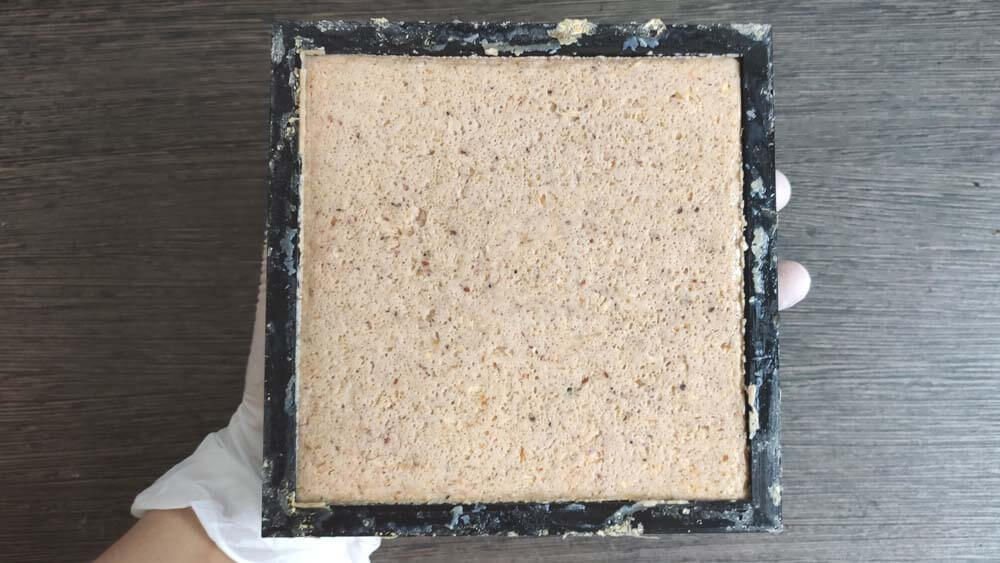
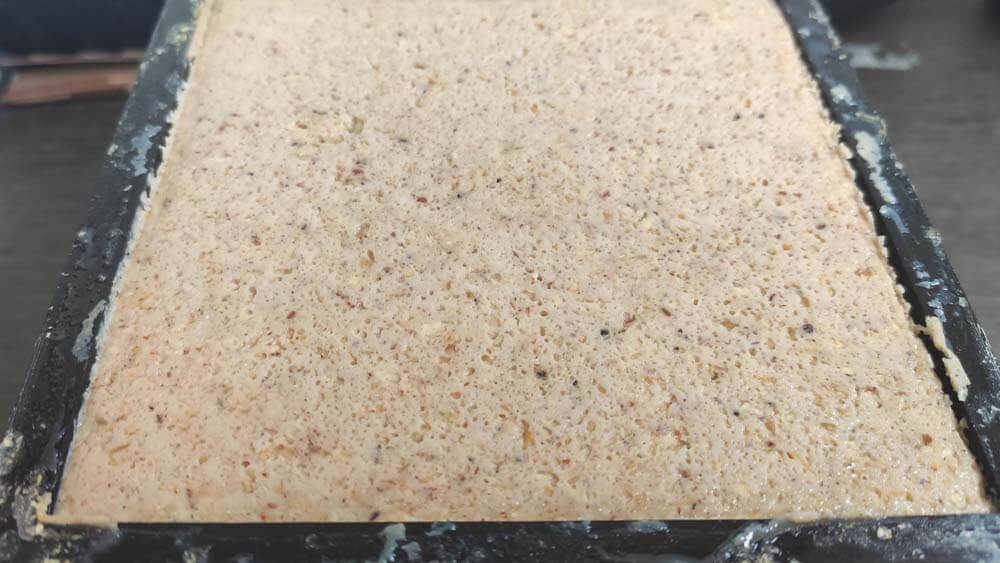
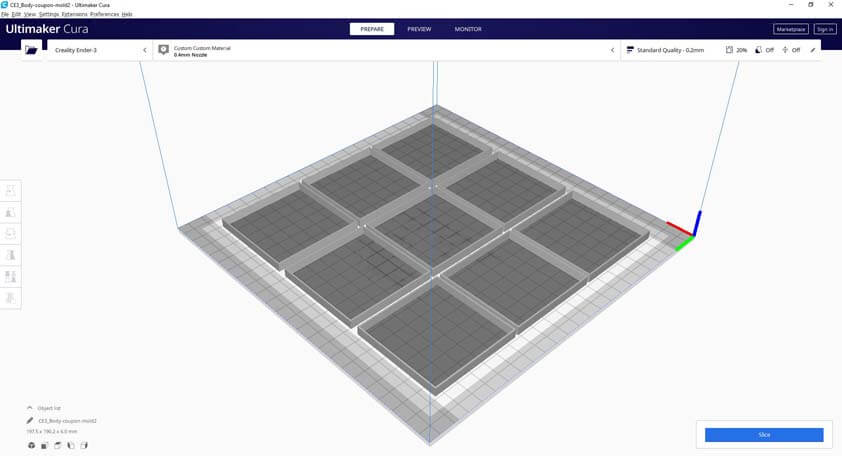
I will test to mill the bio source material once it has dried, I will pour it into 3d compression molds. Here are the molds, and here is the casein drying and being compressed in this mold.
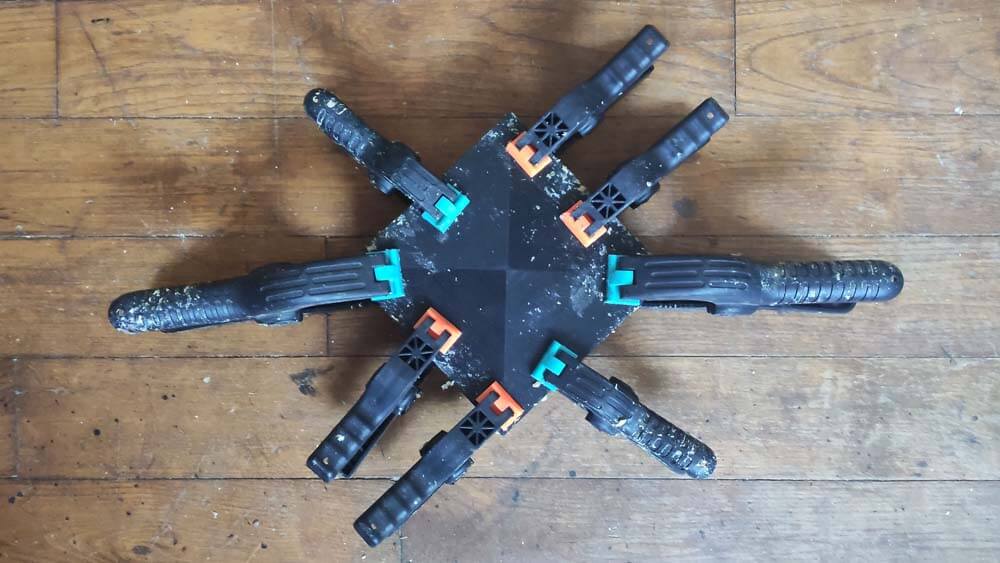
After 48 hours pressed in the mold, I opened it. I must have done something wrong. There's is a lot of "air" in the mold, it is almsot "spongious", it is unexpected regarding the tests I made before using this recipe. I will let it dry open from now.