Fusion 360 Renderer tutorial
- Original tutorial by: Kai Naito
- Your lab name: Fablab Kamakura
- License: CC-SA-BY
- Last Review Date: 02/21/2019
- Last Modified by: Kai Naito
Summary
Quick introduction to Fusion360 renderer. By going through this tutorial, you will be able to:
- Apply appearance to your model.
- Control the light and render environment with Scene setting.
- Adjust the textures with Texture map control.
- Overall, get photo-realistic render image using Fusion360 visualization tool.
Environment
- Mac OS Mojave version 10.14
- Fusion360 (version 2.0.5350) installed
Go install Fusion if you don't have it. Download Fusion360 for education
Step 1. Download and import sample model to Fusion
Download the sample model data.
Original author of the smaple data : Lamp by Frederik Vollbrecht (Autodesk Fusion360 gallery)
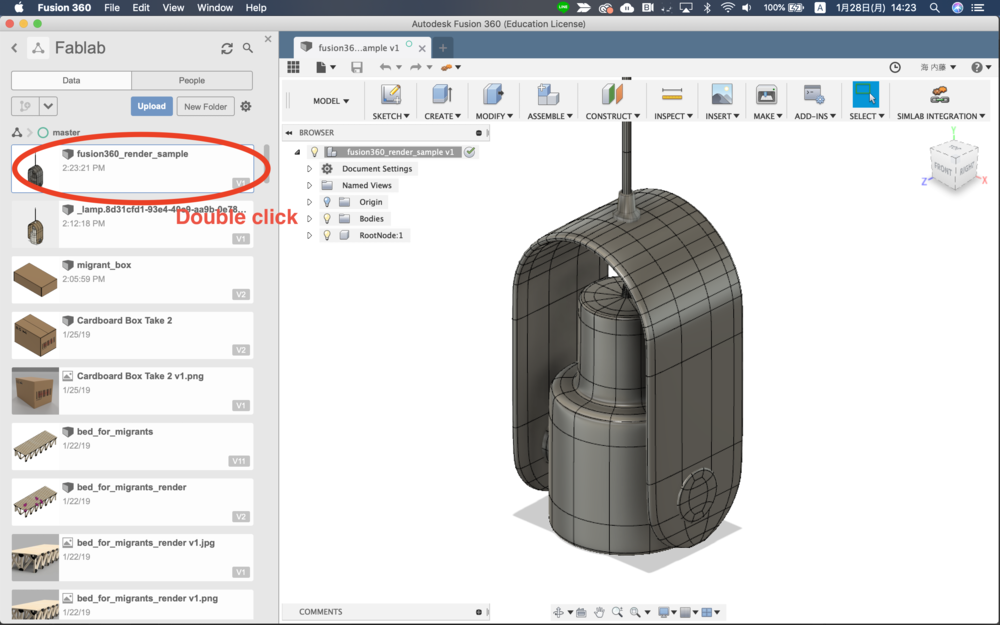
Once you download the 3D data, upload it to Fusion from the data panel.
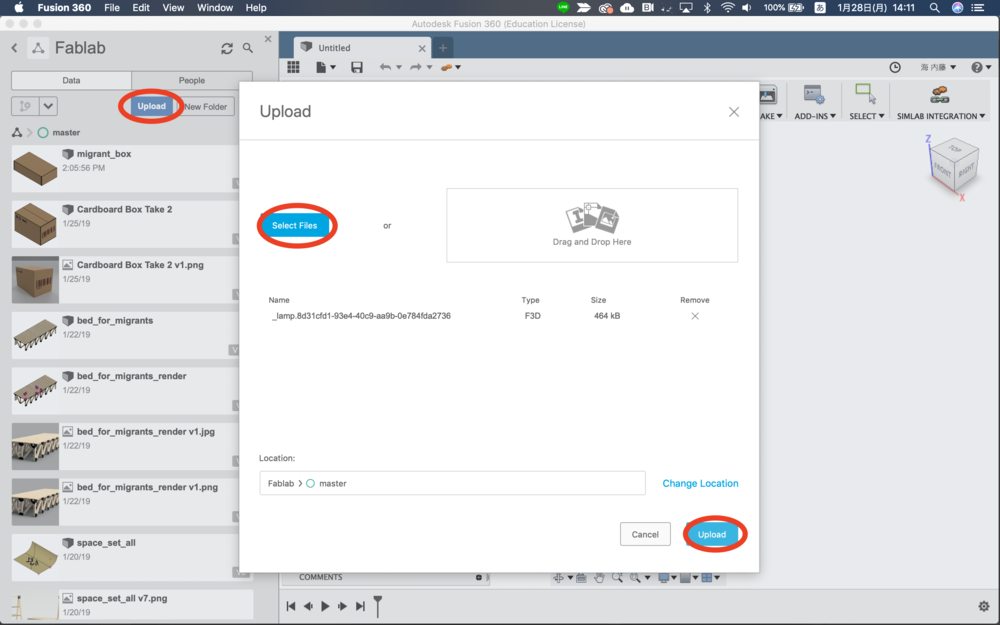
Then double click uploaded data to open.
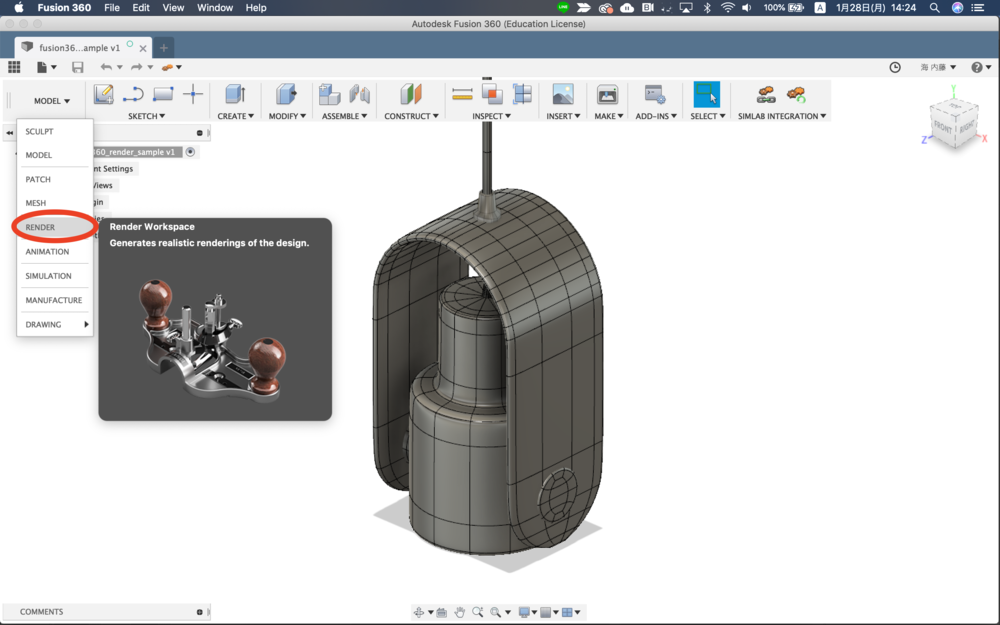
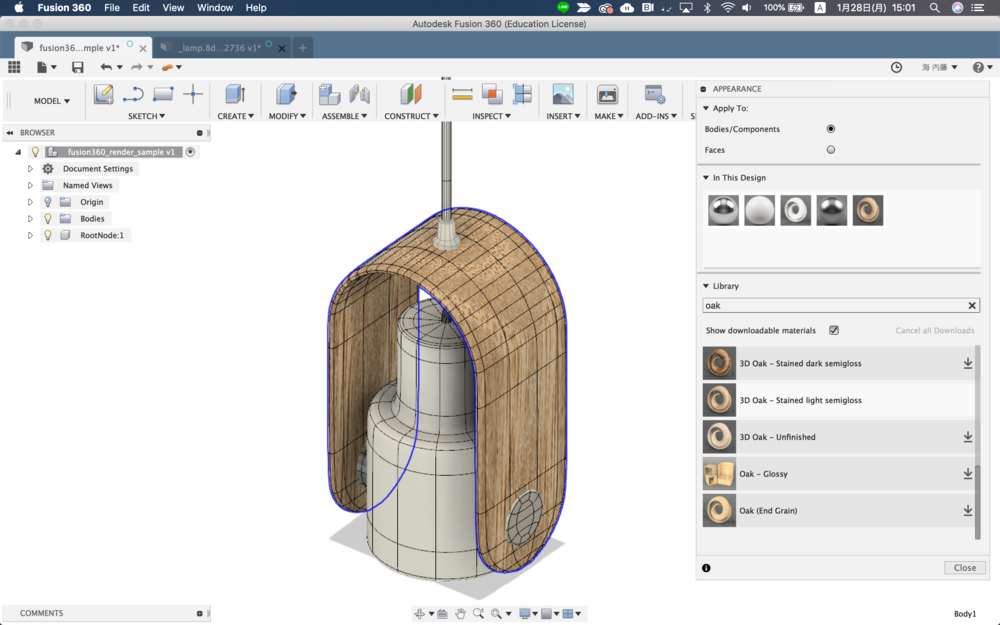
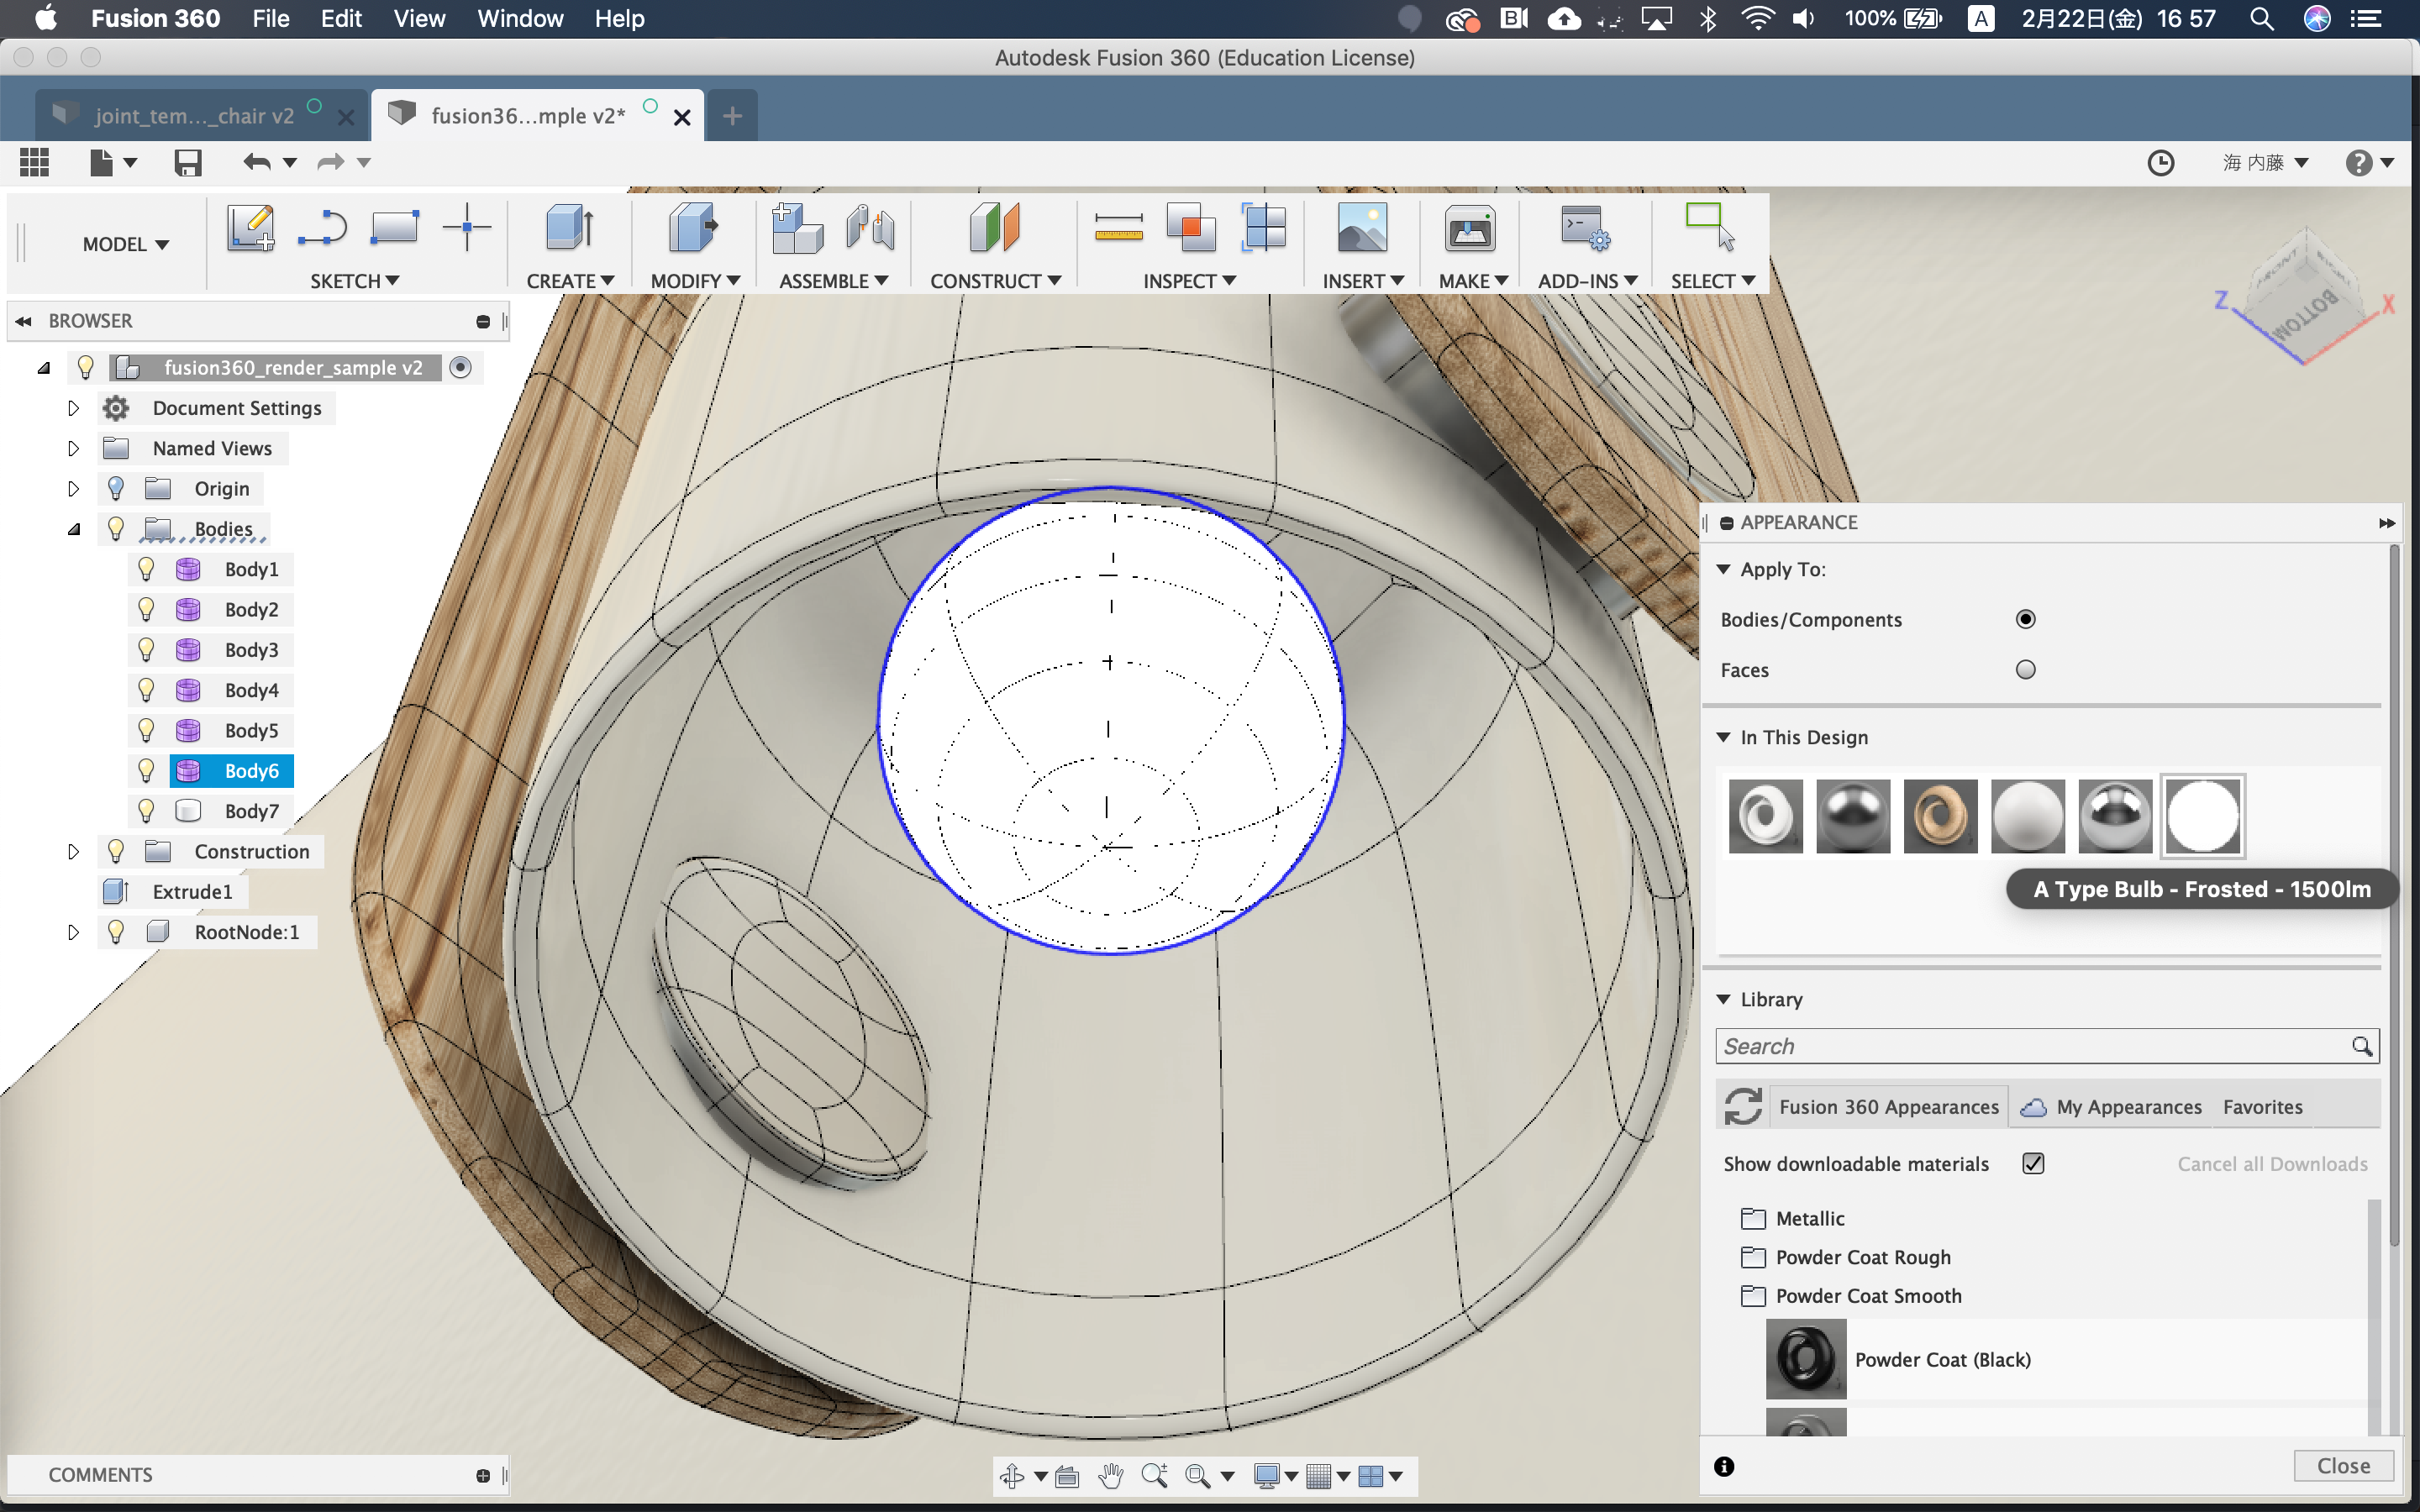
Step 2. Set appearance to the model
Go to Render workspace.
Select appearance.
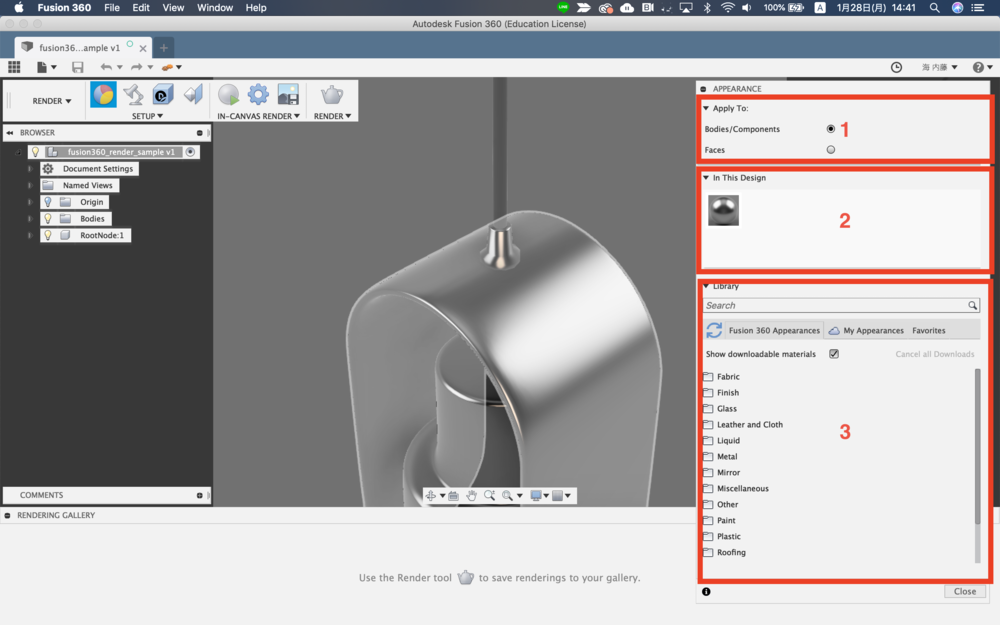
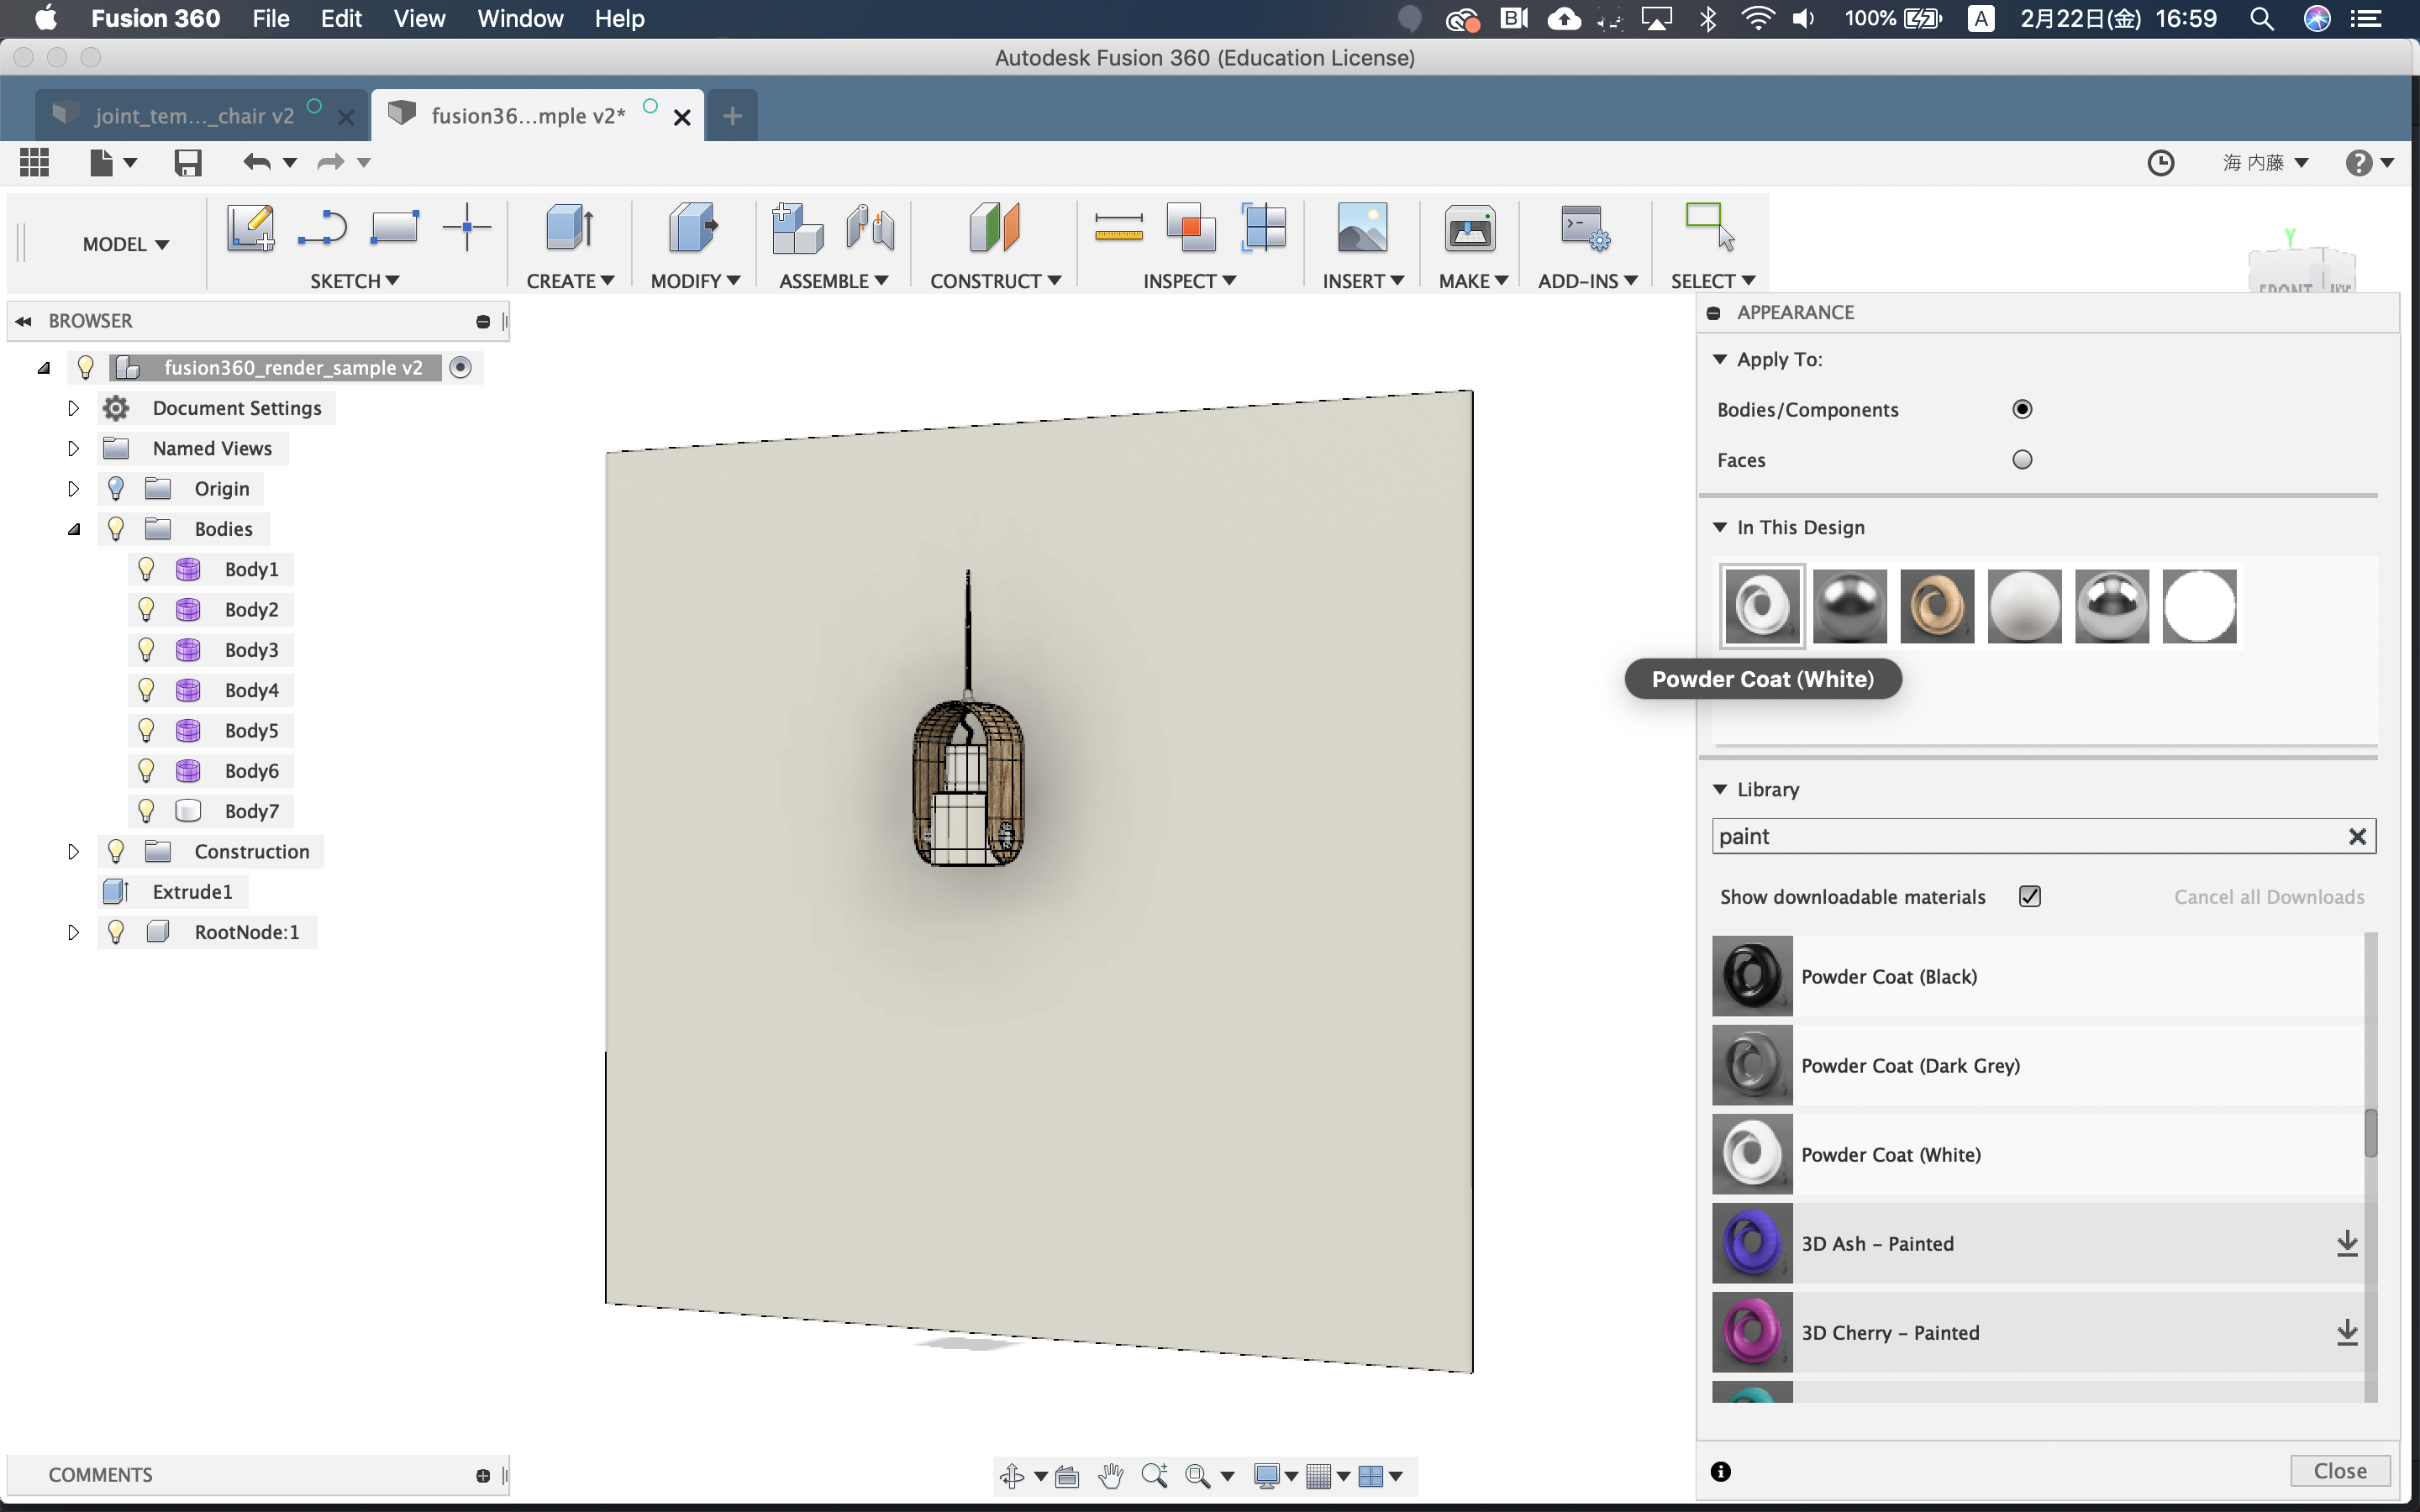
In appearance window, you can add appearances and assign them to the model.
You also can edit appearance in Model workspace if you prefer to do so (access to appearance window by simply hitting a shortcut).
- 1 : You can choose which type of subject you are applying appearance to.
- 2 : All appearances you added shows in this section.(including appearances which are not assigned)
- 3 : You can Find appearances here. Type in keywords or toggle categories to find your desired apperences. Click, drag and drop the appearance on to the part of the model you want to apply.
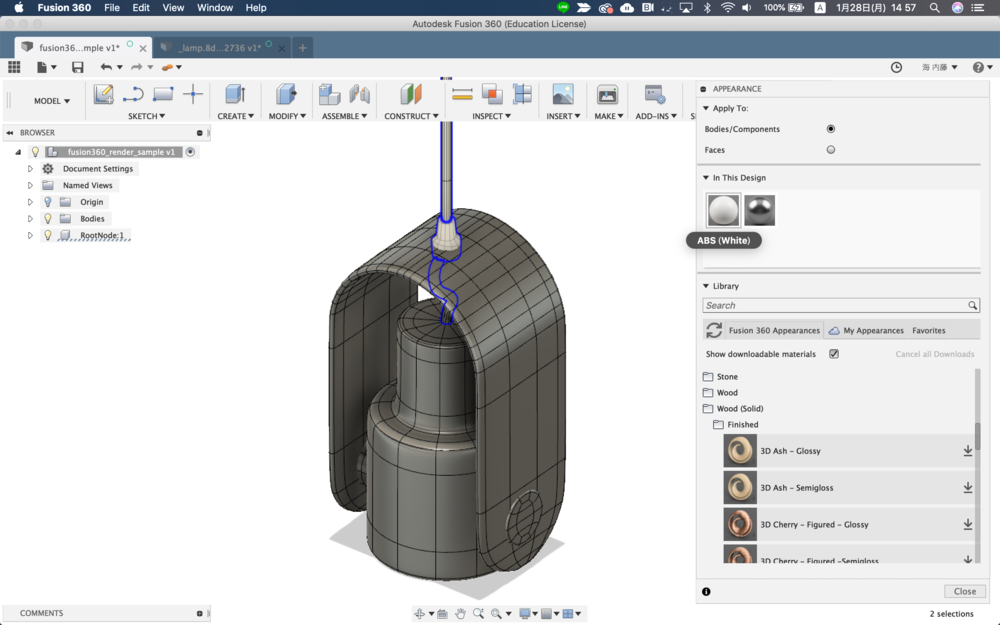
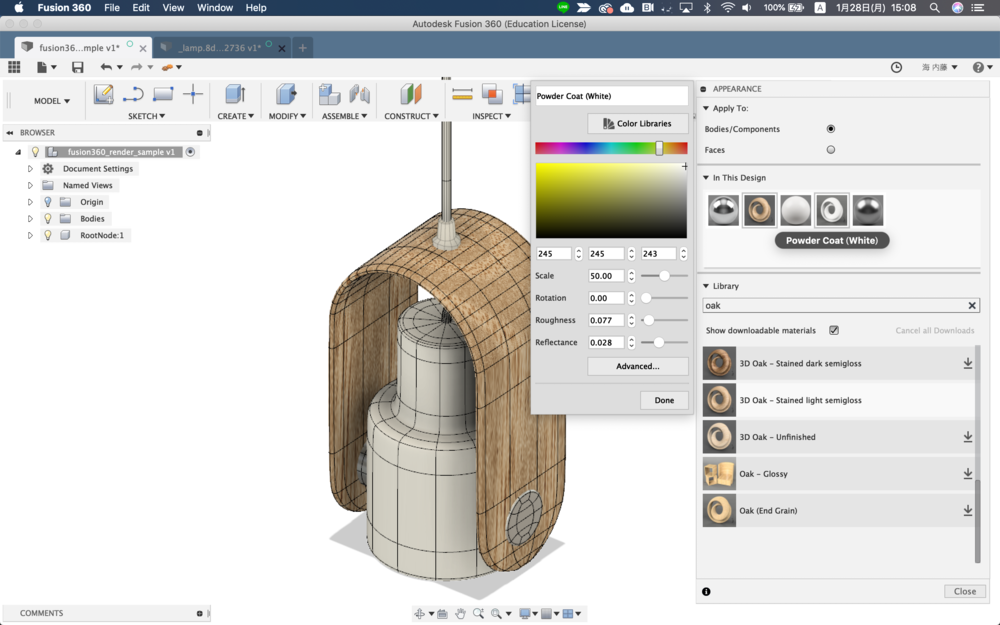
For now apply ABS(White) to the cable and the bushing,
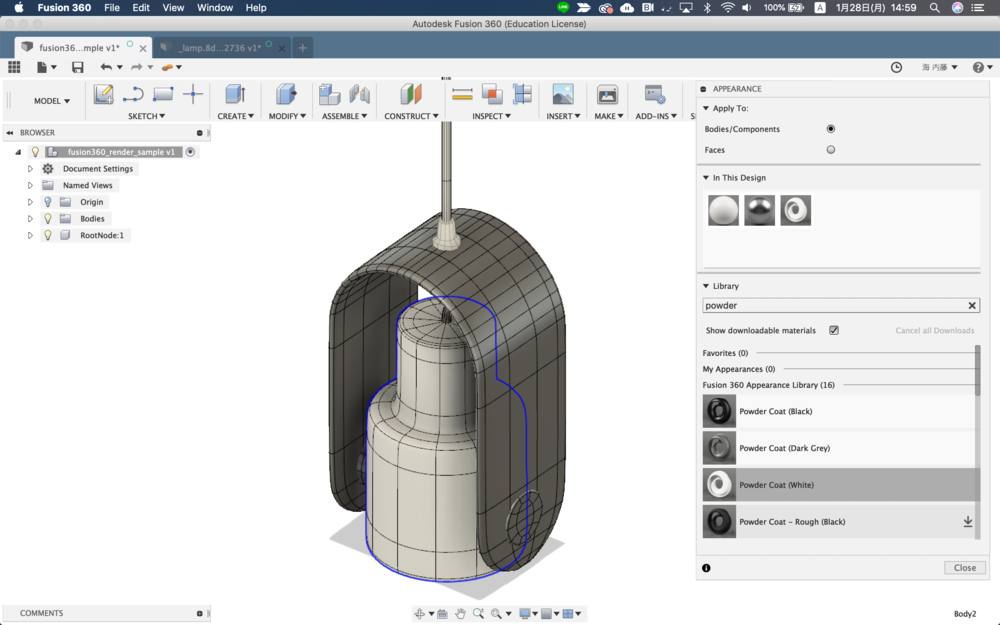
Powder Coat(White) to the lamp shade,
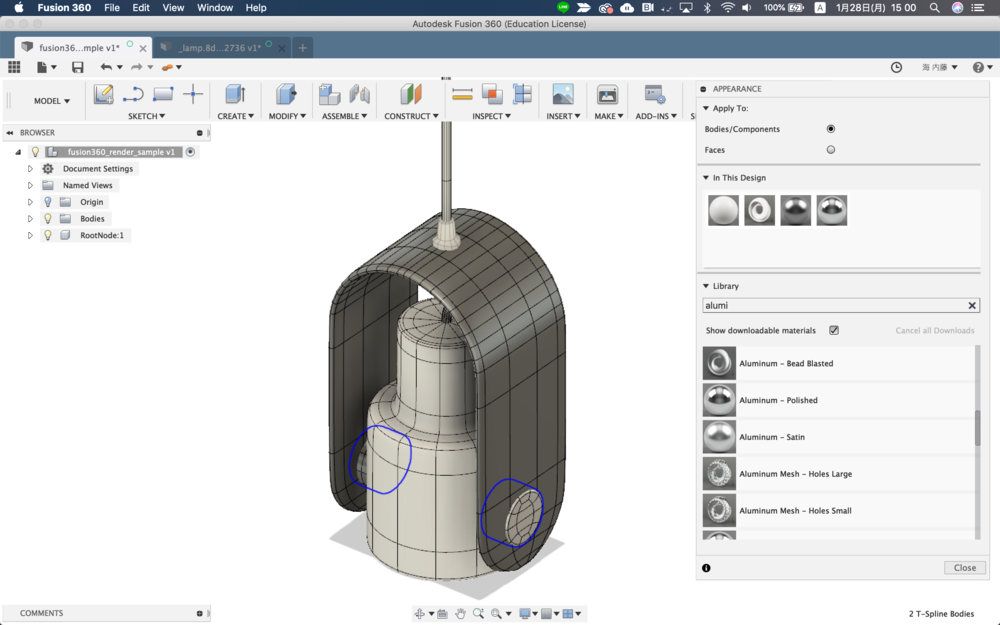
Aluminum - polished to two fittings,
and 3D Oak - Stained light semigloss to the lamp holder.
You may modify appearance you added by double clicking the appearance in section 2.
Here you can change color, roughness, reflectance, etc. depending on the material you chose. Go to Advenced material setting if you need more control on the material.
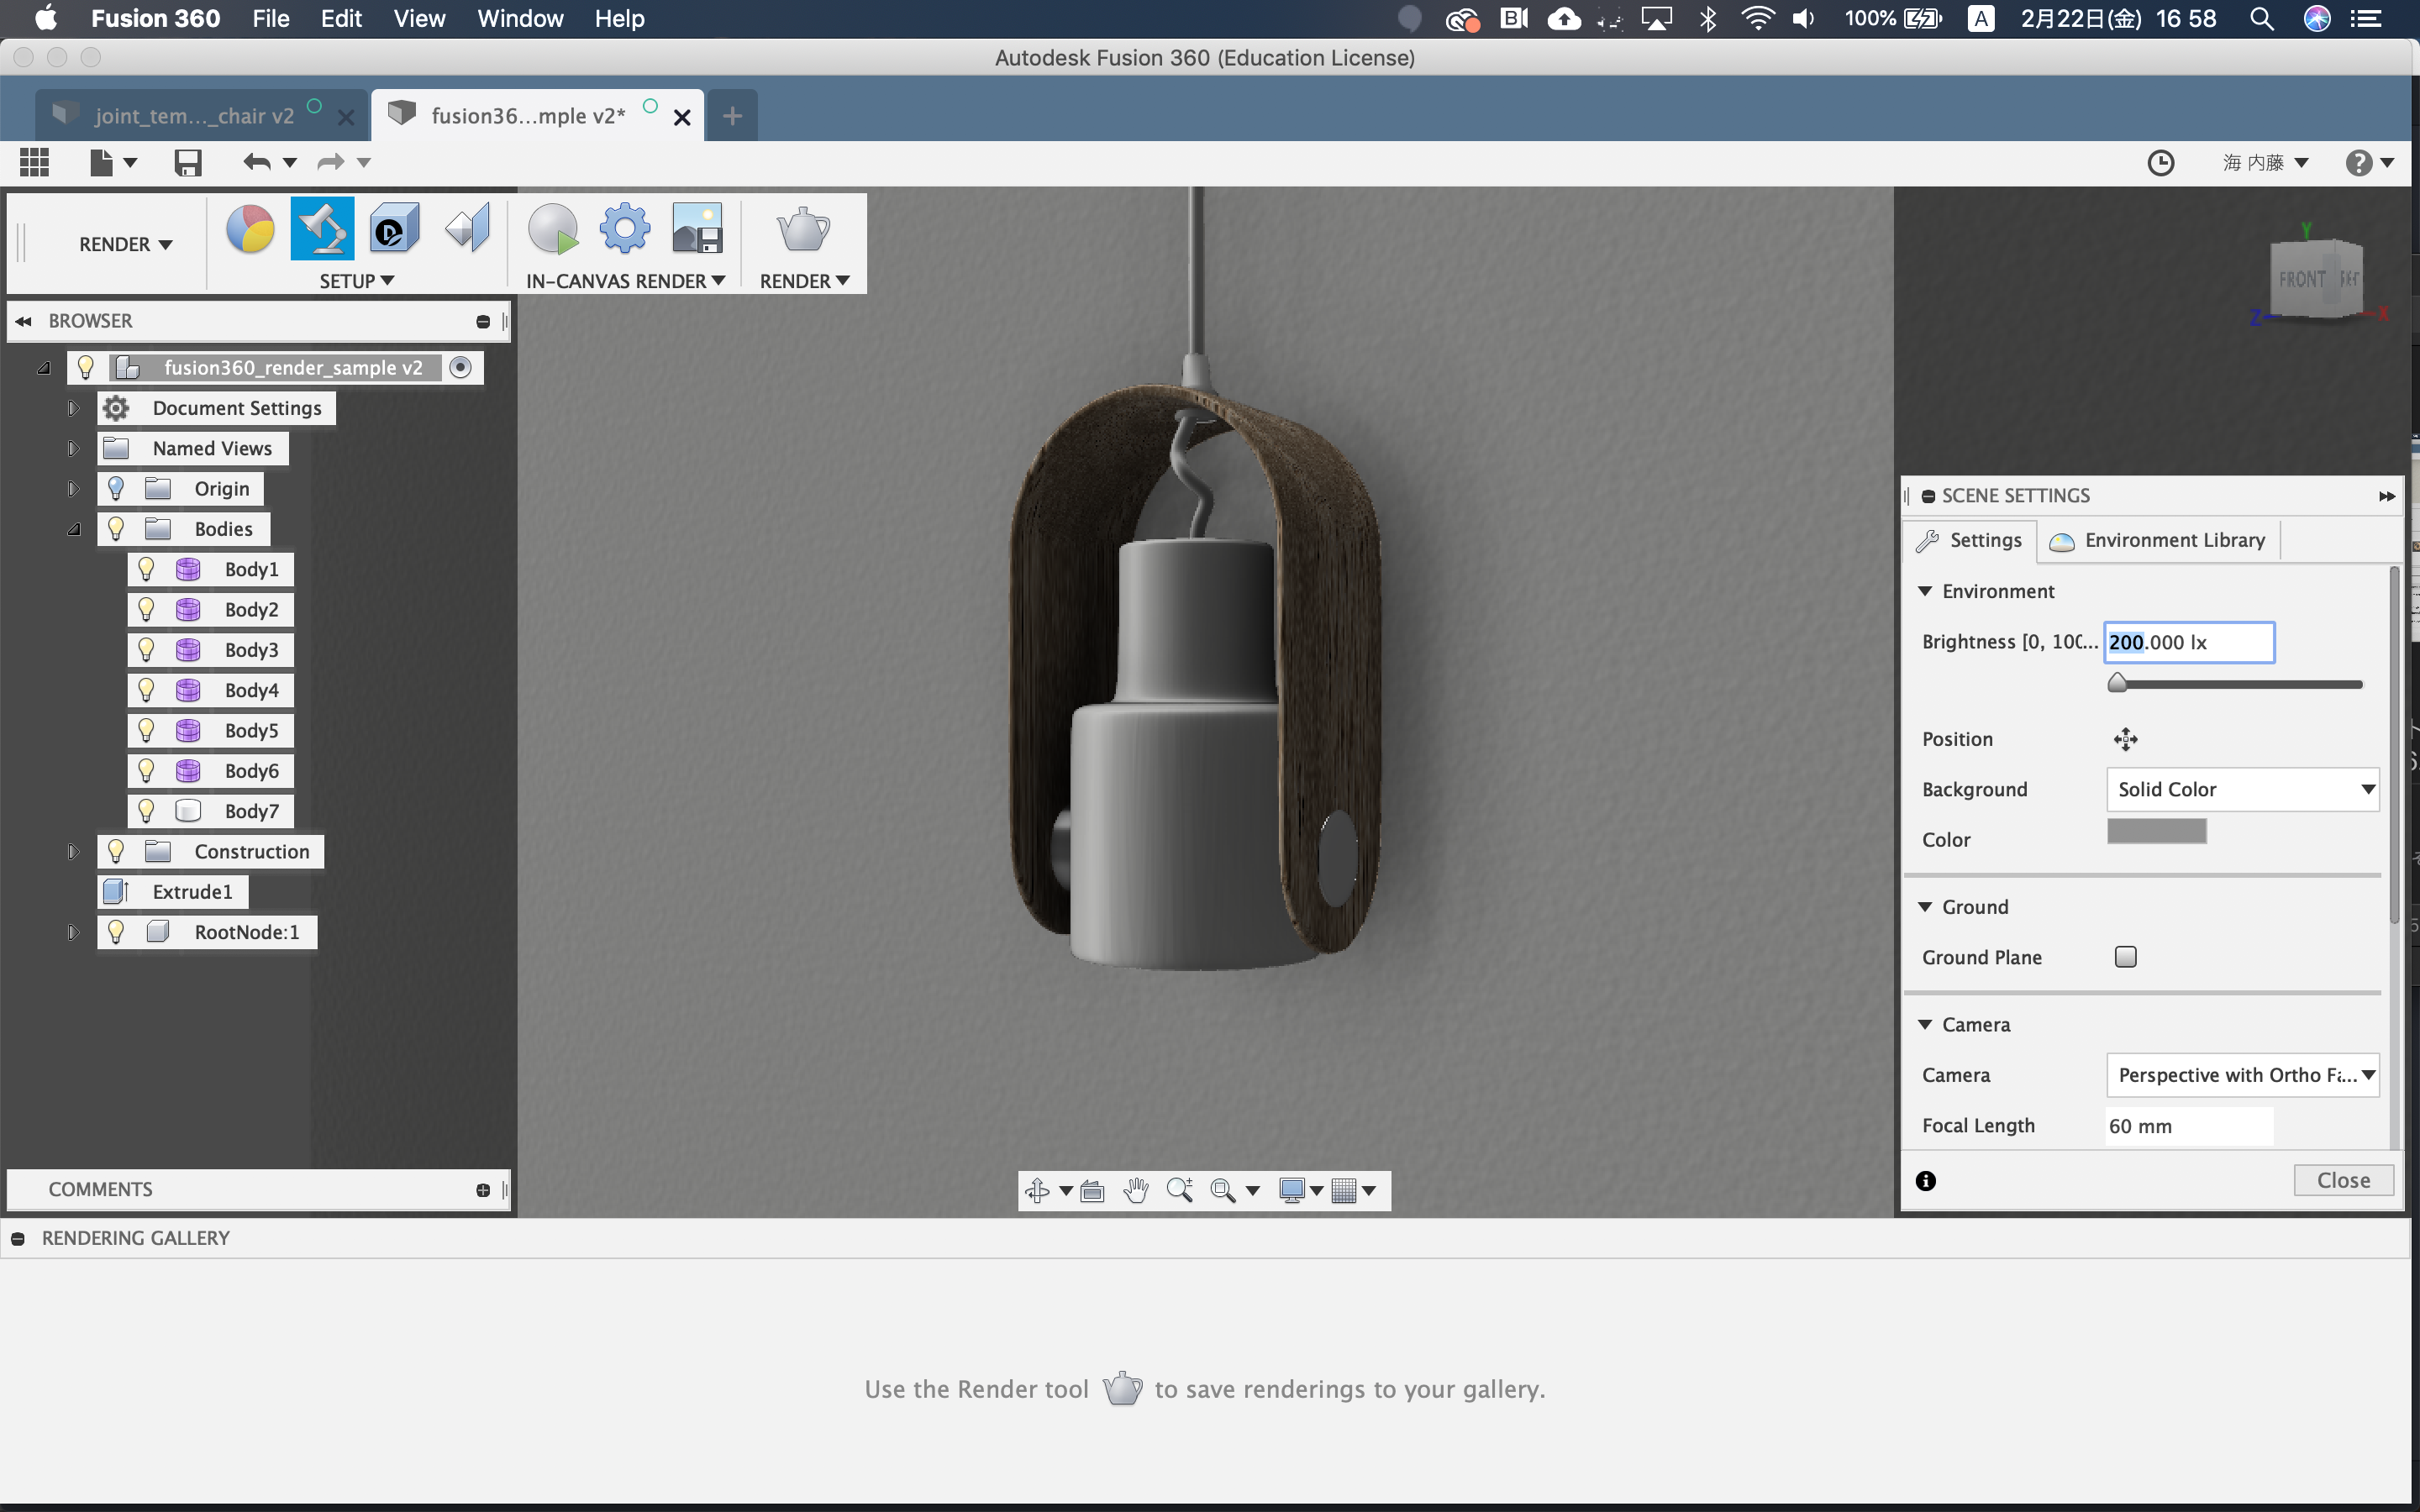
Step 3. Scene setting
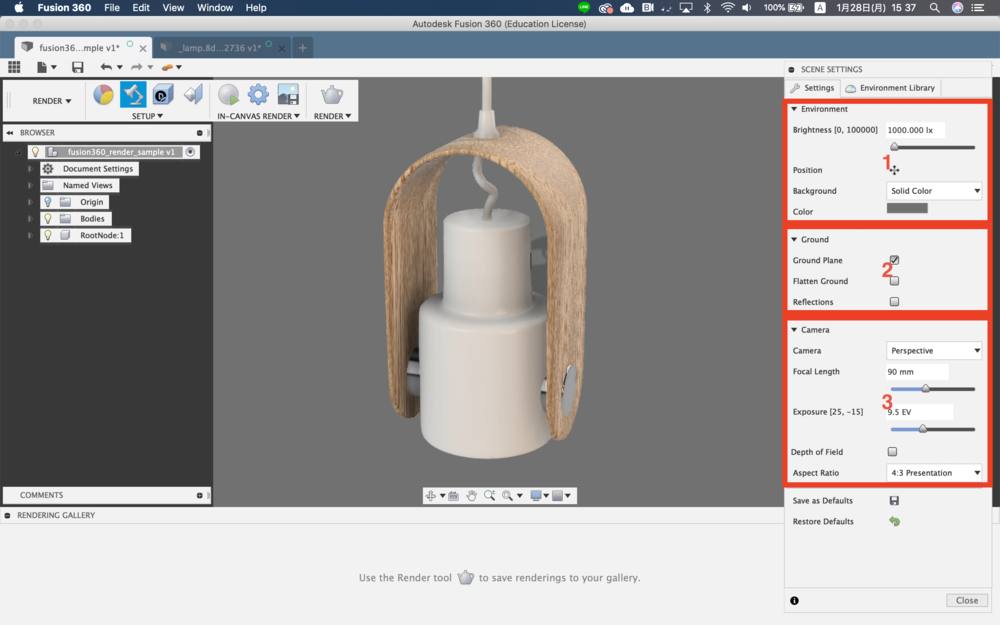 In Scene setting you can
- 1 : Enviroment section allows you to adjust
- Brightness : Better not to touch except when you're using your own object light source and want to make environment dark.
- Position : rotate environment that results in changing the direction of the light source.
- Background : you can choose from "solid color" or "environment". If you choose "solid color", the background will be filled with plain color but the light environment remains. If you pick "environment", the environment that you choose in Environment Library tab will be visible in your rendering.
- 2 : In Ground section, you enable or disable ground. Enable if you want shadow or reflection on the ground.
- 3 : In Camera section, you can pick camera type (Always choose "Perspective" if you want to make your render image photo-realistic. "Orthographic" only works for front/side/top view.), focal length and Exposure (Better not to touch this same as brightness in Environment section).
When you check "Depth of Field", fusion will let you choose the focal point and everything in the front and in the back will be blurred. However, you will not see the effect untill you actually render the image.
Finaly, by setting "Aspect Ratio", it will show you the frame in the canvas.
Now go to Environment Library, add the environment you want to your scene by draging and dropping to the canvas.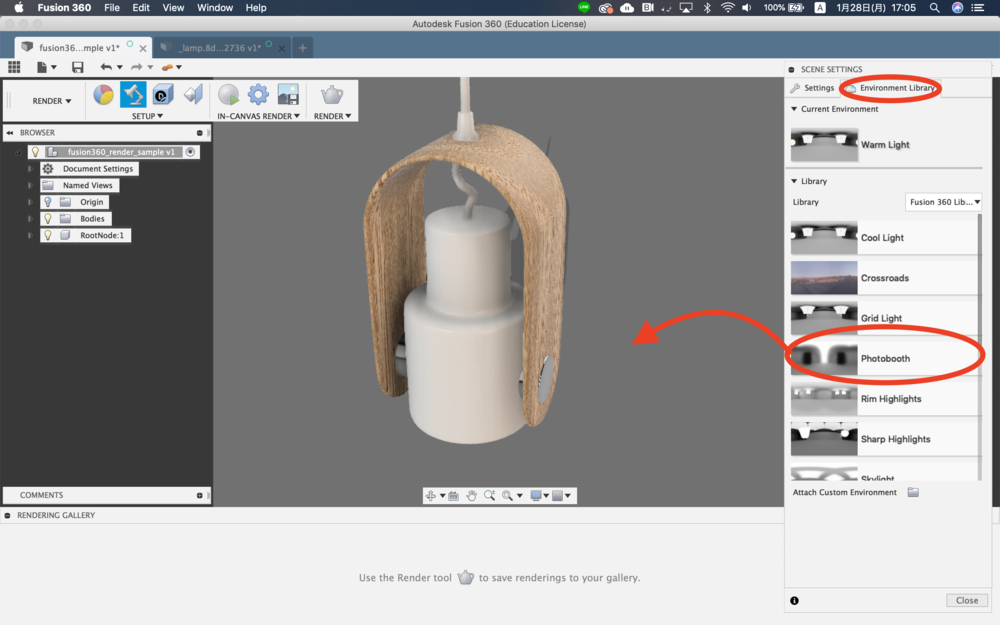 For now, apply Photobooth.
(If there is dowload sign on the right click it to make it available.)
For now, apply Photobooth.
(If there is dowload sign on the right click it to make it available.)
Step 4. Texture Map control
Select Texture Map Control and choose the body which you want to adjust the texture.
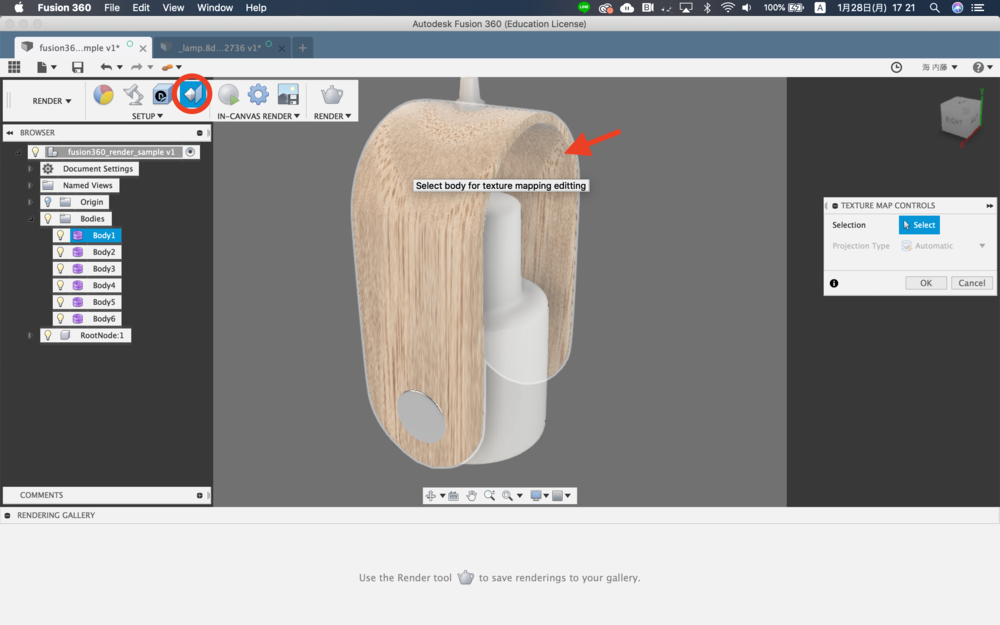

- Projection type is now set to 3D texture as the appearance has 3D texture data. However, you can pick among Automatic, Planar, Box, Sphereical or Cylindrical if you are mapping 2D texture.
- By redefining Axis, you can change the direction of texture mapping.
- Use Mapping Transform to adjust the appearance of grain.
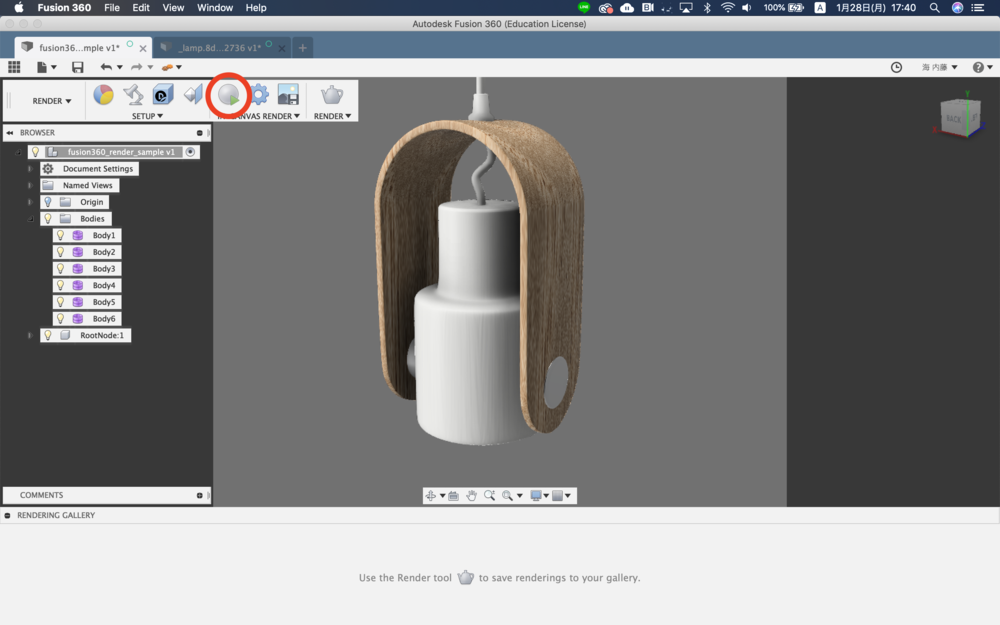
Step 5. In-canvas rendering and
Click In-Canvas render button to fire renderer. Use In-canvas rendering when you want to quickly check the result.
After hitting the button you will see progress bar in right bottom of the canvas. You can move the triangle shaped slider below the progress bar to change upper limit of the number of iteration (More iteration, higher quallity of the image but takes time).
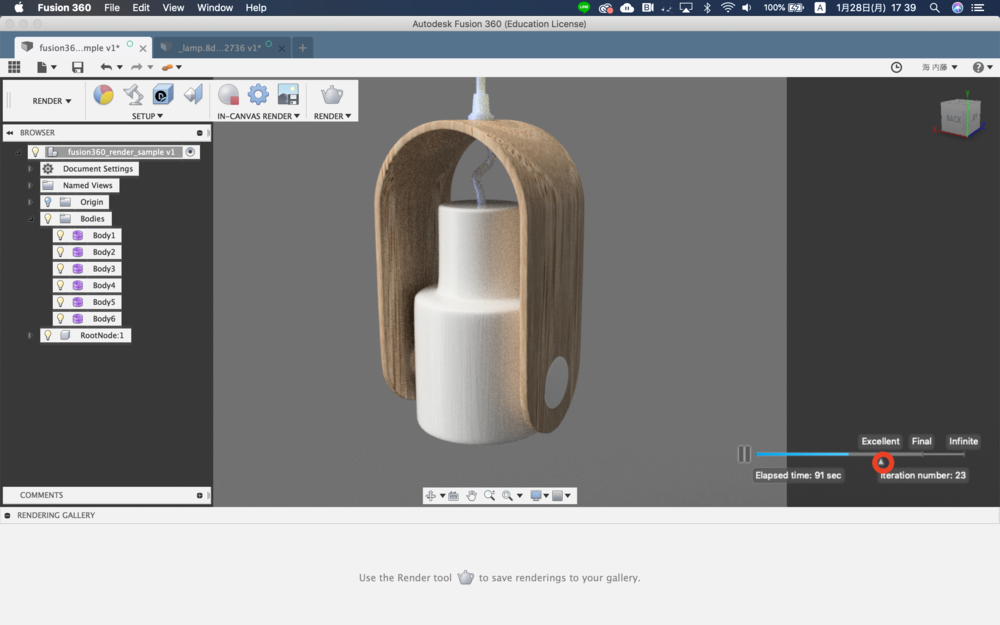
Be careful not to move the perspective or change the settings during the in-canvas rendering process as it will trigger the renderer and restart the culcuration. If you don't want to let that happen, go to In-canvas Render Setting and check Lock View box.

You can also save the image you're seeing in in-canvas rendering. Click Capture Image next to In-canvas Render Setting.
However, you won't be able to work simultaneously on Fusion during the rendering process as long as you are using In-canvas render.
Render (It's at the far right end of render toolbar) will run rendering process in background and also provides advanced rendering options.
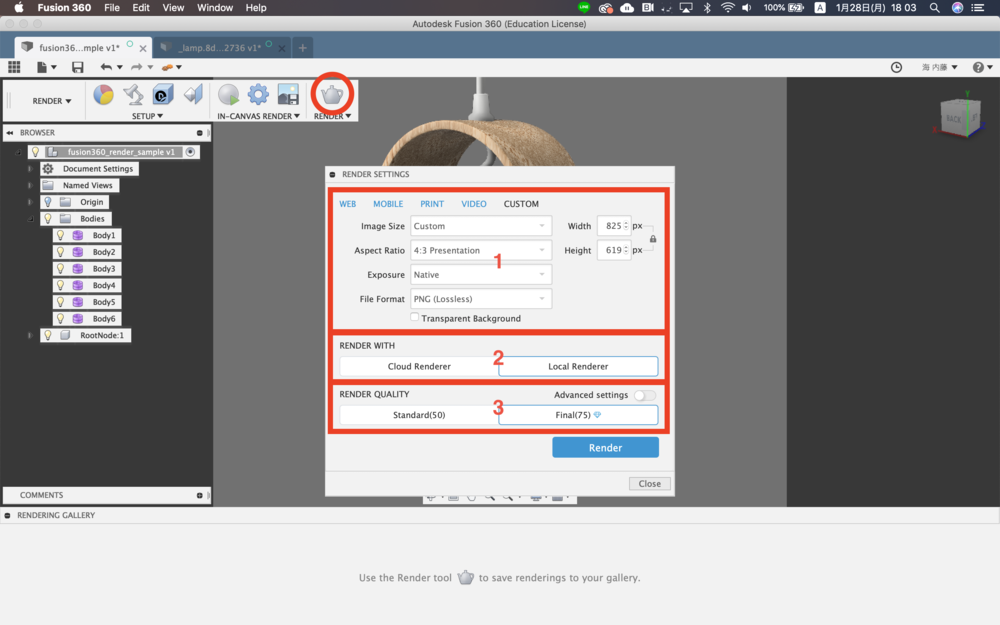
- 1 : Choose image size, aspect ratio and file format here.
- 2 : You have two options Here
- If you choose Cloud Renderer, fusion will send the render task to cloud server. You'll be using credits that are given to your autodesk account (amount of credit given depends on your account type).
Check this video tutorial if you want to know more about benefits of cloud rendering. - Choose Local Renderer to use your local resource for rendering.
- If you choose Cloud Renderer, fusion will send the render task to cloud server. You'll be using credits that are given to your autodesk account (amount of credit given depends on your account type).
- 3 : You can pick the quallity of the final result from Standard or Final.
Step 6. Make emissive material
Aside of light source from environment, you may also make your own light source by applying emissive appearence to any bodies.
However, note that rendering gets drastically slow (takes time) when you add emissive bodies.
There is a light-bulb beneath the lamp shade. Try apply emissive appearance such as "A type bulb - frosted - 1500lm". You can change the brightness of the emissive appearance by changing "cd(candle)" value. Double click the appearance will show you the appearance menu.
Dim environment light to make the light emitted from the bulb visible. You can do that from Scene setting > environment > Brightness. Set it to 200 lx for now.
Creating background object (like wall or ground, etc.) is effective especially when dealing with light objects as emitted light cannot be seen untill it hits other objects. Appearance of the background object pretty puch affect the result. This time use "Powder coat (White)".
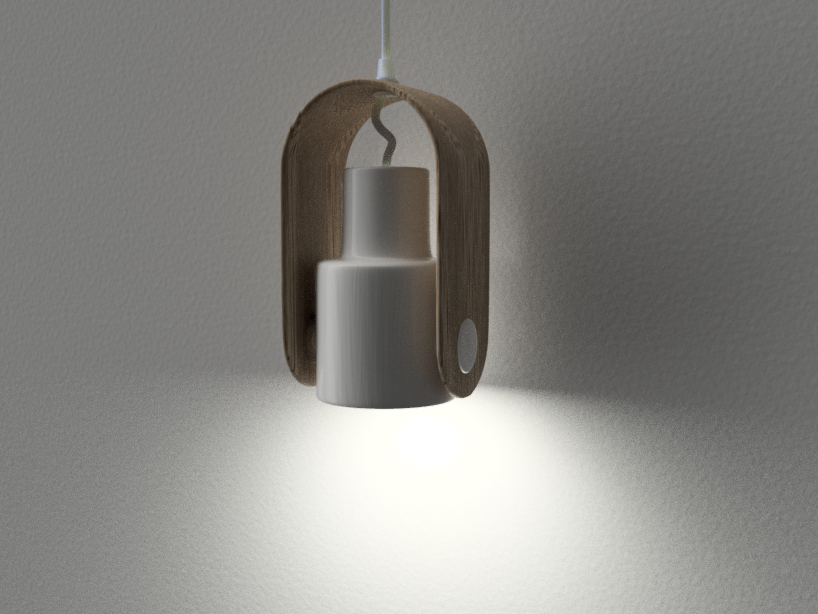
Final result
Render time : 30000 seconds (2240 iterations)
Environment : Photobooth
Brightness : 200 lx
Camera : Perspective (Focal length : 60mm)