1 - Project management - Git & Website

This week we learned about project management and will create a static website. I made some websites in the past but never heard about static websites. We have to put the website on-line using Git. The website should be a template for the upcoming weeks, according to everyone this have to create a static website using markdown pages and set up a structure for our documentation. With no experience in git this week and a strong urge to make a proper website and a good template for the upcoming weeks, it is challenging from the beginning.
Assignment Create a public website displaying your profile, your progress, your steps and your learnings
Requirements
- Use Git and present website on gitlab. fabcloud.org
- Use Markdown to create this static site
- resize images (tip: put images in a separate week folder)
- documentation on: focus on: what you learned, what the hurdles where and how you fixed it
- My own ‘requirements’ mention: “a proud moment”, “the biggest mistake”
The steps for this assignment
- Parallel steps
- 0. Set up a local webserver
- 1. Work with terminal
- 2. Gather screenshots & images for my documentation
- Use images on your static page
- 3. Install Git & SSH
- 4. Add a theme to the documentation site
- build the static site
- Install rails
- 5. Create, build en put site online
- 2. Sketch of my final project
- Mistakes and what I should remember
Parallel steps
- Find inspiration about my final project
- Sketch of my final project
- Document this in my Final project page
0. Set up a local webserver
Prior to the instruction how to make the website it started seting up a local webserver. At the end I didn’t need this webserver.
Find if the web server on Catalina is running and what the address of localhost is: According to DYClassroom the server (apache should be running) test this with
$ httpd -vResponse ERROR: “zsh: command not found: $”Looks like the command ‘$’ is not found RTFM ;-)
$was part of the command, it was a way to make this line of code ‘code’ within the webpage httpd -v works, my apache is availableNow ‘http://localhost/‘ should be running a page, but site is not running, Start the webserver with
sudo apachectl startNow http://localhost/ works!
1. Work with terminal
First we played around in Terminal, browsing to folders and looking at files 
Terminal commands to remember:
ls -l —> show folder
pwd -> current location
Ls |wc -l  —> |wc = Count the words
ls |grep png -> display files, only the files with 'png' in the name
ls -a = show hidden files
cd = go to the home directory
cd ../ = Go one directory back (one higher in hierarchy )
cd ../Documents = Go one directory back and to 'Documents'
cd - = back to previous folder
"CTRL - C" = escape terminal
"CTRL - U" = remove text from prompt
subl . = open Sublime in your project
How to escape the VI editor
Sometimes the VI editor opens, the only way to escape this in the past was closing the terminal. Being scared to terminate processes, while close to a Fabacademy deadline, it is important to know how to close the VI editor.
"CTRL - C"
:
x
2. Gather screenshots & images for my documentation
I have max 9 MB a week…
I know i have to create a document with images and screenshots. With mac you can use Command-Shift-4 to save a part of the screen, but I don’t want the images in a random folder. How can I change the folder where the images when captured? “Shift, Command, and 5.” will open the screen-capture App, turns out default is ‘desktop” I changed this to ’Documents > screen captures’.
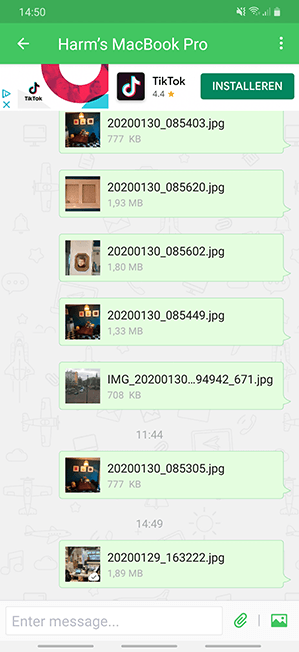
take pictures When looking at the documentation of 2019 students I’m sure I need to take a lot of pictures. My phone has a decent camera, but how can I get the pictures from my phone? Without using an cable? I chose AirDroid, the setup was more or less like Airdrop (Mac file sharing over the air). It is fast and works.
So now I’m set up to gather images!
Used sources:
Use images on your static page
Using a command line image resizer
Imagemagick
brew install imagemagick
brew install Ghostscript
Commands:
This is the 'uber command' I use for screenshots:
mogrify -format jpg -quality 80% -resize 50% *.* --> convert all images in current folder to Jpg with 80% quality and 50% size

identify logo.gif-> will show the information of the image
convert logo.gif logo.png -> convert to other file
Used sources:
3. Install Git & SSH
Git is a version control tools. Used to keep track of the changes in files and folders. It is mostly used when people are working in the same project. At Fabacademy we will send our document files to the Fabcloud server using Git. The most known Git is GitHub, fabcloud is Git too.
We installed git in class and made the directory GitPlay and my user name and email address to be able to play around with git. 
Configure Git
cat config

Use git in terminal
git pull -> before start editing
git status -> get status: Files are not part of staging before you
git add index.html —> adds the file to be tracked (sometimes you don’t want files to be committed)
git commit -m "second commit I RULE" index.html -> Enter a Commit message
git push —> push it to the server
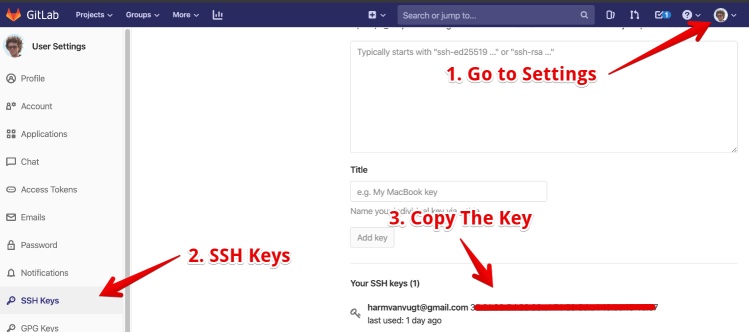
Setup the SSH key
create the SSH directory: 
Enter the key in fabcloud
Used sources:
4. Add a theme to the documentation site
Different static site generators:
- Nanoc = very simple generator
- MKdocs = This is the standard, simple installation
- Hugo = oke, simple templates
- Gatsby = funky but hard to master
- Gitbook = Nice tabout gitbook, you cannot use it
- Jekyll = you can use the same special documentation theme - made in Ruby
Choosing a theme for my site
Henk advised me to look at Jekyll themes and Mickey’s page. Neil advised us to browse the websites from last year. Looking at several examples from fellow FabLab students The pages that really stood out where the one from Mickey. From a template point of view I really liked the width of the text. All other more visual themes used text over the whole body width, so text will be harder to read. Only disadvantage is the focus on the visual. But this will force me to create at least one beautiful screen shot/picture a week. Mickey documentation was mentioned as a very good example. So I downloaded the entire ‘site’ from git. But locally this site looked like a site without css. During Henk’s instruction I learned the markup pages where interpreted by software and generated html. So first I have to install an markdown ‘interpreter’…
It took me some time, but the Jekyll Voyager theme just suited my requirements. My college Micky used it last year, this was holding me back, I don’t want to be a copycat. But being original in documentation is not my goal here. So I download the zip with theme!
Used sources:
install Jekyll
But where to place these files? Just replace everything in my original git location with the downloaded theme? What happens if I clone any Fabacademy’s student’s site, could it work? And if so, everybody would just do so?
I have to install Jekyll locally
To see my webpage (made from the Markup language) on my local machine I have to install Jekyll,
I followed the steps in the documentation
All went well, only two points I was unsure:
- Skipped installing
rbenv- I don’t think I need a specific version of Rubi for Jekyll
- The steps below “On Mojave (10.14)”
- I followed them but I doubt because I have Catalina installed
I decided to follow Micky’s documentation how to install Jekyll
No error messages
Commands to build the page and start the server
Jekyll build //builds the website from the markup ‘pages’
Jelyll serve //starts the Jekyll server
But why? The Jekyll serve documentations points to ‘configuration’ there some explanation how to edit _config.yml, Henk mentioned the yml files a few times. Think I need to edit these later. (probably the yml version used in gitlab (_gitlab.yml)
used sources:
- Build a Jekyll site
- Github article about running Jekyll locally
- install jekyll on Mac
- download voyager
- Micky’s week 2
- install Jekyll locally
- How to use Jekyll
build the static site
No I have 2 sites: the downloaded theme & the site i downloaded from my Git. The biggest question was: How can I compile the .rm files and build the website? I watched this video about a basic build of a Jakyll site.
I followed the video and created a fresh blog with
jekyll new testSite
This gave me a bunch of files in the location (test-site). But when I tried the
bundle exec jekyll
The error message was: Could not locate Gemfile or .bundle/ directory this page on stackoverflow advised me to install Rail. So i did:
Install rails
This post advised me to install Rails. So i did went back to the video, to see if i can build a basic site from scratch with the example in the video. This resulted in “install the bundled gems”.
I start the Jekyll server with (within the directory):
bundle exec jekyll serve
All looks good I should be able to see the site via http://127.0.0.1:4000/ YESS it works!! Now see if I can do this with the downloaded Voyager theme site…
I went to the directory of the site and typed bundle exec jekyll serve It resulted the error message: Could not locate Gemfile or .bundle/ directory
With my college Sonja looking over my shoulder I tried to remove this warning. The Jekyll docs websiteexplained how to install bundler for Jekyll. By executing
bundle init
But this gave an error message “Jekyll is not currently included in the bundle, perhaps you meant to add it to your Gemfile?” I tried to check if Jekyll is really installed using
Jekyll --version.
It is installed (jekyll 4.0.0). So I entered the error message in Google, and found some explanation on github Tried
bundle install
But still no success…


Since the test site works with Jekyll, without errors. I looked at the difference of the gemfiles. The gemfile in my directory was almost empty. I copied the content of the working gemfile in my ‘harm-vanvugt’ directory.

- The major errors disappeared. But error messages about tzinfo-data and wdm.
- I looked in the gemfile and removed lines with
tzinfo-dataandwdm. - Executed
bundle exec jekyll serve
again. And no error messages!
- Went to http://127.0.0.1:4000/and the Site is visible! YES!!
- Changed the text of about.md. And build the site, all works. Images you will have to put in the image dir.
- I Used a separate file directory for every week, to keep track of the size. I was really warned not to upload big files.
The .yml files
- The .gitlab-ci.yml file Henk helped me creating the .gitlab-ci.yml via the gitlab site and I changed this to work with the Jakyll site.
before script:
pip install

pages:
image: python: -->
	script:
		mkdocs build --> builds the website using mkdocs
		mv site pubic --? it is sbuild in public forder (there is my website)
- The mkdocs.yml file This page is used by MKdocs on the server
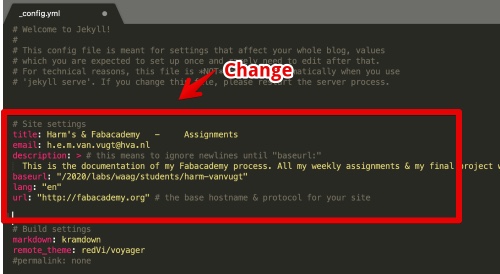
- With the help of Henk I commited and pushed an (almost) empty dir to the server. I altered the
_config.ymlfile and put my right information the first part. Don’t change the rest.
5. Create, build en put site online
The syntax below is markdown, this is the ‘code’ used to generate basic text formating for markdown pages.
Italics -->*text*
Bold --> **text**
Bold italics --> **_text_**.
Code -> ```code```
Link -> [link] (http://website.html)
Image -> 
H1 --> #
H2 --> ##
H3 --> ###
H4 --> ####
ect
Scource basic syntax of Markdown
Put my images in the documentation
During the process I took over 20 screen-shots, I gave them proper names to add later to my documentation. After resizing them, I dragged them all to my ‘images’ folder on my local computer. Then I build my Jekyll site. When I looked in the image folder all where gone!
Then I realized I dragged my images to the wrong image folder (/Users/harmvanvugt/fabAcademy/harm-vanvugt/_site/assets/images). With building the site ‘bundle exec Jekyll serve’ the images folder in _site/assets/ will be overwritten.
Not to self! If you put the images somewhere in the _sites folder and build your site, all images are gone!
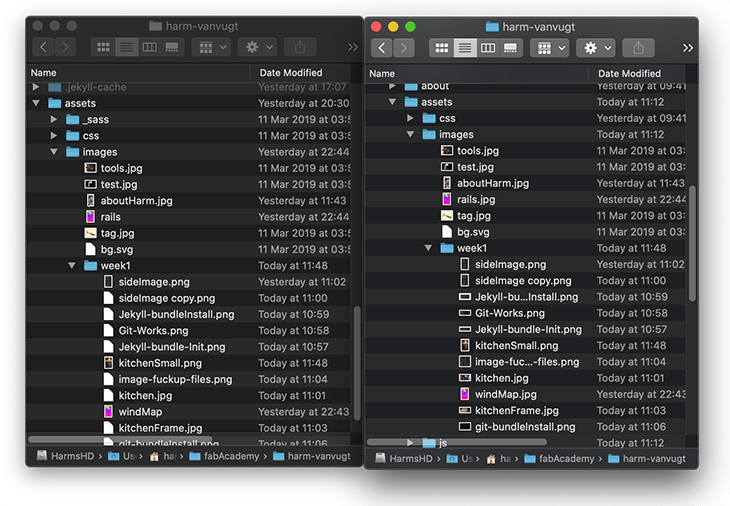 On the left: /Users/harmvanvugt/fabAcademy/harm-vanvugt/_site/assets/images. On the right: /Users/harmvanvugt/fabAcademy/harm-vanvugt/assets/images looks the same but very different.*
To big
Looking at everything I pushed to the gitLab I found out it is 9MB. While my images are only a few MB. I thought about the double images both the images folders. I pushed them both to the server. This should be necessary, gitlab is building the site from the md files. Henk pointed met to the possibility to exclude files using a .gitignore file. This is how it works:
- Mac: make sure you are able to see the hidden files (.files): Press Command+Shift+Dot. Terminal:
ls -allto see the file - create a .gitignore file in your root folder (in my case: ‘/Users/harmvanvugt/fabAcademy/harm-vanvugt/’)
- edit the file (I use brackets) and add
_siteto it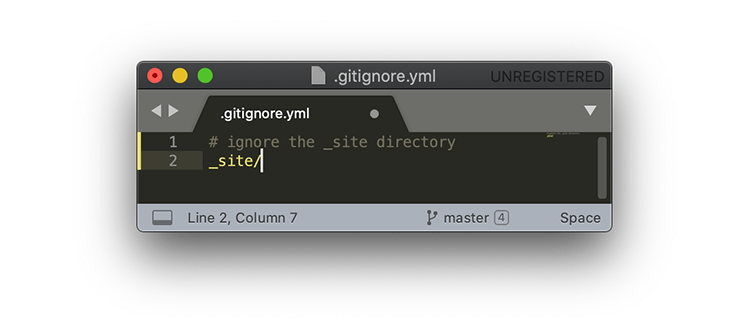
When now pushing the entire directory to the Git server _site is not included. _site is still using space for nothing.
Used these websites as a reference:
- how to show hidden files on Mac
- where to pace the .gitignore file
- how to exclude a folder using a .gitignore file
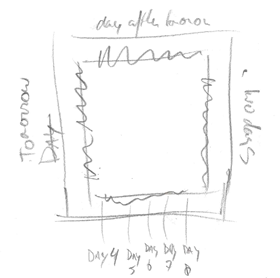
2. Sketch of my final project
I have created a Final project page and will change this page during the weeks. This page will change during the course.
This are the sketches. 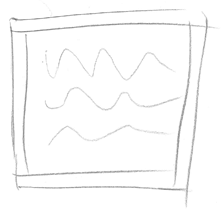
Mistakes and what I should remember
- Set up a web-server without any use for it. Lesson:
- First dive into the assignment before starting with it
- Removed almost all my screen-shots. Lesson:
- Create shortcuts to the proper folders if they look so similar
- Don’t rush
- Edit files on the Gitlab server (web IDE) and not pulling the files before push. Lessons:
- Always first execute
git pull
- Always first execute
- Panicked when time was up. Lessons:
- Create a List of priorities using MoSCoW(a planning method) put this on top of your documentation
- Be ready with the assignment (the MVP version) on Monday
What went really good
- I was able to get my Jekyll site running by my own (for at least 90%)
- I enjoyed ‘debugging’ the Jekyll installation
- Documenting my steps helped keeping me focuses
Credits & References
- Image on the left: a screenshot of the terminal when I was installing Jekyll
- Image on home uses a screenshot of windguru
- Theme used for this Jekyll site: Jekyll voyager theme by redVI
- I used the documentation of Micky