Wildcard week
Week 16- Documentation
Assignments:
- Individual assignment:
Design a mold around the stock and tooling that you'll be using, mill it (rough cut + (at least) three-axis finish cut), and use it to cast parts - Group assignment:
Review the safety data sheets for each of your molding and casting materials, then make and compare test casts with each of them
Composites: Mold for the roch
For this week I kinda used last weeks project because at last minute I decided that it would be better for me to use the mold that I had designed as composites rather than molding and casting project. I had designed the mold for the composite mold in last week and for this week I scaled the mold up and then milled it out with the Shopbot.
- I started out by opening last weeks mold design and scaling it up in VCarve pro.
The mold is two half molds that combined make the rock. After scaling it up I then set it up in VCarve and made it ready for a cut. Last week(Molding and casting) - After making the mold ready for a cut all I neded to do was to glue and making sure that the foam board that I was cutting was secure in place and starting the cut.
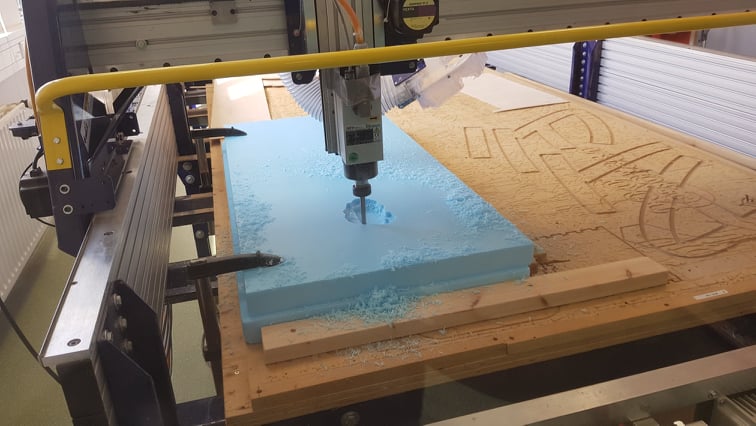
- After I had cut out the mold I removed it from the CNC and cut it out with a knife.
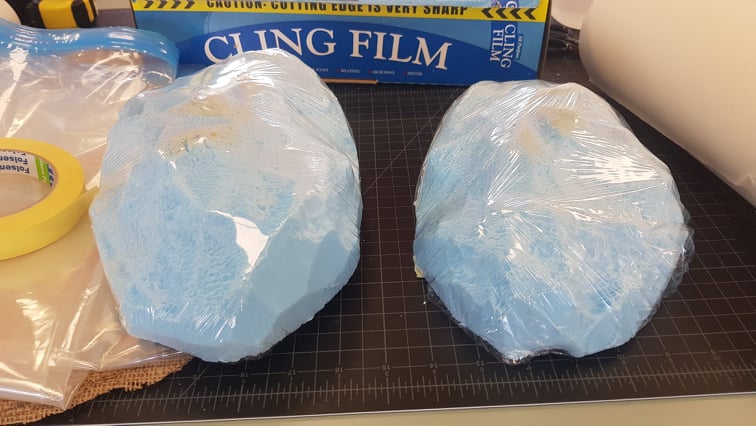
- After removing the molds I realized that I had made the same side twise so I took a sandpaper and sanded one half out so he would fit the other half
- After that mistake I then found a cloth that I was going to use and cut out a pice that would fit on the molds. I cut out a couple of pices for each side. The cloth that I'm going to be using is a cloth that is used to package dry fish in the fish drying company in my home town.
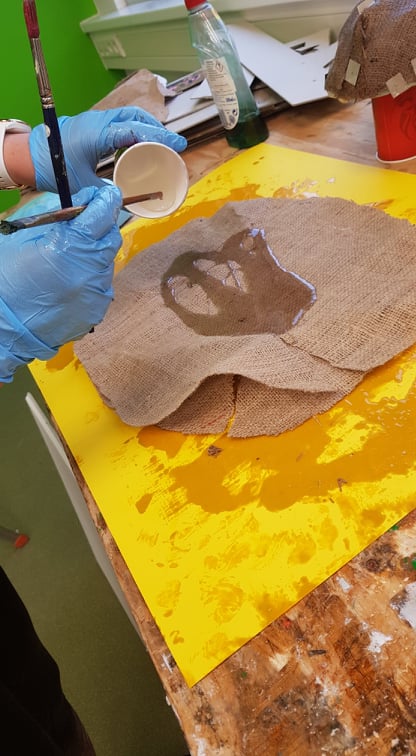
- After cutting out the cloth and I made sure that it fitted around the molds it was then time to make the molds ready so I wrapped the molds with a protective film and then I placed soap on the film to make it not stick to the molds.
- After the molds where ready I then mixed the epoxy. I mixed them 2/1 by volume. I mixed 2 of the epoxy resin and 1 of the hardener. After placeing both materials in the same cup I stirred them together untill they where well mixed togehter and then I started to paint the cloth with it until the cloth's where soked in it. I used four cloths, two for each side.
- After painting the cloth's I placed them on the molds (two on each mold) and pinned them down with metal pins. I put a piece of vinyl sticker material on each pin so the pins would hold the material down. After pinning it well down it was time to let the it dry over night.

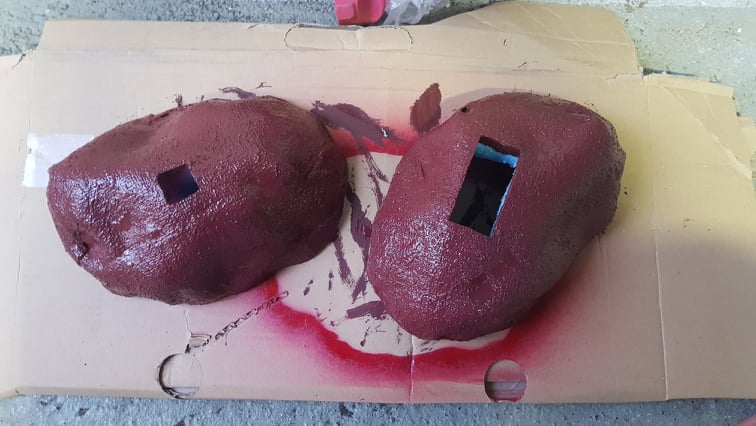
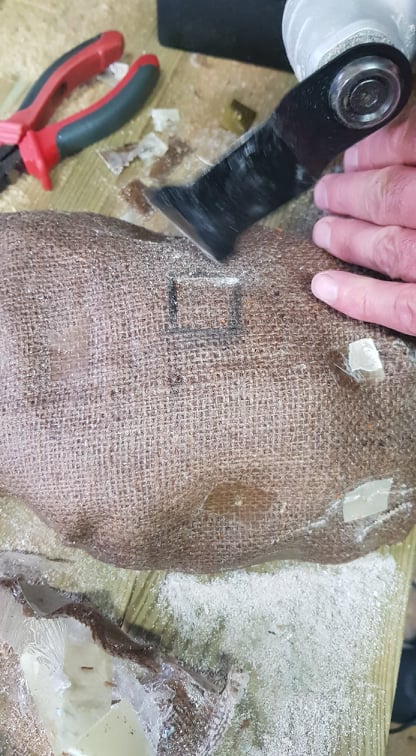
- After it had dryed over night it was time to take the pins out and making holes for the screen. I decided not to take the foam out because then I would need less material to fill the space. I marked the area that I was going to cut out and then I cut it out with a machine (multi vél in Icelandic). After cutting the composites I removed a space for the screen in the foam by cutting it out with a knife.
- After cutting holes for the screen and the light sensor I then removed the foam from the composites and made space for the circuitboards and sensors.
- After removing the foam it was time to paint it. My mother asked if she could help so she painted the composites shell like a red volcanic rock like that can be found on Eldfell the mountain that the Varða is made for.
- After painting it and waiting for it to dry I poured a clear silicone rubber in the hole for the screen to try to make it fit the curve of the rock by placing protective film on the shell and taping it to it. After placing the film I mixed the silicone and poured it into the shell. (see more on molding and casting at molding and castingweek)
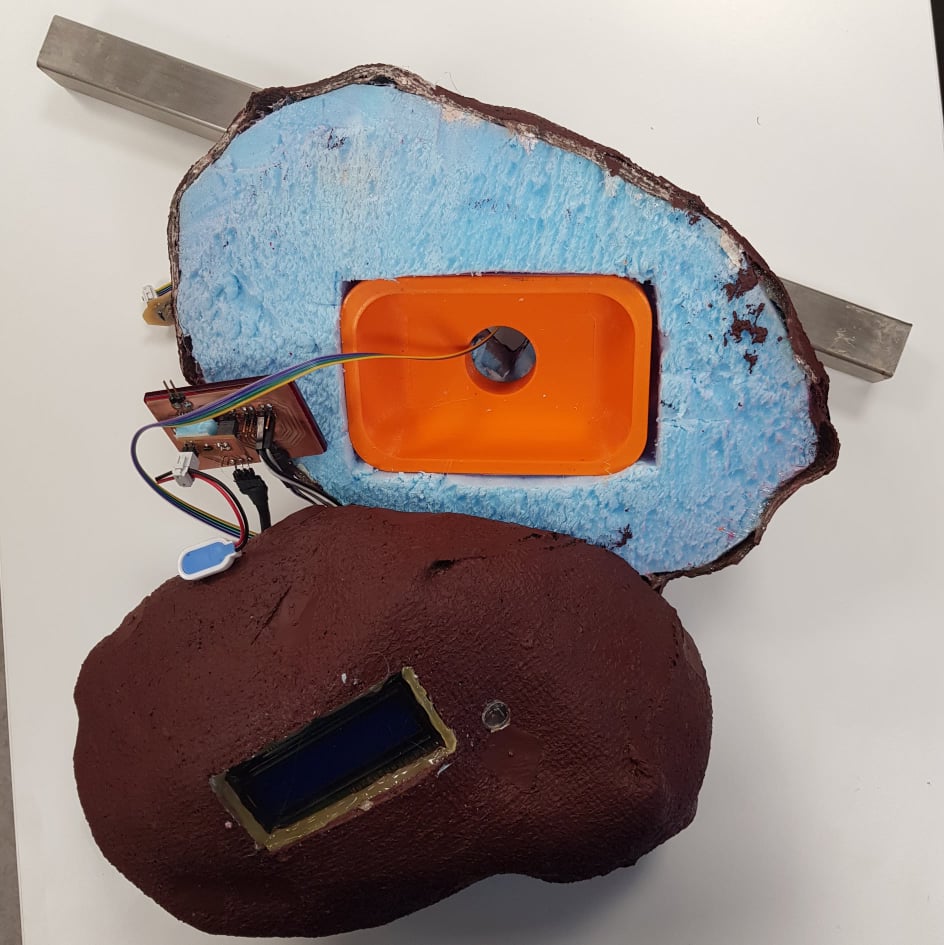
- After placing the circuitboard in the shell via toothpicks I was not wery happy with it so I decided to use a 3D printed case that I had printed previoucely so I made a place for that box inside the rock. I accidentally removed too much area inside the rock so it was a little bit more messy when I was glueing it with hot glue.
- Before I glued the box in I glued the light sensor in with tape and hot clue and made sure that the sensor chip was looking out the hole that I had made previoucly.
- After glueing all of the parts together I decided that I did'nt like the slilicone rubber that I had put in place as a glass for the screen so I took out the sislicone and cut out a plexi glass to fit in the hole for the light sensor hole and the screen. After cutting that I with the laser I then glued it in with a hot glue.
- At this moment all I needed to do was to place the iron tube for the tempreature sensor in place on the bottom in the hole that I had made for it when I was cutting all of the holes out. I was going to glue it shut with a hot glue but stopped at last secont because I needed to travel home with it and it fits better in my bag not with the tube.
- After the shell was ready all I needed to do was to put the motherboard in it.