4. Computer controlled cutting
Assignment
Individual assignment: Cut something on the vinylcutter. Design, lasercut, and document a parametric construction kit, accounting for the lasercutter kerf, which can be assembled in multiple ways, and for extra credit include elements that aren’t flat.
Group assignment: Characterize your lasercutter’s focus, power, speed, rate, kerf, and joint clearance.
Laser Cutting
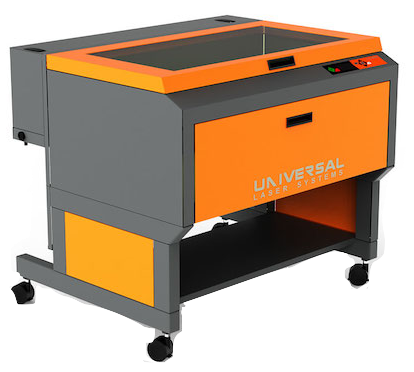
Universal Laser System PLS6MW: Is a free-standing platform uses multiple laser wavelengths to process the broadest possible spectrum of materials and supports either CO2 or fiber lasers.
Laser Material Processing Area (W x H) (813 x 457 mm)
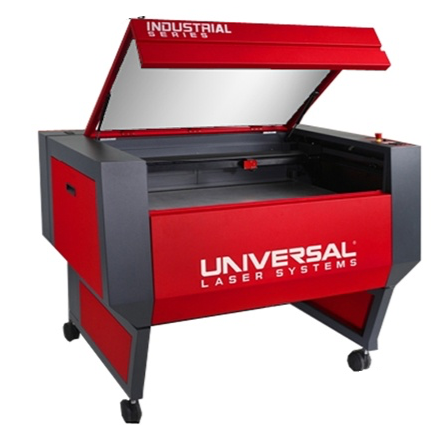
Universal Laser System ILS12.150D: The dual laser platform supports a power range of 10 to 150 watts.
Laser Material Processing Area (W x H) (1219 x 610 mm)
Group Assignment
On the group assignment we where ask to characterize your laser cutter’s focus, power, speed, rate and kerf.
Each group member choose a material and tested the power, speed, frequency and calculated the kerf.
I went with FOAM !!.
All of the Group members work is shown here.
Pressfit Kit
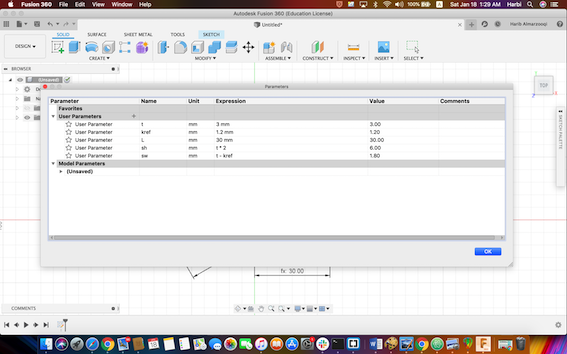
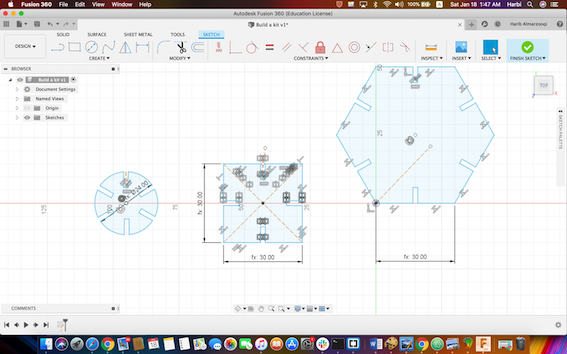
In this assignment I designed a pressfit kit which can be assembled in multiple ways, using parameters, accounting for the lasercutter kerf. Laser cutting machine used is the Universal Laser System PLS6MW.
The Design
Using parameters in Fusion 360, I added the the thickness in my case I’m using 3mm MDF, Kerf 1.8 mm, etc.
Cutting steps:
- First step is turning the machine ON.
- Open the sketch in CoralDRAW and press (cmd P) to initiate the printing process then click on Preferences.
- Choose the type of material. The type of material that I used Natural > wood > MDF. Material thickness 3mm. And put it on the work surface area.
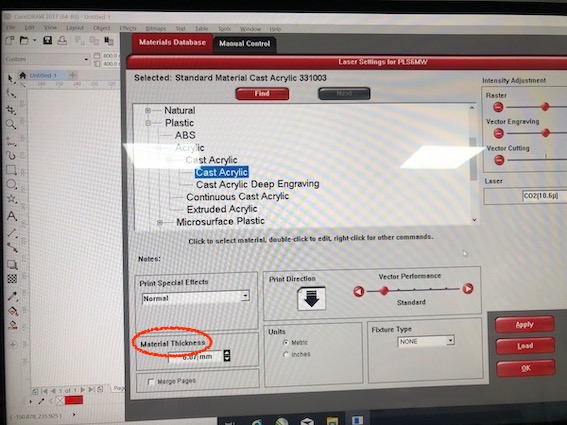
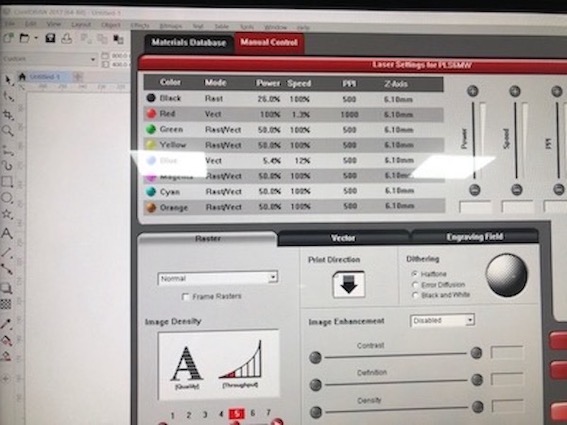
- On the Manual Control > laser Setting is sit to default (In most cases the default material settings will be sufficient and it will not be necessary to adjust intensities), press Ok > Print.
- Move on to Universal Laser System using Control Panel

- Press Focus View (automatically the machine will get in focus)> Relocates View > To Pointer.
 .
. 
- Start the vacuum.
- Press Play.
- Keep an eye and don’t leave the machine running
- Turn the vacuum off
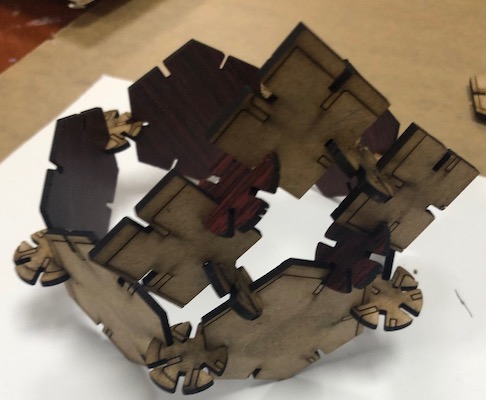
ٍResult
It was suppose to be a crown, I guess it’s close enough.
Vinyl Cutting
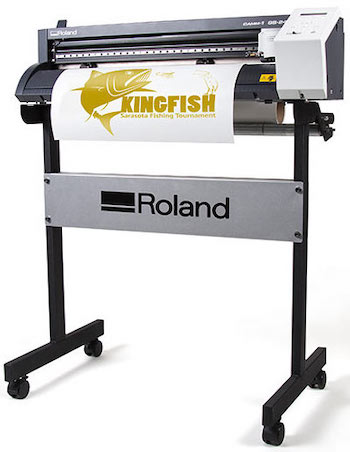
A vinyl cutter is a type of computer-controlled machine. The model of vinyl cutter used in Fablab is the Rolanld CAMM-1 GS-24.
CorelDRAW

Yes I’m a Crown Vic fan. I obtained the Ford logo that I’m going to cut for this assignment from here. I coped the picture to the workspace on a new project file in CorelDraw. Right clicked > Quick trace, to create a vector copy of the image. Selected the picture and chose hairline as a cutting thickness.

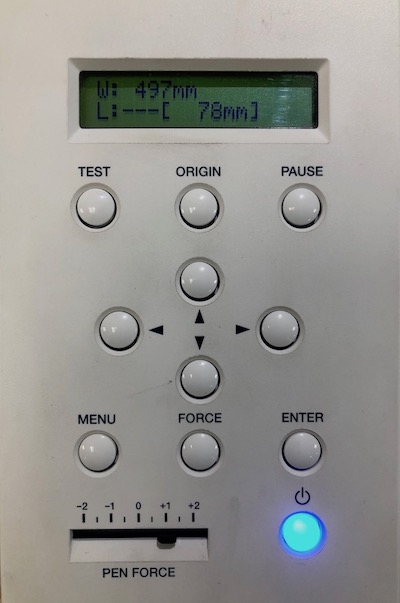
Next I clicked on the Roland Cut studio icon on the tool bar, selected my image and clicked on update so my design is displayed in the preview space. After that clicking on file > cutting setup > media size > change , to change the width according to the value displayed on the machine which is 497 mm.
Sitting up the machine
-
Adjust the start point of the vinyl by first pushing the handle on the left to release the motors grip and then I can adjust the it easily, and pull the handle back when done.
-
Adjust the motors wheels if the grip is not perfect on both sides.
-
Adjust the Blade Force. Click FORCE button on the panel, put it to 70 gf.
-
Test the cutting blade force by pressing and holding the TEST button for a couple of seconds.(If the test result did not peel you have to add more force to the blade, if it cut deep you would have to decrease the cutting force)
-
On CorelDRAW click on the cutting icon on the upper toolbar and click OK.
Result
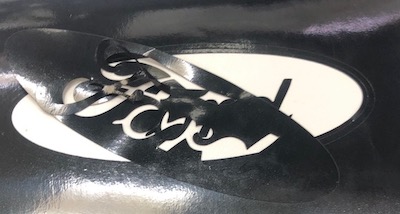
As shown I did not get it right at the first try. The issue was that I did not tighten the blade Force enough, and the vinyl was mostly attached to each other. I fixed it by adding more force to the blade and preforming the Test.
Using scissor, I trimmed Ford logo from the vinyl roll. Then using the tweezer I peeled the inner vinyl. Next adhered some application tape to the logo. Making sure to remove air bubbles with a squeegee.
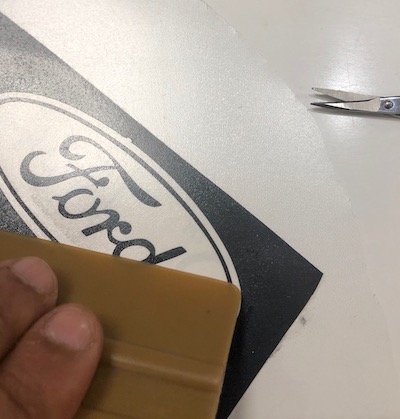
The logo now is ready to be placed anywhere.