Extending on the previous classes on electronics I explore tricks on the output side of the board.
After inspiring week of classes following result of my input week, when I managed to light up an embedded LED on my custom made board with a button press. So I thought I would do this week not as a continuous flow towards one specific goal but as a series of experiments, since the lab is closed and no knew custom boards could be made for the moment.
 – Recitation –
Charlieplexing
This concept got stuck with me from Neil’s lecture. I wanted to try that by myself. For the moment having access to the Arduino only, I made a circuit for it. The wiring might not be the most elegant but using the pre-existing elements I thought it would be acceptable. In the program I tried to make it as manageable and readable as possible.
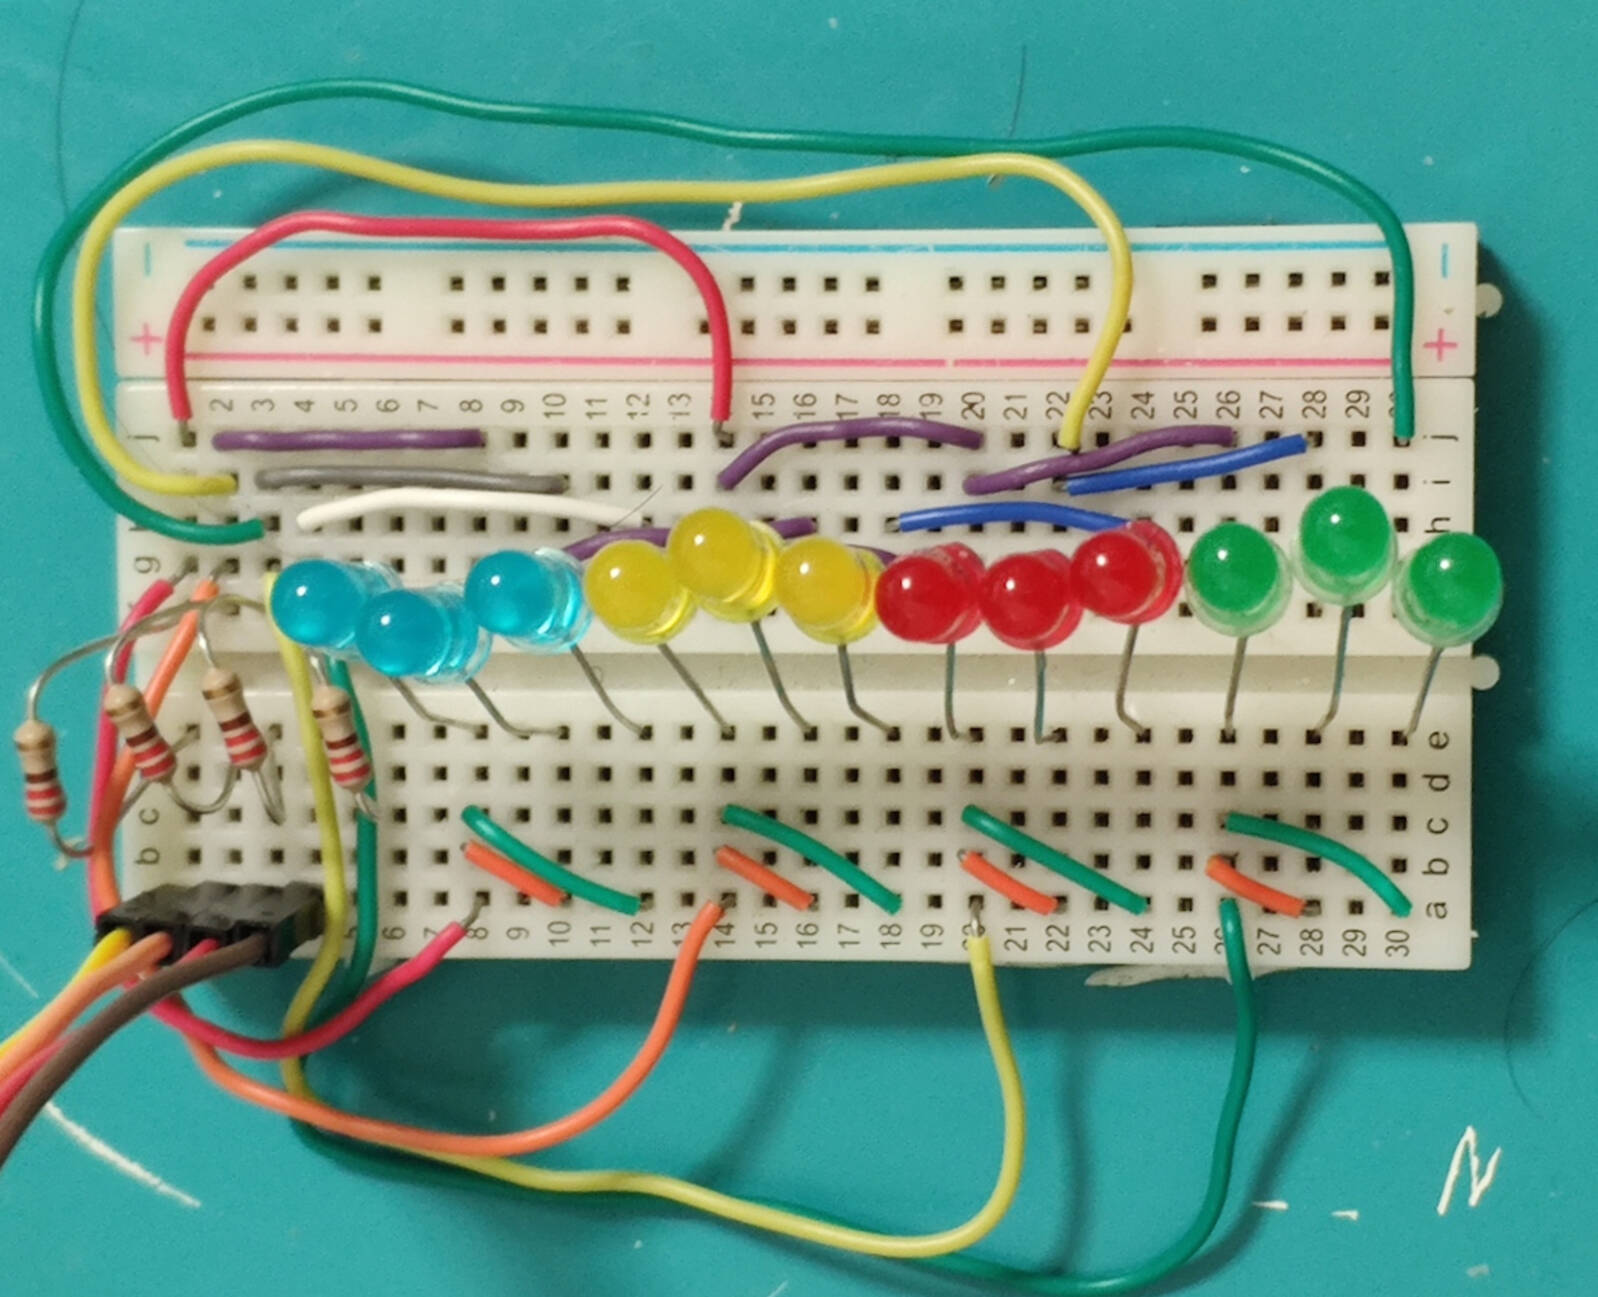 – Charlieplexing Wiring –
As such, I define the count and the relevant pins, make a function to convert Wire index into pin number. This way independently I can both address specific pins and clear all of them dealing with simple arithmetic and not with pin specific indices.
In the main loop I walk through all the indices possible given the number of wires and set them, clearing them beforehand.
Thus, the only thing that needs to be updated is the pinout and the GetPin function.
In development I faced a minor confusion with the pin modes and digital write states. This article from documentation and this example on charlieplexing for arduino helped. Overall, I figured that by setting all pins to INPUT and writen to state LOW no LED get lit. Then in order to light up an LED I put the source cable to OUTPUT and HIGH and the target cable to OUTPUT and LOW.
Additionally this tool helped to select the proper resistor for the LEDs which I realized could just go on the pins and not individually on each LED.
```c
// Number of wires to be used.

const int count = 4;
//
const int control0 = 10;
const int control1 = 11;
const int control2 = 12;
const int control3 = 13;

//
// 0-1, 0-2, 0-3
//
// 1-0, 1-2, 1-3
//
// 2-0, 2-1, 2-3
//
// 3-0, 3-1, 3-2
//

// Set up the script.
void setup(){
Serial.begin(9600);
Serial.println("The charlie-plexing code for arduino. Using " + String(count) + " wires for " + String(count*(count-1)) + " LEDs.");
}
// Called per frame.
void loop() {
    // Loop through LEDs and Set them one by one.
    for (int i = 0; i < count*(count-1); i++){
        // Clear LED states.
        Clear();
        Serial.println("LED: " + String(i));
        // Set i-th LED on.
        SetLED(i);
        // Pause before switching.
        delay(1000);
    }
}
// A function that given index of an LED, activates corresponding wires in proper state.
void SetLED (int n){
    // Given that wires are connected in order outlined in comment in the beginning calculate indices.
    int source = n / (count-1);
    int target = n % (count-1);
    if (target >= source){
        target += 1;
    }
    Serial.println("Source: " + String(source) + ", Target: " + String(target));
    // Translate indices into the corresponding Pins.
    source = GetPin(source);
    target = GetPin(target);
    Serial.println("Converted Source: " + String(source) + ", Target: " + String(target));
    // Activate the pins into the correct state.
    pinMode(source, OUTPUT);
    pinMode(target, OUTPUT);
    digitalWrite(source, HIGH);
    digitalWrite(target, LOW);
}

// A function to Reset all the pins.
void Clear(){
    int pin;
    for (int i=0; i < count; i++){
        pin = GetPin(i);
        pinMode(pin, INPUT);
        digitalWrite(pin, LOW);
    }
}

// A Function to map wire index with the PIN number.
// Adapt the order and count according to your wiring.
int GetPin(int pinNumber) {
    switch (pinNumber){
        case (0):
            return control0;
        case (1):
            return control1;
        case (2):
            return control2;
        case (3):
            return control3;
        default:
            return control0;
    }
}
```
The result of the script is this. With just four digital pins occupied I am able to individually set all twelve LEDs.
.jpg) – Charlieplexing Setup –
– Charlieplexing Setup –
.jpg) – Charlieplexing Result –
– Charlieplexing Result –
– Charlieplexing –