I was in the second group, You will find my hands in implmentation pictures xD
Parametric design
I made my design in the fisrt on Iluustratot jus to make a quick idea for my Kit, then i went through Fusion360 to make it parametric.
Here the tutorial to start in fusion to create a parametric design. VIDEO And for starting in Ilustrator if you interested.
VIDEO
Let's start ....
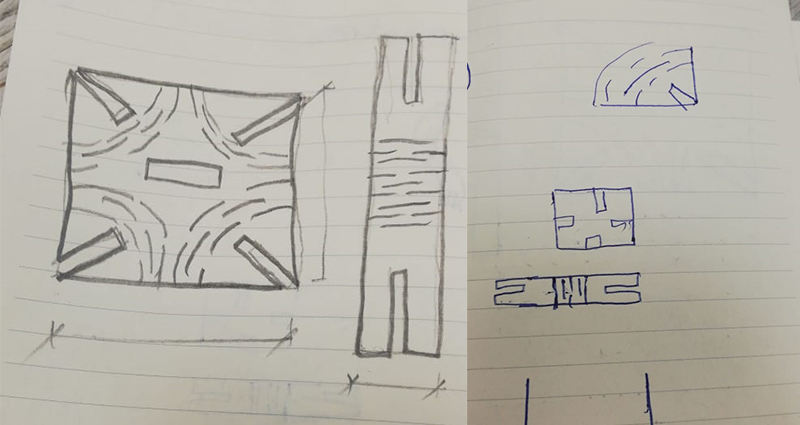
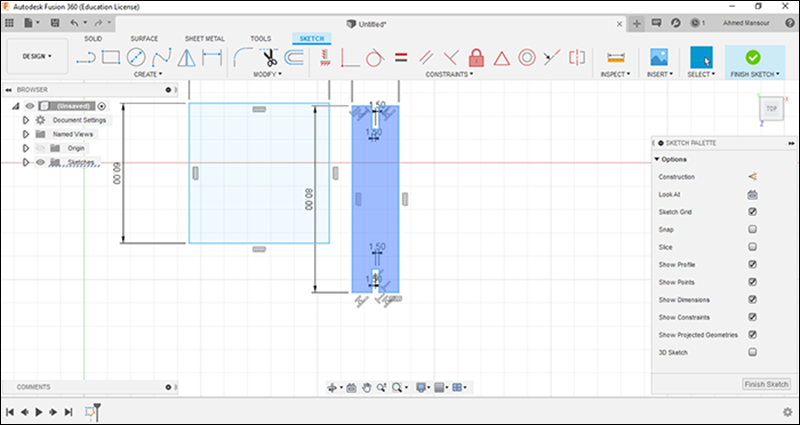
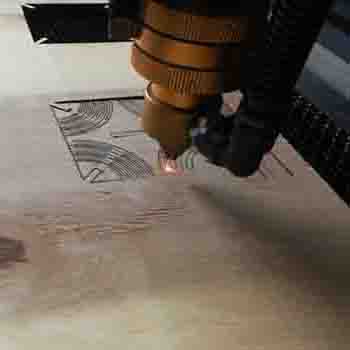
A sketch for the idea, I was trying to add some flexable sides, So i made those dotted lines
Start with the basic shapes with it's dimenstions
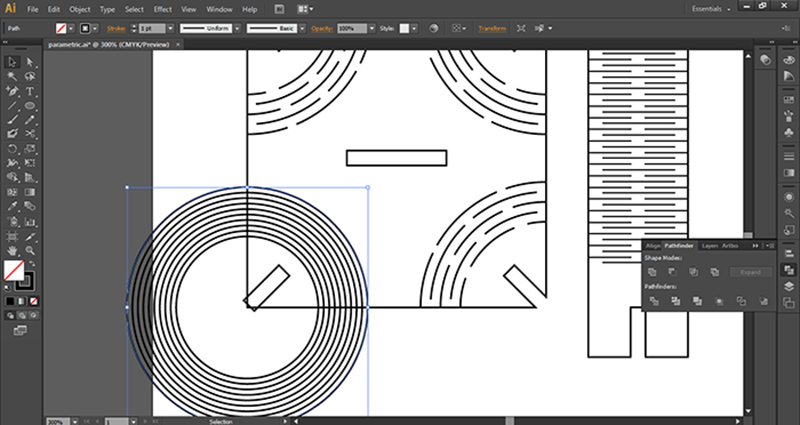
Adding flexable lines in the straight shape was easy, But in the cercular wasn't, So i made it with cicles.
Offset order was very helpfull in this, around 2 mm betweeneach circle and 2mm cut between dotted lines.
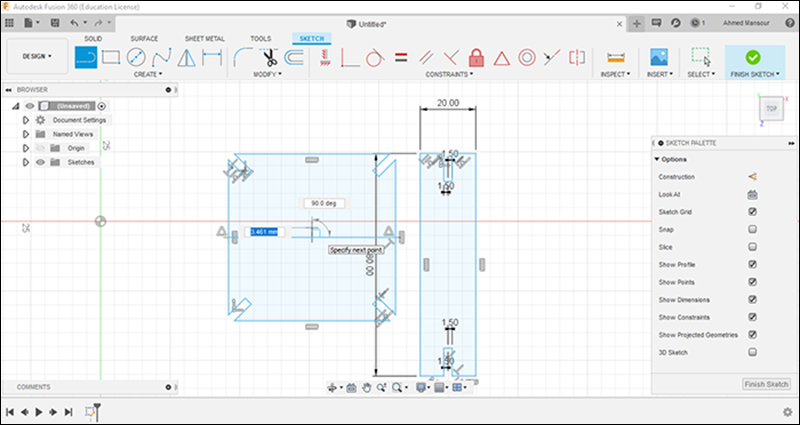
Let's make it parametric and start with the basic shapes sides
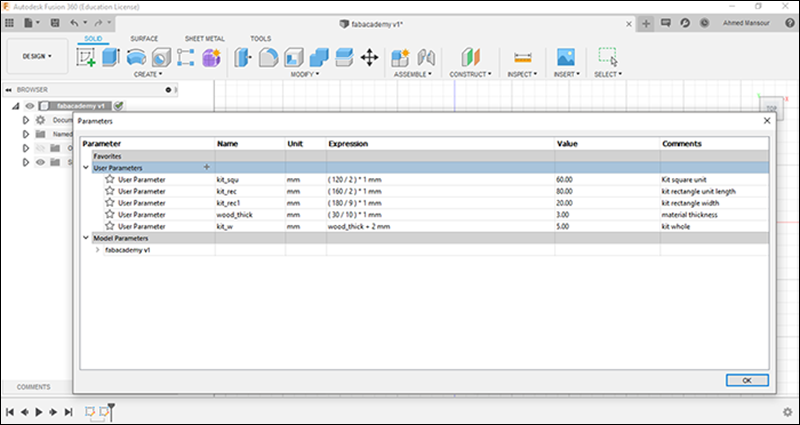
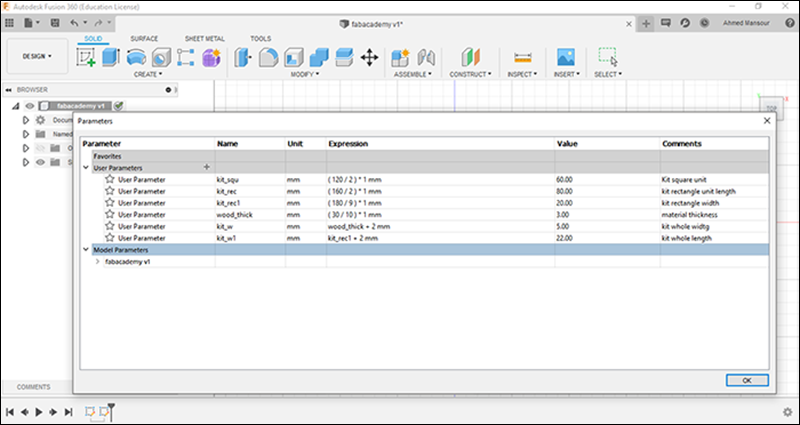
Adding parameters for each side
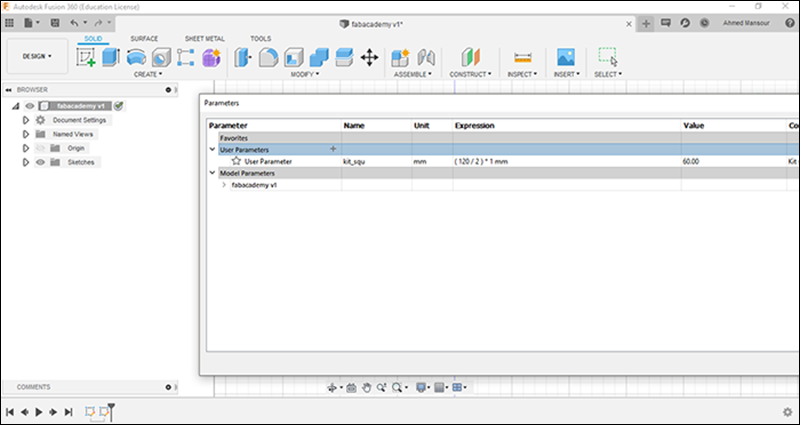
Preparing the parameters ,
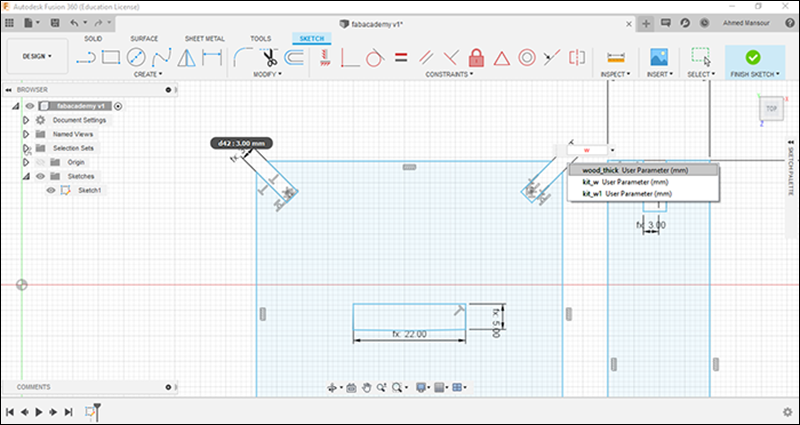
Here we can add parameter name and connect it with a specific dimension or other sides dimesion
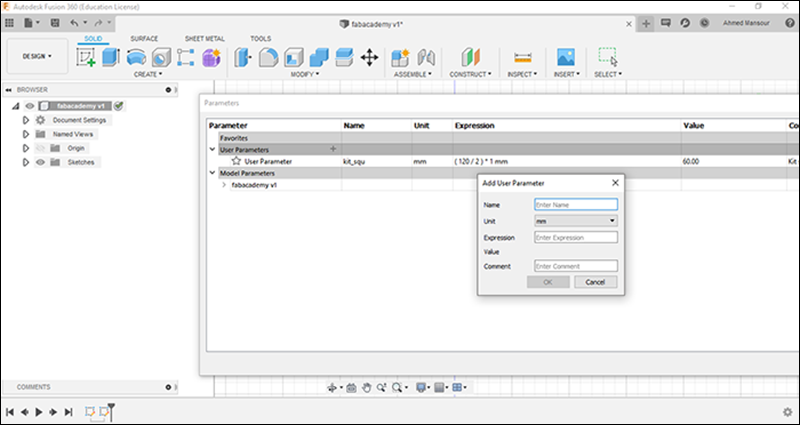
Modify menu, edit parameters then add the parameters you're going to need
Now the list is ready
Just connecting some details
<
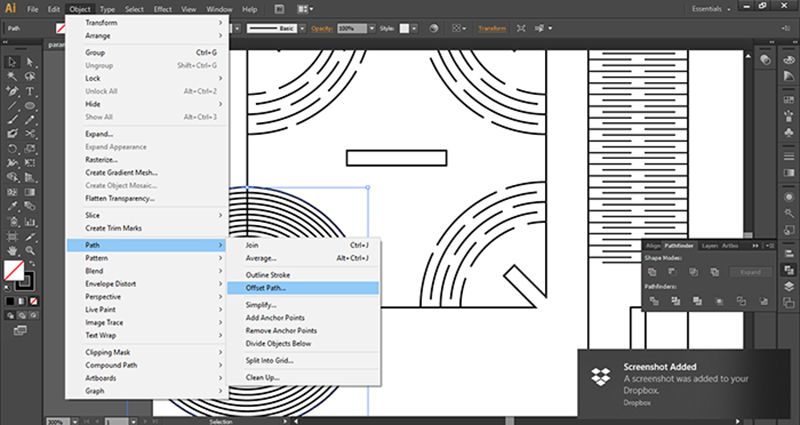
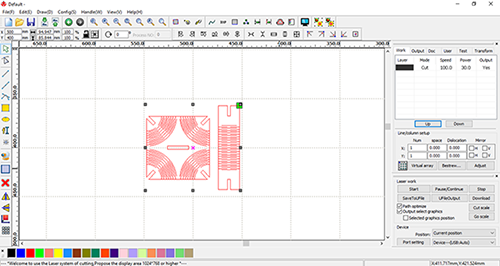
Then we need to Export the file into DXF extension, You can make this in both Fusion360, Illustrator or any other CAD software
DXF file
Fusion360 file
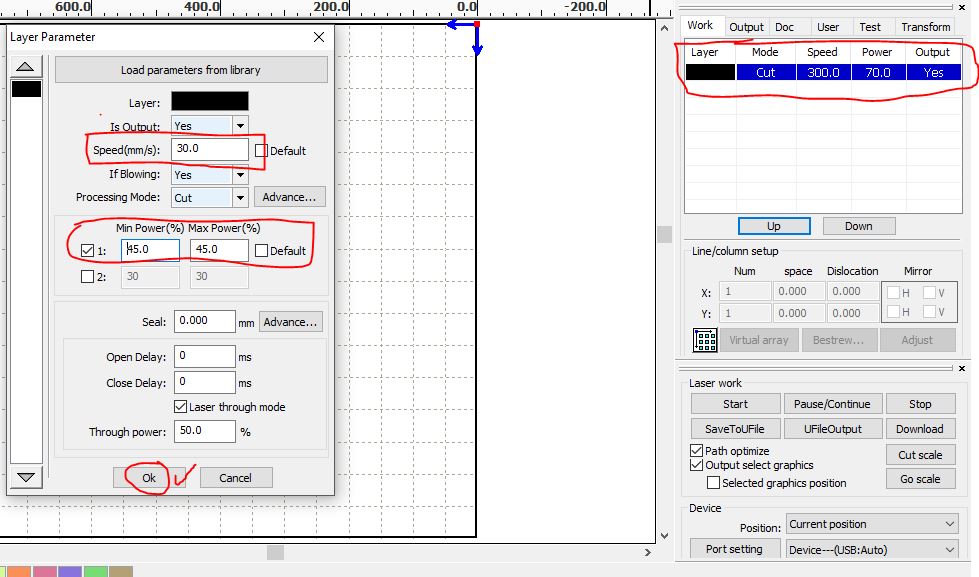
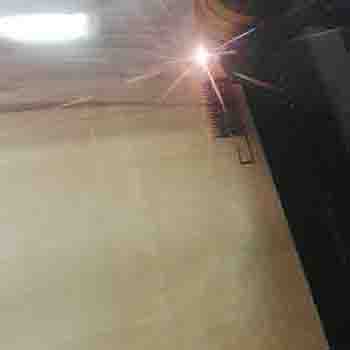
Laser cut
Vinyl cutter
Vinyle was the most interesting task let me show you the journey and explain more in that.
Videos for the whole process on the machine
CutStudio tutorial or Follow my instractor explaining May Eldardery VIDEO
How to Start with the machine.
VIDEO
Measuring material befor processing
VIDEO
Processing.
VIDEO
Finished.
VIDEO
Cut studio steps
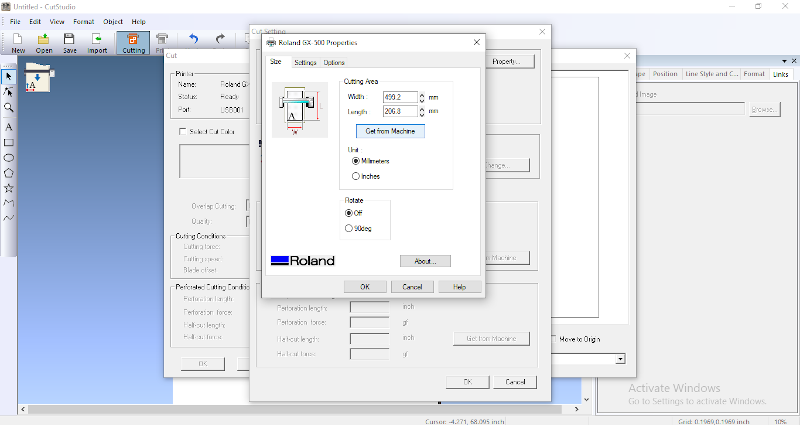
Selecting our machine "Roland GX-500", Getting the sheet dimensions from the machine.
sheet dimenstions will appear
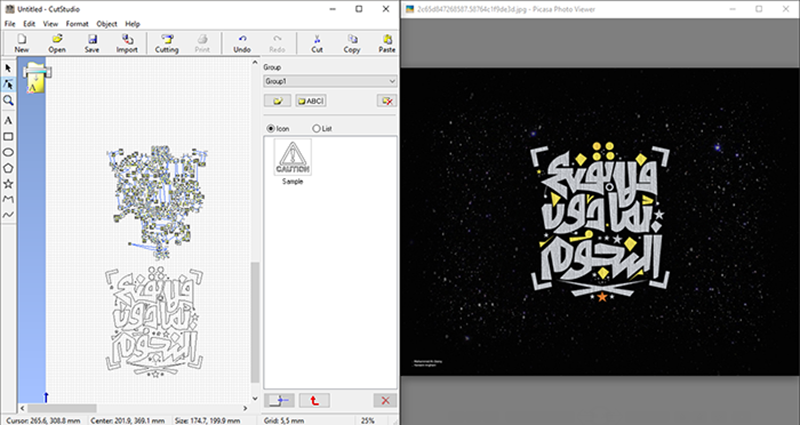
File>import to import the image (extensions jpg, PNG, BMP )
Here where i've impoted another design
Right click> outline image and slect how much details you want the delet the source image and the lines will remain for cutting
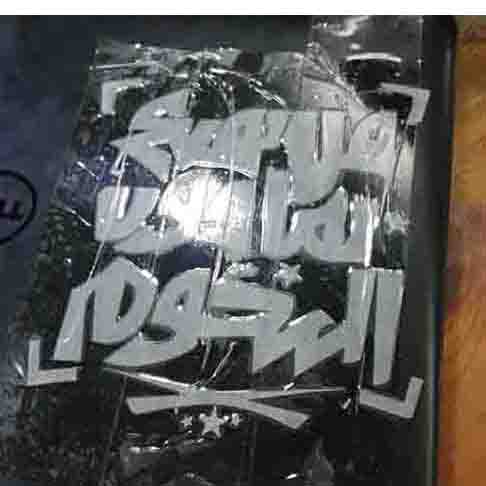
After the cutting shown in the videos cover get with with the design and cover it with the tape and add it on the surface you want to put on
Slowly and with this angle (parallel to the surface) remove the tape.
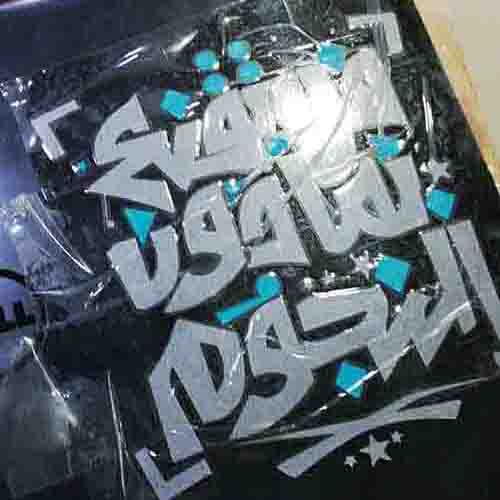
The result, The dots and the rest of the design in the next photos
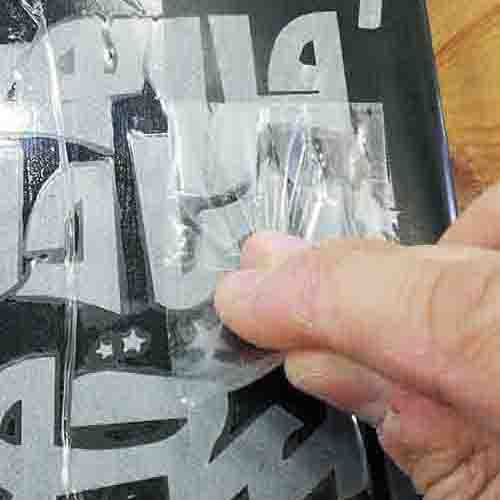
I made the same thing with the rest of the design
Put and remove slowly
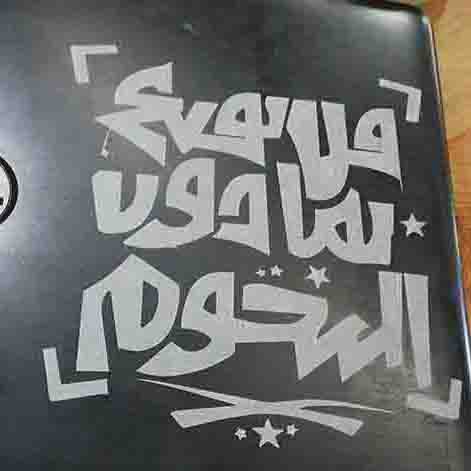
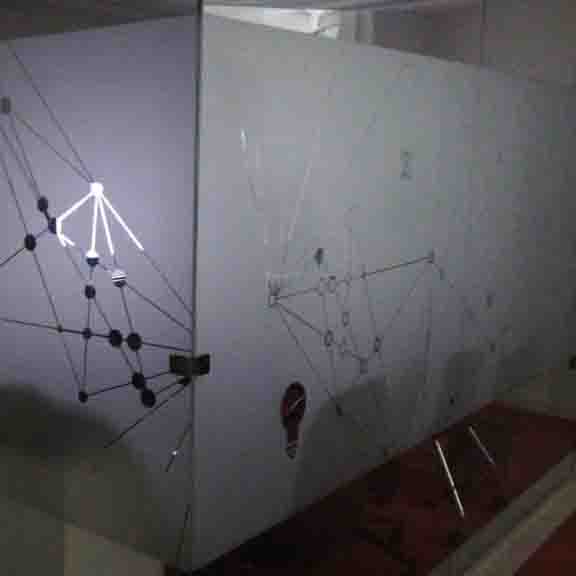
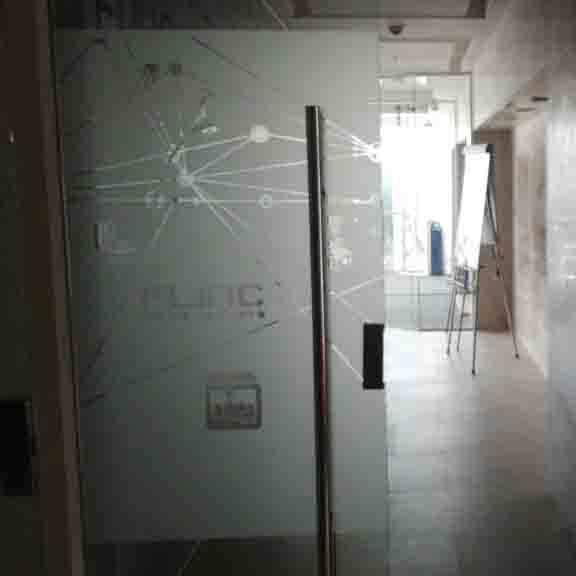
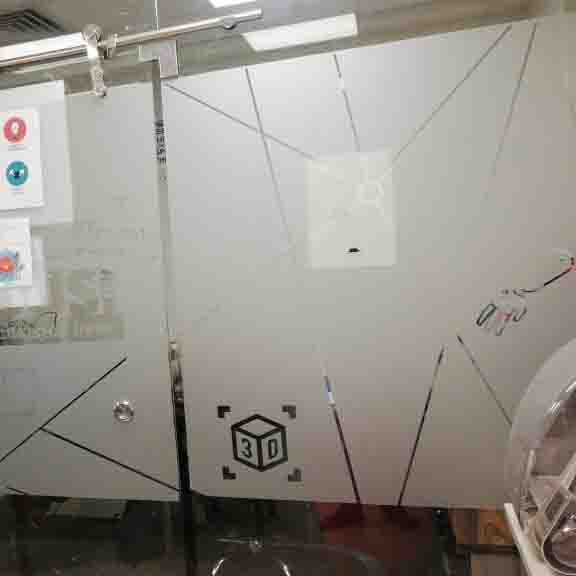
This is other design i've made for the company to cover the glass offices walls
With the same technique, But without tape just add all the design and remove the unwanted parts and leave the details you want
CutStudio file
Done
Creating a construction kit design.
Create a parametric design
Laser cut
Vinyle cut
New Learned
Creating a parametric design.
Make a two colored sticker.
Document with videos.
Enjoyed with
Creating a very enjoyable parametric design and make the parameters connected!
Dealing with the stickers and fixing technics.
Playing with my flexable construction kit.