
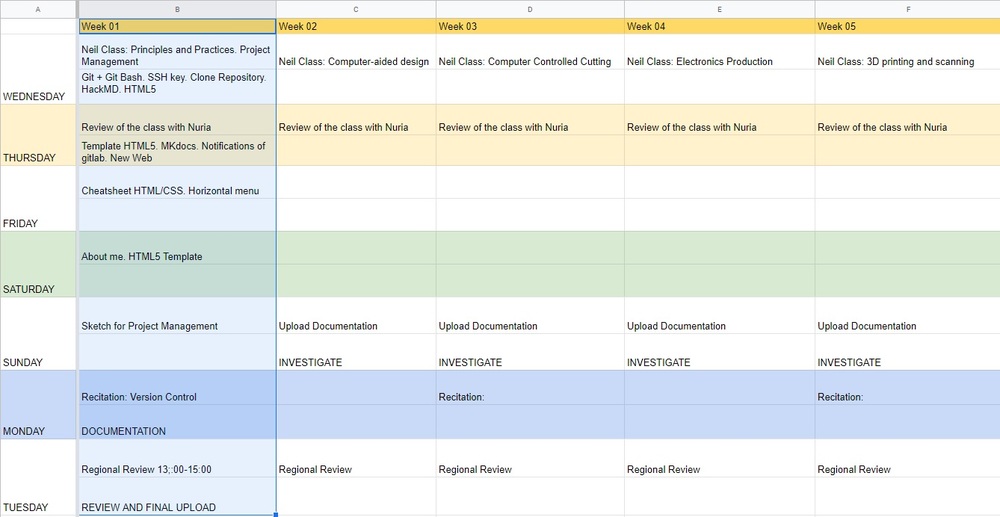
Week 01. Principles and Practices / Project Management
- Read the Fab Charter ✔
- Sketched your final project idea/s ✔
- Described what it will do and who will use it ✔
- Made a website and described how you did it ✔
- Introduced yourself ✔
- Documented steps for uploading files to archive ✔
- Pushed to the class archive ✔
- Signed and uploaded Student Agreement ✔
Project Management
Git and SSH-KEY
29/01/2020 18:00 After Neil's class, I'm going to try to create my SSH-Key, clone my repository. I hope to be lucky, because I am afraid of breaking something.😬
I have followed this tutorial of Git
The first thing I do is download Git. ; Git Bash already had it installed, but if not, I recommend that you have both. Git Bash is going to be the terminal that I am going to use.
Once both terminals are installed, I open Git Bash and I will create my SSH-Key. Open Git Bash
- First step. I need to identify myself: Type git config –-global user.name “your_username” and press enter and then type git config -–global user.email “your_email” and press enter again.
- Second step. I check if I have any SSH-Key created. Type cat ~/.ssh/id_rsa.pub (If you see a long string starting with ssh-rsa that means that you already have a key so you can skip the next step).
- Third step. Generate my own SSH-Key: Type ssh-keygen -t rsa -C “your_email” Here we press enter until you see your “key’s randomart image”.
- Fourth step. Let’s see our public key. Type cat ~/.ssh/id_rsa.pub and that huge string is our key.
This is how it looks in the terminal. First step achieved, come on 💪

Cloned from my repository. Cloud to Local
29/01/2020 18:45 I want to have the repository on my computer, I know that you can work online, but Nuria my instructor recommends that the sooner I start working locally, it will be a routine for me.
The first thing I need to create a folder called "Fab Academy" where I can save my repository clone.
- First: Open a Terminal (Linux/mac) or the GitBash (Windows).
- Second: Navigate to the folder where you want to store the folder with the Archive. For example: cd ~/Desktop/FABACADEMY/FABACADEMY 2020
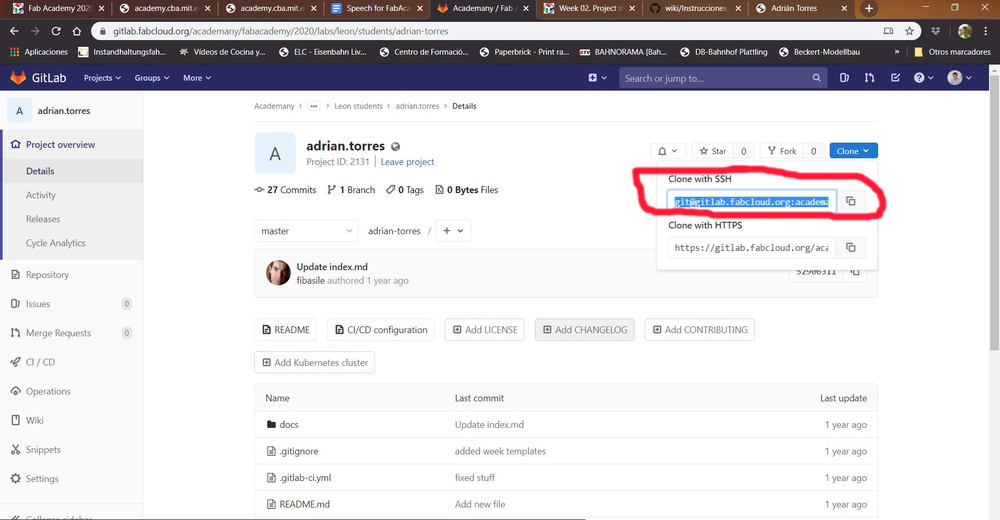
- Third: Clone the archive. git clone git@gitlab.fabcloud.org:academany/fabacademy/2020/labs/leon/students/adrian-torres.git
Here I had my first mistake, for not copying the link that appears on the gitlab page. And the second error copy it, paste it and not put in front "git clone"
- Fourth: Once the address and commands have been copied correctly (in my case it asks me for a password to make changes within the repository), press enter and the repository will be downloaded to our computer.
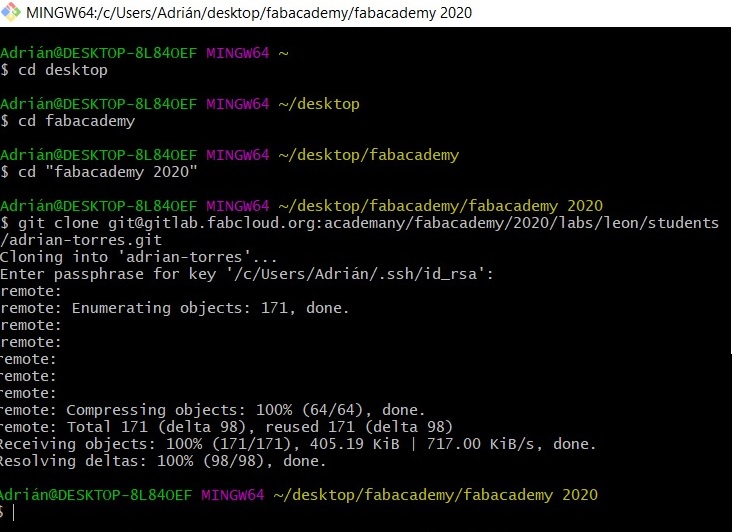
Here the capture of my terminal during cloning.
Markdown
29/01/2020 20:00 Before leaving the Fab Lab to go home, I will try to modify the index in the cloud.
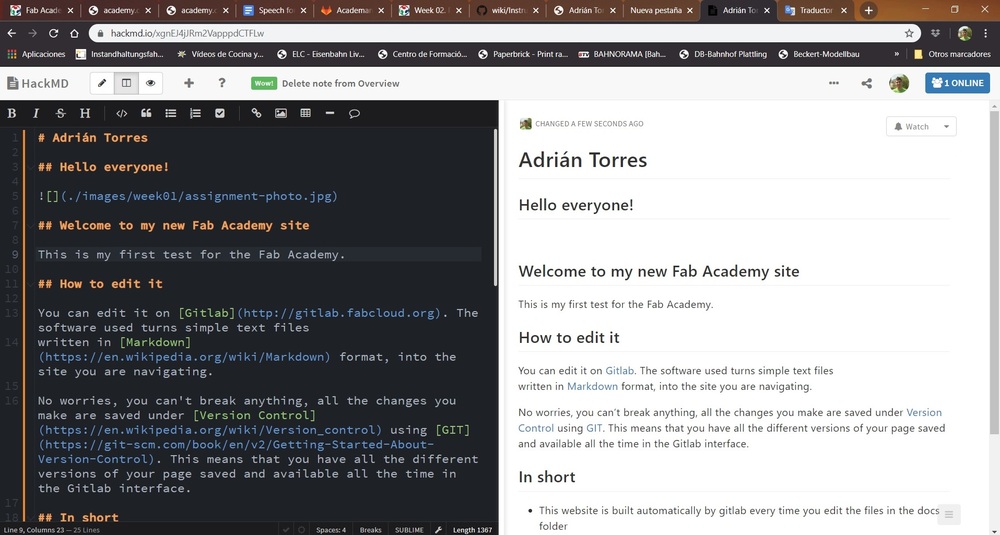
To do this I go to gitlab, and inside the Docs folder is the "index" file that is my web page with the template created by Fiore Basile. It can be modified with the online editor, but my instructor Pablo has recommended the online tool called HackMD
29/01/2020 22:00 After dinner, I still try Markdown. And I will try to make my first "Mantra", upload from local to the cloud. 🤞
After continuing to modify the code on the main page on Markdown, I encourage you to change the cover photo for mine.My instructor Nuria told me that when the images are replaced, the same name should be given so as not to lose the file path. This name must be short and contain no spaces, which is called an "absolute path".
So I took my best photo and reduced it as Neil told us in class with the ImageMagickDisplay program. Save it with the same name as the original "assignment-photo.jpg". ATTENTION be careful with the .jpg or .JPG, the upper and lower case can give us headaches.
Once the photo is prepared and replaced in the same directory, I start the "Mantra" in Git Bash.
- git status (to see what has changed)
- git pull (to download the local repository to the last version of the online repository. This is very useful if several people are working on the same repository).
- git add . (to add the changes)
- git status (to check that the changes were added)
- git commit –m ‘descriptionofthechange’ (to confirm the changes)
- git push –u origin master (to make the changes effective and finally update the repository online)
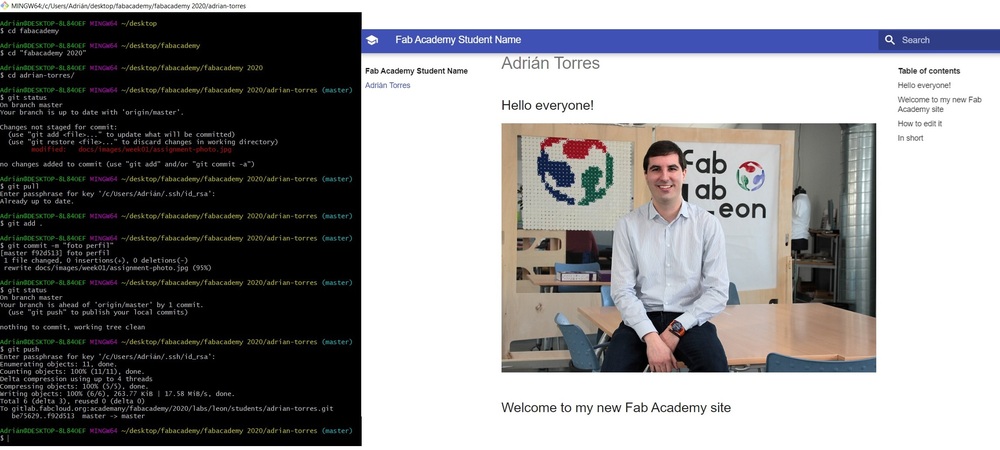
Here the final test. It worked!! and I haven't broken anything 😅
Brackets and HTML5 Template
30/01/2020 17:00 Today I modified the MKDOCS.yml and configured the notifications in the Gitlab so that the notices arrive. And I will start with HTML5.
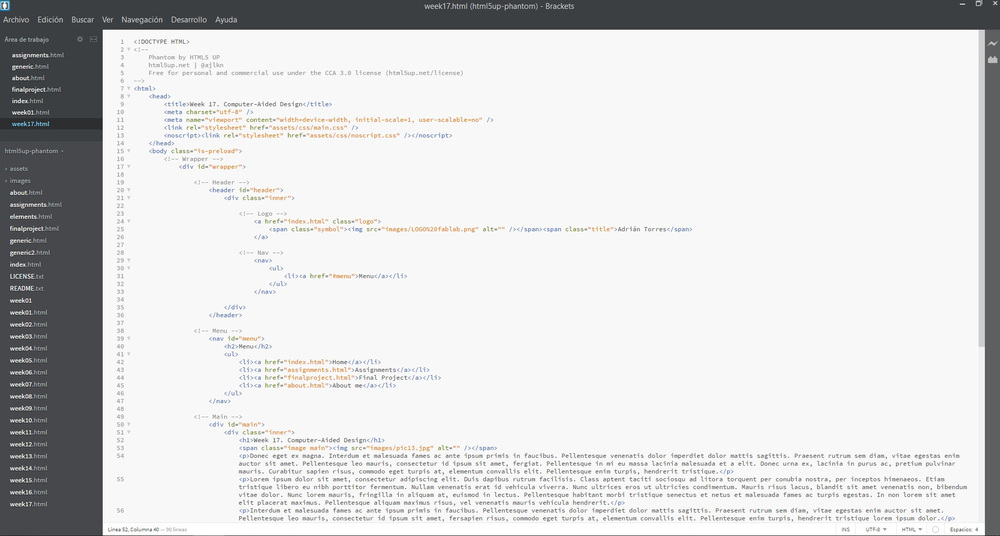
After looking at several templates on the link that Neil put in the class, I chose the one called Phantom. To edit the template I use Brackets, which is an editor that allows you to change the html and the css and make simulations to see how the web looks before uploading it.
I start by editing the template, changing colors, creating new pages for assignments, the about, the final project, menu.
30/01/2020 22:00 After a hard afternoon, modifying the page I decide to upload it to the Gitlab.
I go to my local directory and make a backup copy of everything inside (in case it doesn't work and I have to go back and continue working with the original template). I delete all the folders and files from my local repository and paste the new website. I'm nervous and I'm afraid.
I start doing my second "Mantra". With git status it detects that several files have been deleted and that there are new files to upload. Perfect. I continue with the git pull; git add; git commit -m; git status and finally git push. ERROR.
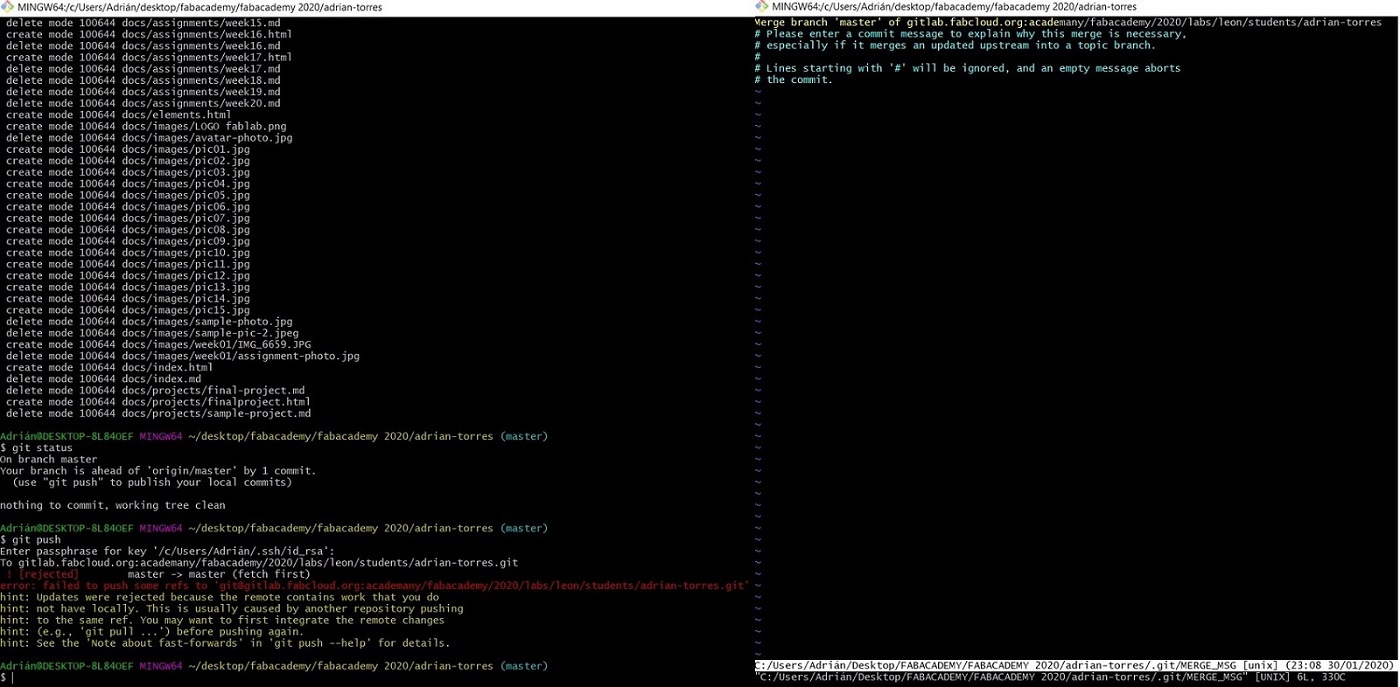
I press enter and a screen appears that is creating a Merge. I close everything, and I do another git status again until I finish with a git push to see if everything has been uploaded. Check the gitlab and there were all the new files, and the commit "new web" reflected it.
I start browsing the new website and the main page works perfectly, but those of the assignments, the about ... do not work correctly and I remember that the absolute paths are not correctly. Thanks Nuria😘

30/01/2020 23:45 It's late and I want some page to work well.
I take all the websites to the main folder and modify all the redirects on each HTML page.
31/01/2020 22:00 The last Friday of the month are OpenLab at the Fab Lab León, we show the space to the general public and show them what we do. There is a group that actively participates that use an open SW / HW camera, it is called Axiom Beta Camera. Sergio one of the members gave me a very interesting comic that teaches children to use Git. Thanks Sergio. I have it on paper, but here you can download it. Dangit,git!
Continuous "playing" with the HTML5 template. Nuria recommends a quick command page for HTML, it's called CheatSheet HTML. The menu tried to place it horizontally, eliminating the "hamburger" but I am unable, because there is something inside the CCS that I cannot decipher so that it stays at the top of the page and does not lower when I scroll on the page. I don't like it, so I don't decide to waste more time.
01/02/2020 11:00 I start filling in the About Me.
For this I use the ImageMagick to reduce the size of the photos.I also add the Agreement within the About. Within the Assignments page each week has a specific page. I decide to fill in the squares with logos on each topic. I edit them with Gimp and reduce them.
02/02/2020 11:00 Today the morning I have dedicated to painting, to drawing my sketch of the final project and I upload it to the final project page.😅
03/02/2020 16:00 After listening to the recitation on Version Control.
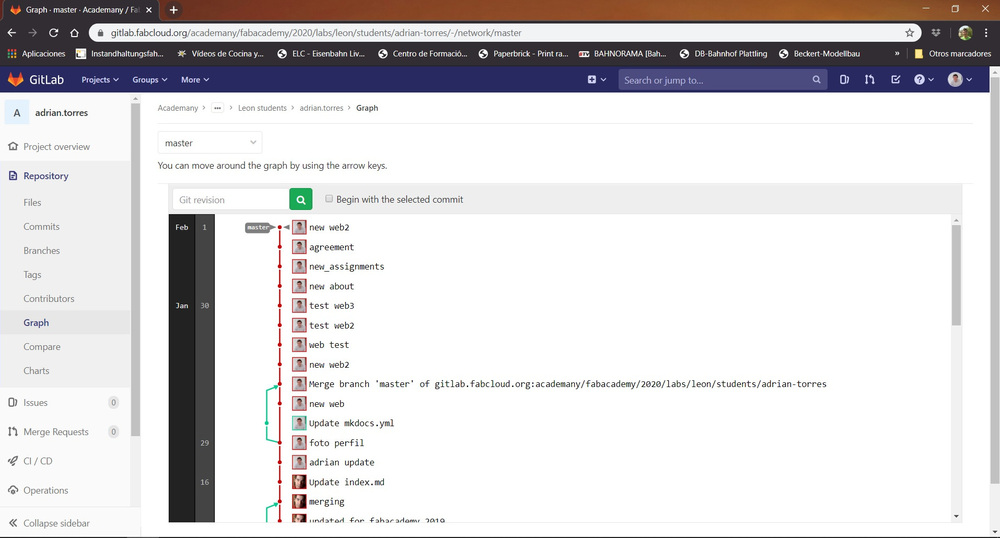
I have made my last adjustments to the page, and I have begun to document this Assignment. I have entered GitLab and I have seen that you can see a graph of all commits that are made. It will be interesting to see the graph at the end of the course.
NOTE: The gitlab sometimes takes a while to refresh the page, so give it time. Do not make unnecessary commit´s waiting to see if the page changes. Try clearing the cache of your computer.🤗
Wordpress
Neil during class mentioned other tools to create web pages. One of them is Wordpress. Here I show my recently created web page of my new personal brand Towy Model
Interesting links
- Git Tutorial
- FabZero by Fran The Beach Lab
- Elena´s Cardiel WebPage. Thank you 😘
- Git.
- HackMD
- Brackets
- Phantom.
- Dangit,git!
- CheatSheet HTML
Principles and Practices
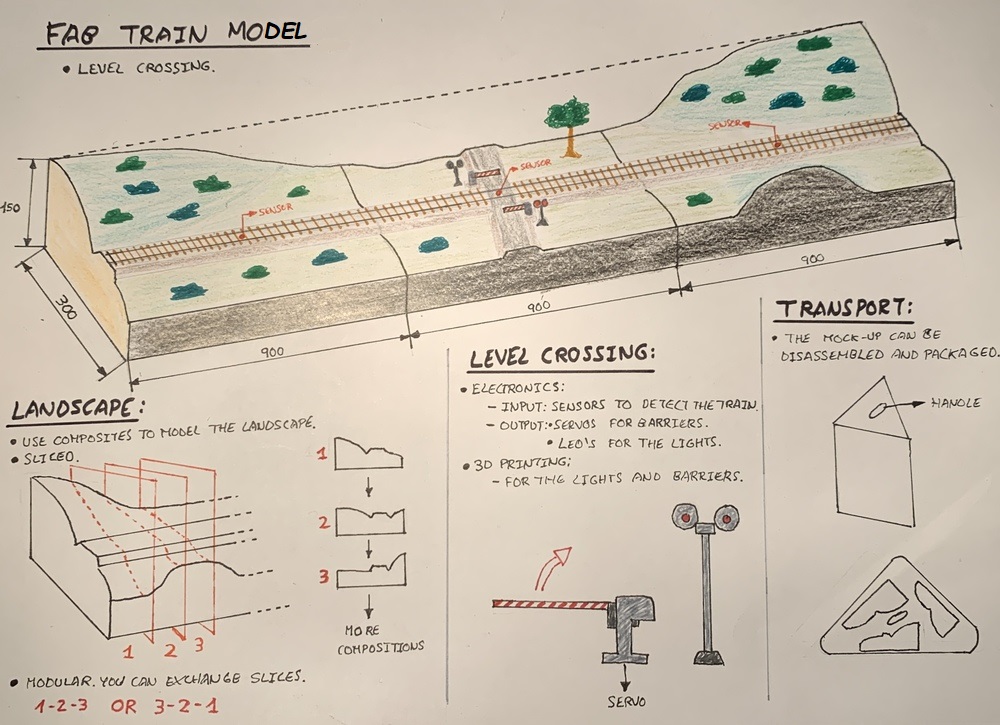
Fab Train Model
My idea for the final project is to build a model using composites to model the terrain. Also that a level crossing works before the passage of the train.
(I like to draw the projects or the prototypes, I can know what materials I will need and the measurements of the objects. I must confess that I have borrowed the paintings and markers from my sister; It had been a long time since I colored anything and it hasn't been bad.) 🤣
As I explained in my About since I was little I like trains and I also participate in an Association that makes models. For this I will be inspired by the Maquetren modular regulations here.
The frame of the model will be built in wood (the perimeter). For the landscape until now we used polystyrene that we carved with a cutter and then put glue and paper. In the Fab Lab my instructor Nuria had taught me several examples of the use of composites. I plan to mill the polystyrene with the shape of the desired landscape, but slice it. This allows me to make different landscape combinations and recycling the milled polystyrene model.
The model simulates a level crossing system. The system detects the arrival of the train by sensors and communicates with the actuators that move the barriers and the sequence of lights. To detect the train I plan to use light sensors or similar. When the train passes the sequence will be as follows:
- Detect the train. The lights begin to flash and slowly lower the barriers of the level crossing.
- When the train has just passed just above the level crossing, the system is deactivated, the lights go out and the barriers rise.
There is a sensor on each side of the level crossing to detect the direction of the train. To activate the movement of the barriers I will use servos.
For the transport of the model, being modular it is disassembled into three pieces of the same size. With two boards at the ends you can hold the three modules and transport them at once.
This is my project idea, I hope to carry it out during these six months.😅