Project management and web developement
Week 02
24/01/2019 5:30 p.m. Remote meeting post videoconference week02: Our instructors are explaining us how to modify our web from local, but the only thing that I see are code lines in a background. No sense to me. (Oh good, this is going to be quite hard…) But there are some words which repeat once and again, such us git, pull, push, commit, markdown, local repository… (If you have turn up in this site, probably by causality, and you have the same feelings I had, do not worry, you can handle this, just keep reading, I’ll try to help you)
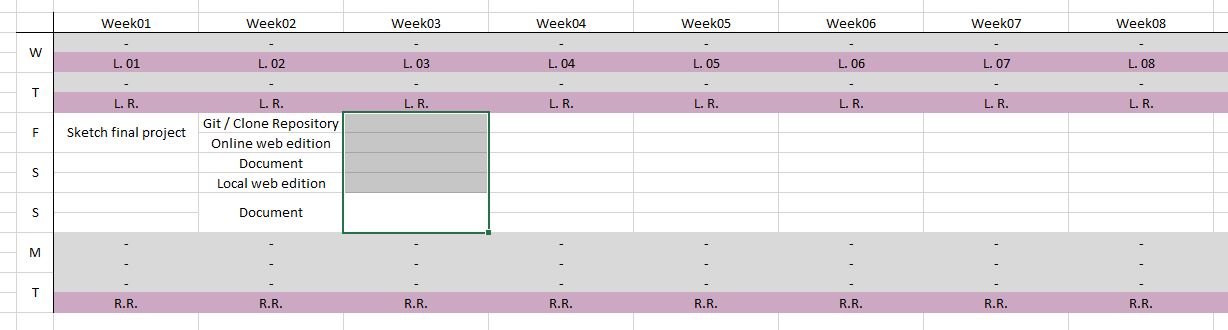
25/01/2019 10:30 a.m. Time to work: due to my personal situation I only can dedicate a few days to the fab academy, so I have to manage my time very well. So I started making a schedule and then working in the second assignment (project management and web development), without forgetting to document everything, all my achievements and failures, because when you fall, is when you learn more. (I never thought that phrase was truer)..
After checking some tutorials, I saw myself with confidence enough to start (I have to say that I was a bit scared. What if I break the computer? I’m not a programmer!!).
How to instal Git and get your SSH-Key
The first thing that we need is to install “Git” in our computer. For that, we just go to its official web page (https://git-scm.com/downloads) and download and install the software. Just leave everything by default. (If you are working with windows, you will see that the software installs “Git Bash”. This will be the interface, our command line, which we will use to communicate with our online repository in GitLab).
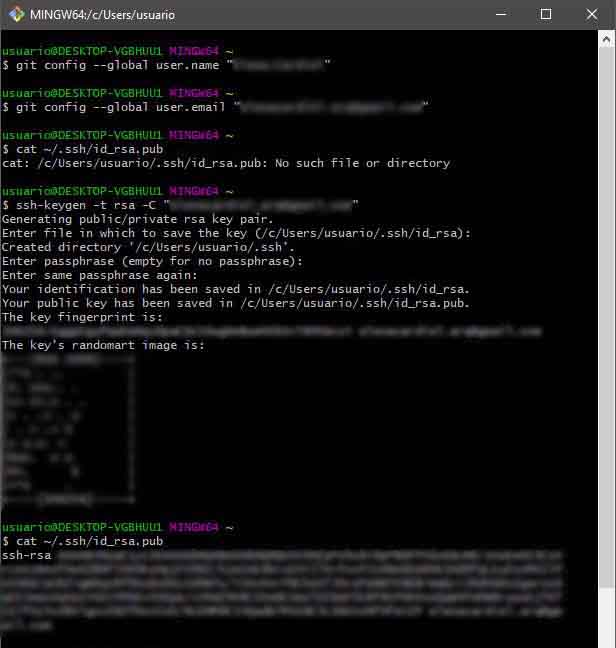
Once this is done, the next step is to create our SSH-Key, that allow us to establish a secure connection between your computer and GitLab. Open Git Bash:
1.- First step: identify ourselves. Type git config –-global user.name “your_username” and press enter and then type git config -–global user.email “your_email” and press enter again. In this step Git Bash don’t give us any response. (Please use the same credentials that you use for GitLab)
2.- Second step: check if we already have a SSH-Key. Type cat ~/.ssh/id_rsa.pub (If you see a long string starting with ssh-rsa that means that you already have a key so you can skip the next step).
3.- Third step: generate our SSH-Key. type ssh-keygen -t rsa -C “your_email”. Here we press enter until you see your “key’s randomart image”.
4.- Fourth step. Let’s see our public key. Type cat ~/.ssh/id_rsa.pub and that huge string is our key.
This is how the process looks in Git Bash:
Now we have to add that key to our account in GitLab: access to GitLab using your credentials; go to our account>settings>ssh-keys and copy your key there (that last huge string); and then click in add.
And that’s it!
25/01/2019 11:10 p.m: Ok, that wasn’t as complicated as I expected… My confidence on my programing skills is growing… :D
And here is when my nightmare starts.
25/01/2019 12:00 p.m.: I’m trying to clone a local repository but when I launch the command in Git Bash, Git denies me the access. I don’t know which the problem is.
25/01/2019 1:30 p.m.: I have been trying to solve the problem but I can’t. My instructors are sending me some links for help and suggesting me what the problem could be, but nothing seems to work.
25/01/2019 2:40 p.m.: My instructors have the idea that maybe I haven’t registered my email well in Gitlab. And when a go to Gitlab I realize that I never registered my email as every time that I wanted to access Gitlab I used the option “sign in with Fablabs”. Hope!! I can see the light at the end of the tunnel!!, Ok so I register my email, and I try to clone my repository again but no, “todo mi gozo en un pozo” we say in Spanish, it’s still not working :(
25/01/2019 4:07 p.m.: after having lunch a sad ham and cheese sandwich I come back to work and I decide that, although I cannot work locally, I can work online. So I go to my online repository in Gitlab and I start modifying things while I identify the language that markdown uses. After a half an hour I can easily work, identify and edit the different files.
Markdown’s language
Thanks to Fiore Basile we already have a personal site with all the folders for the different assignments already created. For now, we are going to keep this web page but in the future we can change the format if we want.
If you want to change it, I recommend you start with the new template as soon as possible, as when you change de format of the page you have to add all the information from the beginning. In my case, I am planning go to HTML5 UP and find a nice template for my final webpage.
In the main page of our online repository we can find these elements:
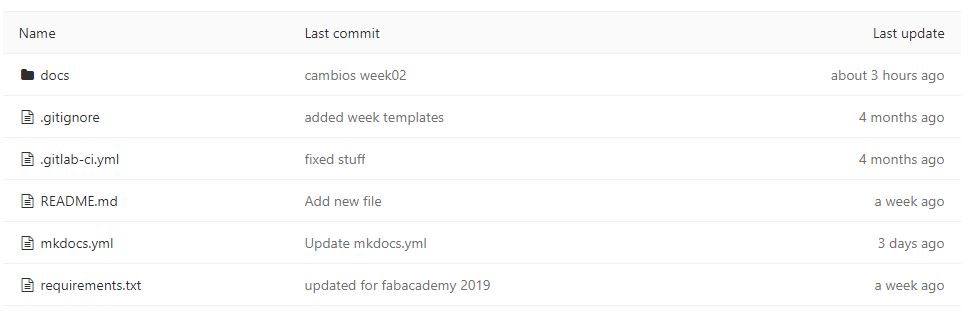
The archive named “mkdocs.yml” is the template of the webpage. Open and edit that file if you want to customise the site, such us change the name of your page, the colour, and so on.
In the folder “docs” we will find, add and modify all the files and texts in our site.

In about you can add your personal information. Just open and edit the file named index.md
In assignment you can explain what you have done and learned during each week of the fab academy. Just open and modify one of the .md files.
In images you can upload the images to show in our page. Please, keep in mind that the memory size of you repository is limited (by 200MB), so please, before uploading, reduce the size of your images (I recommend you 100kb max. per photo, whit a size of 800x800px. max.) There are some webpages that can help you with that, as https://pixlr.com/.
I usually use Photoshop to edit images. It is a very powerful software that allows you to edit photos by a huge amount of different tools. Most of the times, people don’t read the texts when they are surfing the Internet, they just look the photos, but if you have a nice photo then you will have their attention and they will be interested to know more about you and your project.
Then in projects you have the space for your final project.
And you also can find an index.md file which is the home page of your site that you can also edit.
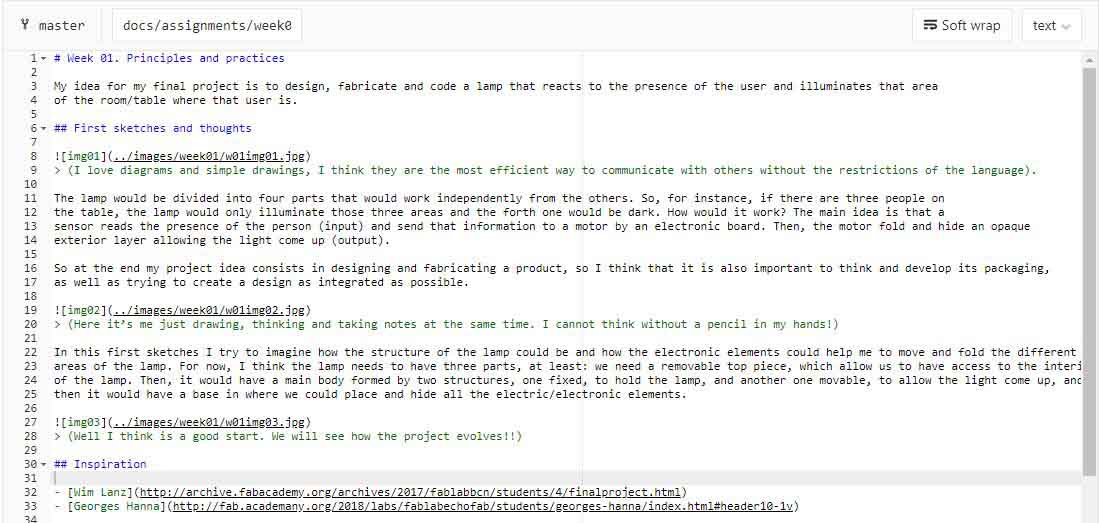
When you go to the edit mode you will see a list of code like this one:
Here you are some tips to help you:

How to clone your online repository and work with it locally
25/01/2019 8:45 p.m.: I was editing my web page the whole afternoon. I have to say that work online is really hard, you have to be changing between folders all the time, it give you a lot of problems, you have to wait a lot until the web page get uploaded.. It’s a pain. And I haven’t found the solution yet to my cloning problem. But then Nuria, my instructor from FabLab Leon, come to help me!! She was with me for a while and she found which my problem was!!!! (I love you Nuria!!).
To clone your online repository in your computer open Git Bash and go to the folder where you want to create the local repository.
Type “pwd” to know where you actually are. Type “ls –a” to know the list of folder/files that you have in the place where you are. Type “cd nameofthefolder” to select the folder.
Once you are working in the correct folder then type git clone git@git.fabacademy.org:fabacademy20… (You will find your git address under your name in the main page of your personal project for fab academy).
In my case, this error came up:
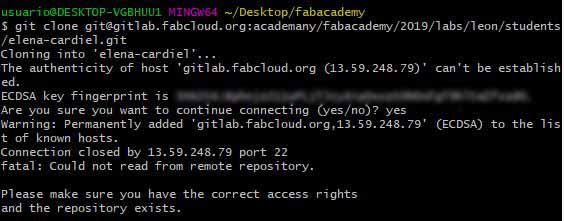
That error was the one which was bothering me all morning. Aggg!!
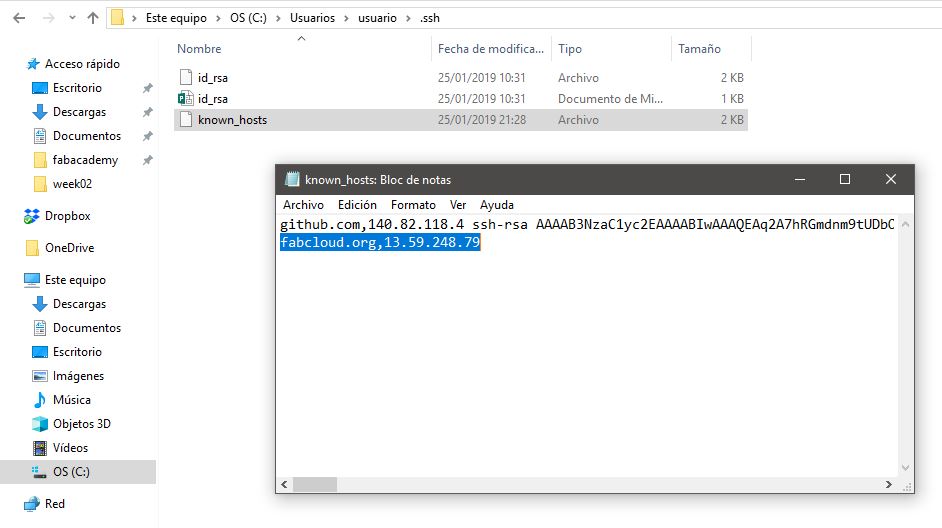
Then my instructor explains me that I had to copy the IP that appears in the message into the known_host file. I found where that file was in my computer and I saved the changes.
Then when I tried the “git clone” again, it worked!!!
25/01/2019 10:24 p.m.: Finally!! Oh good, I was so happy and excited!! (I mean, the solution was there all time, in the response that Git was giving me but you know, this cleary confirm that I am a novice concerning this subject.)
To edit my files locally I decided to use Brackets. (To modify local files you just have to follow the same steps that if you modify online).
In my case that I was editing online before having Brackets I have to say that it is much more comfortable and faster to work locally. There is a huge difference. So I recommend you to work always locally and then upload the changes.
How to uptoad your online repository
226/01/2019 10:30 a.m.: After a restful sleep, I’m ready to make my first commit and push.
If we have modified and saved something in Brackets or added some images to our local repository, we need to upload that information to the online repository and the webpage.
First off all, in Git Bash we go the de repository folder. Once we are there we follow these steps. Type:
1.-git status (to see what has changed)
2.-git pull (to upload the local repository to the last version of the online repository. This is very useful if several people are working on the same repository).
3.-git add . (to add the changes)
4.-git status (to check that the changes were added)
5.-git commit –m ‘descriptionofthechange’ (to confirm the changes)
6.-git push –u origin master (to make the changes effective and finally update the repository online)
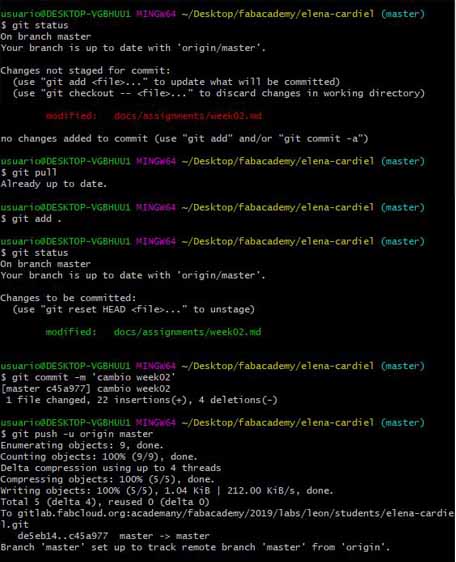
Never do a “push” without first having done a “pull” ;)
Now you are ready for the real world. I told you, you can do it. Be proud of yourseff!
EXTRA. NEW WEB DESIGN
(I'm completing this part of the assignment with the work done in week 07).
During week 07 I changed the design of my web page from the one that we had by default thanks to Fiore Basile to a new one developed in .html. At the end of the assignment 07, you can find the steps that I followed to upload the new web site.