Embedded programming
Group Assignment
For the comparisson of the performance and development workflows for different microcontroller families, refer to the group assignment page
Programming is something I’ll have to focus more in the future. I am interested in understanding more of it, but with the time I have, I focused on completing this task to a minimal degree.
I’ve had a little experience with Arduino IDE, but none with MicroPython. Upon a bit of research, a few differences became aparent:
In Arduino IDE, or integrated development environment, one typically programs in C++ code, which gets compiled specifically for the hardware we want to use, and uploaded to the device, which then runs the code.
In the Case of MicroPython, you have to install an interpreter to the hardware you want to use so that it can understand the code we send it, and act upon it. This is different, because the code is generally avaliable to be edited and run immediately, but generally much less efficient than compiled code.
Here are some key differences ChatGPT helped me summarize:
- Language Type:
C++: Object-oriented extension of C with additional features like classes and templates.
MicroPython: High-level scripting language based on Python.
- Memory Usage:
C++: Can be more memory-intensive due to features like dynamic memory allocation and object-oriented constructs.
MicroPython: Requires more memory due to interpretation and higher-level abstractions.
- Development Environment:
C++: Various IDEs and compiler toolchains.
MicroPython: Supports IDEs and text editors, with interactive REPL *.
- Portability:
C++: Highly portable like C, with compiled code easily runnable on different platforms.
MicroPython: Portability depends on available MicroPython ports for hardware platforms.
- Ease of Use:
C++: More complex syntax compared to C, especially with object-oriented features.
MicroPython: Offers simplicity and readability akin to Python.
- Performance:
C++: Generally offers better performance than MicroPython due to compiled code and optimization opportunities.
MicroPython: May have slower execution speed due to interpretation and higher-level abstractions.
- Applications:
C++: Widely used in software development for applications ranging from system programming to large-scale software projects.
MicroPython: Primarily used for rapid prototyping, IoT, and projects emphasizing ease of development.
In essence, C++ prioritizes efficiency and performance, suitable for system programming, while MicroPython focuses on simplicity and rapid development, ideal for IoT and prototyping.
REPL stands for "Read-Eval-Print Loop." It's an interactive programming environment commonly found in scripting languages and development environments:

*Read*: The REPL reads input from the user, typically in the form of code or expressions.

*Eval*: The input is then evaluated or executed by the interpreter or runtime environment.

*Print*: The result of the evaluation is printed or displayed back to the user.

*Loop*: After printing the result, the REPL loops back to the read phase, allowing the user to input more code or expressions.

In essence, a REPL provides a convenient way for programmers to experiment with code, test small snippets, and quickly see the results, all within an interactive session. It's particularly useful for prototyping, debugging, and exploring language features. Many programming languages and environments, including Python, Ruby, JavaScript, and MicroPython, offer REPL functionality.
Individual Assignment
SAMD11C microcontroller in Arduino IDE with C++
For this part of the assignment I used the SAMD11C board, with led and button, which I had made in Electronics Design week. At that time, I flashed a port of the Arduino Core onto the microntroller, so that it could be easily accessed throught the Arduino IDE.
I read part of the datasheet for the SAMD11C in previous electronics weeks. My main concern was how to address the pins I needed. Adrián Torres has a very nice page documenting his SAMDino, where I got this pinout diagram from.
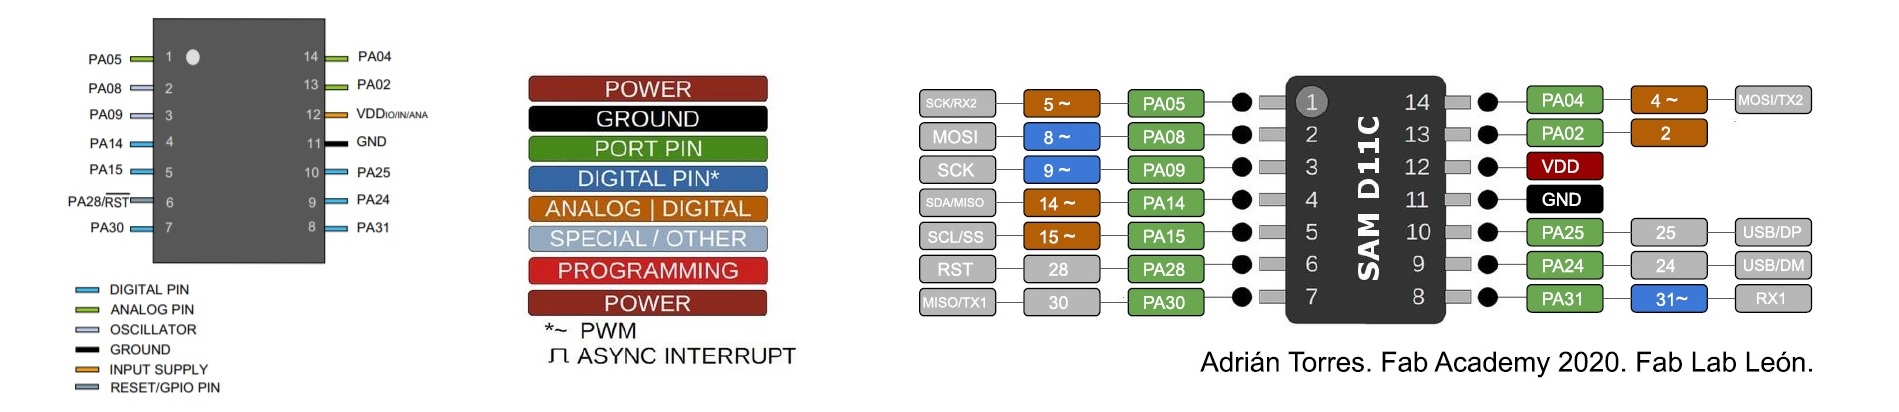
I also referred to Quentin Bolsee’s Arduino Fab Sam Core documentation on this microcontroller, which right at the top also has a diagram on the available pins:
====================================== ATsamD11C14A =====================================
Other  COM   PWM  Analog  INT  Arduino*           Arduino*  INT  Analog  PWM   COM  Other
=========================================================================================
                                 1-------------------
 SCK*/RX2  TCC01    *     *    5 | A5             A4 | 4    *    *  TCC00 MOSI*/TX2  REF
   MOSI*   TCC02          *    8 | A8 (XIN)       A2 | 2    *    *                   DAC
   SCK*    TCC03          *    9 | A9 (XOUT)     Vdd |
 SDA/MISO*  TC10    *    NMI  14 | A14           Gnd |
  SCL/SS*   TC11    *     *   15 | A15           A25 | 25                    USB/DP
BOOT                           28 | A28/RST       A24 | 24                    USB/DM
SWDCLK  TX1/MISO*              30 | A30           A31 | 31   *            RX1/SS*   SWDIO
                                  -------------------
I then looked for a sketch that used a button and an LED, and found this one on Arduino Project Hub. I changed the pin numbers to the ones I was using on my board, in Arduino IDE.
const int BUTTON = 8;
const int LED = 14;
int BUTTONstate = 0;

void setup()
{
 pinMode(BUTTON, INPUT);
 pinMode(LED, OUTPUT);
}

void loop()
{
 BUTTONstate = digitalRead(BUTTON);
 if (BUTTONstate == HIGH)
 {
   digitalWrite(LED, HIGH);
 }
 else{
   digitalWrite(LED, LOW);
 }
}
I checked that the code had no mistakes and uploaded it. The result is demonstrated in the video below.
If I want to change what the button does, I swap HIGH and LOW on the digitalWrite in the if statement and upload again, or program some other actions taking advantage of the avaliable DIO pin 8, if necessary.
RP2040 in Thonny with MicroPython
As far as I could ascertain, there is no MicroPython port for the SAMD11C. As capable as it is, its typical 16KB of flash memory and 4KB of RAM may not be enough to host a practical port.
From Quentin’s SAMD21 DevKit documentation I learned that the SAMD21E18 is able to host a MicroPython port, as it has 256kb flash, but I don’t have such a microcontroller.
I do have a Seeed Xiao RP2040, a very popular microcontroller, for which there is a MP port.
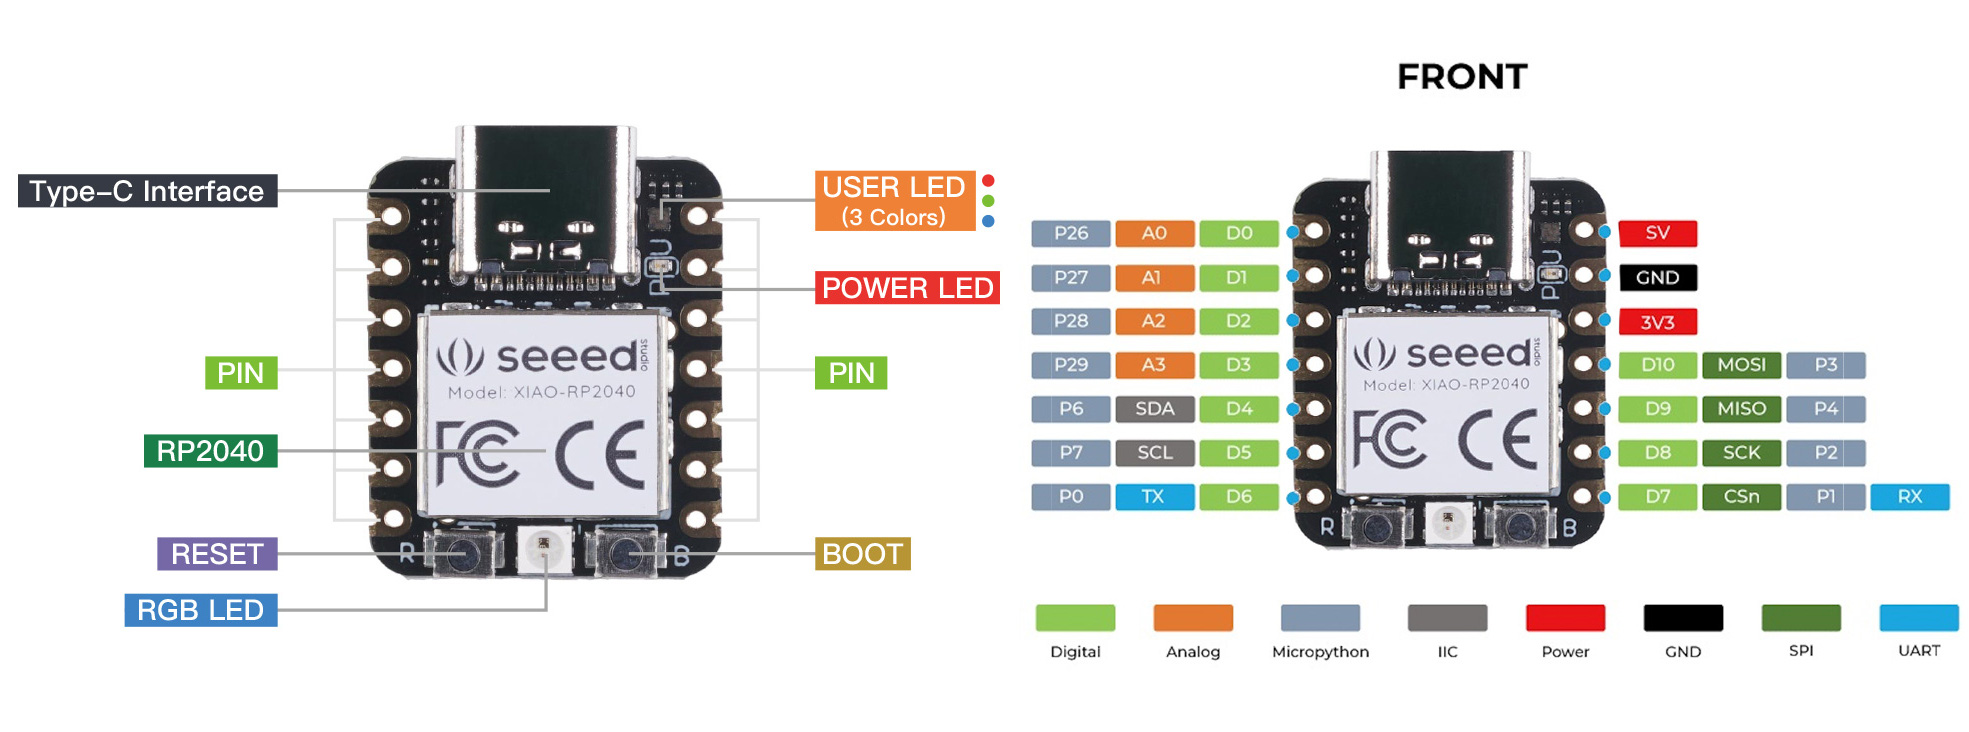
I researched a bit, and several sources pointed me to a python integrated development environment, Thonny, which is also aimed at beginners. Seed has a nice source to get started, which I followed.
I installed Thonny, connected the Xiao to my computer with a USB-C cable while pressing the Boot button, and it was immediately recognized as a mass storage device, which contains a couple of files initially.
In Thonny, you follow the instructions to install the MicroPython port onto the Xiao, and after it automatically reboots, it is ready to program.
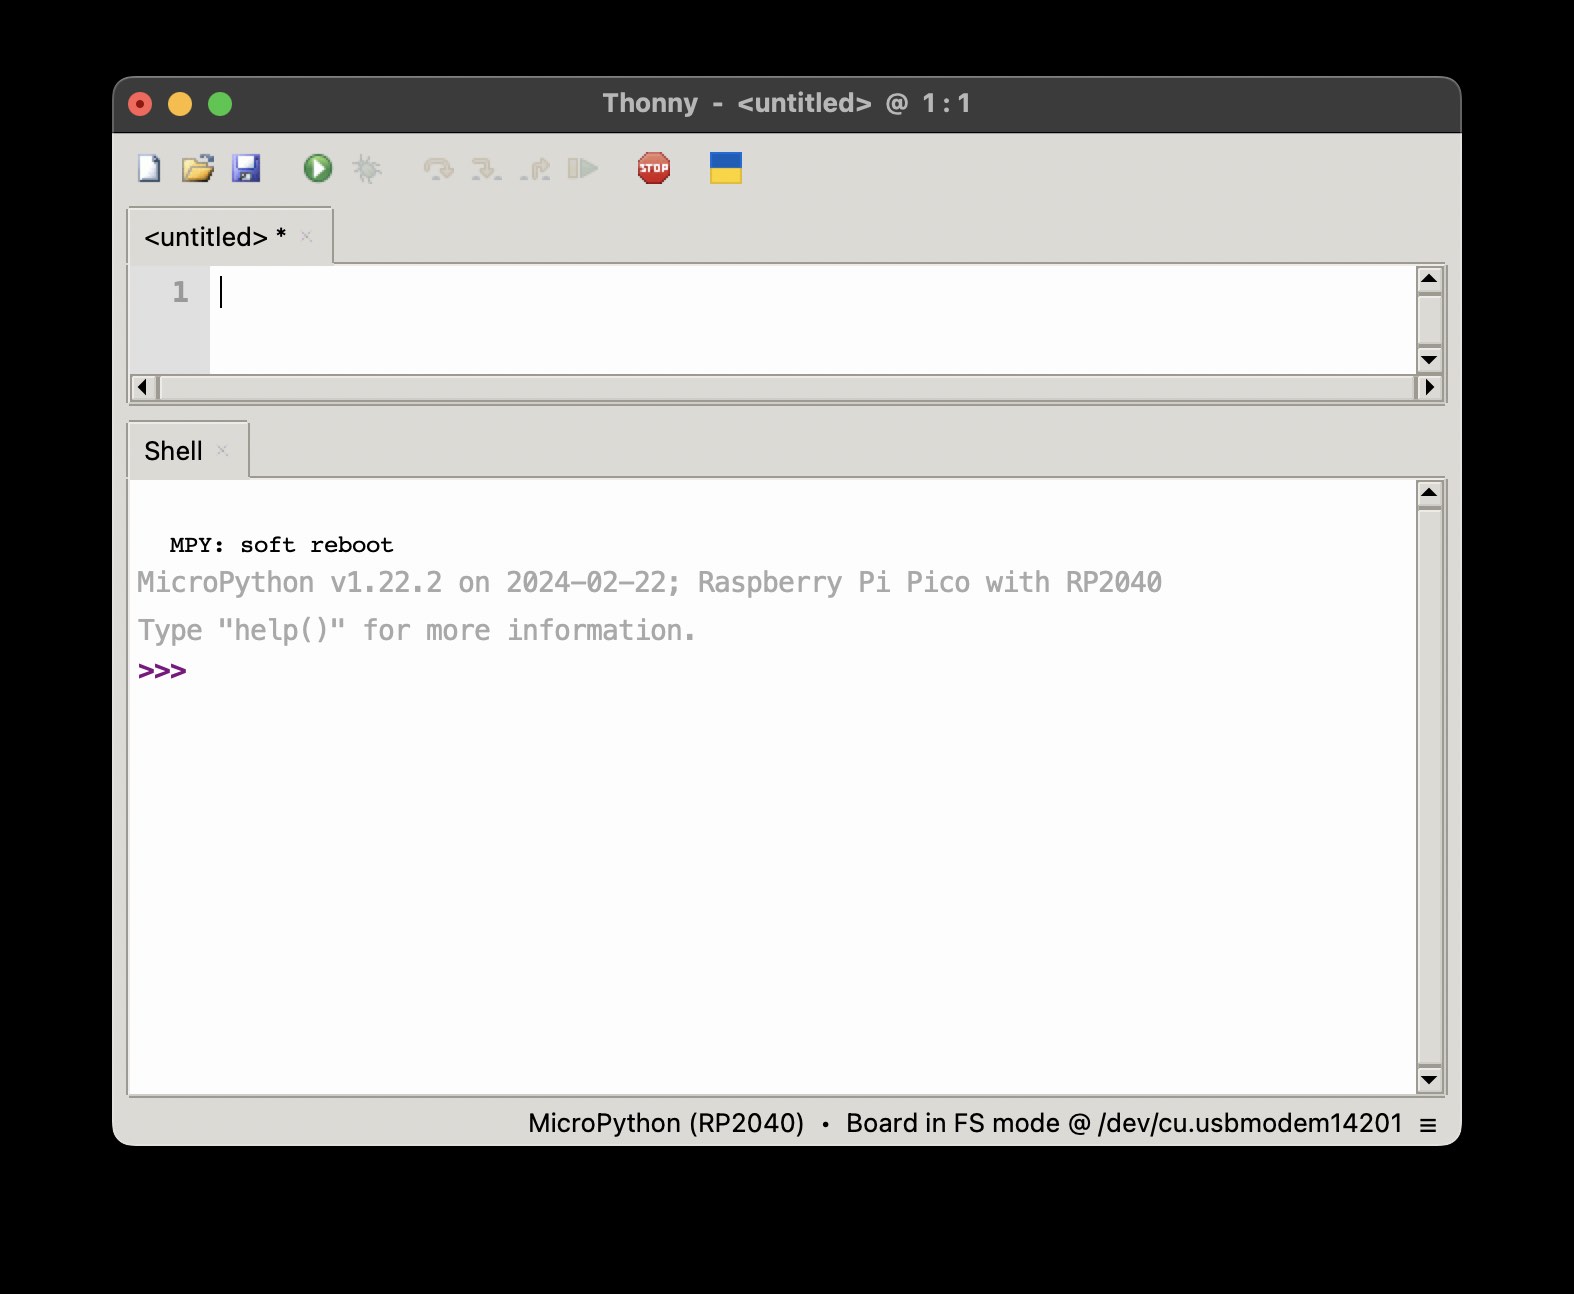
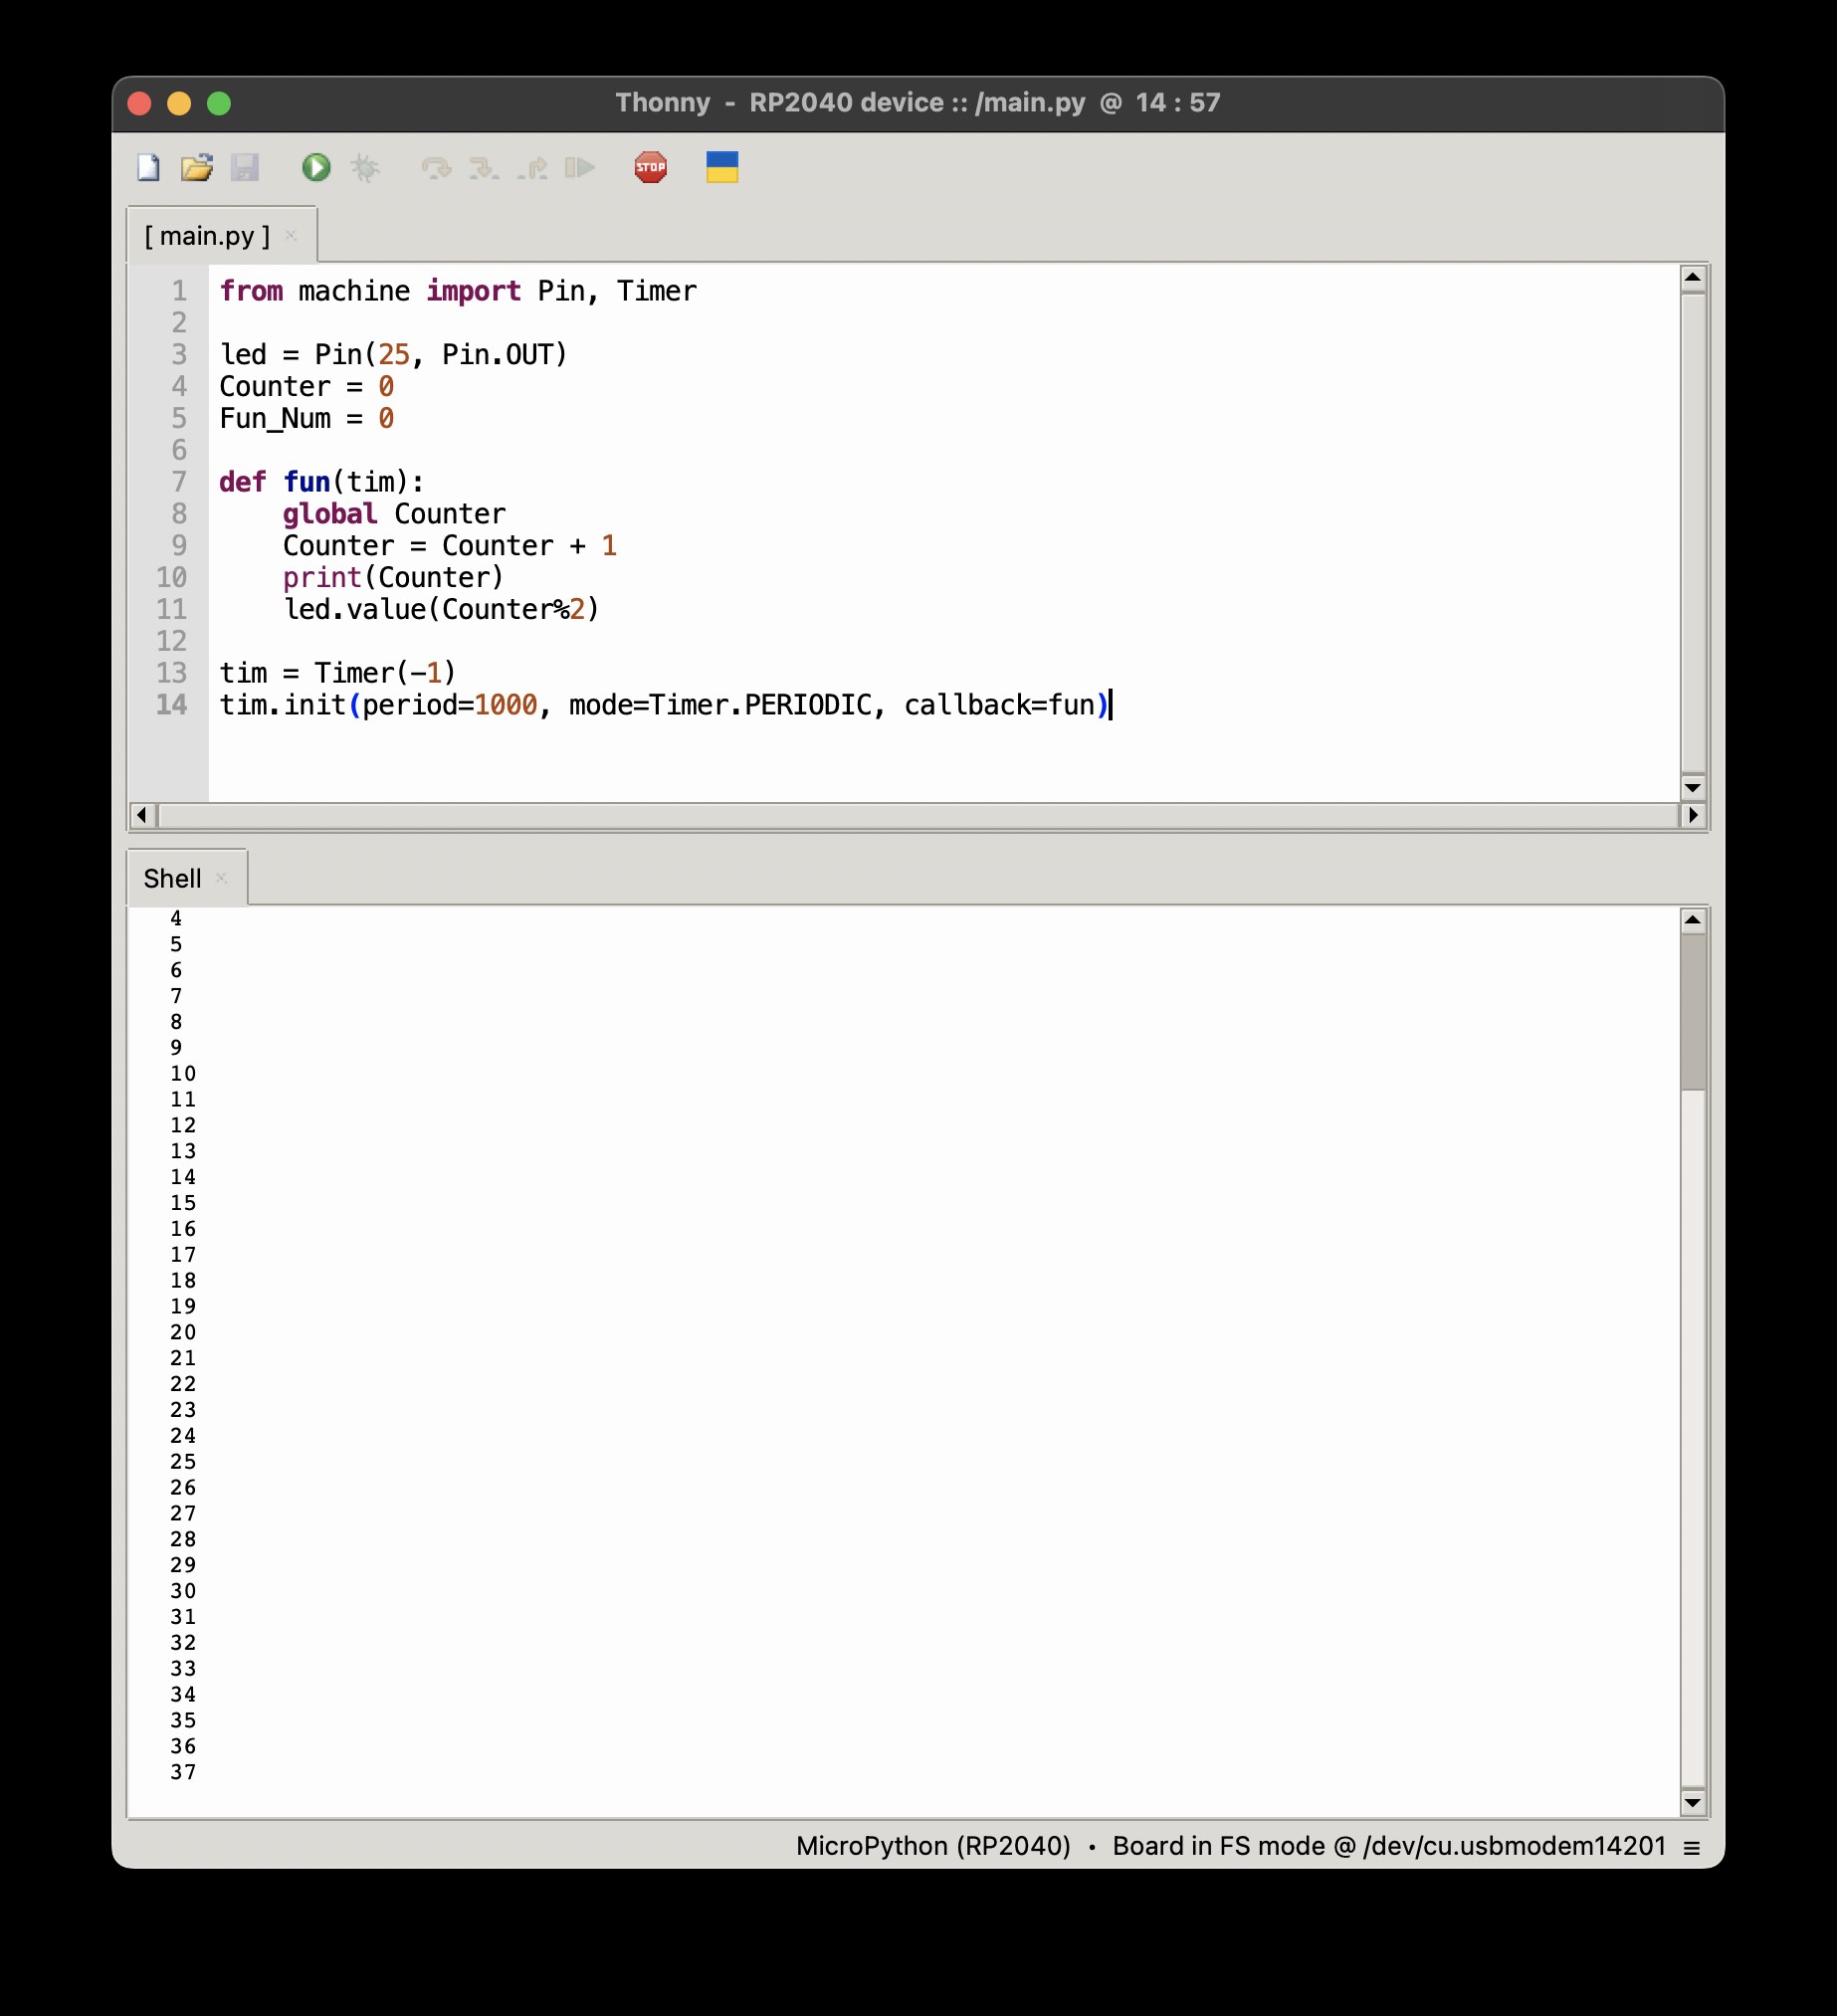
I then continue folling Seeed’s instructions and pasted this code into Thonny to check if the board was working well.
from machine import Pin, Timer

led = Pin(25, Pin.OUT)
Counter = 0
Fun_Num = 0

def fun(tim):
    global Counter
    Counter = Counter + 1
    print(Counter)
    led.value(Counter%2)

tim = Timer(-1)
tim.init(period=1000, mode=Timer.PERIODIC, callback=fun)
The Xiao started to blinking every second and the shell started returning numbers incrementally, as expected.
I then uploaded the ws2812.py library to the Xiao, which enables control of the inbuilt RGB LED, and ran the next example code, which cycles the flashing of 8 combinations of colors:
from ws2812 import WS2812
import utime
import machine
power = machine.Pin(11,machine.Pin.OUT)
power.value(1)
BLACK = (0, 0, 0)
RED = (255, 0, 0)
YELLOW = (255, 150, 0)
GREEN = (0, 255, 0)
CYAN = (0, 255, 255)
BLUE = (0, 0, 255)
PURPLE = (180, 0, 255)
WHITE = (255, 255, 255)
COLORS = (BLACK, RED, YELLOW, GREEN, CYAN, BLUE, PURPLE, WHITE)

led = WS2812(12,1)#WS2812(pin_num,led_count)

while True:
    print("Beautiful color")
    for color in COLORS:
        led.pixels_fill(color)
        led.pixels_show()
        utime.sleep(0.2)
Files
Arduino sketch for turning the led on or off with the button
Checklist
Group assignment
- Compare the performance and development workflows for different microcontroller families
- Document your work (in a group or individually)
Individual assignment
- Read the datasheet for the microcontroller you are programming
- Program the board you have made to do something, with as many different programming languages and programming environments as possible.
Learning outcomes
- Identify relevant information in a microcontroller datasheet.
- Implement programming protocols.
Have you?
- Linked to the group assignment page
- Documented what you learned from reading a microcontroller datasheet.
- Programmed your board
- Described the programming process/es you used
- Included your source code
- Included a short ‘hero video’ of your board