Project Management
Individual assignment
- Build a personal site describing you and your final project.
- Upload it to the class archive. Work through a git tutorial.
Learning outcomes:
- Explore and use website development tools
- Identify and utilize version control protocol
Have you:
- made a website and described how you did it
- introduced yourself
- documented steps for uploading files to archive
- pushed to the class archive
Software Used
Student agreement
Download it here.
Useful Links
- Fab Academy Archive
- Fab Academy Assignments and Assessment
- Gitlab 2020
- Neil's Classes Archive
- Fab Modules
- Mods
- Student Dashboard
- My Personal Website
Making a Website
Useful reminders
I keep forgetting basic stuff about HTML editing, so in order to make my life easier I will start by listing useful code and the location of stuff like my template page:
HTML uses tags for each entry, like a paragraph or a button, so I list the tags I will use the most while editing my pages:
PS: one should open the tag with <some tag inside here> and not forget to close the tag with </same tag inside here>
- The
<p>element is used to create a paragraph - The
<button>element is used to create a button, like this - this is my exercise template page
- The code
<a href="replace with the address"> replace with content</a>creates a link like this that takes you to another page. - The code
<p class="pic"><img src="path/path/image.jpg" alt="Description of image"></p>adds an image to the page, like the ones below - Using this code
<pre class="prettyprint linenums">stuff inside here</pre>gives it a terminal look, like this:stuff inside here
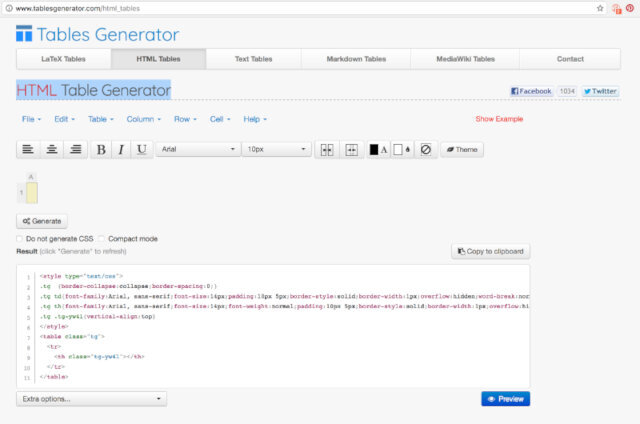
- To generate tables, use the HTML Table Generator
Research
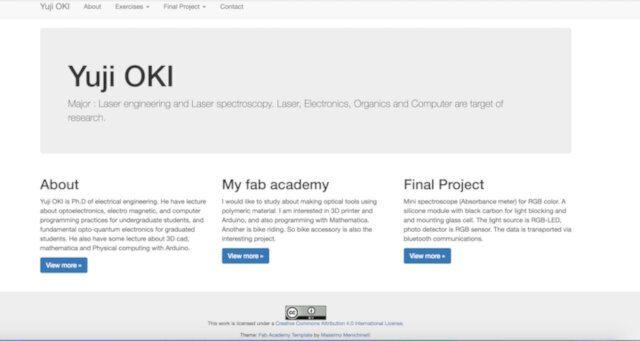
To get an idea of what my site would look like, I went to the 2016 Fab Academy Student Archives to have a look at what others had done, and used the random student button.

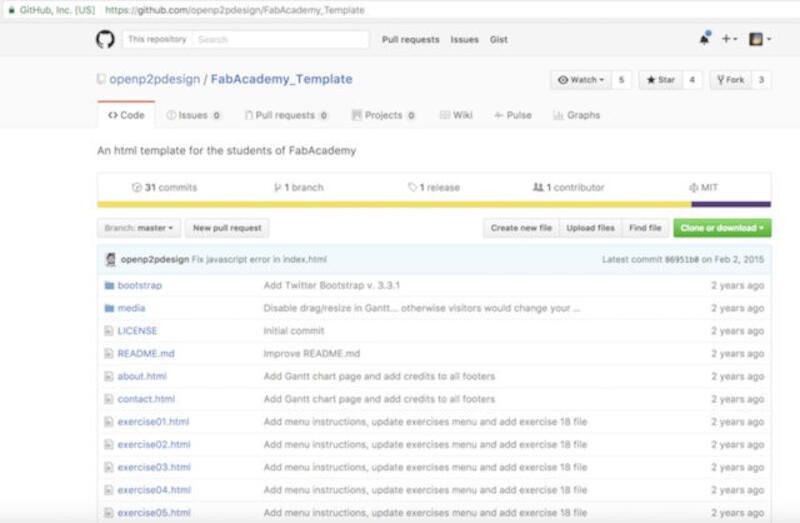
After reviewing a few pages, I found Yuji OKI's page which led me to the Fab Academy Template by Massimo Menichinelli.
Using Massimo's template
On GitHub, I cloned the repository for Massimo's template page to my hard drive. Then I copied its contents to a directory with my name.
Editing
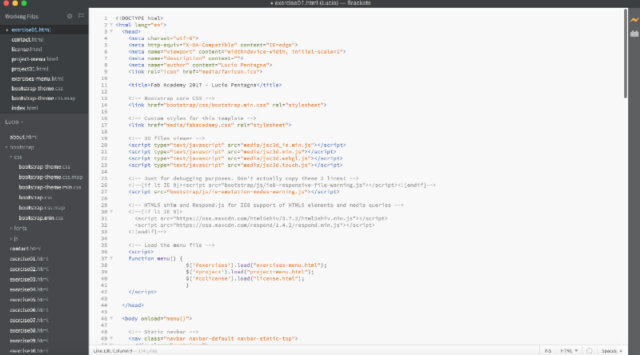
The code editors I chose to use are Sublime_text3 and Brackets.
About Sublime_text3:
Sublime is great for coding, diffing, and merging two pieces of code. I especially like to use the plugin "Sublimerge3". It lets me compare 2 files and then merge portions of the code.
About Brackets:
Most of the time, that's where I code HTML. The great feature Brackets has is that it updates what you code in the browser page in real time. This way every single modification can be viewed without the need to refresh.
To install them on macOS, I simply run the following terminal commands:
$ brew install --cask sublime-text
$ brew install --cask brackets
Customization of the template's CSS
CSS lets you style your HTML. This can be done in 3 ways: inline, internal, and external.
As the current template uses the external method, and it's a huge time saver, that's what I went with. In some places on my website, for lack of a better understanding of how CSS works, I might have used inline styling.
The external style files are bootstrap.css and fabacademy.css. These files are referenced in the <head> section at the beginning of each HTML file.
So far I have changed only a few settings to get the current look, and they are in the fabacademy.css file:
- The image container max-width, from 920px to a variable 95%;
- The legend margin was increased from 2px to 10px.
In bootstrap.css I also made some changes, as shown below:
- The background was changed to black by adding the code
background: black;in the html bracket - The text was justified, and the font color and style were modified in the body bracket section with the code:
 text-align: justify;
 font-family: Menlo, 'Bitstream Vera Sans Mono', 'DejaVu Sans Mono', Monaco, Consolas, monospace;
color: green; - I also modified the vertical alignment of images in the img bracket with the code:
vertical-align: center;Warning:
centeris not a valid value forvertical-align, so the browser ignores that line. The right value ismiddle.
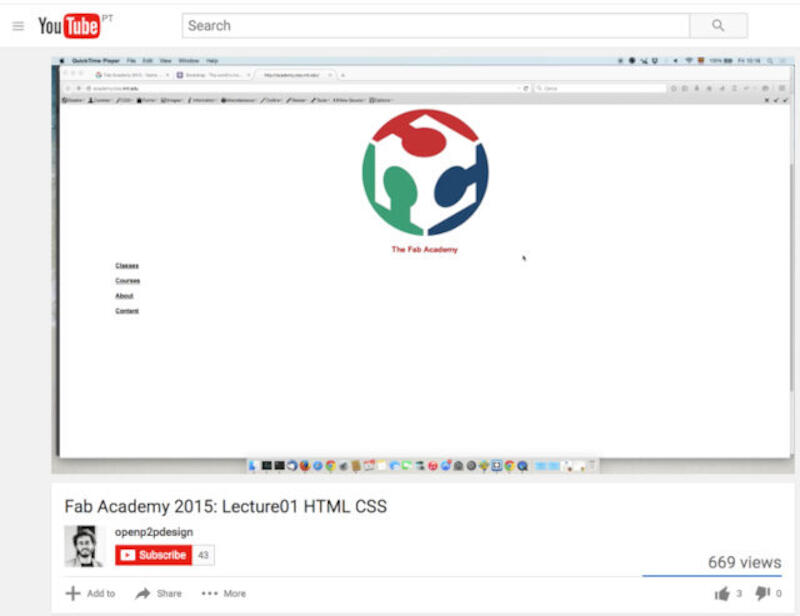
As I had near 0 knowledge of HTML editing or CSS, to better understand HTML prior to the above modifications I watched Massimo's lecture on HTML and CSS.
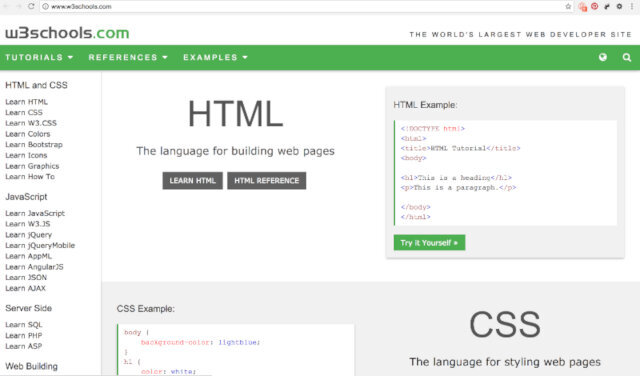
I also used the HTML references at w3schools.com.
Website Folder Structure
Currently, the folder structure is quite simple and will need some cleanup.
Folder Structure:
- All HTML files are in the root
/folder.The exercises or weeks are in HTML files named after the number of the week they correspond to, e.g. week01.html, week01b.html. Because I am having to adapt this website to the current 2018 Fab Academy requirements, I decided to differentiate the files by adding the year in front of the file name, e.g. 2018week01.html
- An exercise template file is located here "exercisetemplate.html"
- All multimedia files or code are in the folder
/mediaThis includes files like: STL, PNG, JPG, MP4, ZIP, etc...
- All the CSS files are in the
/bootstrapfolder
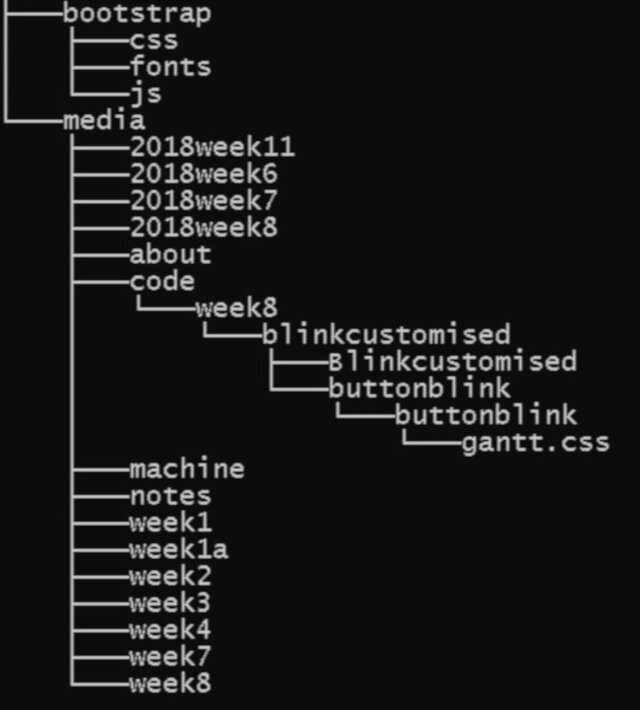 Current folder structure
Installing ncdu and using it in order to check for big files
In order to save space on the server, as well as to have a faster loading website, we need to constantly make sure we don't miss big uncompressed image and video files.
- On a Linux terminal type:
sudo apt install ncdu

- Start ncdu on a Linux terminal by typing:
ncdu
ncdu will open, and with the up and down arrows and the enter key you will be able to navigate your directories.
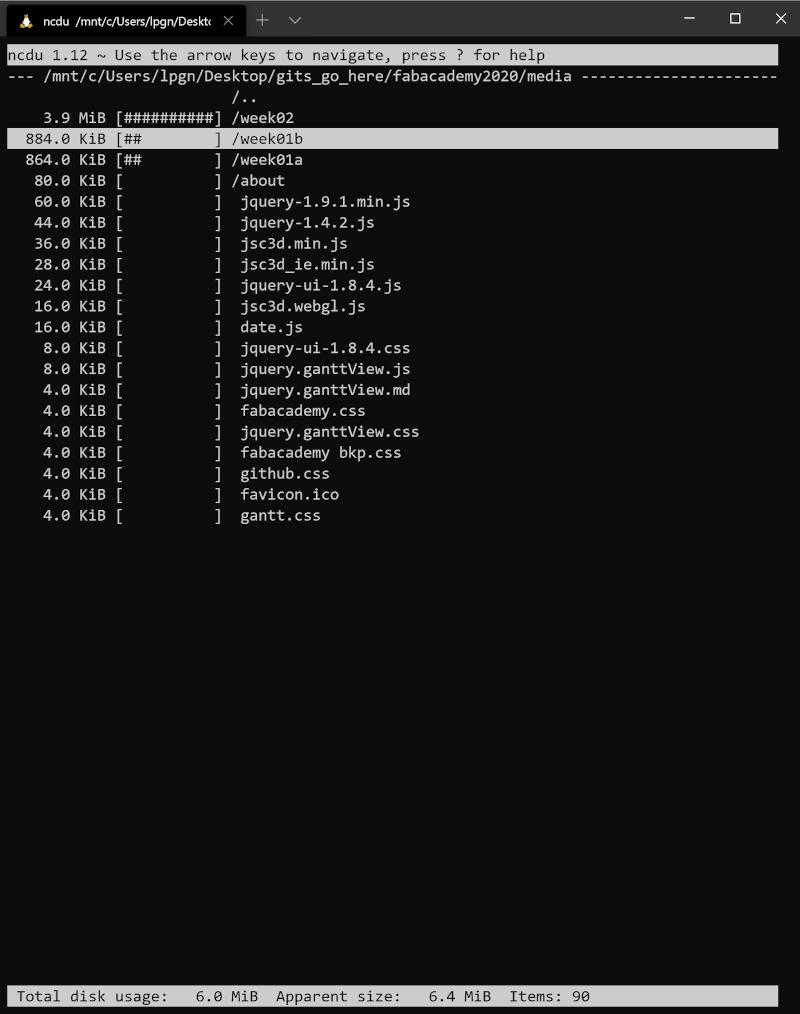
ncdu will sort the biggest files first and show more hash tag characters "#" for the biggest folders or files.
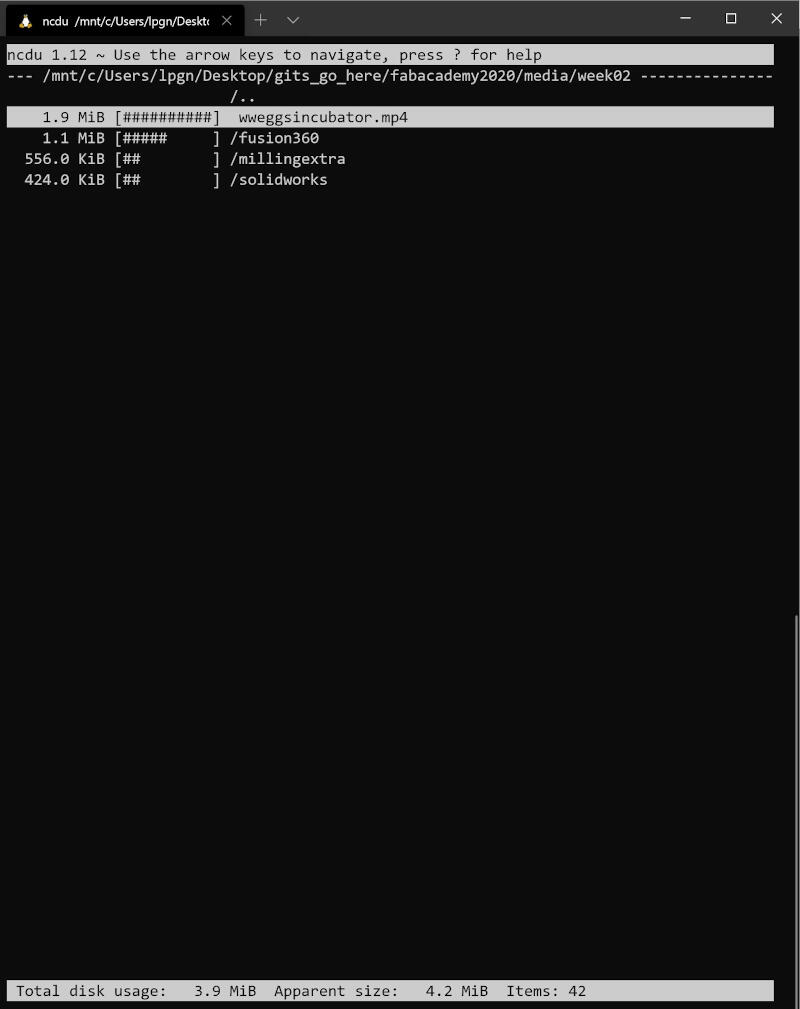
In this case, the biggest file is a video file for my final project sketch.
Compressing the biggest files
For the video file we will use ffmpeg.
- Start by installing ffmpeg on a Linux terminal:
sudo apt install ffmpeg
- Next, run ffmpeg on the big video file as in my example:
ffmpeg -i input_video -vcodec libx264 -b:v 1000k -vf scale=-2:720 -an output_video.mp4
The code above should give you a 720p video without audio. For more examples, check Neil's ffmpeg cheatsheet.
For the images you can use a software called Gimp and a plugin called bimp.
I use a package manager called Chocolatey to install some Windows software.
It works similarly to apt, but for Windows.
- On a Windows administrative shell run:
choco install gimp
- Then download bimp from its website and install it so you can run it under gimp.
- After the installation is finished, run gimp and select the Batch Image Manipulation plugin
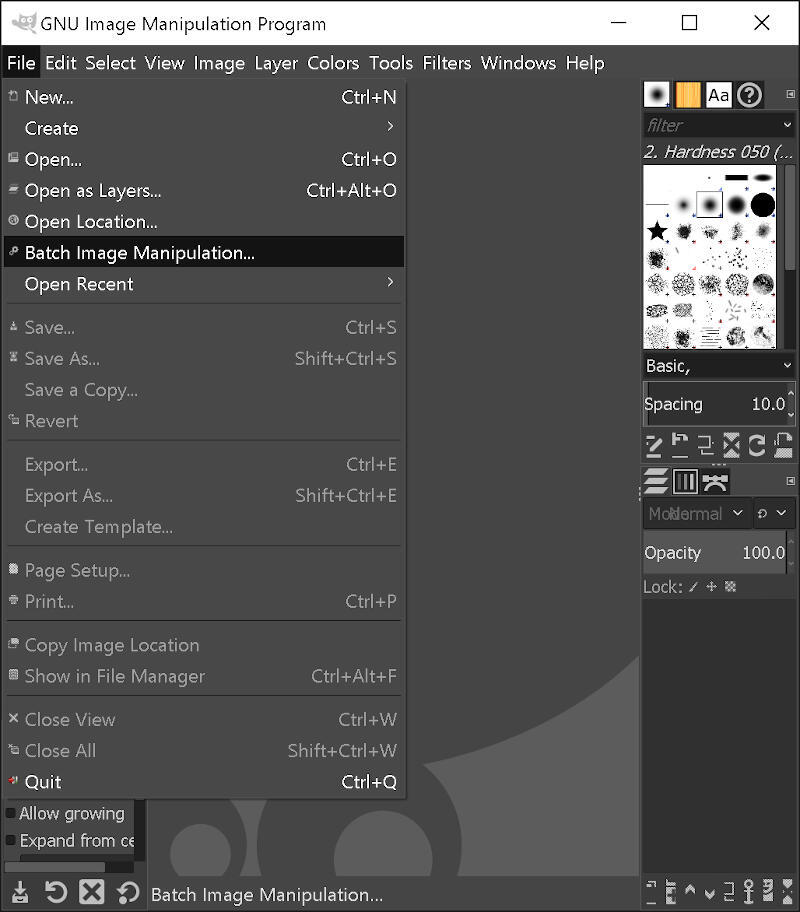
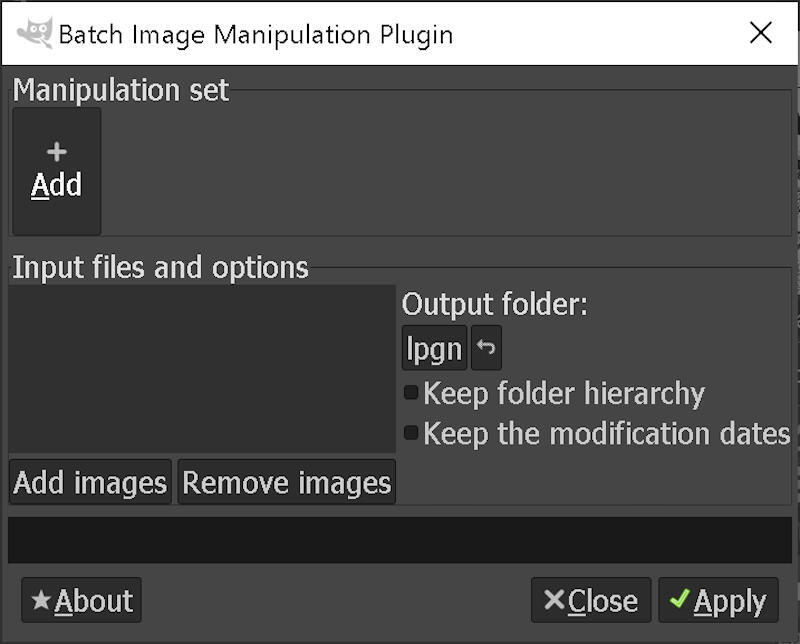
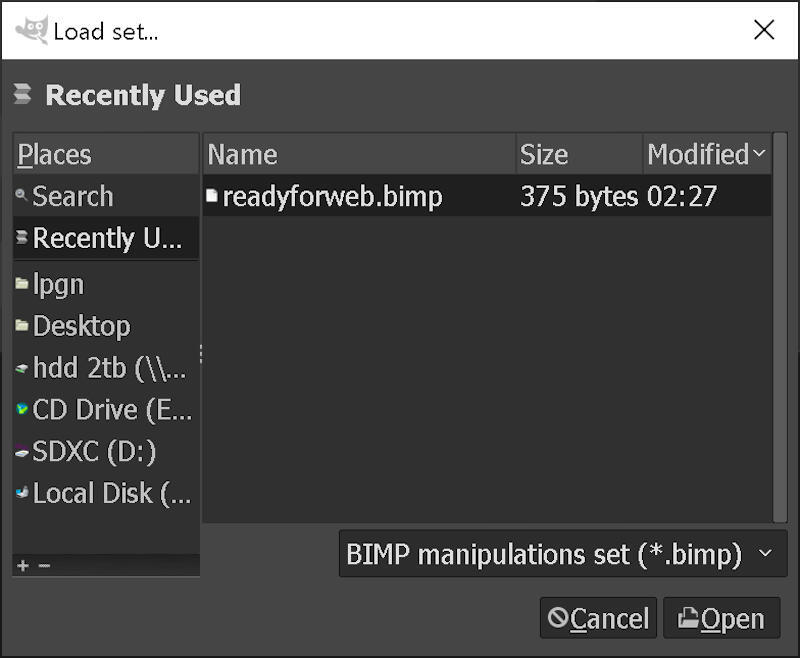
- In order to load a previous set or to save a new one, you have to press the Add button, then select the desired operation
- In my case, since I had the set saved already, I selected "load set"
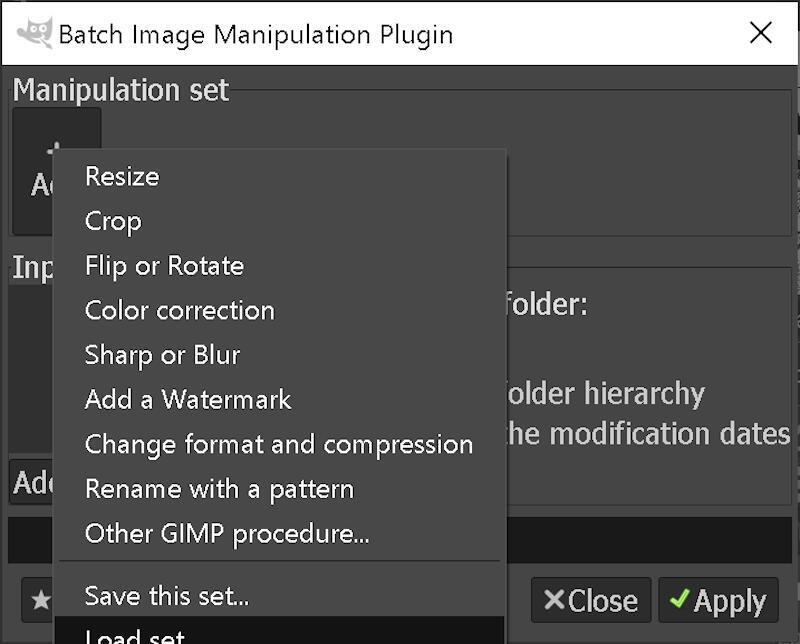
- Then select the set, in my case "readyforweb.bimp"
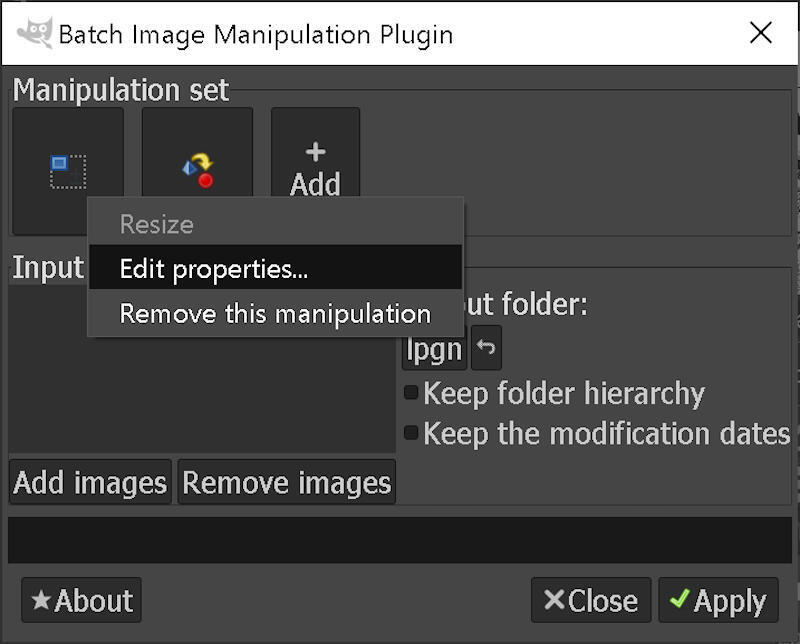
- In order to create or modify the behavior of the plugin, click on Add to add a process, or click on one of the ones you have saved before
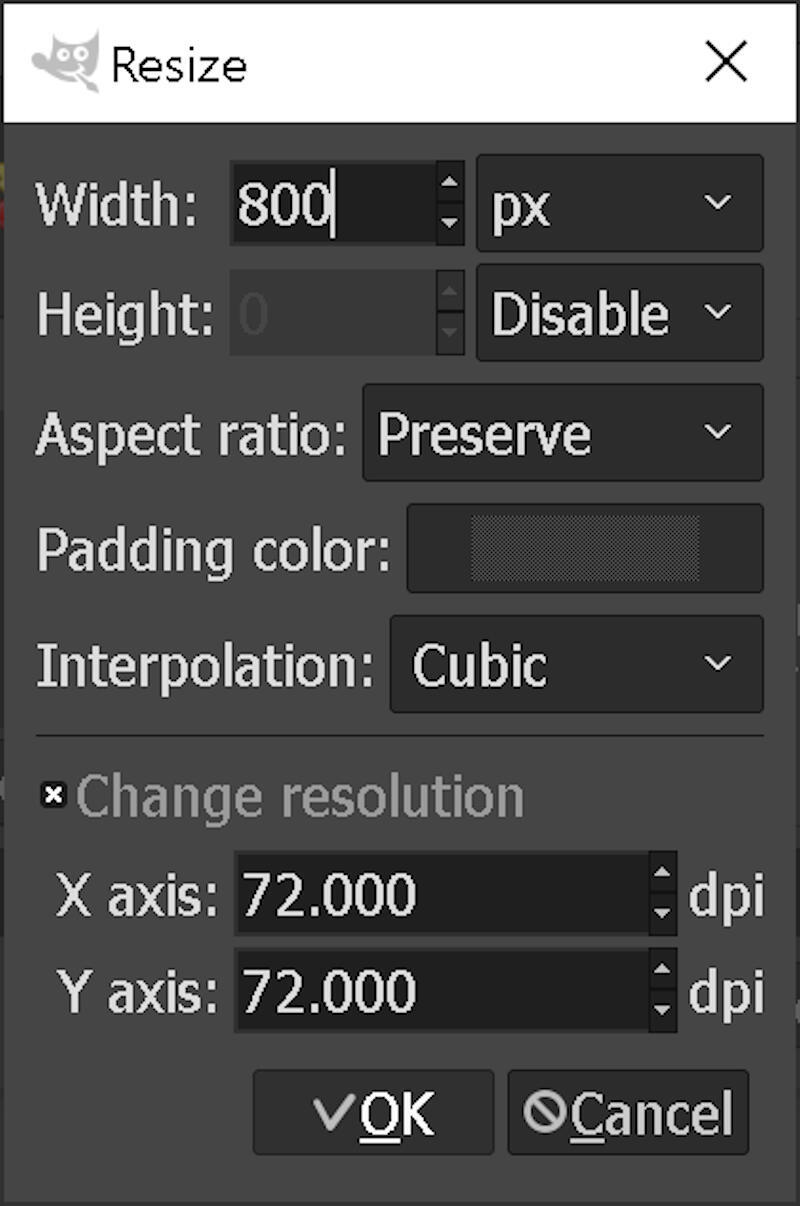
- Inside the resize set I selected the options I wanted, specifically the width to 800px
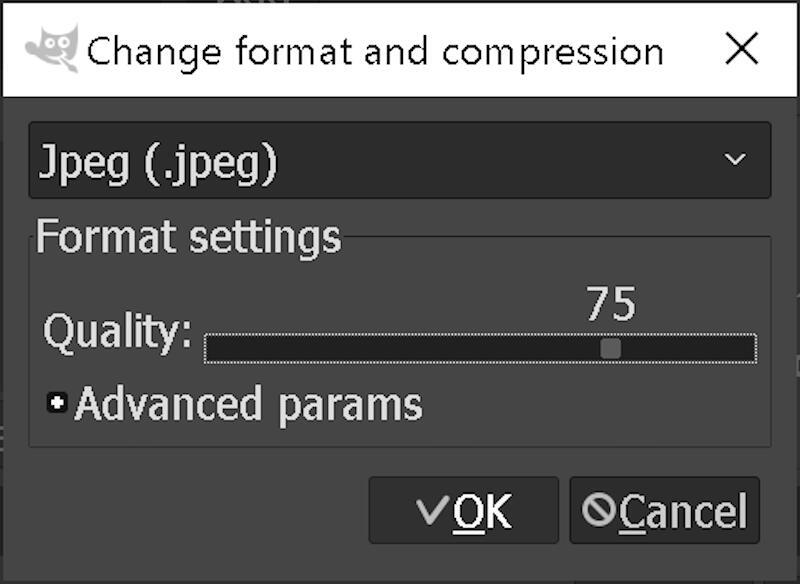
- Then I went to the other process and opted for a compression quality of 75, as well as converting the format to jpeg
- Then I selected all the images I needed to convert at once and applied the changes
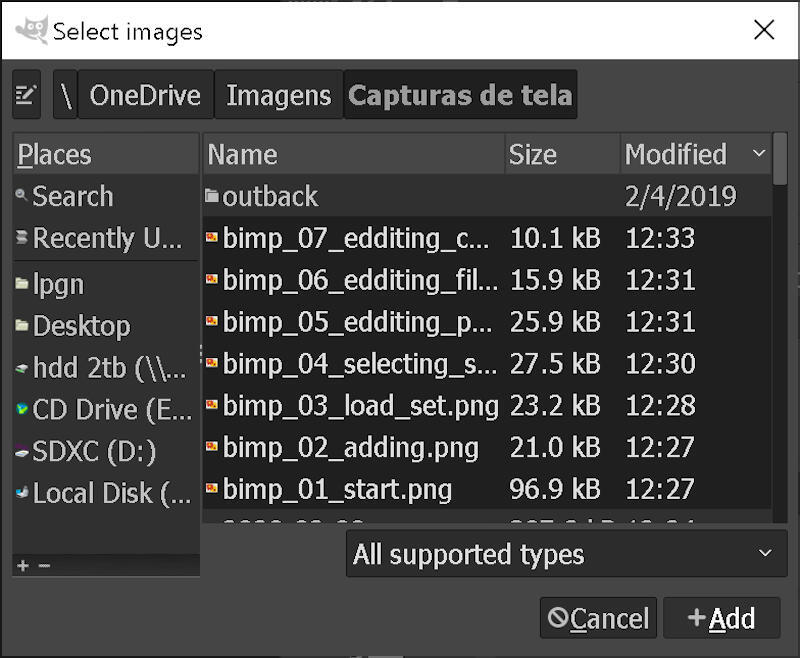
- Next, copy the converted images to your folder if you did not specify it before.
Installing and using git
First, I am using macOS. With that in mind, and with many possible terminal applications to be installed, it's useful to have Brew. It helps with all the installations one needs to do on Terminal and desktop.
To install it, open the terminal and run:
$ /usr/bin/ruby -e "$(curl -fsSL https://raw.githubusercontent.com/Homebrew/install/master/install)"
Warning: Homebrew retired this Ruby installer. Today the install command, from brew.sh, is /bin/bash -c "$(curl -fsSL https://raw.githubusercontent.com/Homebrew/install/HEAD/install.sh)".
Next, install Cask. It helps with installing desktop apps.
$ brew tap caskroom/cask
Warning: brew tap caskroom/cask no longer works. Cask is now built into Homebrew, so skip this step and install desktop apps directly with brew install --cask <app>.
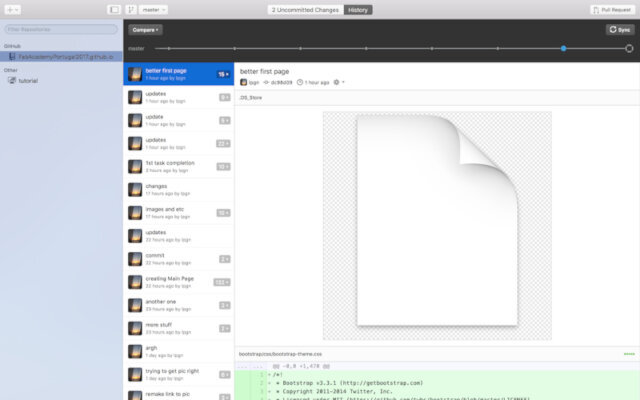
Next, install GitHub Desktop, which will include Git as well.
$ brew install --cask github
Working with your Repository
Now that I have the website set up locally, it's time to upload it to the Fab Academy repository.
To do that, I will have to save my public ssh key on the Fab Academy's gitlab website. This will let me access it using git without the need to type my password every time. After that, it's necessary to clone your repo to the local drive to start working on it.
A source of info on how to do it is the ssh help at gitlab. Below is how I did it.
Step-by-step instructions:
- Since I had previously installed git, I go ahead to the directory I want to work in and create an ssh key with:
ssh-keygen -t rsa -b 4096 -C "your_email@domain.com"
This will generate the SSH key, and the label of the key will be whatever you include inside the quotes
Generating public/private rsa key pair.
Enter file in which to save the key (/Users/someone/.ssh/id_rsa):
- After a while, a message will ask you to either leave the location and name of the new SSH key as default or make a new one. I chose a new one, typing a location and a new file name.
Enter file in which to save the key (/Users/someone/.ssh/id_rsa): /Users/someone/.ssh/id_rsafab
Enter passphrase (empty for no passphrase):
Enter same passphrase again:
Your identification has been saved in /Users/someone/.ssh/id_rsafab.
Your public key has been saved in /Users/someone/.ssh/id_rsafab.pub.
The key fingerprint is:
SHA256:IheXdVbB4DChb7Lyo5nJPHhNyExDKAFw5kADUTMR7MU your_email@domain.com
The key's randomart image is:
+---[RSA 4096]----+
|XBX= .    =.++o. |
| =+oE .  + *  .  |
| ..o .. +   .    |
|  .   oo .       |
|    .+ooS o      |
|     o+..+       |
|     ..o.        |
|    .oo*o        |
|     .Bo..       |
+----[SHA256]-----+
- Show your ssh key by running
$ cat ~/.ssh/id_rsafab.pub
- Next you can select the text on the screen, which will look like this
ssh-rsa AAAAB3NzaC1yc2EAAAADAQABAAACAQDRdz+KsRwD2jgojGESZzVQNtFT0uWLGZAieKRNMy4ytav//ABgEB5eAWFTU/YfjQn2apnt+YgXC7aWfjk8Ta5/AQblQ2r/randomfakekeyrandomfakekeyrandomfakekeyrandomfakekeyrandomfakekeyrandomfakekeyrandomfakekeyrandomfakekeyrandomfakekey+rEk6OvIq5F46sKZclXdCLFbj4b9CP5wlFVWm/vq/tgeEbc701587xVCSq/7Ssqv5GNbipbq8eGElKiM4J7h1xlEJmSb06uuqk7PswQjDhV2RFHTl6sNM45qJw30y9O3WkfddFmW5nQ8roP880ef0rvvWK51nvUpmm37rIrHa+rdFpPc9U0bRZ5BhYpp/wMnVHLmZB8W/9Wf2TN0TD/H1AWjvQ1O2EJxKn7GStVGUzopCcIwt+jEjcMZRC/pRZnvEjH30FAFv5F+kYQwmsKcNuZz+qLWF8D5sjVySHSdERLJ3Y7h4ObCJt0ll5+NJ7syf1S7gCotvT910Evorq1f2jb4l6Lt1gJz7uXA03va0HhaBGTKTB0mF7NRJusotyhGWncXgNTkZOkfFQ5Ps1xAcLRmB0uMt0/3MnS7ONu/TfJVuSqYqUuuUtz9hqbke4I4JsD+X7e1a4gAvsFK/nv6Usf0m8aQ== your_email@domain.com
- Because my key is not the default one, I need to let the SSH agent know where it is by typing:
$ eval $(ssh-agent -s)
Agent pid 9284

$ ssh-add ~/.ssh/id_rsafab
Identity added: /Users/someone/.ssh/id_rsafab (/Users/someone/.ssh/id_rsafab)
- Next is to load the public key to gitlab and copy your repo ssh address, in case you do not know it. Go to gitlab.fabcloud.org
- Log in with your fablabs.io account
- Locate your lab and then your student name;
- There you can copy your repo ssh address by switching from HTTPS to SSH.
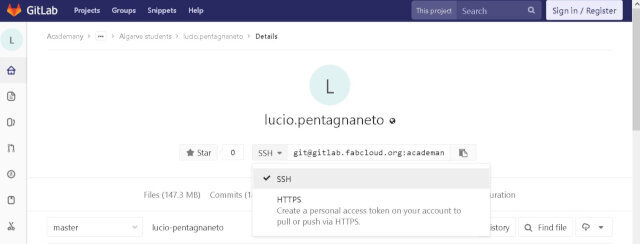
- Next, add your key to your user profile
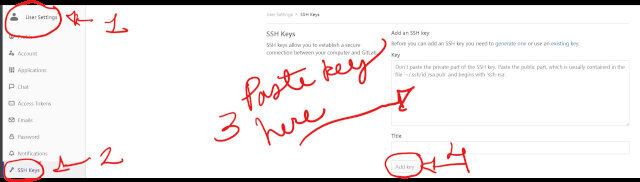
- Now it's time to clone your repo and start with the "mantra"... so, with the ssh address you copied before, type the following
git clone git@gitlab.fabcloud.org:academany/fabacademy/2018/labs/yourlab/students/yourname.git
- Now that your repo is cloned locally, you can either start editing your HTML right there or paste your already edited website or template into the directory created.
- Now the "MANTRA"
git pull
git add --all
git commit -m yourmessagehere
git push
This series of commands will make sure:
- First (git pull), that you are up to date with your origin
- Second, that you add all new changes to your local branch (git add --all)
- Third, that you commit all changes (git commit -m yourmessagehere)
- And last, that you send the commits to your origin (git push)
Git and Bash Notes:
(Notes here are to be added along the course as a cheat sheet of git commands)
- When I want to know info about the origin of a repo
git remote show origin
- Copy an ssh key to a server
ssh-copy-id -i ~/.ssh/mykey.pub user@host
- When I want to push an existing repo commit by commit to a new address
git remote add gitlab git@gitlab.fabcloud.org:Lucio/frankenlaser.git
git rev-list --reverse master | ruby -ne 'i ||= 0; i += 1; puts $_ if i % 1 == 0' | xargs -I{} git push gitlab +{}:refs/heads/master
Creating a new Repo
I wanted to include instructions on how to create a new repo and upload it to GitHub, for future reference, even though it was not how I did it
- First, it's necessary to be in the working directory and then make it a git directory with:
git init
- Next, add all files to the local repo, which stages them for commit
git add .
- Next, they need to be committed with:
git commit -m "First commit"
- Now create a new repository on GitHub
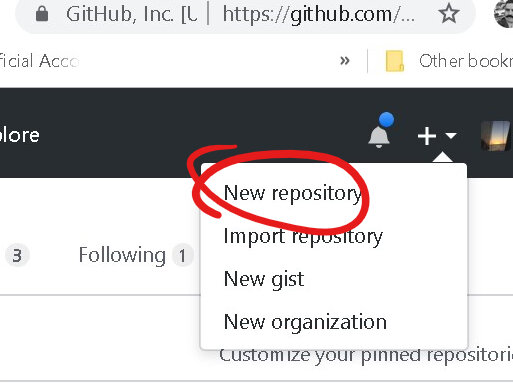
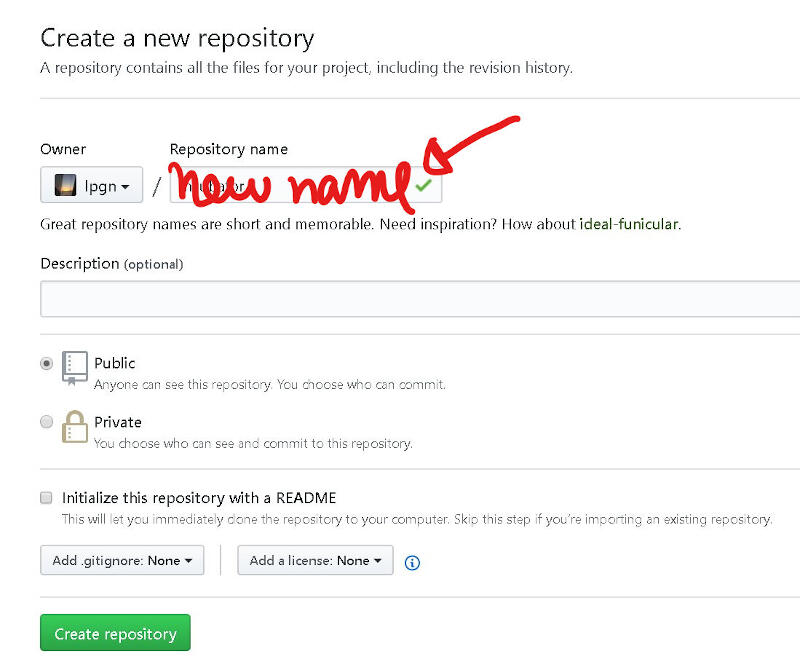
- Then copy the remote repository address
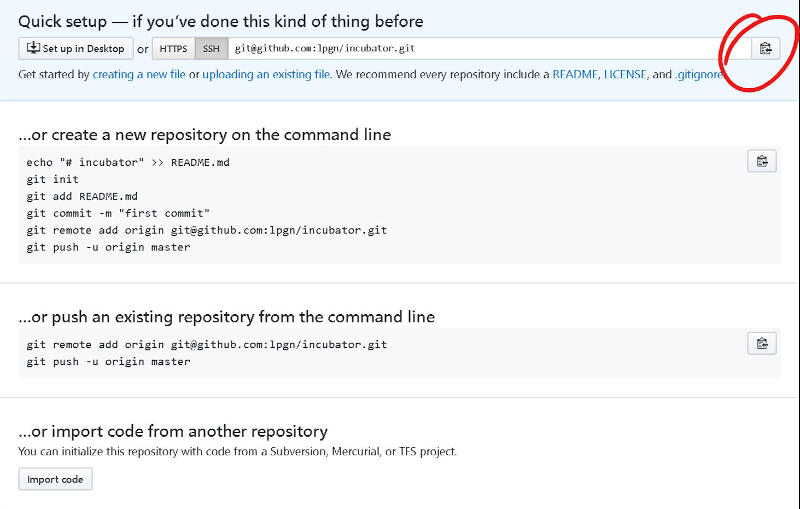
- Now add a remote with the copied address
git remote add origin copied_address_here
- Finally, push everything with:
git push -u origin master
And it's done
- Notes on git:
- Notes on ffmpeg:
- Cut ??:??:?? of video starting at ??:??:?? (
-ssis where the cut starts and-tis how long it lasts, not the end time)ffmpeg -i videoinput.mp4 -ss 00:00:11 -t 00:00:22 -async 1 videooutput.mp4
- The same kind of cut can be obtained with similar code
ffmpeg -ss 00:00:00 -to 00:00:37 -i videoinput.mp4 -c copy videooutput.mp4
- Create a gif and cut video
ffmpeg -i input.mp4 -ss 00:00:00.000 -pix_fmt rgb24 -r 10 -s 320x240 -t 00:00:10.000 output.gif
- Compress audio and video
ffmpeg -i input.mp4 -vcodec libx264 -crf 25 -preset medium -vf scale=-2:360 -acodec libmp3lame -q:a 4 -ar 48000 -ac 2 output.mp4
- Compress audio and video of all files in a certain directory and write the compressed files to another dir.
for i in *.mp4; do ffmpeg -i "$i" -vcodec libx264 -crf 25 -preset medium -vf scale=-2:360 -acodec libmp3lame -q:a 4 -ar 48000 -ac 2 "./1/${i%.*}.mp4"; done - Compress video and remove audio with -an
ffmpeg -i input.mp4 -vcodec libx264 -crf 25 -preset medium -vf scale=-2:360 -an output.mp4
(Corrected later: the command also had the audio options
-q:a 4 -ar 48000 -ac 2, which do nothing when-anremoves the audio, so I took them out.) - Rotate videos 90 degrees clockwise
ffmpeg -i input.mp4 -vf "transpose=1" output.mp4
- Cut ??:??:?? of video starting at ??:??:?? (
← (Feb 05) Principles and Practices · all weeks · Computer-aided Design (Feb 12) →