9. Embedded programming
This project require some experience, AVR are relative new in comparison to the old 8051 microcontroller. Hopefully there is a lot of information. Nowadays is possible to use additional languages besides Assembler. It is possible to load Arduino IDE to the microcontroller and program it by Arduino SW application.
Group assignment
Compare the performance and development work flow for other architectures. Please take a look at the Group assignment part of Silvia Lugo web page.
Individual assignment
The activity consist of: - Read a microcontroller data sheet. - Program your board to do something.
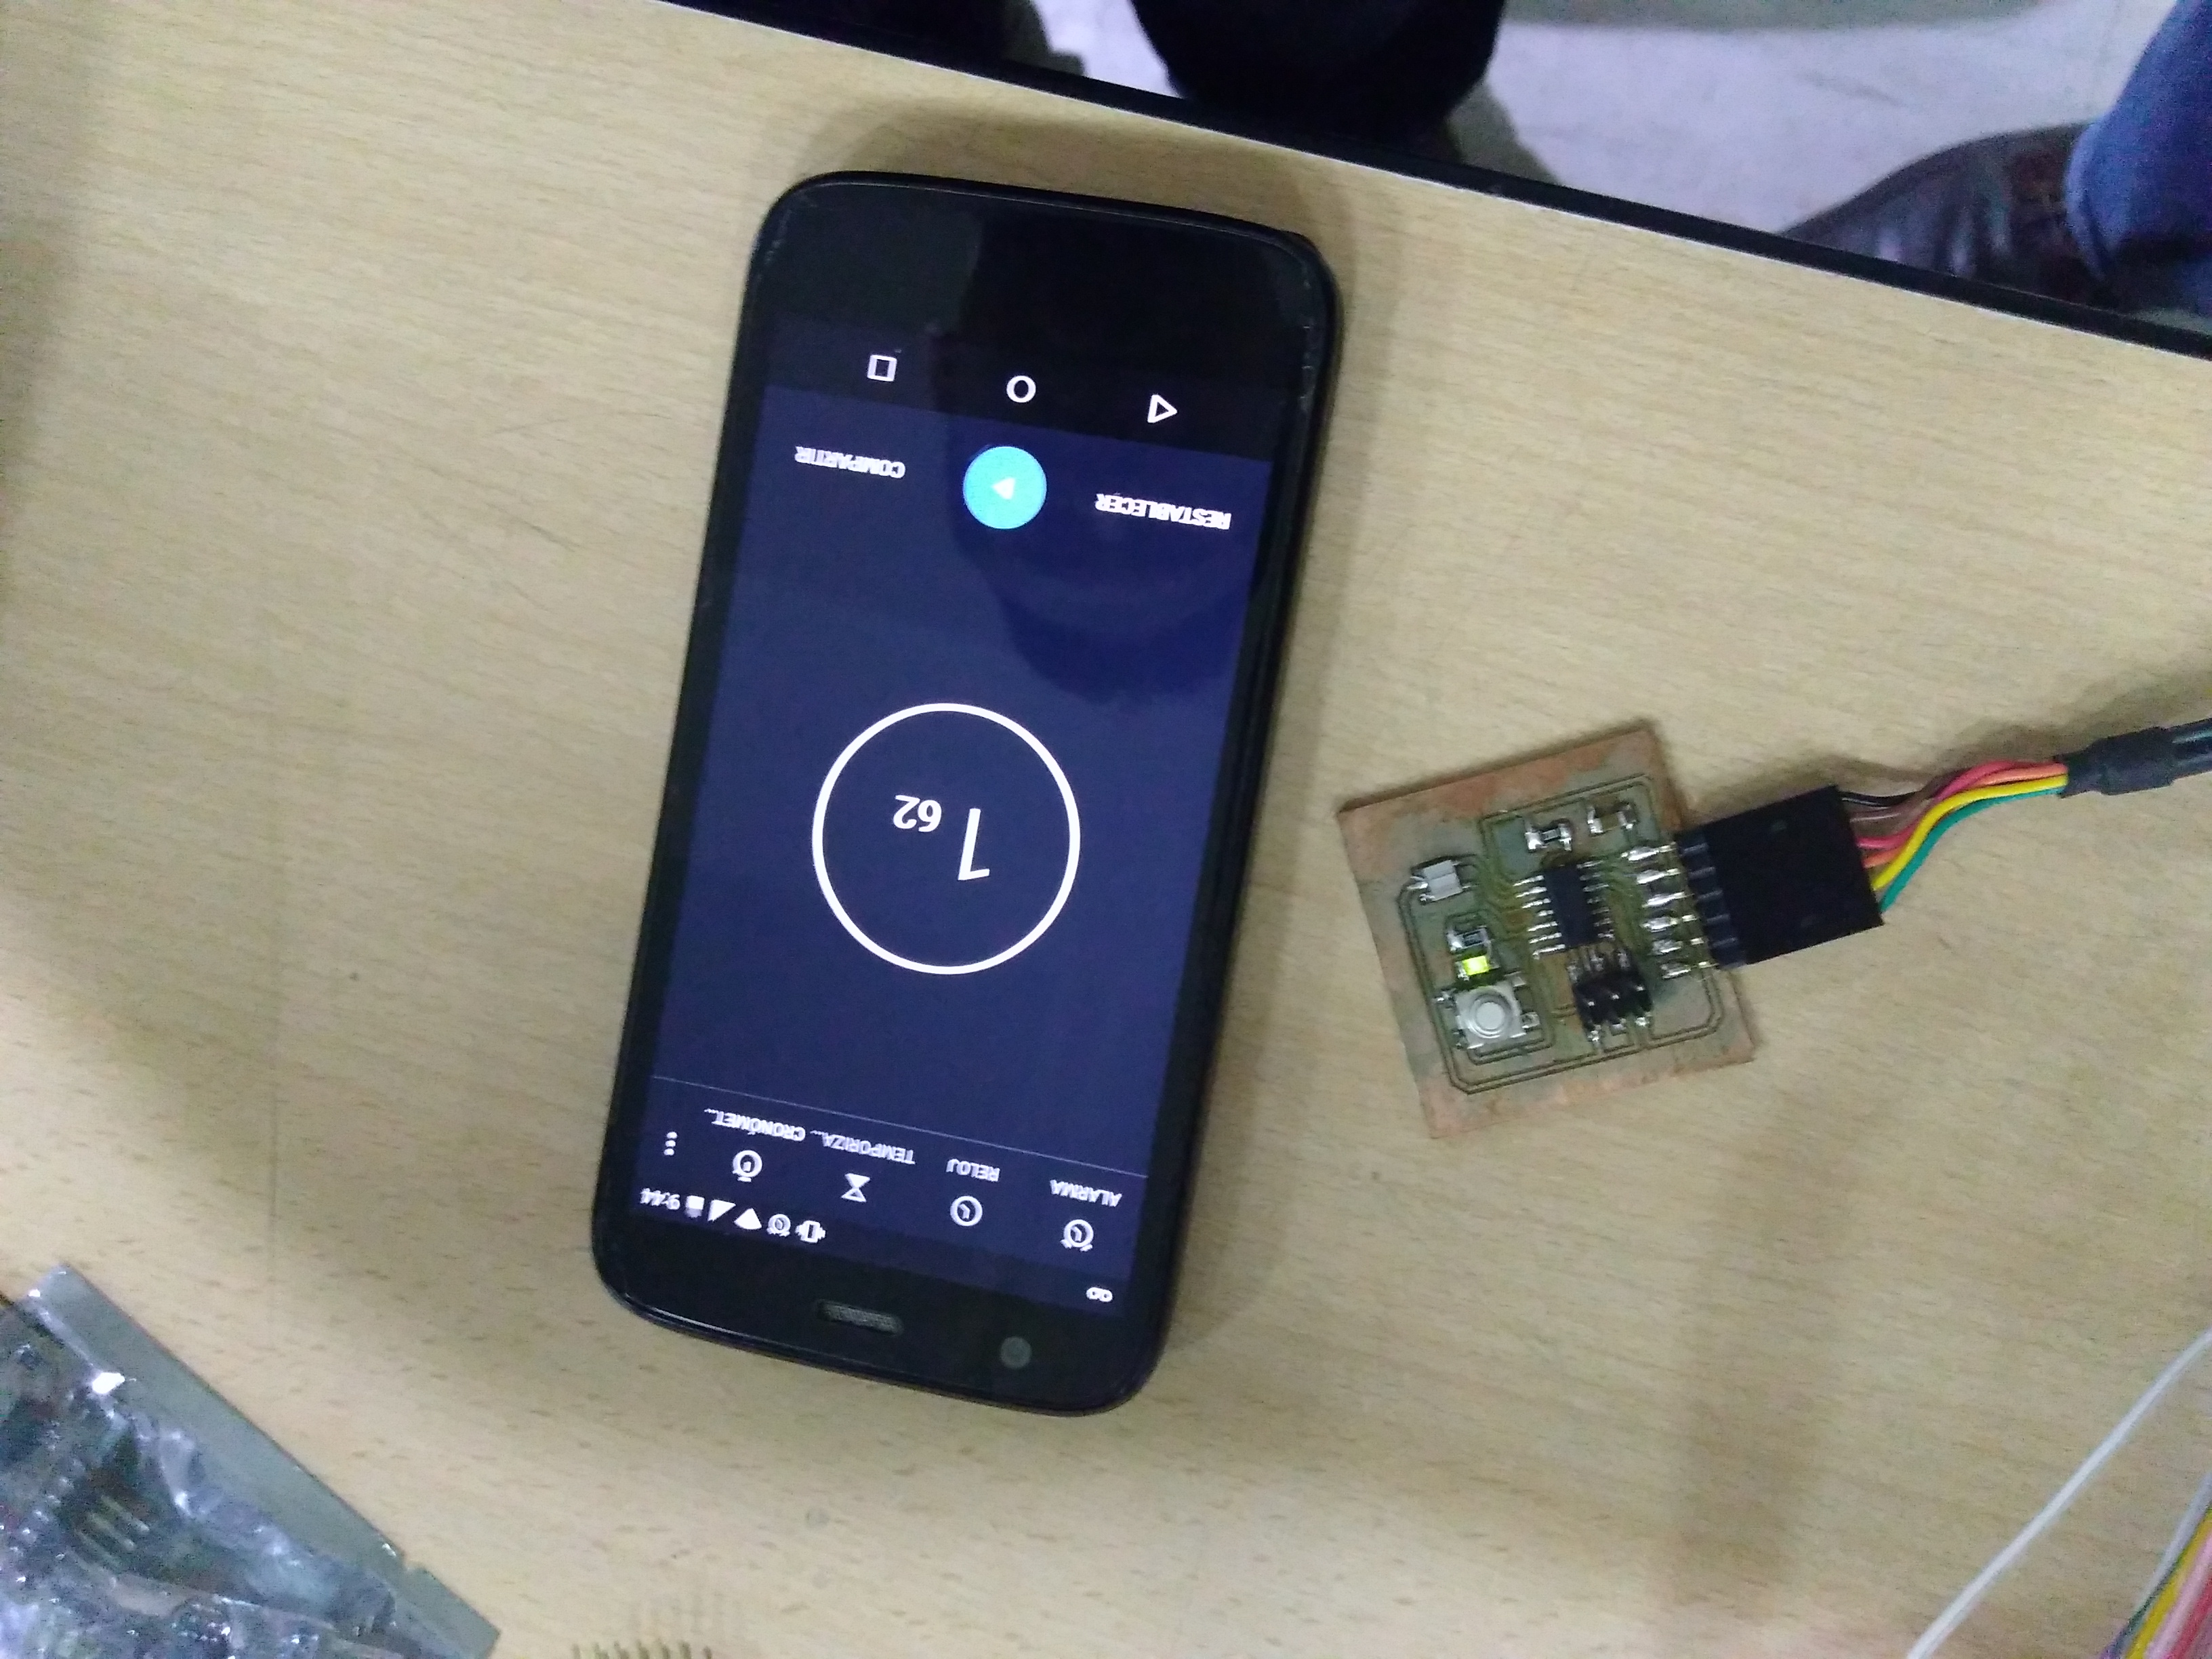
At this opportunity I had worked with the ATtiny44A by Atmel.
Datasheet
The datasheet has some important parts such as:
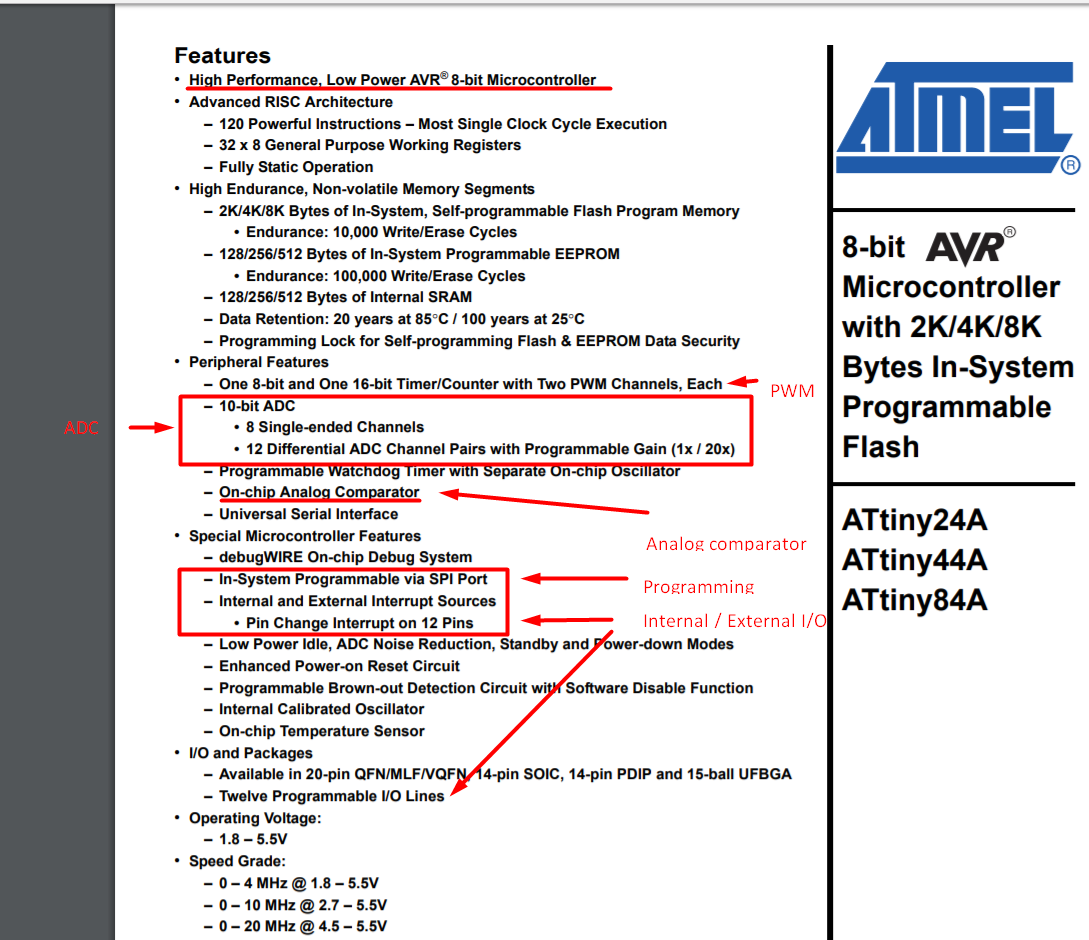
Features
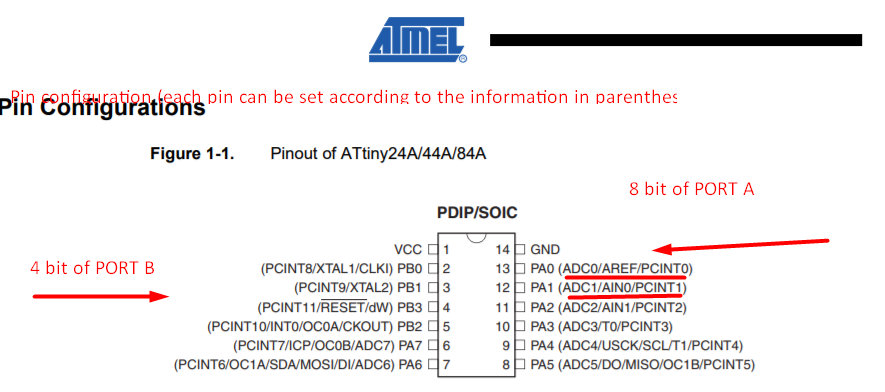
Each pin can bet set according to the information in parenthesis.
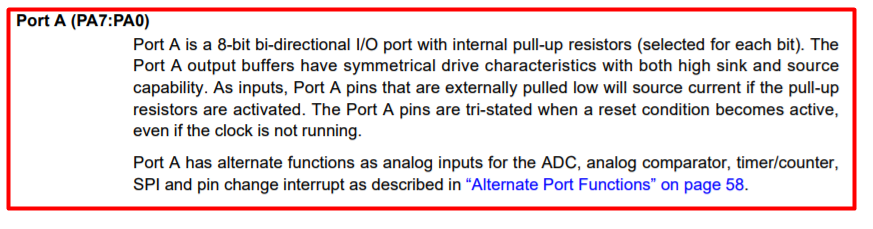
Port A
The port A configuration is:
Port B
The port B configuration is:

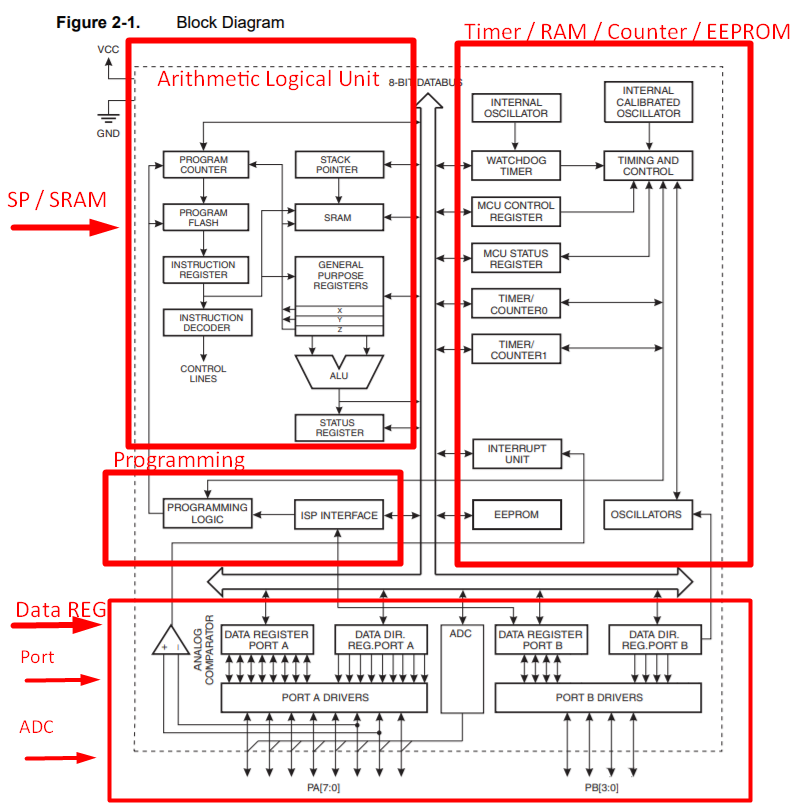
Block diagram
The block diagram of the microcontroller is:
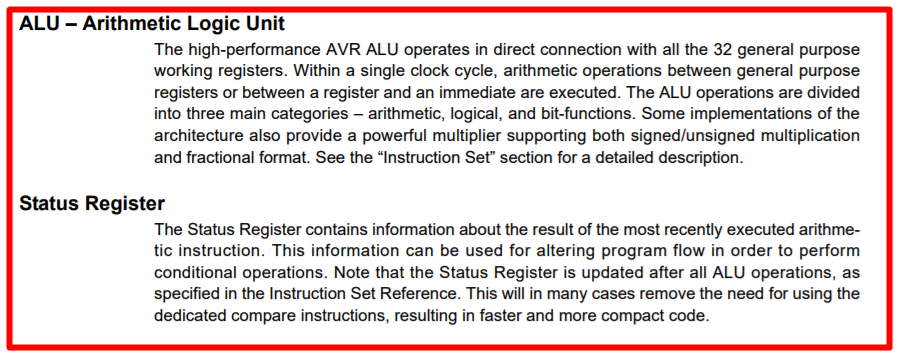
ALU
The ALU - Arithmetic Logic Unit - operations are divided in some categories like: arithmetic, logical and bit-functions. Status register contains the most recently executed arithmetic instruction.
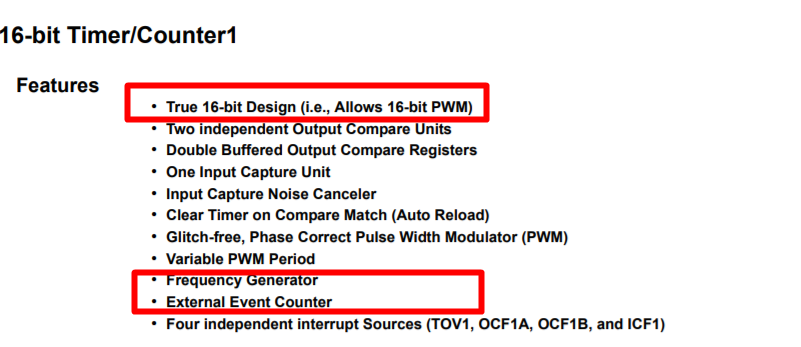
Timer and Counter 1
The main features of the timer - counter are:
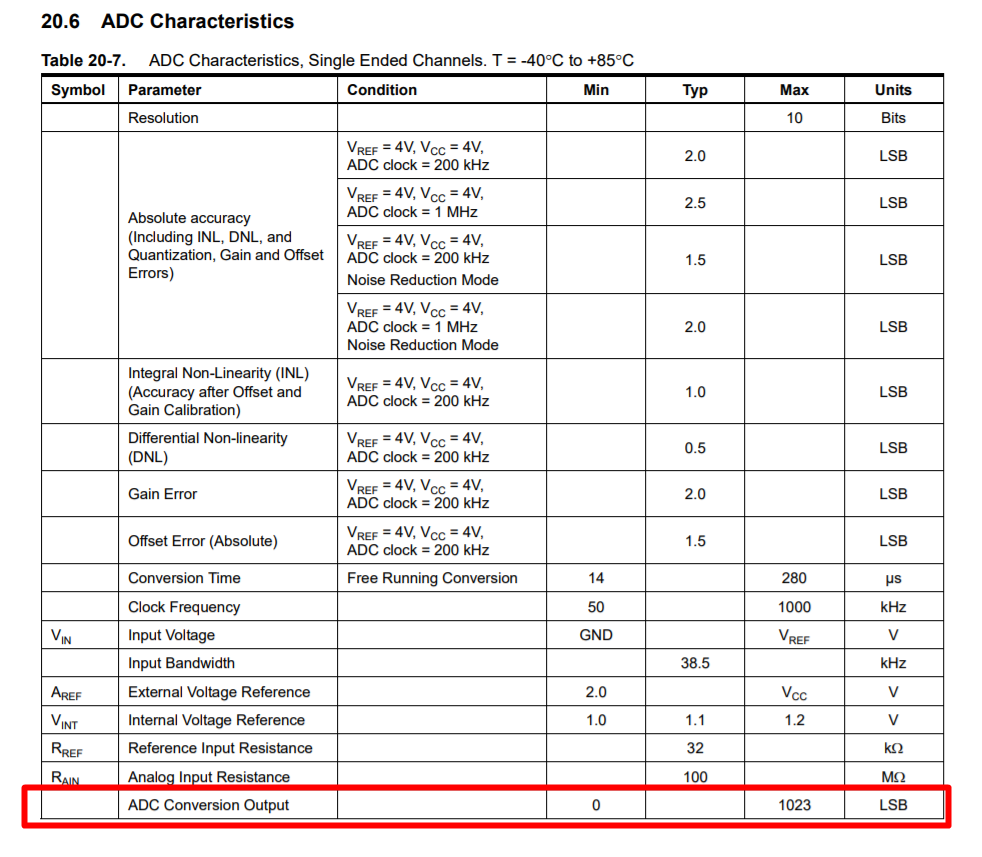
ADC charasteristic
The ADC table characteristic are:
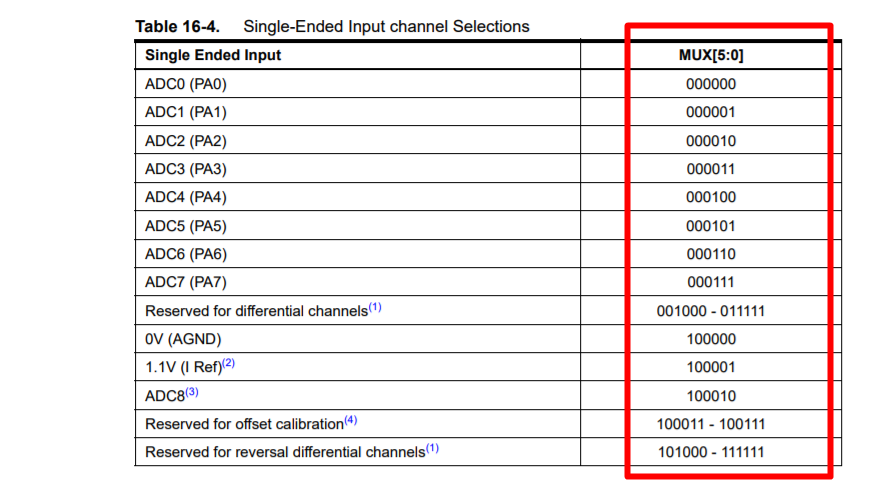
In order to choose an ADC there is a use of the multiplexer like:
Arduino IDE loaded at microcontroller ATTiny44A
After the installation of the Arduino IDE, however it is necessary the installation of drivers. In order to complete it we have to done the following steps.
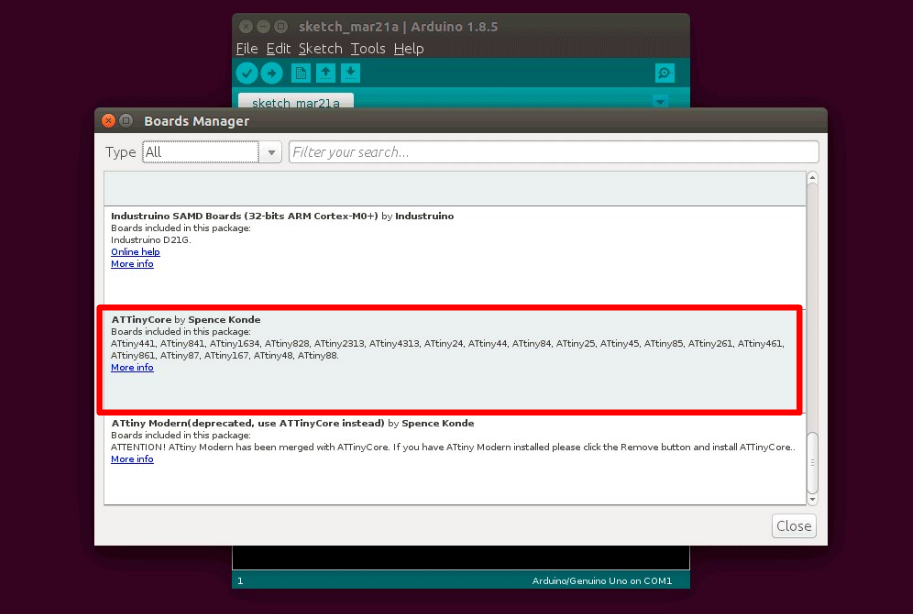
You may download the ATTiny core that may be use at Arduino.
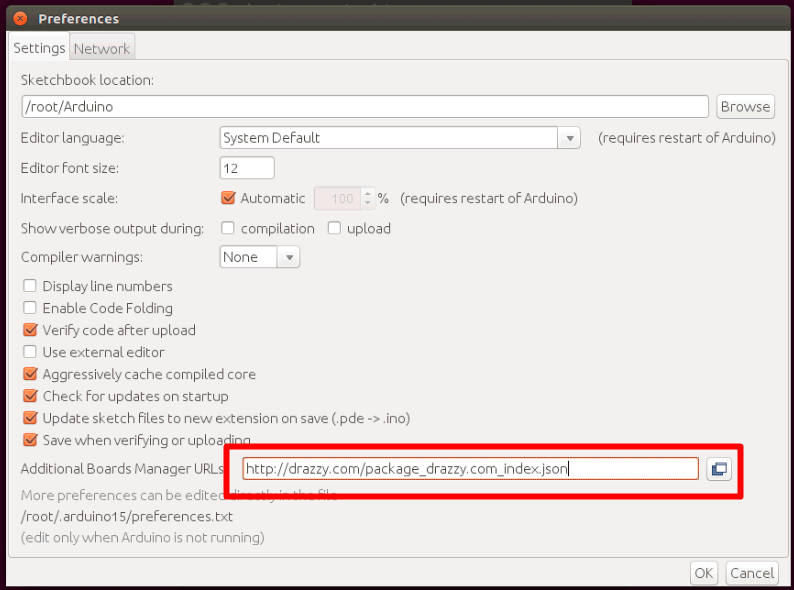
Please put these references at the board manager: http://drazzy.com/package_drazzy.com_index.json
At tools –> board manager select:
ATtinyCore by Spencer Konde
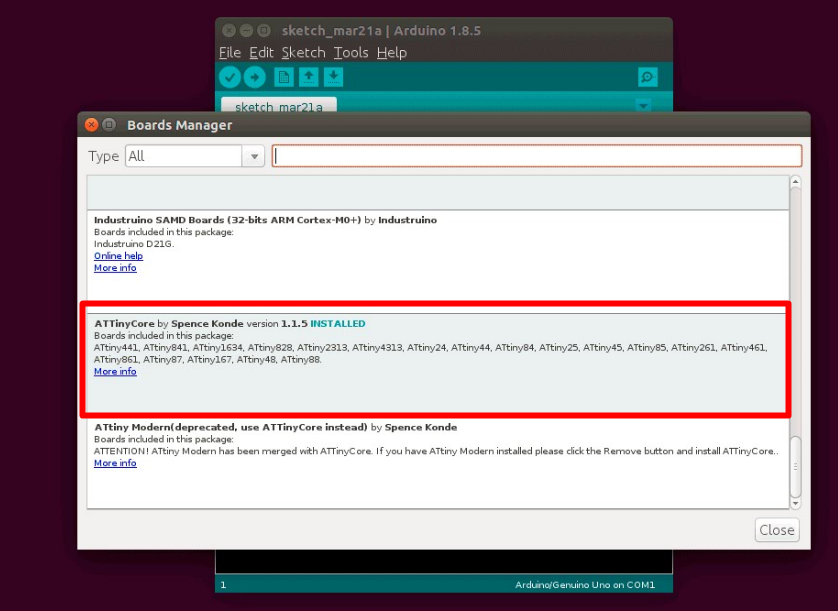
 Select install, once done you may see that the library appears like INSTALLED
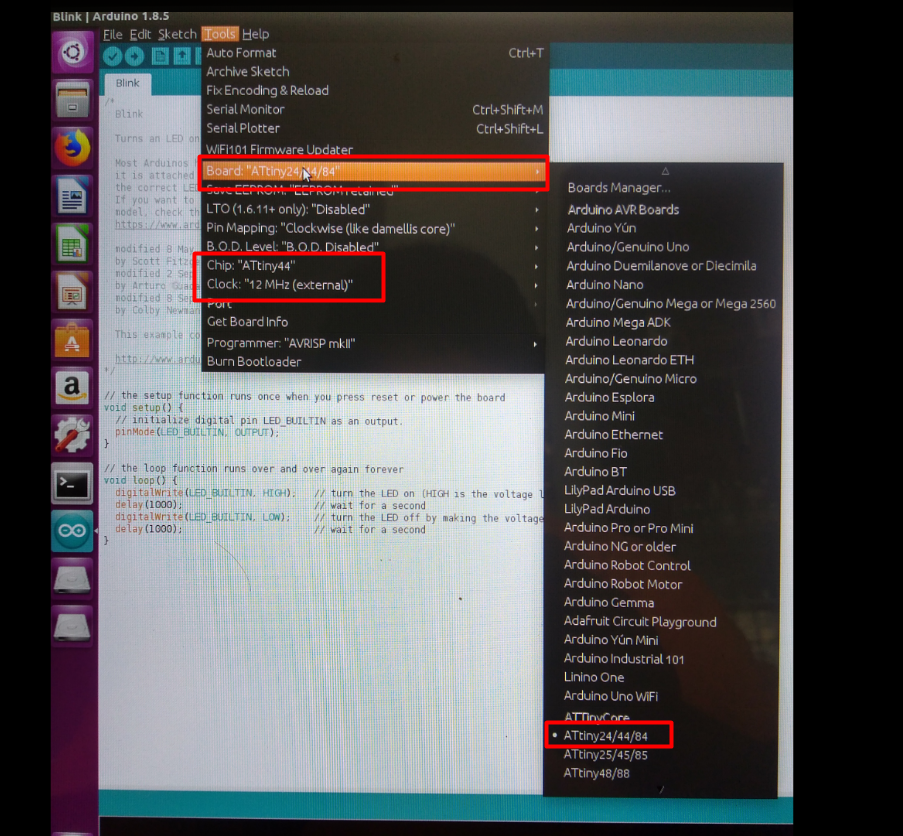
Prior to the programming of the board select: Tools —> Board: ATtiny 24/44/84
Select the correct chip: Tools —> Chip: ATtiny44
Select the correct clock reference (according to your design): 12 MHz external
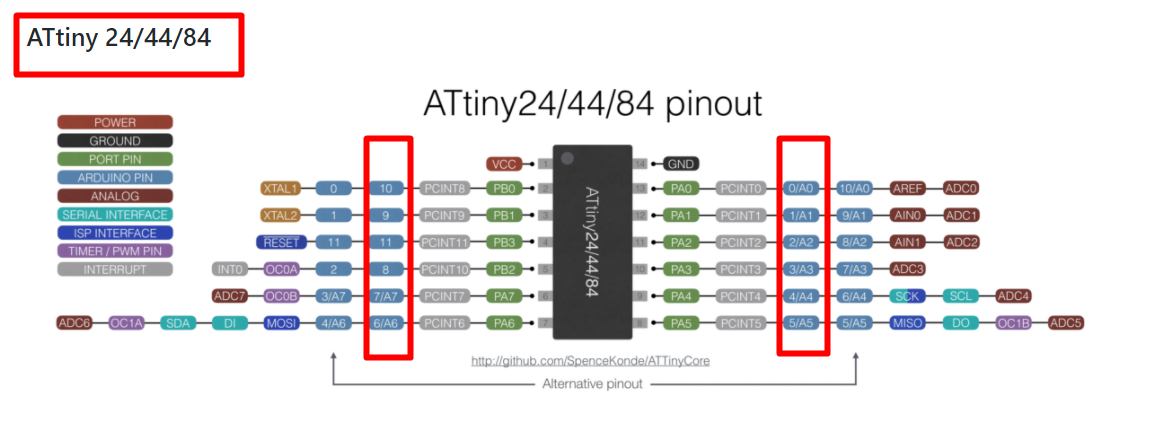
Port configuration for Arduino.
Please consider the following ports when handling the Arduino IDE. The port number are not the same as the Datasheet.
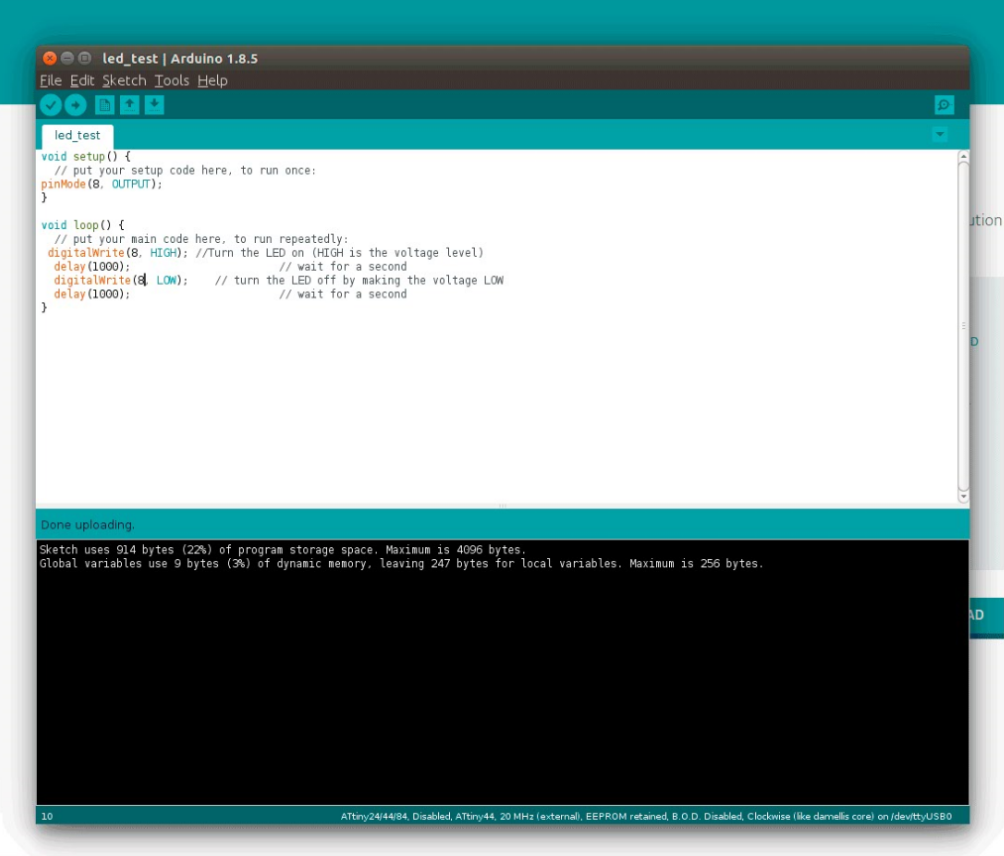
I had programmed a led blinking program. I had some problems with the port handling. Hopefully at the documentation there is the information of the ports, after that, I was possible to load the program to the microcontroller.
Something else to consider, it is the resonator value. If its value it is not properly set, the blinking will not be respect the value of the program.
 ”
”
 ”
”