VCarve Tutorial
A lil' introduction
VCarve is a profesionnal software used to interact with the CNC. You have to pay to use it, but you can download the trial version to start and to make some files on your own computer.
In here I'll show you how to use it properly.
Step 1 : install VCarve
Here is the link to download it : https://www.vectric.com/free-trial/vcarve-pro
and a link to its documentation : https://docs.vectric.com/docs/V9.0/VCarvePro/ENU/Help/VCarvePro.html
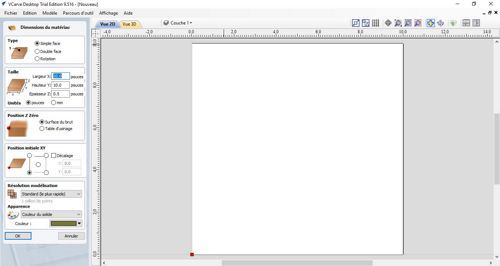
Here is what the interface looks like :
Step 2 : open your file or create a new one
Like most of the software, if you want to use a previous work you just have to click in File > open file.
Step 3 : software settings
First, you have to modify the default dimensions so it fits the ones of your wooden board.
Here is a good tutorial for the basics of doing all the setup of VCarve :
Sizes
Here, our dimensions are :
- For the feet :
- Height : 600 mm
- Large : 500 mm
- Thickness : 18 mm
Do not forget to select the right mesurement system, here I'm in mm so I have to check the right box
Position Z Zero
Here, you have to tell the machine where you want your mill to start on Z position : on your wooden board or on the machine board. Here we want it on the wooden board.
Initial position XY
Here, you have to tell the machine where on your board and on your XY axis your milling will start. Here, it's on the downer left corner.
Here are the full settings of our document.
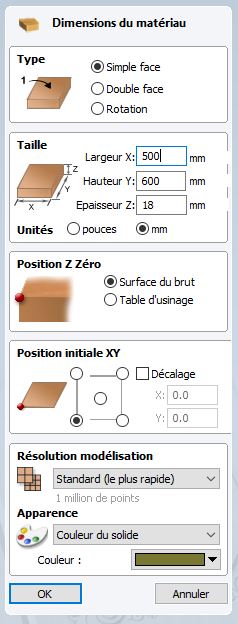
Once you're okay with everything, just press "okay".
Step 4 : machine settings
I now have to tell the machine what to do exactly : milling, carving, etc In order to do that, you have to go to a new panel. The one one your left, called toolpath.
Here I want to machine an outline, so I select this function in the panel. Here is what it looks like :
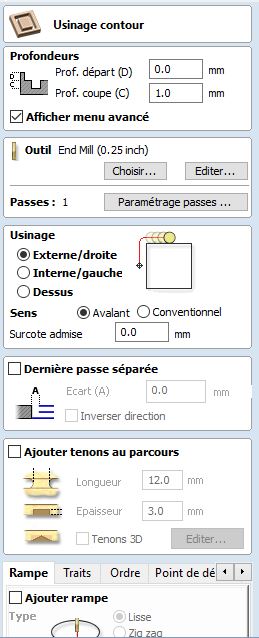
I have to select the proper End Mill (here it is 6.35 mm).
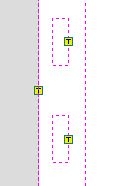
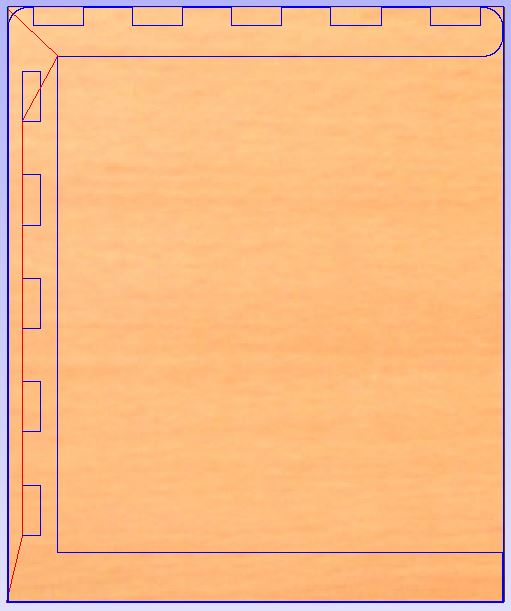
I have to add tabs to my project, so it won't move around and be stable when the milling process is on.
Select "Add tabs to toolpath". Then you have to place them manually. Be careful to place them correctly, so it won't damage your project.
When you are okay with everything, just press "close" to go back to the previous screen and keep going with the settings.
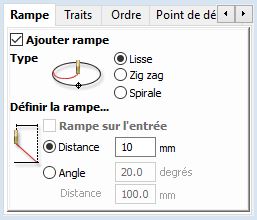
You can also add a ramp if you want. It will create a small ramp before entering the material and the result can be smoother.
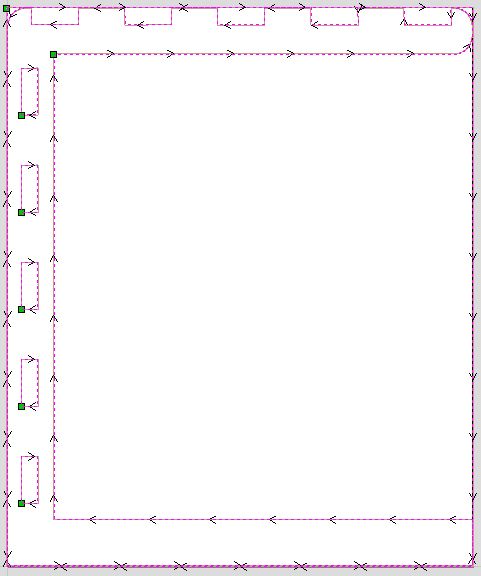
When you are happy with everything, you can press "calculate". Here is what should appear on your screen !
3D view
2D view
Step 5 : preview
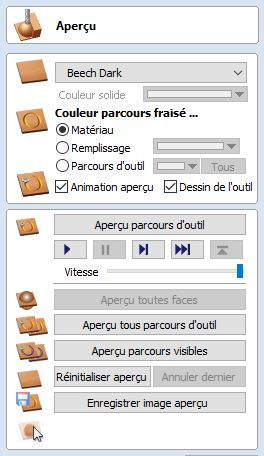
Now that you have done all this, you can have a preview of what the machine will do and make sure everything is okay.
Here is what the preview window looks like :
Step 6 : save your file
Now you can save your file. Close the preview window and click on the icon : Save the toolpaths.

Here you go, you're all set to launch your ShopBot :)
Wanna go further ?
Here are some tutorials :
| Name of the website | Link |
|---|---|
| DU Faclab - Fraiseuse – Assemblage à mi-bois[FR] | http://cours.education/dufacilitateur/2016/05/18/fraiseuse-assemblage-a-mi-bois/ |
| VCarve pro tutorial [ENG] | https://www.dailymotion.com/video/x30s4oj |