Inspiration
Fish feeder (thingiverse)
Research article

Ideation
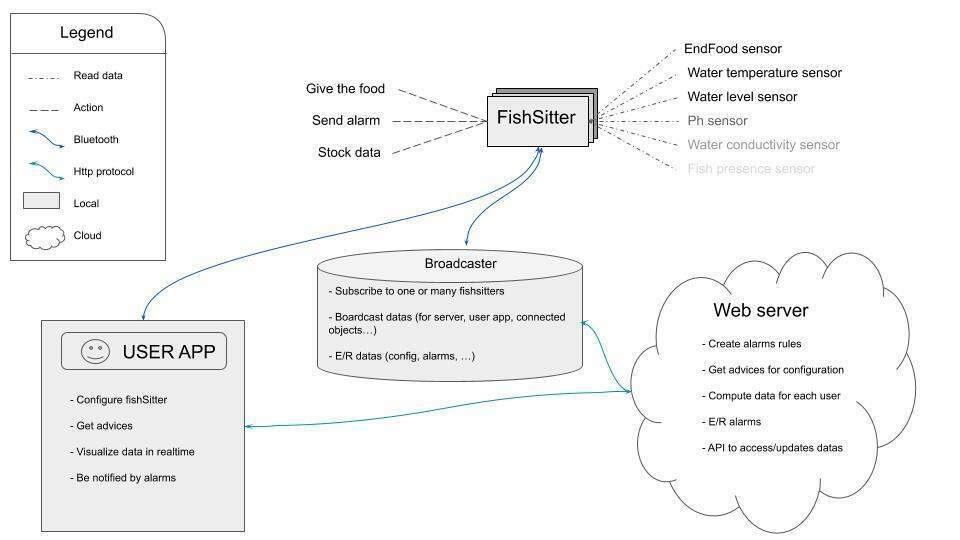
The fishsitter concept
Fish databases
To be able to really monitor data, we need to have serious data in our system, because I'm lot of inspired by open innovation, I think that we need to use open data base to enrich devices and applications. So I find some open databased for fishes and fish fooding, if I have time I will use them.
⚠️ I didn't have time to add them for the final presentation but it's clearly an axe that I will study in the future to improve the fishsitter
The fishsitter design
3D design
For the design of my final project, I start from big inspiration on thingiverse, and I designed rough draft of each fishsitter part.

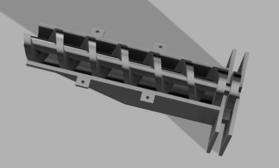
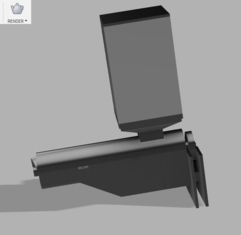
After the fist draft, i decide to give more details to my Design, so I add hole of the motor in my design, and integrate the dimension of the motor. I Get the dimensions from the vendor.
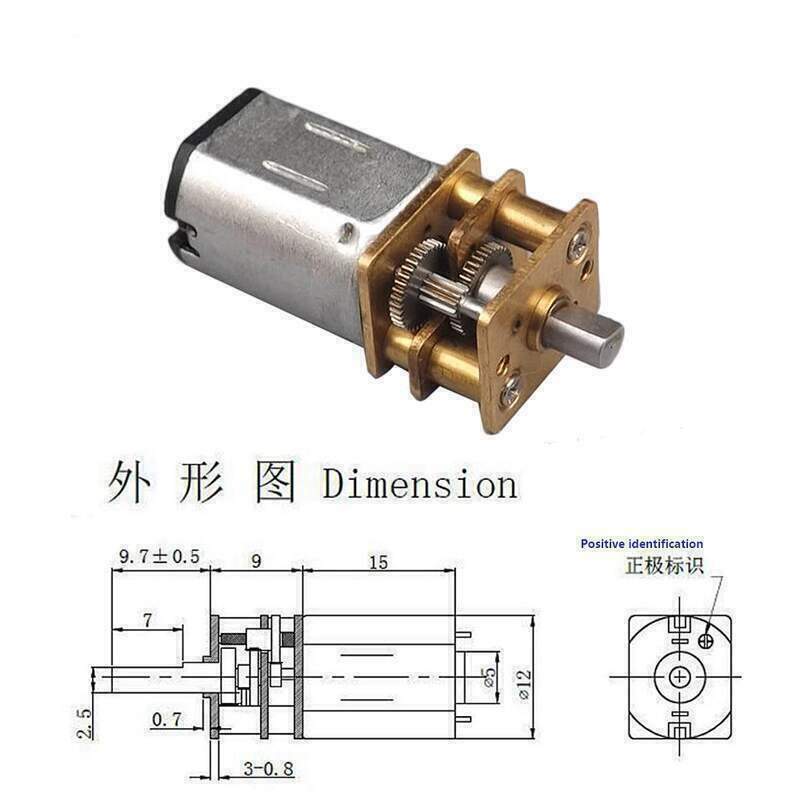
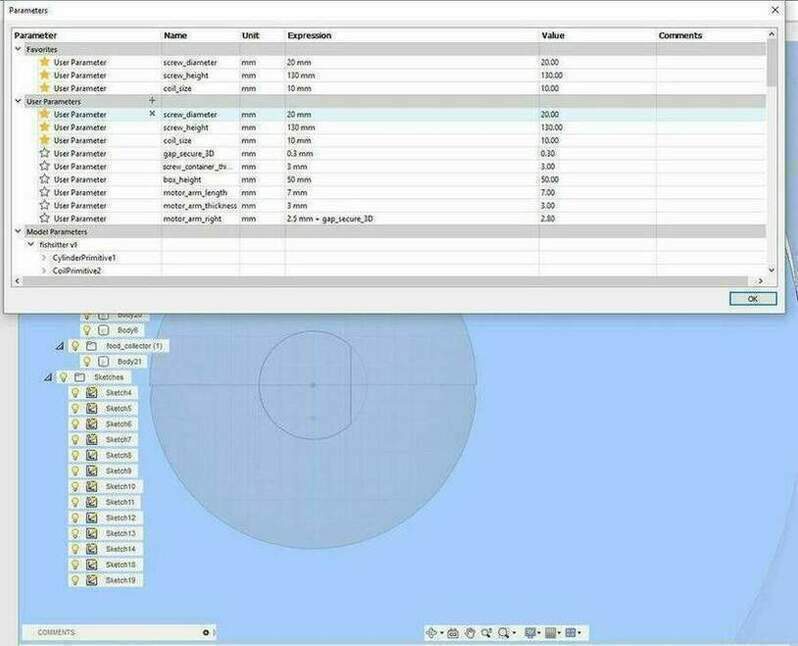
And then, I add the dimensions as parameter to fusion 360 (in case where I change the motor, I will not update all the desin) and then I add a 3d print gap, to be pressfit.
Print the fishsitter
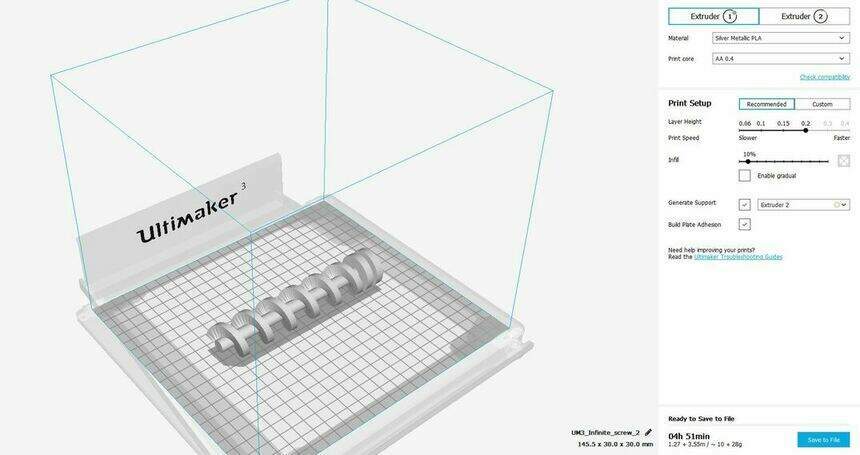
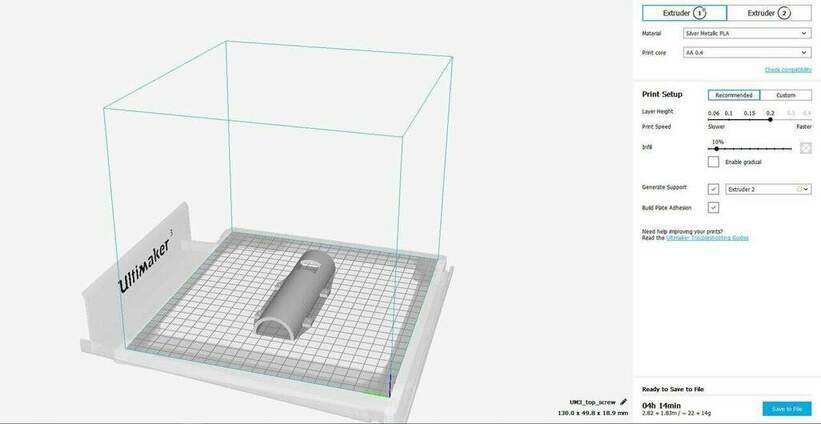
I start by printing the rotor food, to validate the mechanism and start my tests. Before to print the complete rotor food, I just print the hole for the motor in little circle to be sure that was what I expected. When I was sure, I print the complete piece with PLA and PVA supports (it's really easy to remove, just need to be deeped in water).
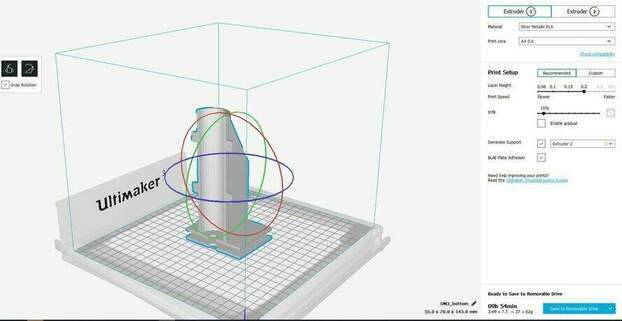
Then I print the bottom and the first part of the fishsitter top, the two pieces takes both of them lot of times so I was really becarefull during the printing to check if they are no fails.
After the print
After the print, to remove the PVA supports, I put the 3D parts, in water, and I let it on the water almoast 12 hours, and regulary, I reverse the parts in water and not.
⚠️ At the last 3d part that I printed, I found solution more easy, the solution is to cut the top of an recuperated platic water bottle
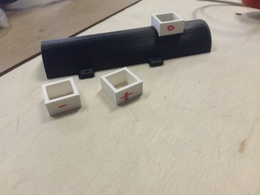
Box container food
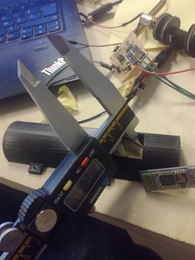
To make the box container food, and I maid measure with calipers and I print a 3 rectangle, one with the exact measurement and the thwo others are +/- 0.4mm, which corresponiding to the tolerences that we saw in the 3d printing. Finally the measure that I tooked was good, I don't ned to add or remove tolerence to have pressfit box. So with this test, I updated values in the parametric system of Fusion 360.
The fishsitter board
To start the fishsitter board, I take example from some of my previous fabacdemy board, and I choose the microcontroller that I know the most, the attiny84. For alimentation, I want to use an old USB cable that I had, so I just placed two male pin header. And like for all my boards, I add the resonator of 20Mhz, debugging led with the FTDI and SPI interfaces.
Then, I add the end food sensor and temperature sensor from the input device week schematic. Because, I found a small dc motor, seems have a great torque, they are any reference in the motor, so I don't know the voltage input, but I think I will use it it can be from 3 to 6 or 12 V.
Debug input voltage
To debug input voltage of the motor, I take a stablizied alimentation and start with the minimum voltage (3v), I add slowely voltages to see the limit, when I arrived from 5v to up, I did'nt see a big difference, So I think the limit is 6 voltage, I will juste use a 5 volt to keep the board simple.
Motor schematic
Then after some talking with Luc about best practice I maid this schematic to control the motor. My goal is to use the time to take portions food. So I only need a transistor to be able to enable and disable the motor rotation. Then the DC motor should be connected with a zener diode, in this way, we are sure that the courant flow always in the same direction. The capacitor is used to decharg the motor when he stopped. I also add resistance before the transistor drain to prevent short circuit when the pin is HIGH.

Motor routes width
To prevent problems of tension, I choose 24 width for routes. It should deliver more courant in this way. So I update all routes from the alimentation to the motor, included the diode, and the capacitor.

Mods problems
I had some problem, like you can see in the botton, when I generate the rml file using mods. I don't have enought space beetwen the food sensor and his vcc.
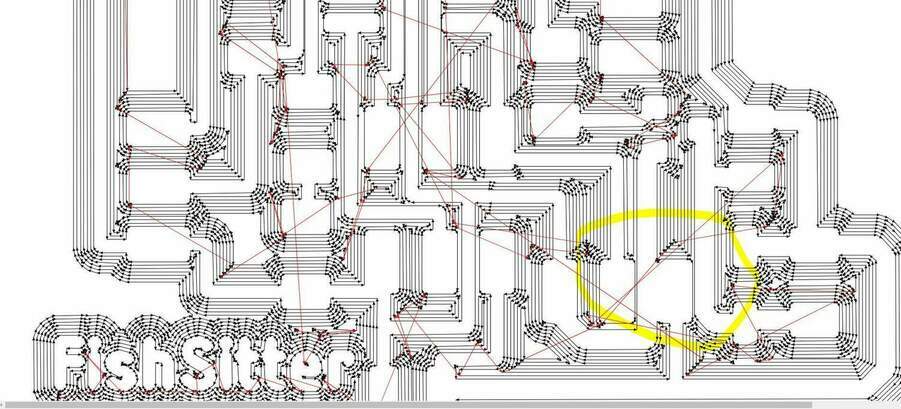
So for this path, I will reduce the route to 20 instead 24 like I mentionned it in the top. But instead to change the routes paths, I just move with few millimetters the routes between the two routes and it works great.
I hope, it will be the same for machining. Finally the board was milled perfectly.
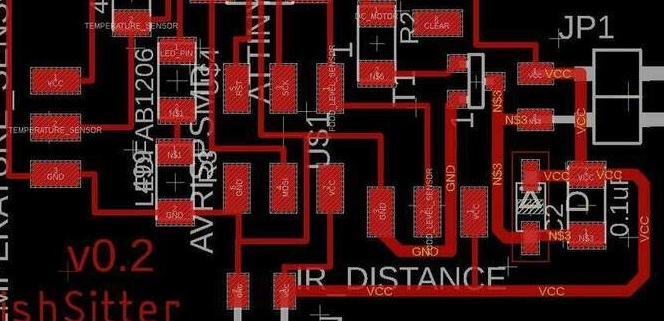
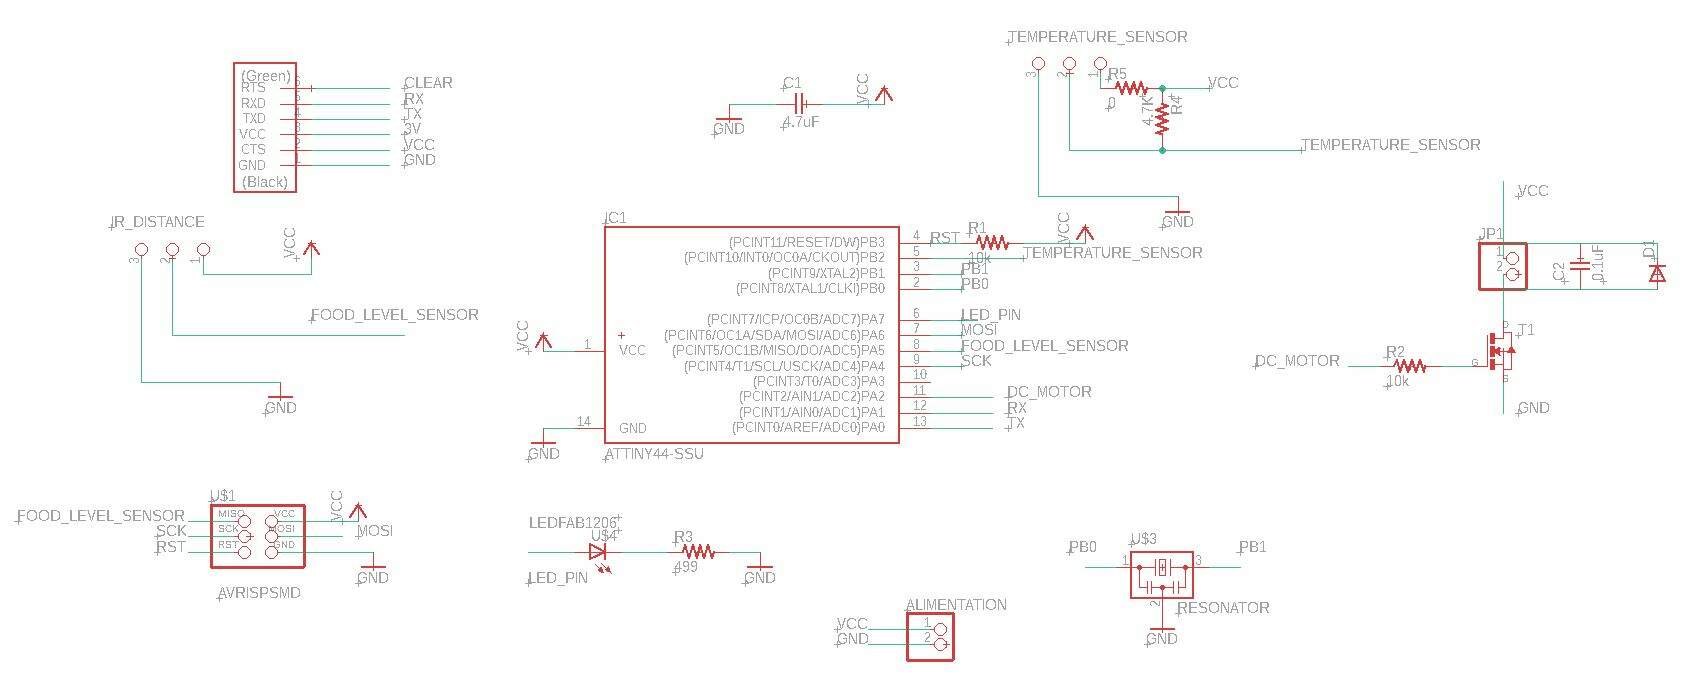
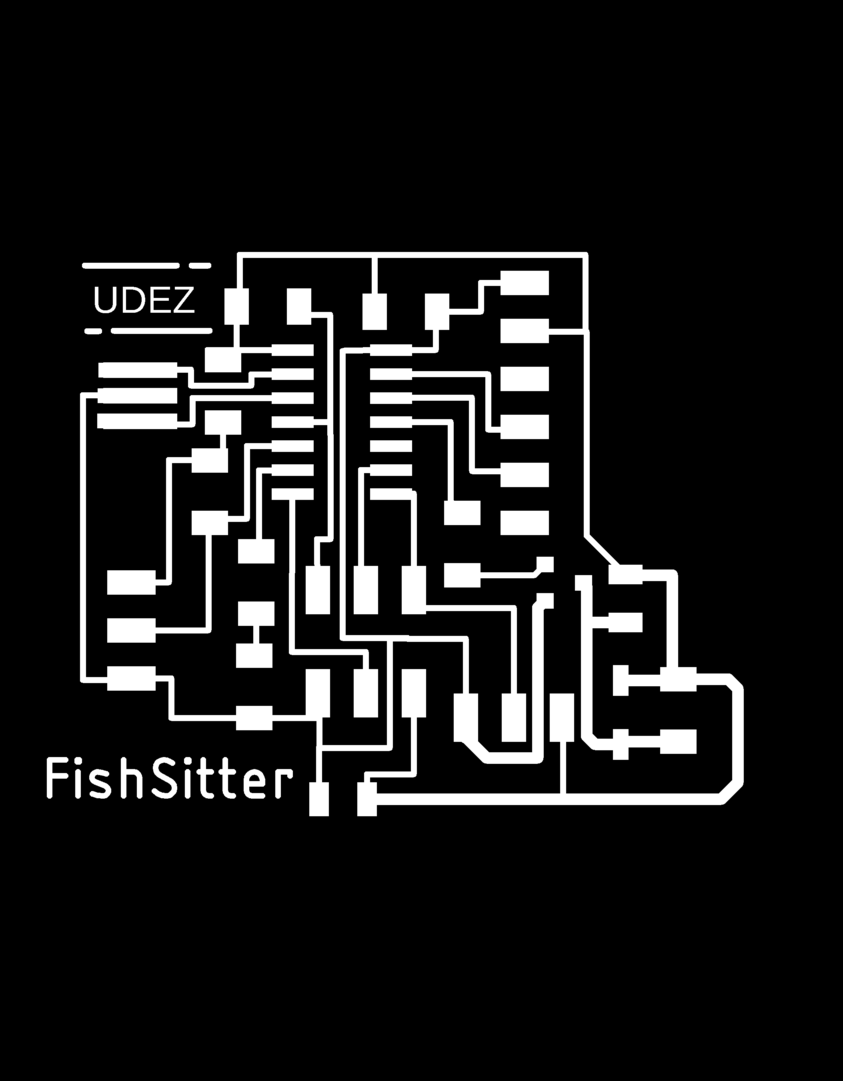
Board schematic
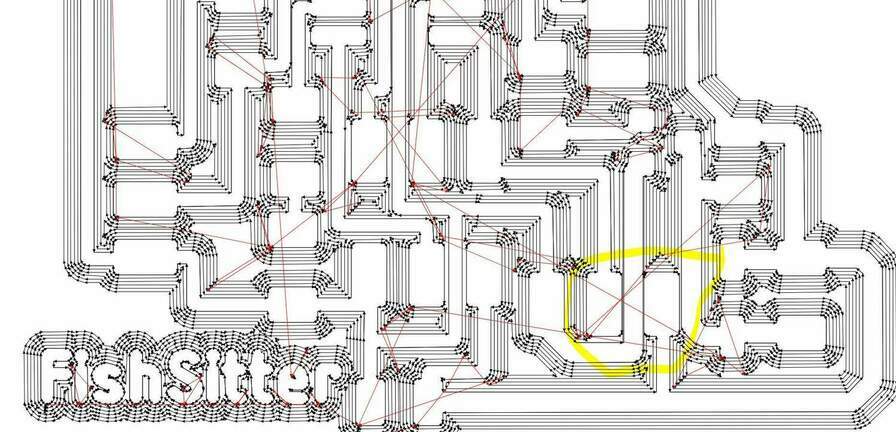
Board traces
Here is the final traces for my fishsitter board.
Board machined
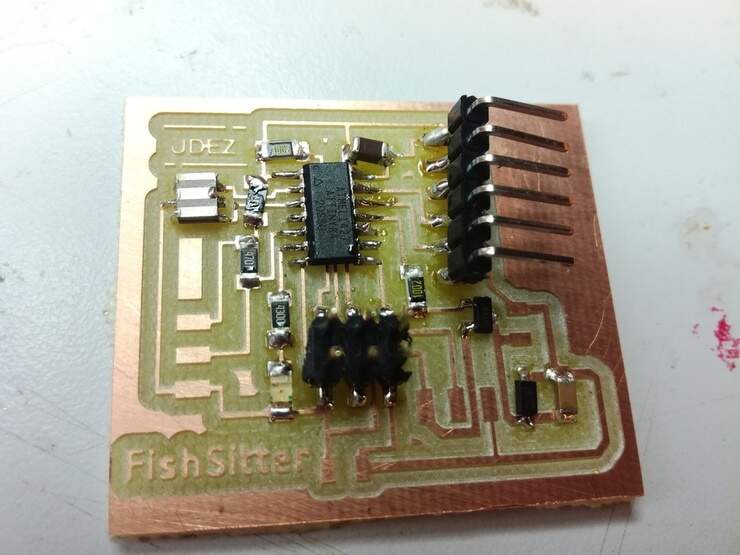
⚠️ I missed to take a great picture with all pins solded before to drop the board in the water, hopefully works again but I fiw some traces with Pistocole
Write the code to test the motor
Using the arduino IDE, I maid a simple delay and I didn't use a function millis (unlike the previous week), to simulate the portion of food giving. In the same time a choose to activate the led when the motor is running (principally for the debug).
/*
  Blink motor

  by Madjid AIT SI AMER
*/
#define LED_BUILTIN A7
#define MOTOR_PIN A2

void setup() {
  // initialize digital pin led and motor.
  pinMode(LED_BUILTIN, OUTPUT);
    pinMode(MOTOR_PIN, OUTPUT);
}

// the loop function runs over and over again forever
void loop() {
  digitalWrite(LED_BUILTIN, HIGH);    // turn the LED on
  digitalWrite(MOTOR_PIN, HIGH);    // turn the Motor off
  delay(6000);                       // wait for 6 second
  digitalWrite(LED_BUILTIN, LOW);    // turn the LED off
  digitalWrite(MOTOR_PIN, LOW);    // turn the Motor off
  delay(6000);                       // wait for a 6second
}
Note, that for the final project I used the function millis, to have better management of even, for more information, please go on the final project note book
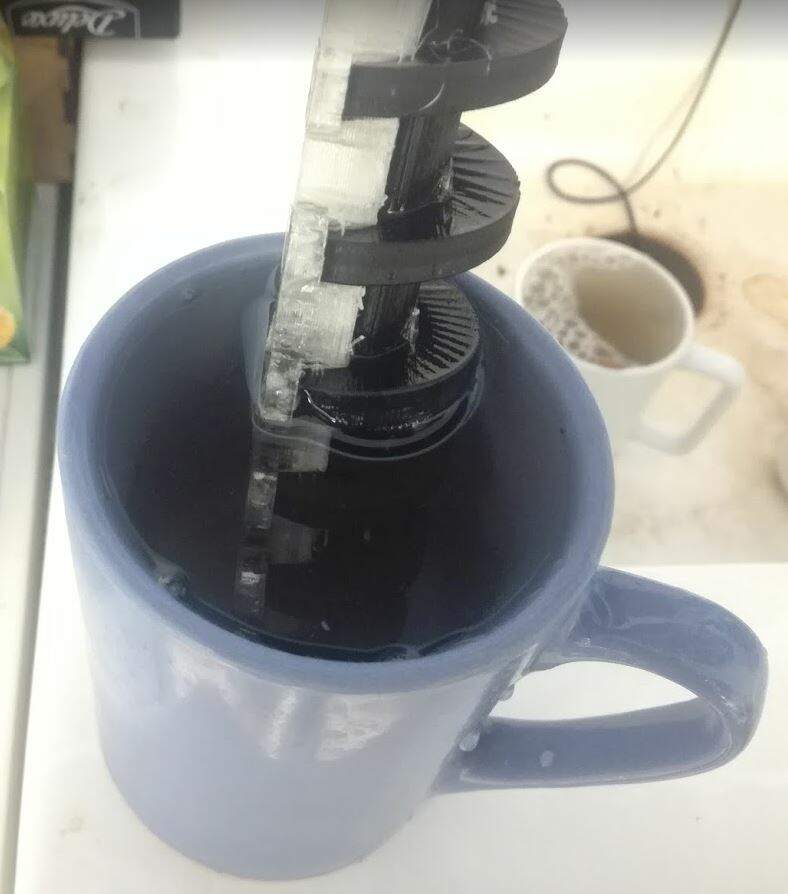
Test the motor
Here is one of my first test with the infinite screw and the fishsitter board:
Bluetooth module
I designed my board to be connected with the BC04. But for the reason that I don't know, the shield burned. So I bought two others, to make my test. I bought the another BC04, and an HC05. The BC04 does'nt work, so I use the HC05.
Using the ftdi, I connect the VCC and GND to the HC05 module ,and to enable the AT mode, I need to connect also the VCC to the EN of the module.
# test if AT commands works
AT
> OK
# get the name of the module
AT+NAME
> HC-05
# update the name of
AT+NAME=Fishsitter
AT+CMODE=0
Param: - 0 - connect fixed address
- 1 - connect any address

- 2 - slave-Loop
After that, like I did in the network communication week, I test the module from the HC-05 android mobile app
exported Bom
This above list was generate using the run bom command on Eagle.
| Part | Value | Device | Package | Description |
| ALIMENTATION | PINHD-1X02_2.54-SMD-90° | 1X02SMD/90 | PIN HEADER | |
| BLUETOOTH_MODULE | FTDI-SMD-HEADER | FTDI-SMD-HEADER | 1X06SMD | |
| C1 | 4.7uF | CAP-UNPOLARIZEDFAB | C1206FAB | |
| C2 | 0.1uF | CAP-UNPOLARIZEDFAB | C1206FAB | |
| D1 | DIODESOD123 | SOD123 | DIODE | |
| IC1 | ATTINY44-SSU | ATTINY44-SSU | SOIC14 | |
| IR_DISTANCE | SPDTSWITCH | SPDTSWITCH | ||
| JP1 | PINHD-1X02_2.54-SMD-90° | 1X02SMD/90 | PIN HEADER | |
| R1 | 10k | RES-US1206FAB | R1206FAB | Resistor (US Symbol) |
| R2 | 10k | RES-US1206FAB | R1206FAB | Resistor (US Symbol) |
| R3 | 499 | RES-US1206FAB | R1206FAB | Resistor (US Symbol) |
| R4 | 4.7K | RES-US1206FAB | R1206FAB | Resistor (US Symbol) |
| R5 | 0 | RES-US1206FAB | R1206FAB | Resistor (US Symbol) |
| T1 | NMOSFETSOT23 | SOT-23 | MOS FET | |
| TEMPERATURE_SENSOR | SPDTSWITCH | SPDTSWITCH | ||
| U$1 | AVRISPSMD | AVRISPSMD | 2X03SMD | |
| U$3 | RESONATOR | RESONATOR | EFOBM | |
| U$4 | LEDFAB1206 | LEDFAB1206 | LED1206FAB | LED |
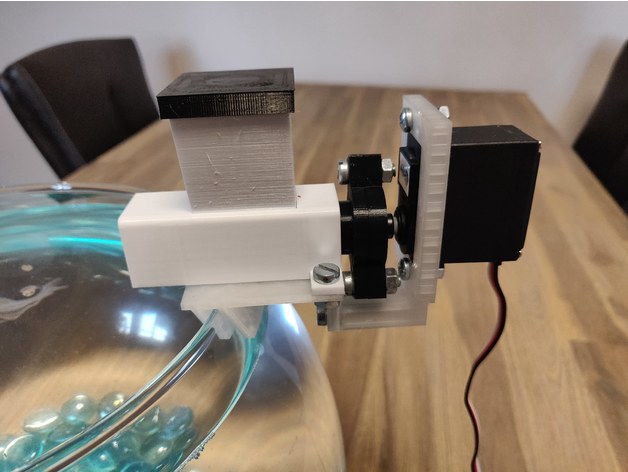
Assemblate fishsitter
Before to assembly all pieces, I just fixed the motor and the electornics stuff on the backside under the place of the box. I made a mistake for the screw that I told for the top and the back infinite screw container. So I will need to fix with some glue. I used double face tape to fix the board on the fishsitter.
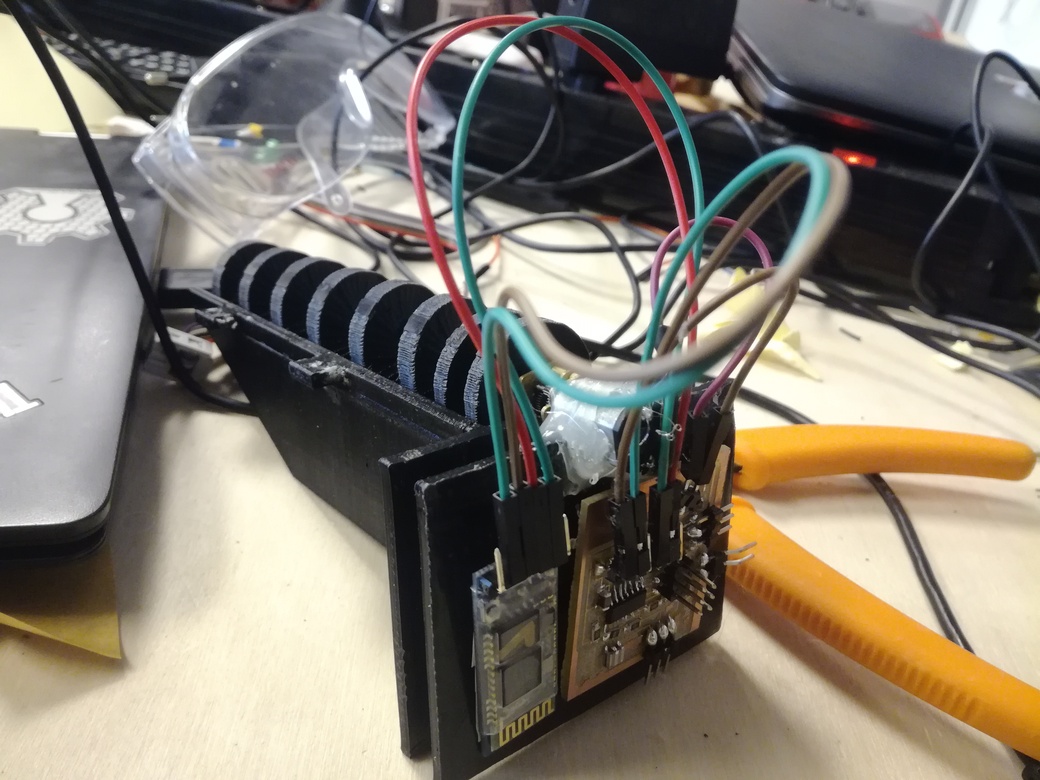
When the code is done, I will put the box to cover all the electronics and wires.
Mobile app
For the final project, I choose to make an application using React native. I choose this technology because I was full stack developer and had a good experience with React. React is javascript library (can also be considered as microframework or a framework), it was developped intially by facebook developpers. To start with react, they are some knowledge requirements about web developpement and interface developpement. But it's a pretty library, and the philosophy of react is oriented as component, the component manage they own state and they can be composed to make complex component.
They are many many things to tell about react, but it's not the subject, because here we talk about react-native. Even react and react-native has the same philosophy and share basics componenets, react-native is more than a library, it's a framwork with complete CLI tools, to build, upload and publish code.
React-native can be qualified as a cross plateform frameworks for mobile app. That means, you only need to develop one application, for android and ios application, and you use only one language Javascript (with html and css optionnaly). They are two kinds of cross plateform applications framework, the first one (like Cordova) used the webbrowser components of devices to display application, it's like an encapsulated web application, and the other familly (like react-native), use node server of devices to execute the logic of application and the native component to display application, so the application does'nt look like a web page and the performance can be really better in some cases.
Install React native
Install React native
Install React bluetooth lte plx and set the permissions
React native bluetooth library
    npm install --save <library>
    # The bellow line will add some dependencies, and update Gradle Settings (<project>/android/settings.gradle), Gradle Build (<project>/android/build.gradle) and register React Package (MainApplication.java)
    react-native link <library>
For specific libraries, like for bluetooth where they are no API permission integrate natively, you need to add permissions in the android manifest (android/app/src/main/AndroidManifest.xml). You can see the follow example for bluetooth.
    <uses-permission android:name="android.permission.BLUETOOTH"/>
    <uses-permission android:name="android.permission.BLUETOOTH_ADMIN"/>
    <uses-permission android:name="android.permission.ACCESS_COARSE_LOCATION" />
:::
Tested libraries
To find the good library to use the bluetooth with react native was not so easy. I tested few libraries and spend lot of time tounderstand why I was blocked.
I tried to use react native Bluetooth lte rtx and react-native-ble-managerbut both of them doesn't detect the HC-05, but th detect othes devices. This library was built for bluetooth 5, that's why they didn't detect the module. So, with the help of this tutorial, I founded one interesting library called react-native-bluetooth-serial.
On the first try, I was not able to connecton the module, I got an error on the compilation, it about overriding a shouldn't function in main JAVA, (I missed to take a screenshot about the error, so I'm not sure that its the real sentence). After a quick look on th github issues repository, I found that other people has the same problems. So by, luck, I ty just to remove the override from the source library, and it works.
Clone the application
git clone https://gitlab.fabcloud.org/ait.siamermadjid/fishsittercd fishsitter/mobile_appnpm ireact-native -hreact-native run_android
How to progress in react
On this project I used many libraries, like react-redux for state management, react-navigation for the navigation, and base-native for the theming of the application. I really recommand to read each file of the application to understad, I try to separate each component and make them easy to composed. It will be a good thing to learn each readme of library, try to start from an existing app, update it, and then you will learn so much.