18. Wildcard week
This week I had decided to use sandblasting because I wanted to use sandblasting for my final project. I compared sand blasting output on different materials for engraving.
Sandblasting
According to Wikipedia
Abrasive blasting, more commonly known as sandblasting, is the operation of forcibly propelling a stream of abrasive material against a surface under high pressure to smooth a rough surface, roughen a smooth surface, shape a surface or remove surface contaminants.
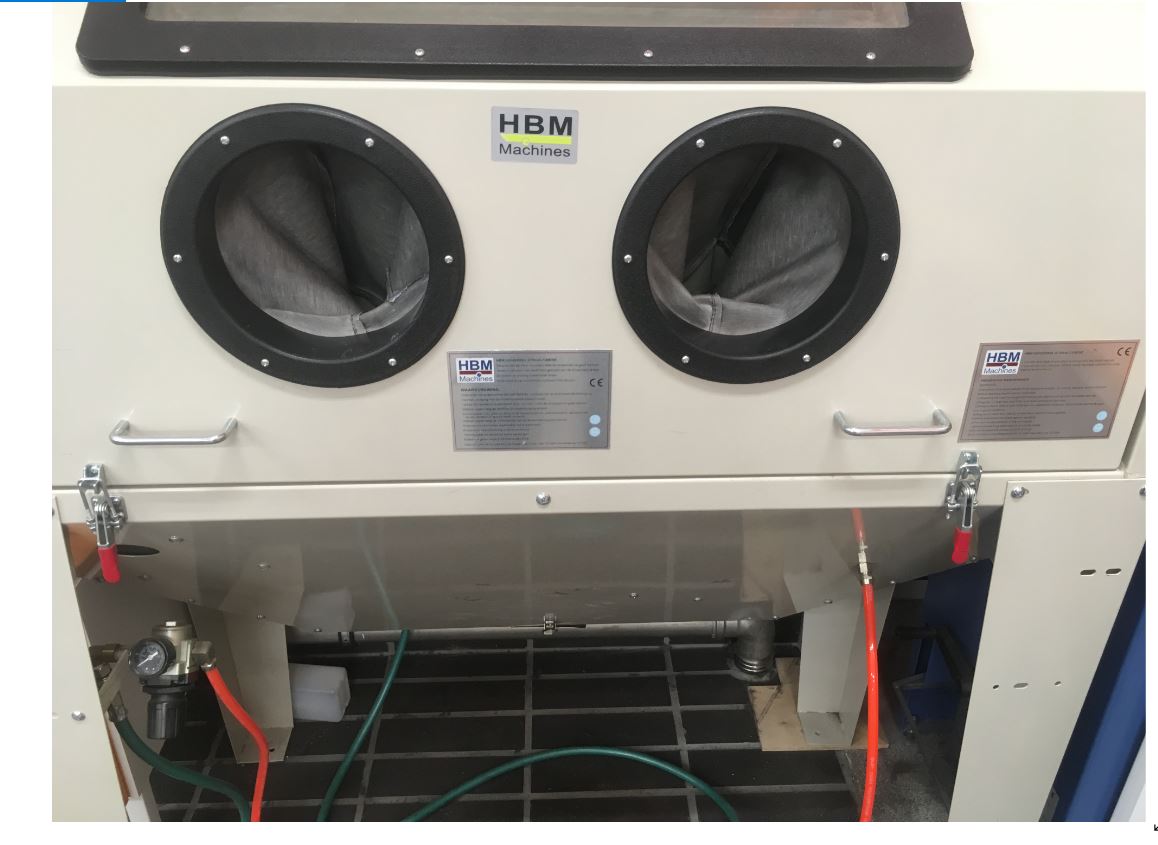
The Sandblasting cabinet available here is an SBC 420 with attached vacuum system.. The manual can be found here
The basic work flow is
- Open the door, place the work piece inside and clamp it shut
- Power on the external vacuum
- Turn on the light switch
- Turn on the air pressure knob
- Place hands inside the rubber gloves, take the sandblasting hose and step on the foot pedal gently to start blasting the abrasive material.
The manual provide the following guidance related to the operation.
Blasting distance angle
Aim the sandblasting pistol towards the blasted part under angle of 40 - 60° utilizing the reverse bounce of the rear wall. Do not hold the pistol under 90° angle because the reverse bounce comes directly back, slowing down the blasting process. Using this angle causes excessive wear and tear of the pistol and the viewing window. Hold the pistol about 15 cm from the blasted piece.
|
|
|
Preparation
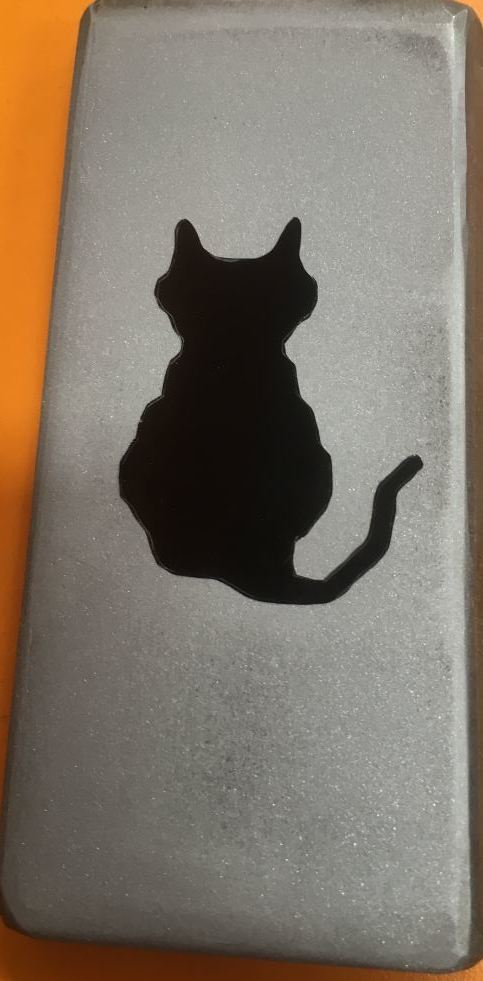
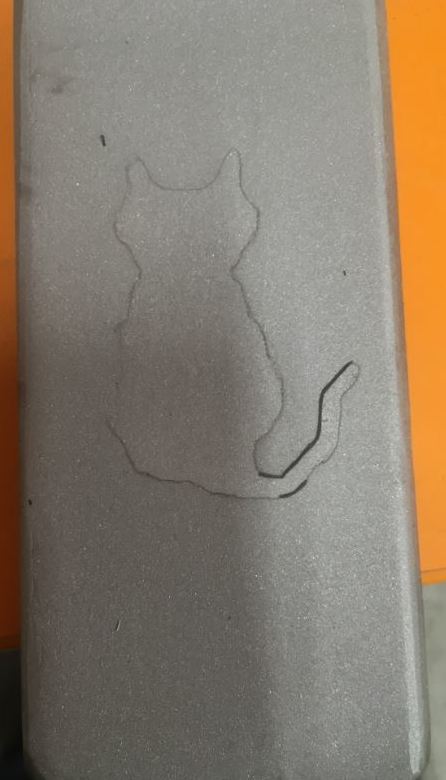
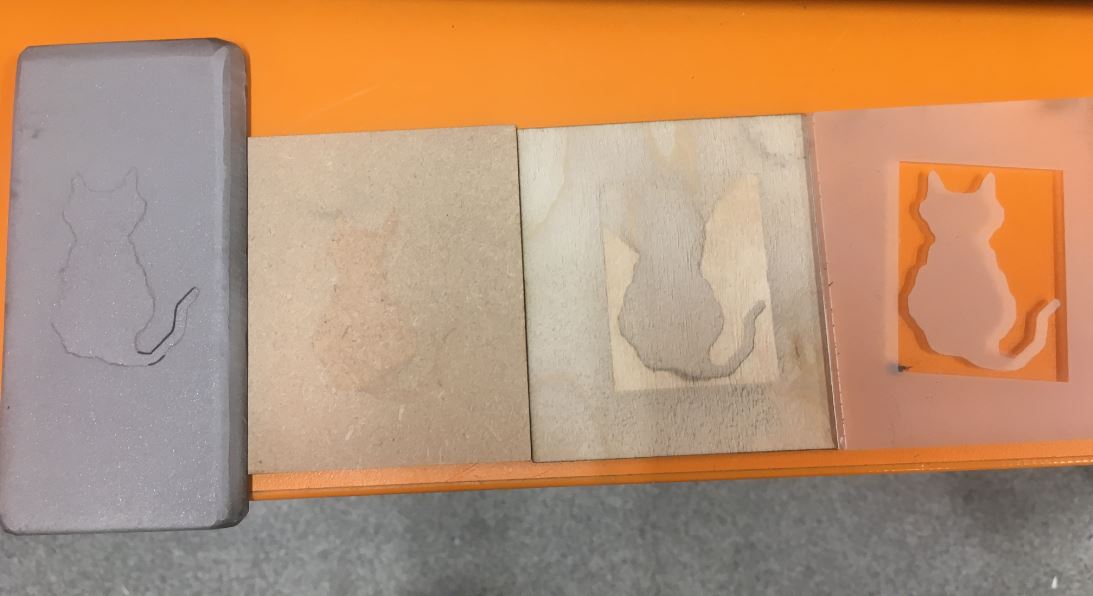
For engraving purpose, a mask is required. I made a mask using the vinyl cutter. I used the output of the Computer controlled cutting week. I tested four different materials, iron bar, plywood, mdf and acrylic. As I was only interested in the abrasive properties of the process, I didn’t bother much with the mask design, so, I used the positive mask for metal and MDF and the negative mask for plywood and acrylic.
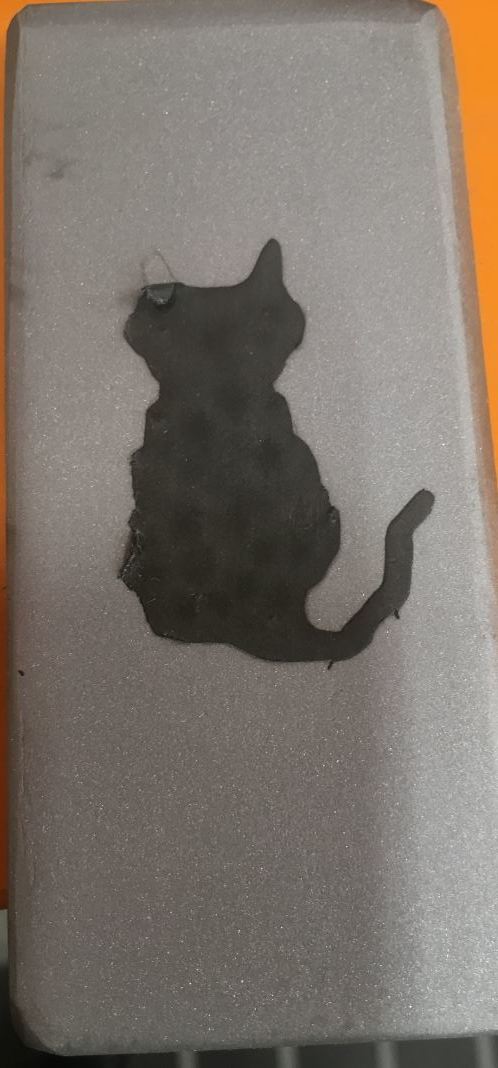
Iron bar
The vinyl backing stuck fairly well with the iron bar. I managed to remove all the rust that was present on the iron bar. As the metal was not very shiny to begin with, it is a bit difficult in the picture to view the difference between the areas that where sandblasted and the areas that were not.
|
|
|
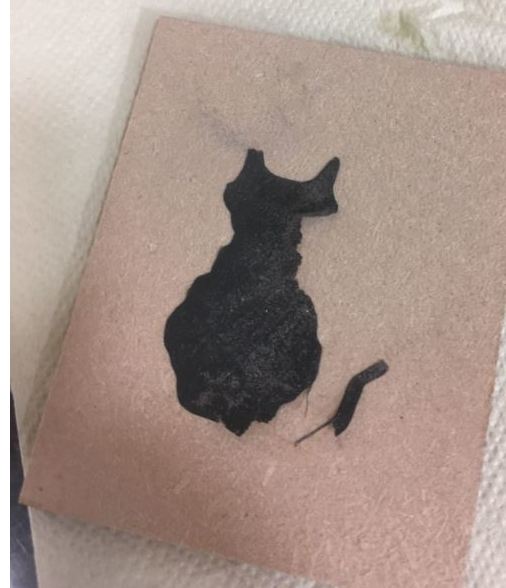
MDF
The vinyl backing stuck not so well with the work piece as I managed to remove parts of the mask itself. Here, too the base material was not very shiny to begin with, thus, it is a bit difficult in the picture to view the difference between the areas that where sandblasted and the areas that were not.
|
|
Plywood
The vinyl backing stuck horribly with the work piece as I managed to remove major chunks of the mask itself. Here, too the base material was not very shiny to begin with, thus, it is a bit difficult in the picture to view the difference between the areas that where sandblasted and the areas that were not. Furthermore, the areas which were sandblasted looks dirty.
|
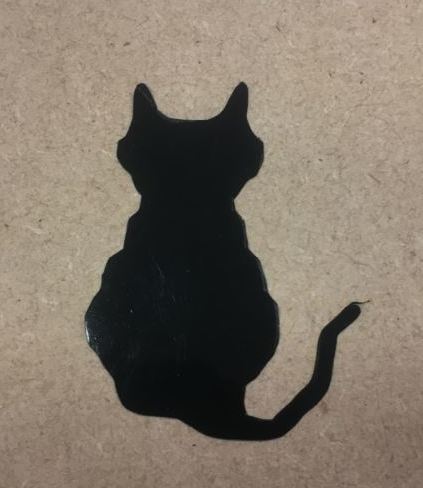
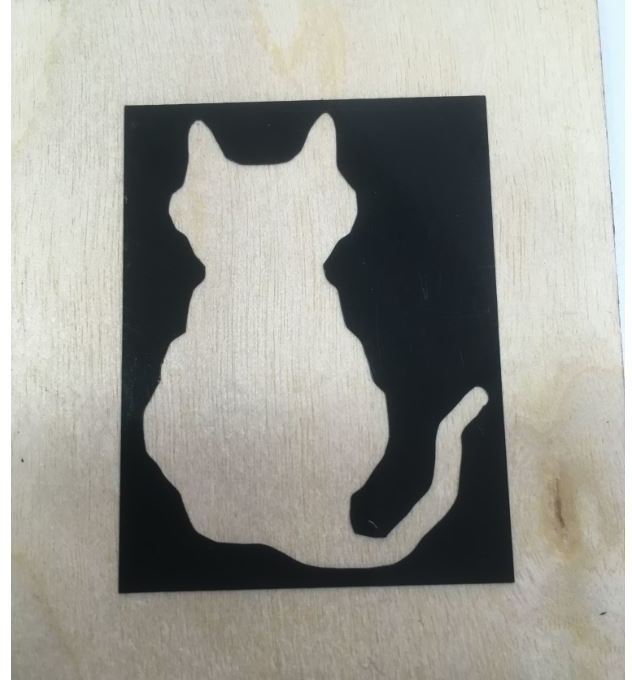
Acrylic
The vinyl backing worked perfectly in this case. Here, the difference is very much visible.

|
Results
Overall, for using the technique as a method to engrave, acrylic seemed to be the best material. The technique works fairly well with metals too, in case one wants to remove rust or just want a brushed look.
|
Problems
Different abrasive materials have different properties and have different uses. I used whatever material was available, which was aluminum oxide in my case. However, it seemed that somehow it got some moisture inside or it just broke down completely, as I was not able to get any abrasion at all. Furthermore, it was making the work surface extremely dirty.