6. 3D Scanning and printing.
I started checking the 3d printer and their operability status. I listed them in the following images.
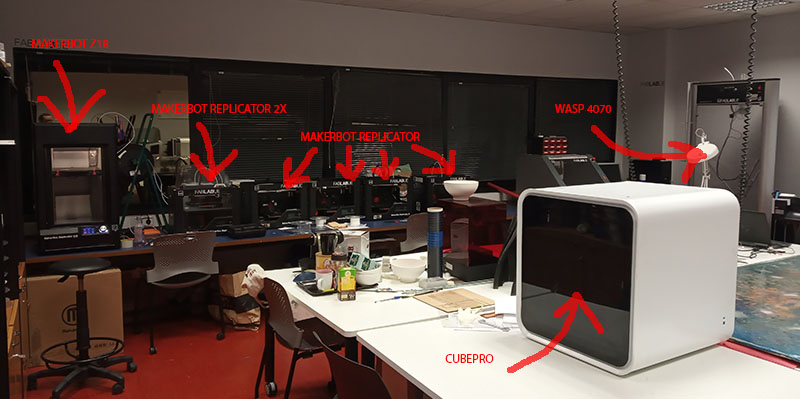
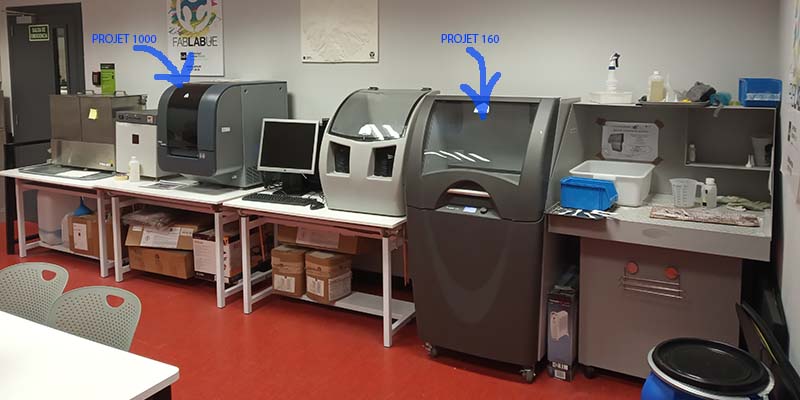
Just checked that all of the printer could be used and there was fungible material for all of them.
I consider important to classify the machines by their printer method and by their build volumes.
FDM
28.5 x 15.3 x 15.5 MAKERBOT REPLICATOR 2 // PLA
24.6 x 15.2 x 15.5 MAKERBOT REPLICATOR 2X DUAL // PLA, ABS
30.0 x 30.5 x 45.7 MAKERBOT Z18 // PLA
29.7 x 21.0 x 20.0 BQ WITBOX // PLA
Φ 40.0 x 70.0 WASP 4070 // PLA, CERAMICS
28.5 x 15.3 x 15.5 CUBEPRO // ABS
DSPC
PROJET 160 // Powder
SLA / SGC
PROJET 1000 // RESIN
6.A Group assignment.
As group we decided to test the same file in every printer technology available in the different labs. It is the one you find in the following link


3D Model to test the printer
6.A.1 MAKERBOT REPLICATOR 2. Interface and code configuration
First of all we had to select the machine in its own software. I was easy to load it since it has the machines preconfigured.
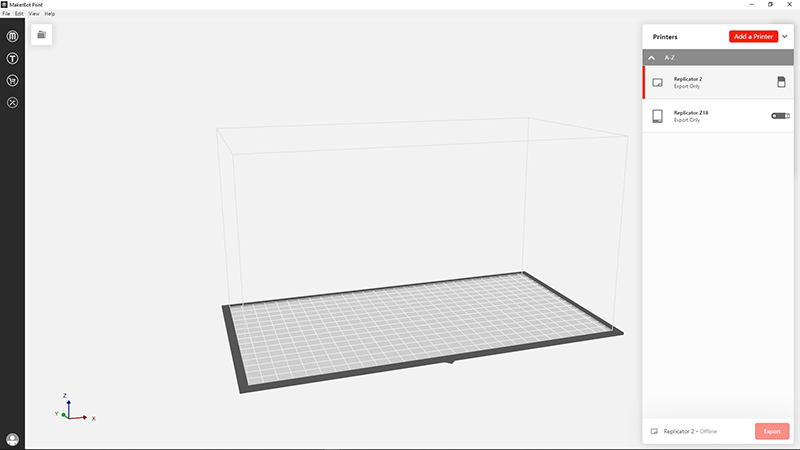
Then the .stl file just needs to be draged to the 3d printer software interface and be dropped. The configuration for the code is 15% of infill density, 3 shells for the skin of the mesh, and a layer height of 0.3 mm. In the next images you can see the previsualization of the infill grid and the layer setting.
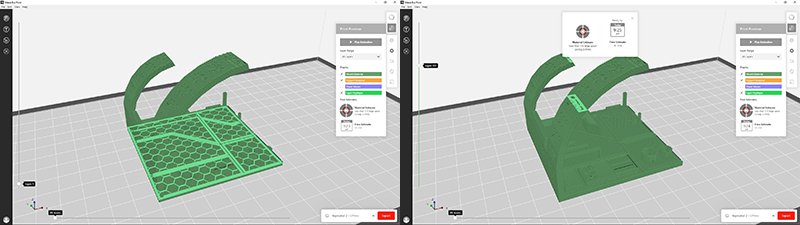
We were given the stimated time and the grams of material use in the print.
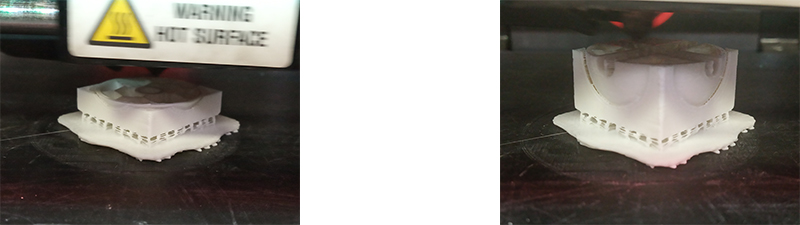
In the following image you can see the result gotten from the Makerbot Replicator.
**MISSING IMAGE.. GERMAN!!!!

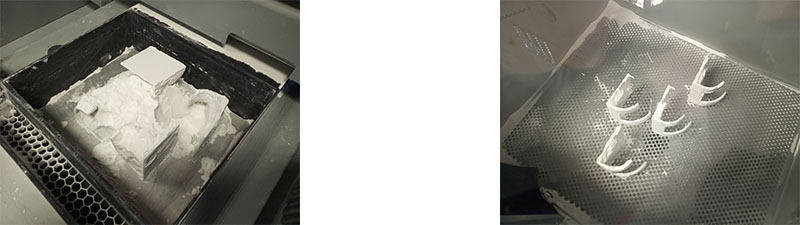
6.A.2 PROJET 160. POWDER
**PONER PANTALLAZOS DE CONFIGURACIÓN
The settings for the print were 0.1 mm for the layer height, and that was everything. The machine ask for some maintenance at the begining but nothing else.
In the following image you can see the powder being vacuumed from the printer tray and finally blown at the cleaning station.
To finally fix the print it had to be glued with cyanoacrylate liquid glue and then dried out.
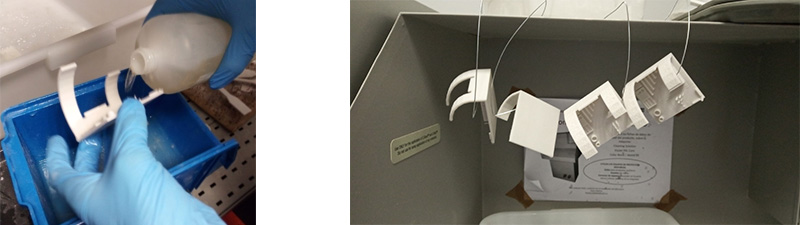
In the following image you can see the result.
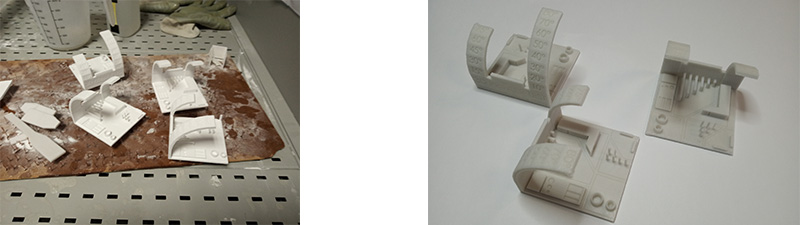
By testing the printers I learned that the main difference between them is the material used to print. Every material is related to a printing sistem. Other considerations is the definition of the layers. Some printers work well with layer heights above 0.2 mm others just work on 0.05 or 0.10 mm.
So depending on the geometry and purpouse of the final piece we wil decide which printer to use.
6.B Individual assignment.
6.B.1 Design and 3D print an object.
3D Models
I decided to design a joint. I will work as a module for the final project we have to submit. So I started developing a parametric code to generate the design. It is a ball inside a box. The main parameters are the whole dimensions, the relation in dimension between the inner ball and the ball that substracts the volume inside the box and the dimensions of the holes.
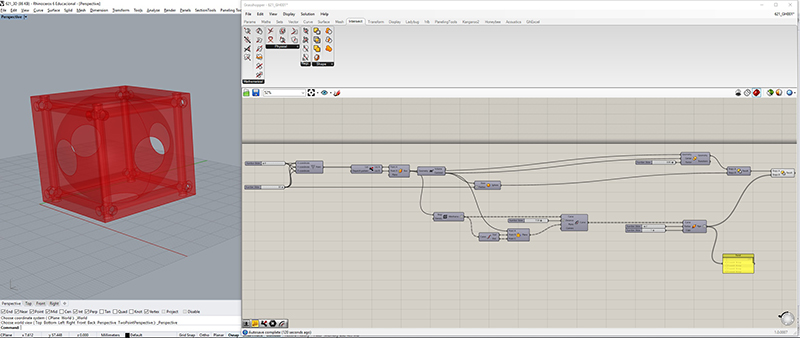
Since it is a ball with perforations, inside a ball embeded in a box, 3d printing production method is the only way to get it in one process.
I also tried to print it in powder just to check that it is a problem when you have to infiltrate de print and the geometry inside easily gets glued.
Finally I corrected the geometry and print it in PLA using a Makerbot Replicator 2
Here you can see the last design even it is still in development.
It still needs to be able to be grouped by joining modules.
.3dm rhino file .gh parametric file
6.2.2 3D scan an object.
3D scan a paper roll.
This one is to learn how does the 3d scanner get the surfaces with no thickness. It is a paper roll with stimated dimensions of 12 cm. in diameter by 30 cm. in height.
Surfaces with no thinkness are represented with low accuracy.
3D scan myself.
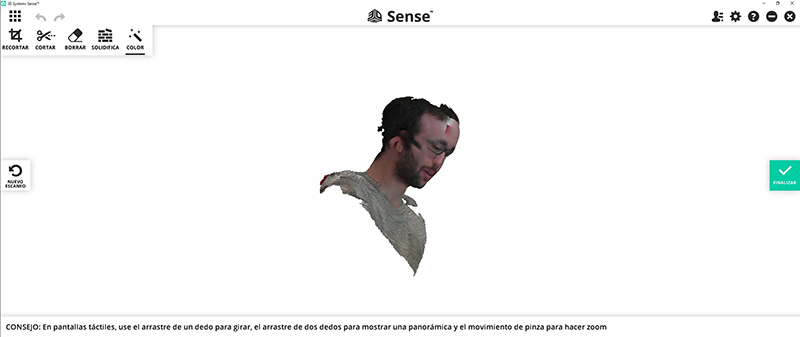
I don’t have friends so I tried to scan myself using a 3d sense scanner.
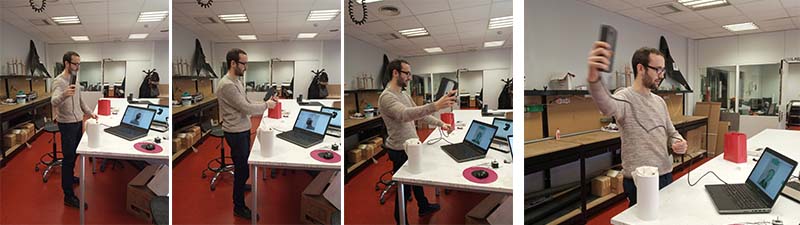
The results were not really good since the meshe obtained was not well placed in space. I think I need a longer arm.
So the best way to get a 3d scan of yourself is asking for help.
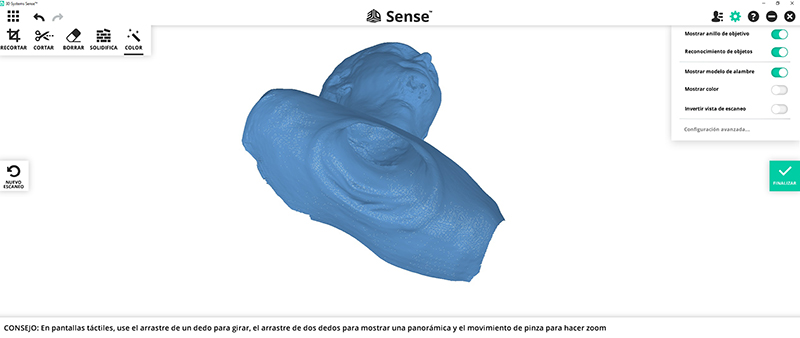
At the begining we were not getting good results due to the basic pre-setting on the software. So we changed them to get a more accurate mesh. Opening advance configuration and increasing mesh resolution and the volumen to be scanned.
What we get is an open mesh
This is what we could print from the scan. It is reduced in scale of 1 to 10.