symp

Week 6 - 3D printing and scanning

Design and 3d print an object that could not be made subtractively

3D Scan an object and optionally print it

.

This week's task was to design and 3D print an object that could not be made subtractively along with 3D scanning an object and printing it optionally. This was the most interesting week as i think that 3D printing is the heart of fablab and i was so eager to undertsand the same. Since i had no previous experience with 3d modelling and designing ( even thoough i had done some 2D designs) i started with Autocad fusion 360 on the first week itself. My friend Jogin francis (fablab instructor) helped me a lot with the basics of deisgning. Since i started it from first week onwards i tried to design my final project in fusion 360. My final project was to built a VTOL Plane (Vertical take off and landing plane), i had a design in my mind and even though i knew it was a complicated project i decided to move along with it. I have an altenative project in my mind ie, to build a personal assistant in the shape of an owl.

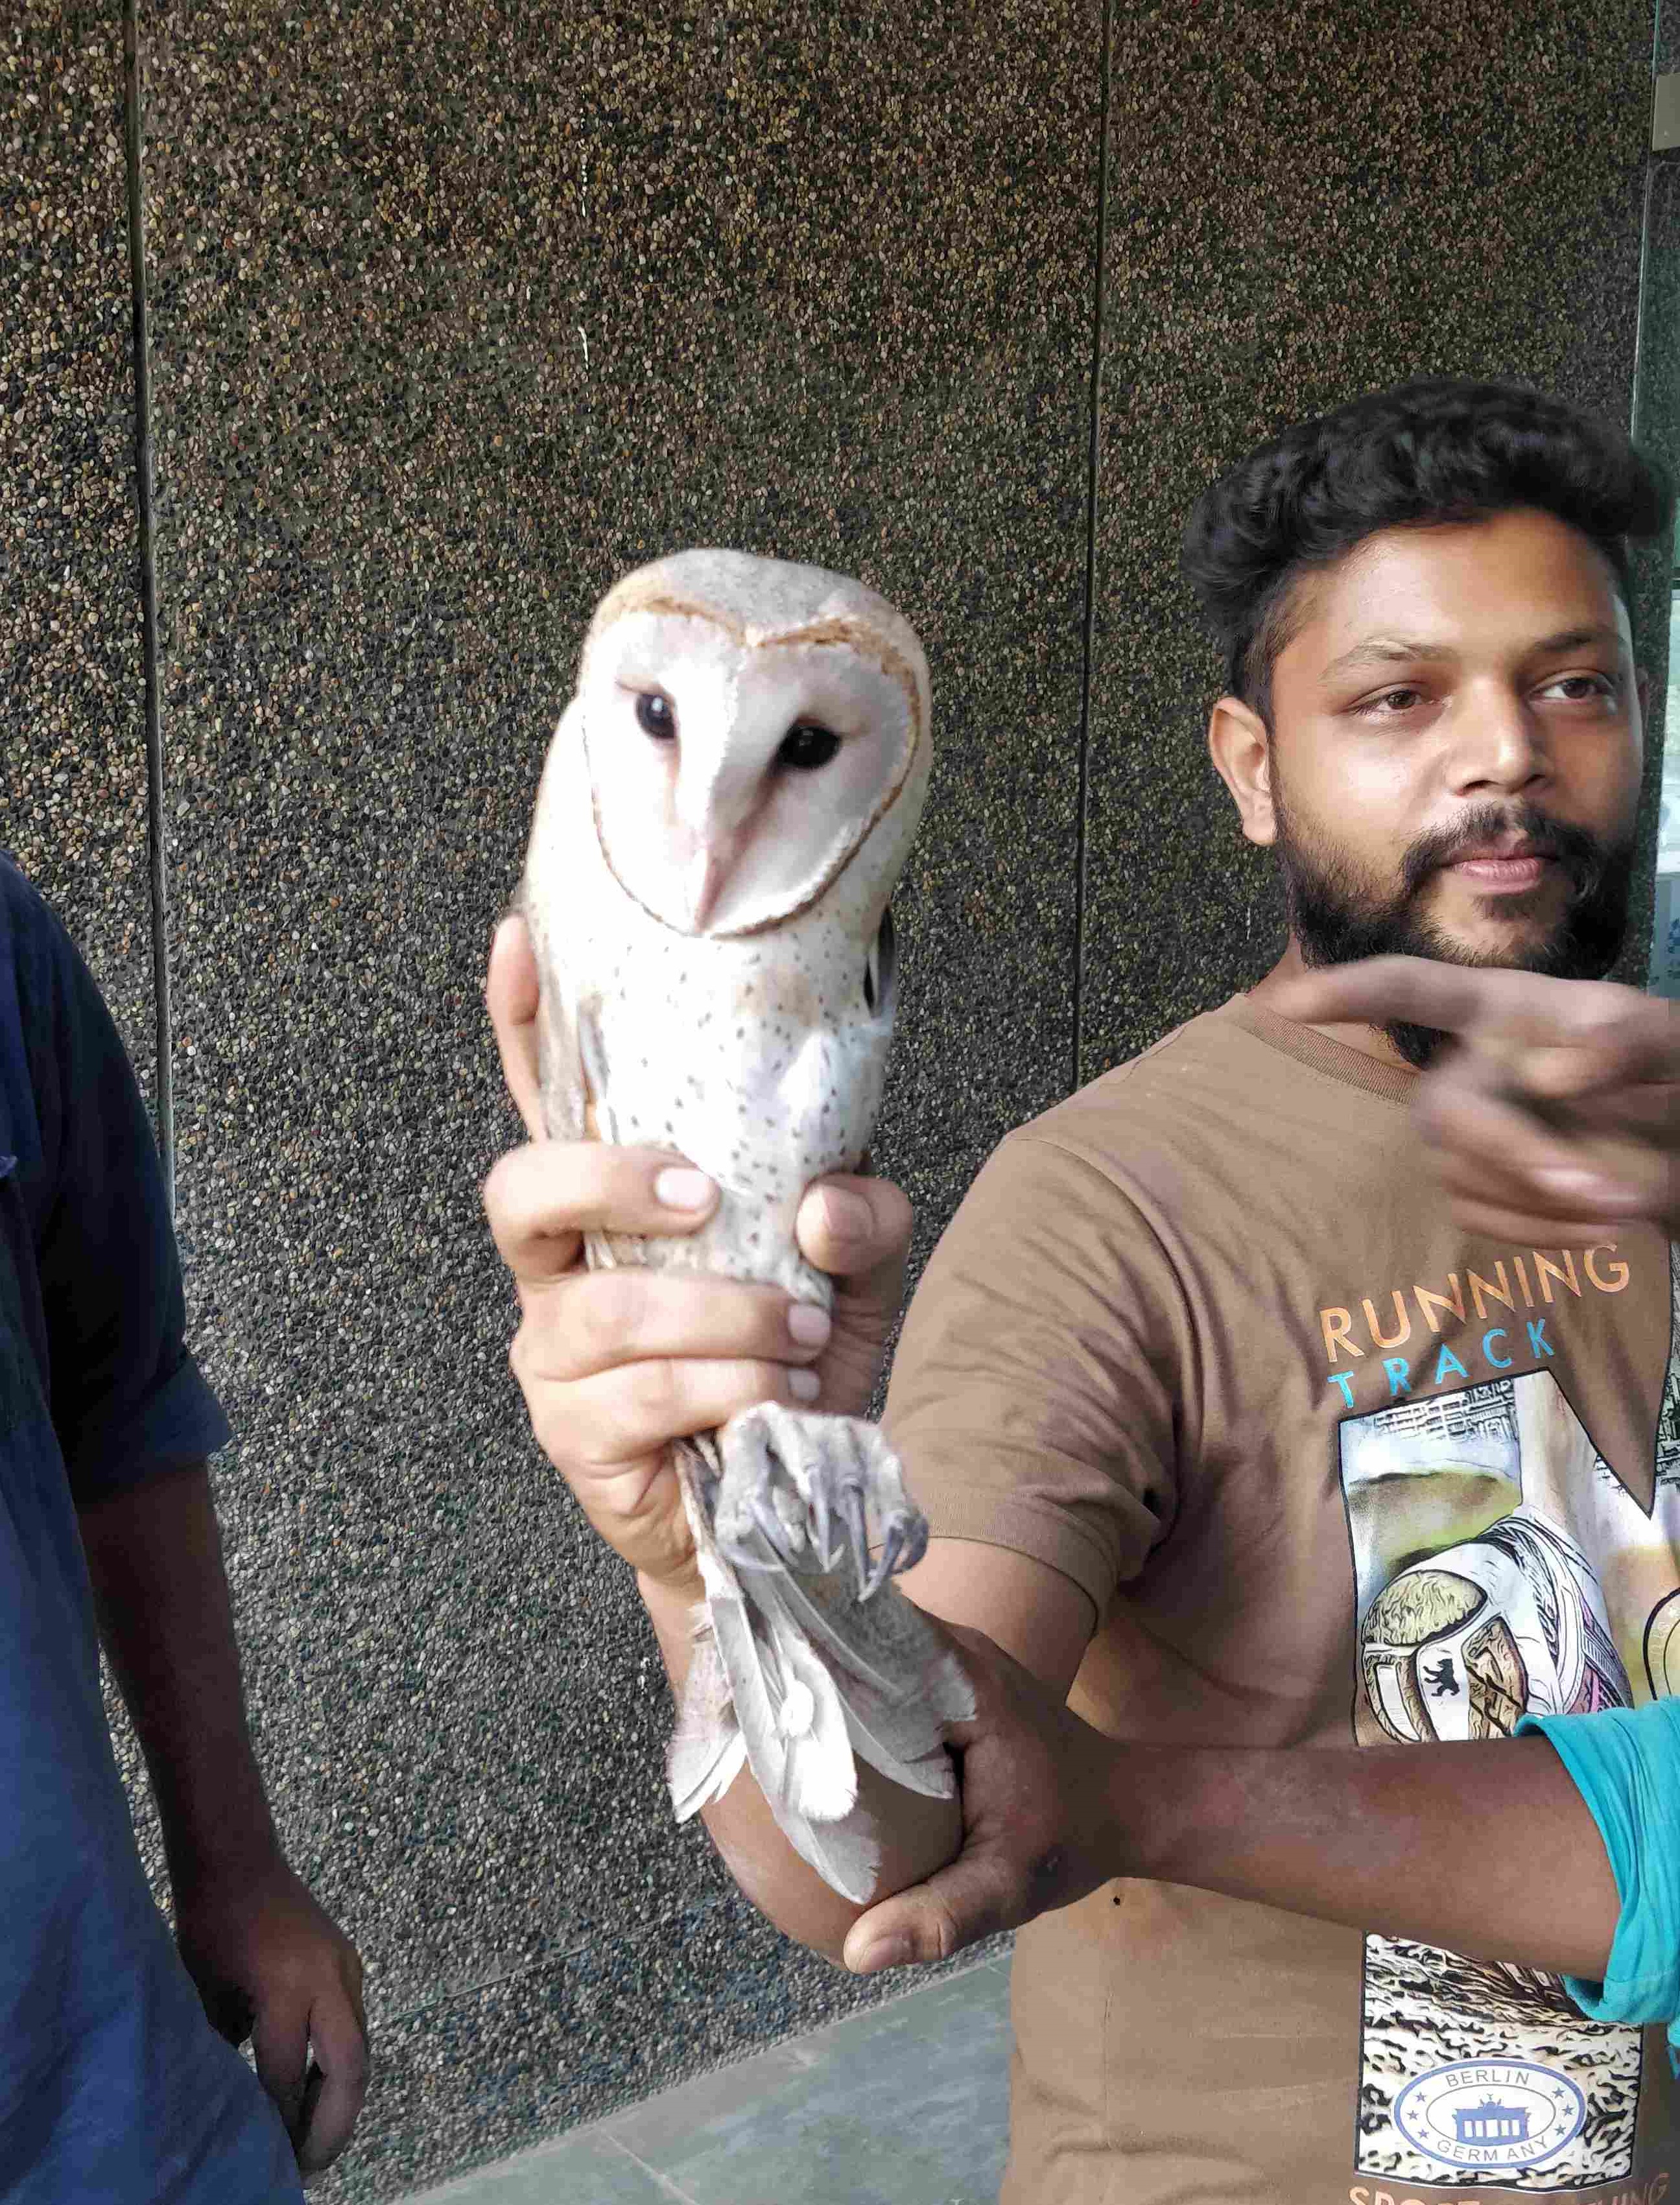
The thought of an owl came to my mind when a 'silver owl' flew into my office. Anyway the owl was handed over to forest department. So i started searching on the matter in internet, i found the following matters very interesting.

.

Silver owl in my office - The owl was handed over to forest department

.

symp

.

Ulo, an interactive home monitoring owl

.

symp

.

.

Alex glow's archimedes

.

symp

.

So i decided to build a personal assistant/assistants with the shape of an owl in fusion 360

First step was to design something that could not be made subtractively

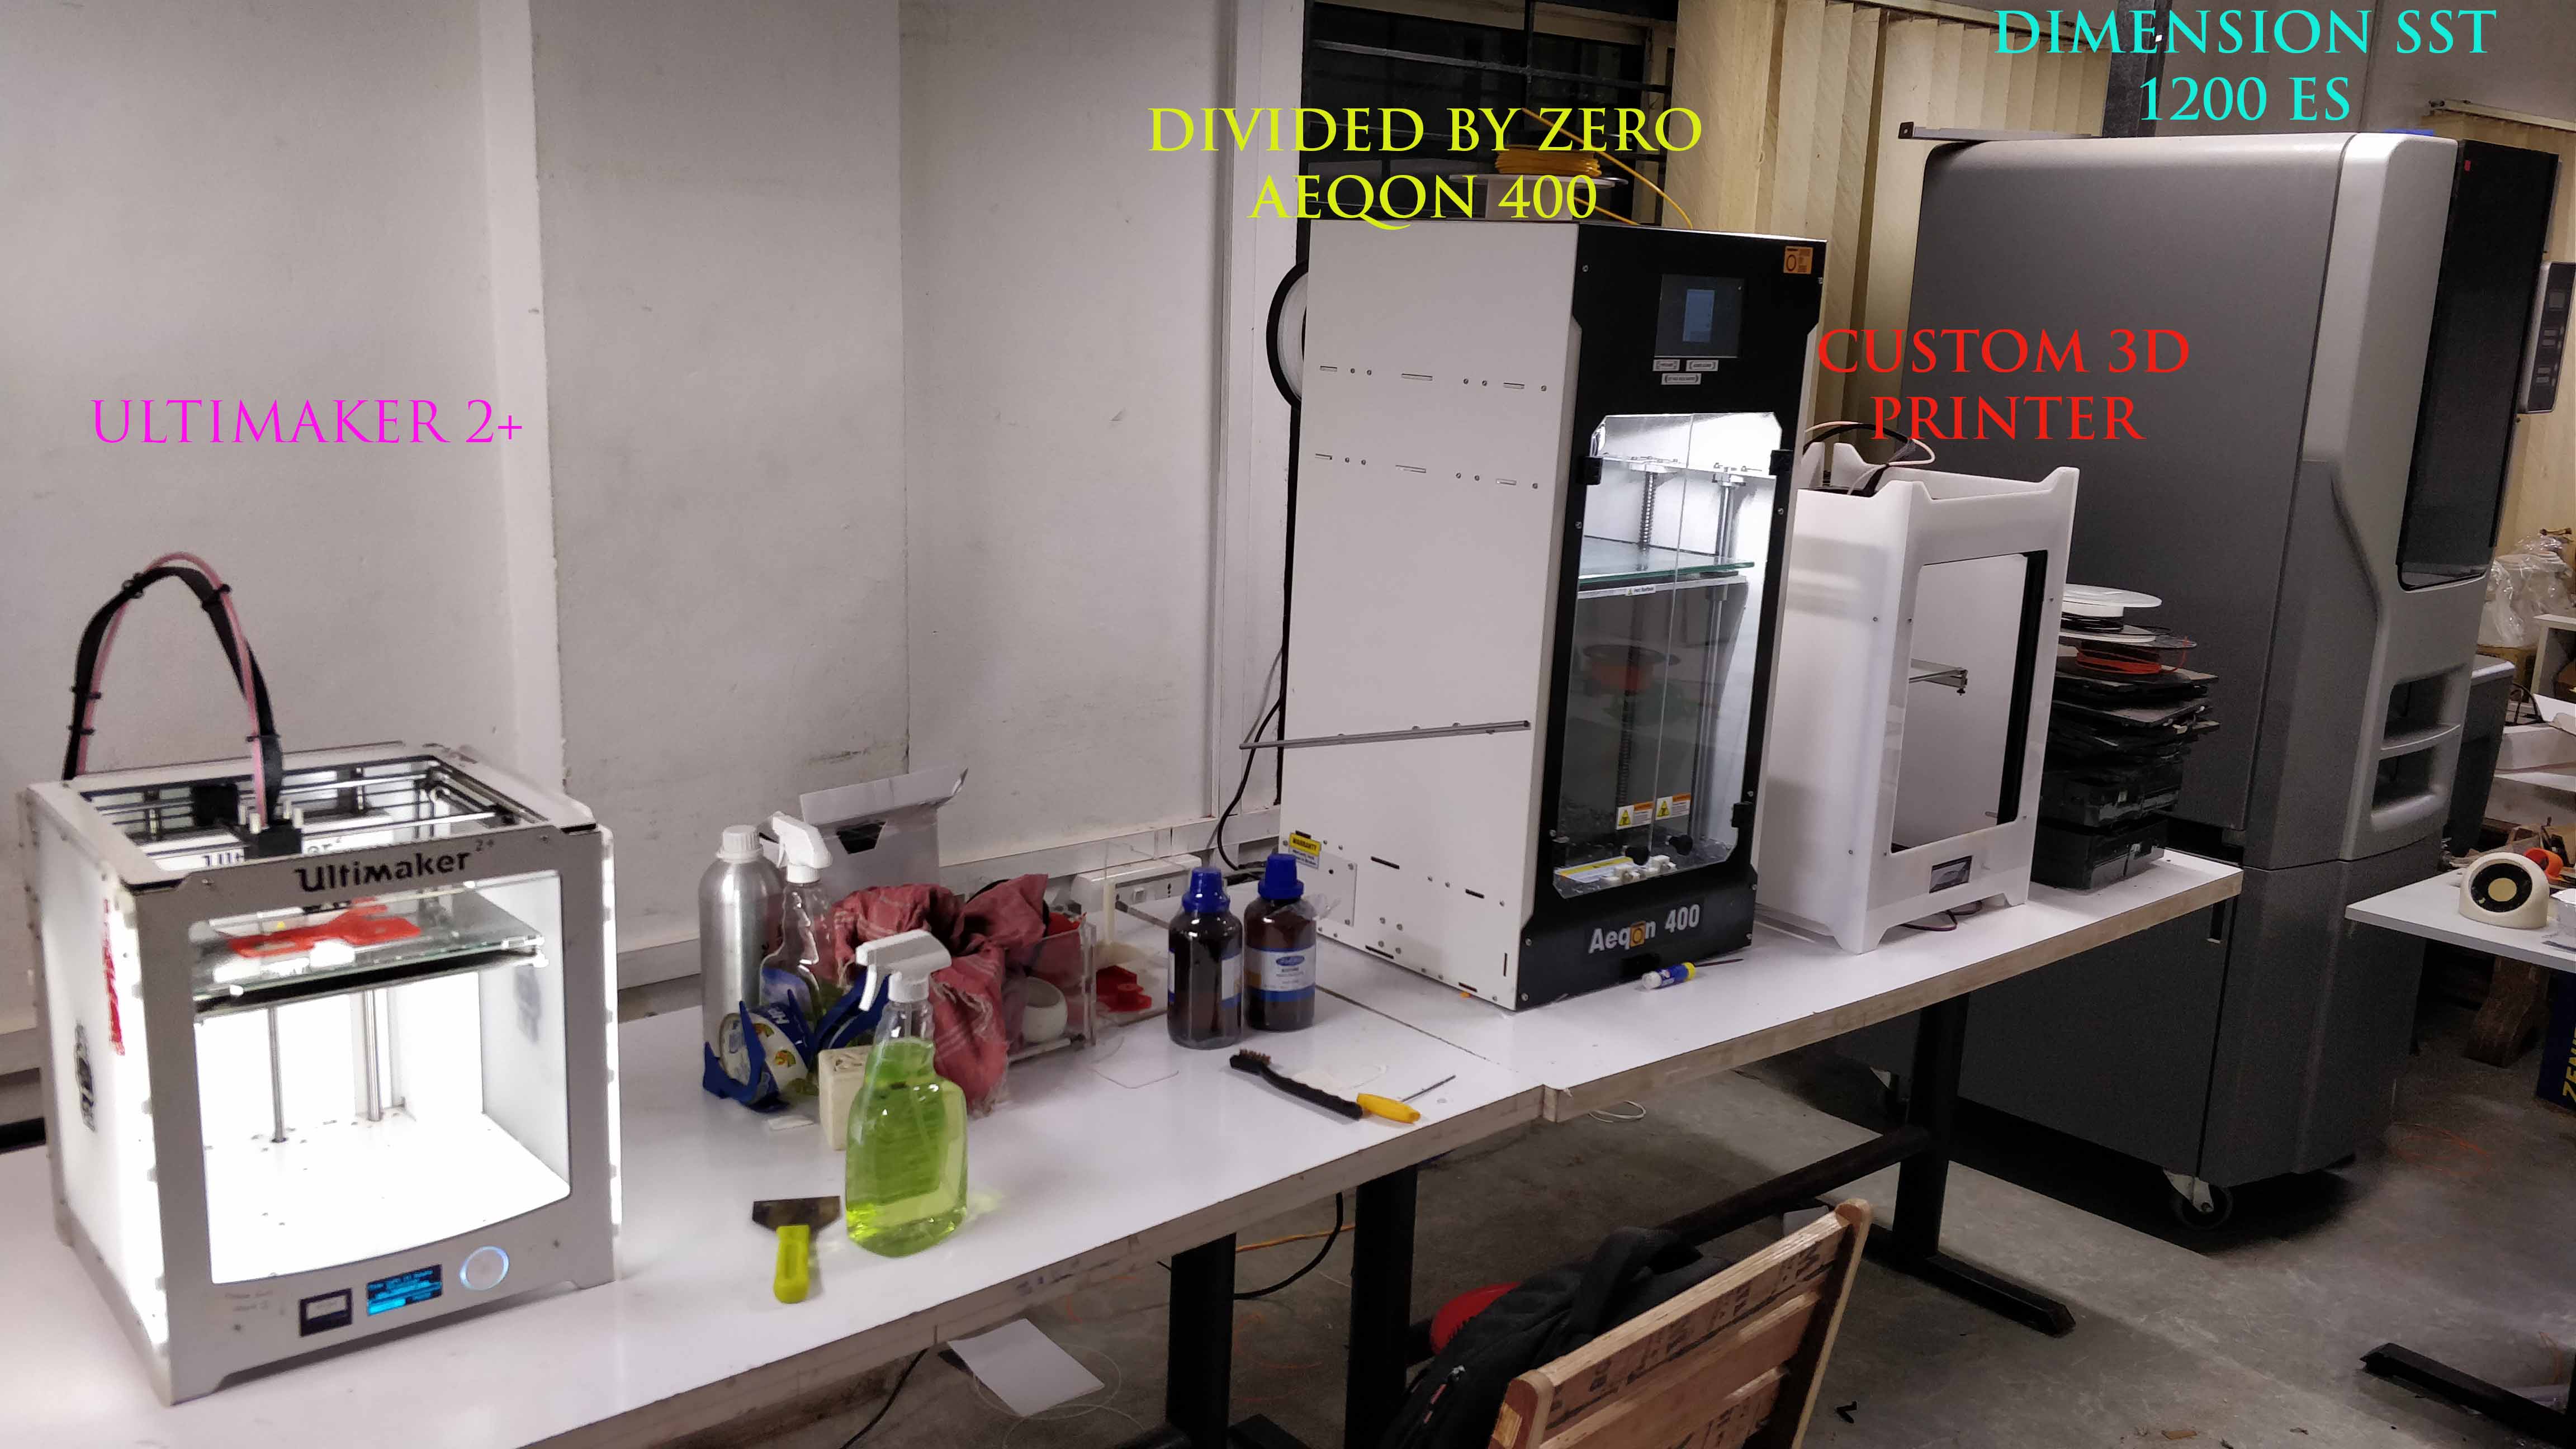
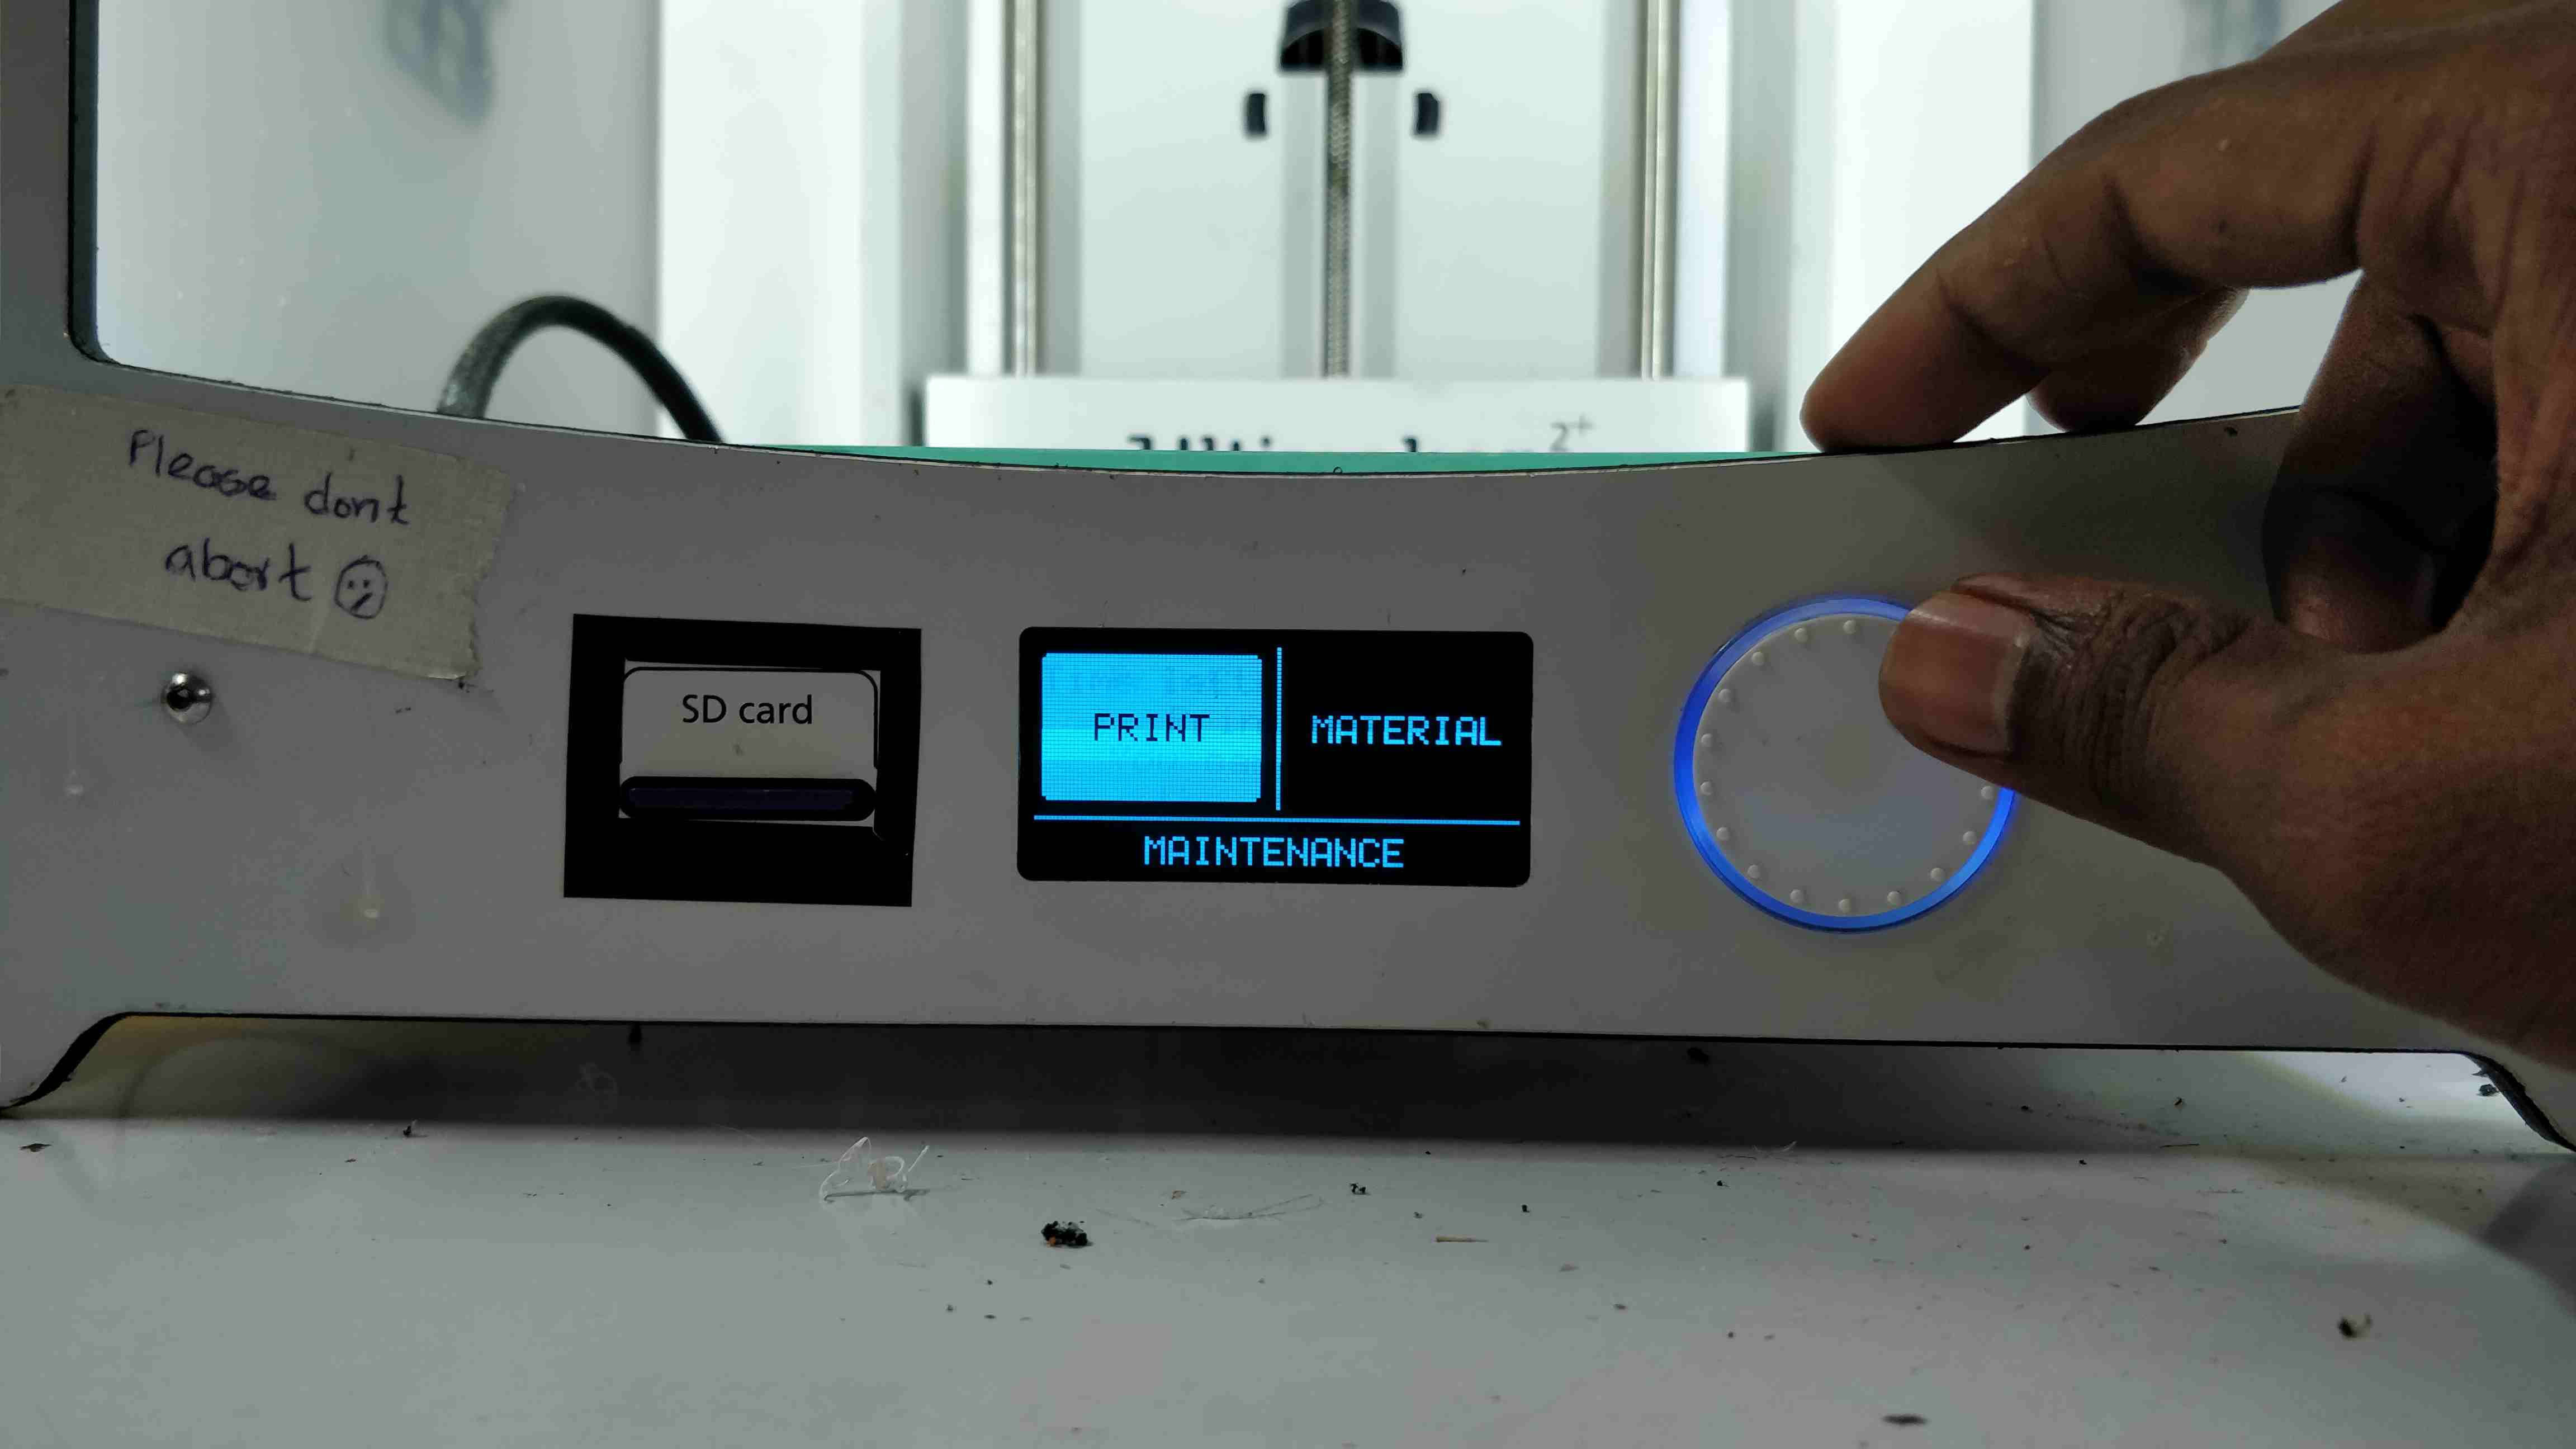
In our fablab we have Ultimaker 2+, Stratasys Dimension 1200es, Divided by zero (indian model)

.

symp

.

ULTIMAKER 2+ - Non subtractive design

.

symp

.

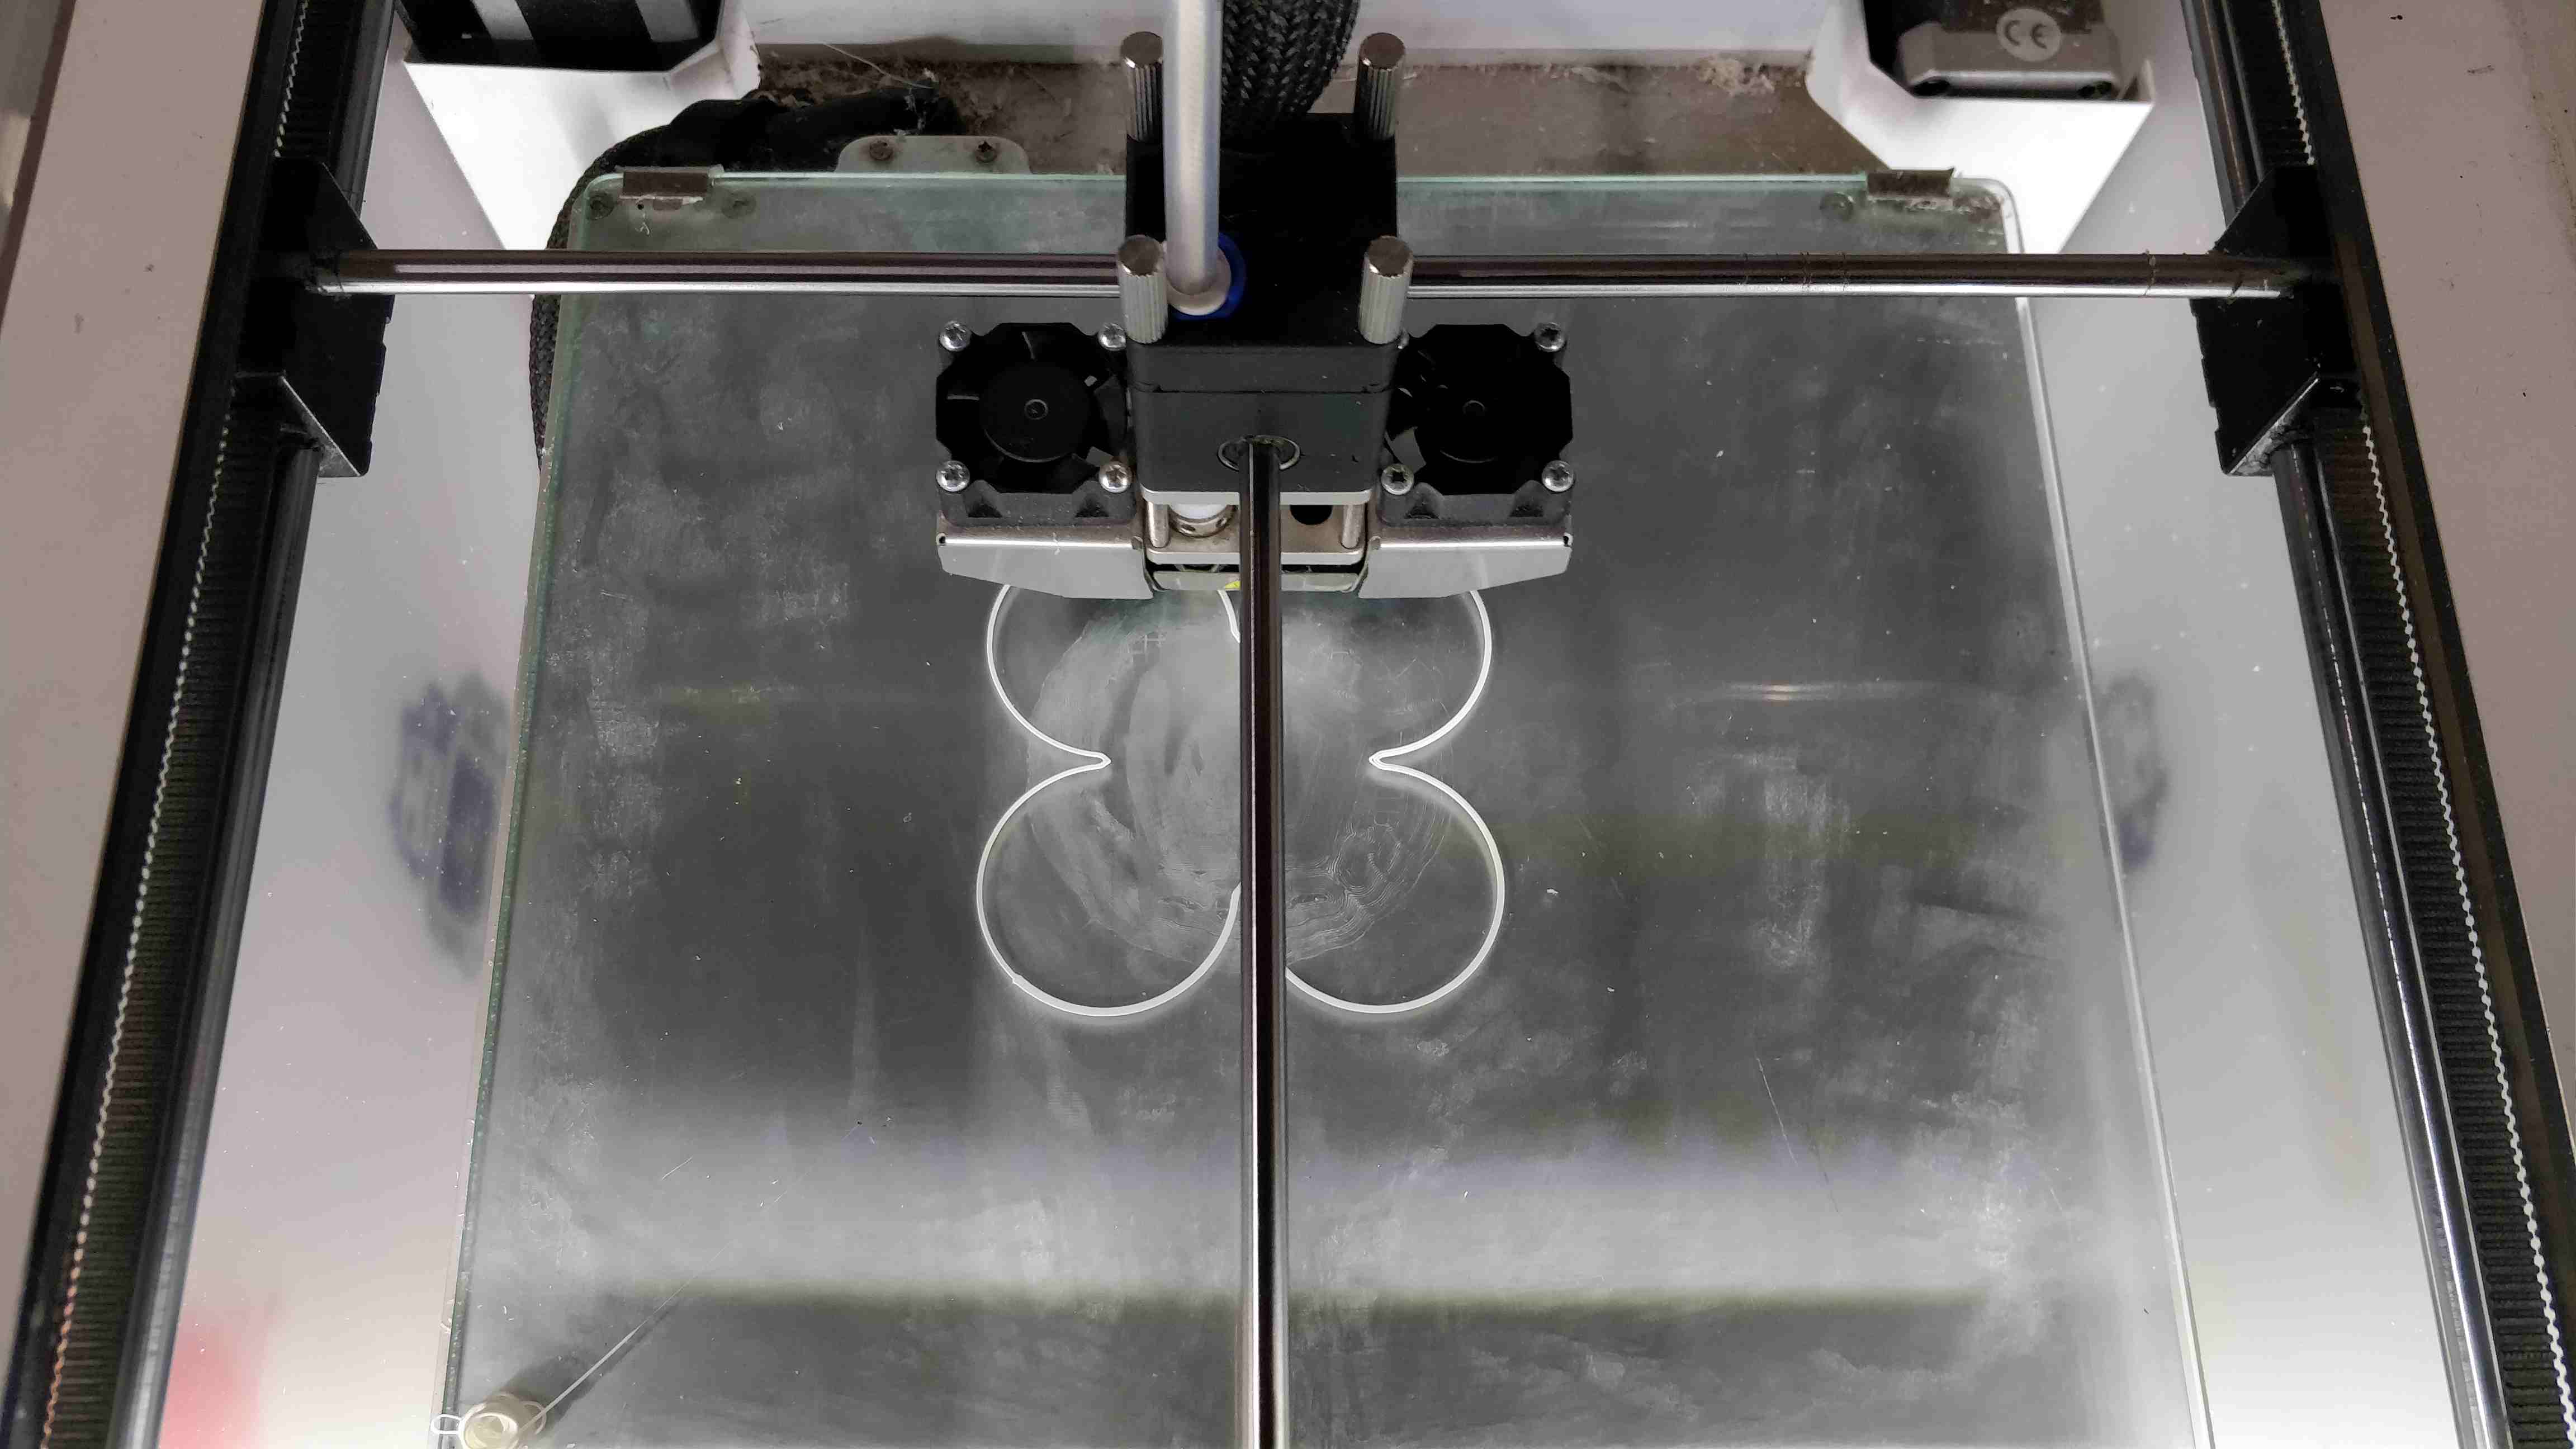
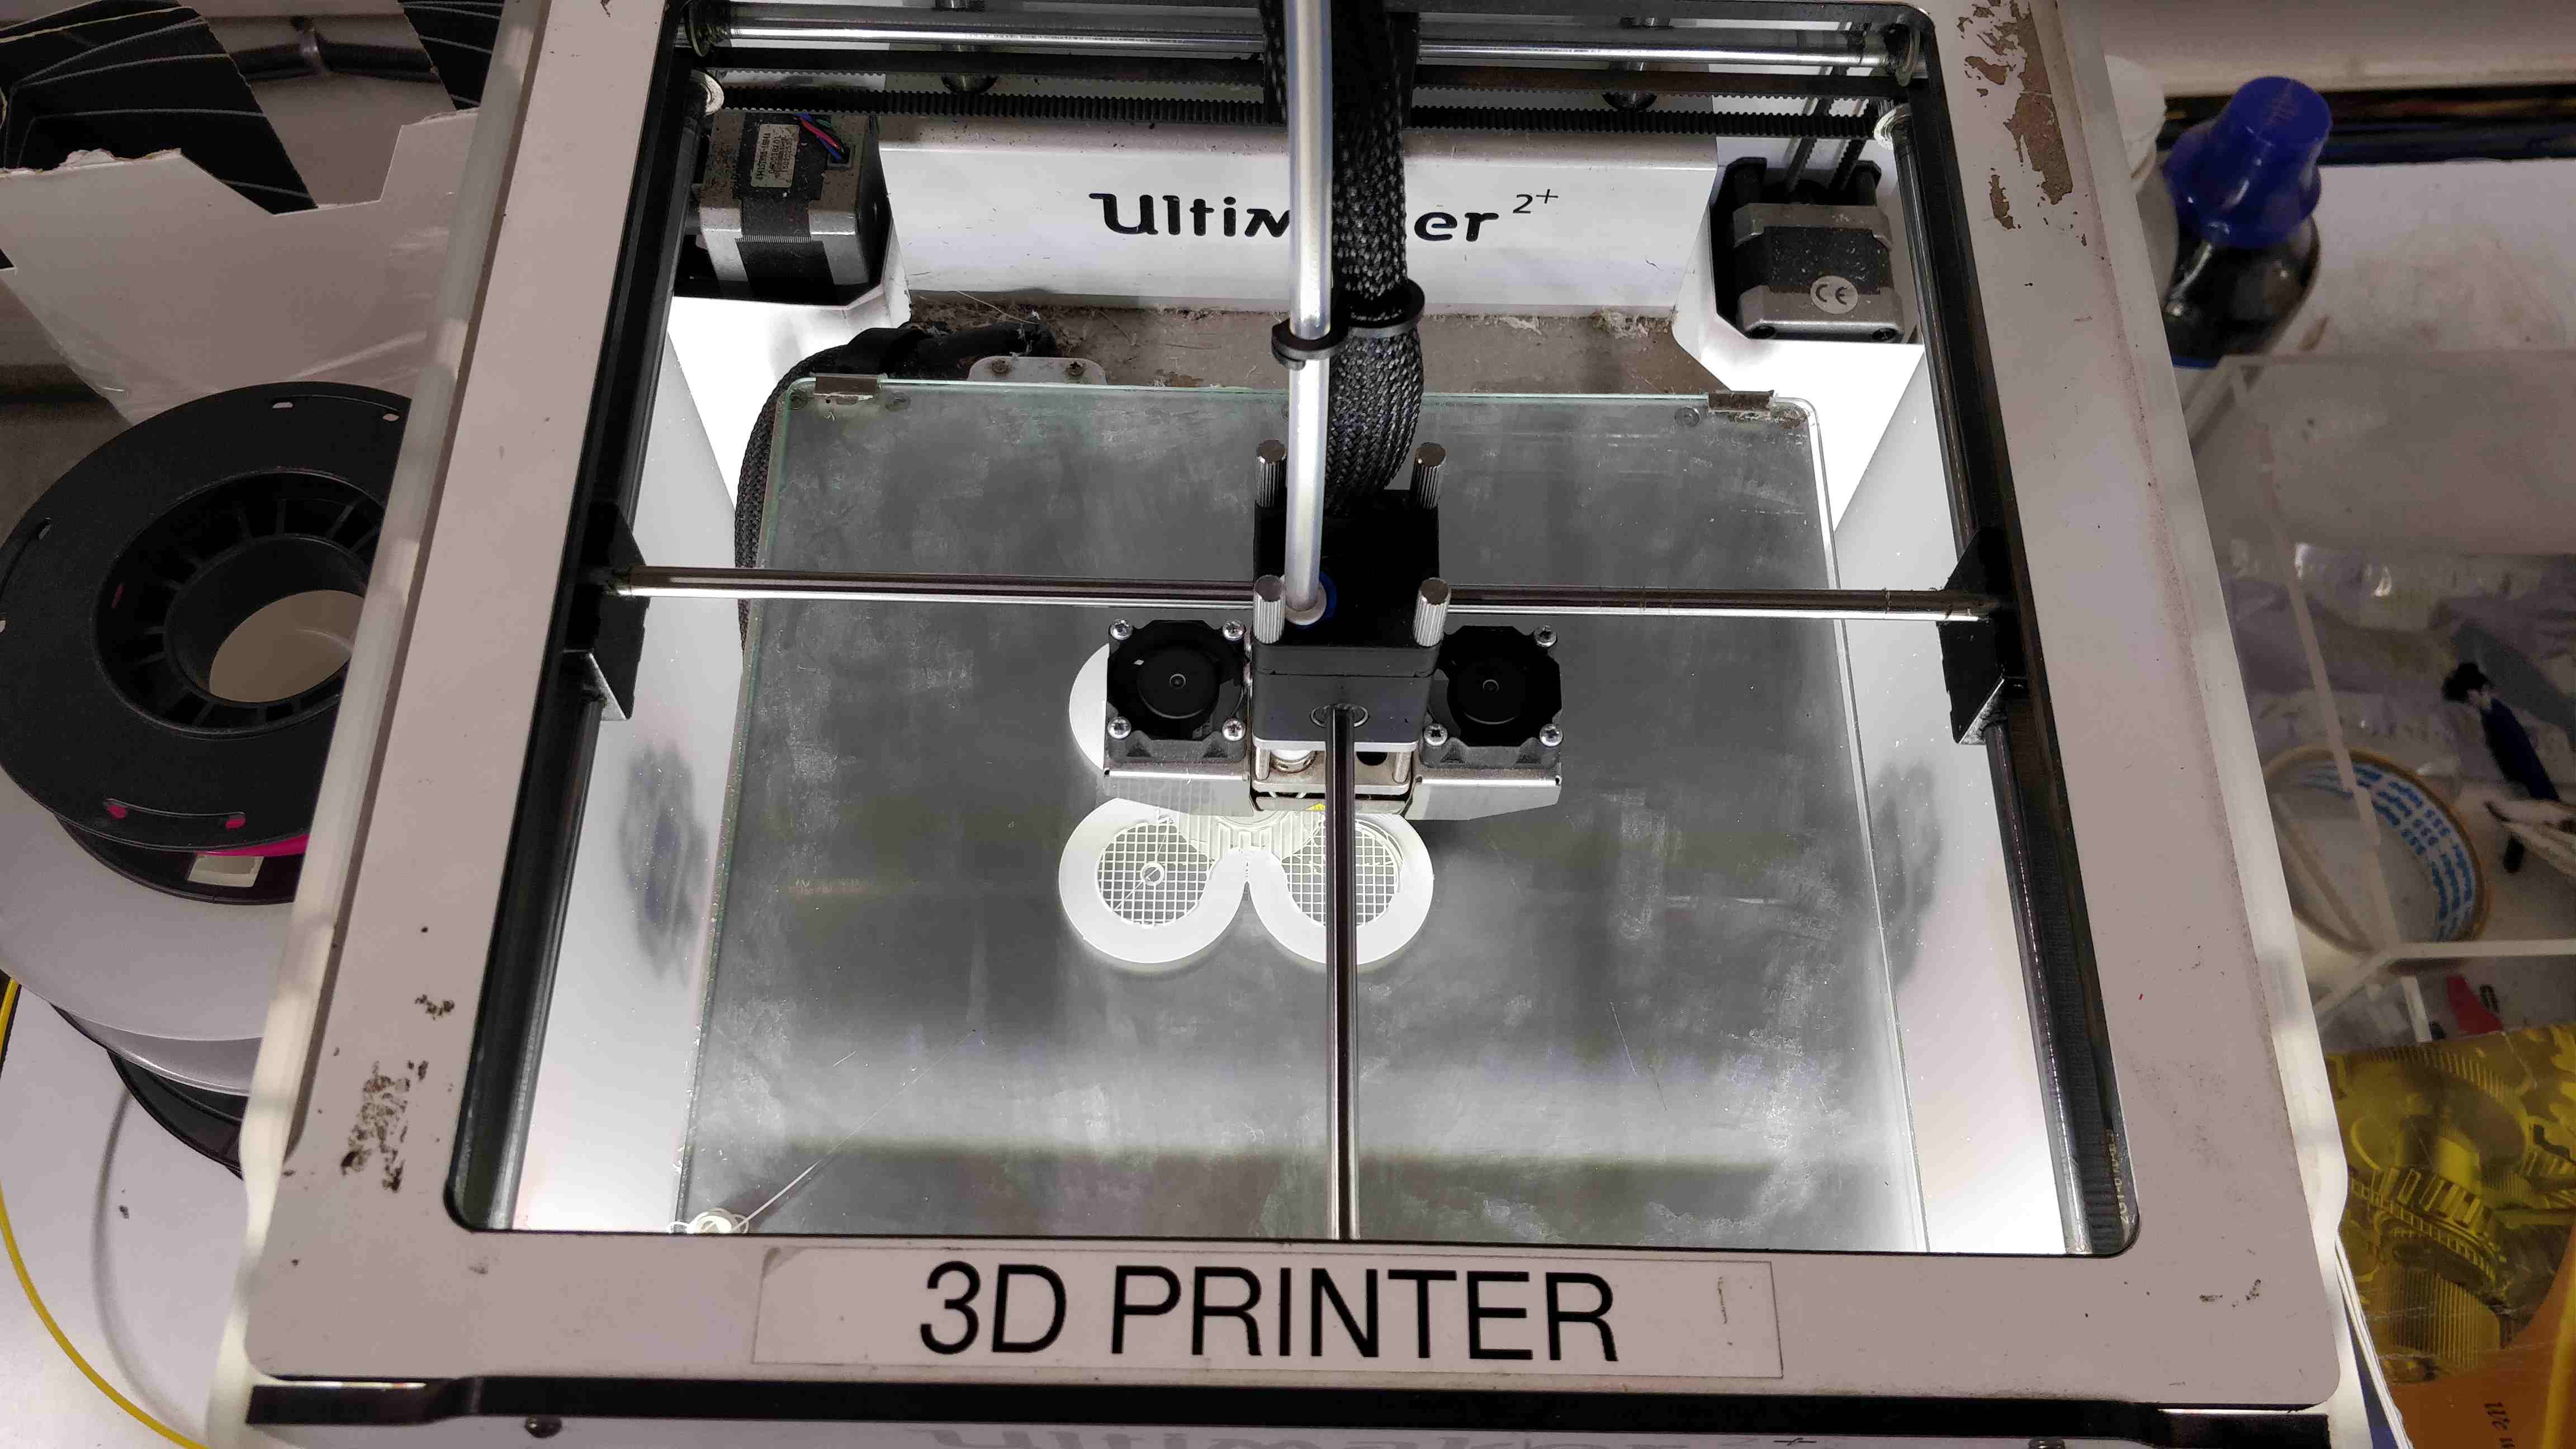
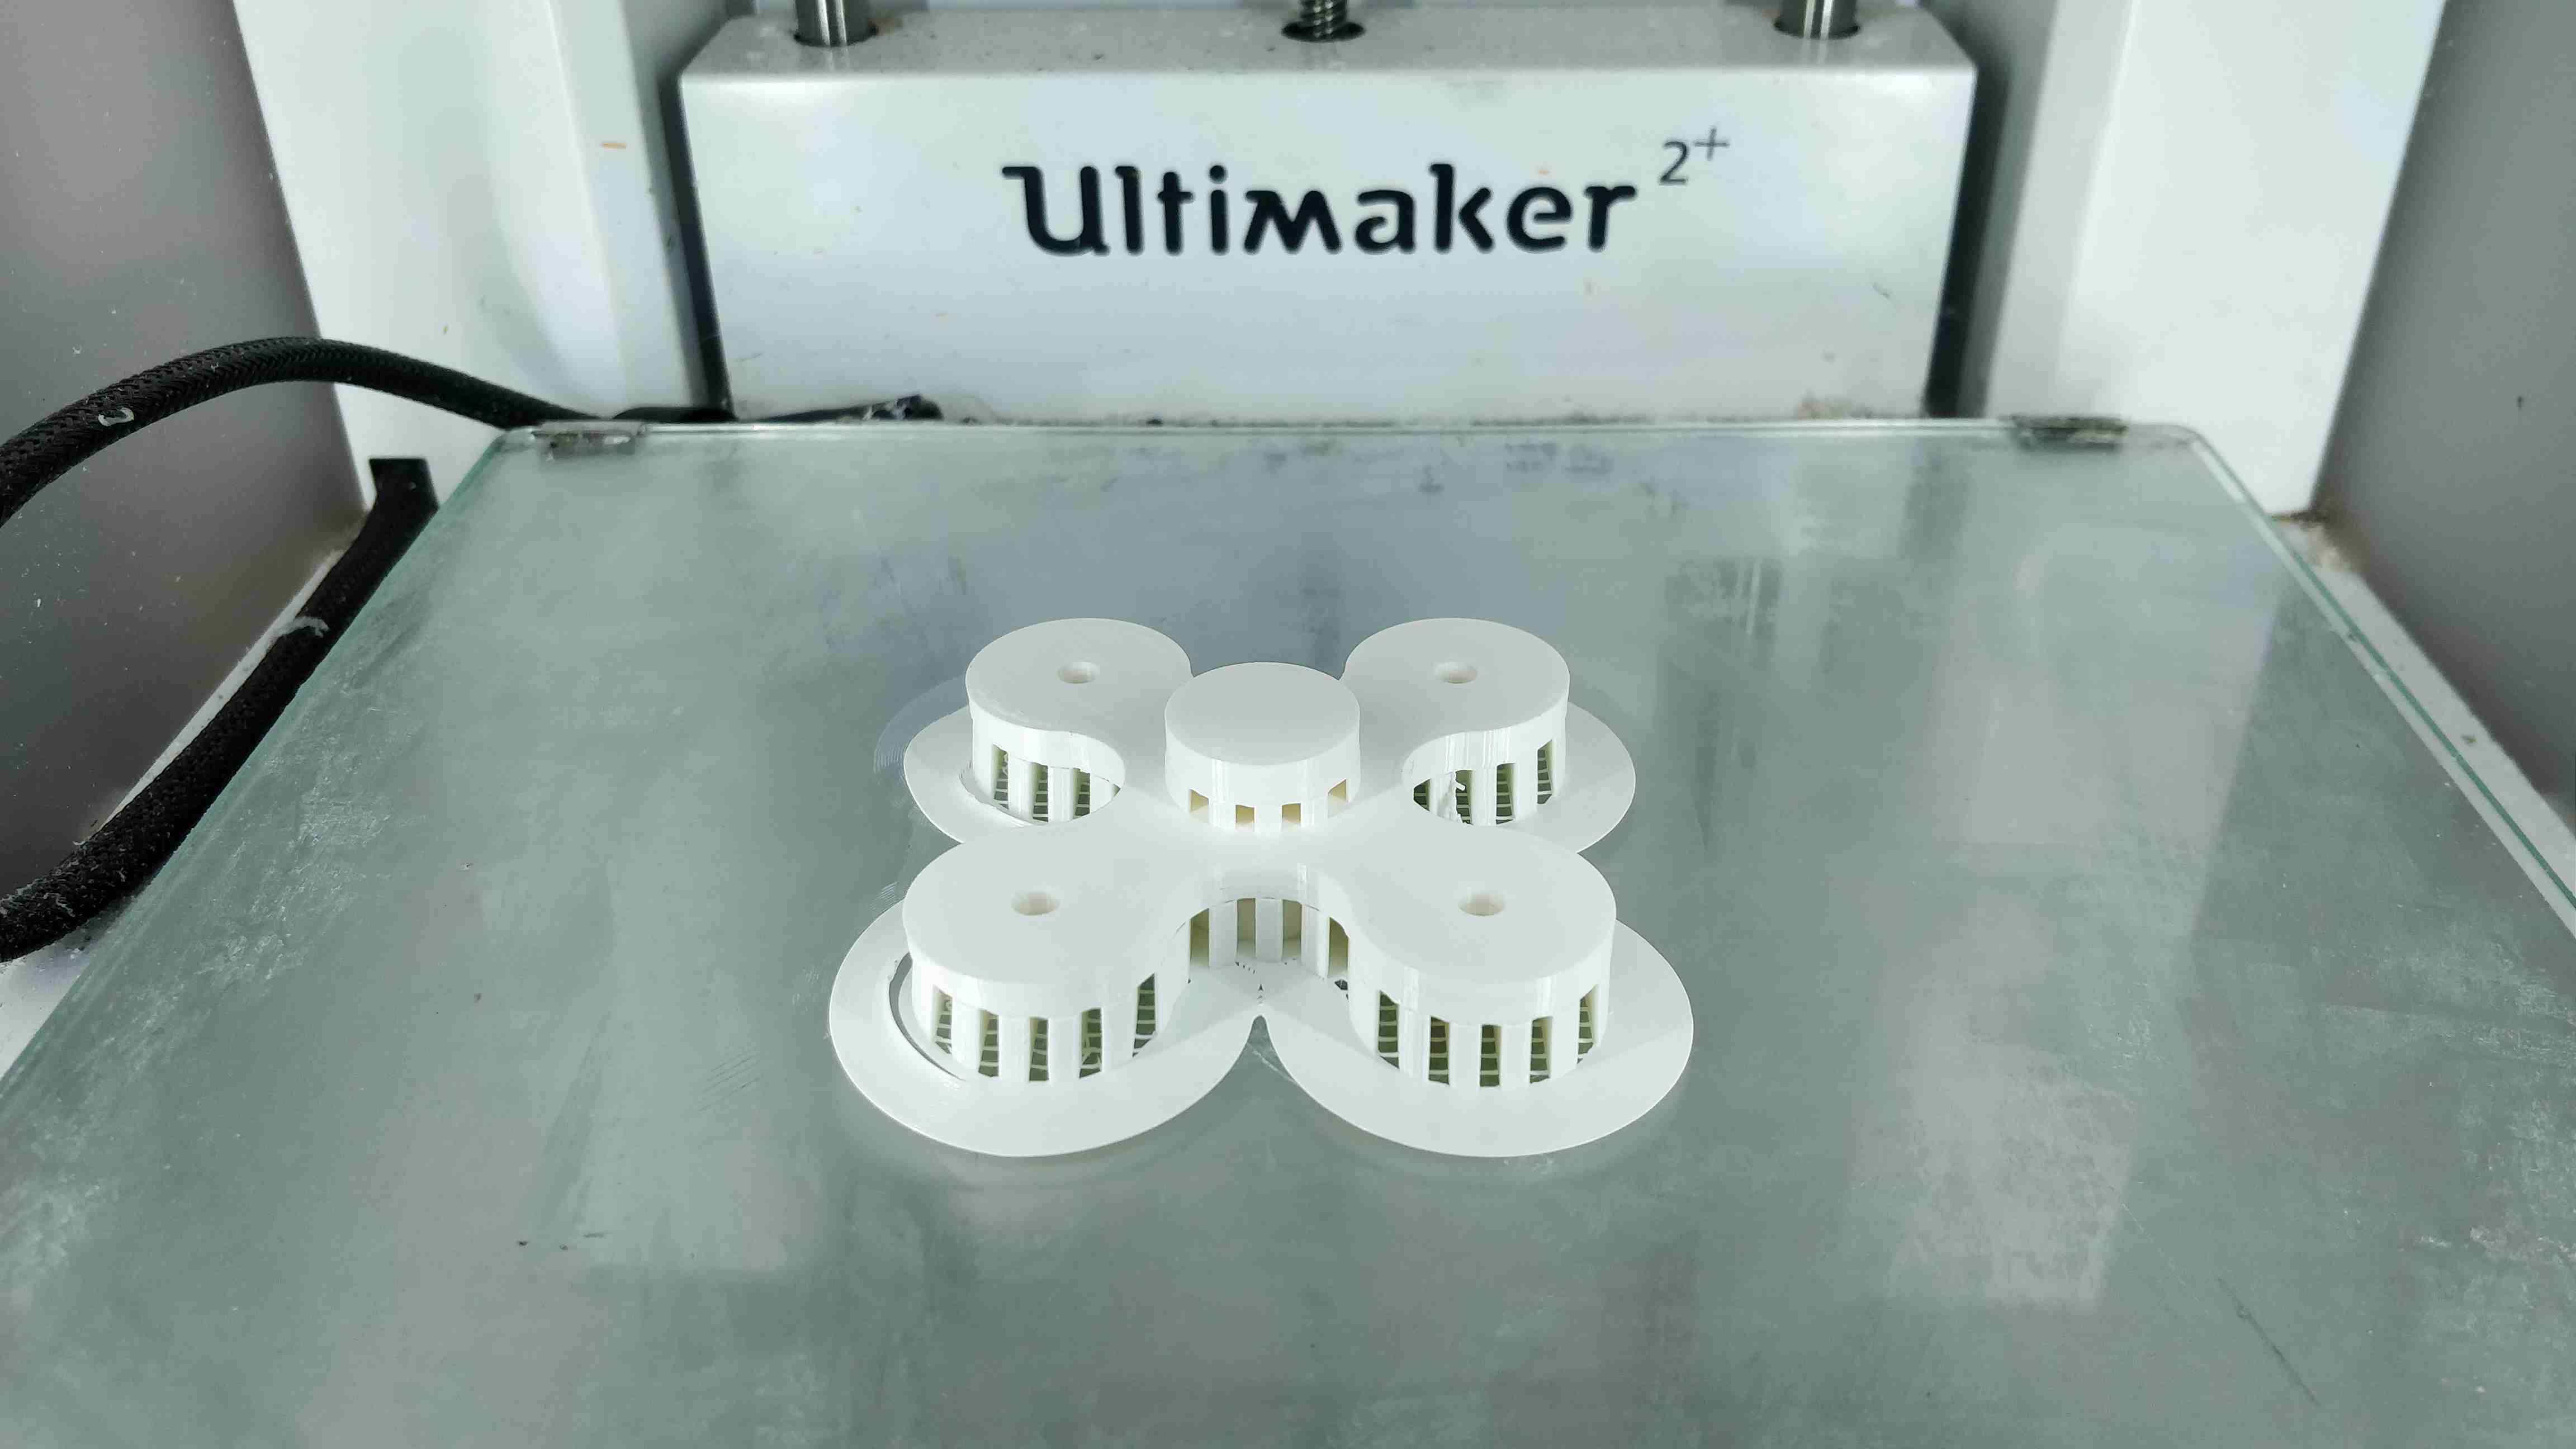
I thought of printing a fidget spinner which would be sufficient for this week's assignment as it would be a non subtractive design

So i started from scratch, sketched circles and joined them ,extruded them as below

symp

.

.

symp

.

.

symp

.

.

symp

.

After completing the design the different bodies were combined to a single body by selecting every body and selecting 'combine'

.

symp

.

.

symp

.

After combining bodies two bodies exists as below since they have no connection between them. Draw a sketch inorder to connect the two bodies as below and repeat 'combine' command.

.

symp

.

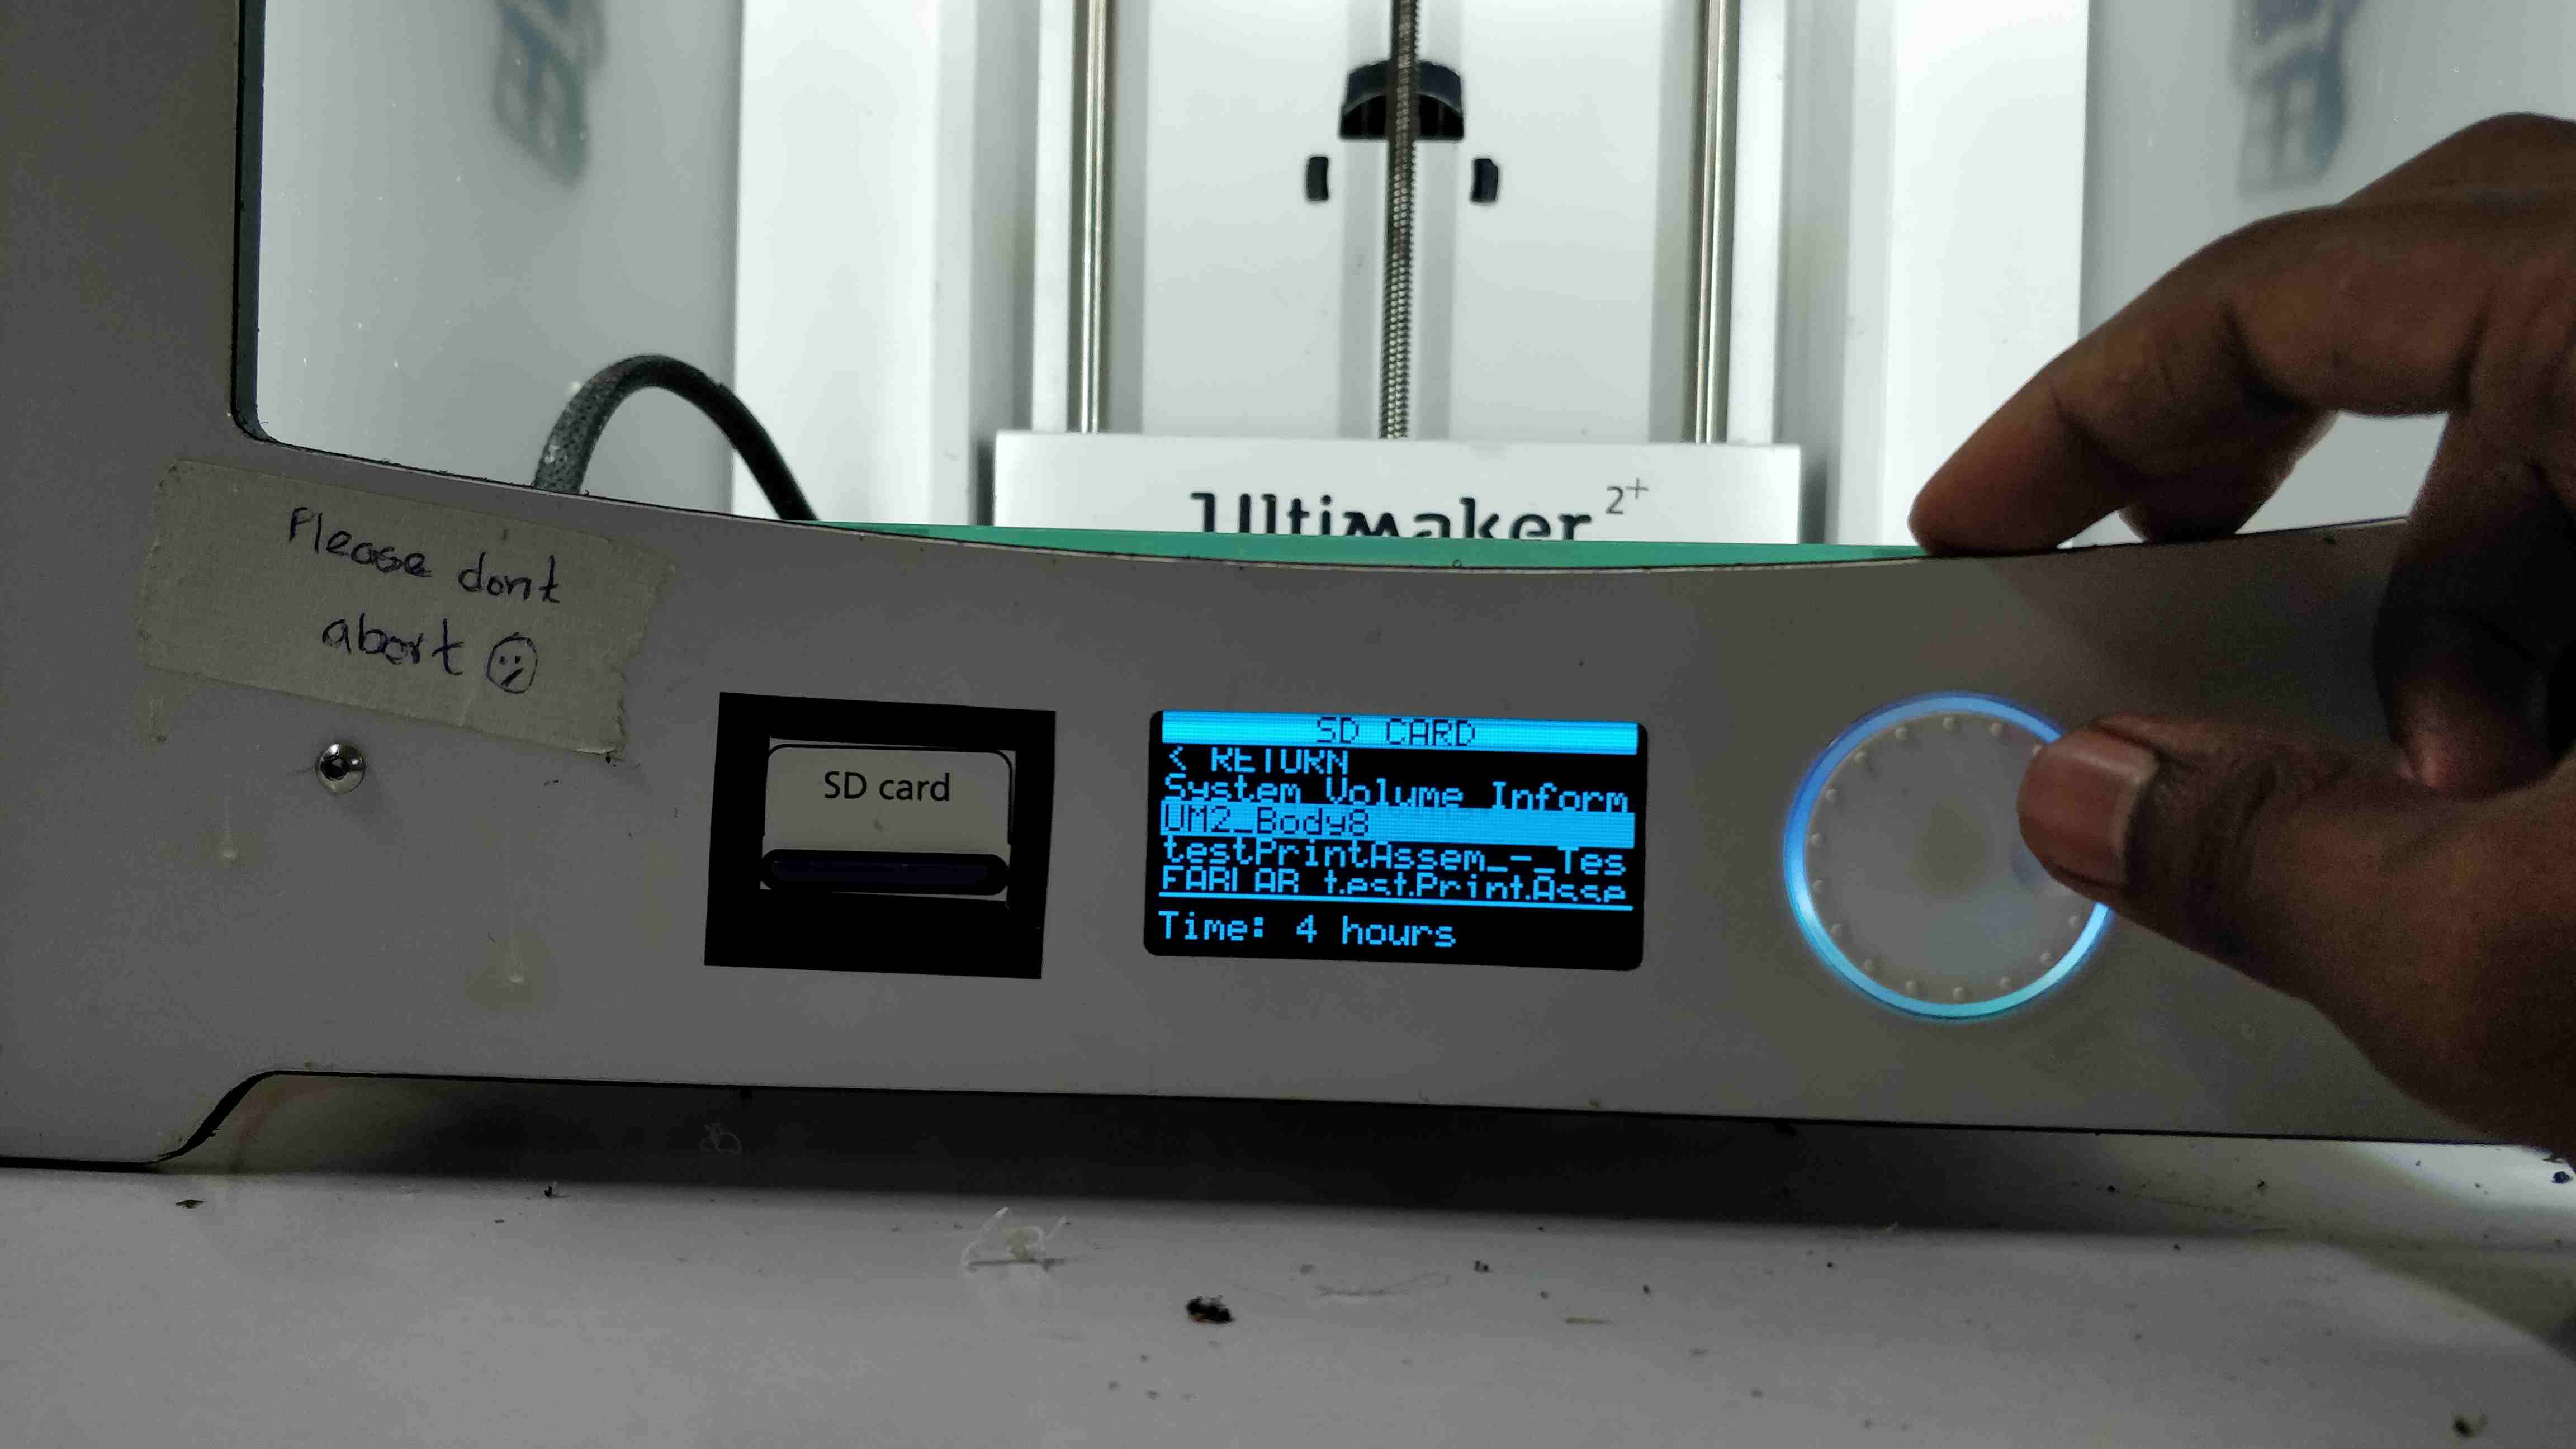
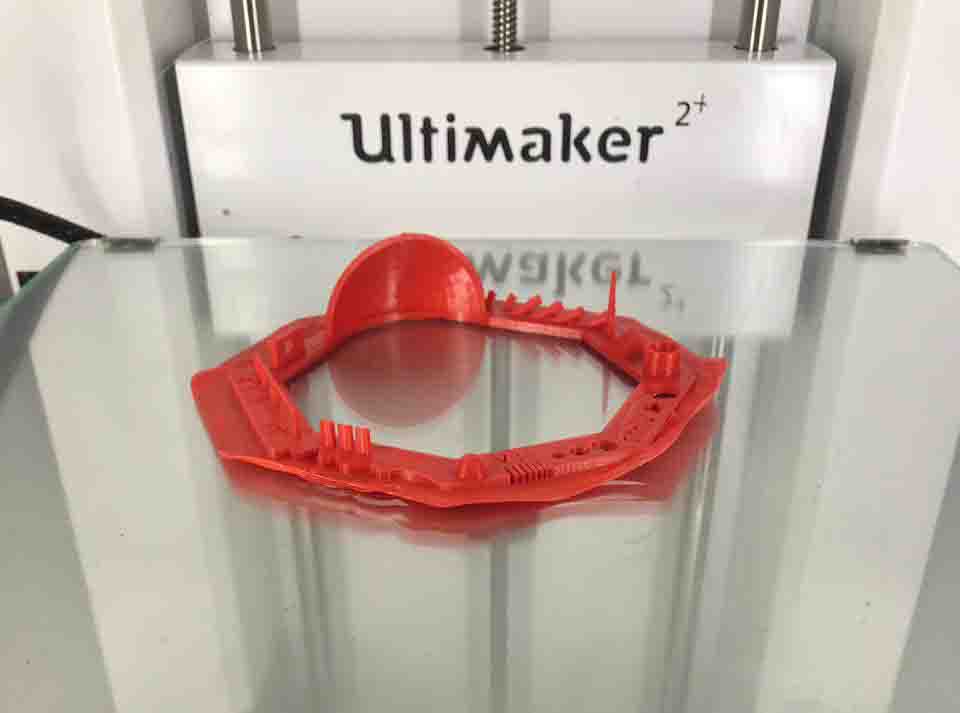
The body was then saved as .stl file inorder to print in 3D printer

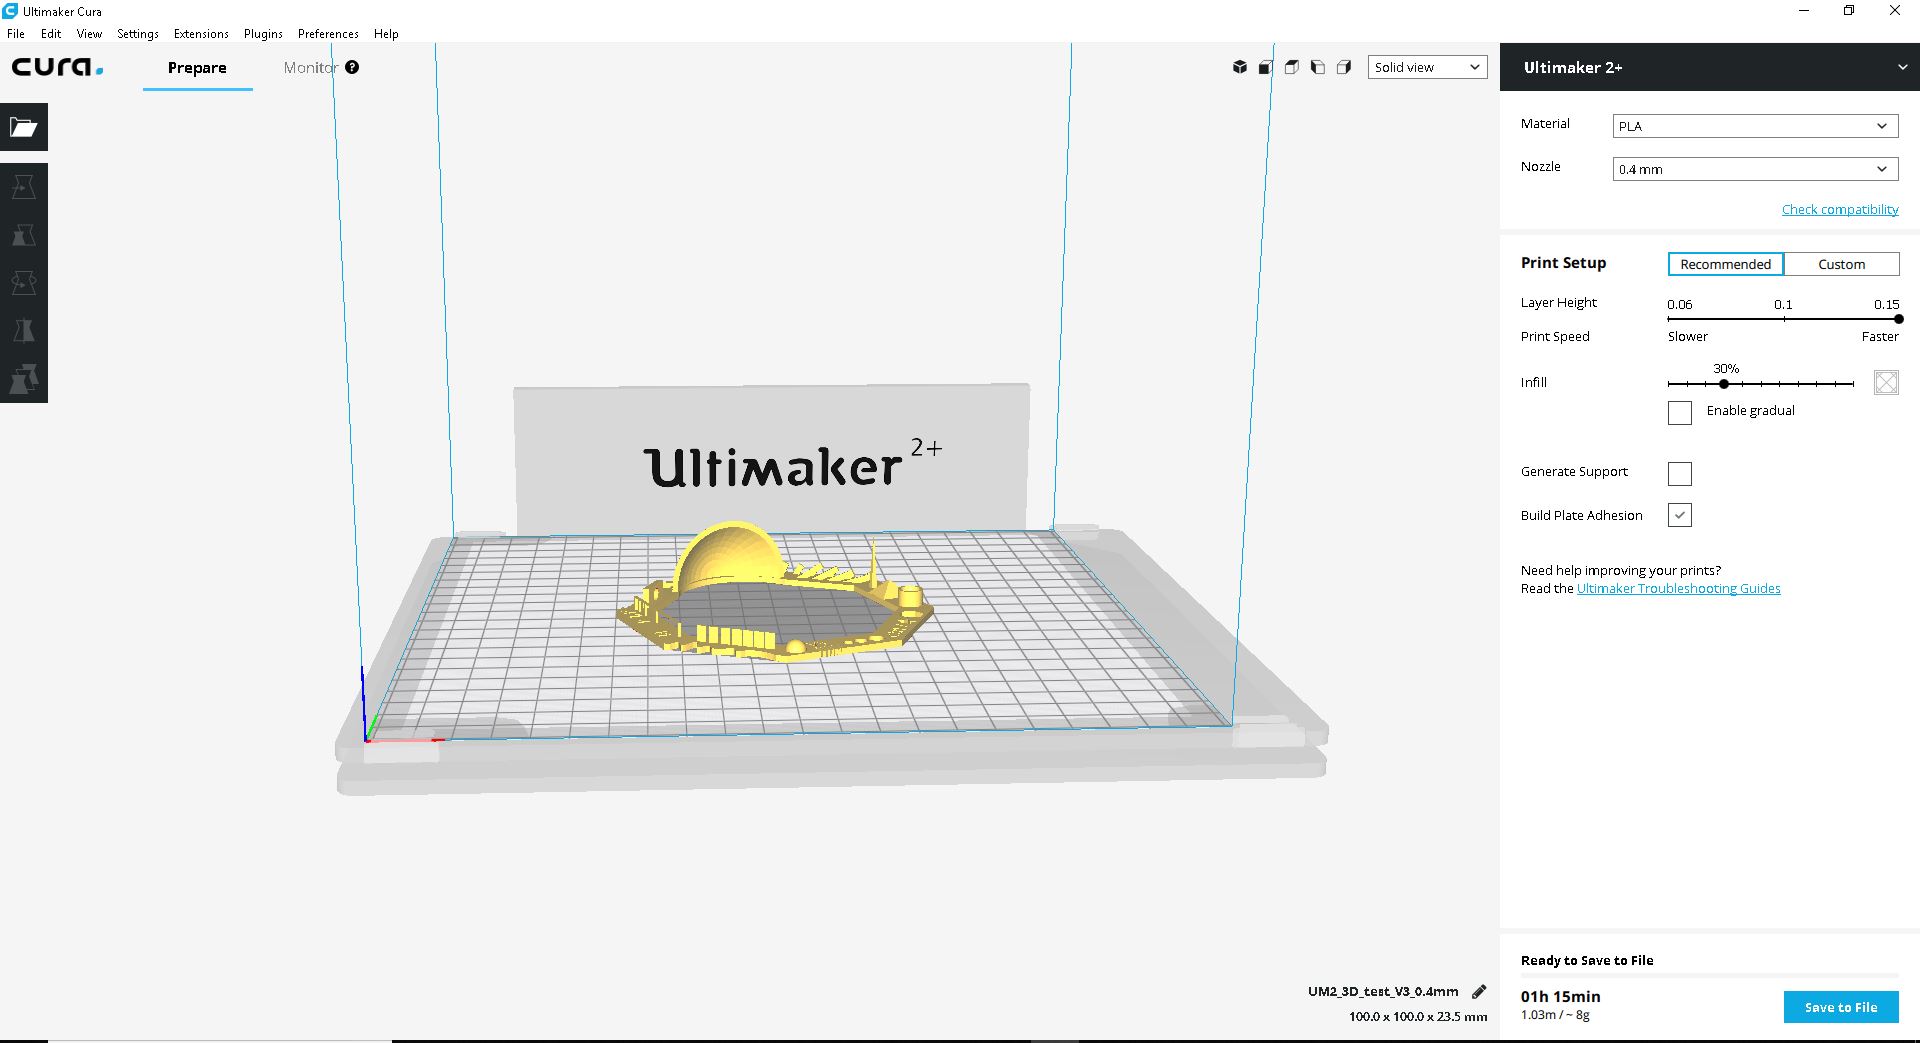
The Software 'Cura' for 3D printing was downloaded from here

Next step is to load the .stl file in cura

symp

.

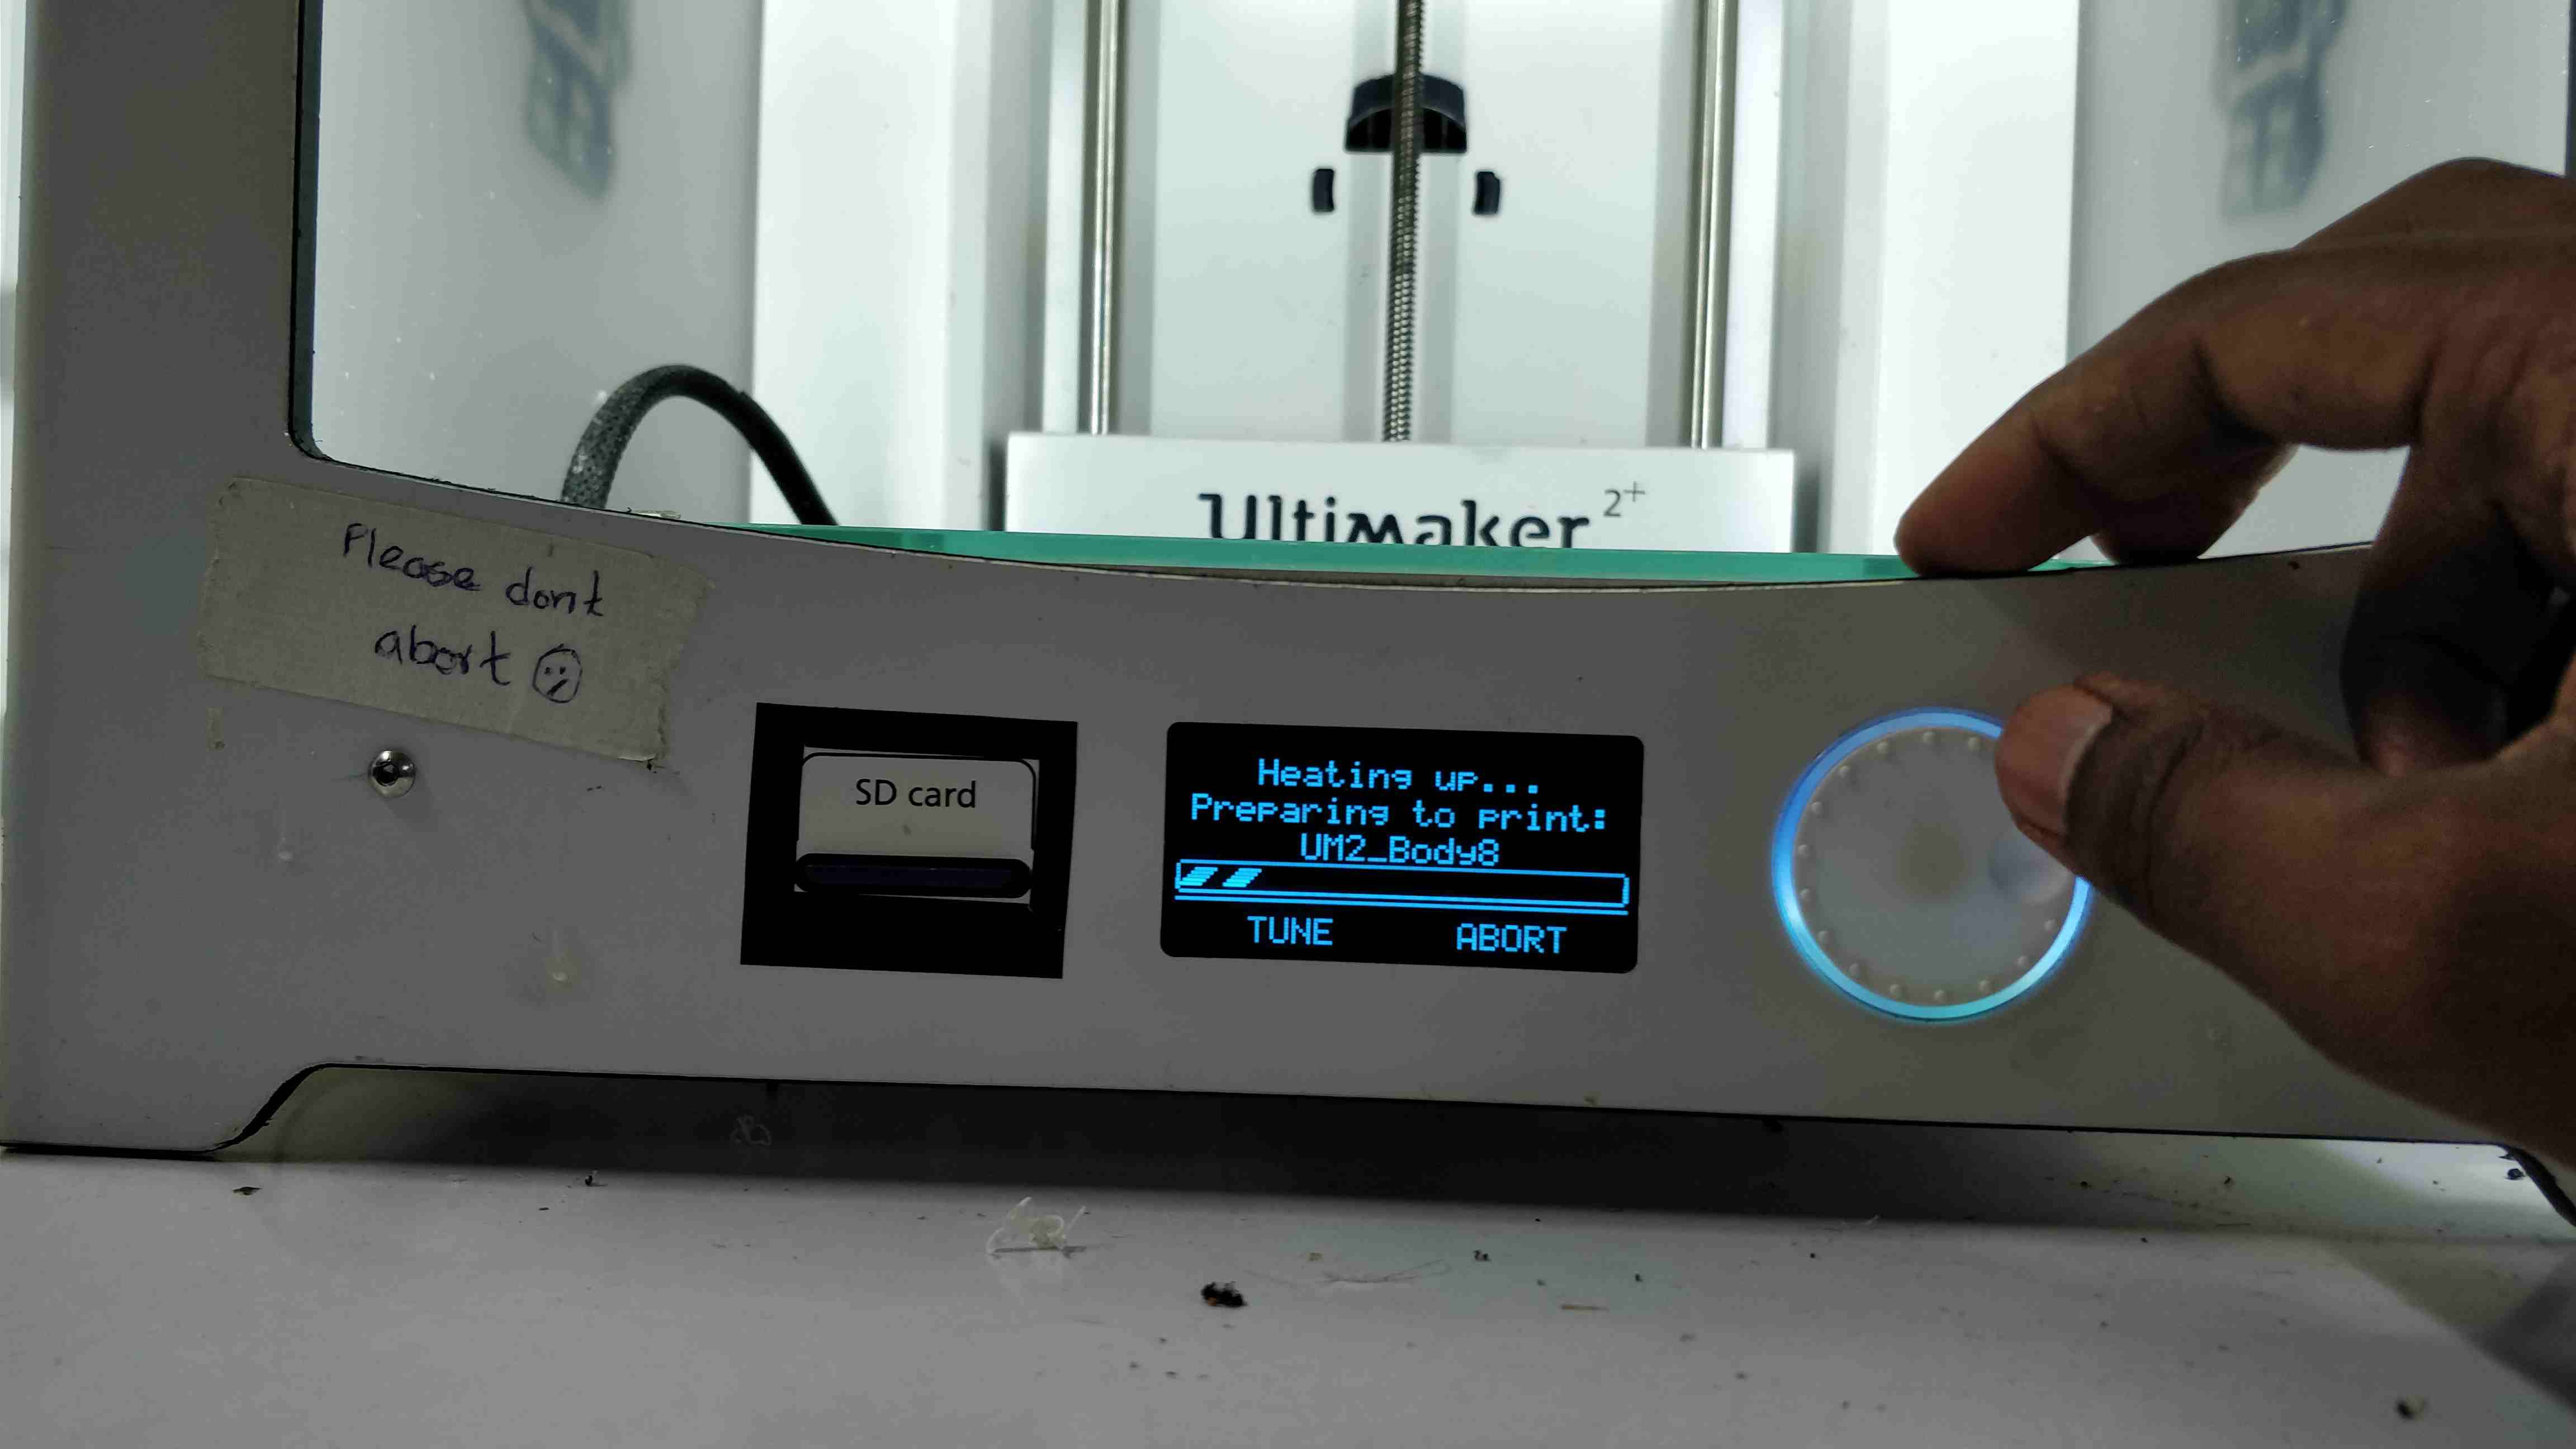
Following settings needs to be set before printing

  • In recommended settings, select the 'material'. Here i am having PLA, so i selected PLA
  • Select each layer height. As layer height decreases the print becomes faster
  • Select 'infill' percentage. Infill is the structure that is printed inside it, we could select the number of infill and this increases the strength and quality of the build
  • Select 'prepare' and the software calculates the time required in the current view
  • By selecting Layer view, we could view the printing layer by layer and understand each process, like the size of support material,time etc
  • .

    symp

    .

  • After that, to start printing the file could be saved to an sdcard.The file will be saved as '.gcode' which should be copied to sdcard and name should be noted
  • symp

    .

  • Insert the sdcard in 3D printer. After that follow the below steps:

.

1. Fit the printer filament, insert the end of filament inside the valve, and gently push it until it reaches the other end of tube ie,nozzle
symp

.

.

2. Select 'print'
symp

.

.

symp

.

.

3. Select the required file
symp

.

4. Machines gets heated up
symp

.

.

symp

.

.

symp

.

.

symp

.

.

symp

.

.

symp

.

.

DESIGN FILES FOR DOWNLOAD

.

fusion 360 public link

.

3D Printed Fidget spinner

.

symp

.

As mentioned earlier my alternative project was to have owl/owls with google assistant which will communicate with each other as my personal assistant

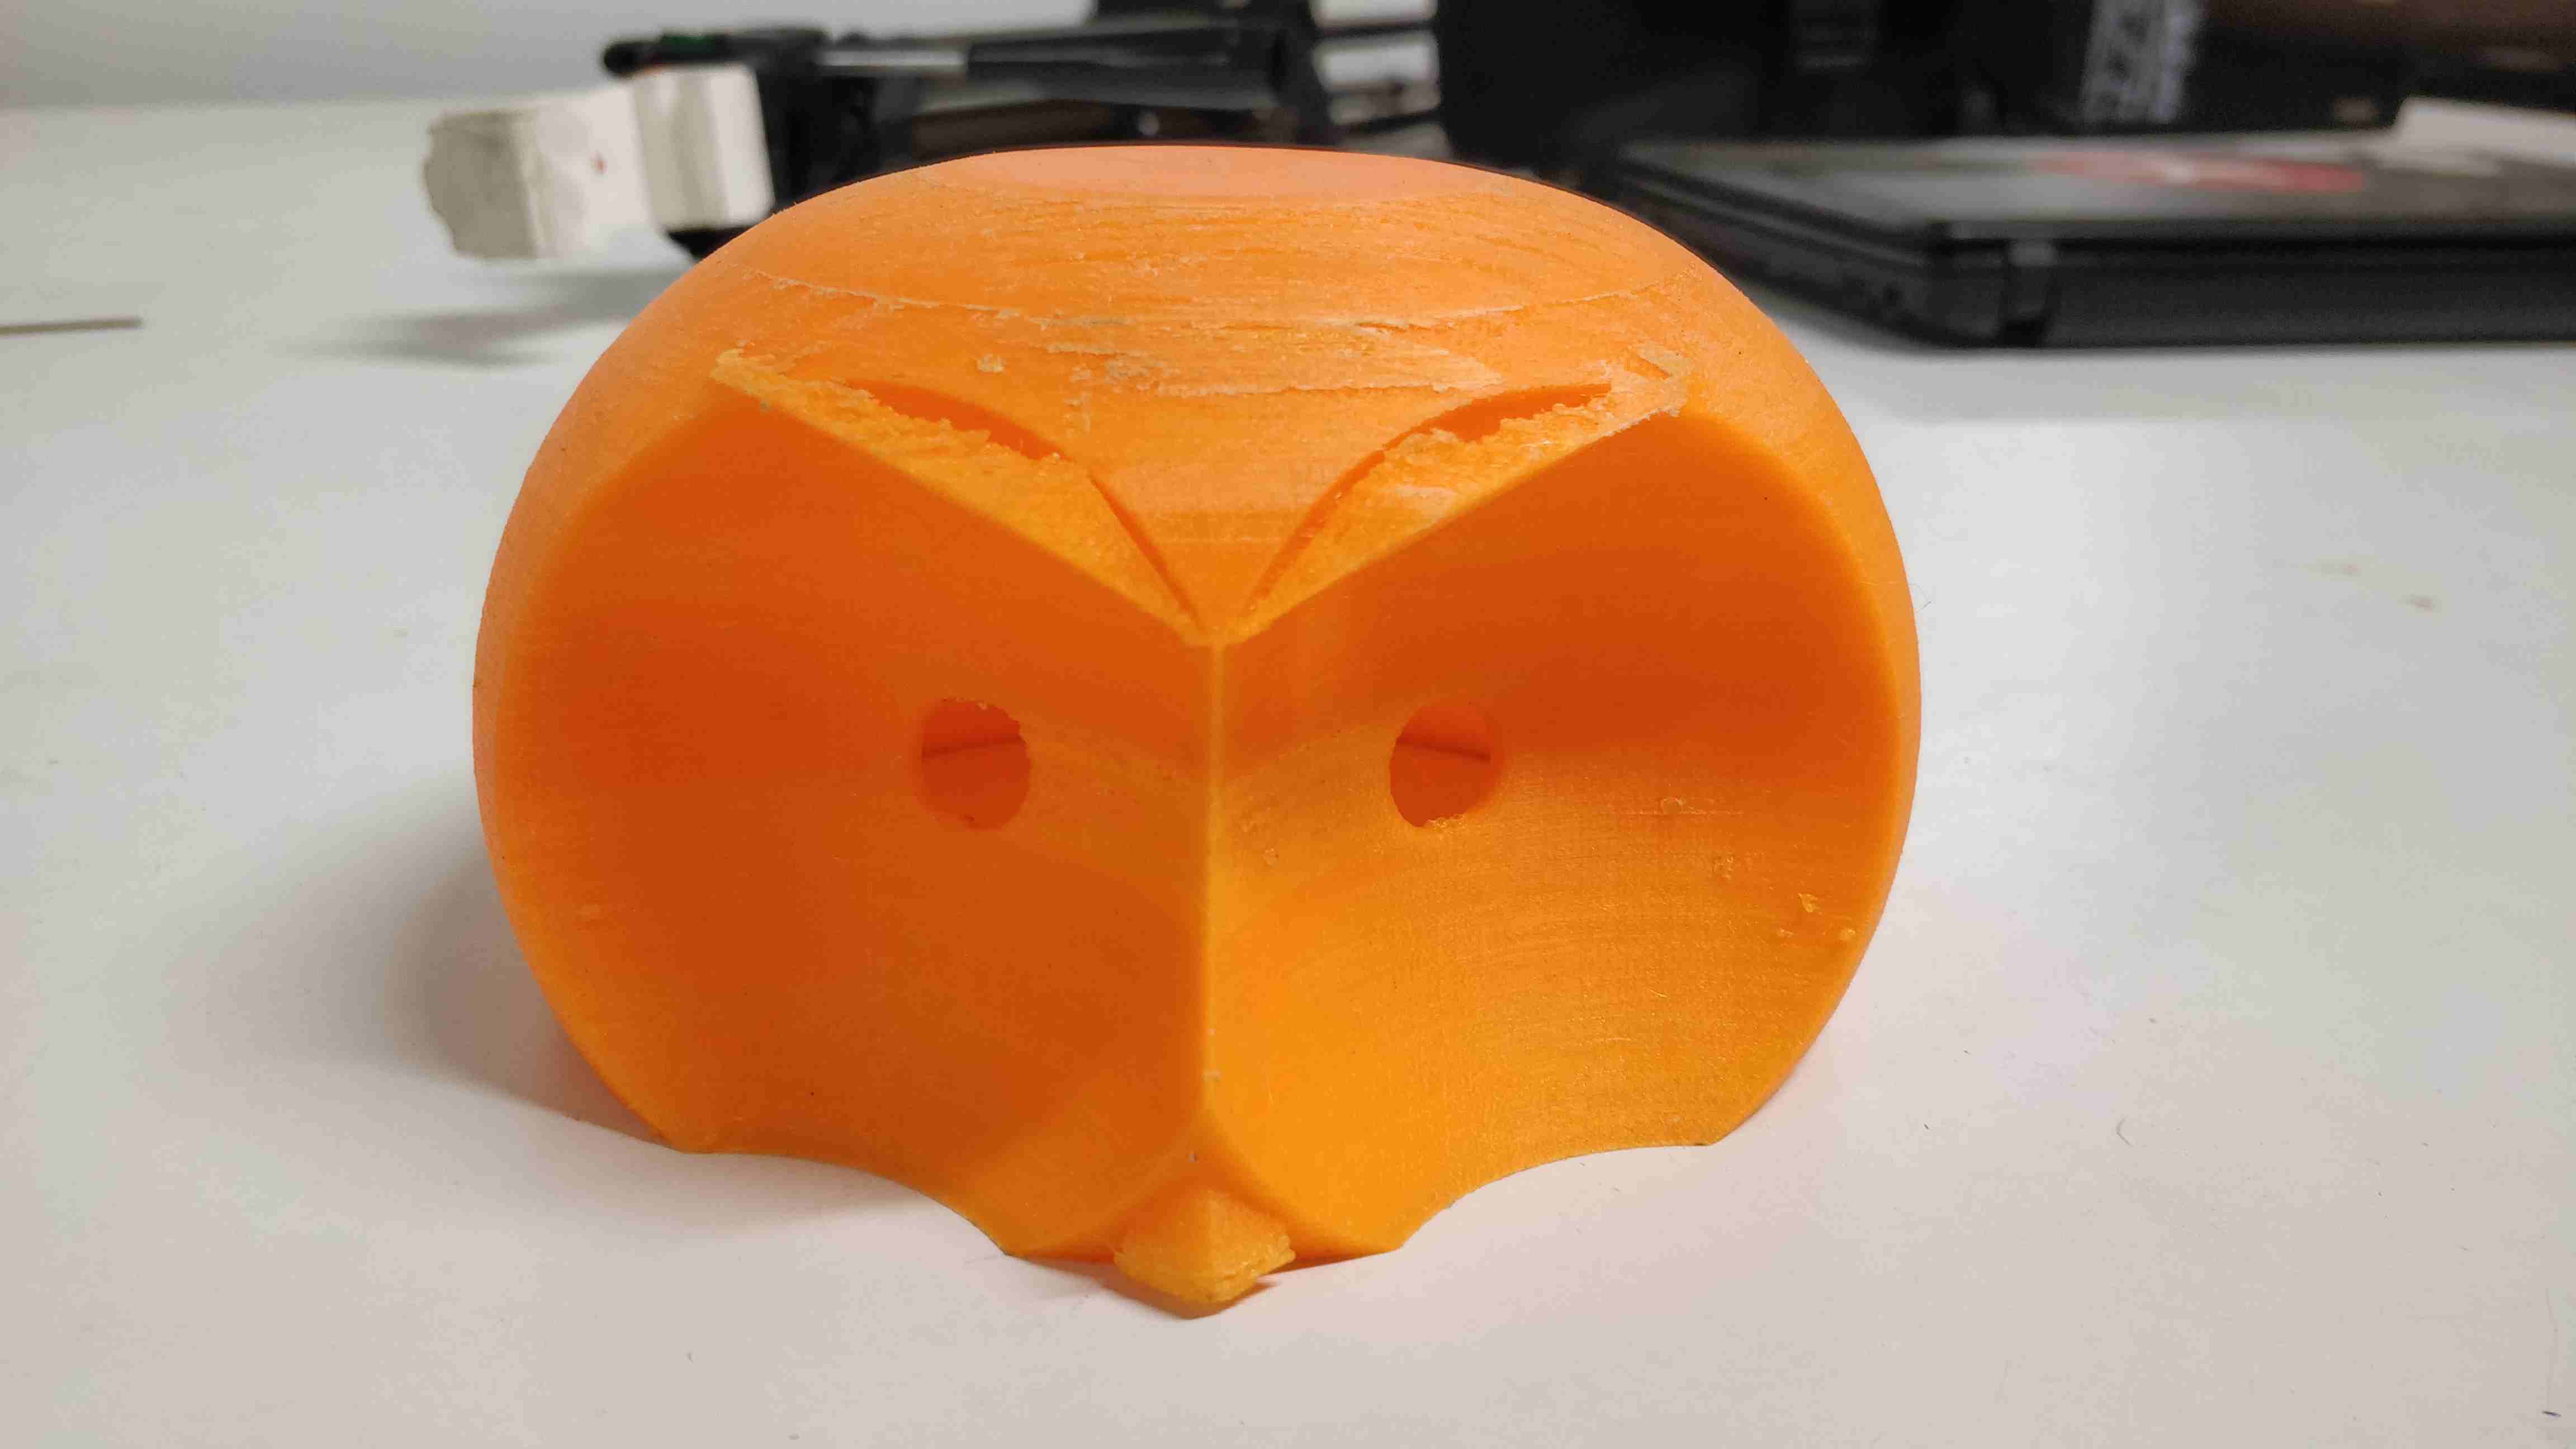
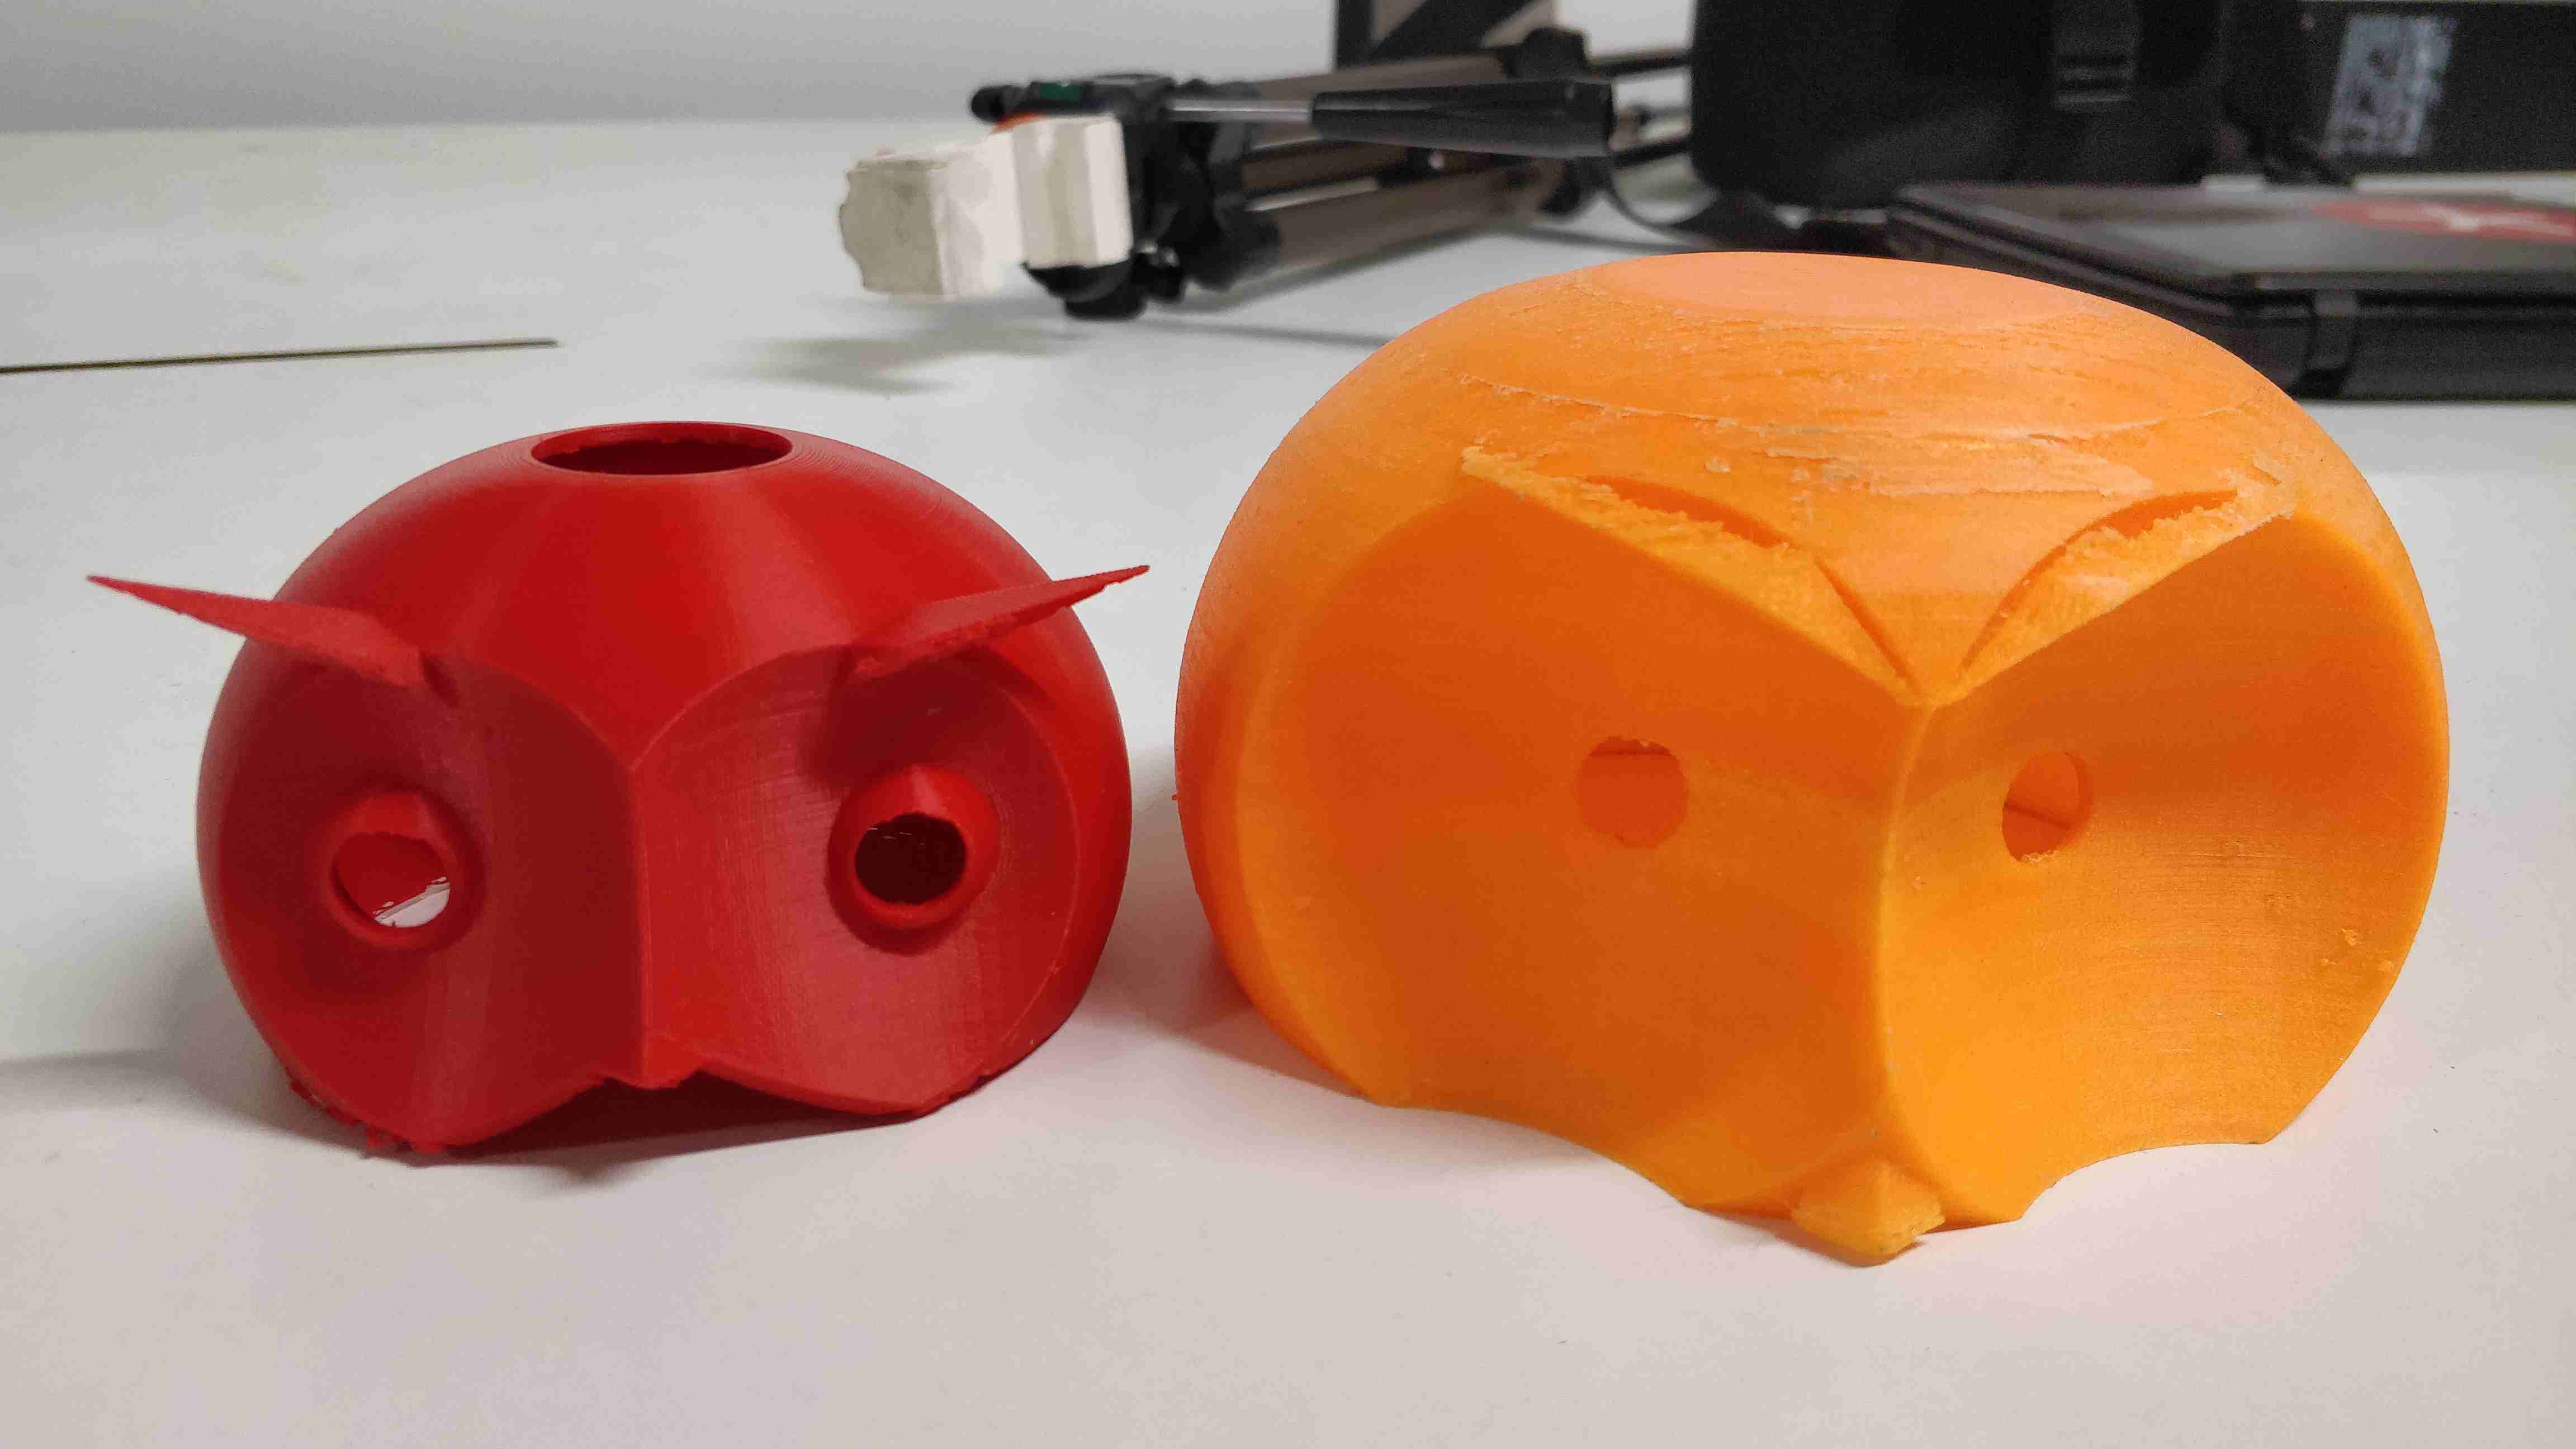
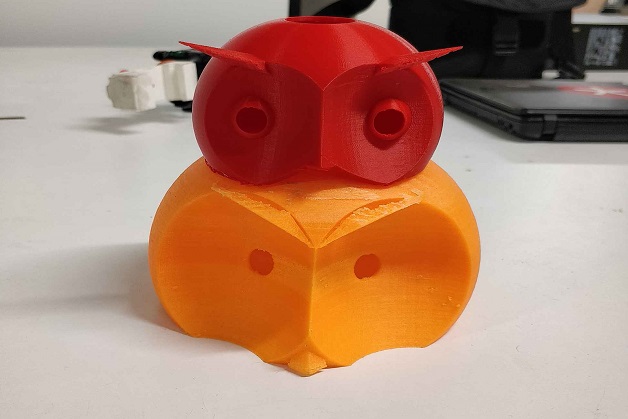
I started with designing the head of the owl in fusion 360

.

.

1. Draw an arc with support lines as below:
symp

.

.

2. Revolve the surface with revolve command:
symp

.

.

3. Make a plane at an angle with the origin ,draw spheres on this plane. Mirror the same sphere at the other side
symp

.

.

4. Subtract the two bodies from the main body
symp

.

.

5. Draw a nose as below by drawing a rhombus and circle and then using the 'loft' command.;
symp

.

.

6. Shift the nose to required position by move command;
symp

.

.

7. Draw the eye brow as below;
symp

.

.

8. Mirror the eye brows and draw circle for eyes. Final sketch is obtained as below:
symp

.

.

9. Open the cura software and load the .stl file
symp

.

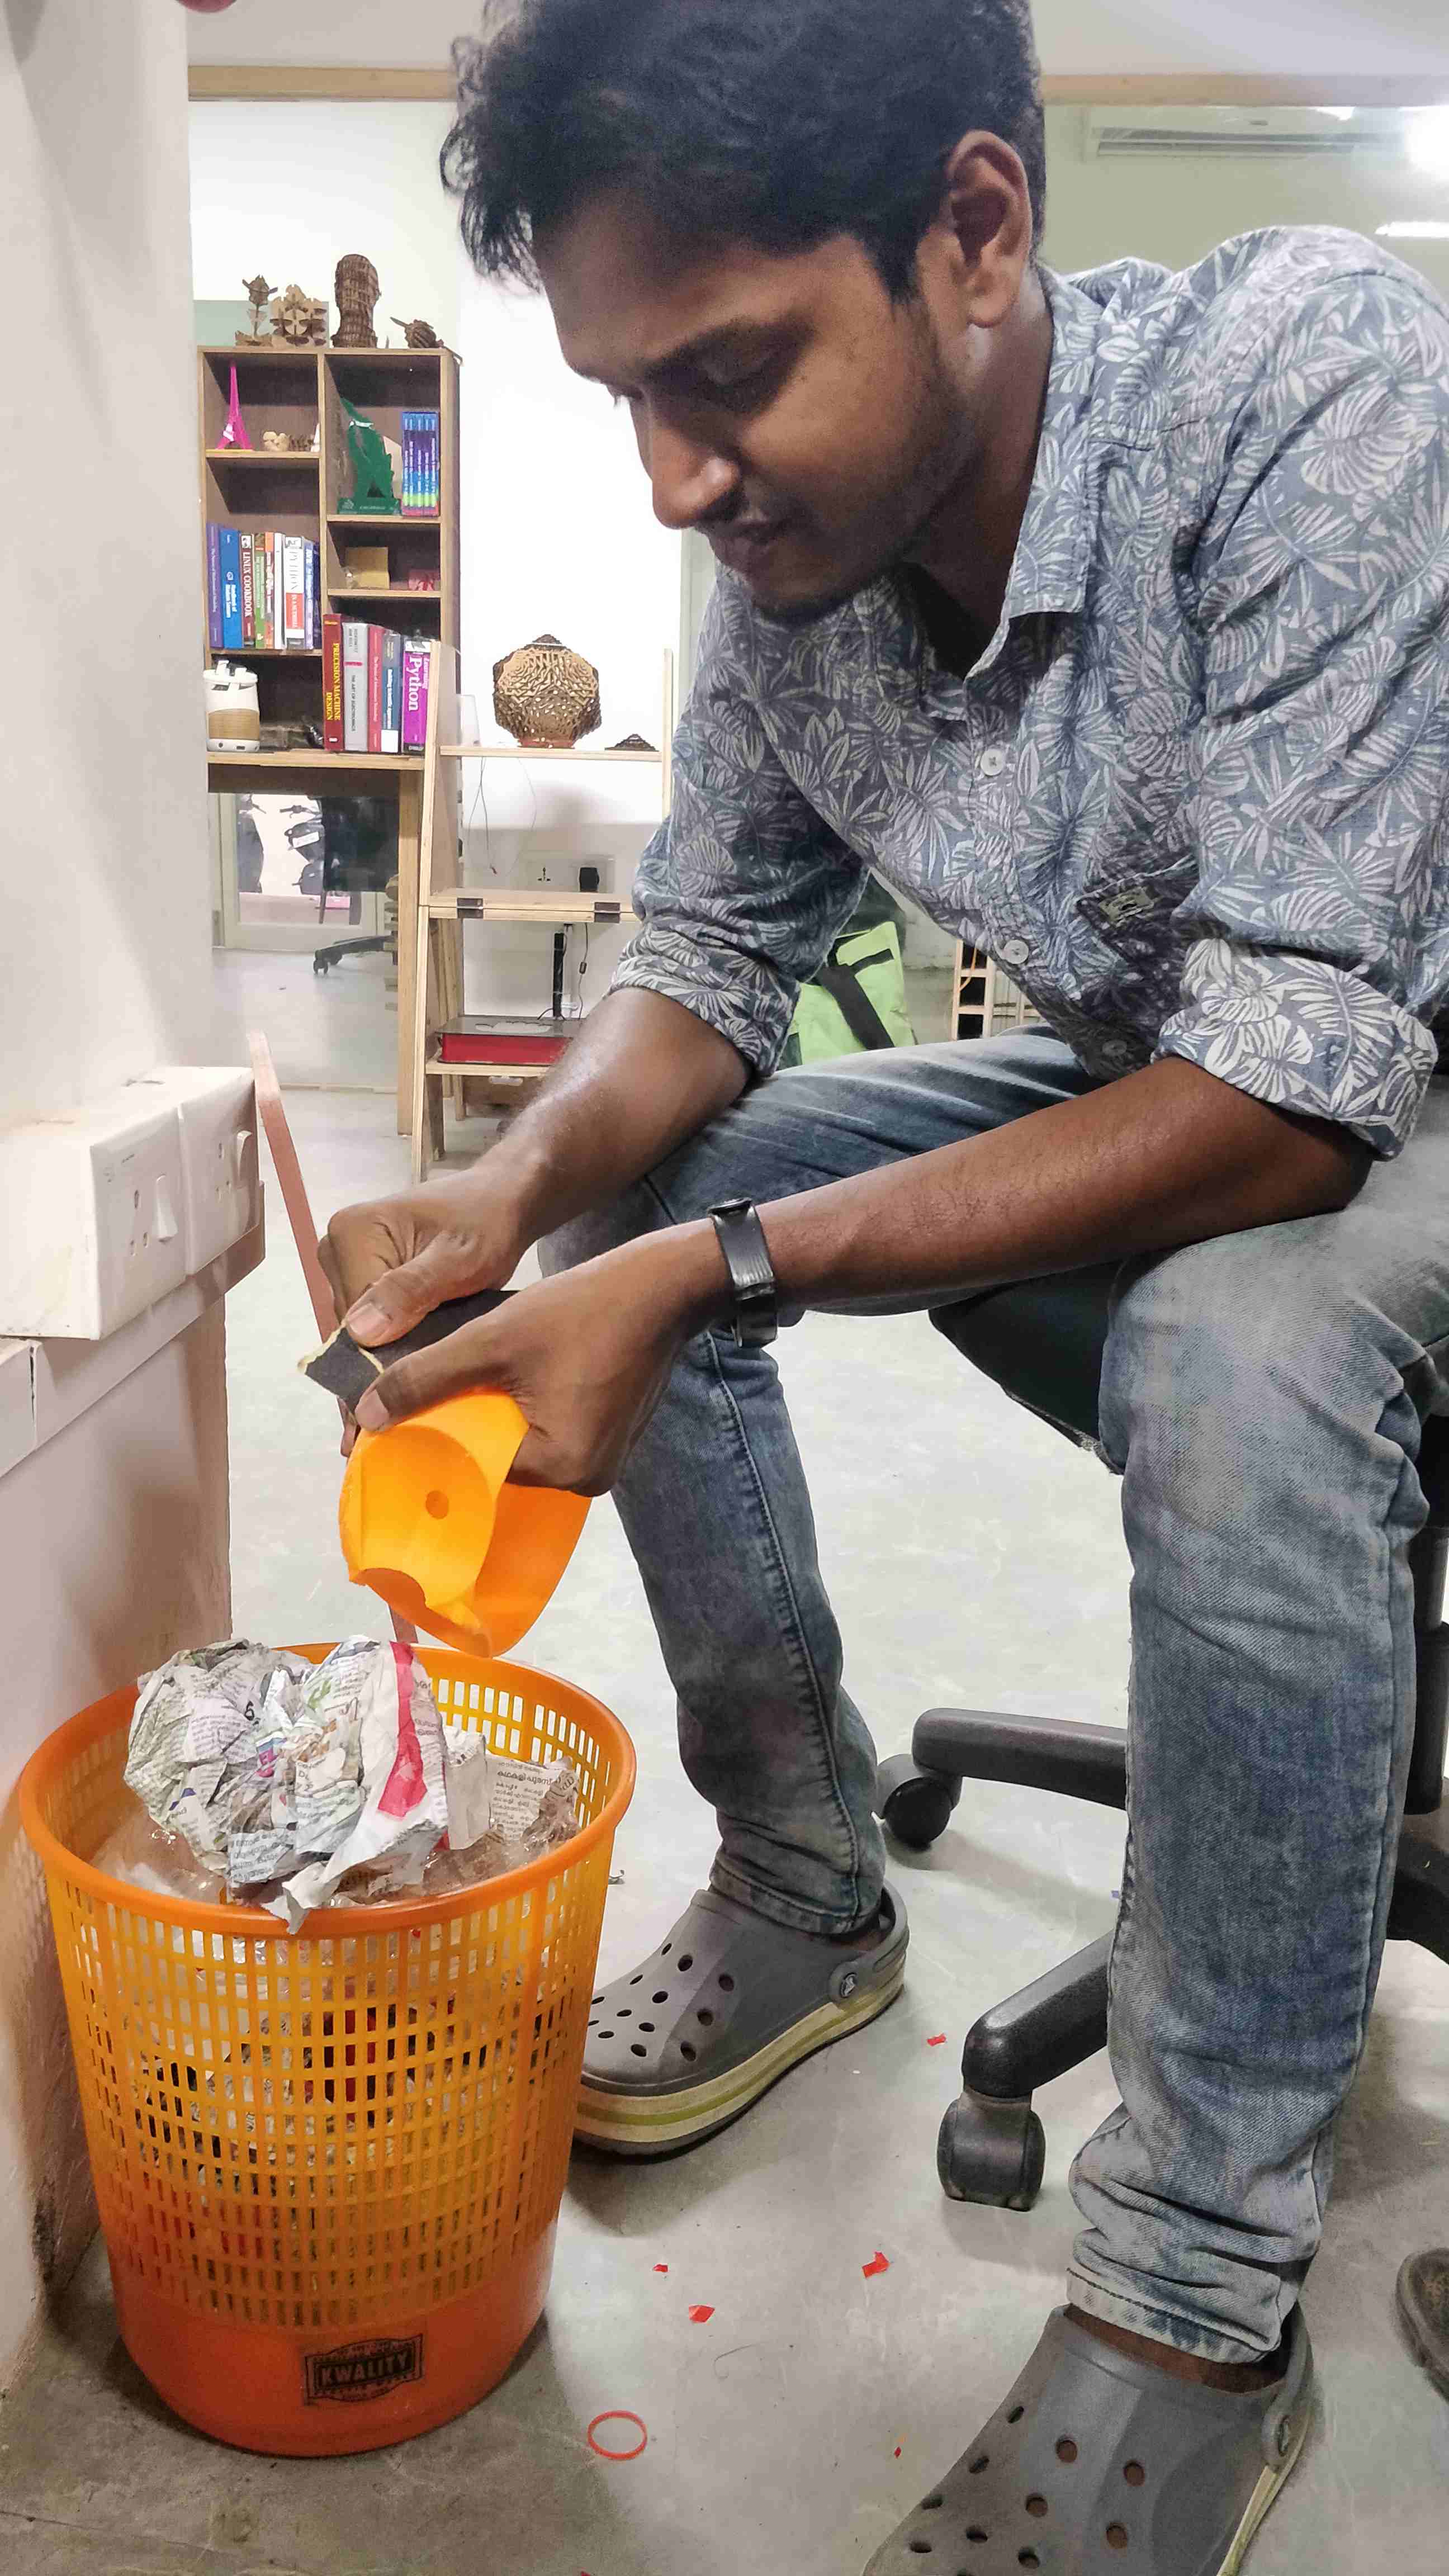
Since i was using a custom made printer by akhil joseph one of by fab colleague, he had set the specifications of the printer similar to Prusa i3. This printer was chosen with custom settings as shown below

.

10. The customs settings as his guidelines were done
symp

.

.

symp

.

.

symp

.

.

symp

.

.

symp

.

.

11. The 3d printer output after filing with sand paper
symp

.

.

Out of curiousity i just printed another head and thought of making it useful final project
symp

.

.

symp

Fusion 360 link for the owl

.

.

3D Scanning

.

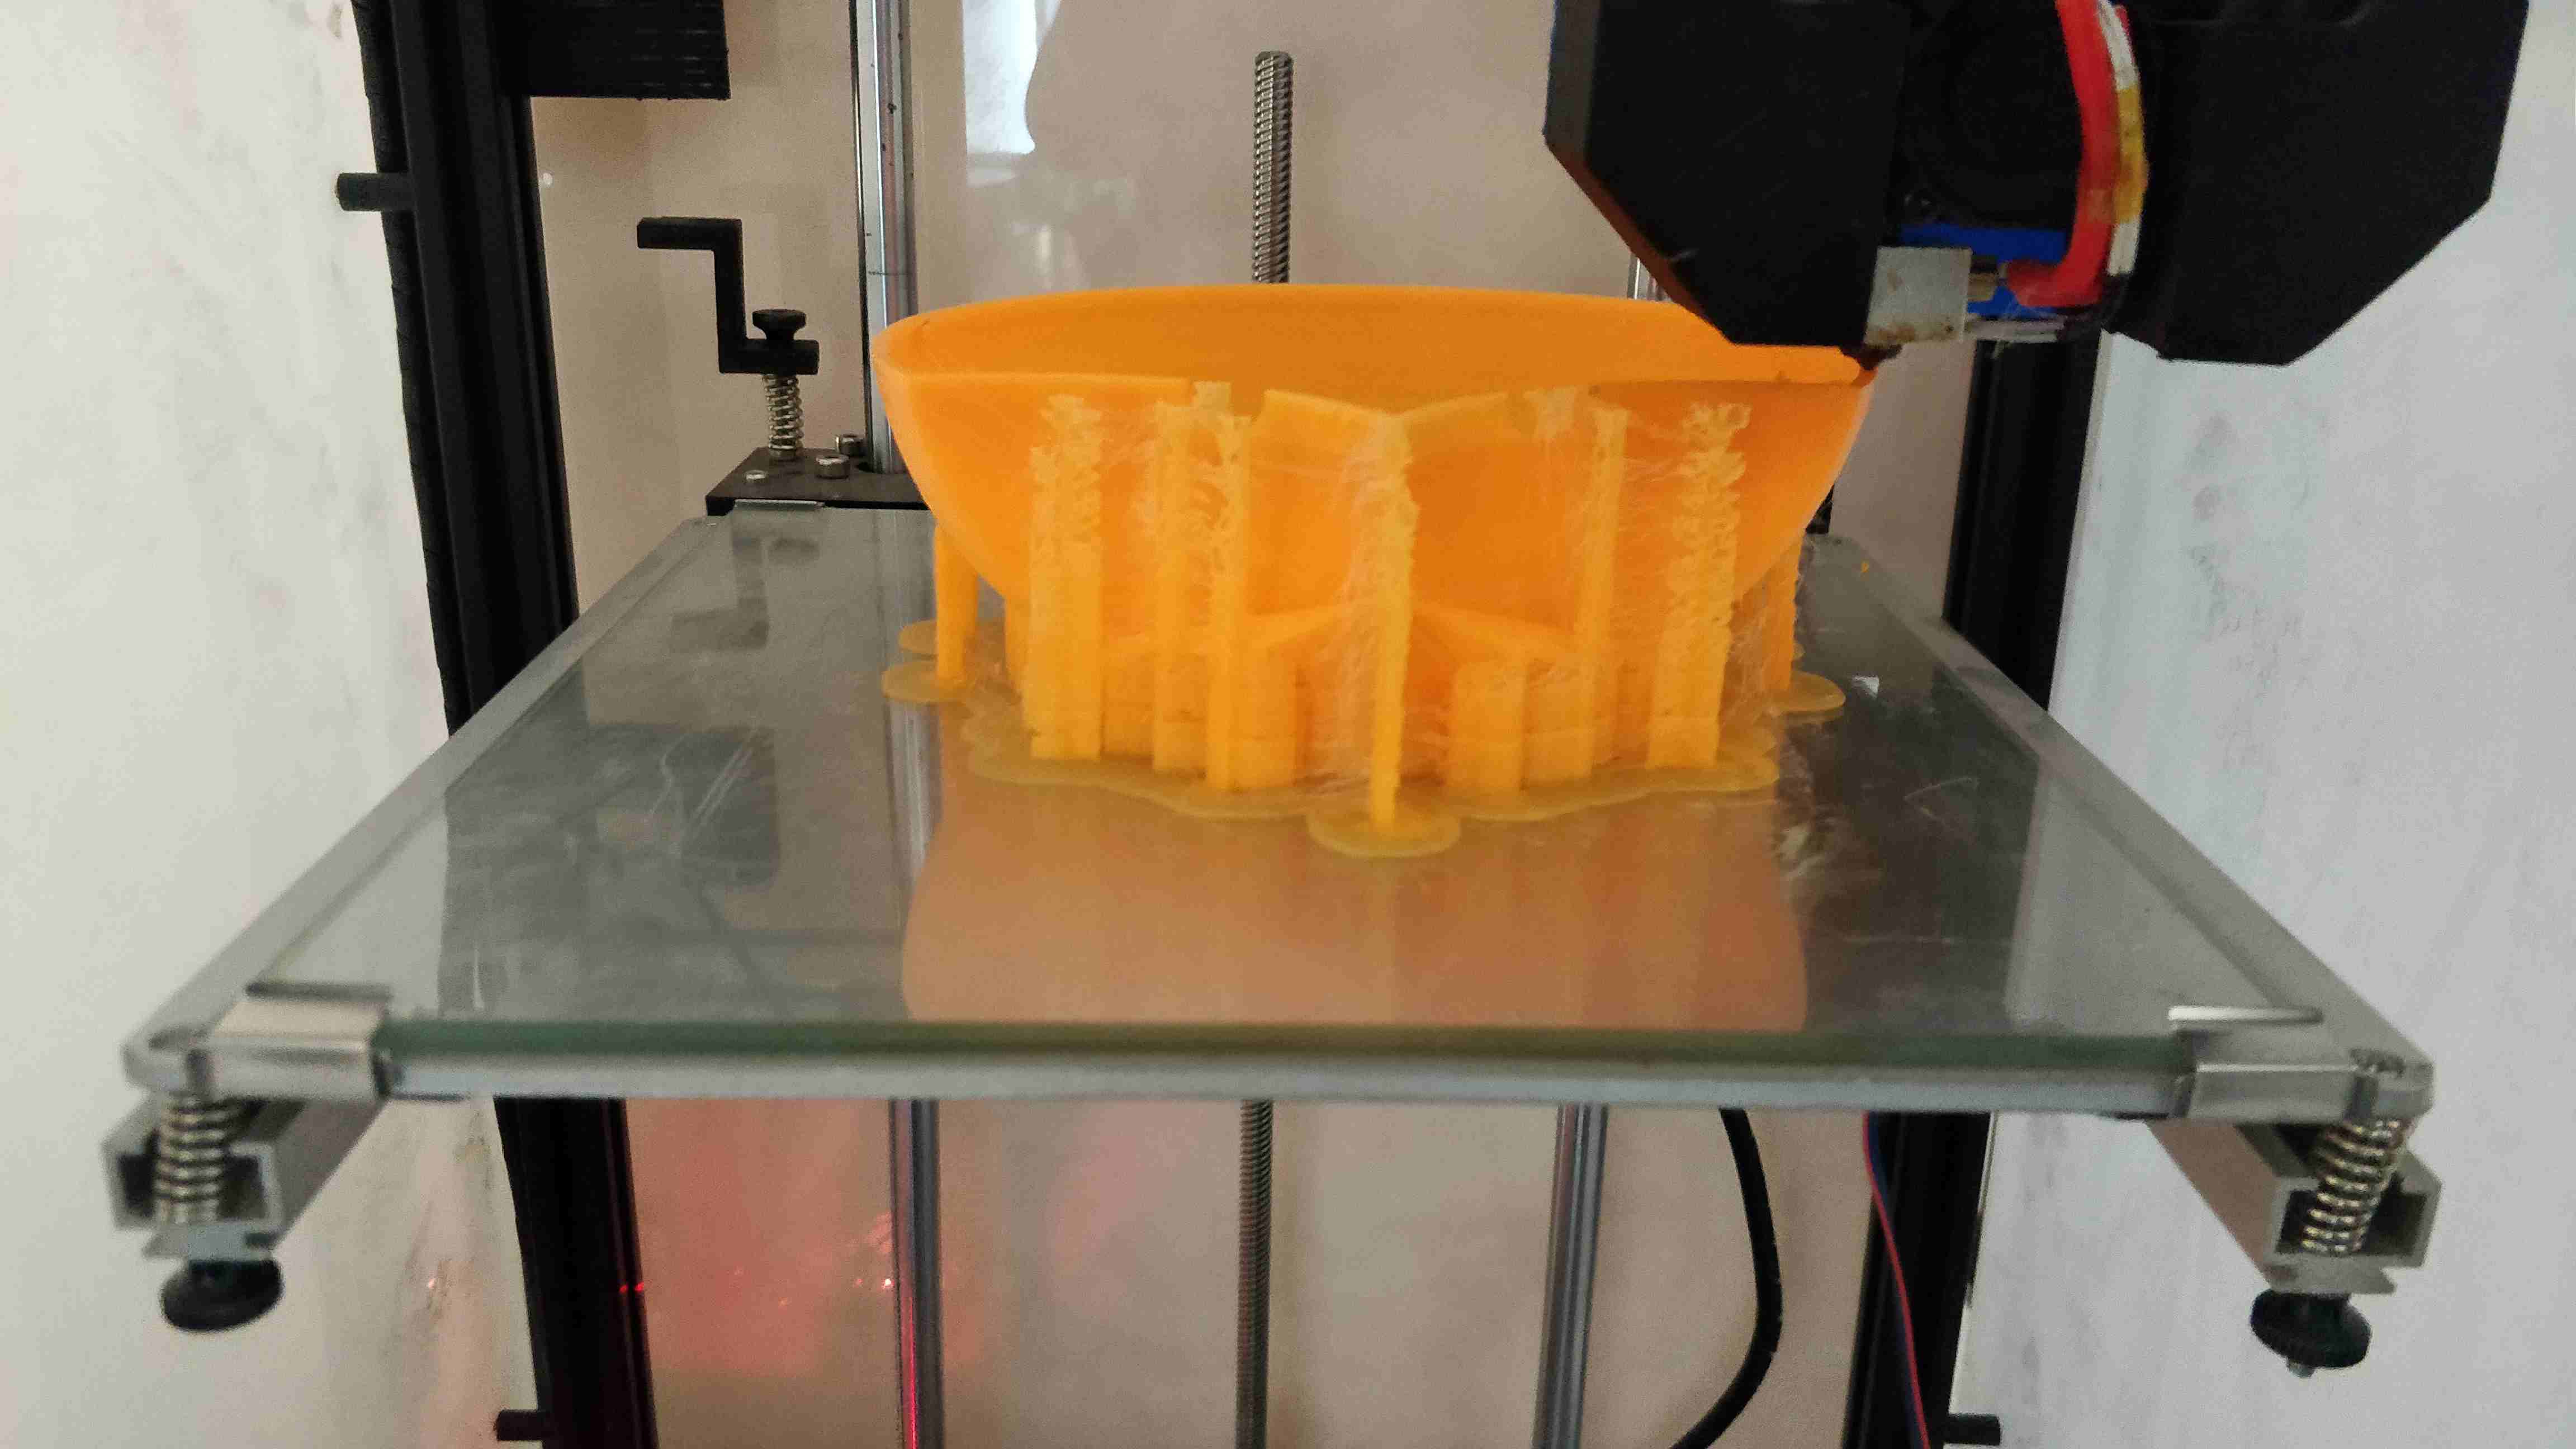
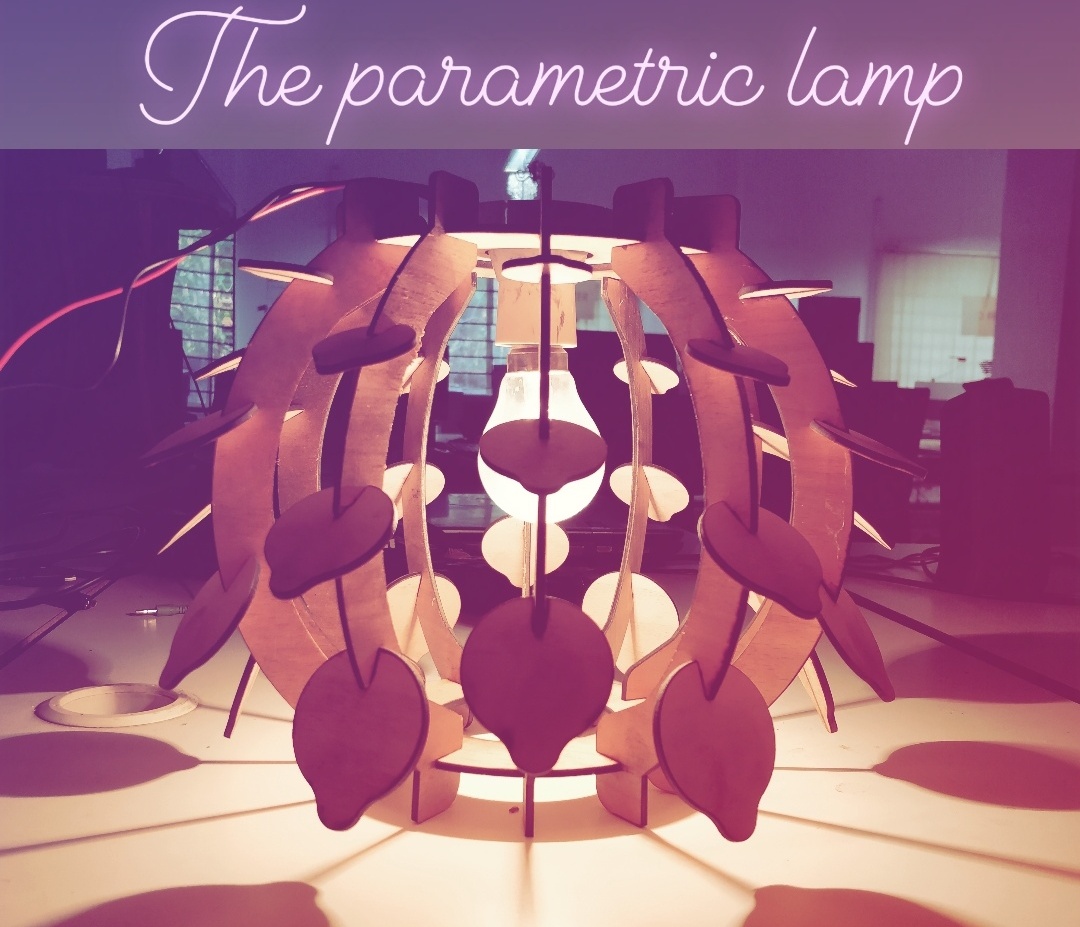
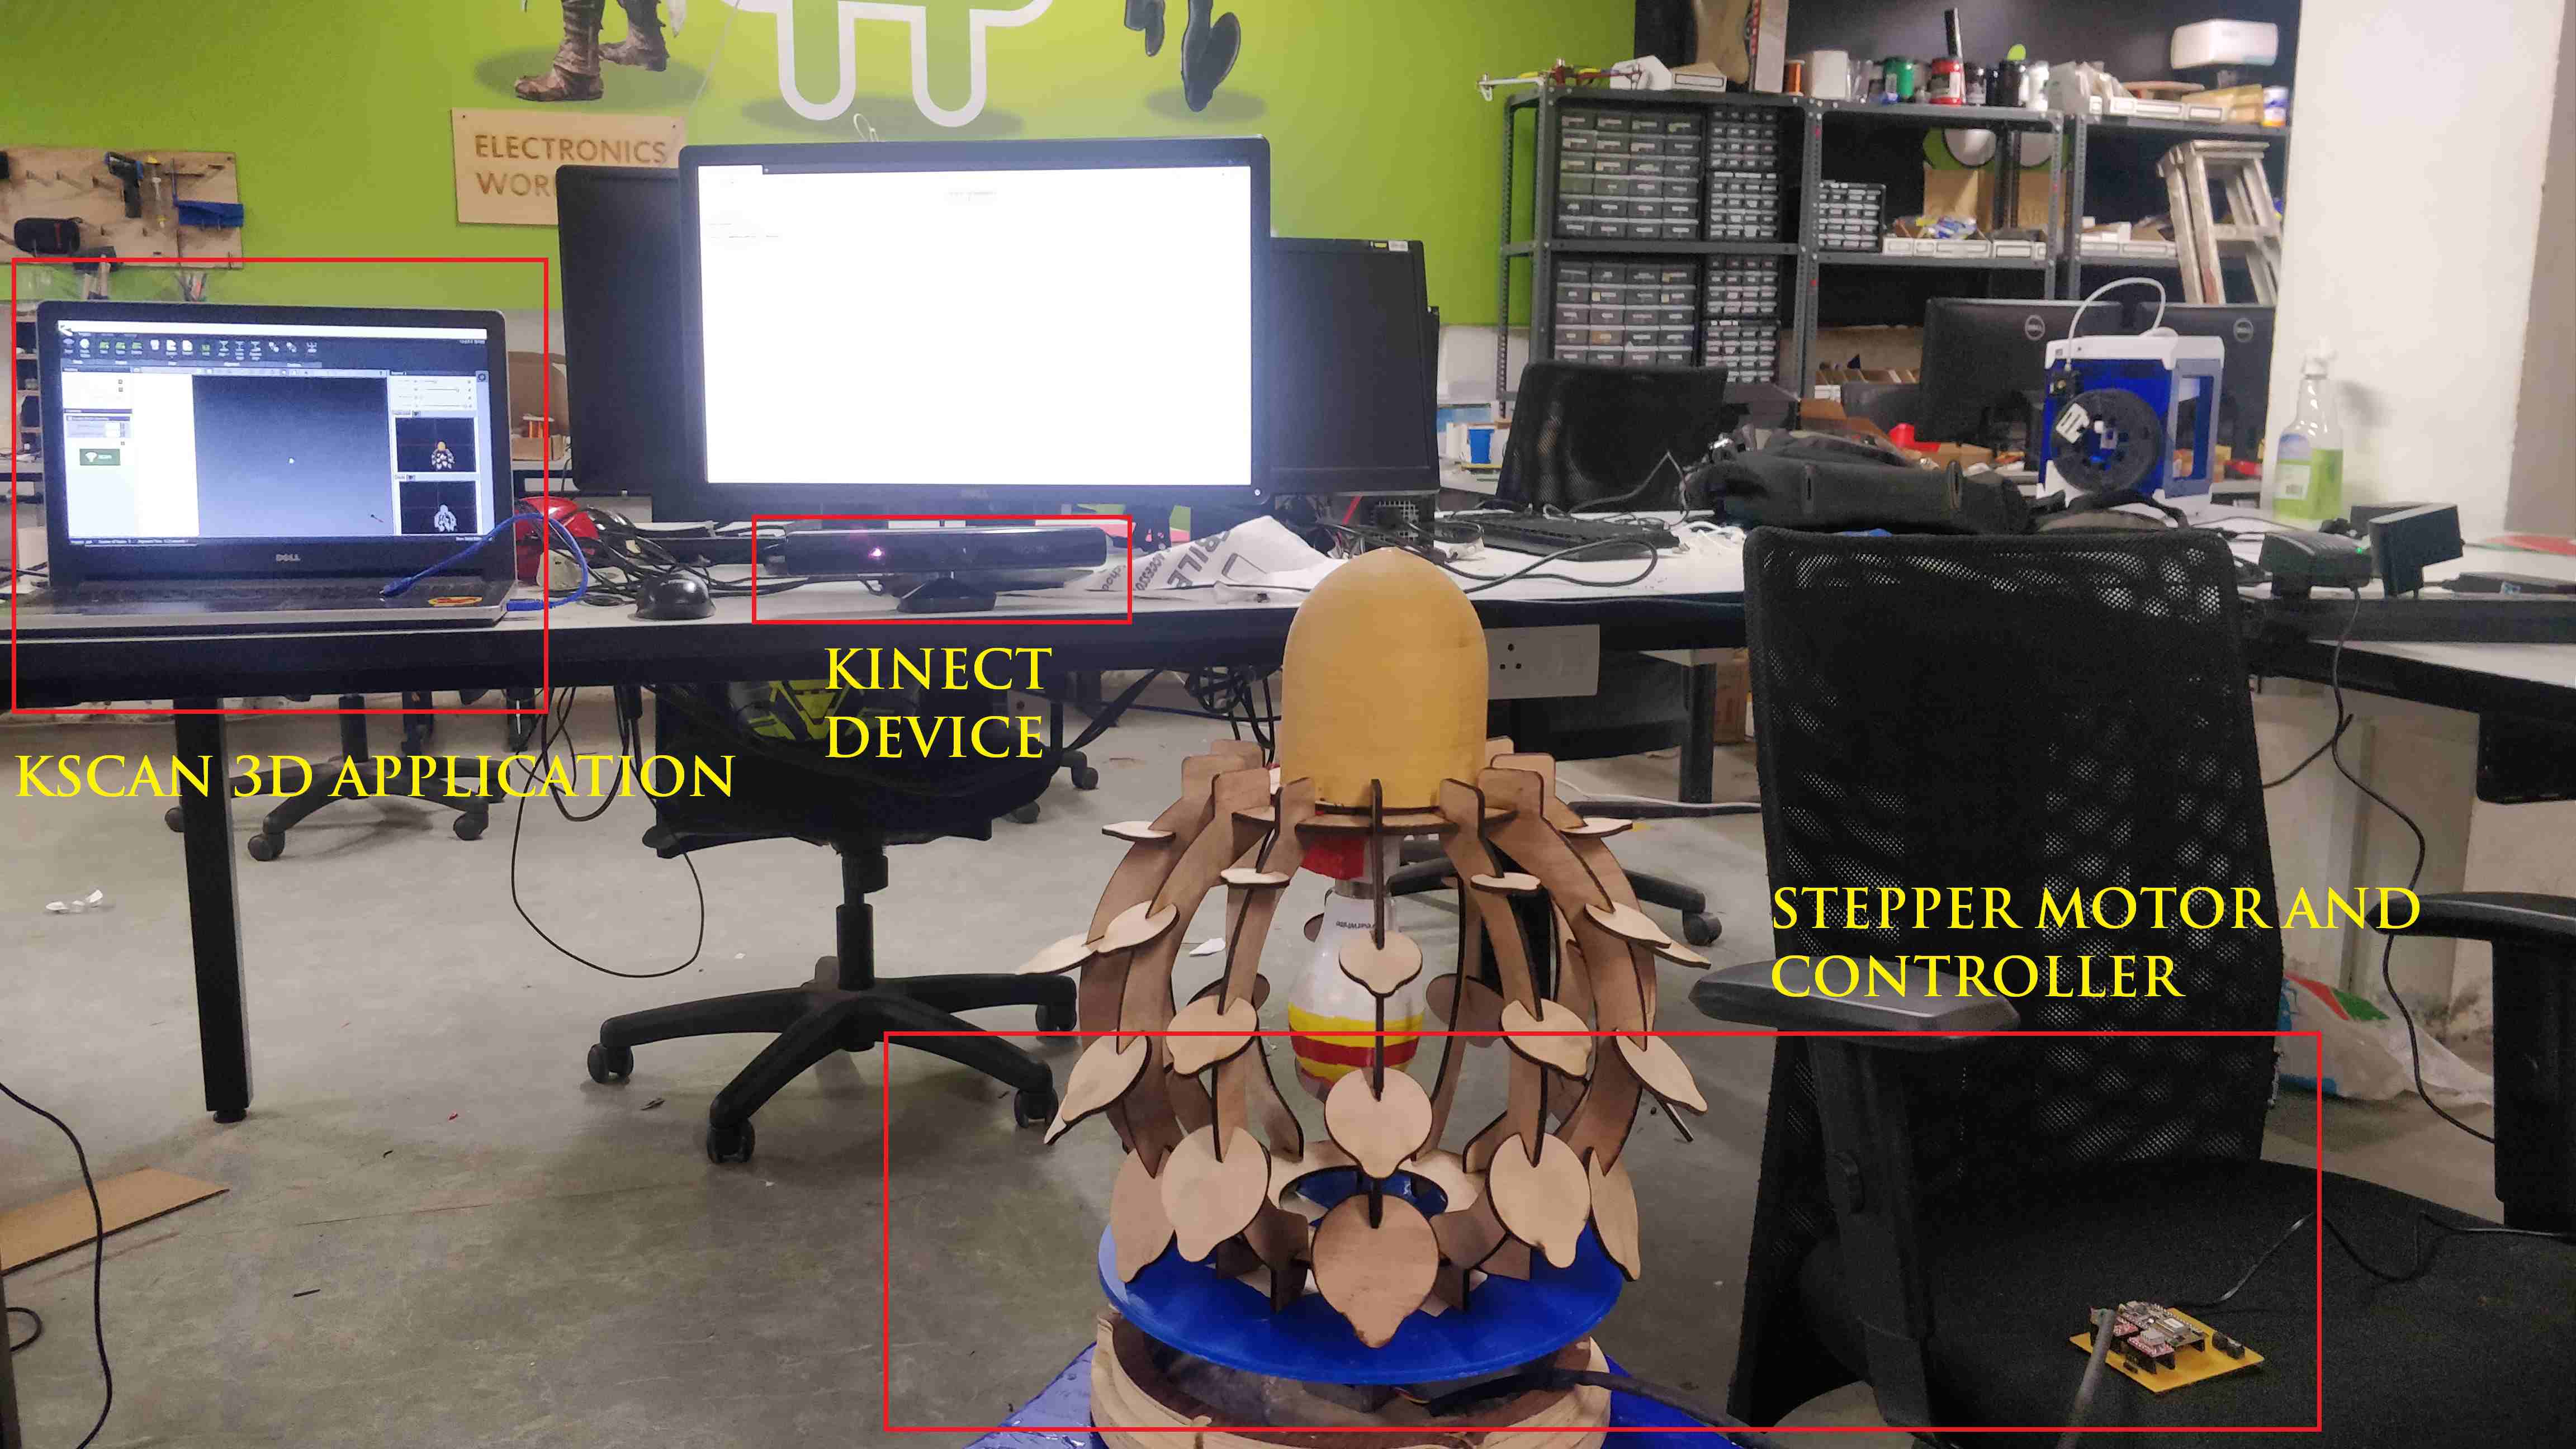
In Week 4, i had designed a parametric lamp and cut it using laser printer, i thought i would 3D scan the same for this assignment

.

symp

.

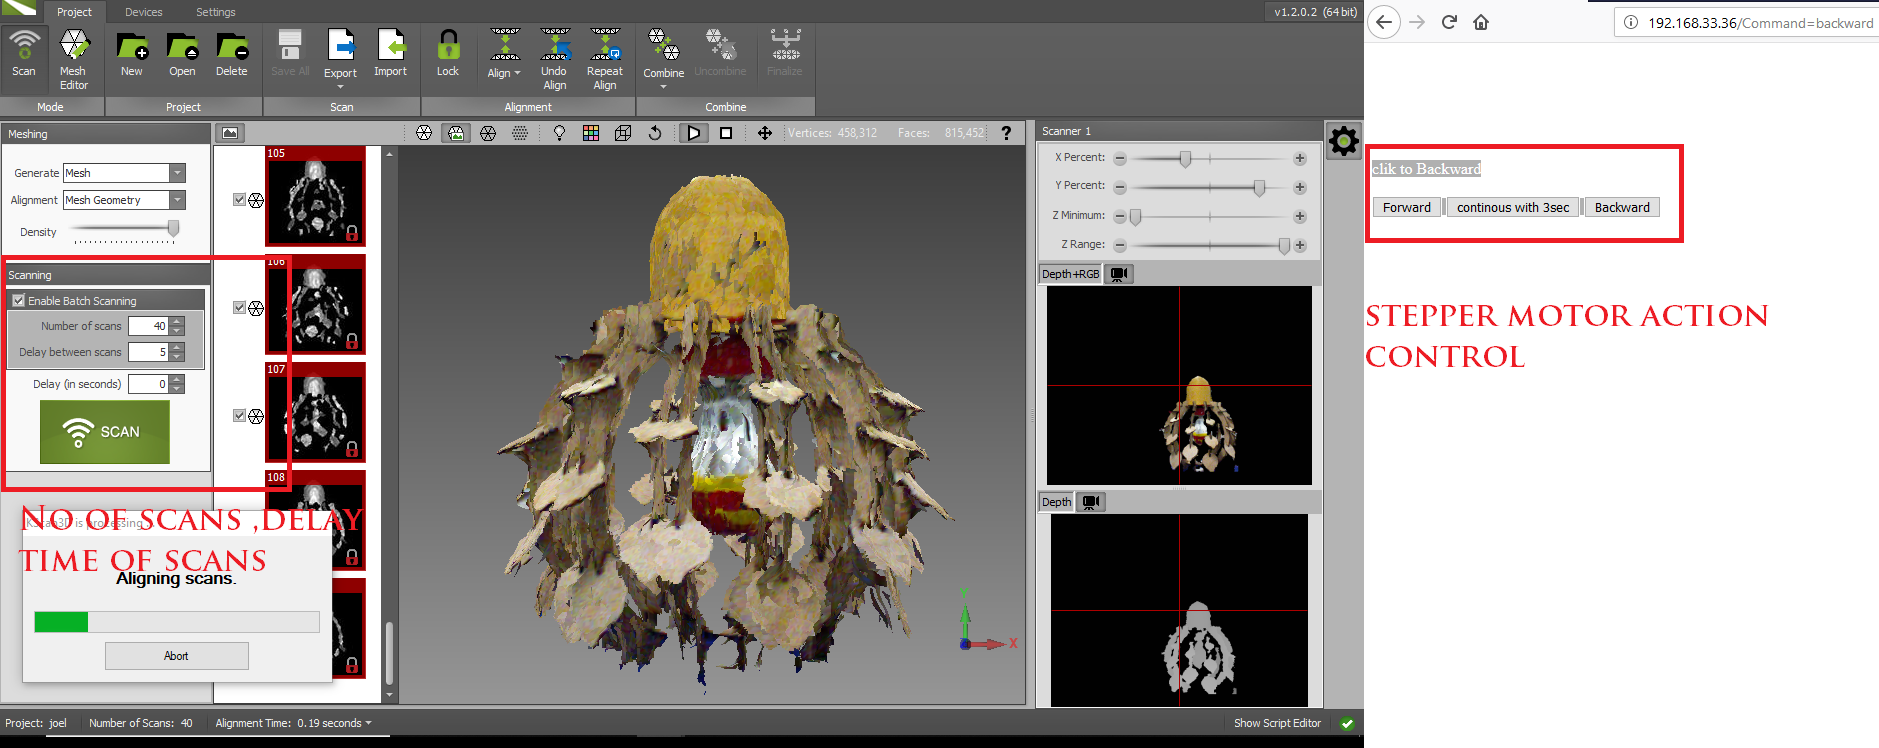
For the purpose, a kinect, KScan software, a 360 degree rotationg diaz ( made by akhil joseph) was setup.So using the software we could move th stepper motor arrangement at different angles for scanning the object

.

symp

.

.

symp

.

.

symp

.

The no of steps can be combined and an stl file can be exported.

.

3D Scan file download here

Group assignment - Testing design rules of the 3D printer

.

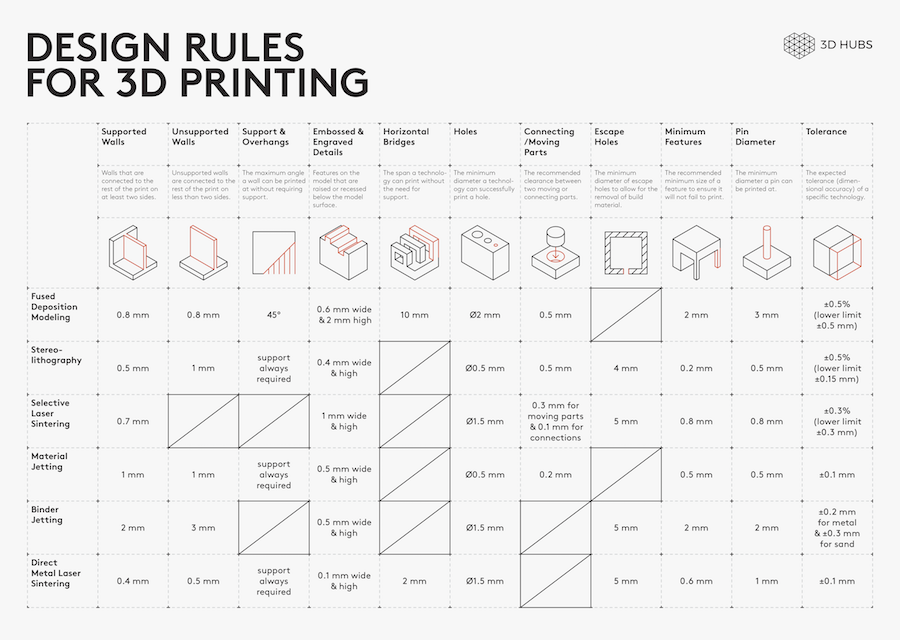
In this group assignemt we will take into account the design capabilities and restrictions.

Design rules for 3D printing
symp

.

A design file was taken from thinkverse

.

symp

.

The print settings files were obtained from the site as below:

Print settings

  • Rafts : Yes
  • Supports : No
  • Resolution :0.1mm or higher
  • Infill: 30%

.

symp

.

.

The 3d printed model

.

symp

.

Parameters that needs to be checked for printing:

  • 01 Nut, Size M4 Nut should fit perfectly
  • 02 Wave, rounded print
  • 03 Star, Sharp Edges
  • 04 Name, Complex Shapes
  • 05 Holes, Size 3, 4, 5 mm
  • 06 minimal Distance: 0.1, 0.2, 0.3, 0.4, 0.5, 0.6, 0.7 mm
  • 07 Z height: 0.1, 0.2, 0.3, 0.4, 0.5, 0.6, 0.7, 0.8, 0.9, 1.0, 1.1 mm
  • 08 Wall Thickness: 0.1, 0.2, 0.3, 0.4, 0.5, 0.6, 0.7 mm
  • 09 Bridge Print: 2, 4, 8, 16 mm
  • 10 Sphere, Rounded Print 4.8mm height
  • 11 Sphere Mix, 7 mm height
  • 12 Pyramide, 7 mm height
  • 13 Overhang: 25, 30, 35, 40, 45, 50, 55, 60, 65, 70°
  • 14 Warp, does it bend?
  • 15 3D Print Font, optimized for 3D printing
  • 16 Surface, Flatness
  • 17 Size, 100 x 100mm x 23.83 (10mm width)
  • 18 Spike, minimum Layer Time, 21 mm height from Bottom (include Baseplate)
  • 19 Hole in Wall, 4 mm diameter, check for proper print
  • 20 Raft Test, raft should be just under the model
  • 21 Retract Travel, check retract settings for longer travel

Week 2

Week 3

Week 4

05

Week 5