Week 9: Embeded Programming
Group Assignment
Individual Assignment
Group Assignment
The few common microcontrollers we found on internet are given below.
1. AVR
2. PIC
3. 8051
4. ARM
They are differentiated on the basis of their operation at the lower level. While 8051, AVR and PIC come in 8-bit, 16-bit and 32-bit, the ARMs generally come in 32-bit and even 64-bit. The 8051, AVR and PIC work closer with the I/O peripherals and can be lower power and faster as a result.
1. AVR
AVR is a family of microcontrollers developed by Atmel that use the RISC processors. AVR are most commonly used in the Arduino line of open source board designs. These are available in 8-bit tinyAVR, megaAVR and XMEGA. AVR32 is the 32-bit offering, which was intended to compete with ARM processors. These are not compatible with the original ARM and include additional SIMD and DSP instructions as well as audio and video processing features. One of the nice features of most AVR models is that they can reserve a bootloader region to store re-programming code. The code can then re-program through any interface available.
2. PIC
PIC stands for Peripheral Interface Controller. It is a family of microcontrollers developed by Microchip with a wide variety of options available. They are not strictly RISC processors as they differ very slightly in their operation. The product range includes the 8-bit PIC10, PIC12, PIC 16 and PIC18, the 16-bit PIC24 and dsPIC and the 32-bit PIC32MX, PIC32MZ, PIC32MM and PIC32MK. The 8-bit range focuses on lower cost, the dsPIC focuses on digital signal processing. The PIC32 series of microcontrollers uses the MIPS32-M4K core technology, which is a 32-bit RISC architecture. MIPS is a direct competitor to the ARM processors covering all types of applications in home entertainment, embedded and networking products, mobile, wearable and IoT devices.
3. 8051
The Intel MCS-51 (also known as 8051) is a CISC architecture. These are available in 8-bit, 16-bit and 32-bit microcontrollers. 8051 silicon IP cores are typically smaller size, lower power compared to ARM Cortex-M and MIPS processors. They are used in everything from USB flash drives to washing machines and complex wireless communications systems-on-chip
Individual Assignment
At first instance I did my individual assignment which was to read the data sheet of microcontrollers like attiny 44,45 and atmega328 of avr faimly. Reading datasheet is a fun task so I just googled the datasheet of avr attiny 44, 45 and atmega328 where I compared mentioned microcontrollers in terms of their speed, operating voltage , timers etc. The comparative chart of Atmel microcontrollers is given below. From this chart we can deduce that attiny 44, 45 have bit difference in their memory , operating voltage range and power consumption however the atmega 328 has memory advantage which is double.
| Features | Attiny 44 | Attiny 45 | Atmega 328 |
|---|---|---|---|
| Operating voltage range | 1.8v-5.5v | 2.7v-5.5v | 1.8v-5.5v |
| Speed of operation (range) at specified operating voltage | 0-20 MHz | 0-10 MHz | 0-4 MHz |
| Power Consumption (Active Mode) | 210 uA | 300 uA | 0.3 mA |
| Memory (EEPROM and SRAM) | 256 Bytes | 512 Bytes | 1k Bytes and 2k Bytes |
| Timers | 8 bit and 16 bit | 8 bit | Two 8 bit and one 16 bit |
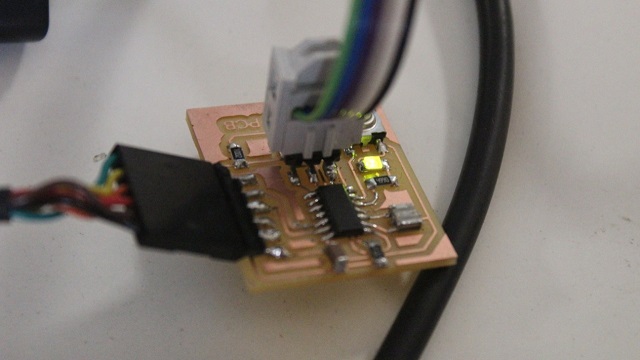
Since I have used the attiny 44 in this assignment so I went through it's pin configuration of Attiny44 which is shown below. I read the pin configuraion of attiny 44 from it's data sheet which is also described below. Generally It has four types of pins for example VCC, GND, PA and PB
1. Port A (PA0 to PA7)
Port A is a 8-bit bi-directional I/O port with internal pull-up resistors (selected for each bit). The Port A output buffers have symmetrical drive characteristics with both high sink and source capability. As inputs, Port A pins that are externally pulled low will source current if the pull-up resistors are activated. The Port A pins are tri-stated when a reset condition becomes active, even if the clock is not running.
2. Port B (PB0 to PB3)
Port B is a 4-bit bi-directional I/O port with internal pull-up resistors (selected for each bit). The Port B output buffers have symmetrical drive characteristics with both high sink and source capability except PB3 which has the RESET capability. To use pin PB3 as an I/O pin, instead of RESET pin, program (‘0’) RSTDISBL fuse. As inputs, Port B pins that are externally pulled low will source current if the pull-up resistors are activated. The Port B pins are tri-stated when a reset condition becomes active, even if the clock is not running.
3. VCC
Supply voltage
4. GND
Ground

The second task was to program the board to do something with as many programming languages and environment so I tried many but succeded in two. Initially I used arduino ide because it provides integrated ide which can directly burn the code to avr microcontroller. Later I tried the atmel studio version 7 which took my almost day. I also tried flowcode 6 which was block programming.
1. Programming the board using Arduino IDE
There are few steps to program the designed board using arduino.
1. Open the preferences from the file tab.
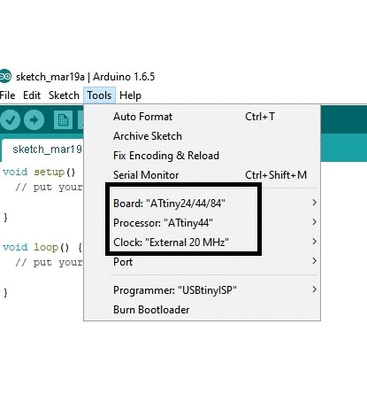
2. Add adiitional board URL , "https://raw.githubusercontent.com/damellis/attiny/ide-1.6.x-boards-manager/package_damellis_attiny_index.json".
3.Go to Tools > Board Manager, in order to install the arduino library for ATtiny44 microcontroller.
4. Search for ATtiny44 and install it.
5. It's time to connect the board to the FTDI cable and PC, Now check the port by clicking on Tools > Port > in my case COM4.
All of the followed steps are shown below in GIF
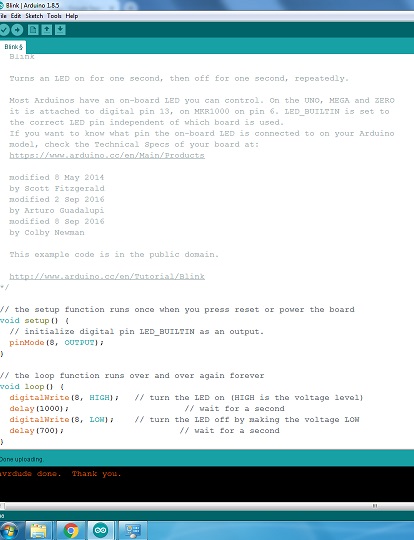
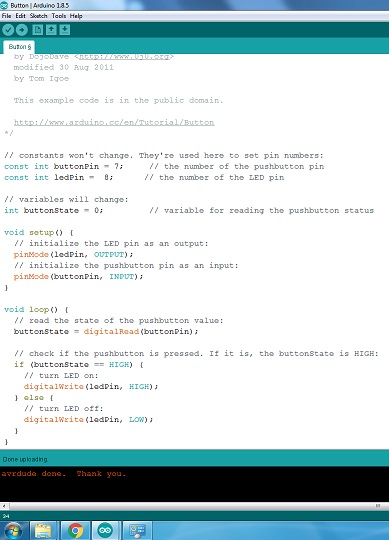
I tried three programs blink, button and fad led program. All of the programms worked properly. The three programs and their output is shown below.

2. Programming with Atmel Studio 7.
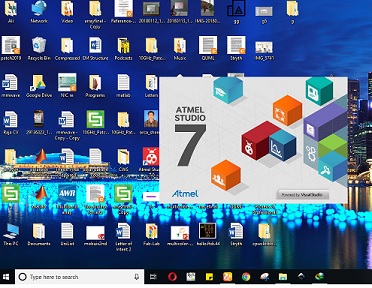
In this method we should need hex file so initially I installed the atmel studio 7 shown below.
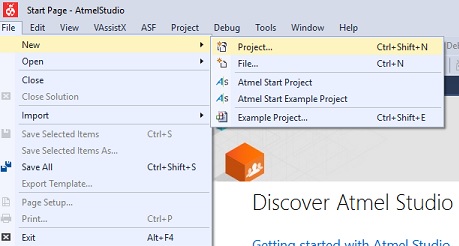
Step 01:File=>New=>Project
Step 02:Select C/C++ GCC executable project.
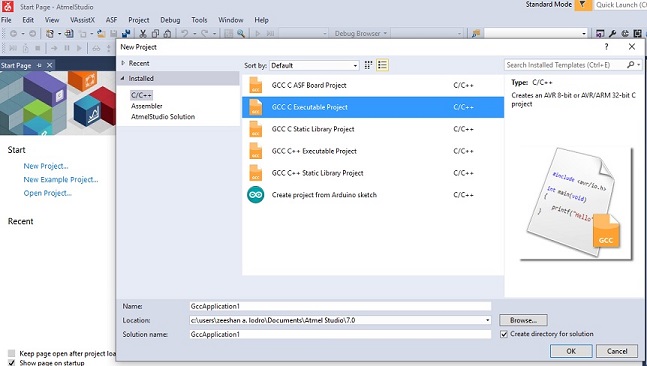
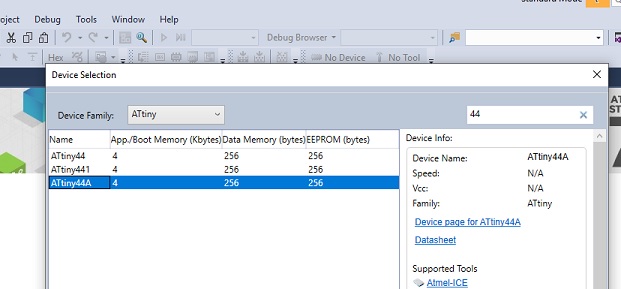
Step 03:Device selection attiny 44A.
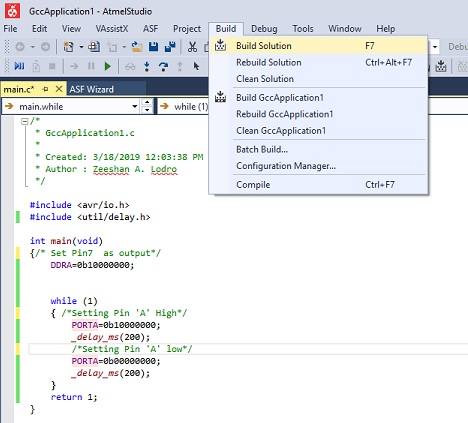
Step 04:Write C program and compile as given below.
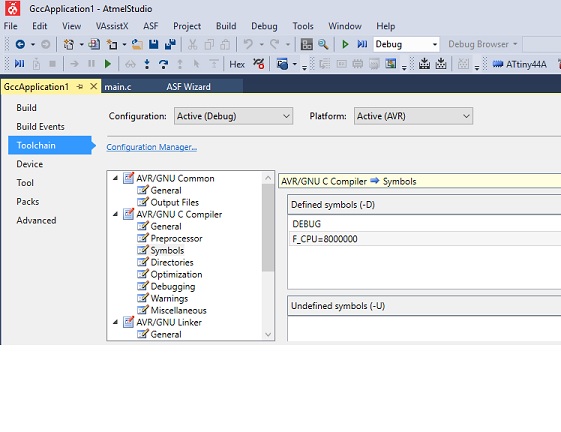
Step 05:I got one warning as shown below. In order to make it correct I did few thnigs like I defined the clock speed in project=>properties=>toolchain=>Symbols=>F_CPU= 8000000. It can be seen below. we can also define this in program as well.

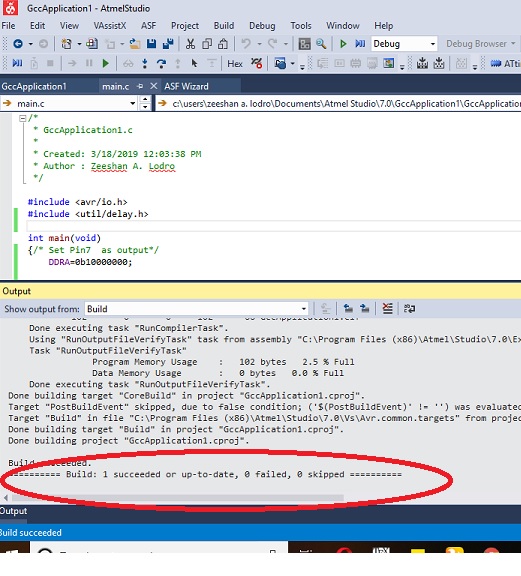
Step 05:Success message will be shown right below if you have followed every step.
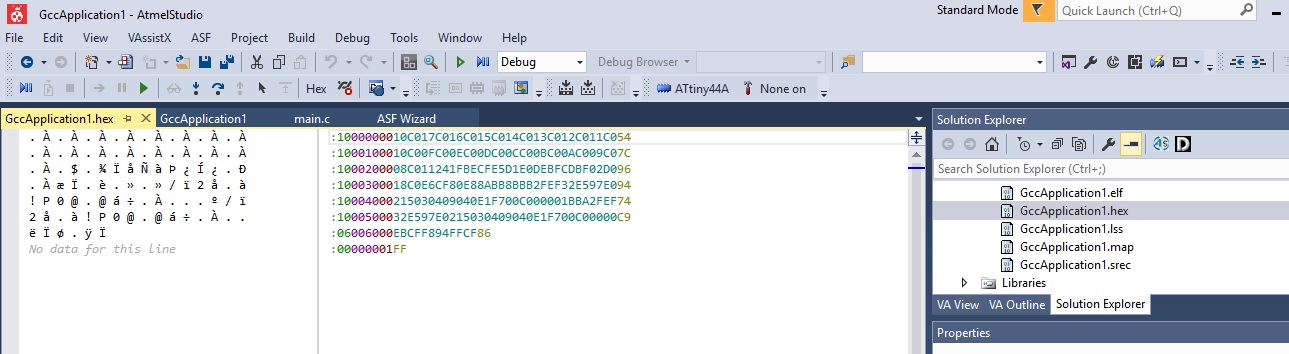
Step 07:The hex file can be obtained from solution explorer as given below.
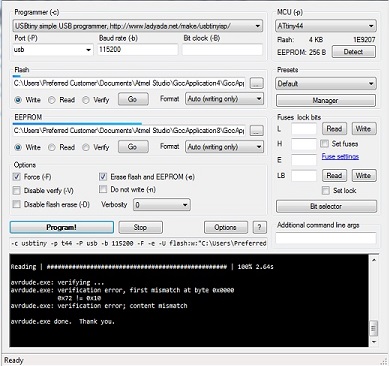
Step 08: Download Avrdude and do following steps.
1. Install the avr dude.
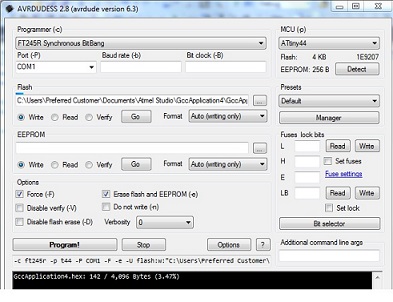
2. Open generated hex file of written code.
3. Set few things like programmer, Port , Baud rate, MCU and hit detect.
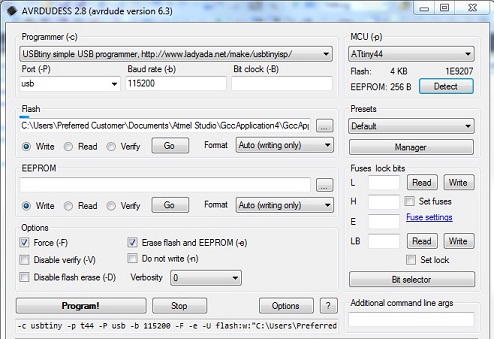
A success message will be shown as below.
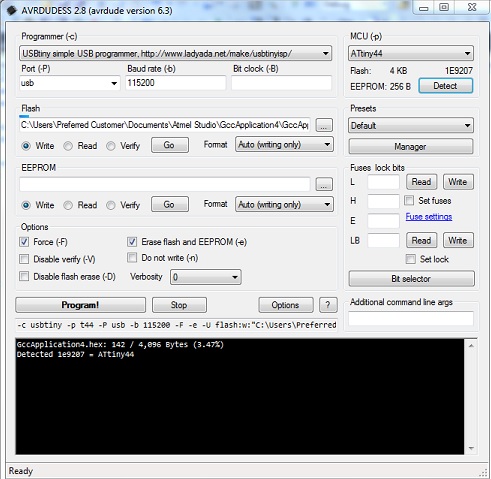
Now just press program and look at message that program is done.