In order of my final project which is a elecric gokart I wanted to use an rfid scanner to authenticate myself, so I could use it for my final project afterwards. I've made a board design using the atmega328p chipset, to attach my rfid scanner to.
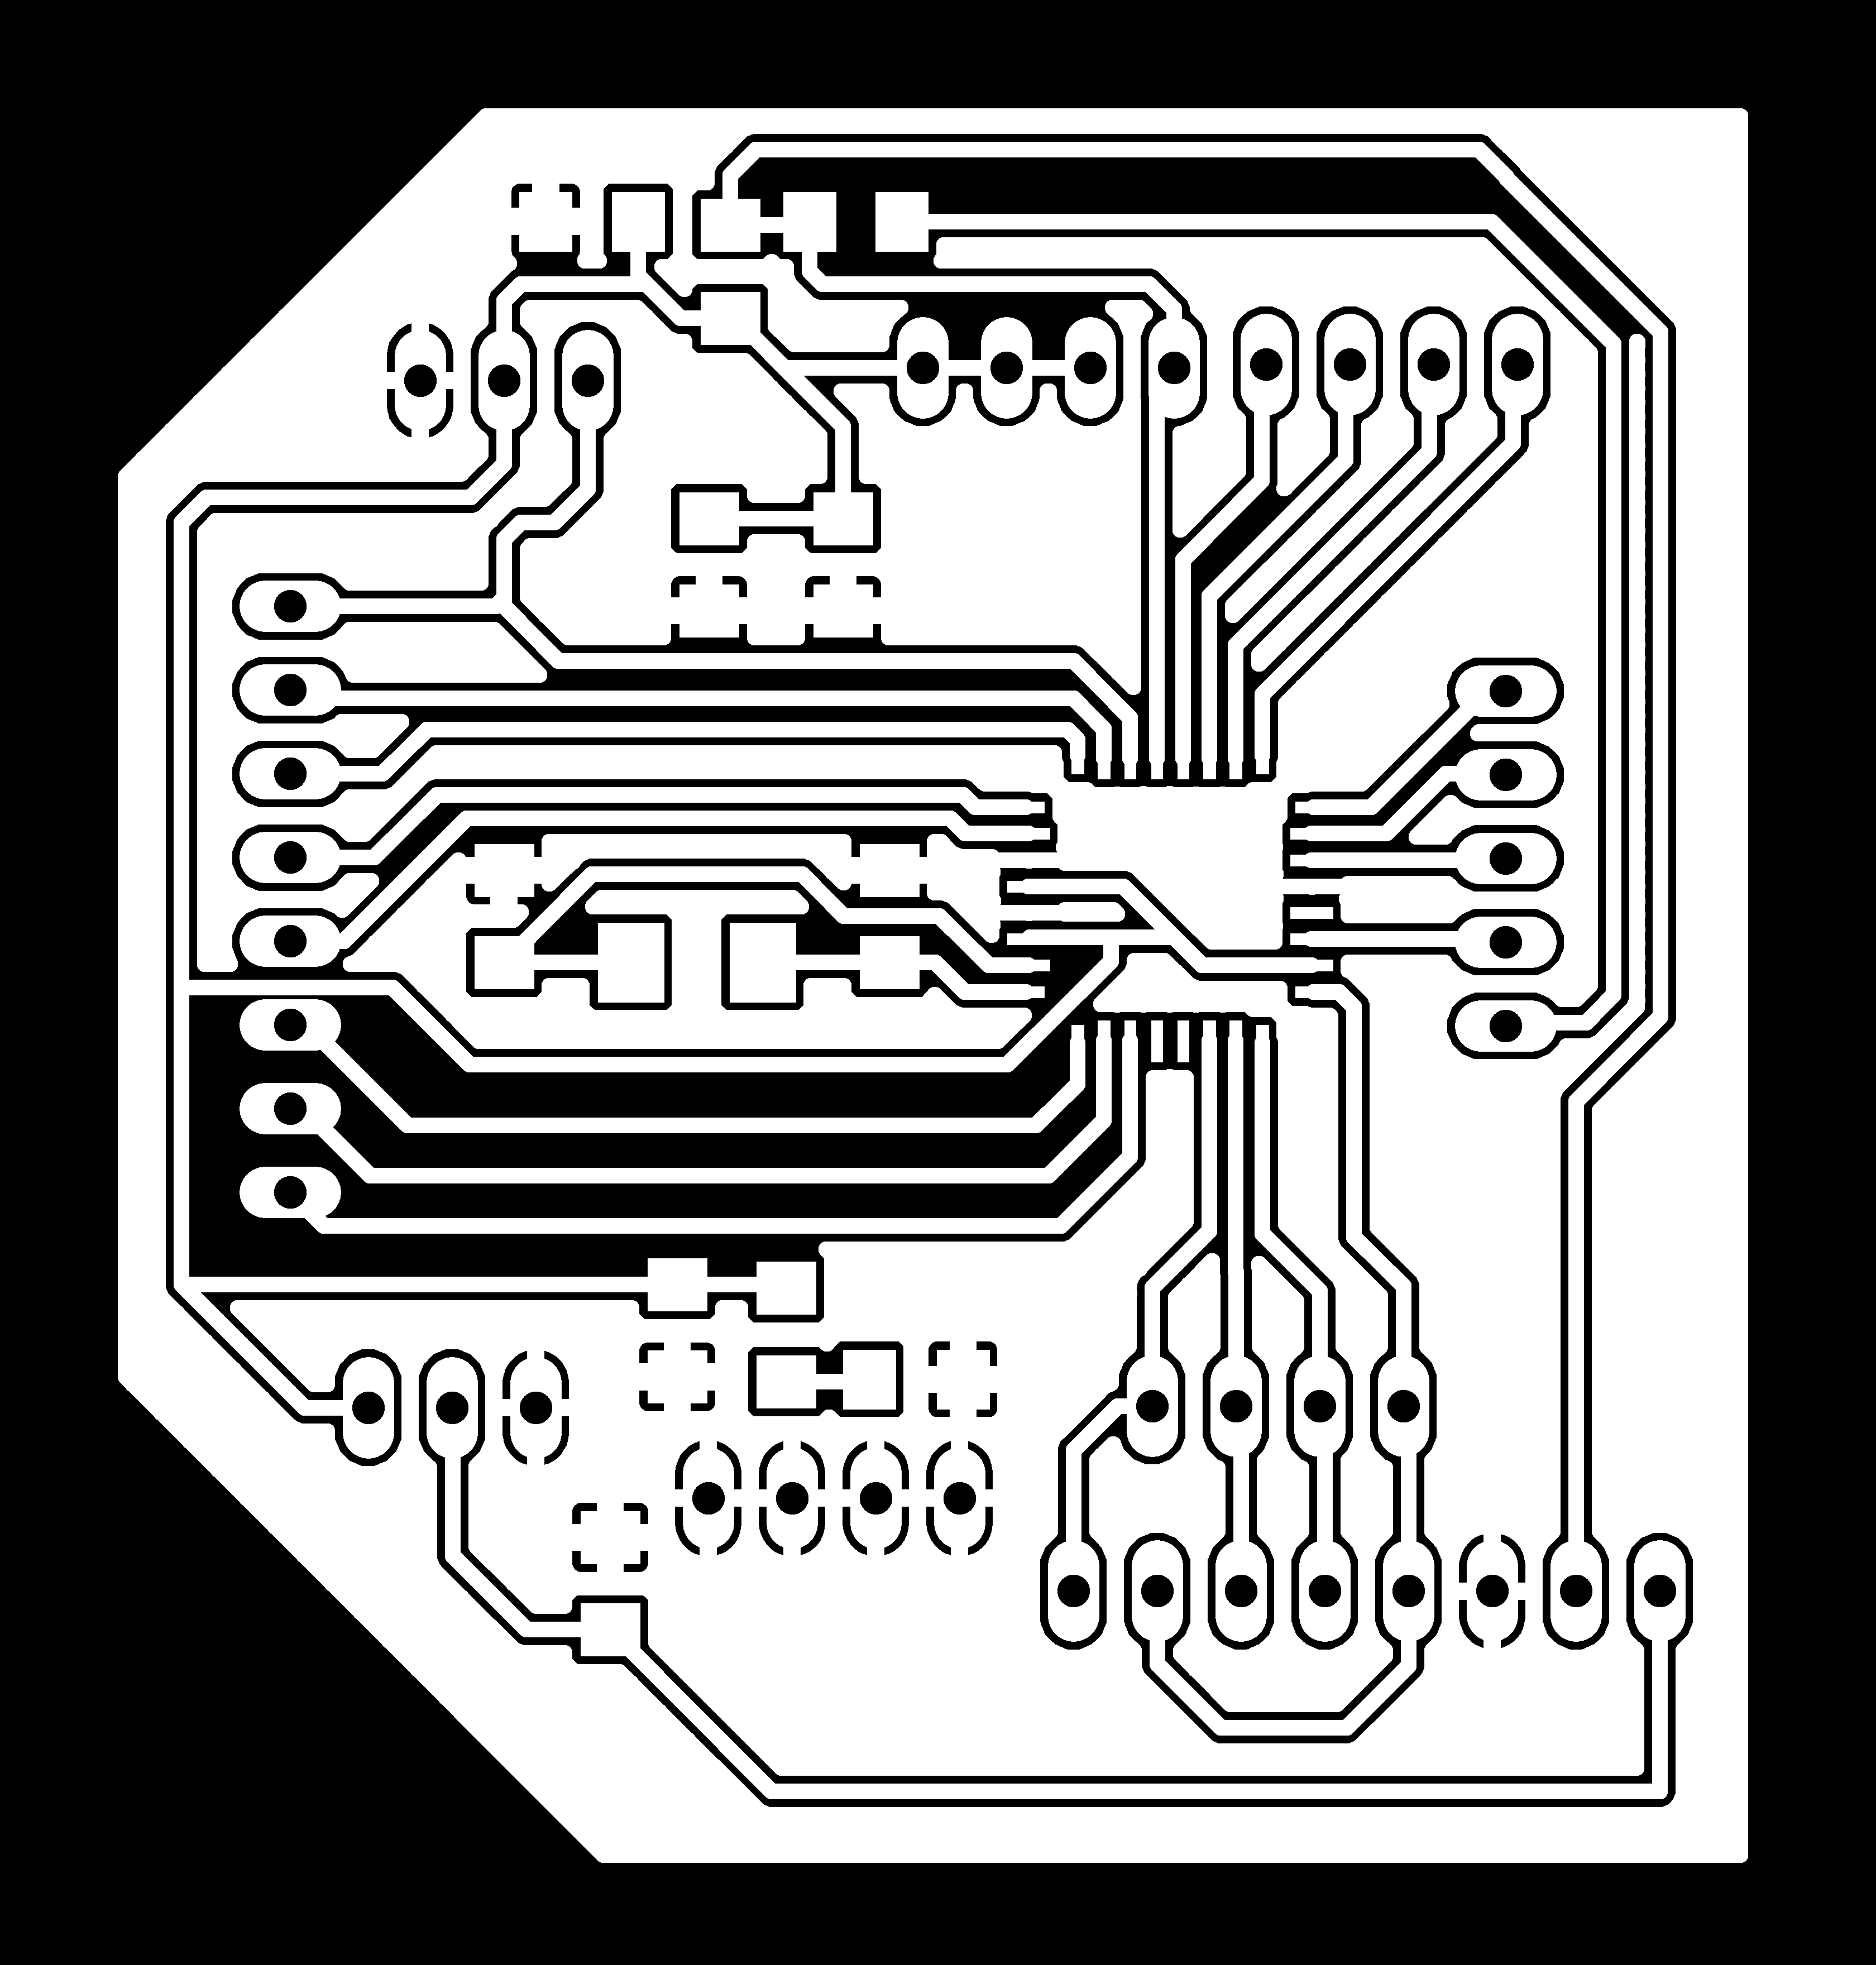
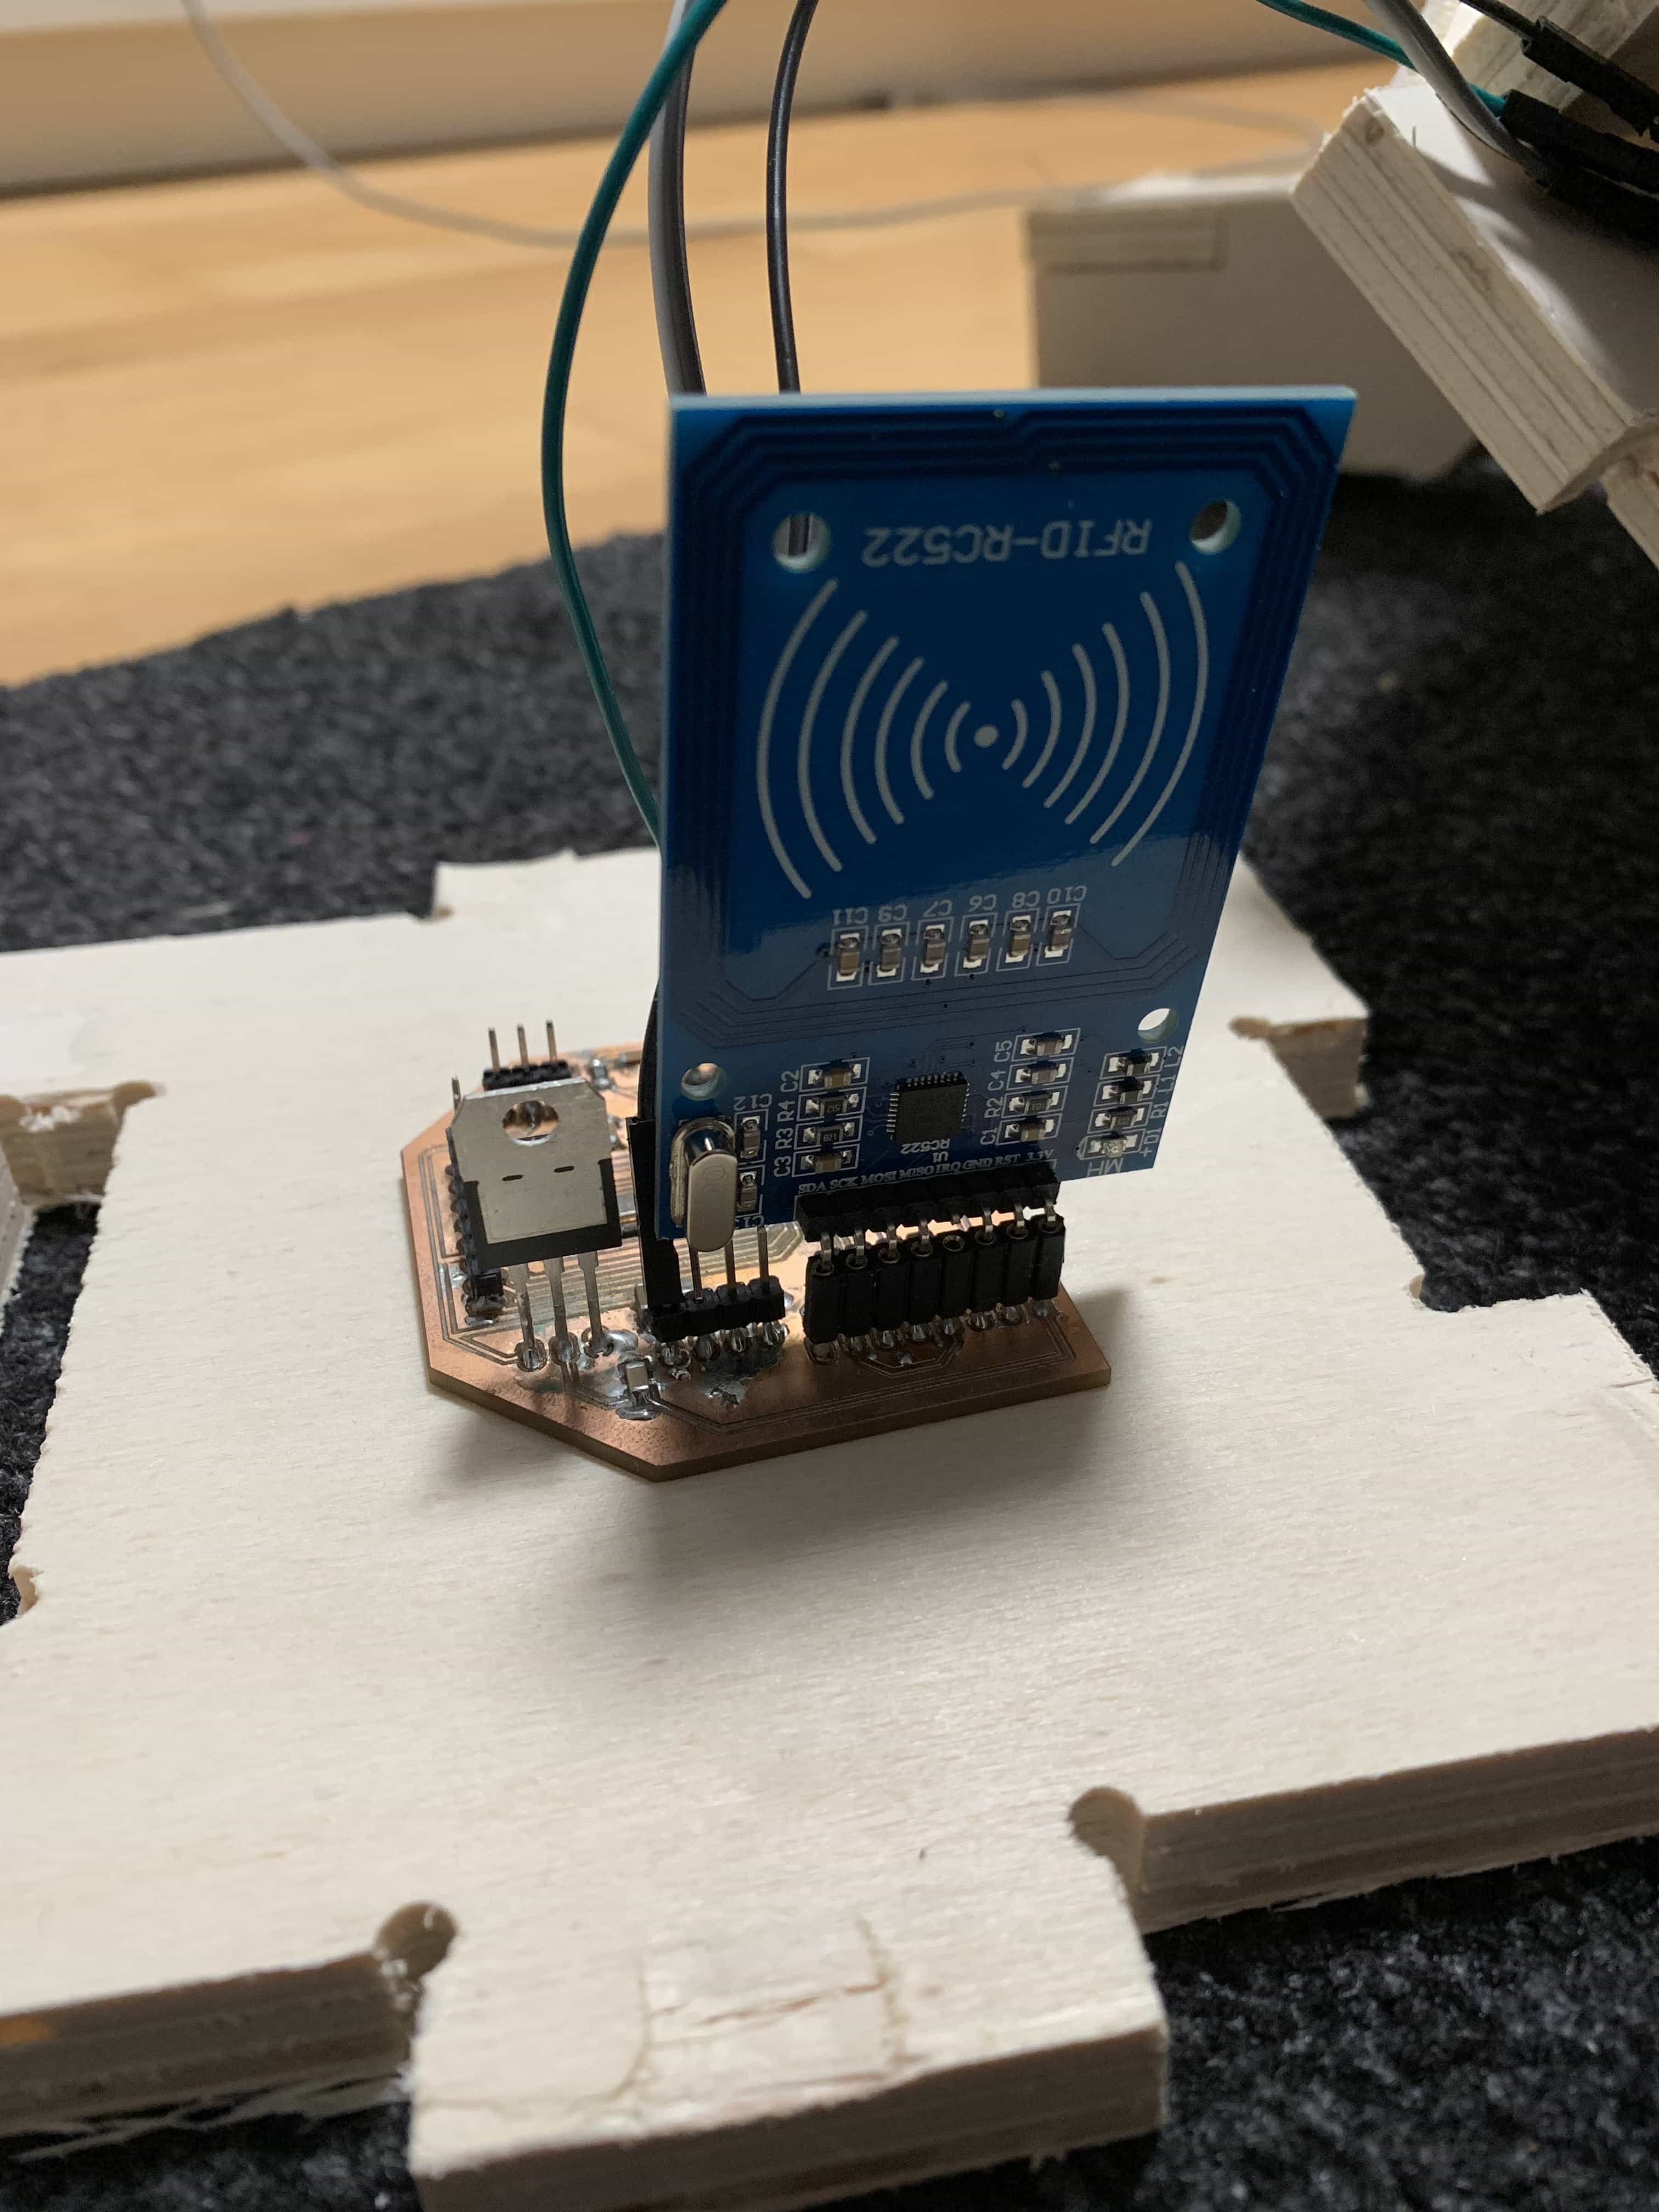
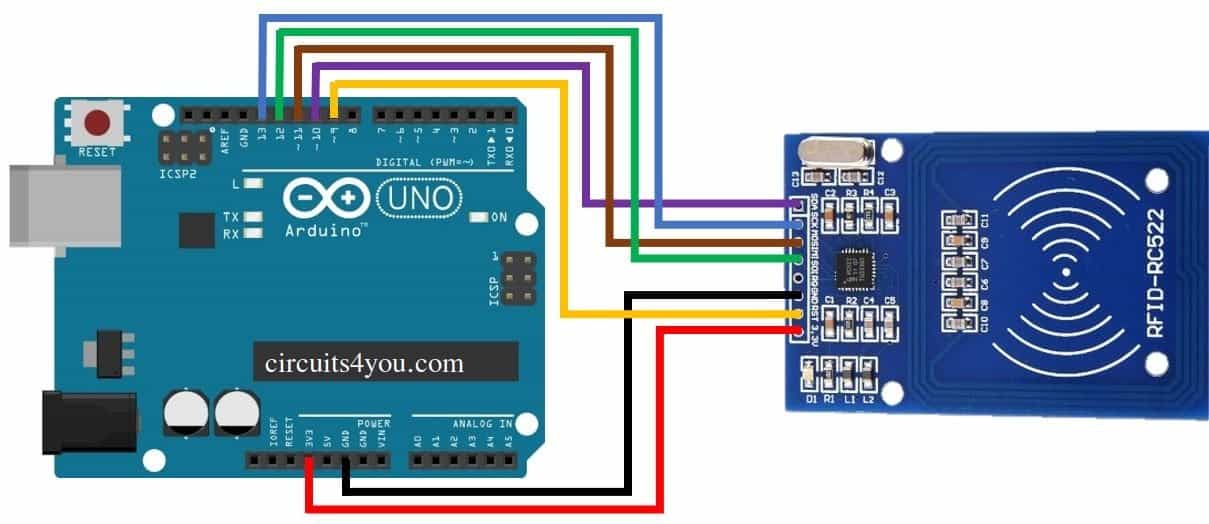
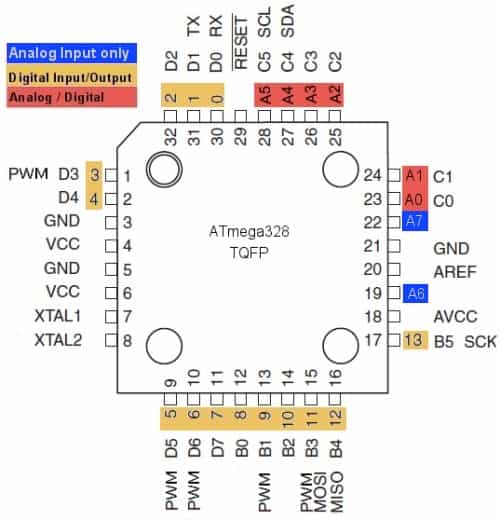
My code is a simple authentication using the id of rfid chips and storing them into arrays, to authenticate I compare the scanned tag with the id of the master key.
		#include >SPI.h≷
#include >MFRC522.h≷

constexpr uint8_t RST_PIN = 9;     // Configurable, see typical pin layout above
constexpr uint8_t SS_PIN = 10;     // Configurable, see typical pin layout above

MFRC522 rfid(SS_PIN, RST_PIN); // Instance of the class

MFRC522::MIFARE_Key key;

// Init array that will store new NUID
byte nuidPICC[4];


void setup() {
  Serial.begin(115200);
  SPI.begin(); // Init SPI bus
  rfid.PCD_Init(); // Init MFRC522

  for (byte i = 0; i < 6; i++) {
    key.keyByte[i] = 0xFF;
  }


}

void loop() {

  // Look for new cards
  if ( ! rfid.PICC_IsNewCardPresent())
    return;

  // Verify if the NUID has been readed
  if ( ! rfid.PICC_ReadCardSerial())
    return;

 // Serial.print(F("PICC type: "));
  MFRC522::PICC_Type piccType = rfid.PICC_GetType(rfid.uid.sak);
  //Serial.println(rfid.PICC_GetTypeName(piccType));

  // Check is the PICC of Classic MIFARE type
  if (piccType != MFRC522::PICC_TYPE_MIFARE_MINI &&
    piccType != MFRC522::PICC_TYPE_MIFARE_1K &&
    piccType != MFRC522::PICC_TYPE_MIFARE_4K) {
    //Serial.println(F("Your tag is not of type MIFARE Classic."));
    return;
  }
  //Check if the scanned tag has the same NUID by comparing the array with the actual numbers
  if (rfid.uid.uidByte[0] == 201 &&
    rfid.uid.uidByte[1] == 211 &&
    rfid.uid.uidByte[2] == 124 &&
    rfid.uid.uidByte[3] == 91 ) {
 //print hello message
    Serial.println(F("Hello Master!"));

    // Store NUID into nuidPICC array
    for (byte i = 0; i < 4; i++) {
      nuidPICC[i] = rfid.uid.uidByte[i];
    }


  }


//Check if the scanned tag has the same NUID by comparing the array with the actual numbers
 else if (rfid.uid.uidByte[0] == 36 &&
    rfid.uid.uidByte[1] == 159 &&
    rfid.uid.uidByte[2] == 223 &&
    rfid.uid.uidByte[3] == 43 ) {

//Print hello message
    Serial.println(F("Hello Mr.Rustamov!"));

    // Store NUID into nuidPICC array
    for (byte i = 0; i < 4; i++) {
      nuidPICC[i] = rfid.uid.uidByte[i];
    }


  }
//Check if scanned tag has a difference to the master tags
  else if (rfid.uid.uidByte[0] != 201 ||
    rfid.uid.uidByte[0] != 36 ||
    rfid.uid.uidByte[1] != 211 ||
    rfid.uid.uidByte[1] != 159 ||
    rfid.uid.uidByte[2] != 124 ||
    rfid.uid.uidByte[2] != 223 ||
    rfid.uid.uidByte[3] != 91 ||
    rfid.uid.uidByte[3] != 43
                                  ) {


    // Store NUID into nuidPICC array
    for (byte i = 0; i < 4; i++) {
      nuidPICC[i] = rfid.uid.uidByte[i];
    }


    //Giving an error message because the tag is not a master tag
    Serial.println(F("Invalid Card!"));
    }
  //Scanning a new tag
  if (rfid.uid.uidByte[0] != nuidPICC[0] ||
    rfid.uid.uidByte[1] != nuidPICC[1] ||
    rfid.uid.uidByte[2] != nuidPICC[2] ||
    rfid.uid.uidByte[3] != nuidPICC[3] ) {


    // Store NUID into nuidPICC array
    for (byte i = 0; i < 4; i++) {
      nuidPICC[i] = rfid.uid.uidByte[i];
    }
    }
  // Halt PICC
  rfid.PICC_HaltA();

  // Stop encryption on PCD
  rfid.PCD_StopCrypto1();
}


/**
 * Helper routine to dump a byte array as hex values to Serial.
 */
void printHex(byte *buffer, byte bufferSize) {
  for (byte i = 0; i < bufferSize; i++) {
    Serial.print(buffer[i] < 0x10 ? " 0" : " ");
    Serial.print(buffer[i], HEX);
  }
}

/**
 * Helper routine to dump a byte array as dec values to Serial.
 */
void printDec(byte *buffer, byte bufferSize) {
  for (byte i = 0; i < bufferSize; i++) {
    Serial.print(buffer[i] < 0x10 ? " 0" : " ");
    Serial.print(buffer[i], DEC);
  }
}
My code is based on the tutorial of Circuits4You.
For visualizing purposes I will show you my phyton interface which I made for the Interface and application programming week.
In addition to that I have designed another board based on the atmega 328p chipset. I wanted to build a electric longboard which I will accelerate using a pressure sensor.
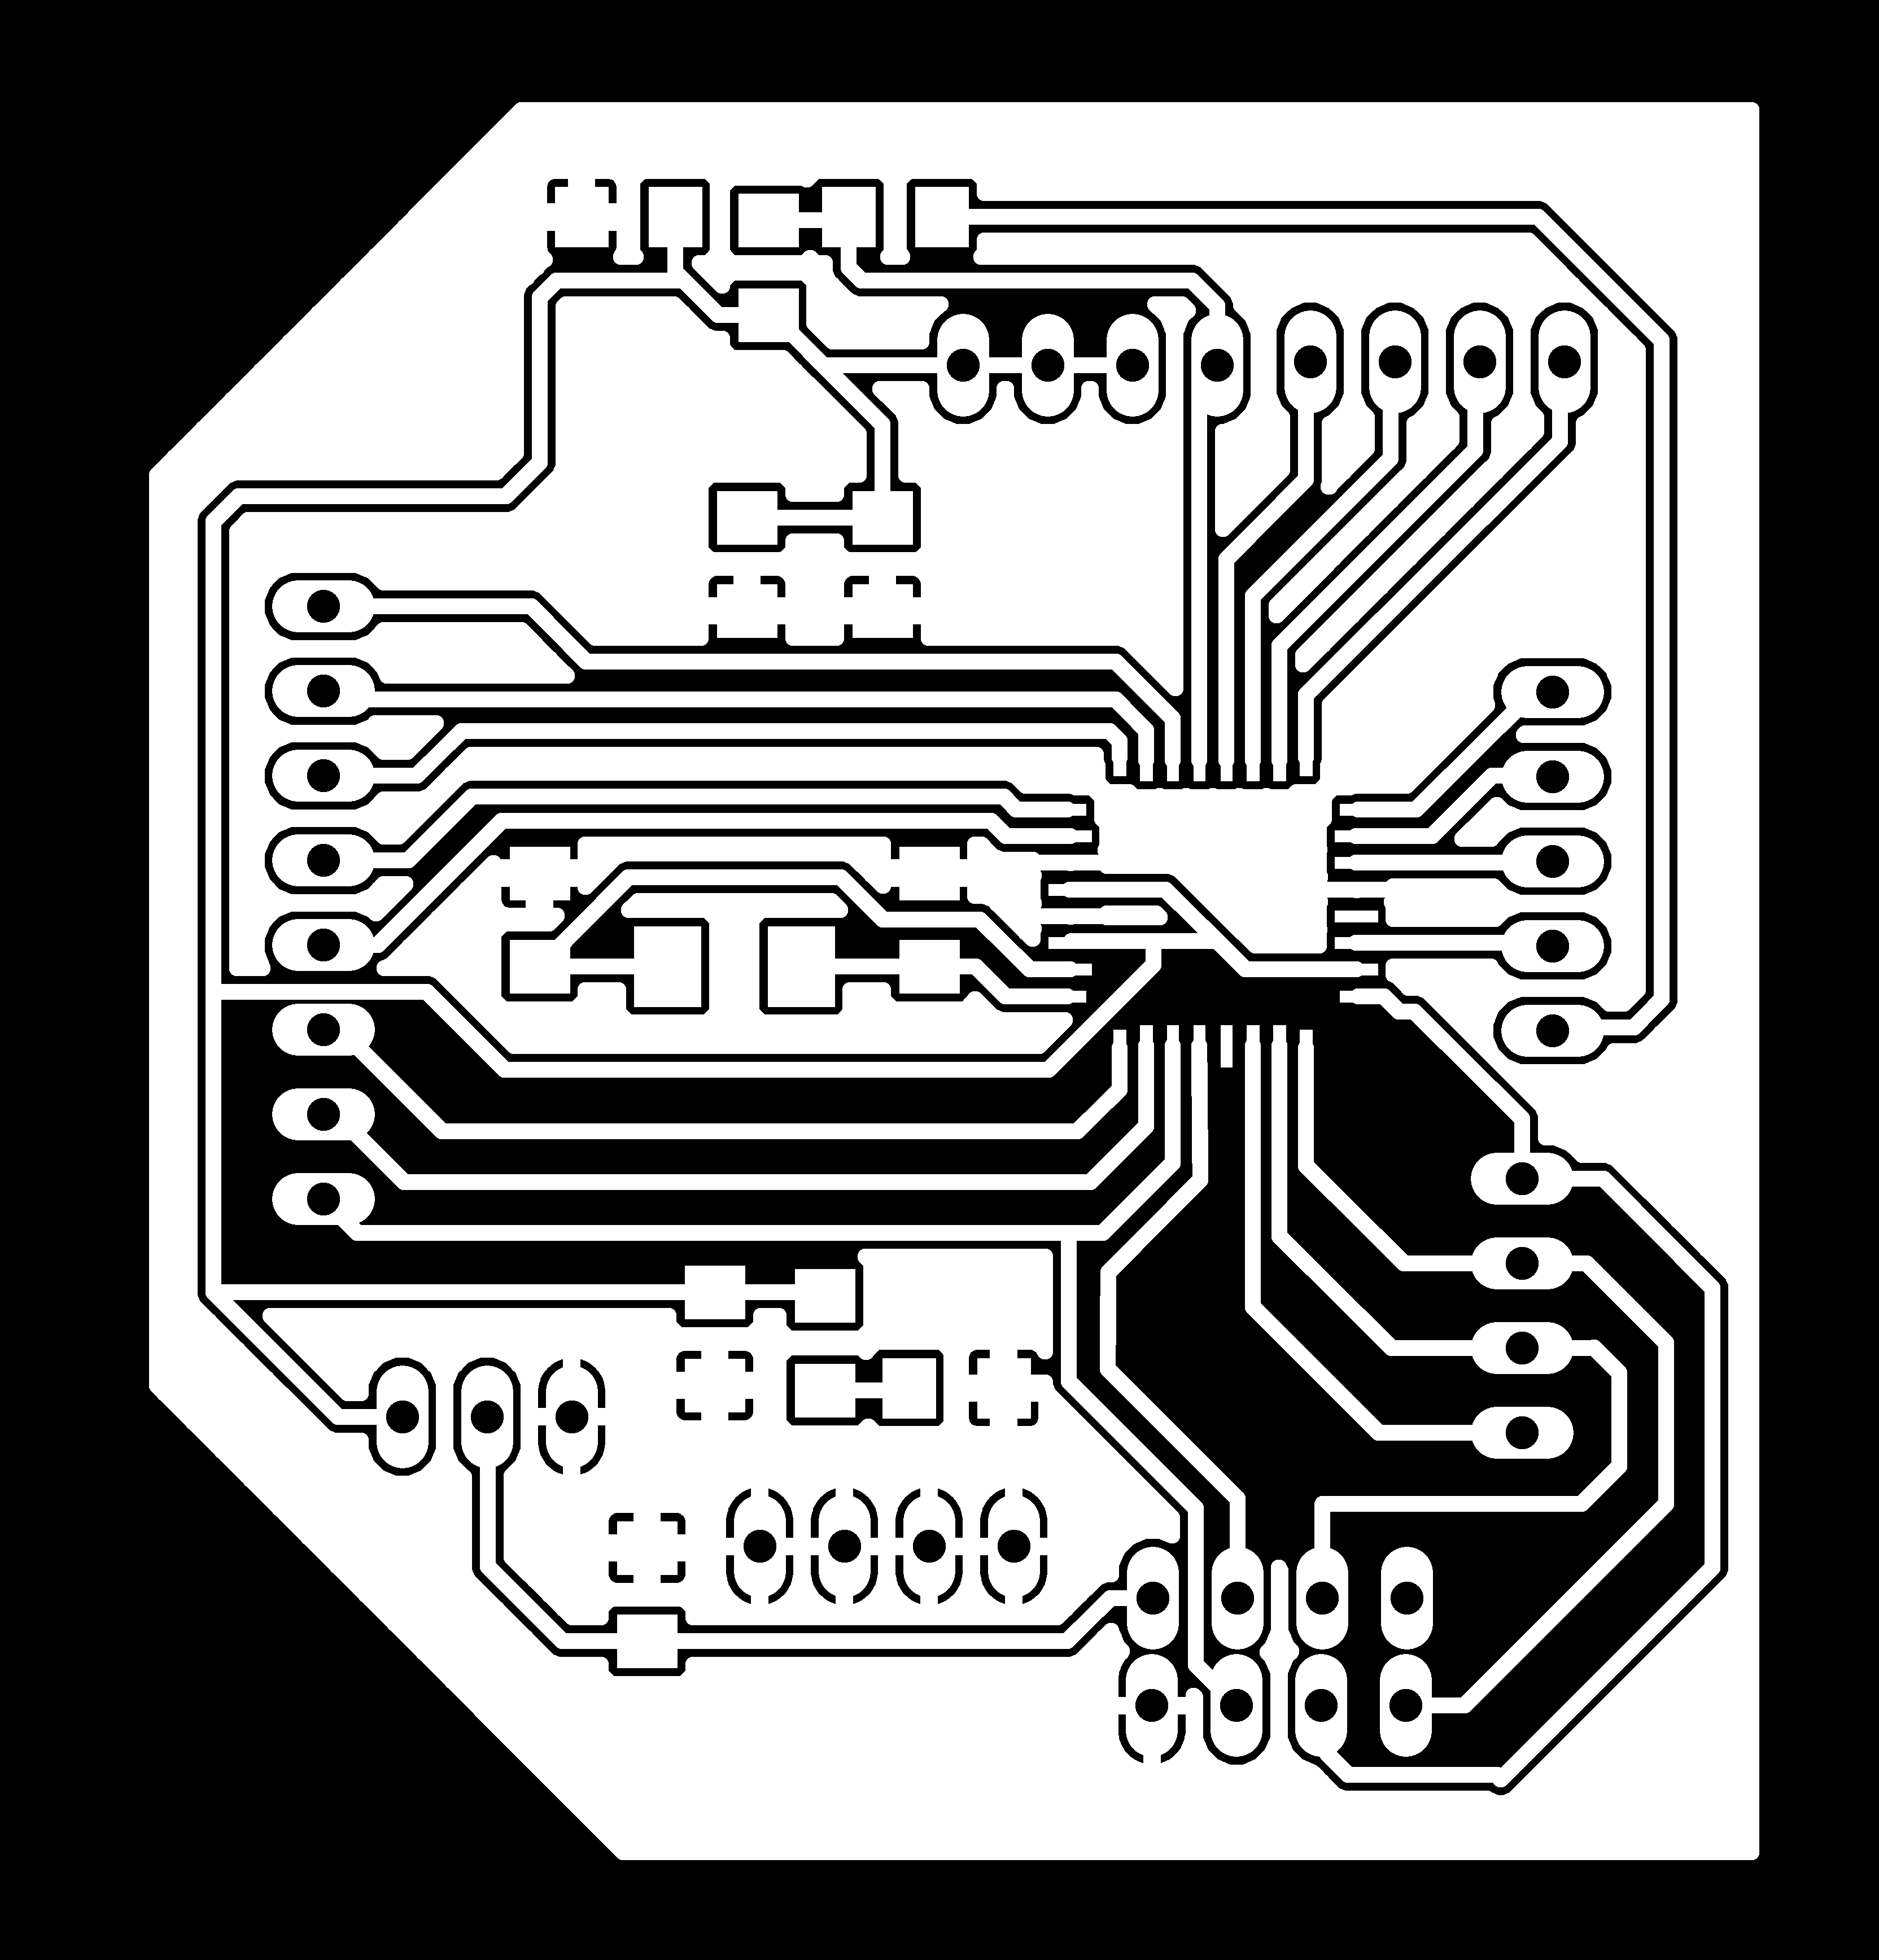
If you would like to have an introduction to electronics design/production check my electronics design and my electronics production assignment.

to attach the pressure sensor, I have followed this schematik. It is important that you use a 10k ohm resistor between the analog pin and ground to protect the sensor from overvoltage.
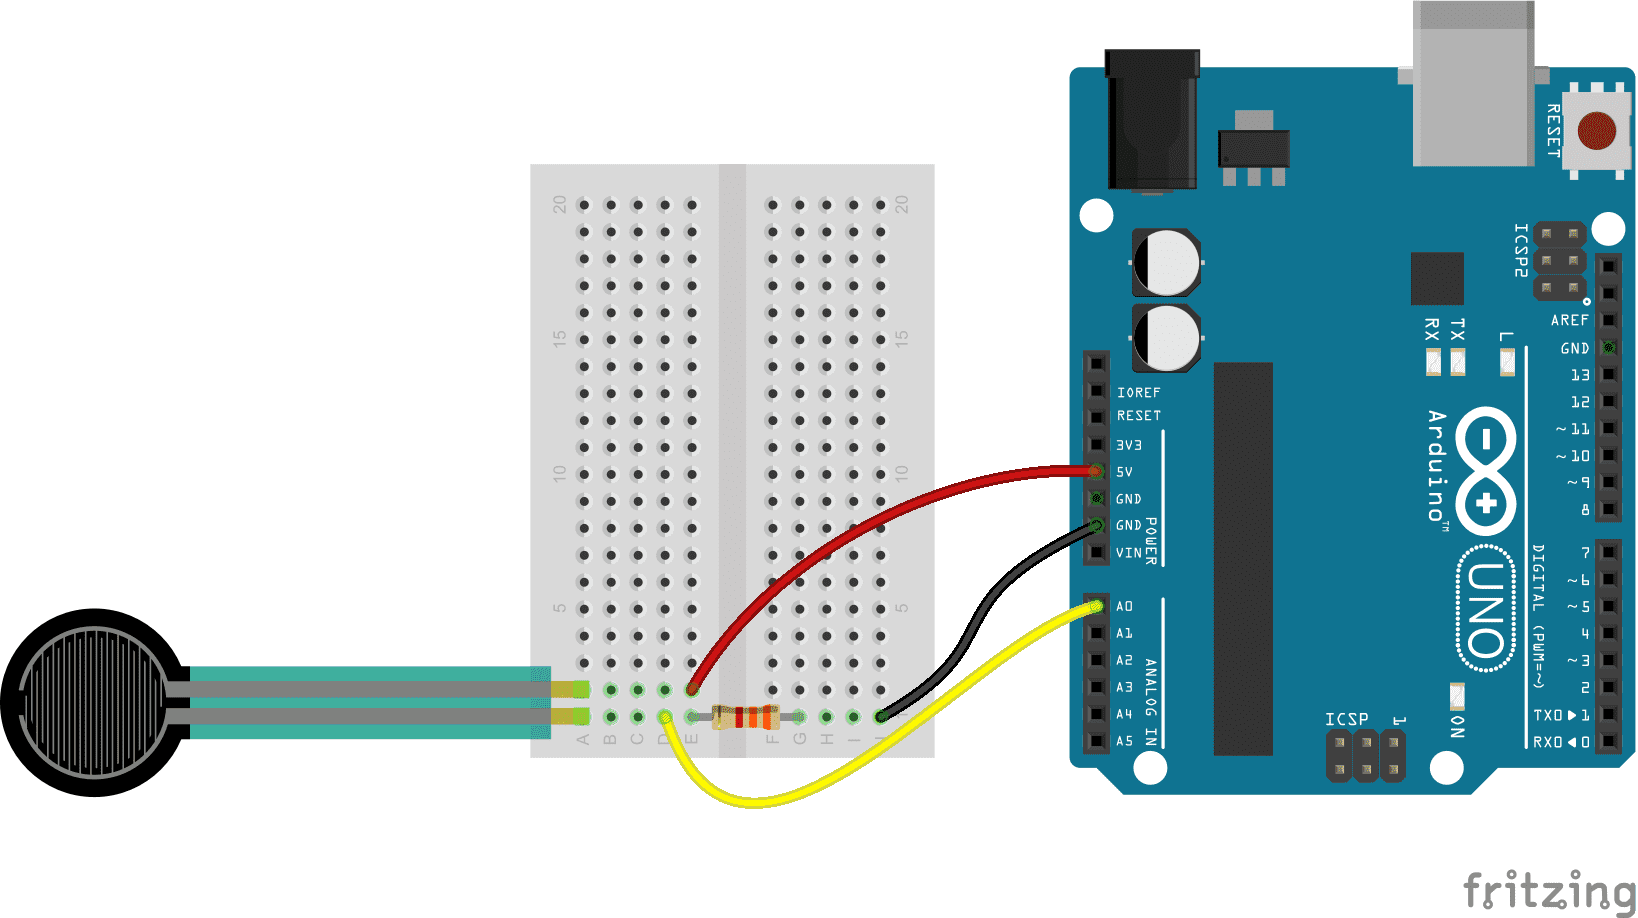
The pressure sensor returns an analog signal which I can use to control an brushless motor. I wrote a small code to do that.
const int motor = 11;   //defining motor pin
const int pressurePin = A0;   //defining pressure sensor pin(has to be analog pin)
int value = 0;    //creating value for the sensor
int mappedValue = 0;
void setup() {
pinMode(motor,OUTPUT);    //setting the motorpin as an output pin
Serial.begin(9600);

}

void loop() {
value = analogRead(pressurePin);    //giving value the output of the analog sensor
mappedValue = map(value, 0, 800, 100, 254);
//Serial.println(value);
Serial.println(mappedValue);


analogWrite(motor, mappedValue);//give motorcontroller the value of the sensor


}
In the following video you can see a quick demonstration of the brushless motor working using the pressure sensor