Machine Design
For this week. We need to automate the machine we built in mechanical design last week. For this, I will explain the board I design for this, and then show how our group integrates all the parts to have this machine working. As explained last week, the circuits we needed for functionality are a component for dc motor control, the component for the color sensor, and the component for a servo.
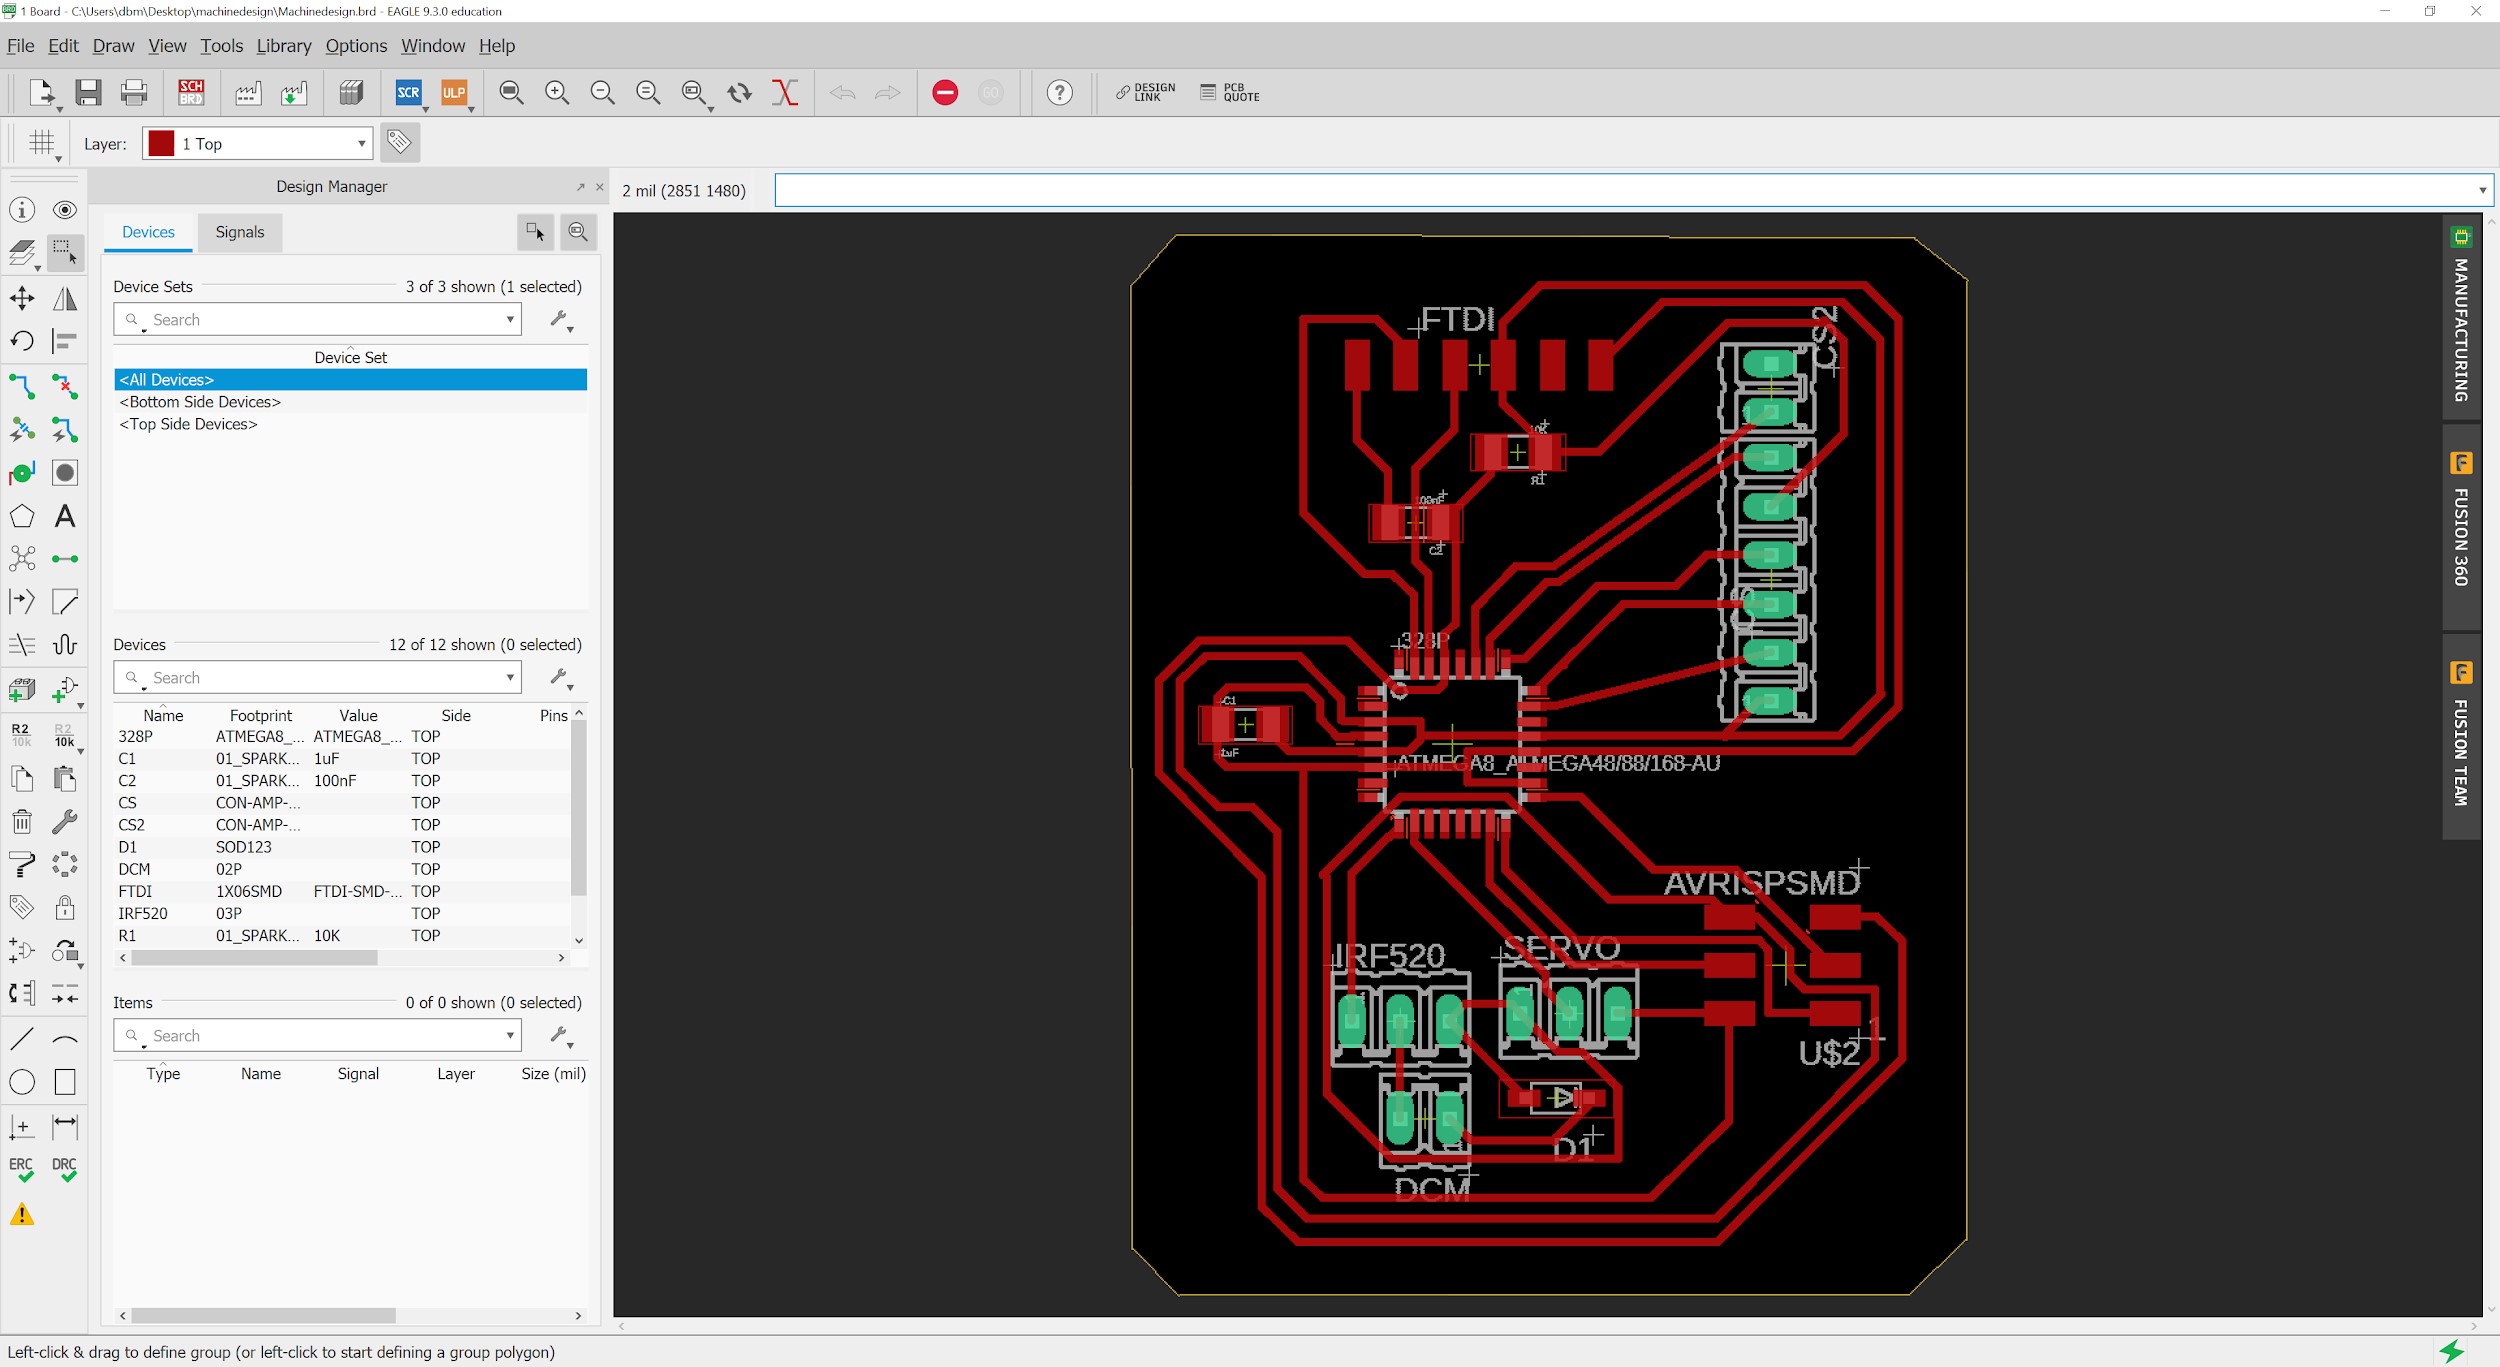
After integrating, optimizing and testing our circuits, we arrived to the following design
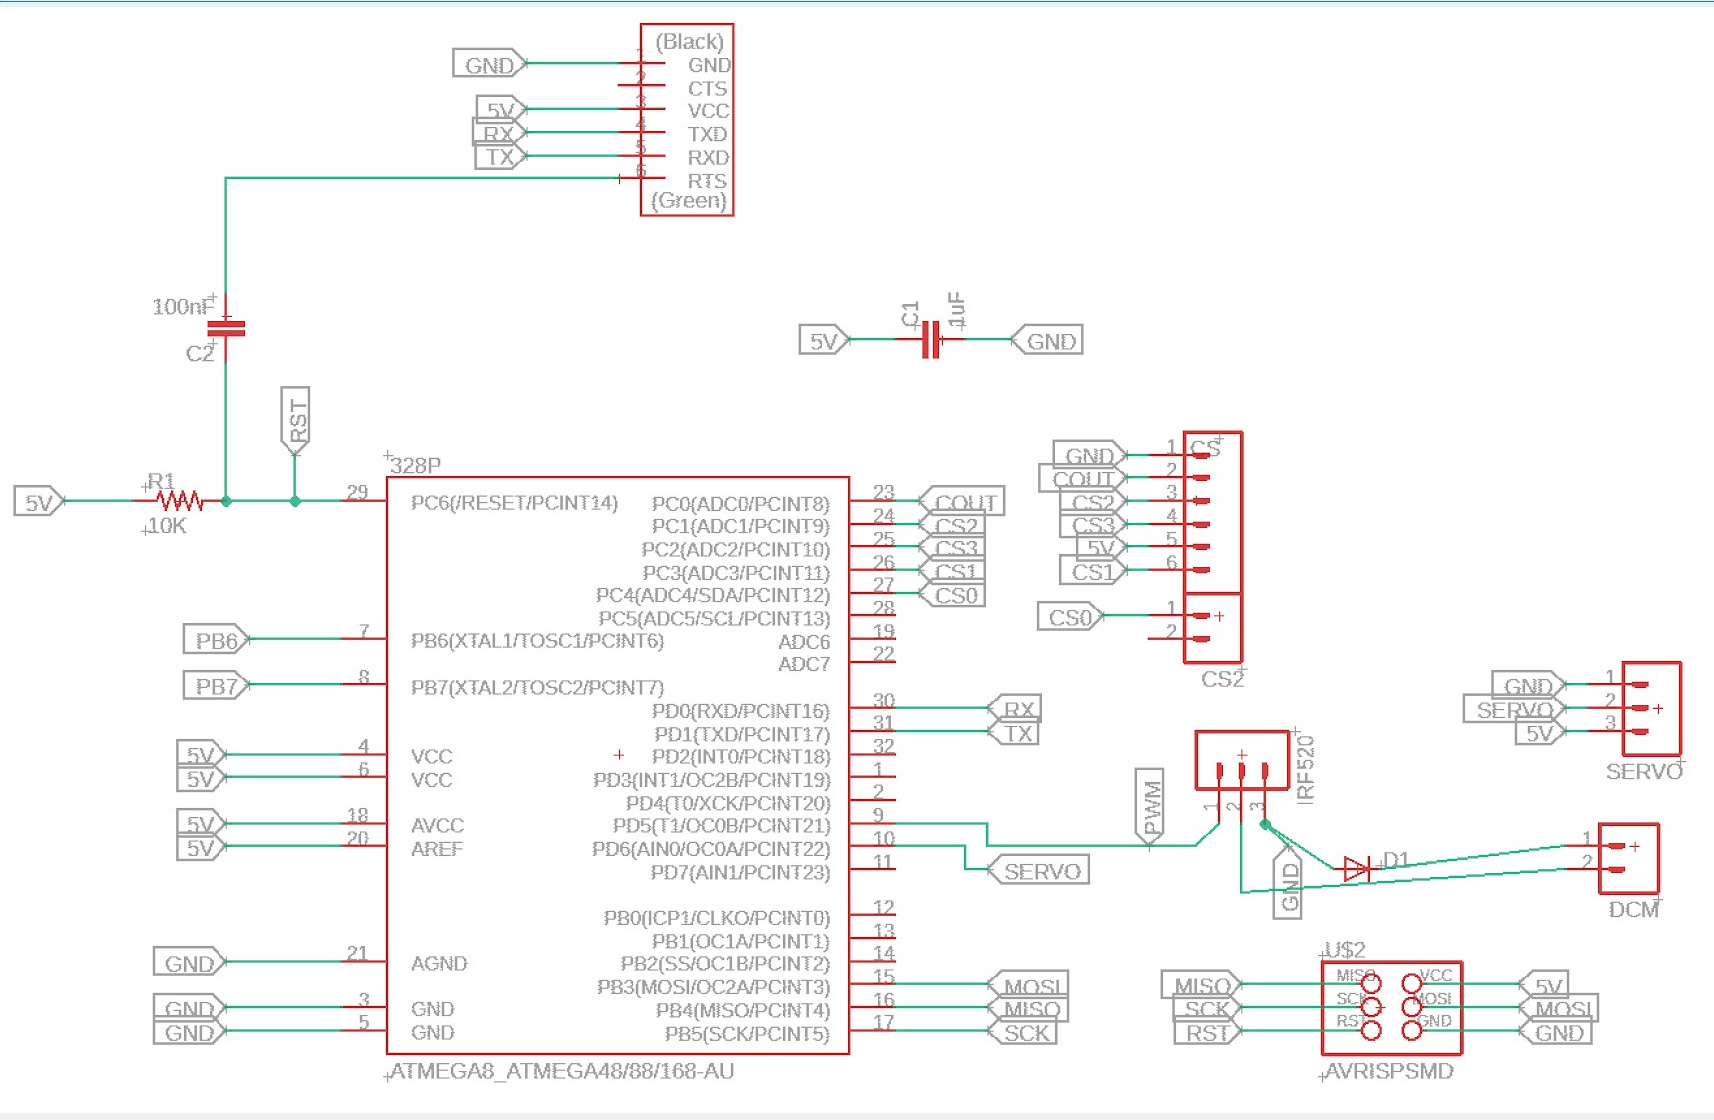
Based on the satcha design, I did the following modifications to include the circuits needed:
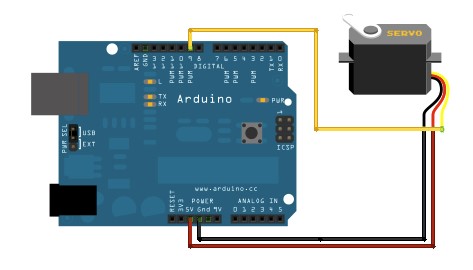
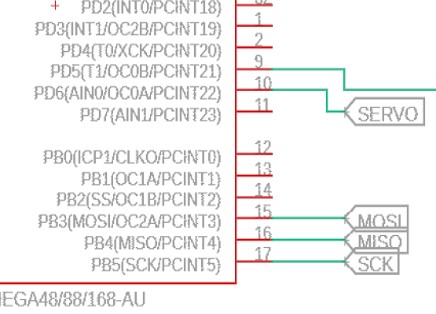
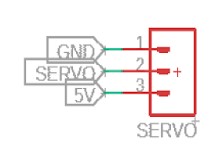
- For the servo, added an M03 and connect it to ground, vcc and pin 10 of my atmega.
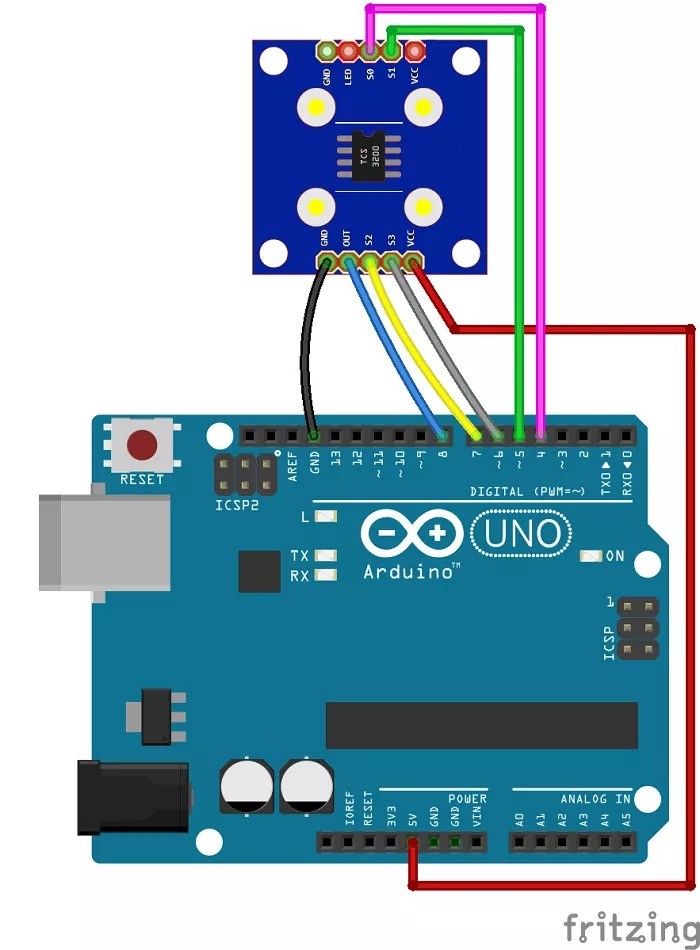
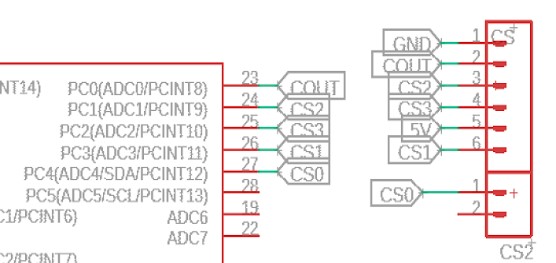
- For the color sensor, I added and M06 and a M02 to have enough pins, and then conneted the 4 pins for the sensors, named cs0 to cs3, and vcc and ground.
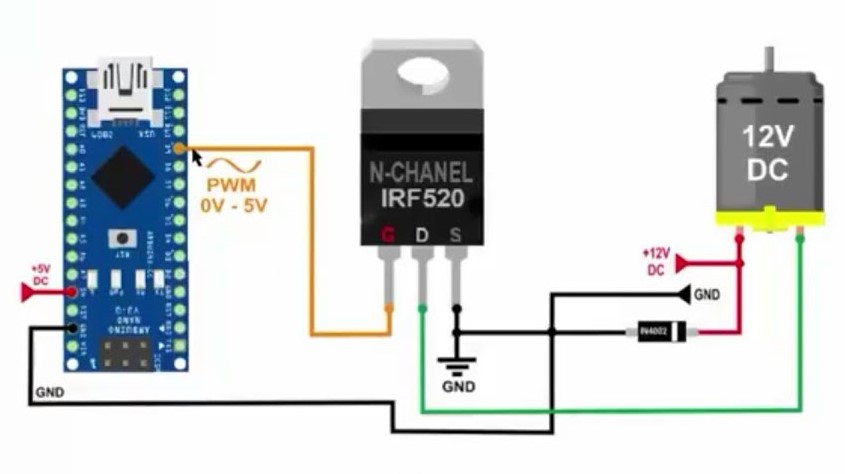
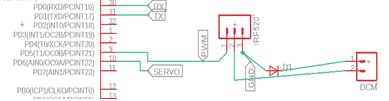
- For the dc motor, I added an M03 to connect the IRF520 and an M02 for the motor pins,
- and then made the connections according to the schematic shown previously.
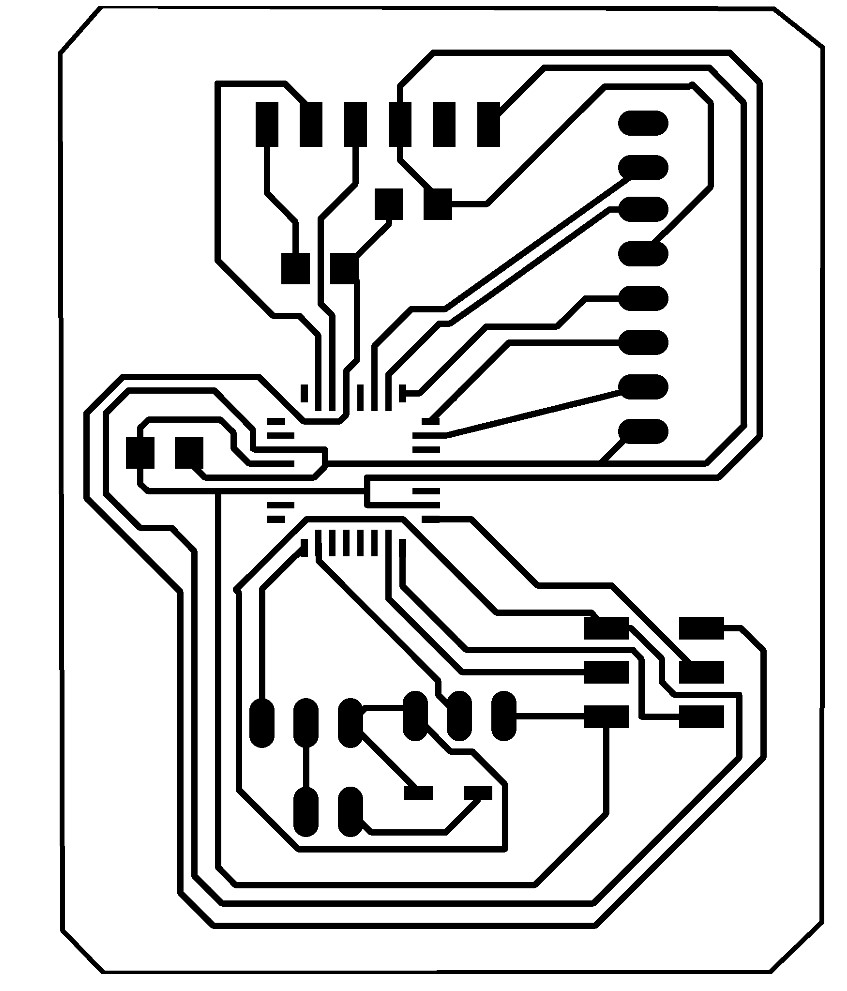
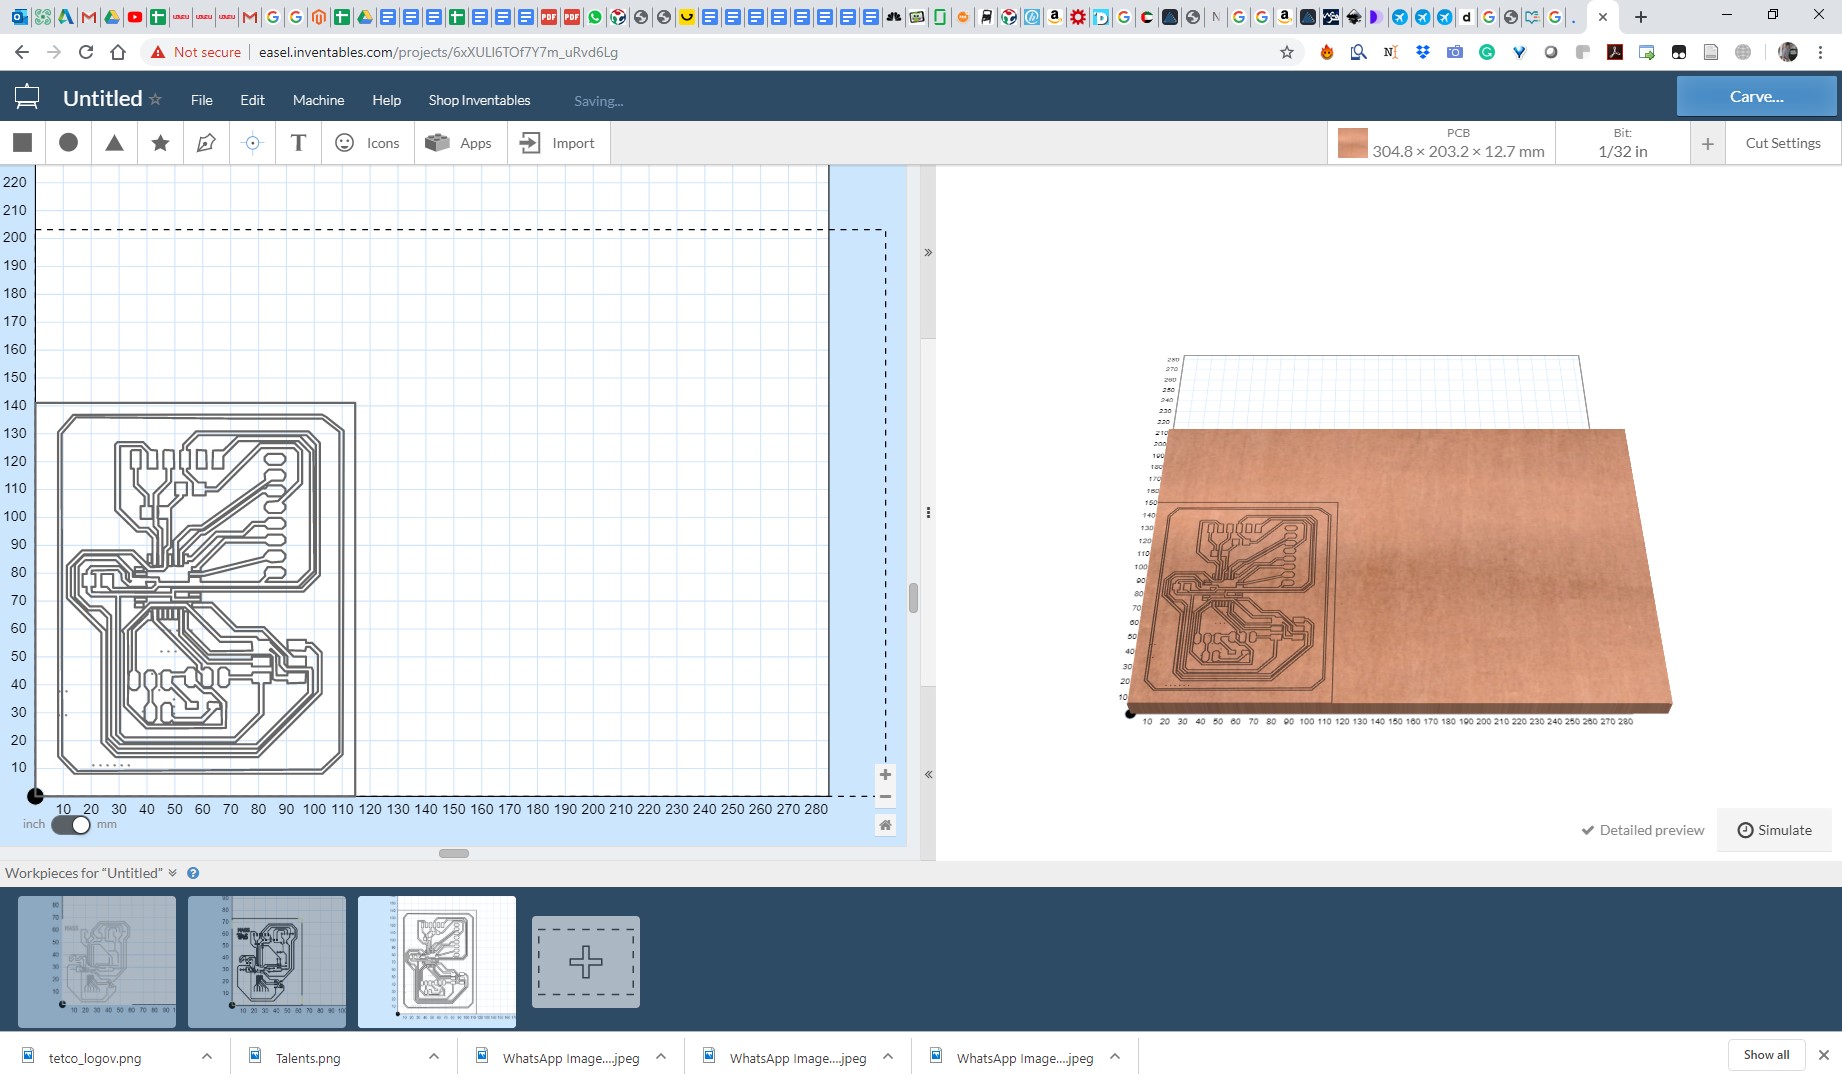
This is the final layout of the board,
And as explained last week, it was fabricated using a Carvey machine.
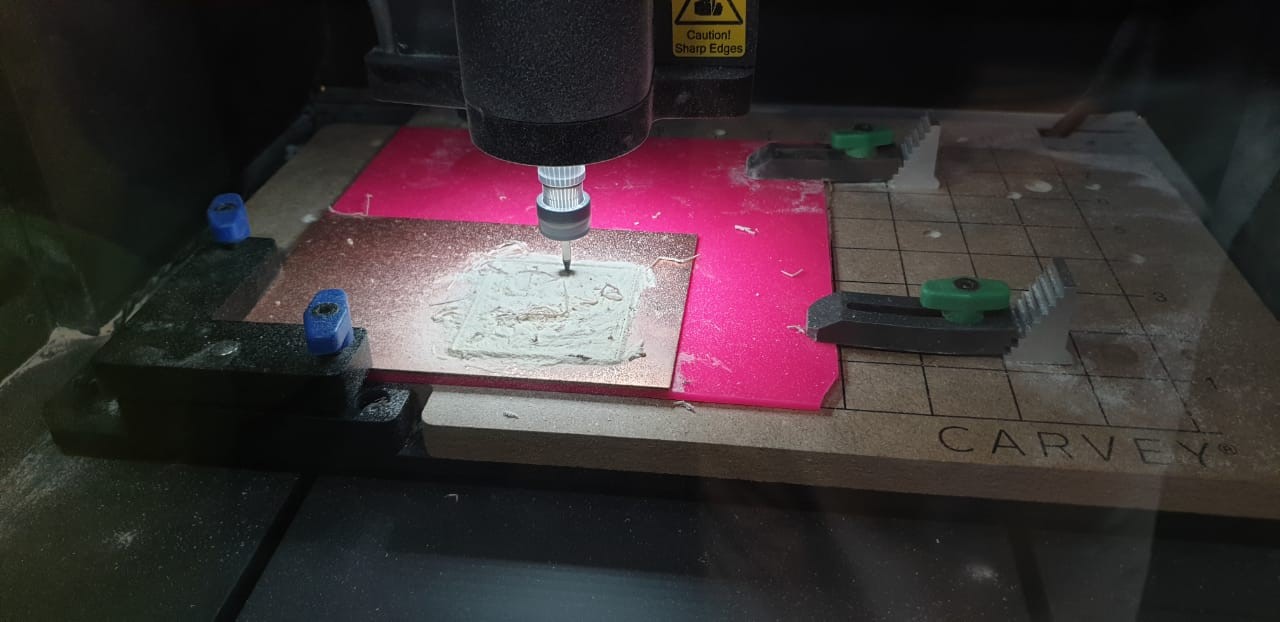
Now, we are ready for soldering.
My friends Hussain Alhudhud worked on the soldering and he documented it in his page http://fabacademy.org/2019/labs/dhahran/students/hussain-alhudhud/machine.html
My friend Yousef ALsenwar worked on the programming and he documented on his page http://fabacademy.org/2019/labs/dhahran/students/yousef-alsenwar/week17.html
The final video