15. Mechanical design
The group decided on…drumroll please…a Rube Goldberg Machine! Because why press two buttons when an elaborate setup can allow you to only press one?
The setup is shown on our group page, and Dan’s page summarizes everything.
Learning outcomes - Work and communicate effectively in a team and independently - Design, plan and build a system - Analyse and solve technical problems - Recognise opportunities for improvements in the design
Have you? - Explained your individual contribution to this project on your own website
On the group page, has your group: - Shown how your team planned and executed the project - Described problems and how the team solved them - Listed future development opportunities for this project - Included your design files - Optionally included an aprox. 1 min video (1920x1080 HTML5 MP4) + slide (1920x1080 PNG)
Sketches
Brainstorming
This is a space for brainstorming ideas - please excuse the freeflow of thought and word vomit.
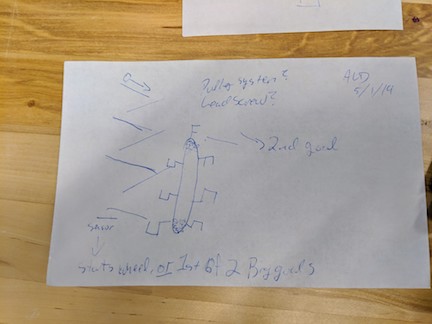
Sketch 1: Ball down ramps (shopbot cut the ramps with grooves for the ball to follow? A notch in the vertical supports for them to slot in and angle?) Hits button - button triggers lifting device and maybe something else? Like one of the end buttons?
Lifting device can either be buckets on a wheel or a lead screw with a platform and guides. Maybe the guides end, platform rotates, ball falls/gets knocked off?
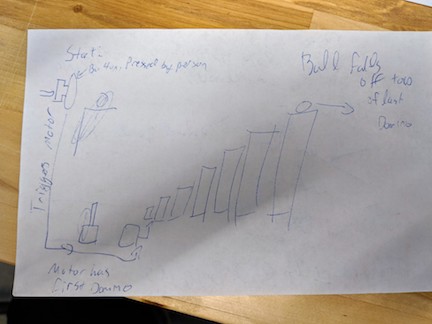
Sketch 2: The start of the system! Hit a button, trigger the dominoes falling over. Motor? Solenoid? The ball in a groove on the last one falls into the rest of the apparatus to start it. The domino setup can be a fun way to make the thing optionally larger.
Models and Stuff
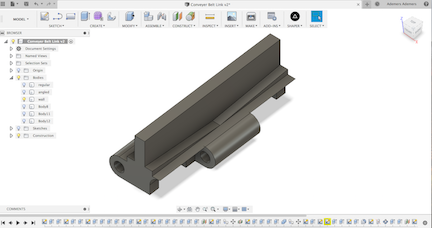
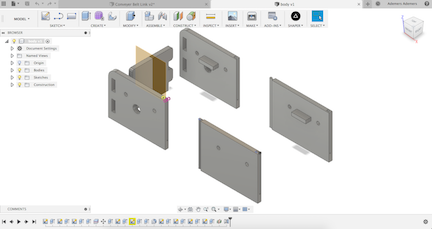
I was inspired by the modular conveyor belt I found here on Thingiverse, but it seemed a little too wide for what we were looking to do, so I decided to make my own version of it on Fusion 360, to success!
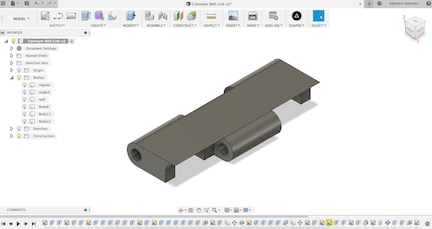
I decided that I wanted a little groove to try to catch the ball, so I added that in.
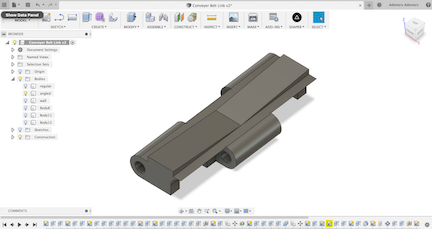
Great! Might be a little small, but let’s see how it goes. I also needed ones with a wall to catch the ball, since it will be angled.
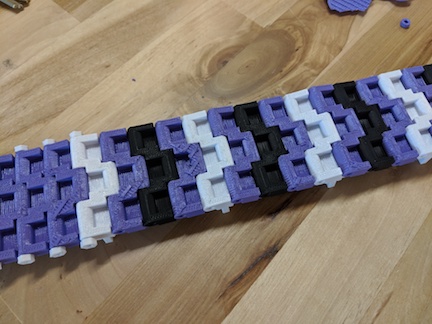
Cool. I also designed connectors for it to link everything and put them in (pictured below), but in retrospect I think fishing line would work better.
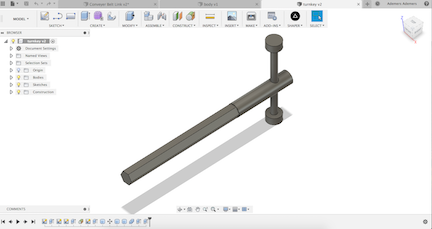
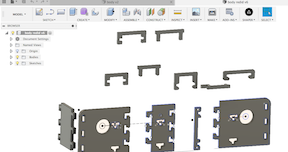
Now to design the sprocket - basically measure the underside of the cavity (pictured below), put it into a gear with like 10 teeth, and then make a spot for a connector.

Cool. I also made a handle and walls. First attempt at the handle could be better - the hexagonal piece needs to be longer. And I need to make the other terminal side of the walls with space for the sprocket.
I tried to print the walls for it, but the didn’t come out well. Back to the drawing board. Maybe instead of that, I could laser cut something and have lateral and cross supports running between everything? It is also made in a modular way, so that you can add more of the middle pieces and all you need to do is put in 8 more links!
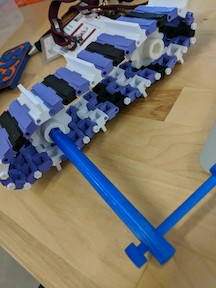
Great! To reduce the friction of everything going around, we probably need some ball bearings. We can 3D print them! There are several available on Thingiverse, but I thought, similar to the belt links, to use it as an inspiration in order to further my modeling chops.
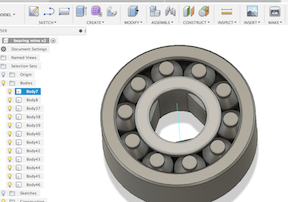
This was the 3rd version of them, to get the ratios of the outer wall, inner wall, and void space between the parts right so they actually spin. Took a little bit to get it right, especially so it would print as separate parts. I found it best to have a distance of 0.4 mm between everything, since that was a bit more than the layer resolution and step of the motors.
Video
Now that everything has been designed and printed…let’s see how it works!
Great! A little bit rough, but some of that would be smoothed out by some design refinements and a constant torque applied by a motor.
Summary
For my part of the Rube Goldberg machine, I, by myself, designed a conveyor belt that can work in with everything to get a ball to move either laterally or vertically or both! That’s pretty important if the height ever needs to be reset. It was also a lot of fun furthering my capabilities in remixing things that I was inspired to design by, and seeing the full on mechanical capabilities of things produced in the lab is always exciting. Students who saw the thing come together were really impressed by it and wanted to learn how to make stuff like that, which is always great to hear! Given that I will be teaching a digital fabrication course next year, it is music to my ears!