4. Computer controlled cutting
Laser cutting! Pew pew!
Requirements
Learning outcomes:
Demonstrate and describe parametric 2D modeling processes
Identify and explain processes involved in using the laser cutter
Develop, evaluate, and construct the final prototype
Have you:
Explained how you parametrically designed your files
Shown how you made your press-fit kit
Included your design files and photos of your finished project
Software
For my parametric modeling, I decided to use Fusion 360 to do my designs. I had previously used that in the 3-D design week, and liked the parametric functions for it.
First things first though - understanding how the laser works with the kerf.
Laser Kerf
Comb
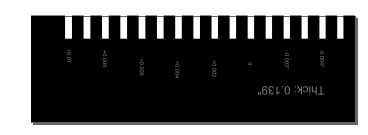
For the kerf, I first tried to make some combs to see how things fit (pictured above). It seemed like a good idea at first. I did a parametric design in Fusion with the thickness, and going through and setting the thickness plus and minus a bunch of values going up to what the thickness is.
This was dumb. When I was doing it, there was a lot of work to it. It really didn’t seem like a good way to approach it. How can we better measure the stuff that the laser burns off? Then, an epiphany!
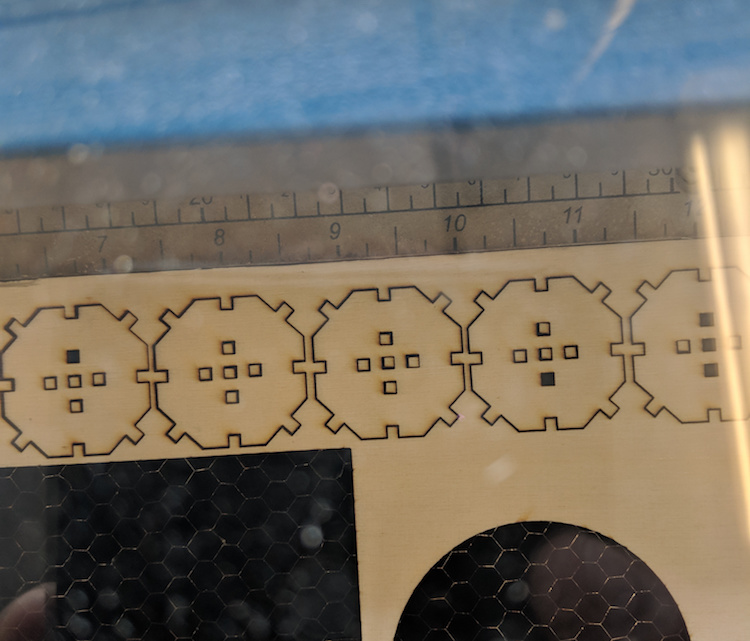
Cut stuff out that we know how big it is supposed to be, then see how big it actually was when it came out. I also figured that I should measure the hole that came out.
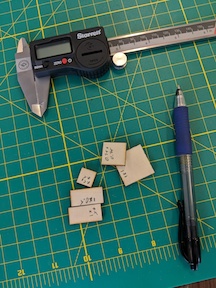
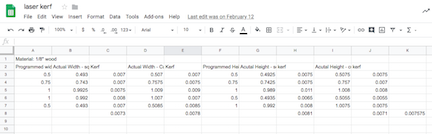
Yay! The kerf was about 0.0075” for my laser (Epilog Mini 24, 40 Watt) on this wood.
Design
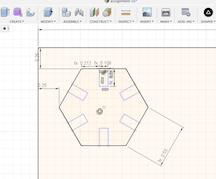
Let’s get back to the design in Fusion 360. I started off thinking doing a hexagon that can pop together on any face, allowing for a design that can branch off in different directions.
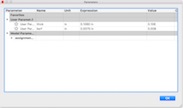
First, set the parameter and kerf (like shown above!). I initially set the value to be 0.125”, since that’s a common number that is close to what I would be using.
Here’s the first sketch. There are a couple steps not shown, like doing circular patterns for the slot. It is showing the numbers, but each side was set to be 5 times the thickness.
This didn’t take the kerf into account. Oops! Back to the drawing board. I also decided to change the shape and add in more features while I was at it.
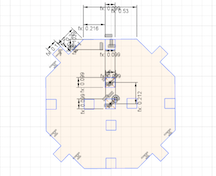
There! On the tabs sticking out, the width is the thickness plus the kerf, and going in it is the thickness minus the kerf, to allow for things to fit in. The holes in the middle are squares of the thickness minus the kerf.
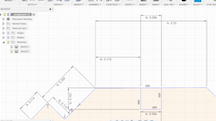
I quickly realized I had a problem though. I had no idea how to get the file to a format that works with my laser cutter. A quick google search yielded a result - an add-in for shaper which exports faces as .svg files.
Great! I extruded the face out like…8 meters (not really - if you use this function, you can either export sketches or faces as a .svg) and exported the face. Oops! When I first did it, I forgot to change the thickness to my actual value. Did that, it adjusted everything all parametric like, then did it again. From there, I just tweeked everything in Inkscape (no fill, line thickness to 0.001”, etc) then used the inkscape clone tool to make a lot.
Finally ready to cut! Here it goes! I did get slightly creative with placement of them in the Inkscape file to use as much of the wood as I could.
Forgot to do a fillet for the edges, and the board was slightly warping in some locations so not everything will be perfect. But I did fix the file, and will make sure to get a more better work piece for next time.
But here they are, all together!
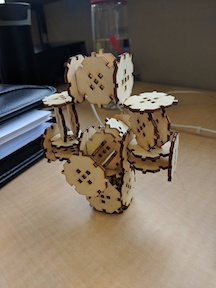
Note the different ways they can be connected - slide fit, lateral fit with the pegs into the slots, or using the pegs and the through-holes in the middle of the boards. I like ‘em, and students and staff alike always fidget with them. Learned a couple of things for next time, like making sure to set the thickness and put in fillets, dammit!
Vinyl Cutter
Greg Buckland showed me how to use the vinyl cutter at Lena Park a while ago, using the Roland software. At Madison Par, however, we have the old version of mods to use. That is pretty straightforward to do, just use GIMP or Inkscape to make a .png or .svg, respectively. The .pngs work better in terms of getting the size you need.
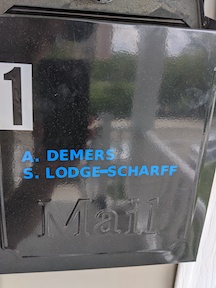
I did need to make names for my mailbox, so I used GIMP to write out my and my wife’s names to cut out to put on there. I don’t have that design file handy, but it is literally just our names.
Here’s the finished result!
Gallery
As always…the doggos. I just really like this picture.