Week 10: Molding and Casting
Individual assignment
This week we design a 3D mould, mill it finish cut and use it to cast parts.
3D DESIGN
To create the 3D design, I will use the pictureframe tool from the rhinoceros program. For this, I chose an image of a grapple (1), use the poliline tool to create the silhouette of the object (2) and with the tool "sweep2" genre relief between the curves (3).
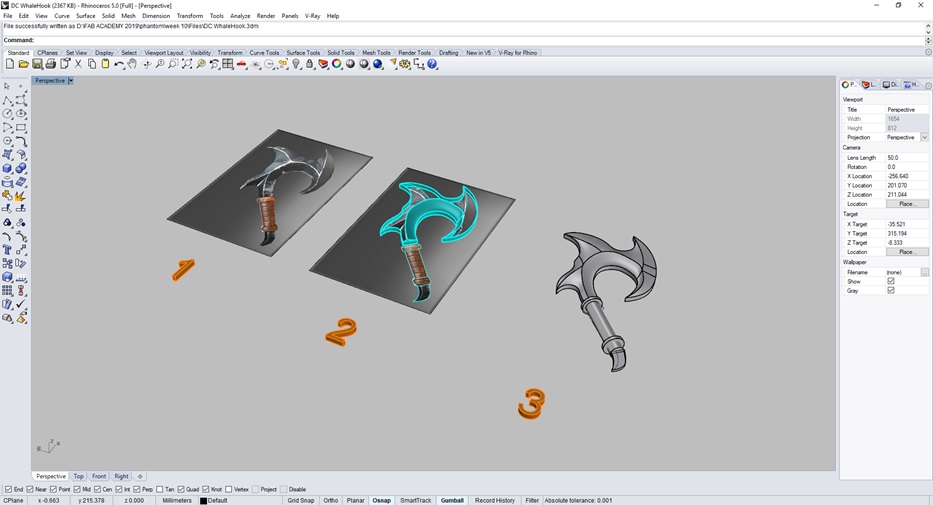 Fig.01 - 3D Design
 I create a base of 8mmx5mm and I scale my design to not exceed the material to be used in the mold (4), I stretch the figure in the axis to give it height and we rotate the figure to cover more design area, I add a design to the handle of the hook (5).
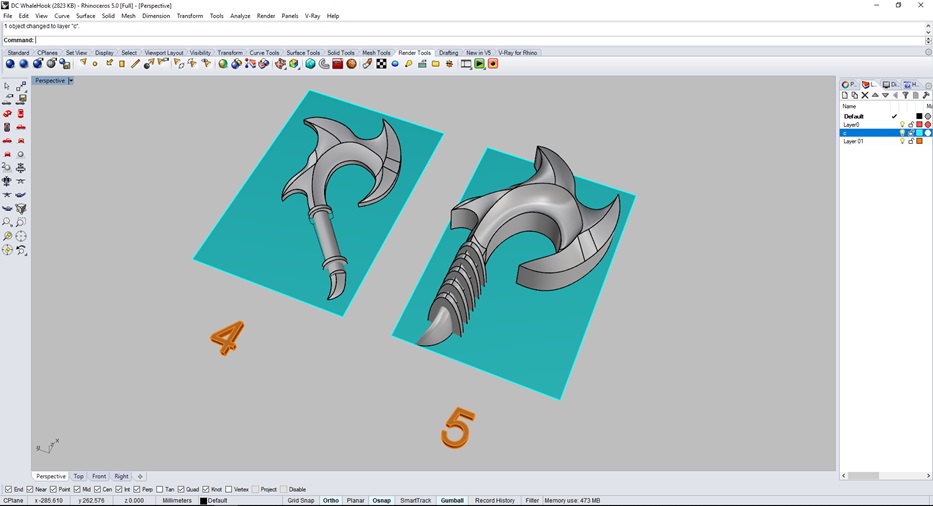 Fig.02 - 3D Design
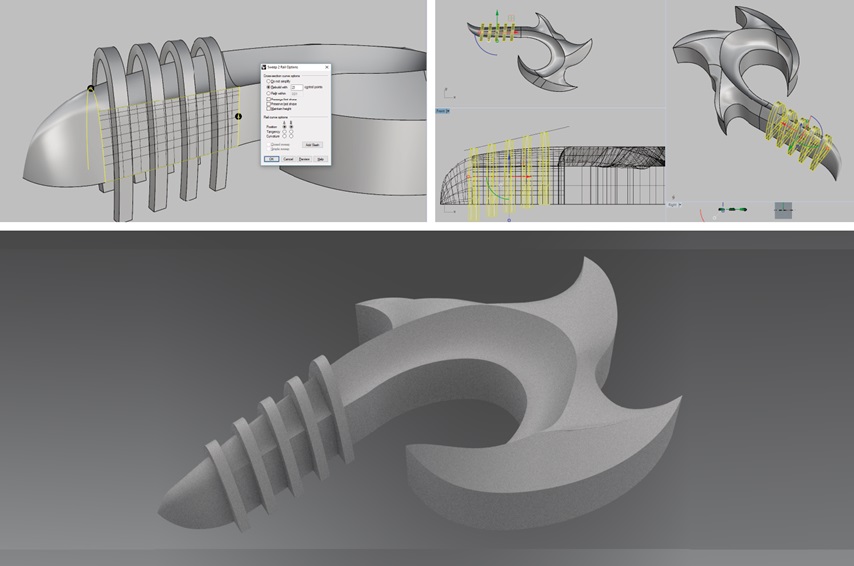
 With the tool "sweep 2" I generate surfaces that are more complicated to make them with the tool "surface", since these lines are not in the same plane x, y. In this way, we generate an object that has no limitations to machine it.
 Download Rhino Files
 Download STL Files
Fig.03 - Download Files
ROLAND SRP PLAYER
After obtaining the 3D design, we took the file in STL format to the SRP player program, which is the software of the Roland mdx-540.
As a first step, insert the file and the settings are placed on the right side of the screen. We will observe that the dimensions of the model and its orientation must be confirmed.
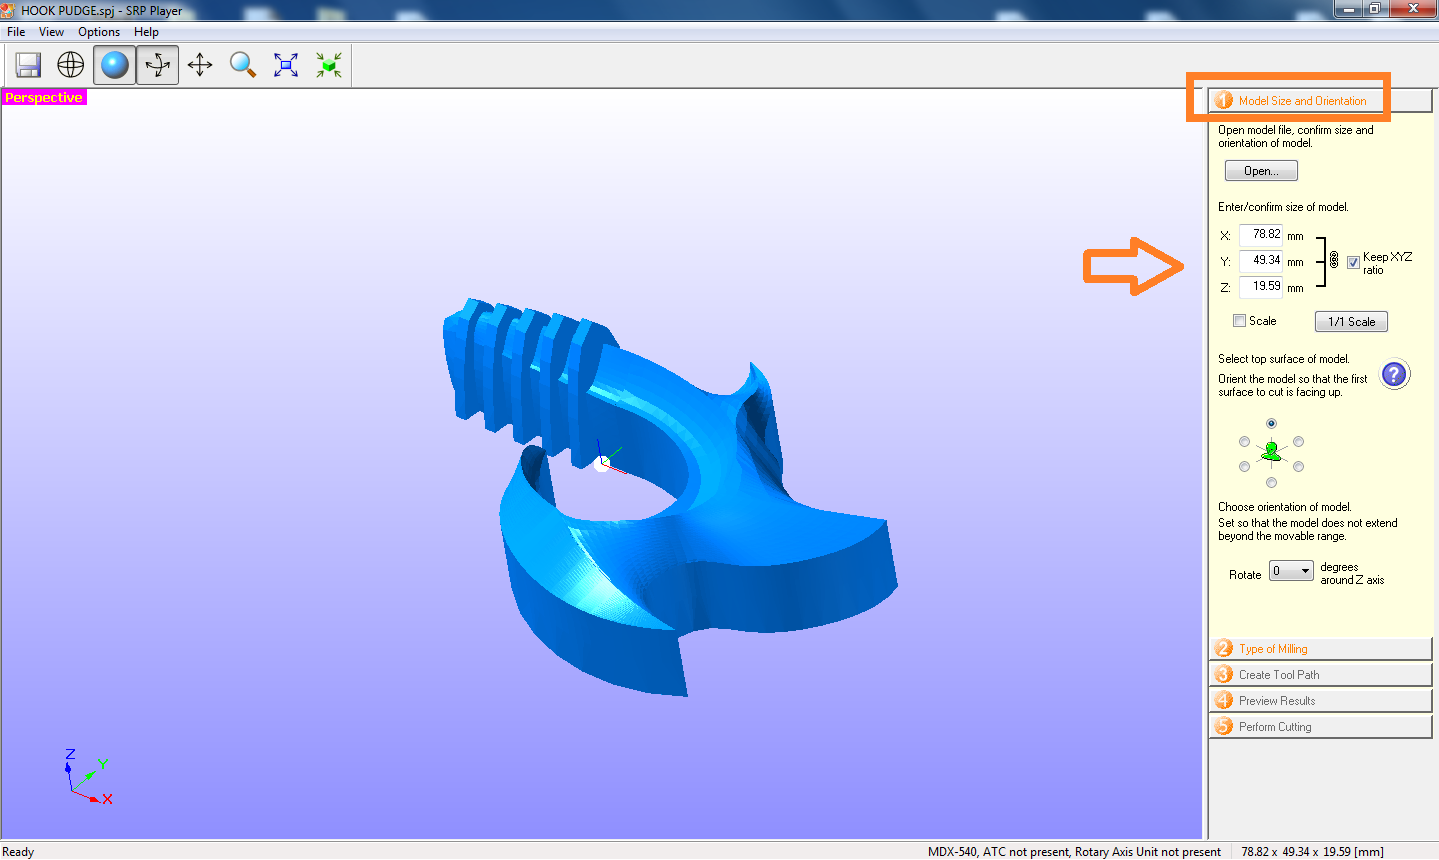 Fig.04 - Model Size and Orientation
 The second step is to select the type of miling, in this case better surface finish, model with many curved surface and block workpiece just cut top.
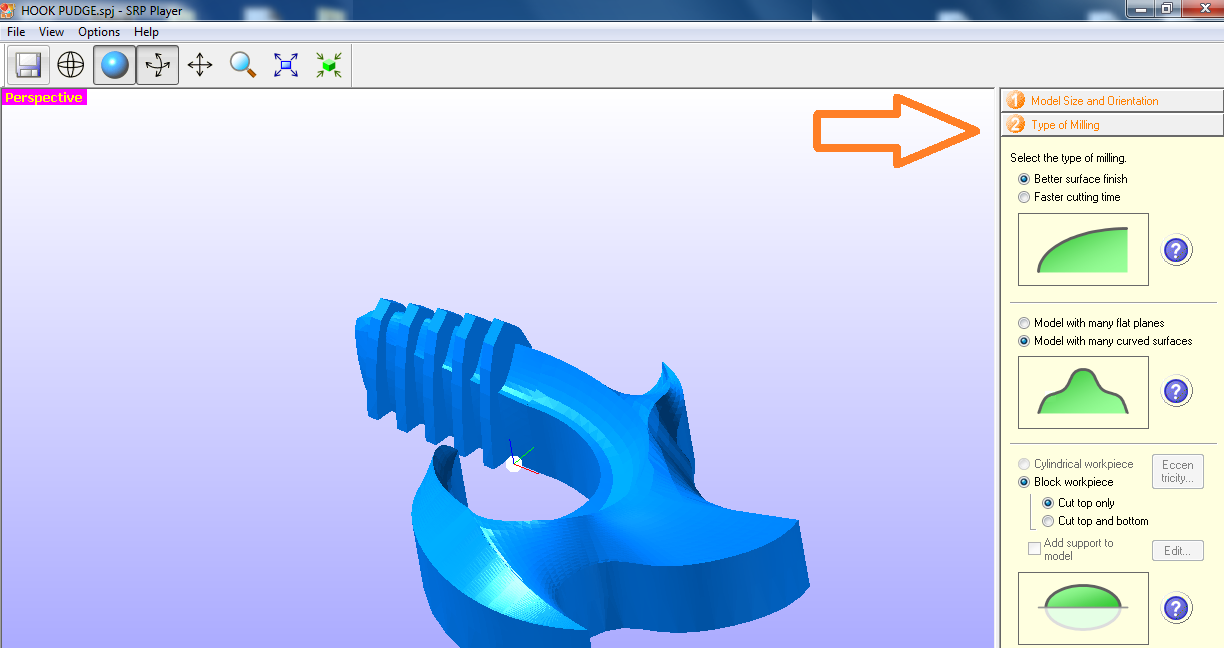 Fig.05 - Type of Miling
 We create the tool path, select polycarbonate and place the measurements of the surface. We should consider a minor tailored to the Blue Machinable Wax.
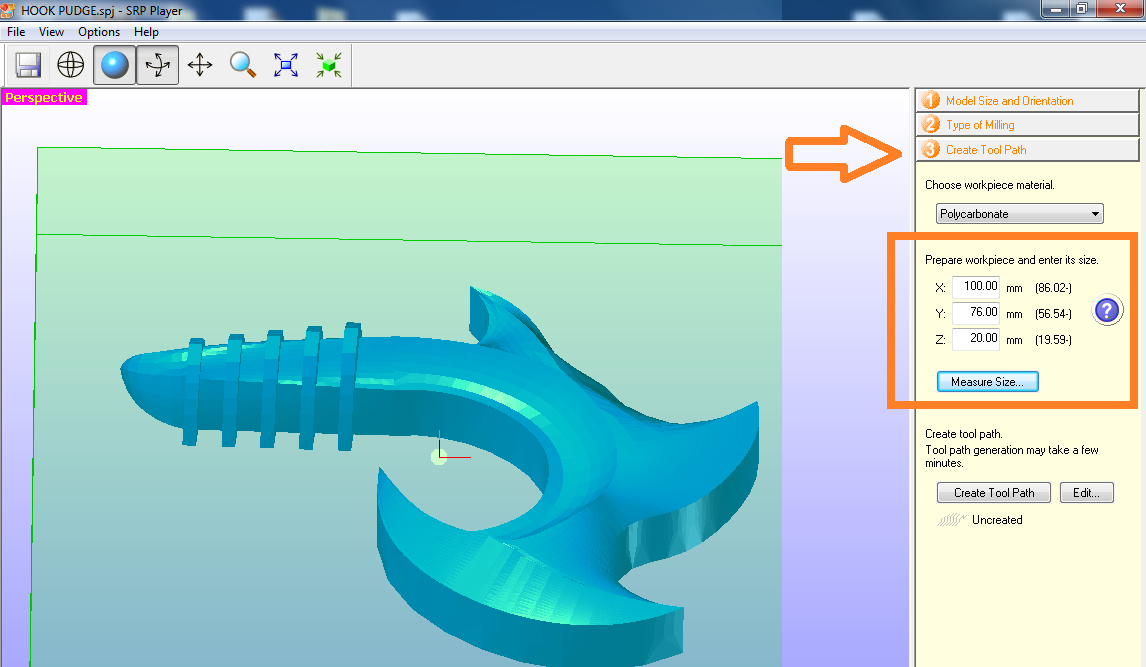 Fig.06 - Create tool path
 We change the shape of molding, we add a margin of 8mm in my case.
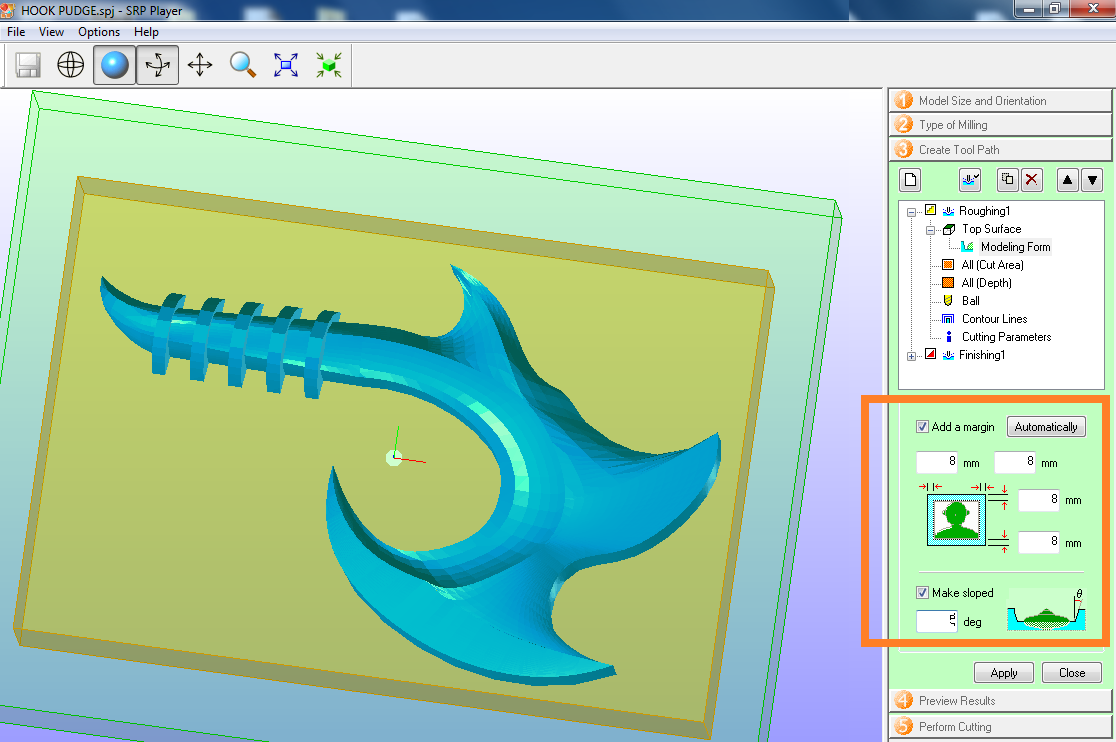 Fig.07 - Roughing Modeling Form
 We change the type of ball, in my case I will use a 4mm flat with 3.2mm flute lenght.
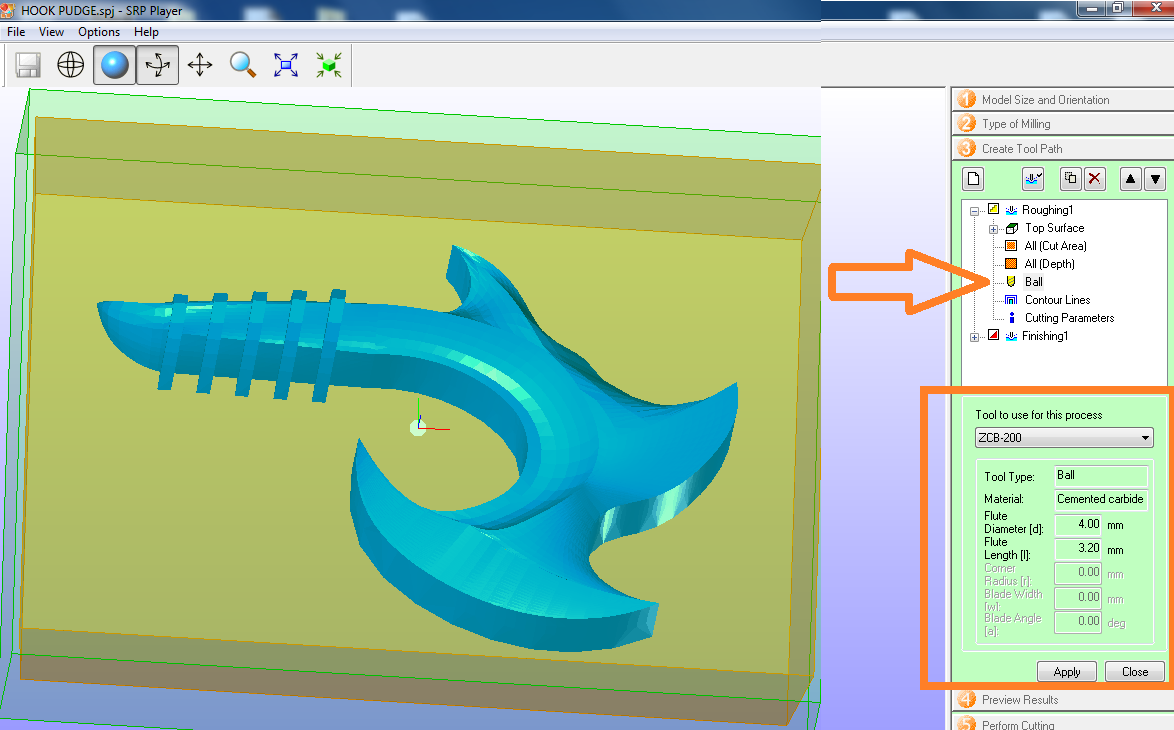 Fig.08 - Roughing Ball
 If we do not have the default measurements, we open the add / remove tool and insert the measures to be used.
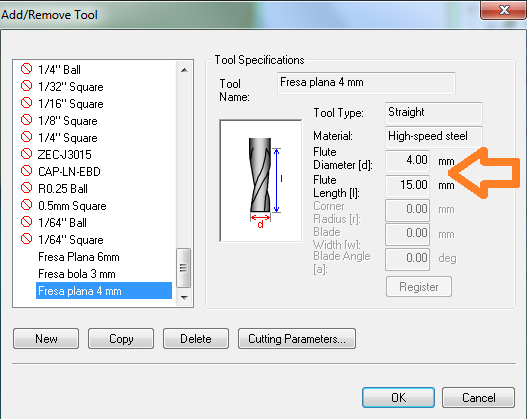 Fig.09 - Add/Remove tool
 We changed the measures of cutting parameters, with a feed rate of 1000 mm / min, spindle 9000 rpm, cutting-in amount 0.27mm and to have a better resolution a 2mm path interval with a margin of .2mm
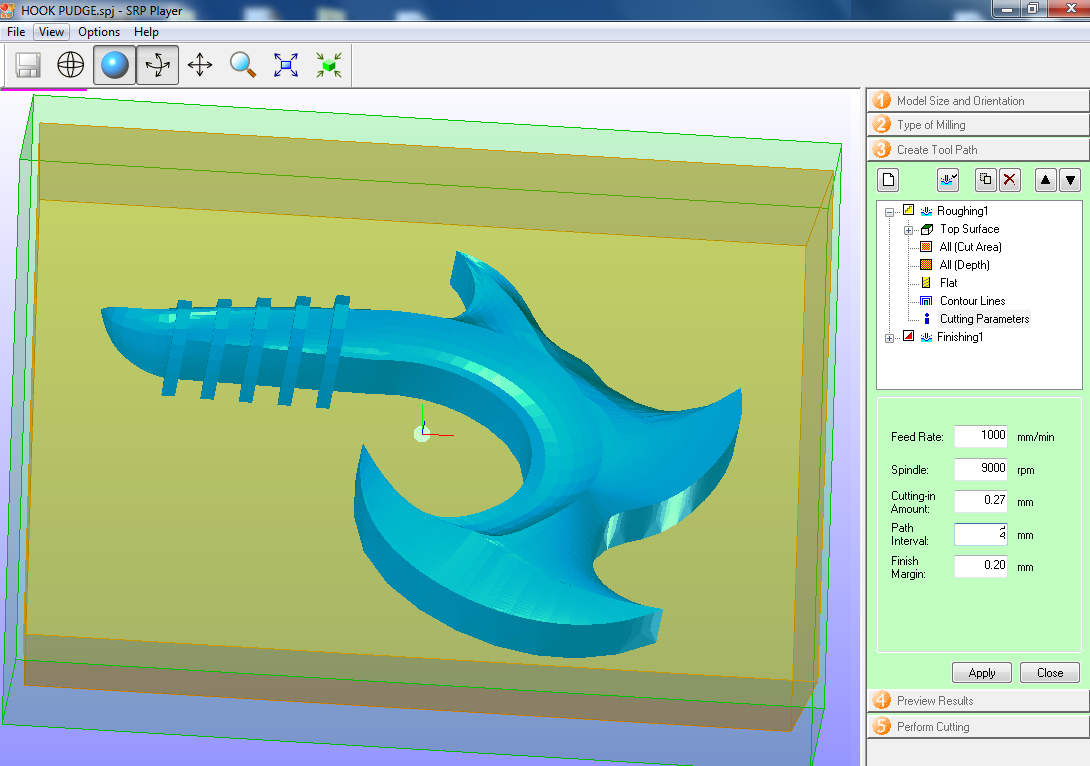 Fig.10 - Roughing Cutting parameters
 I added a margin of 3.2mm to generate depth in the finishing part
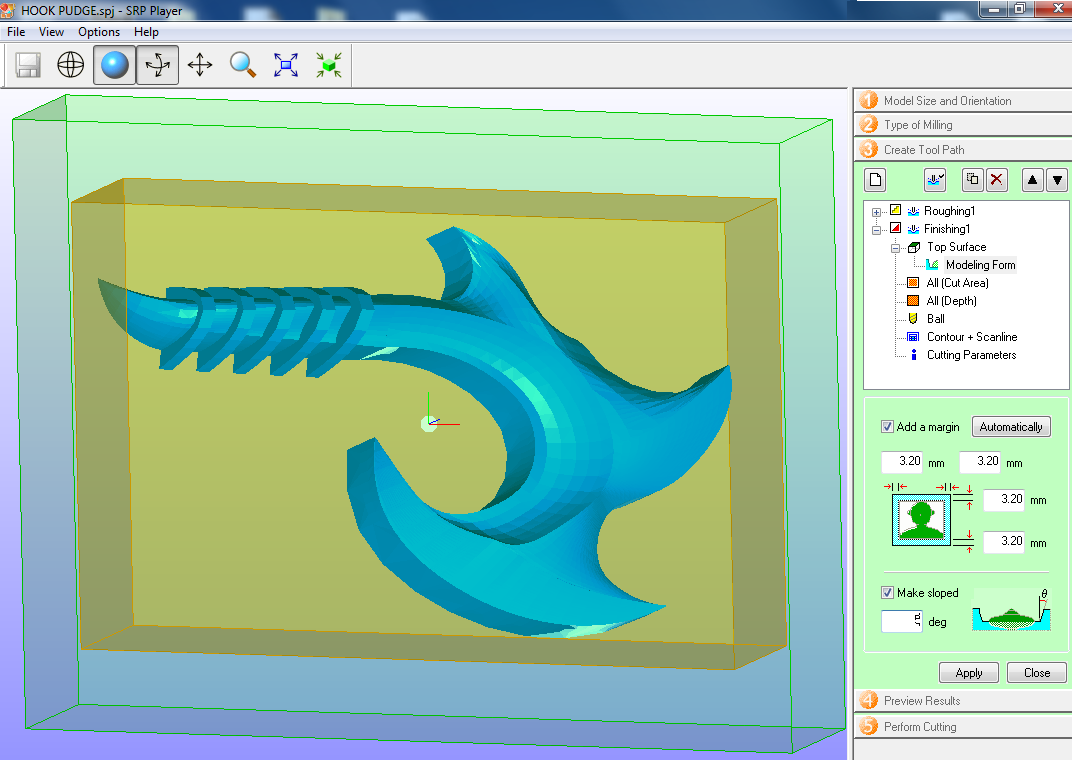 Fig.11 - Finishing Modeling Form
 I have created a 3mm ball mill to have a better finishing surface
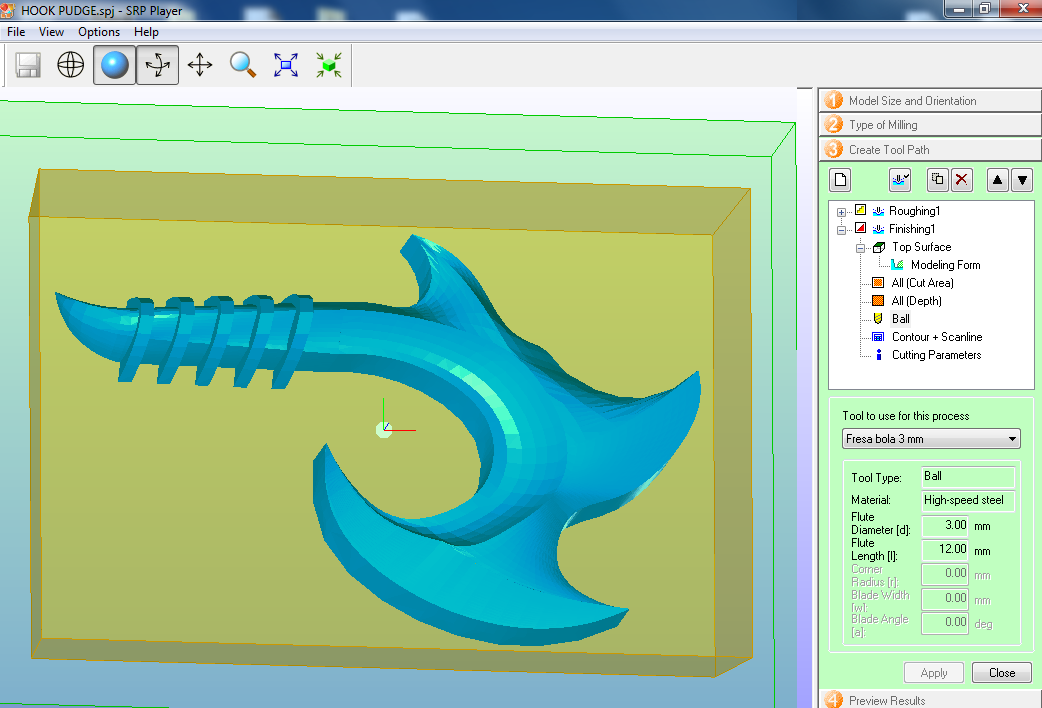 Fig.12 - Finishing Ball
 The data will be smaller to generate a smooth surface
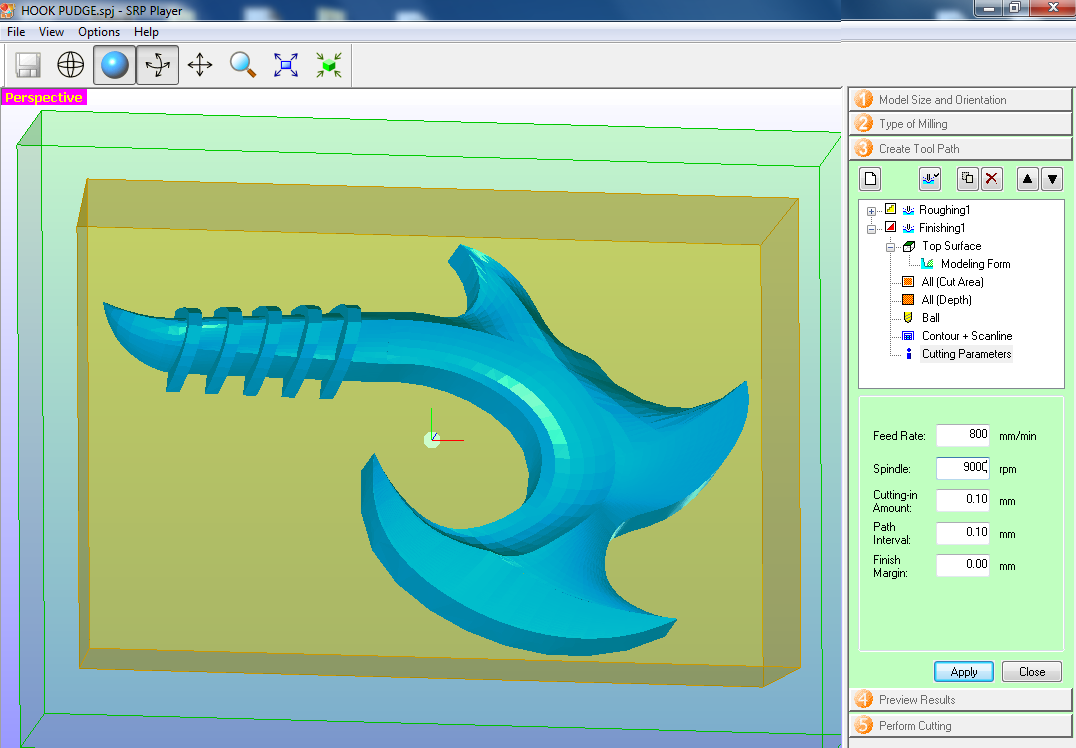 Fig.13 - Finishing Cutting Parameters
 After configuring, the software will show us how our design will look in the Blue Machinable Wax
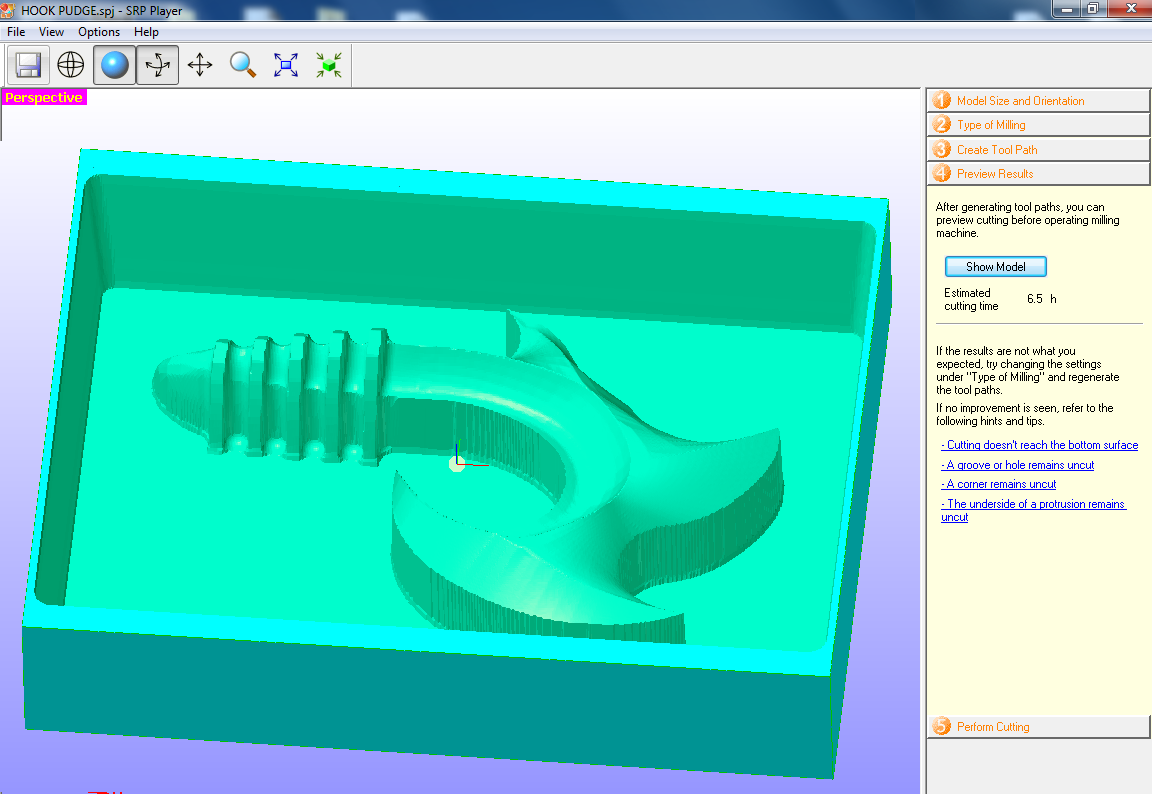 Fig.14 - Show Model
 Selecting start cutting, a window will open in which the tool list is displayed and we click on the next to start the machining process, in this way we generate the roughing and finishing files.
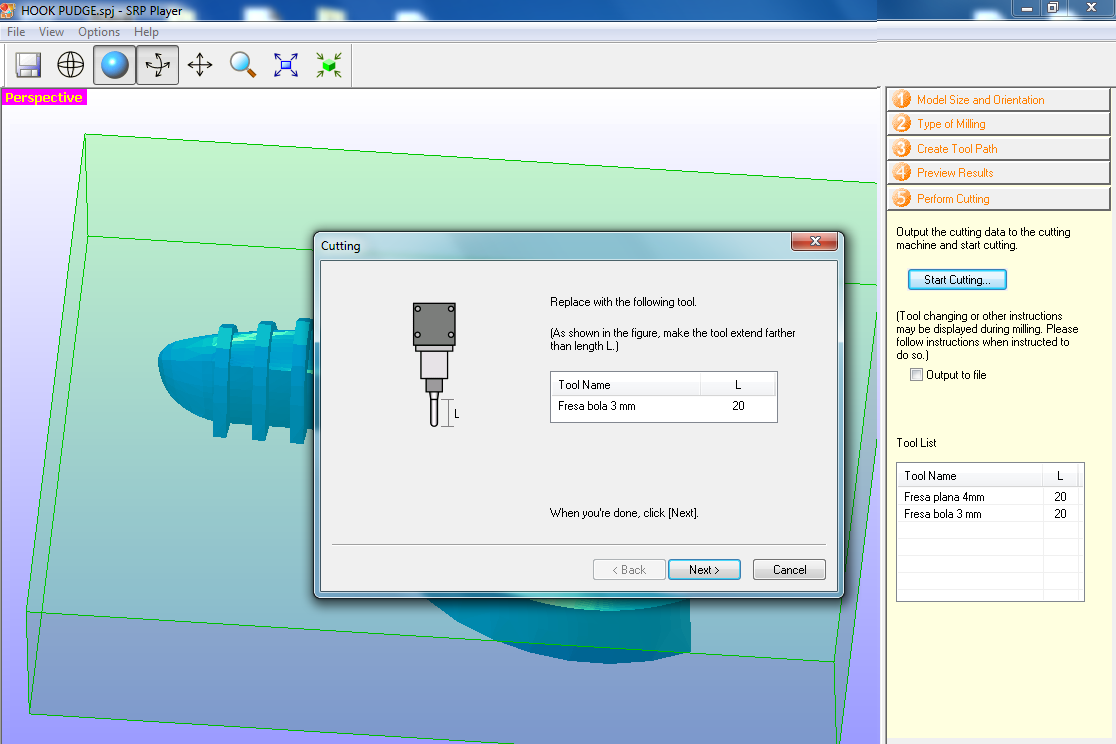 Download Roughing and finishing Files
 Fig.15 - Roughing and finishing Files
MACHINING
For the machining part, we use a block of machinable blue wax with the dimensions of 77 mm x 160 mm.
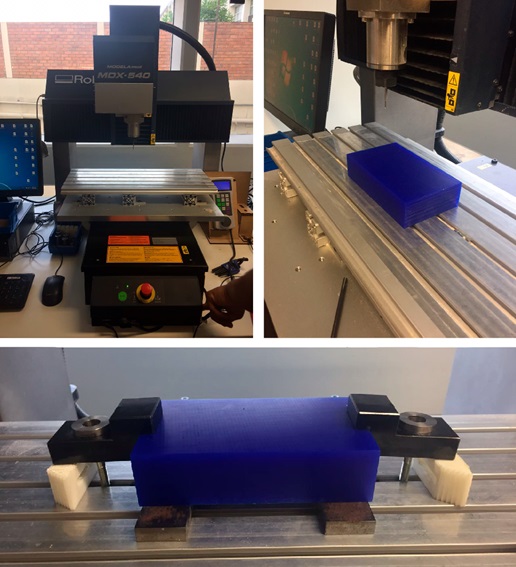 Fig.16 - Blue Machinable Wax
 When starting the software, the process of cutting my files took 6 hours.
The milling process looks like this.
The image shows an intermediate quality, which shows a topography in our design, that is corrected with the change of 3mm ball mill.
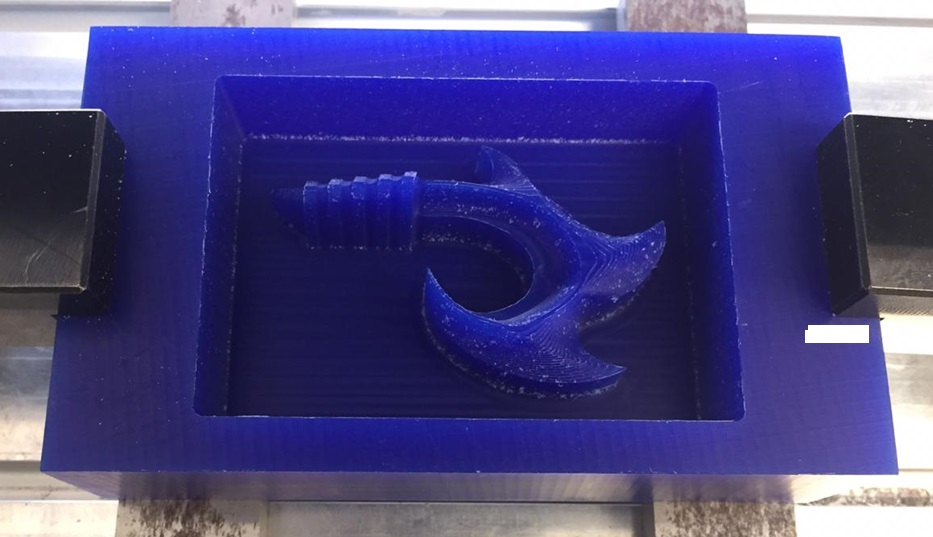 Fig.18 - HookWhale in blue machinable wax
 It is necessary to follow the process of change of mill with care, since if we release the mill it will generate a hole in our mold.
We calibrated on a flat surface, this was considered when generating the 3D model in the SRP player program.
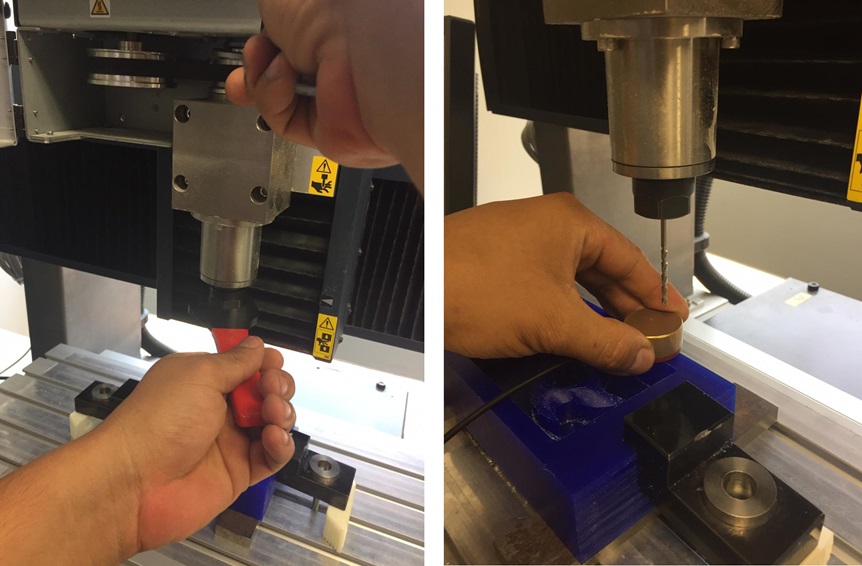 Fig.19 - Consideraciones al calibrar la CNC
 The ball mill allows to generate a continuous surface
The use of a smaller size drill allows a very smooth finish.
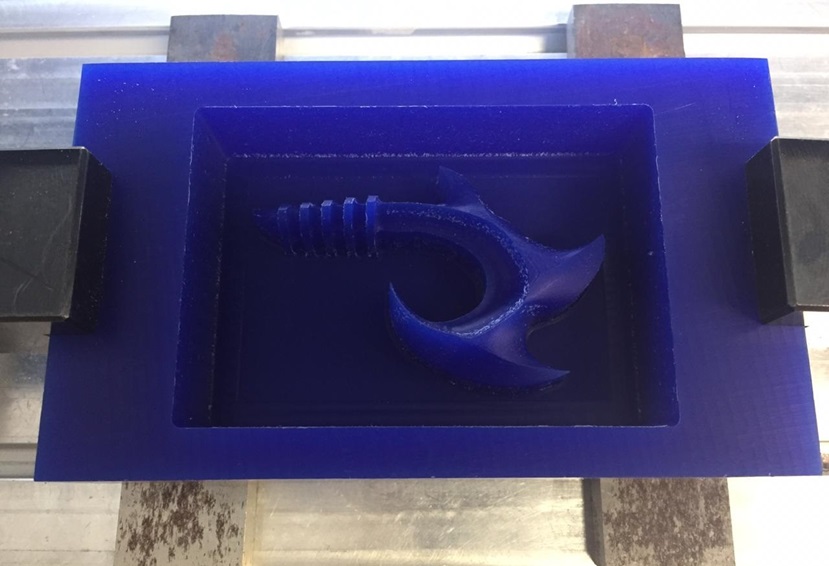 Fig.21 - Drill Size
 MOLDING
In the FabLab CIT Ulima we have four types of silicones, among them food friendly and others to use them with resin. Among them we find silicones of RTV type, Bi-Component Platinum, Silikast platinum and polyurethane rubber.
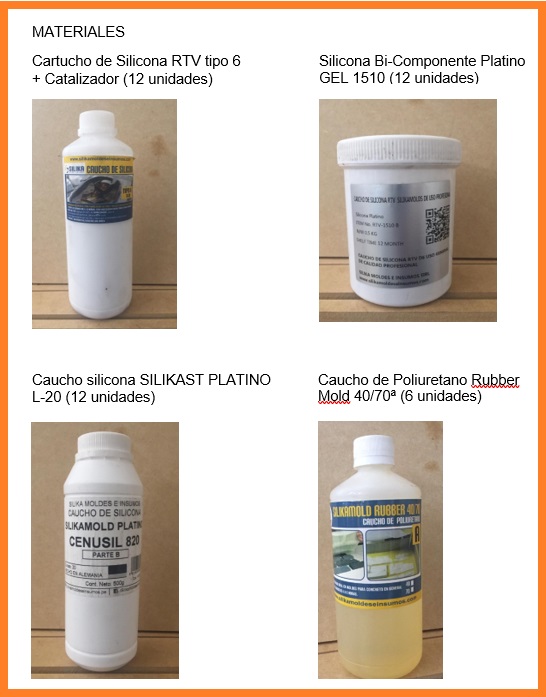 Fig.22 - Silicones
 To create molds we need materials like a balance, the mold, rods, silicone and its catalyst.
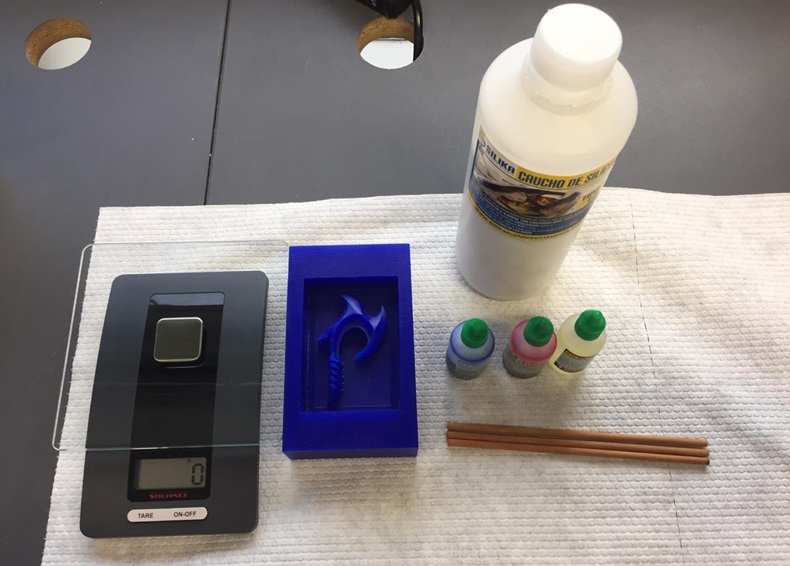 Fig.23 - Materials
 We must consider a quantity of 10 drops of catalyst to mix them with 100 grams of silicone.
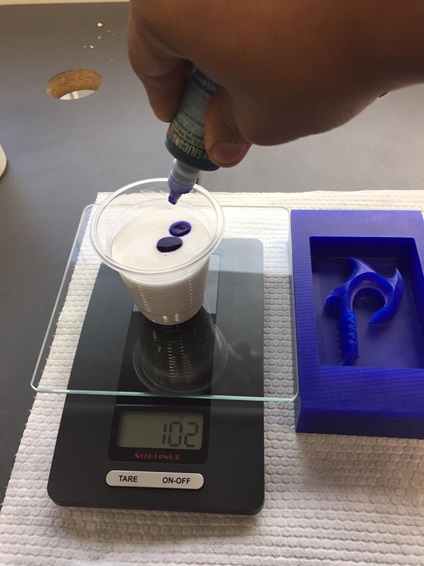 Fig.24 - Proportion
 My first mistake was not mixing the RTV silicone well with the catalyst and the result was that it solidified in parts. One can realize with the color of the mixture, in my case it was not uniform.
In addition, my second mistake was to hurry, as I had never prepared a mold, I did not perceive the degree of solidification since I felt that the mixture became hard so I dumped it into the mold very fast. However, with my second mold I had no problem.
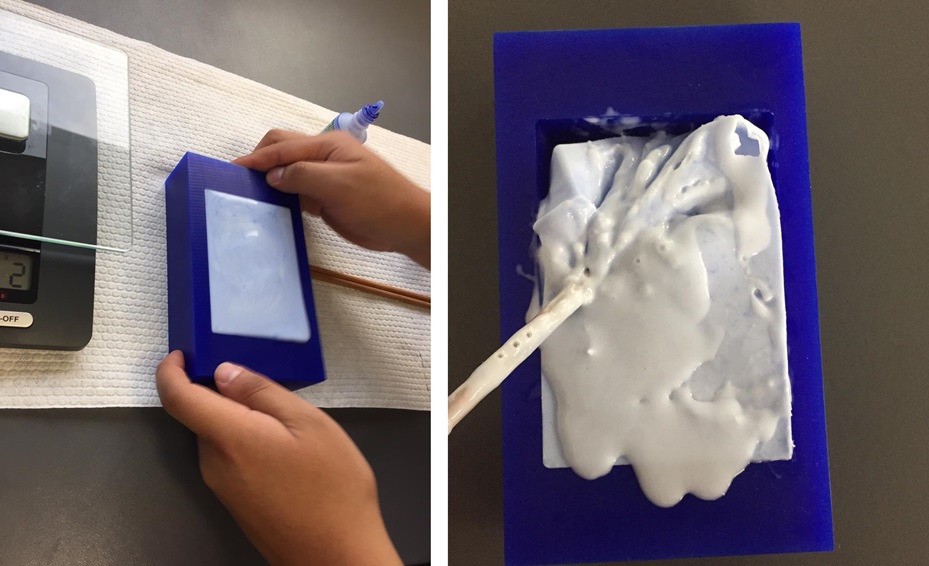 Fig.25 - Fail mold
 Create another mold with silikast platinum with a ratio of 50/50, in this opportunity mix a little more time since there was no way to observe the color in the mixture.
Unlike the RTV silicone that solidifies when moving, silikast platinum never showed such a characteristic, so you have to be patient when obtaining the solidified mold. Your process can last 12 hours
 Fig.26 - Platinum silikast mold
 If you follow the correct procedure the result is applied like this, the perception of texture and color is uniform.
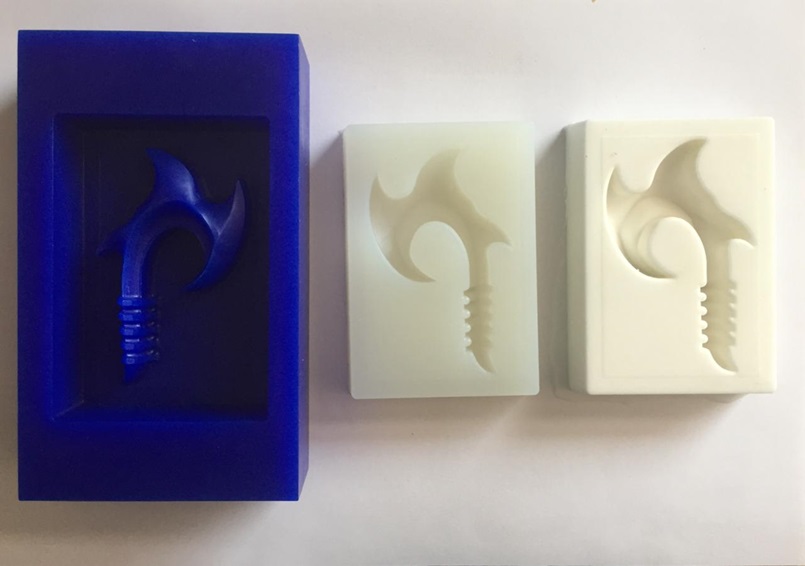 Fig.27 - Food friendly Mold
 CASTING
As a first example, I melted chocolate with steam to obtain a uniform consistency. So I proceeded to do the casting, in minutes the chocolate mixture solidified and I got a piece of chocolate.
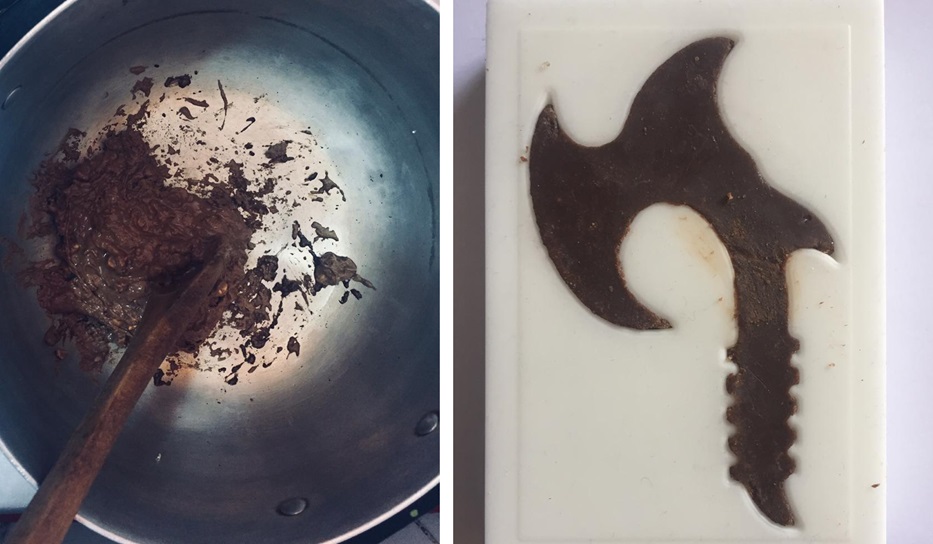 Fig.28- Chocolate WhaleHook
 On the other hand, in the FabLab CIT Ulima, we find resins such as Polyester for general use, silikast crystal and epoxy silikast.
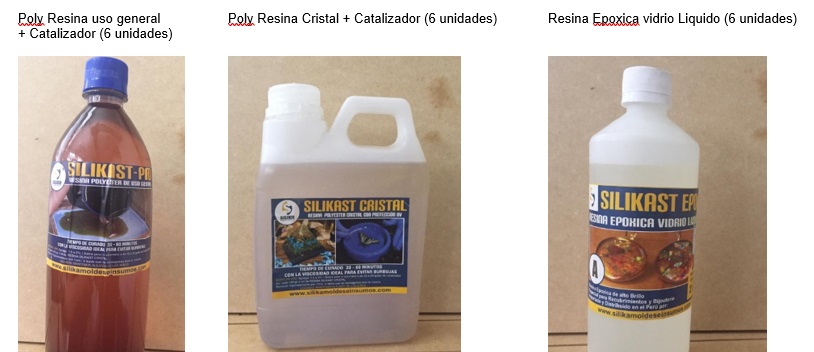 Fig.29 - Resins
 To work with resins, we need safety materials such as a respirator, goggles and gloves. We need to avoid the inhalation of vapors and interact with the elements since they solidify very fast, they produce burns if the contact with this is prolonged.
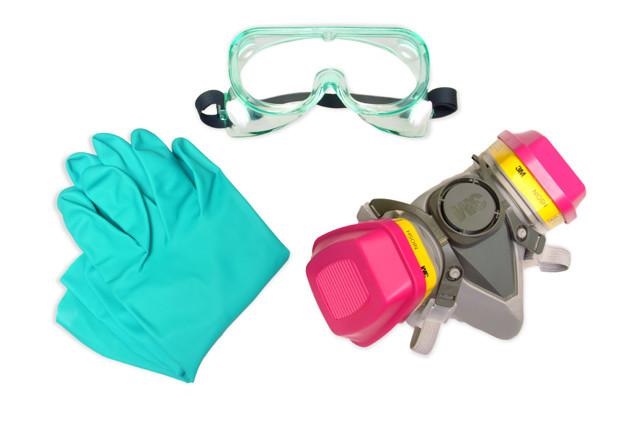 Fig.30 - Resins
 In the laboratory I found some metals like steel, aluminum, brass and bronze. Interact with the leftovers of other projects, I thought to fuse them but then when observing dust I decided to create more of them.
I took a few minutes to get metal shavings for the casting, but in the end I managed to put together one of each type.
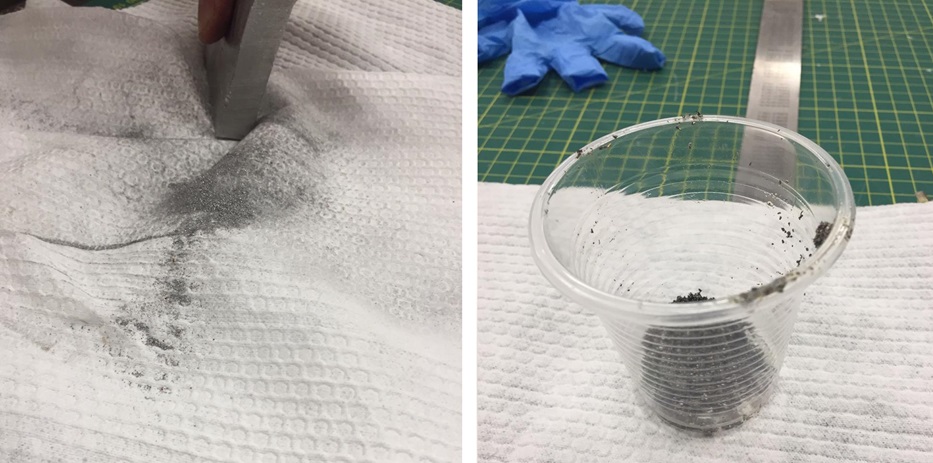 Fig.32 - Aluminum dust, brass and steel
 My first mistake in casting was to consider the same time of mixing that was done with the silicones, to realize in three turns in the glass my mixture solidified, I tried to fill the mold but there was no way to do it.
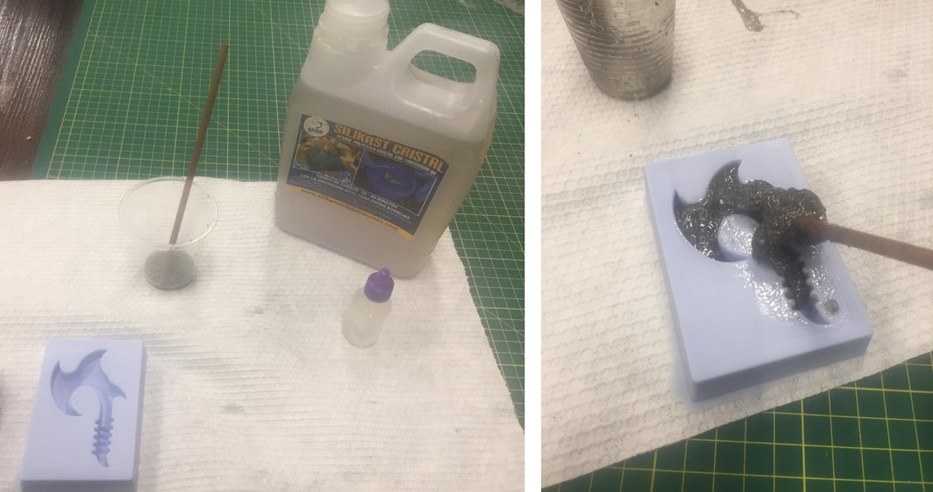 Fig.33 - Mistake
 For the other examples that I am going to make, I had to consider reading the characteristics of the resin catalysts, since they interact differently from those of the silicones. Less amount of drops is needed, the proportion of any resin is 100gr for every 5 drops of catalyst.
In this way, I did not have any problem when doing the casting.
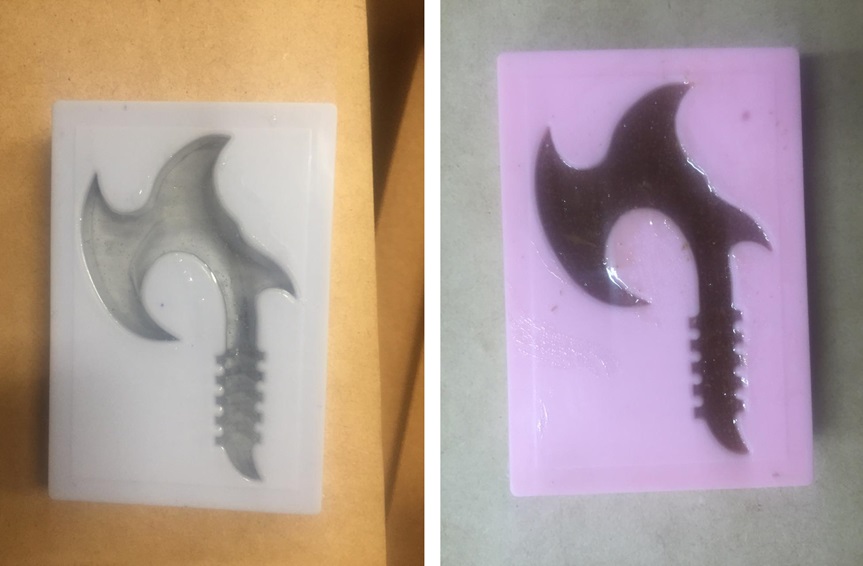 Fig.34 - Example
 By continuing to practice, I managed to mix metals and catalytic pigments with the resins the result, from left to right by rows, was a mold of brass, steel, chocolate, glass, plywood sawdust, red pigment, brown pigment, green pigment, aluminum , purple pigment and MDF.
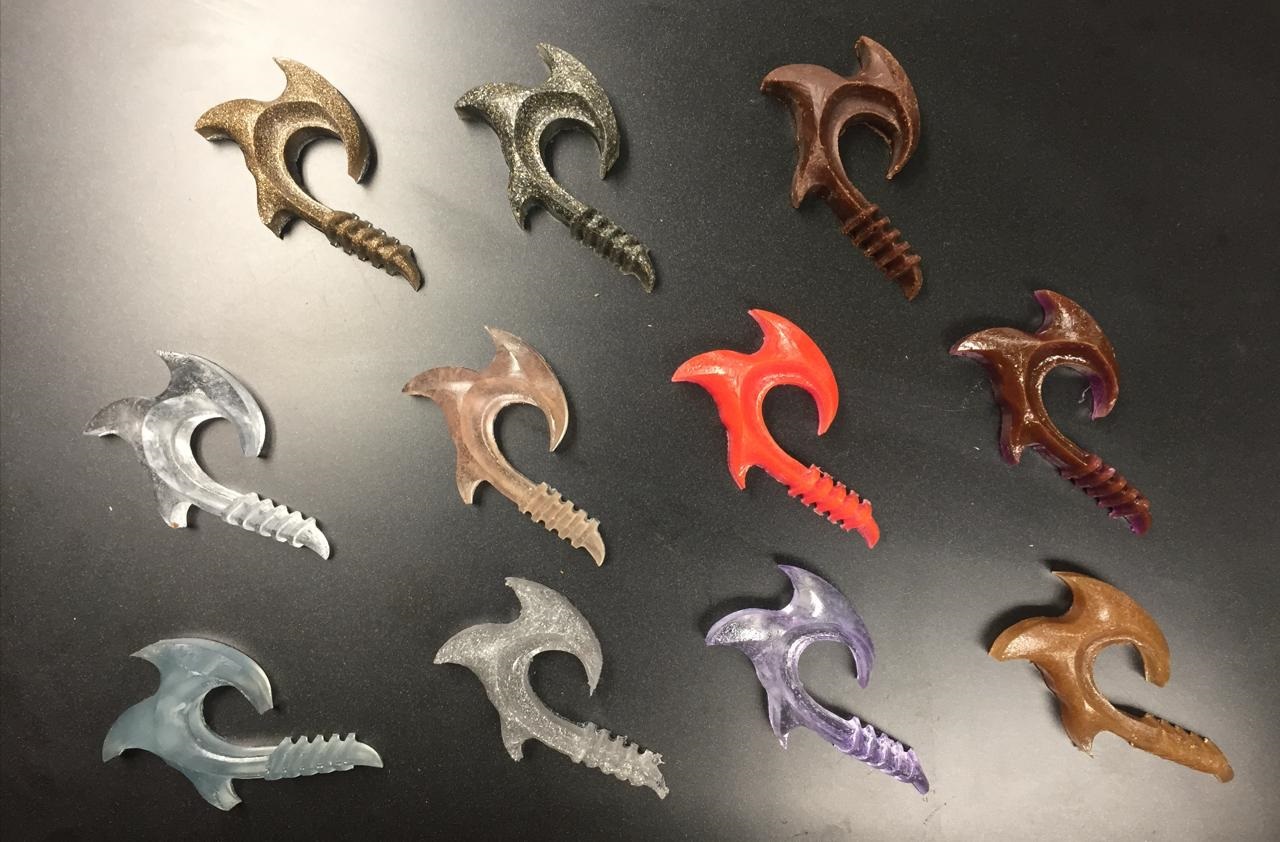 Fig.35 - Casting Complete
 Group assignment
We review the safety data sheets for each of our molding and casting materials.
Moulding:
Material 1
To manufacture the molds we use 3 different materials, the first was RTV silicone rubber, which requires a catalyst in proportion of 20 drops per 100 grams of silicone. Safety data sheet
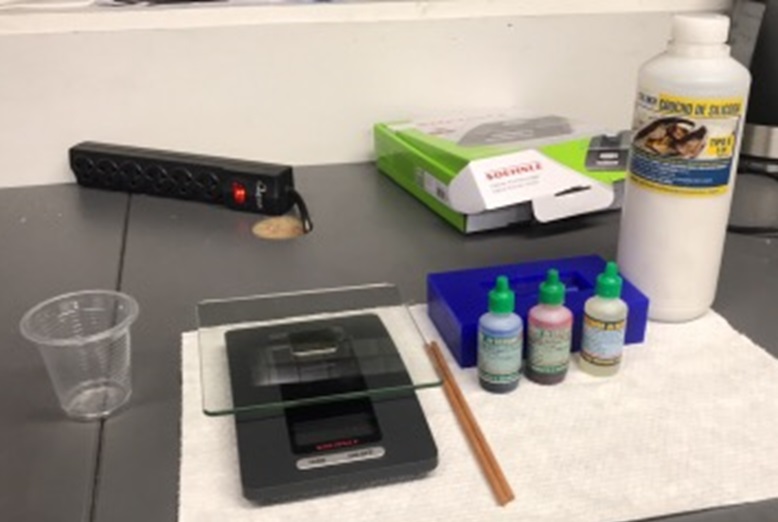 Fig.36 - RTV Silicone
 According to the information gathered, these are the personal protective equipment that should be used for the manufacture of molds of this material.
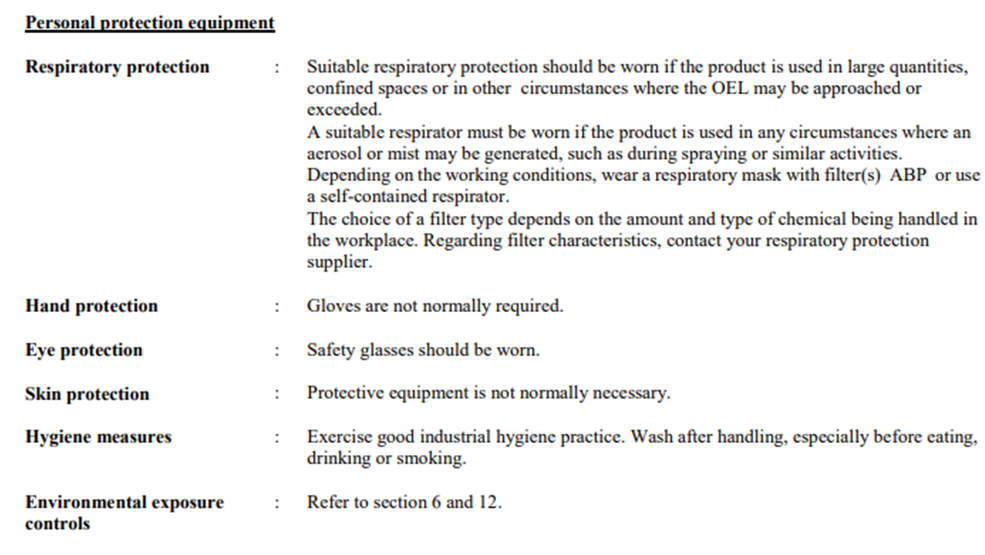 Fig.37 - Personal protection equipment
 In the image you can see an example.
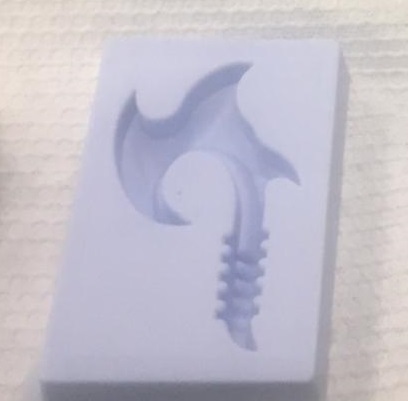 Fig.38 - Results
 Material 2
The second material we used was Cenusil 820 platinum silicone rubber, of German origin. For the manufacture of molds it is necessary to mix part A and part B in proportion 1-1. Safety data sheet
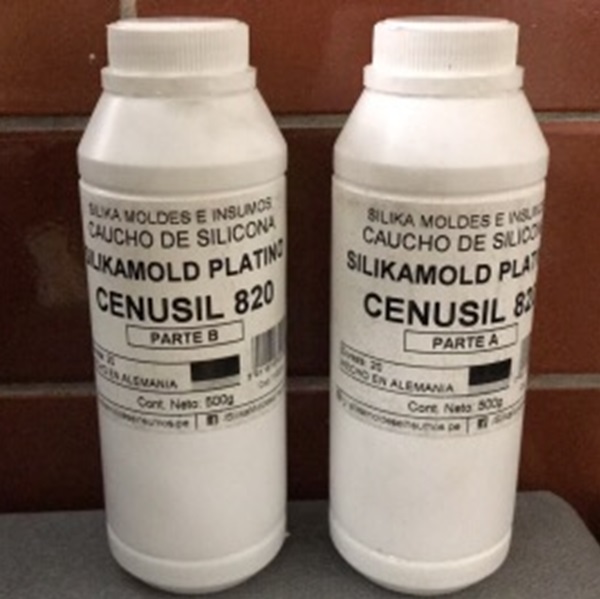 Fig.39 - Cenusil 820
 According to the information obtained, it is recommended to wear gloves and protective glasses.
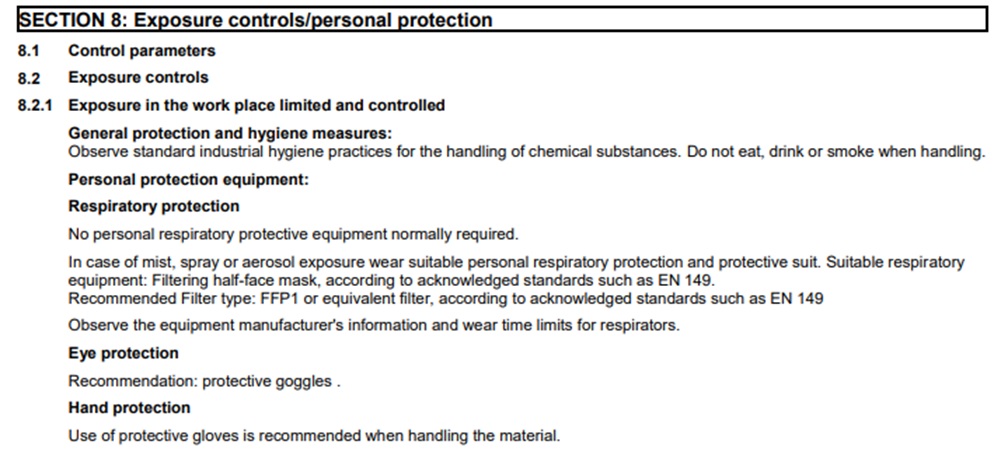 Fig.40 - Personal protection equipment
 In the image you can see an example.
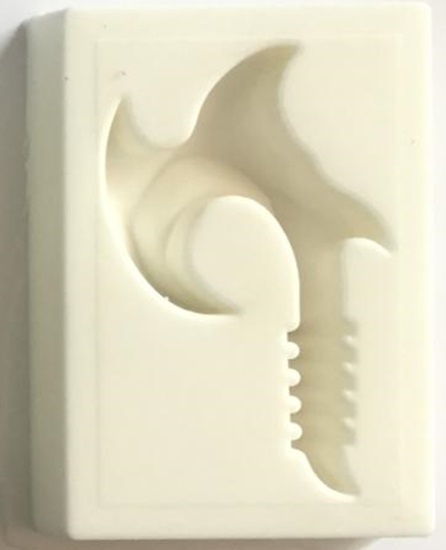 Fig.41 - Results
 Material 3
The third material that we used for the manufacture of molds was platinum rtv silicone rubber. For the mixture must have part A and part B in equal proportions. Safety data sheet
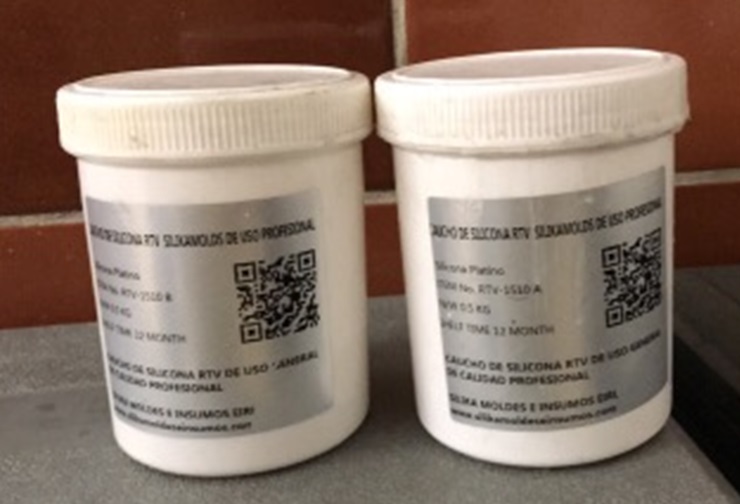 Fig.42 - Platinum RTV
 From the information collected, the following recommendations are obtained when manufacturing the mold.
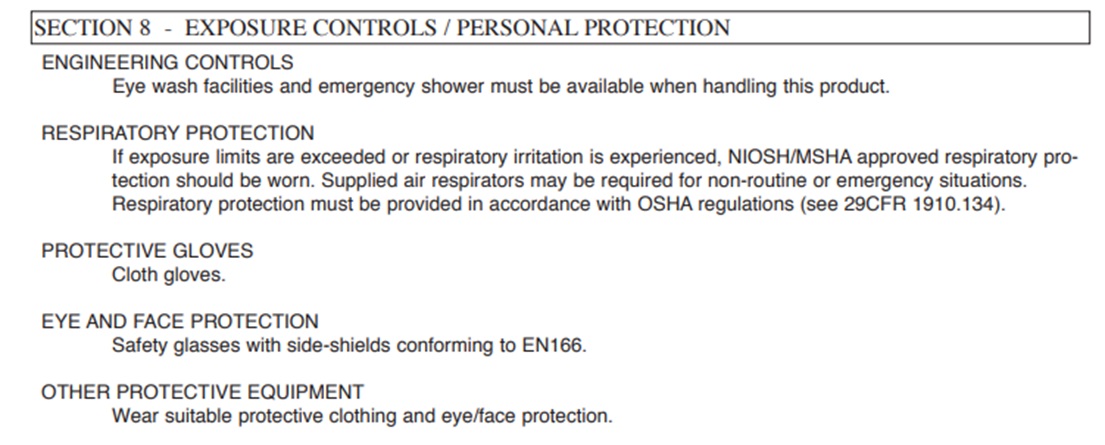 Fig.43 - Personal protection equipment
 In the image you can see an example.
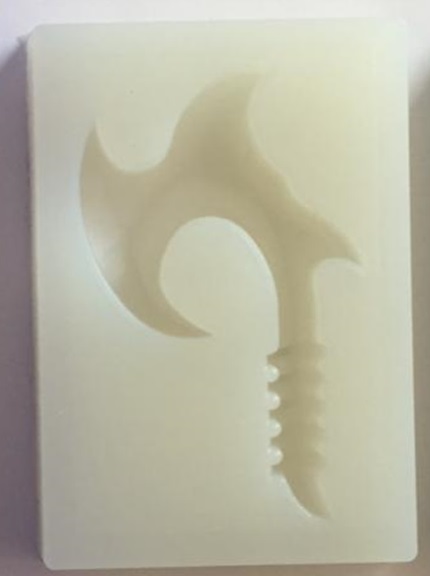 Fig.44 - Results
 Casting:
Material 1
The polyester resin requires a catalyst to perform the curing process. Safety data sheet
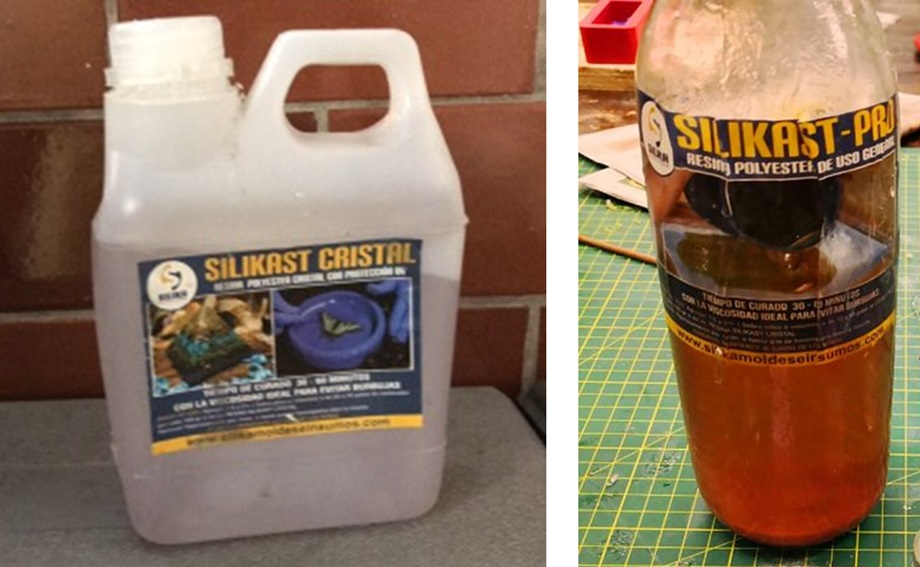 Fig.45 - Polyester Resin
 As you can see in the data sheet, this material requires a respirator, due to the odors that are released.
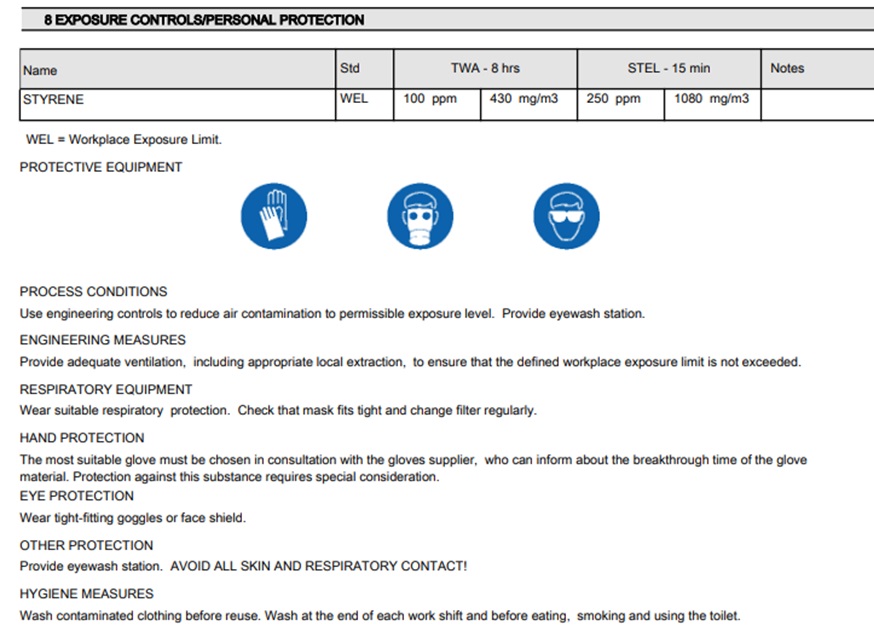 Fig.46 - Personal protection equipment
 In the image you can see an example.
 Fig.47 - Result
 Material 2
Epoxy glass resin, to carry out the curing process, combine part A and part B in a ratio of 1 to 2 and stir the mixture for 3 to 4 minutes. Safety data sheet
 Fig.48 - Epoxy Glass Resin
 As you can see, respiratory protection is essential due to the gases that emanate.
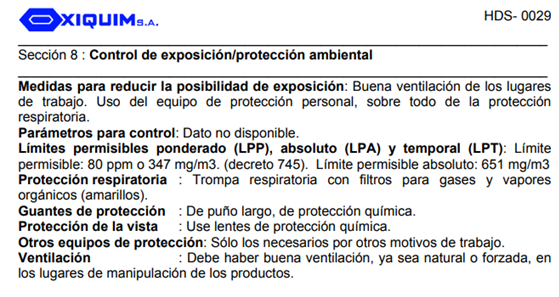 Fig.49 - Personal protection equipment
 In the image you can see an example.
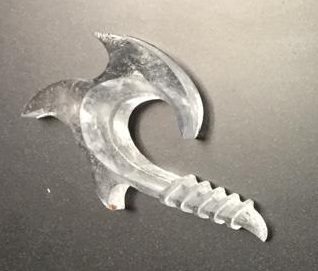 Fig.50 - Result
 To see all the documentation of the group work, you can visit the CIT page.