project development
Fab academy 2018
fablab uae
● My proposal for the Final Project for Fab Academy 2018, is to make fablab uae
an Interactive Table Lamp.
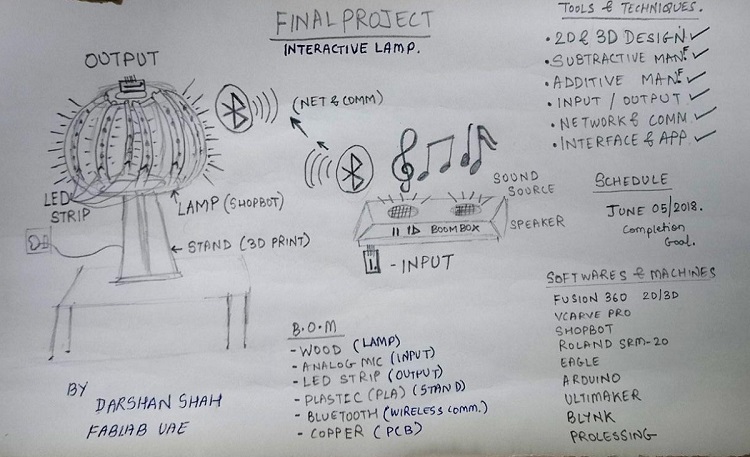
● I'll be using the analog microphone sensor to record the sound which will be the source from a musical instrument or a speaker and convert those differential sound frequencies into some sort of pattern for the LED strip to present different colors, levels of brightness according to the data it receives through the input mic.
● My responsibility was to communicate my project concept to my instructor and discuss how it would help me express the skills I gained in the these 20 weeks.
● My instrustor explained me to consider all the essential parameters involved in the process before finalzing the final project and also to regulary document this particular page for all the tests, plans and work I'll be doing towards the final product. This helps me understand my progress towards it.
Material & Resources
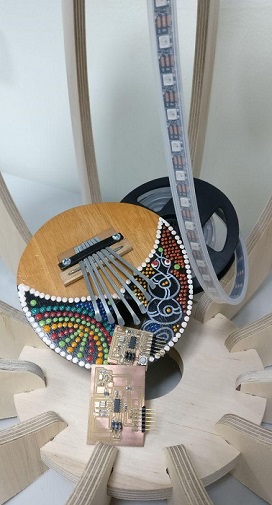
● The following musical instrument , Indonesian Kalimba is what I am thinking of using to control the LED's. Looks like a cute little instrument and sounds sweet as well.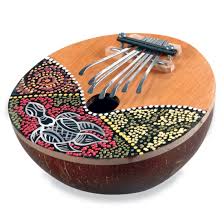
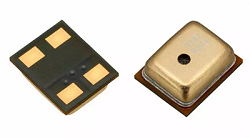
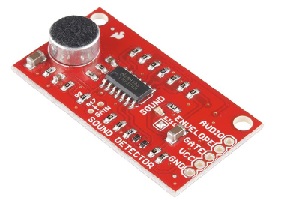
● The Knowles SPU0414HR5H-SB-7 sensor Analog Microphone was used for testing but the Sparkfun Sound detector was being used as the final input drvice week and to record the sound from the source, which can be the above instrument.
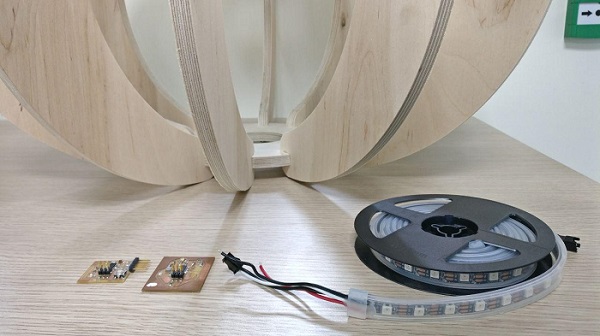
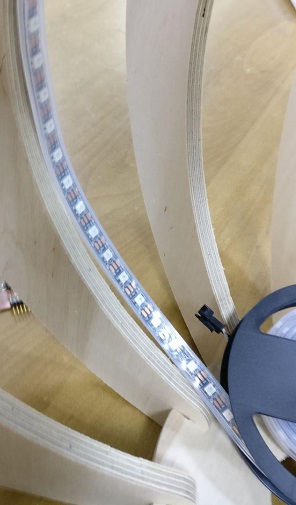
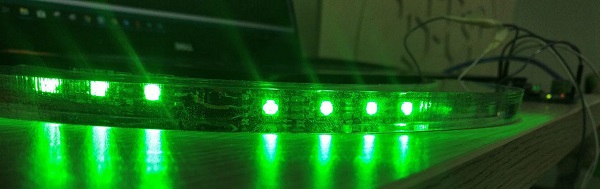
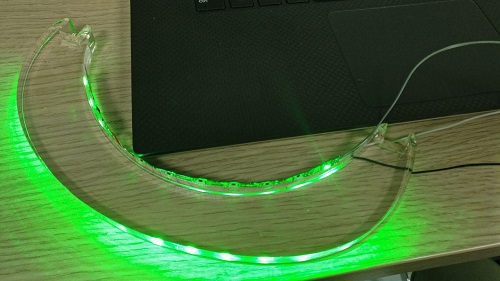
● And the following Adafruit Neopixel LED will be used as the output device which shall be connected to the mic and programmed in such a way that the LED responds to the recorded sound of the mic.
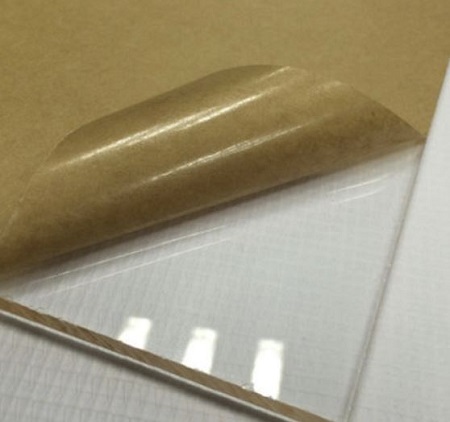
● The 12mm transparent Acrylic will be used to produce the spines of the lamp which were made in wood before for my Week 08 shopbot assignment. I changed my mind on using the transparent acrylic, which will make the LED lights look better in the combination with them to reflect and showcase the same.
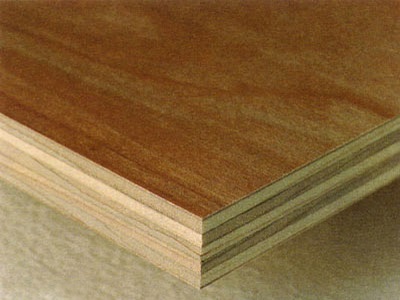
● Although, I shall still be using the shopbot and the 12mm Plywood to cut the top and bottom base for the lamp as I have tested the slot joint for the wood and acrylic and it fits perfectly fine. Also Wendy recommended me to do the same, because the acrylic fitting in to each other makes it more brittle and it's always good to use diversified materials for the final project and work on the shopbot again.
● The below images shows the full set of components and material, Wendy asked me to do that which was quite helpful and I just got most of the parts which will be used and put them all together just to understand the placement and integration of the components, so I played around a bit with all.

testing & development
testing the led
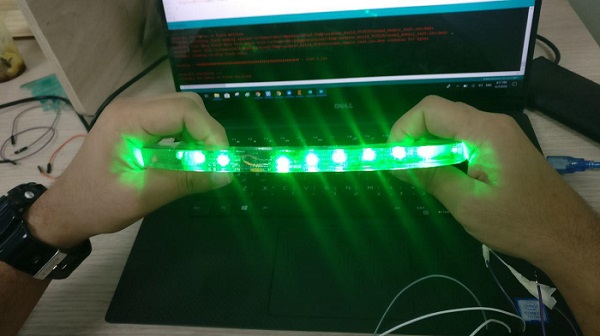
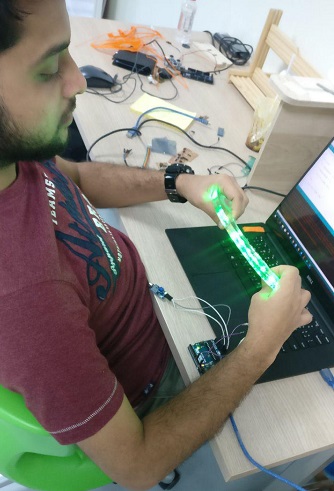
● I used the Arduino Uno commercial board to test the neo pixel LED, it only required ground and vcc to be tested at 5V. The LED looked fine and were working, so the next step would be to create a board for the same for my final project output device.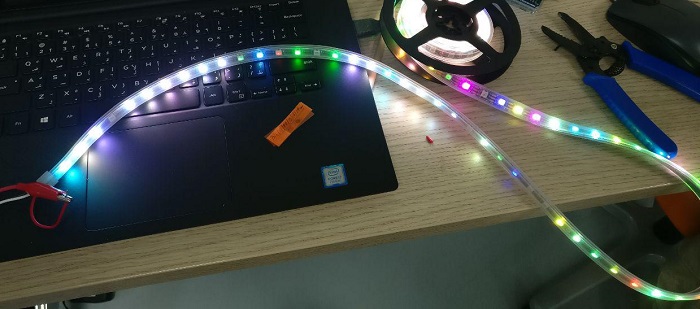
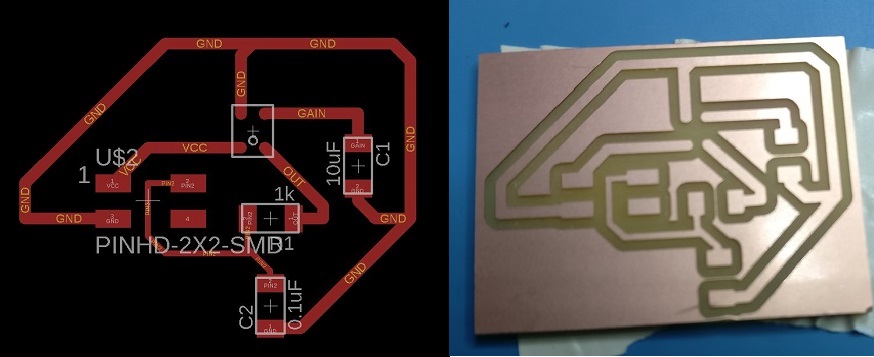
● Download the mic schematic, board files and the (png) files HERE
testing the mic
● I had already tested the Analog Mic during my Week 11 assignment for input device, but unfortunately the FTDI component fell apart from it so hashim asked me to test the mic again using the most basic no. of components such as the MIC sensor, 1k resistor, 10uF capacitor, 1uF capacitor, 2x2 header for vcc, ground and output.
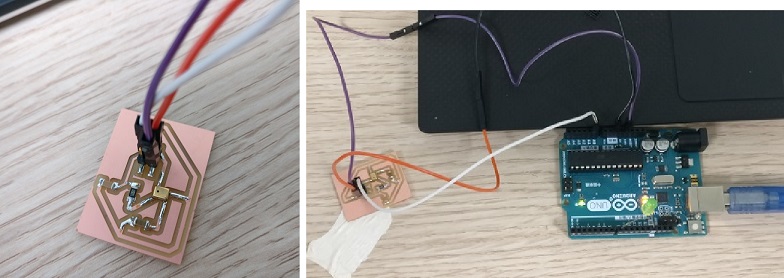
● Here is the video of the Mic sensor sensing the sound in the environment. I used Arduino Uno and Arduino IDE with the serial plotter which showed the graph of the sound.
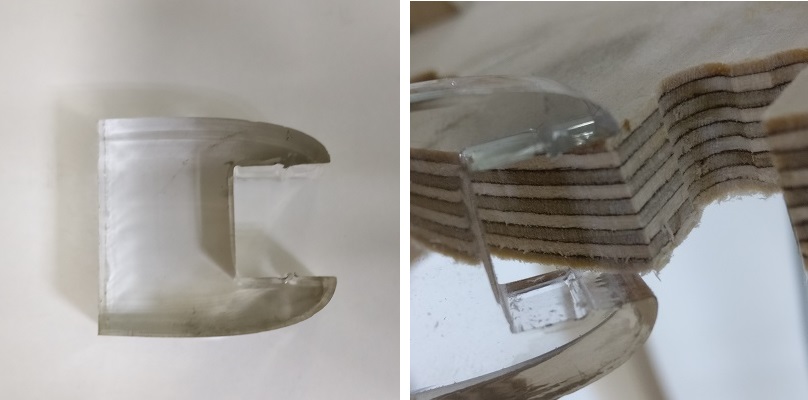
testing the slot (acrylic and plywood)
● Wendy and me decided to test how the 12 mm Acrylic fits into the slot of the 12mm Plywood base. So, we came with pretty smart soultion of creating small bumps in the slots of Acrylic so that it could fit well with the plywood because we have finalized to use the Acrylic for the spine and plywood for the base, so it was very important to test the slot and make sure it fits perfectly and also easy to remove the acrylic from the wood.
● Below, we can see, how I used the laser cut acrylic piece of the slot to test on the wooden base and it did fit really well. Not very hard and not at all loose.

testing the lamp(main body) prototype
● I decided to reduce the lamp size to half scale compared to the one I made during the shopbot assignment, as it was the week of making something BIG, but for my final project the lamp will be smaller and won't look like a pumpkin anymore.● So I just scaled the same model down in fusion and begin to cut the 6mm cardboardd to see how the lamp would look and how can I fit the PCB and the LED inside of it.
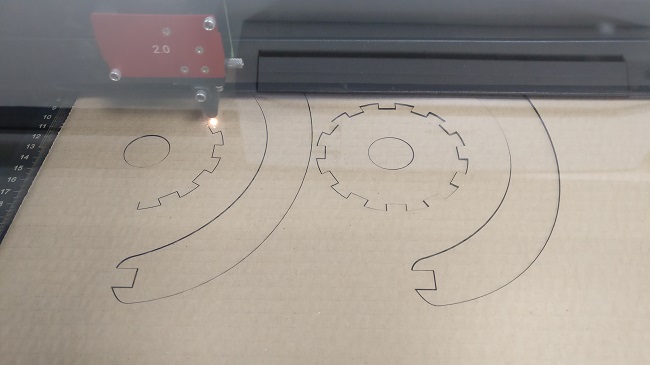
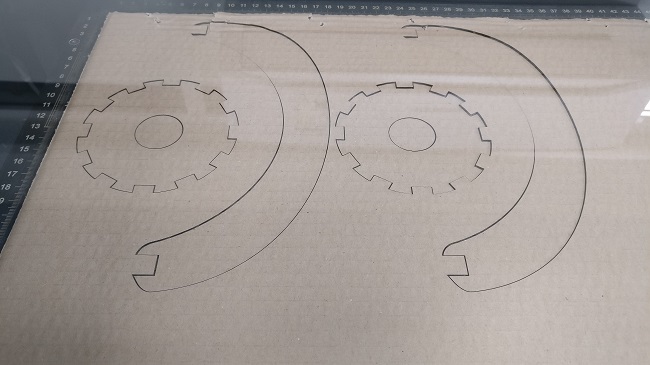 ● I used the Universasl Laser System and Trotec machine to Laser cut the card board and test, how it looks once the spine and the base are fit together.
● As I know the width of the NeoPixel LED is 12mm so it made sense to use acrylic with thickness of 12mm for the final product. But just to test the design prototype I used 6mm card board and by using 2 parts together would make it 12mm, so as you can see in the images below that I made a sort of sandwich using the 6mm card board for the spine and the base to achieve the required thickness for the prototype of the main body.
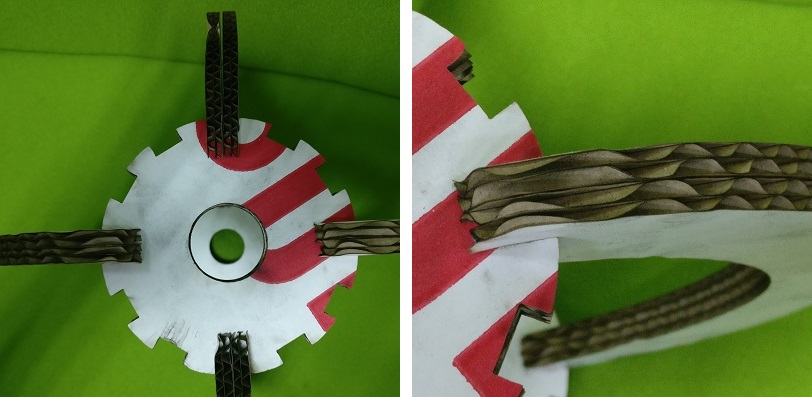

comparison with full scale lamp
● Me and Wendy compared the full scale model of the lamp to the newly cut half scale, we can see the comparison clearly and it looks thin, tall and super cute.
interesting orientations
● Once we had the prototype ready our mind started working in all directions, so we tried different orientations as well for the lamp, whcich look quite impressive as well.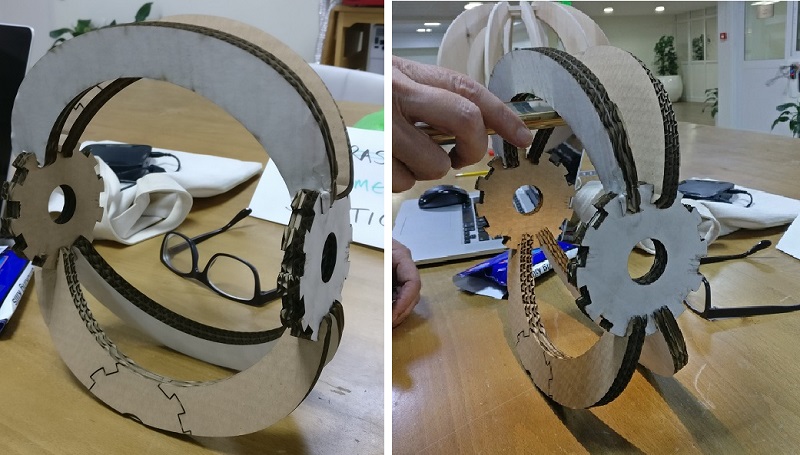
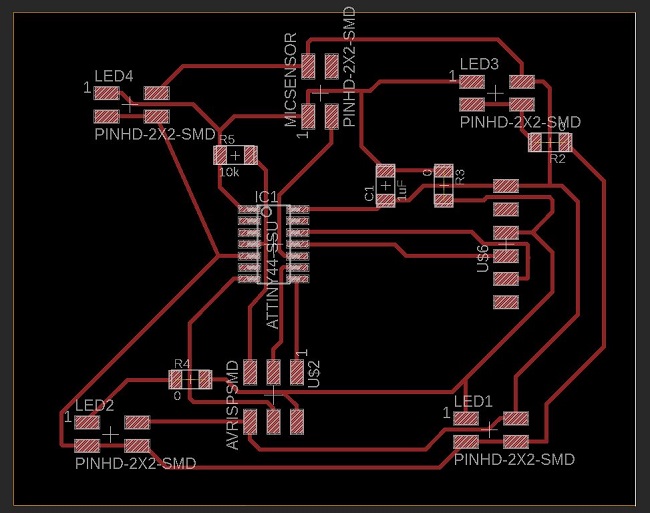
final board schematic

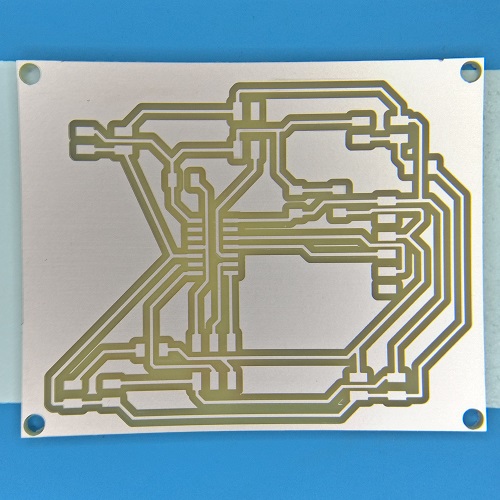
final board outlook
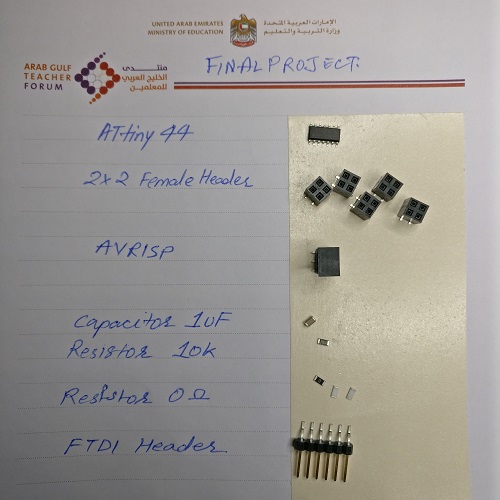
final board components
final board outcome
final board stuffed and ready
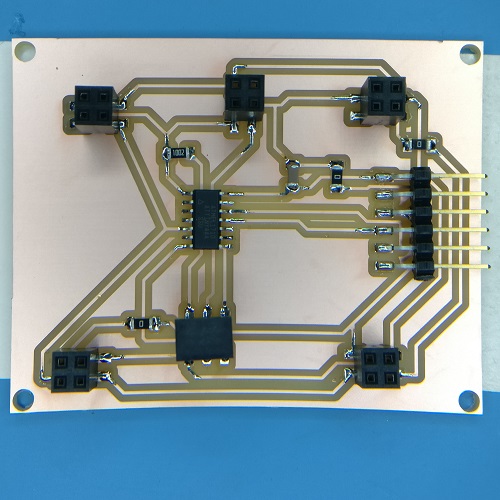
● Download the schematic, board and (png) files for the final board HERE
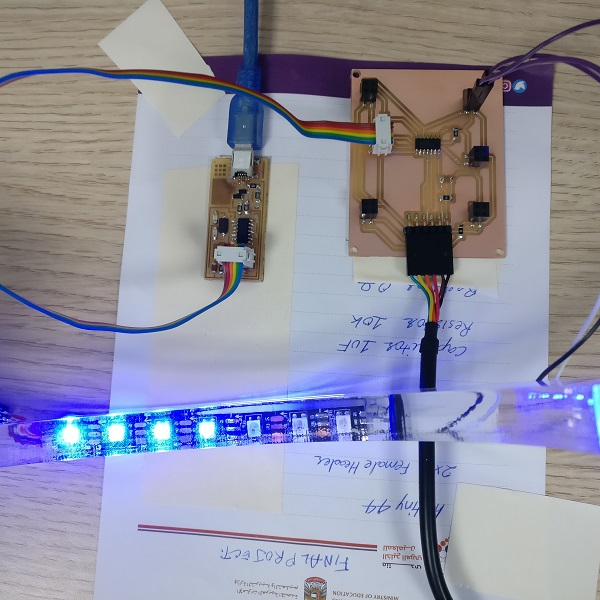
combining components
important questions
● what is the deadline ?- The deadline i set for myself is 19th June as I have my final project presentation on the 20th June, I am at a good pace and wish to complete everything on schedule.
● which tasks are completed and what remains ?
The task of finalizing the design of the lamp and testing the input, output have been completed, what remains is the 3d printed cover for the PCB which shall sit inside the lamp at the bottom base. Also the final code is to be skecthed using arduino to make the communication between the mic and the neopixel LEDs.
● How will I complete the reamaning tasks ?
My plan is to assemble the lamp with all the essential components, so that I can finalize the design for the 3d model and proceed to make the final connections and packaging.
● What has worked so far ?
Apart from the Analog microphone everything has worked pretty well.. I faced some trouble with Neopixel, but they're all fine now.
● What hasn't worked ?
The Analog Microphone worked but not as per my expectations, I expected the rangle of the mic to be more than what I showed in the video. So that is why I decided to use the Sparkfun Sound Detector to complete the final project input device.
● What questions I need to answer ?
The power source, I am planning to use a power bank in order to acieve a portable power source and I need to create a code which makes the lamp work as per my vision.
● What did I learn ?
check out the final project page for the beautiful result outcome.
progress report
● My priority is to achieve the final design prototype with the correct provision and dimension to fit the 3d Printed component for the PCB to fit in, create pathways for the LED and the wire connections, also to see the looks of the lamp and the final integrated outcome.● After the final body of the lamp is ready, I wish to work on my PCB for the next couple of days and program the board so that I can move forward to 3D Print the component which shall arrest the PCB into it and that component will be placed in the lamp.
● Personally this week resulted in a lot of progress in terms of getting to know what are the aspects of the project development and where to start with along with spiral development and good progress rate.