getting started
● Neil's lecture on the input device was very helpful and he showed a wide range of sensors that we can use for this week's assignment and also select one for the final project.● I started this week by testing a temperature and humidity sensor, even though it might not be the same sensor used for my final project , but just to understand how to go about with this week in terms of using Arduino UNO to test the sensor and also using Arduino IDe for programming the same.

● I connected the sensor with Arduino Uno and started testing it, below you'll also find the code for the same.

● I found the code for the sensor from file/examples/DHT sensor library/ DHT tester to test the same.

● I verified and uploaded the code while ensuring all the connections were alright and once the code was successfully uploaded, I performed the serial monitor window to check how the sensor reacts.
● And the sensor did measure the change in the temperature, I noticed more changes in the temperature compared to humidity but the more important thing for me to carry out this test task was to learn the programming bit and see how the sensor reacts.


● The next step was to use the sensor which will be used for my final project, design the board accordingly, mill it, solder the components and test the same.
● So for my final project, I was really inclined towards using a microphone sensor and I was really curious to learn and notice how it works.
● The datasheet helped me at a great extent to understand the use and function, have a look at the datasheet of the Analog MIC HERE
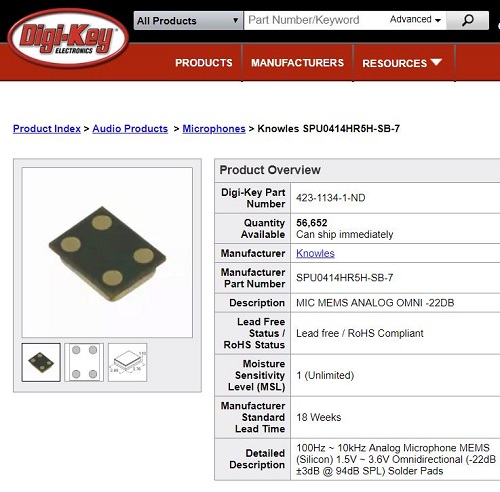
● The decision of using the analog microphone was one of the most challenging decisions in terms of designing the board with all the essential components required and then soldering the very very tiny analog microphone which had the soldering pad beneath itself.
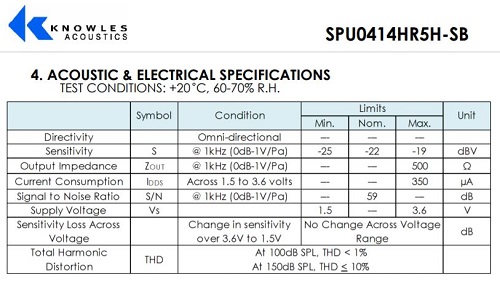

● So in order to go about and test this analog microphone I faced a lot of challenges for most part of my week and I learned a lot about what to consider and more importantly what not to consider when we are choosing a particular component for a specified output purpose.
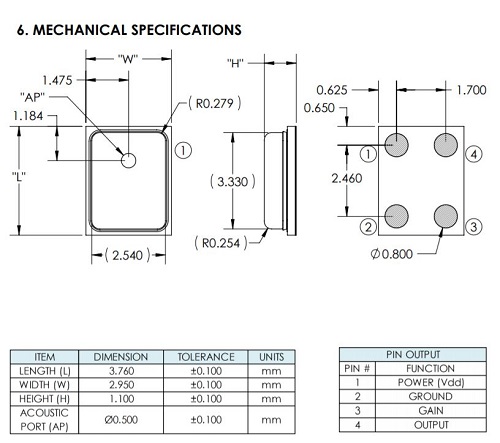
● The datasheet for the mic was a real great deal of help in terms of the supply voltage, mechanical specifications to solder the components in the correct way and also the solder flow profile as well.


● I must admit I did invest a lot of time in researching about the same sensor and how previous fab academy students used it and for what application.
● So moving ahead I found a couple of students who had used the analog microphone so I decided to test their boards and then designing my own for the final test.
● I decided to test the design of one the students, Dhawal from MIT who used the same sensor as well for his Apnea project.
● I downloaded the design, soldered the components, checked all the connections twice just to be sure and began to test it, but for the first entire day I was literally lost and unable to upload the code because everytime the software showed me the error message of "Serial was not declared in this scope" for the basic example code for Analog In Out Serial.
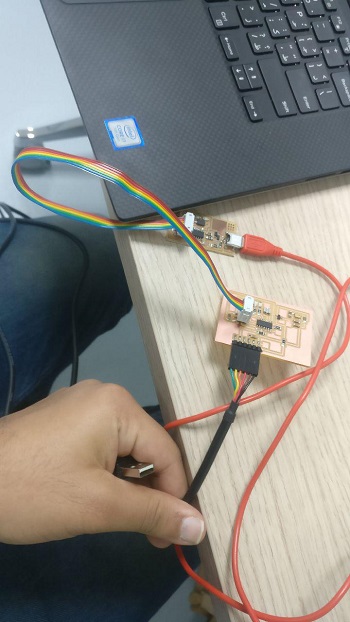
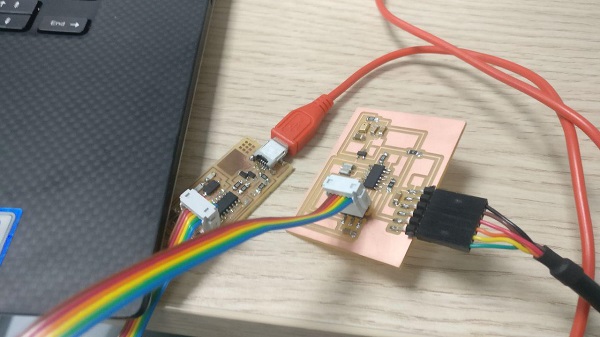
● I did a lot of research for the reason about why this error occured, I also did try all the solutions for the same but still no success. My fellow students and Hashim sir were also surprised as there was no concrete mistake from my side.
● And after a lot of hustle on the Arduino IDE, one fine morning Hashim sir, going through the Arduino library found that I did not have the library for the software serial.
● So, the solution was to uninstall the Arduino IDE software, and reinstall it.
● I honestly started laughing when I realized this was such a silly mistake and I actually learned a lot throughout this process of trial and error and finally re-installed the software.
● Apparently my fellow student face the very same issue for her respective sensor when she tried to test it using the example code, and again professor Wendy asked her to do the same of re installing the software.

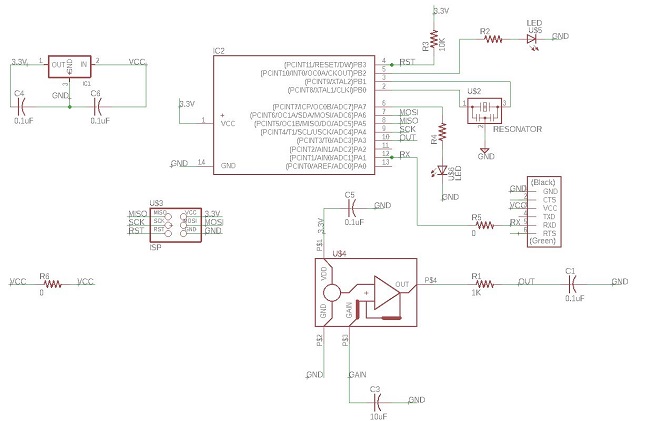
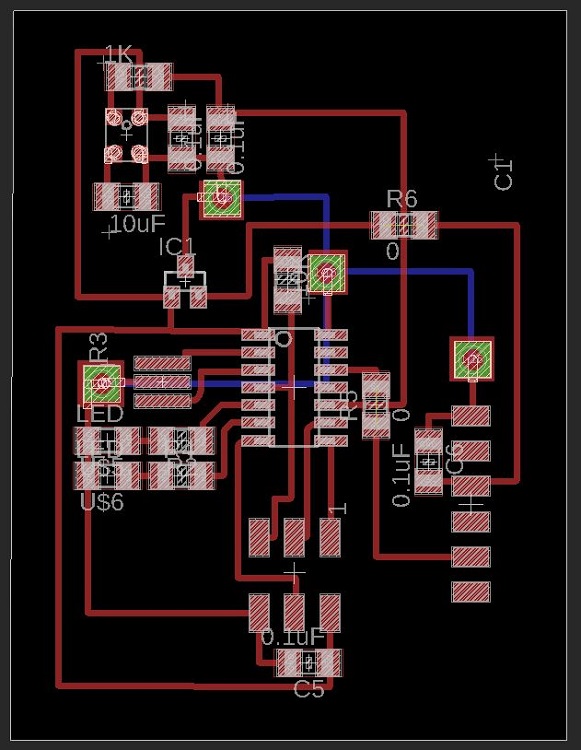
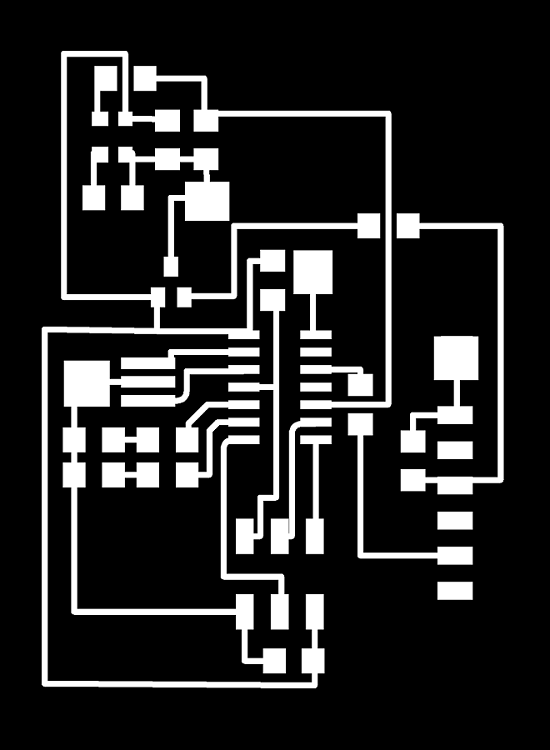
● These are the schematics and board design which were made on Eagle and then I used fab modules to download the (.rml) out of the (.png) file.
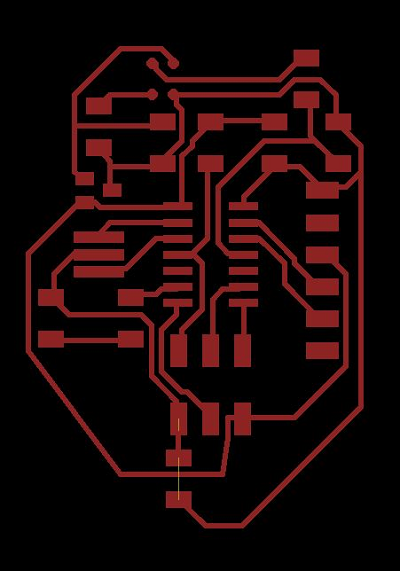
● So moving on, by this time, I was confident and started designed my own board with the analog microphone sensor using Neil's Board as the reference. I used ATTINY 44 and also and an LED as well.
● One of the new component for this week that I used for the first time was the
Knowles SPU0414HR5H-SB-7 Analog Microphone,
which as an ultra-mini surface mount Silicon Microphone usually used for consumer electronic devices. And indeed it is ultra mini, like seriously small and I had a tough time soldering this particular component. At the same time I was super excited to experiment with it for my final project.
● I also used a LM3480 100-mA, SOT-23, Quasi Low-Dropout Linear Voltage Regulator which helps in regulating the power for example, the mic works on 5V so I put the regulator which has an input voltagerange upto 30V and regulates the same to 5V. The datasheet for the Regulator was helpful as well.
● The other following components, have been previously used by me during my Electronics Production WEEK 04 and Electronics Design WEEK 07
ATTINY 44 - the micro controller
FTDI - Used to Power the board
AVR ISP - for programming
LED - I actually added the LED not for any specific purpose but just for fun, because I like it.
RESONATOR - To create an electrical signal with a precise frequency.
CAPACITOR - values(0.1 uF x2, 1 uf and 10 uF)
RESISTOR - values (1k, 10k, 499 and 0)

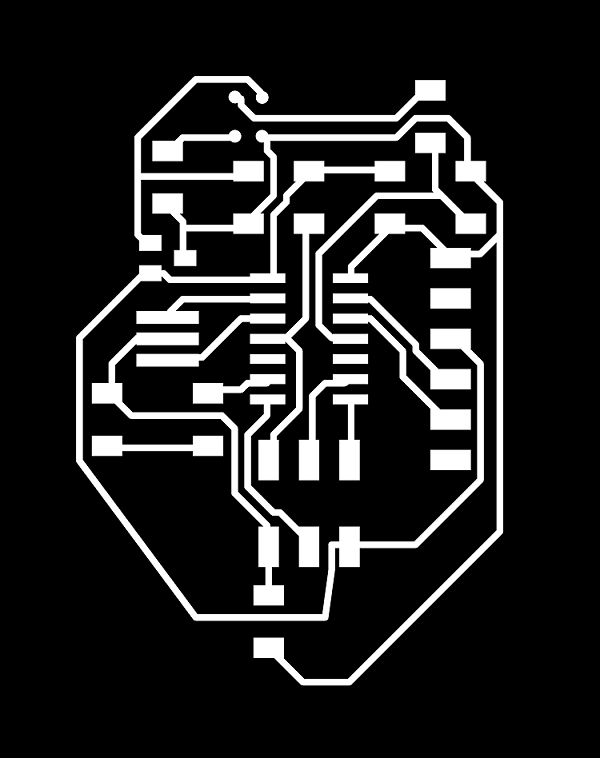
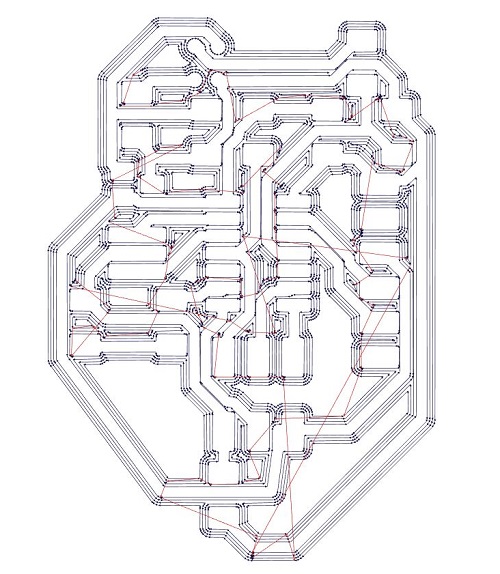
● Once follwing the same steps for fabmodule and getting the .rml file cut ready was a good practice. The I soldered the components, especially the analog microphone itself again needed like utmost concentration and at least 4 hands to be soldered correctly to make sure of all the connections.
● Once the board was ready with all the components soldered and carrying out the smoke test along with the multimeter contuinity check, I went through the same process of connecting it to the FabISP that I had designed and made in Week 04.

● The Arduino Language Refrences Page helped me to understand all the commands for the code below.
● I found the Analog Serial code from this Page and modified the same as per the Pin connected. The code below helped me to read the values from the mic sensor on the serial monitor and also notice the variation on graph through the serial plotter.
● I started the code by including the software serial library as to recive and transmit serial communication through pins 0 and 1 for rx and tx. Then I define the analog input pin as the concstant integer which is pin 8 (in my case), also defining the sensor value and output at 0 variable to store the value coming from the sensor.
● The the code let's me set up an new serial object with SoftwareSerial serial (rxPin, txPin). Multiple SoftwareSerial objects may be created, however only one can be active at a given moment.
● Then I define the rxPin as input and the tx as the output in the void set up function and begin the serial communication with serial begin at 115200 bits per second.
● Moving on to the void loop routine which runs over and over to help me read the sensor and output value by using the serial.print which prints as linefeed character with a delay command with a delay of 100 milliseconds between the reads for stability.
Original code sourced from the Funduino Website.
Download the modified Arduino Mic test code HERE
● The above code was succesfully uploaded to basically communicate with the Arduino IDE and print the value recieved from the mic from specified pins on the serial monitor and the plotter as shown in the video below. I could observe the sensor reading the sound in the environment.


● It was honestly the most essential weeks to progressively stay on the right path and have a really good idea of the sensor being used for the final project. Also the amount of knowledge gained in this week through the challenges I faced were the best teachers for me, because I took them quite positively and looked for the correct solutions also the staff and students really helped me as well.
learning outcomes
● Download the Eagle Board files HERE
● Download the (.png) file for traces and outline HERE
● It was a really difficult week I must say, to achieve the goal I set for myself and that's the best part of this course for me personally, that I face a really interesting challenges every week and then I learn more about the particular topic, that's how we grow.
● It's quite important to mention that I used Eagle to design the board this time, because I wanted to try something new for electronics design, It was a valuable learning experience with the software, it is user friendly and intuitive as well.
● The idea of working with the analog microphone made me much confident and now it looks quite achievable than before in terms of programming and using the same.
● A super interesting week brings a lot of practical knowledge for me, and I look forward to work more in the next couple of weeks.
● I tested the Analog microphone again in Project Development Week with better results and I was much more comfortable and test the super ULTRA MINI mic this time around, a real boost of confidence on my way to the final project.