| Seonghee Kim | |
| 9. Embedded Programming | |
| HOME | ABOUT | ASSIGNMENTS | FINAL PROJECT | DOWNLOAD FILES | CONTACT | |
Week9
AssignmentS
-group assignment
Compare the performance and development workflows for other architectures-individual assignment
Read a microcontroller data sheet.Program the board to do something, with as many different programming languages and programming environments as possible
Hardware and Softwares used
-Roland SRM-20
-fab module
Outcome
First time I knew none of the word from week9 shedule site except Harvard. And the word Harvard does not mean the university I knew. And still I can not understand most of the word but now I understand at least where the components have to be connected with microcontroller such as MOSI, MISO, SCK, VCC, GND, RESET for programming and pin numbers for input and output.
However I still confused and want to know about
-why capacitor need different values? 0.1, 1, 10uf??
-why built in LED is connected to SCK?
-why reset has 10K registor?
-why FTDI of hello board and fabkit differnet?
(FTDI hello board has CTS, RTS but fabkit DTR, 1 more GND)
Datasheet
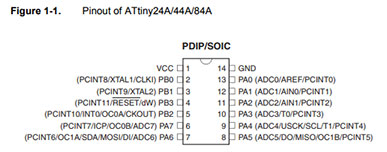
ATtiny 24/44/84 datasheet
-Attiny44A is RISC archetecture, AVR 8-bit microcontroller, 1.8-5.5V operating voltage, internal oscillartor 8MHz - 128kHZ(see clock sources p25) external 20MHz-Attiny44 has
1 VCC pin,
1 ground pin,
4 PROTB pins,
8 PORTA pins
Some important vocabularies from Rodrigo's page
- -SPI: Serial Peripheral interface
- -MOSI: Master Output, Slave Input (output from master}
- -MISO: Master Inout, Slave Outpu (output from slave)
- SCK: Serial Clock
- -ADC: Analog to digital converter (translating analog to digital)
- -AREF: Voltage Reference that the chip will use to know the range of voltage.
- -PDIP/SOIC : PDIP(Dual in-line package, through hole package),
-SOIC(Small-outLine integrated circuit) - -EEPROM (128/256/512 Bytes of In-System Programmable EEPROM) : Electrically Erasable Programmable Read-Only Memory, Non-volatile memory. used in computers and other electronic devices to store small amounts of data that must be saved when power is removed.
Programming
Hello.echo using Arduino IDE
-To install ATtiny board follow the highlowtech.orgpage step by step.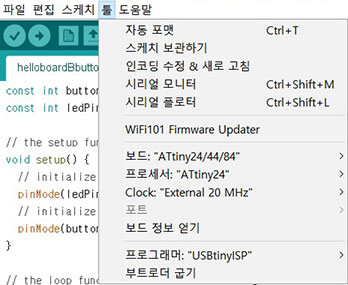 -select the board, processor, clock, and programmer.
-select burn the bootloader. bootloader tells the hardware where to look and how to get running when you start things up.
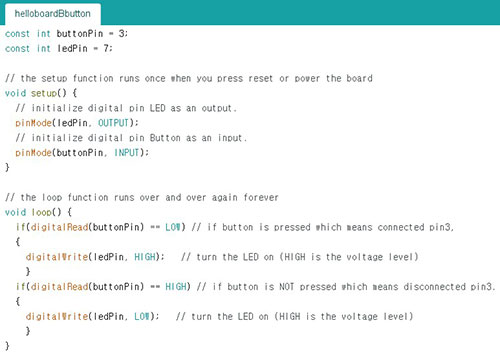 -LED is pin3, Button is pin7.
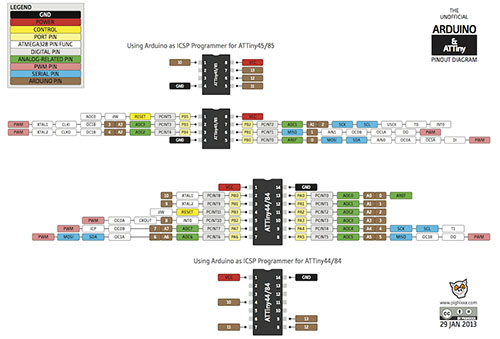 -Check ATtiny45/44 pin information from this image.
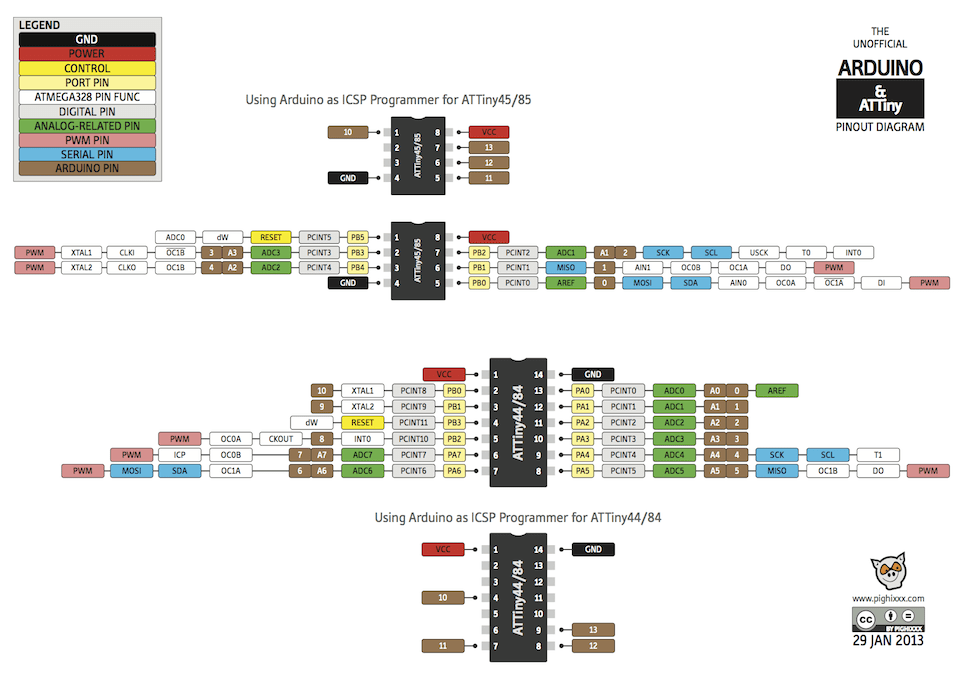
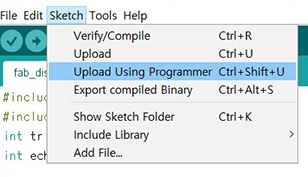 -upload from sketch>upload using programmer. first time I just uploaded using the button
Hello.echo using Git bash (c file)
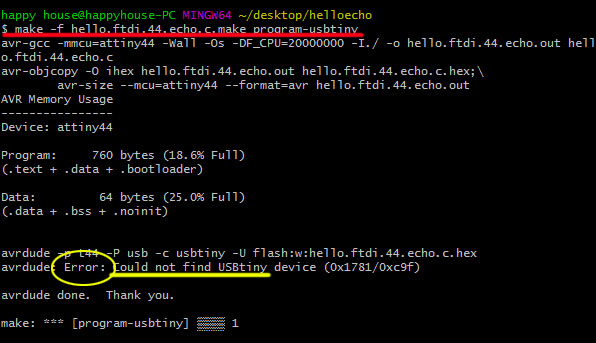
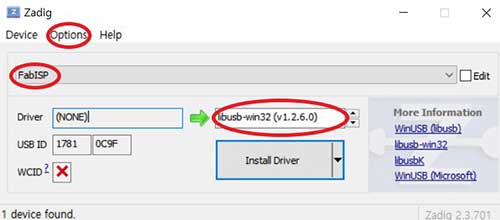
-if USBtiny is not found, install using zadig.
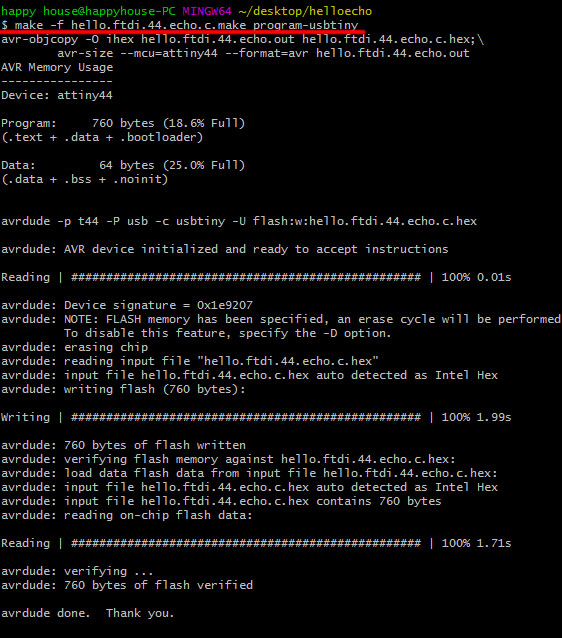
-programmed well.
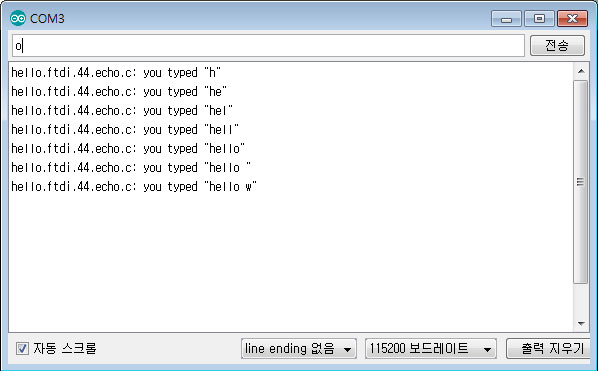
-open arduino serial moniter. type any character, board replys.
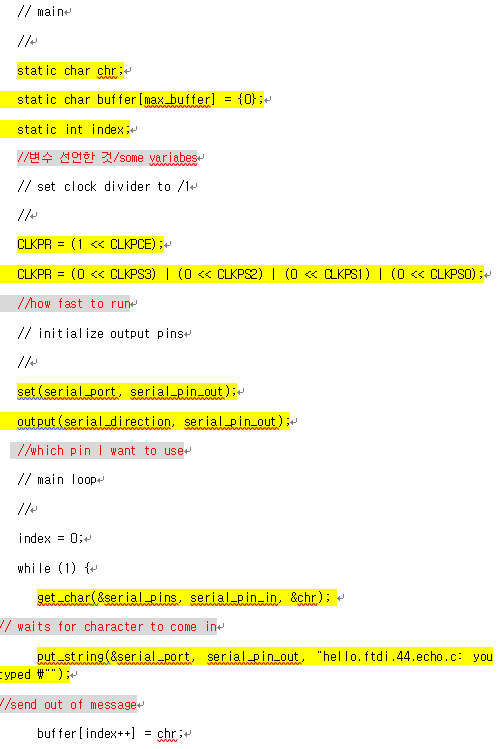
-this is Neil's .c file
Fabkit
-Download filestaces
hole
outline
schemtic
board
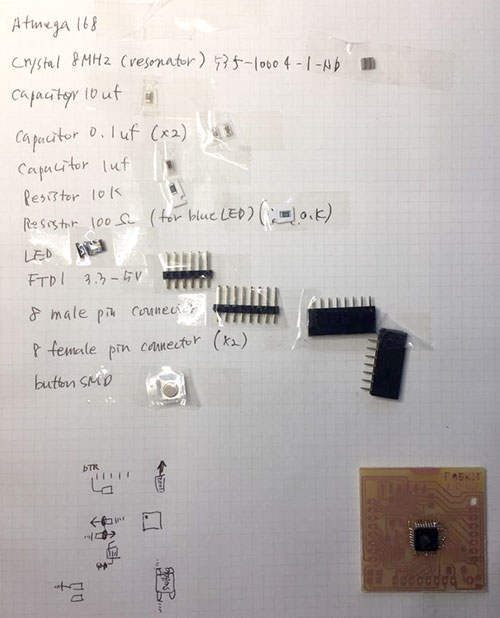

-Check the componet values and places with Board file using info button.
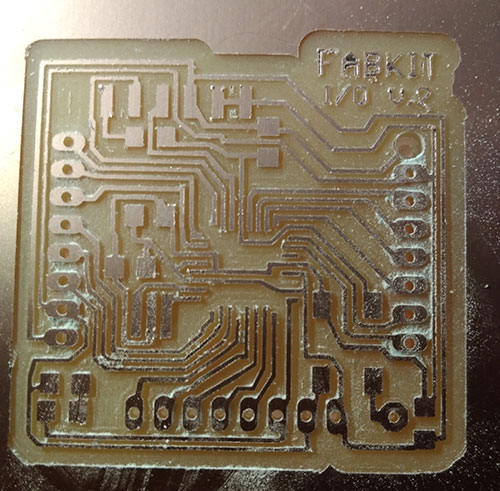
-Up right, I made a big hole, because I didn't invert the hole image file. So I pause milling, After inverting the hole file, restart milling.
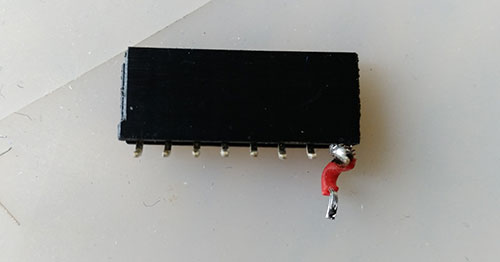
-The big hole was VCC connection. So, it was ok to ignore it since there were more VCC connection. But I tried to fix it with jumper.
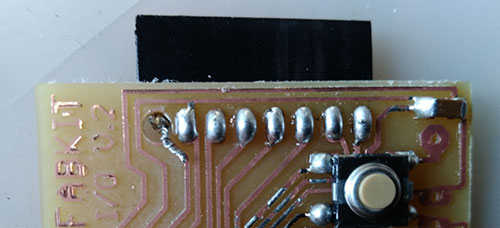
-I connected header from back to protect short from big hole, as you see the hole is very close from the left GND line. When I tried to cut the jumper, the red plastic protector is cut, too. It would be better not to cut the red protector.
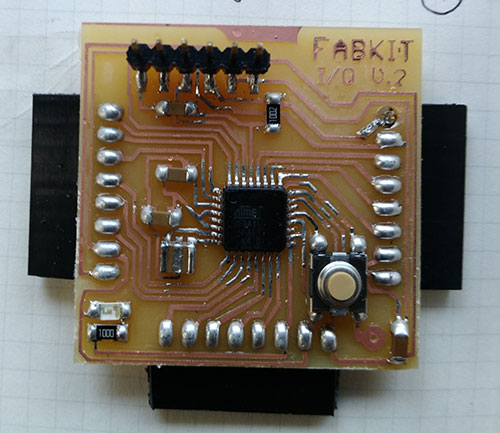
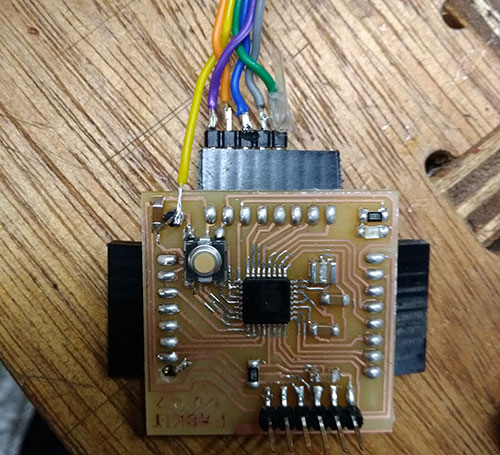
 -Finished the soldering, Check the connection. Everything was good.
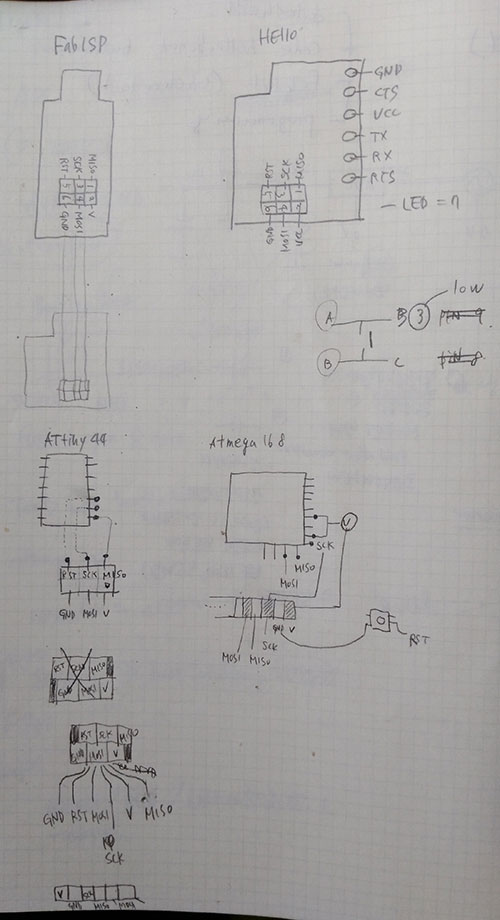

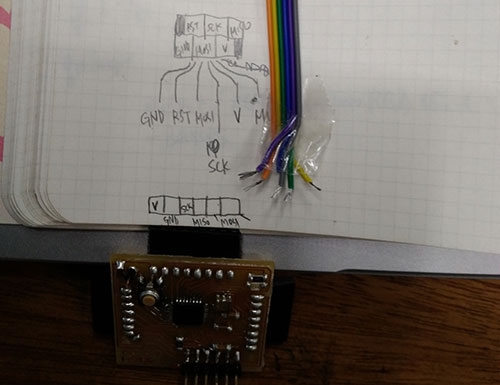
-To find the pin order same with FabISP and Fabkit, check the grinned header order first, then find the pin one by one.
-FabISP:GND, Reset, MOSI, SCK, VCC, MISO in order and Fabkit:VCC, GND, SCK, MISO, MOSI, Reset in order
.
 -Reset pin has to be conncected when butning the bootload.
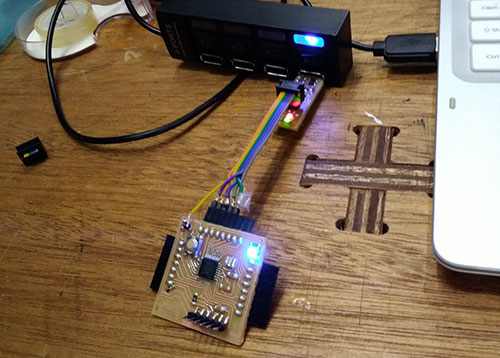
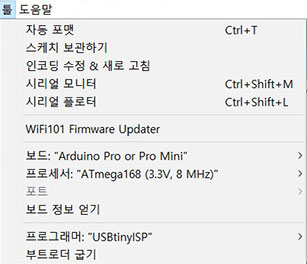 -select the board, processor, clock, and programmer.
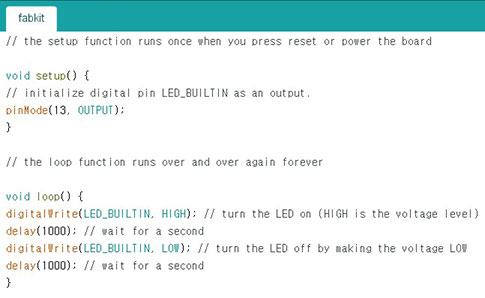 -LED_BUILTIN can be changed pinmode13.-upload from sketch>upload using programmer.
Download the codes
-hellobutton
-fabkit
Date: 2018-03-20 Author: Seong Hee Kim @ Fablab Seoul