| Seonghee Kim | |
| Final Project | |
| HOME | ABOUT | ASSIGNMENTS | FINAL PROJECT |CONTACT | |

-click here to see presentation.mp4
-click here to download presentaion.png

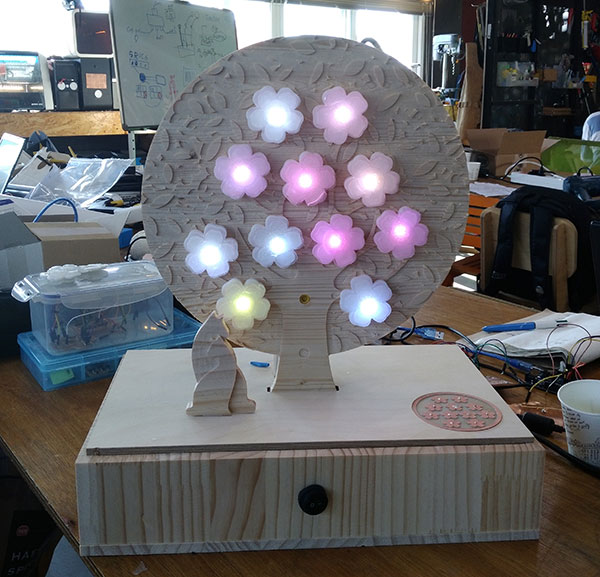
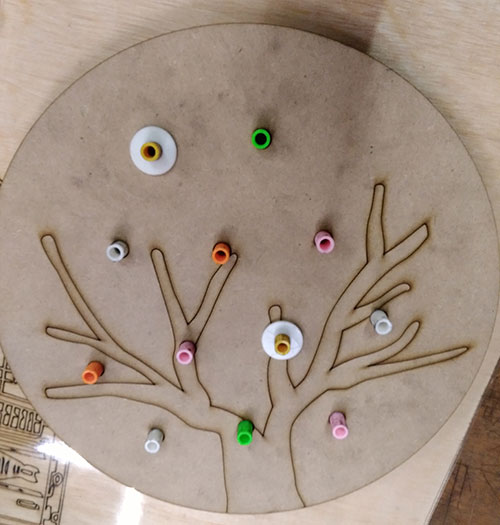
I want to make electronic automata. When I discovered this lovely automaton made by Bong Seo Kwon, I was motivated to make it. I want to add some electronic control to his work. So I decided to add the neopixels in each of flowers are illuminated by the each of touch sensor.
Thanks to Bongseo Kwon for letting me change his work.
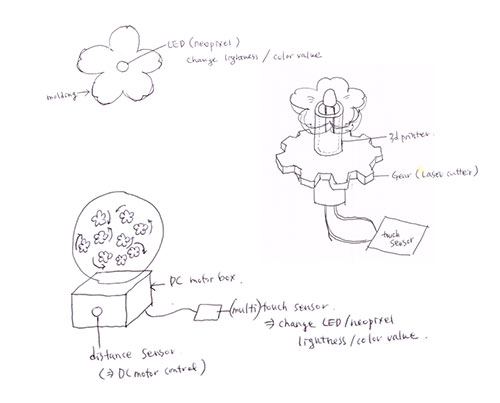
Idea Sketch
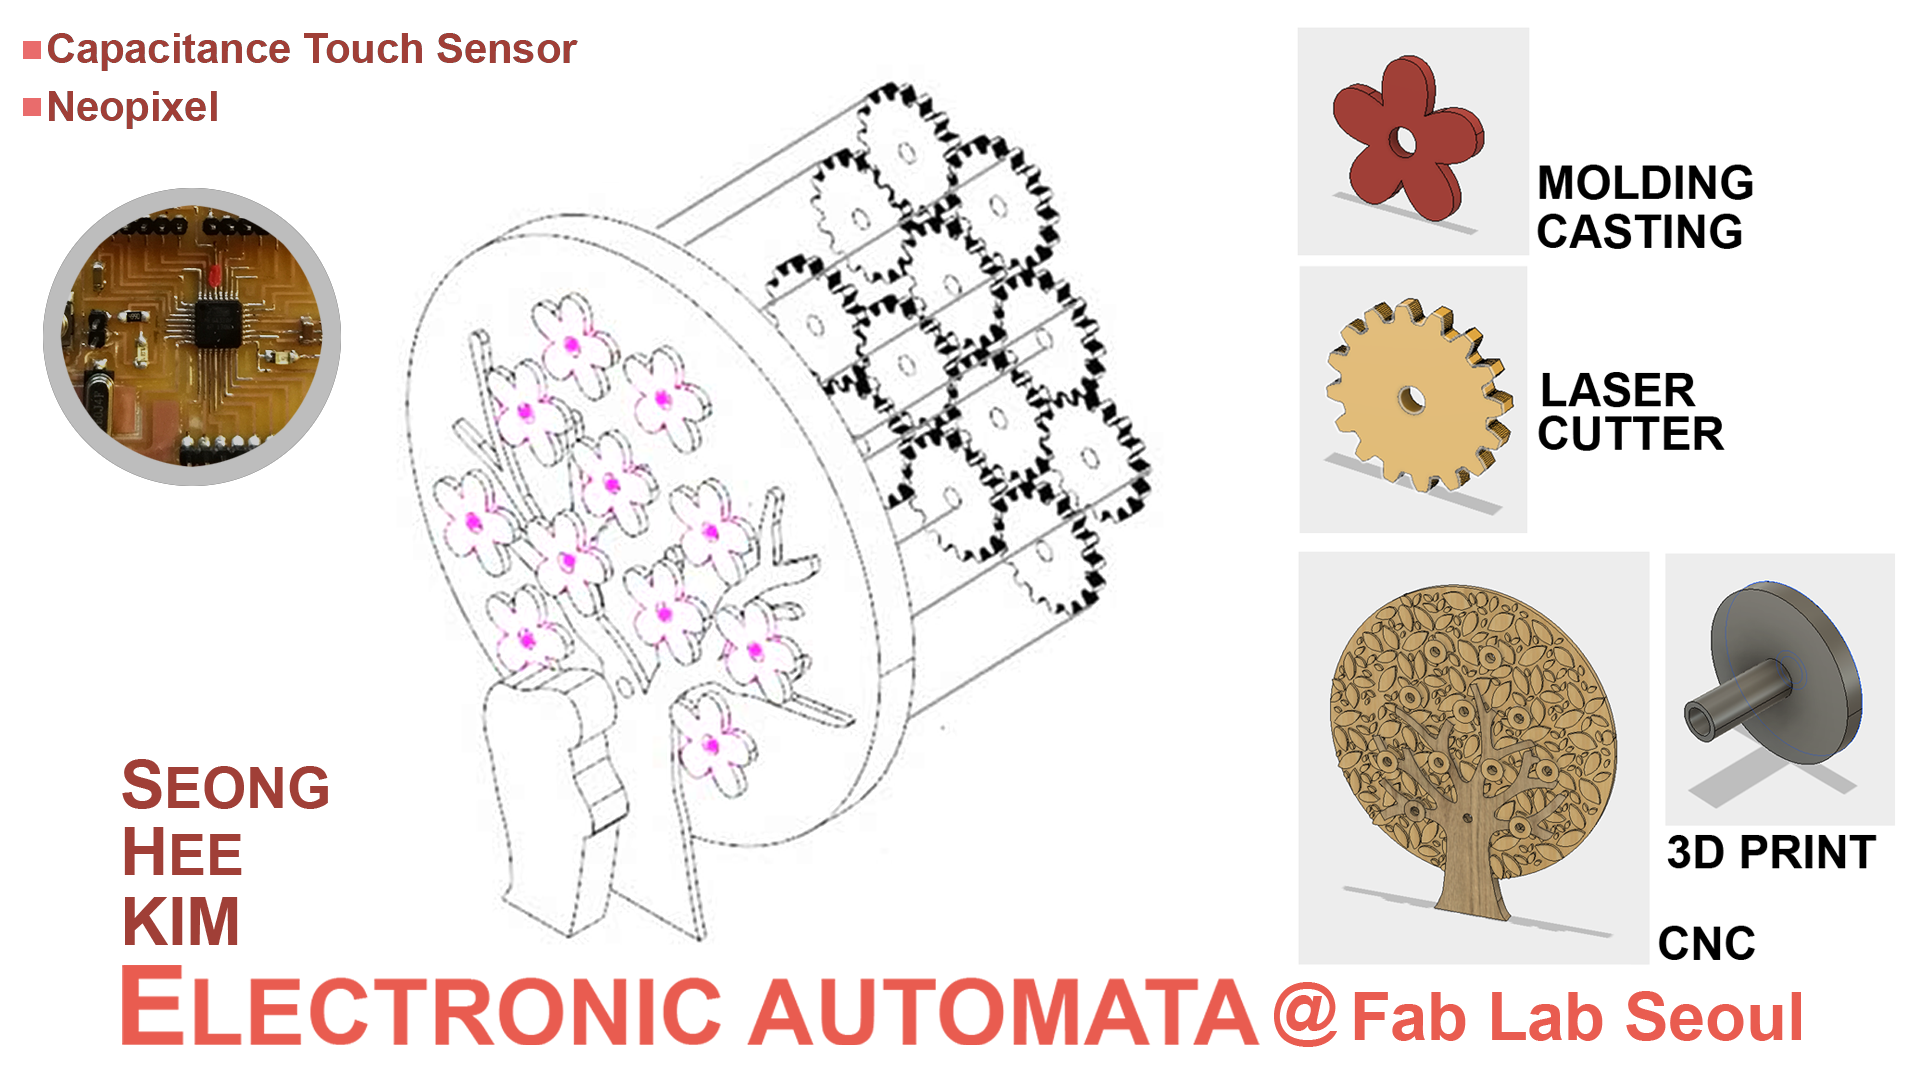
 Skills for this work
-molding and casting: to make flower shape.
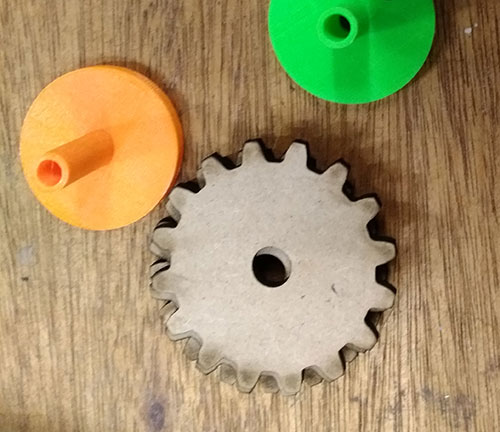
-3D printing: shafts, rods(inside of each shafts)
-laser cutter: two types of gears.
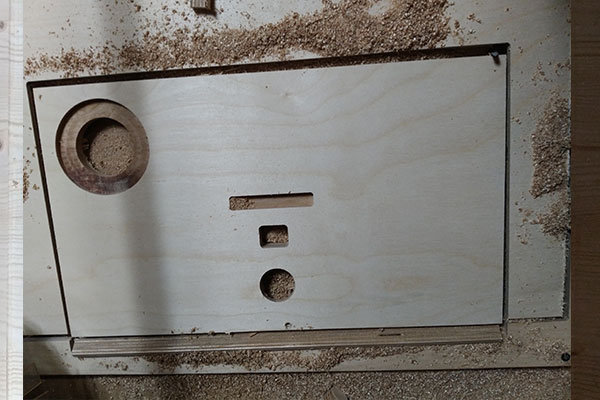
-CNC: DC motor gear box, tree
-electornics: touch sensor(input), neopixel(output), motor
Prototyping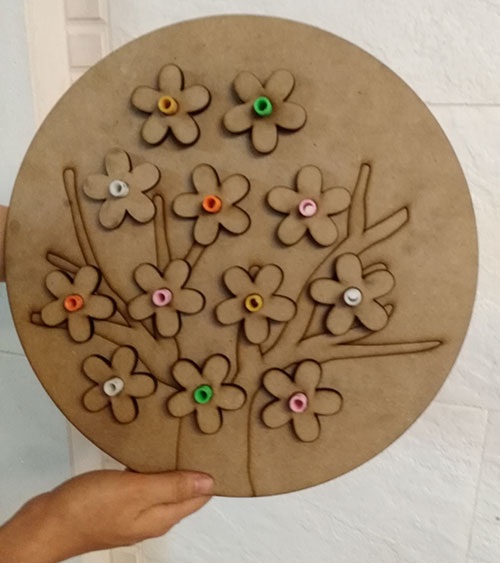
First, I tested prototyping with mdf before cutting expensive wood to see if the mechanism works well. The rotation is a bit stiff, but using acrylic will reduce friction and make it a little easier than mdf.
CNC for tree
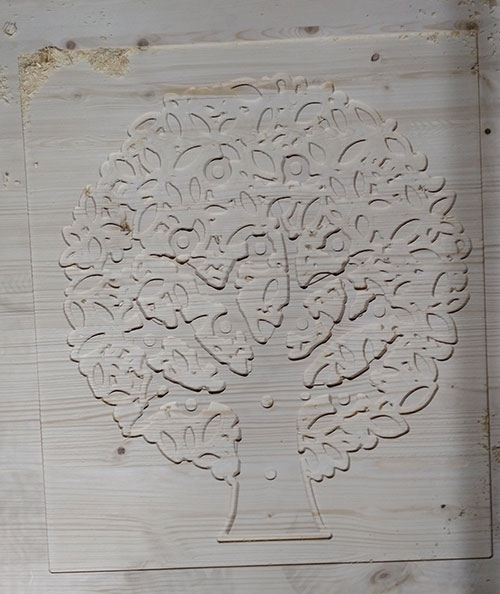
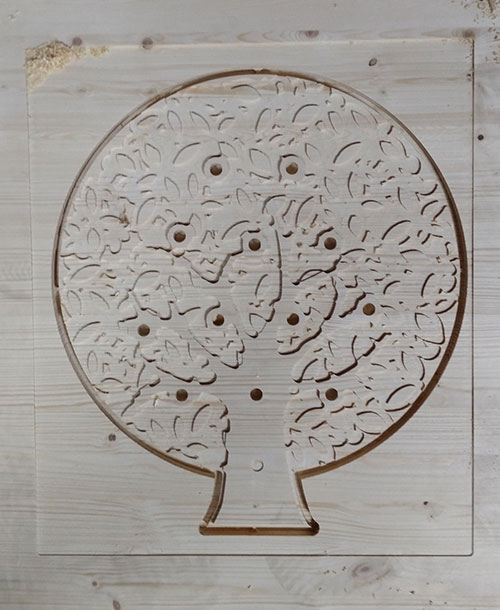
When cutting a tree with cnc, the design of the leaves was so complicated that pocketing was not easy. Whenever I calculate the Gcode with Vcarve, the gaps between leaves is smaller than the end mill size and Vcarve continued not to be calculated. In the end, I chosed a oncut, and I'm glad that it came out nice and pretty.
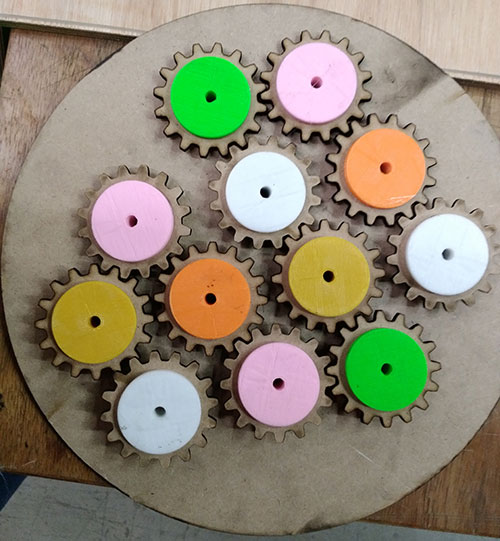
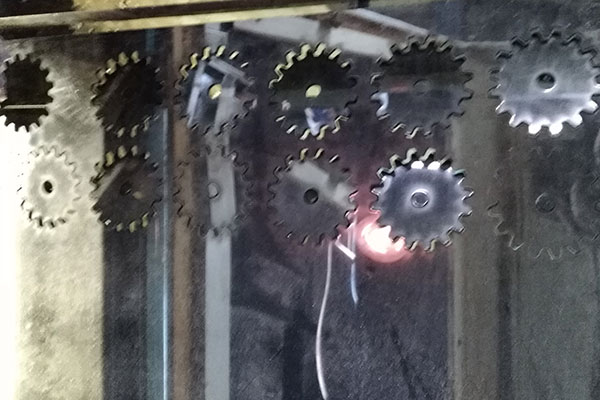
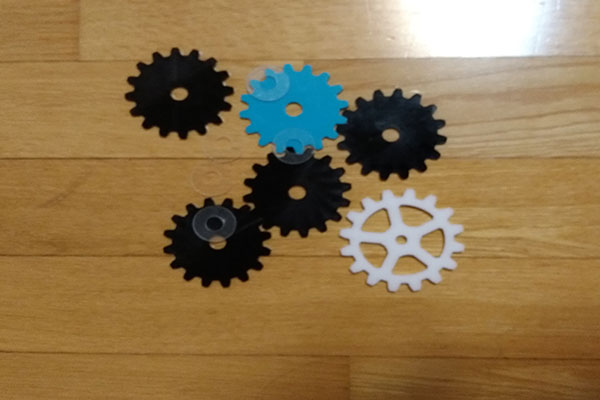
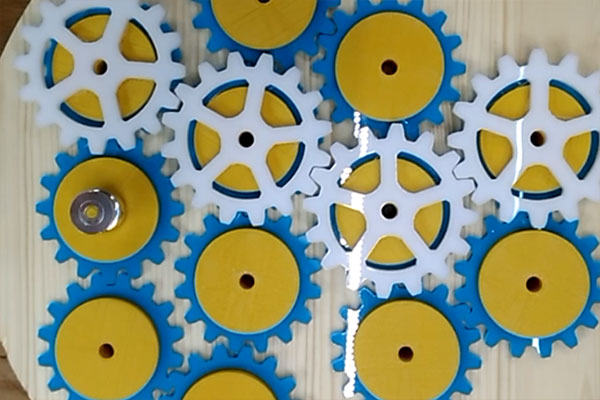
laser cutting of gears
3D design and printing of gear rods 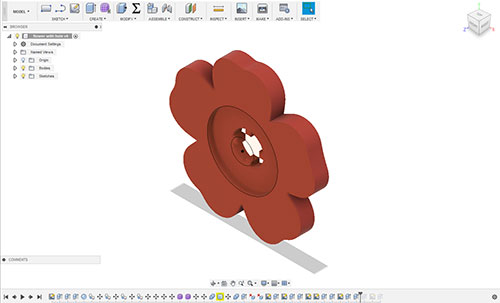

To make the gear I usesd a laser cutter. Small gears are 3t and large gears are 5t acrylic because they have less friction than wood. I wanted to reinforce a little stiffer rotation in prototyping. So we made a large gear on the vertical axis and connected it. So it has been reinforced and can be rotated with less force.
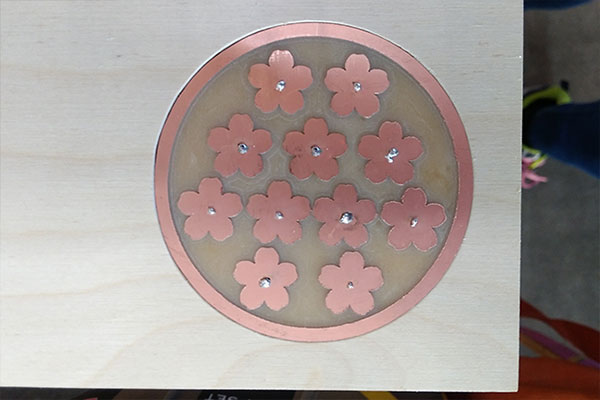
molding and casting of flowers

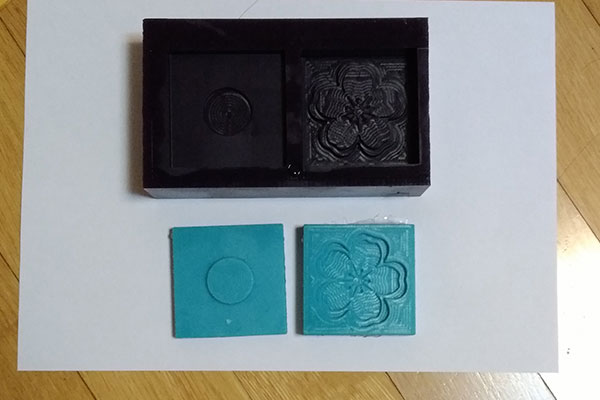
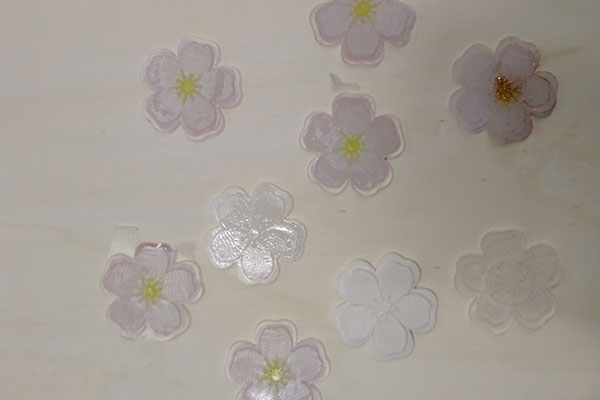 Because cherry blossoms require 11 pieces in the same design, it was good to use molding and casting. But since long cure time, it took a long time to finish. I like the result very much so after fab academy I will make the fridge magnets with the same moldings.
soldering for neopixels 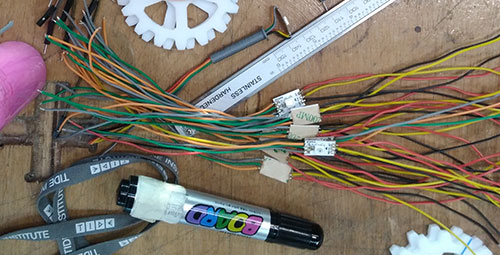
I need eleven Neo-pixels. The neo-pixels of the string type are slippery to solder. It was hard because the lead did not settle sufficiently. so I had couple of fails. After a few tries, I got used to it, but it was helpful to have plenty of flux. Since I had to connect each wire on the back of the tree later, I distinguished the in and out and soldered each of the with same colors of wires.
PCB board design, fabricating, coding, programming 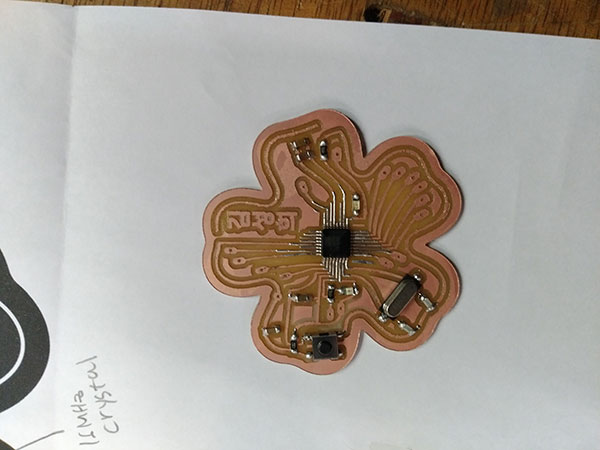
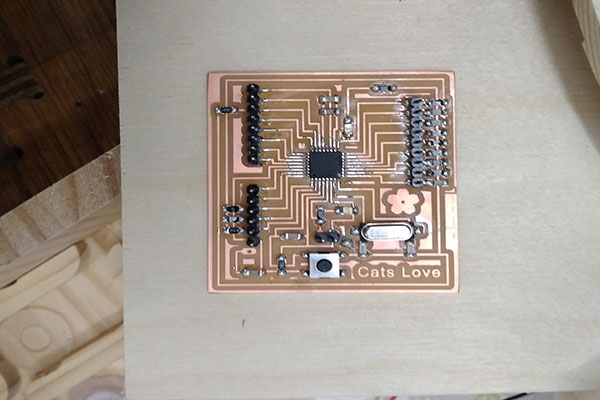
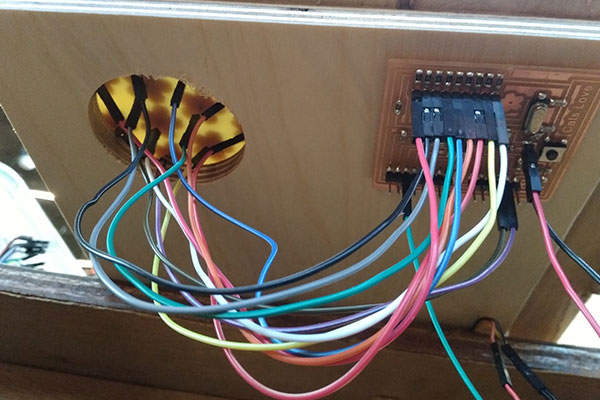
I first made a beautiful pcb in flower shape. However, I could not test the coding because I did not create a serial port. I used Arduino to complete the code and upload it to my pcb, but it did not work. I had to re-create it because I can not test with serial monitor. I had to re-create it. Because I did not have enough time I chose a simple and safe design. I made it refered on satshakit. The touch sensor was simplify tree design and each flower was connected to the same position. Assembly
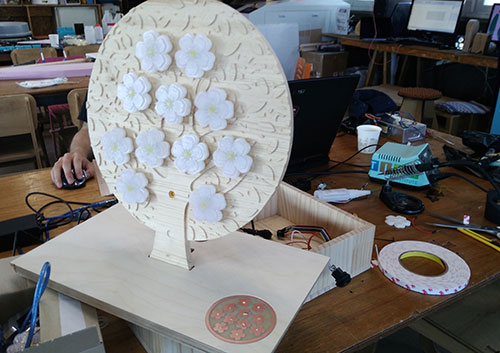
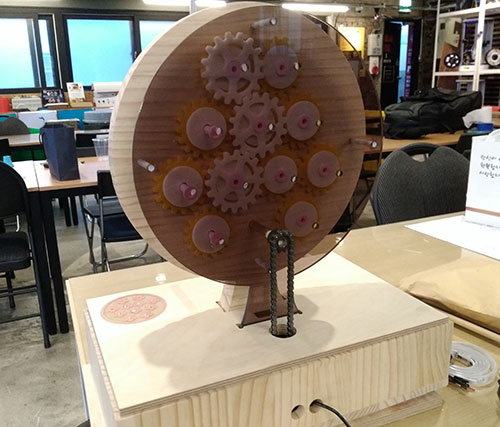
The back side was covered with transparent acrylic so that the mechanism could be seen clearly. I think watching the mechanics is a fun part of automata. But I wanted to show a well-organized look, so I was carefully choose colors and alignment and I will connect the wires through the acrylic, which will prevent the wires from tangling when the gears are turned.
Motor
I finally connected the motor. It was hard for me to operate the motor, which is to adjust the length of the chain. Even if it is too long, it does not turn. And I had to adjust the gear teeth too. I am so glad that it is well done. Now everything is done.
Files to download
-CNC(tree, cat, box)-Laser(gears)
-3D(rod, flower base)
-code
-pcb