

Interface and Application Programming
Tasks of the week
PROCESSING
In this week's task, our objective is to design an application or an interface which allows users to interact with the
microcontrollers which we designed by ourselves in previous weeks. To fulfill the requirements of this task, we have plenty of options
like MIT APP inverter, Python, Processing, and many others. Without any hesitation I jumped on processing, as MIT APP inverter
was also very new to me. Processing is a flexible software, sketchbook, and a language for learning how to code within the
context of the visual art. Using of processing has many benefits, few are listed below:
- Free to download and it is open source, can be download from HERE.
- Interactive programs with 2D and 3D.
- Well documented, with many books available.

Serial Library: The Serial library reads and writes data to and from external devices one byte at a time. It allows two computers to send and receive data. This library has the flexibility to communicate with custom microcontroller devices and to use them as the input or output to Processing programs.
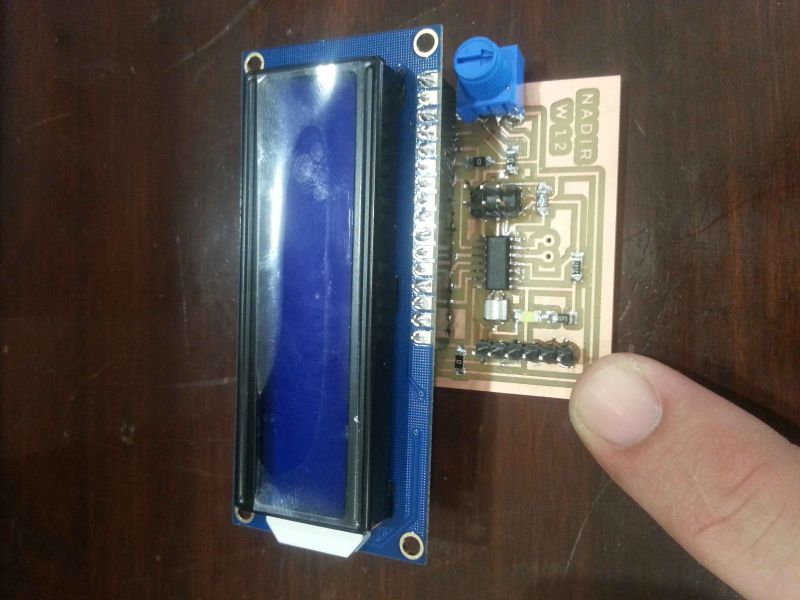
After downloading the "processing", I intended to use attiny 44 based microcontroller using LCD, as I designed such a board in week 12. I want to display digits on LCD by writing the data in processing. I interfaced LCD in microcontroller in output devices week and I will use LCD in my final project too in atmega32U4. Here in this week, I am again using LCD through attiny44 board.
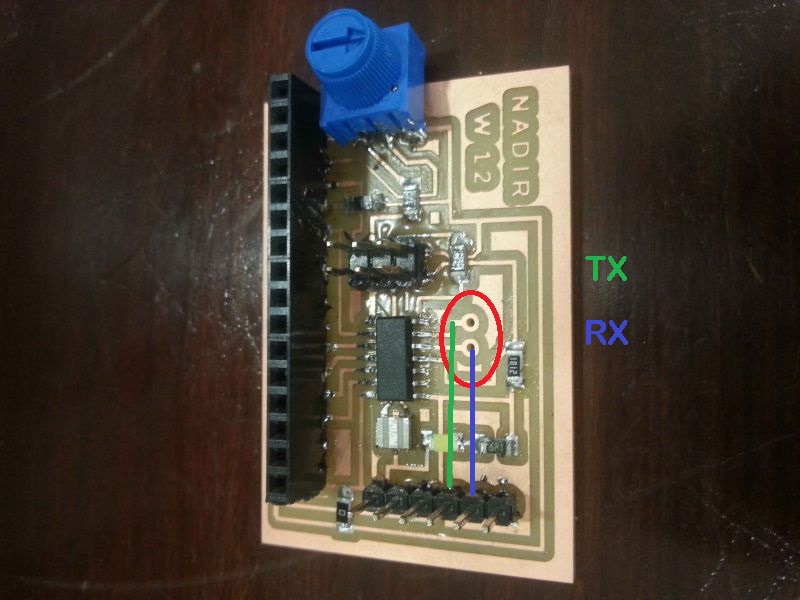
Rx /Tx: I did not connect pin no. 4 and 5 of FTDI connecter in week 12, because there was not use of these pins in that time. But here in this week these pins are in use, so by using jumper wires I connected pin no. 4 and 5 of the FTDI header, Rx and Tx respectively to the two unused pins of attiny 44 like pin no. 5 and 6 of the attiny44 IC. In week 12, I connect these two wire in a empty header for future use, so here is the use of these two pins.
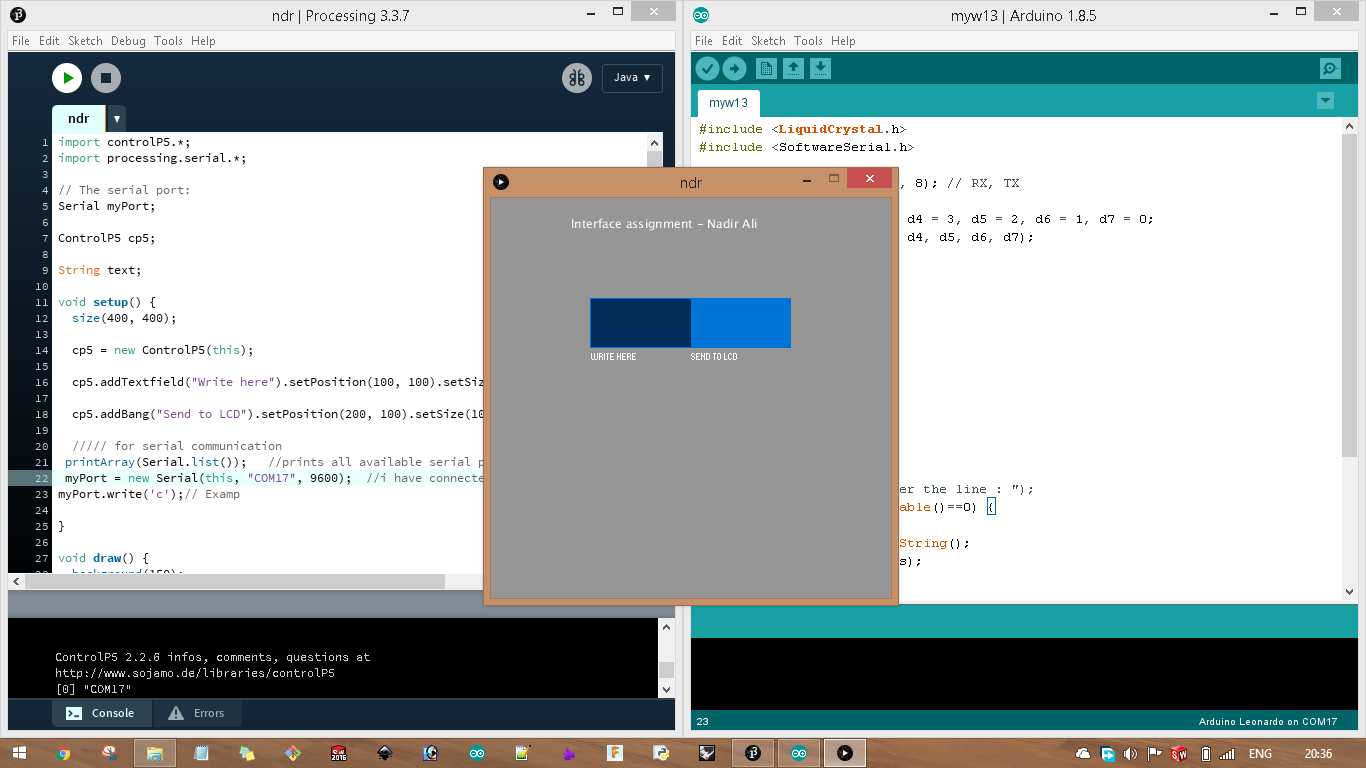
PROCESSING code:
import controlP5.*;
import processing.serial.*;
Serial myPort;
ControlP5 cp5;
String text;
void setup() {
size(400, 400);
cp5 = new ControlP5(this);
cp5.addTextfield("Write here").setPosition(100, 100).setSize(100, 50).setAutoClear(false);
cp5.addBang("Send to LCD").setPosition(200, 100).setSize(100, 50);
// for serial communication
printArray(Serial.list()); //prints all available serial ports
myPort = new Serial(this, "COM9", 9600); //i have connected my board to COM9 port
myPort.write('c');
}
void draw() {
background(150);
text("Interface assignment - Nadir Ali", 80, 30); //"text", x coordinate, y coordinate
}
void Submit() {
println();
print("this is the text/digit you typed :");
text=cp5.get(Textfield.class, "a").getText();
//myPort.write(65);
print(text);
}
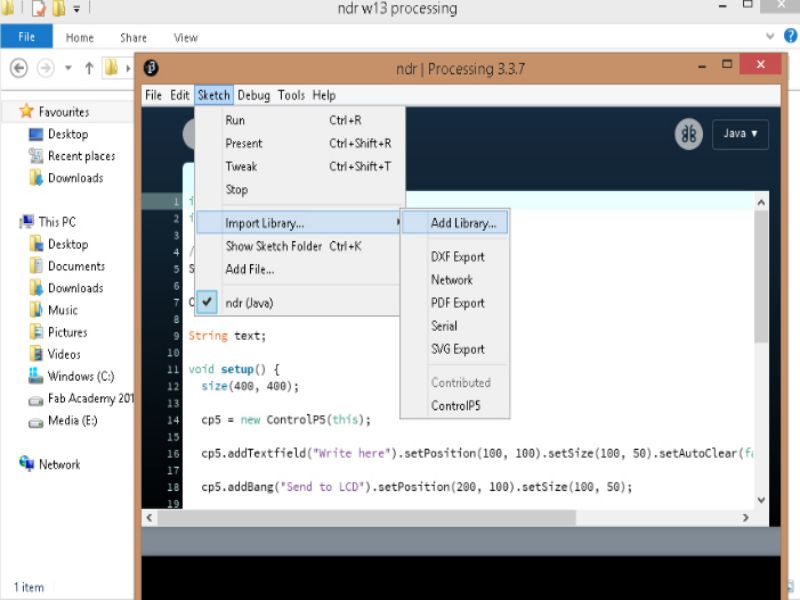
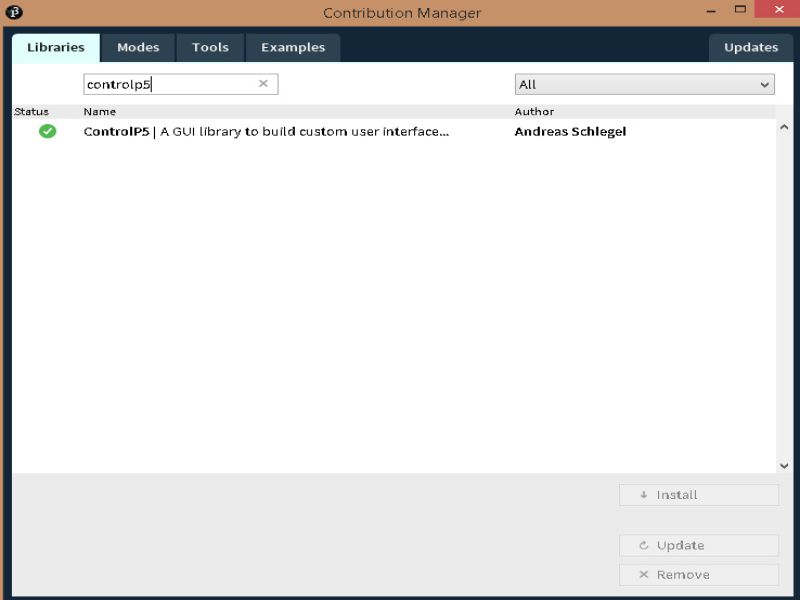
While playing above code, it needs including of library controlP5. So, go to Sketch, Import Library, Add library, then a windows will appear, there is a search box. Write controlP5 and install it.
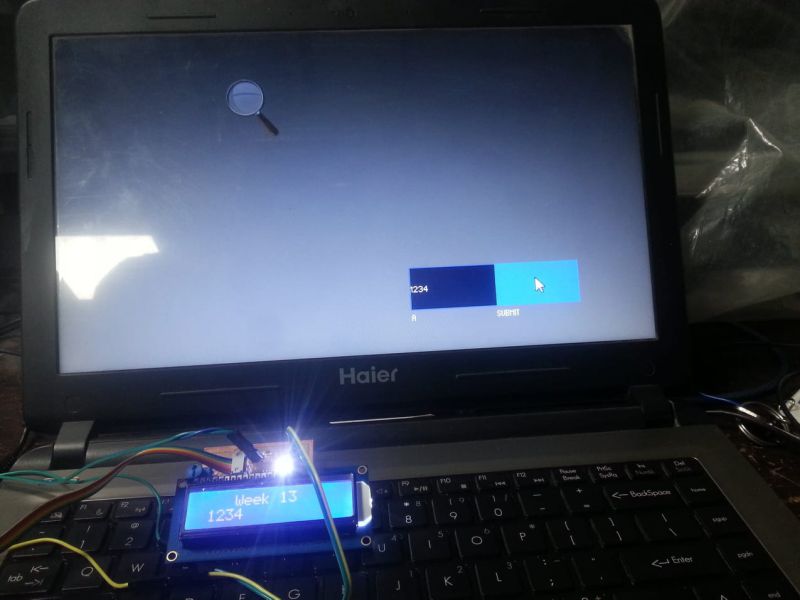
By playing code with valid port number and installing libraries and instaling them, here appears a window, where user types anything then that will display on LCD as it is. I typed digits 1 then play it, it appeared on LCD, then typed 2, then 3 and 4. These all typed digits appeared on LCD as shown in below photo.
Learning outcomes
- Controlling and managing output devices through this interesting software , 'processing'.
- Coding in 'processing' is easy to write and understand.
- Coding within the context of the visual art.

This work is licensed under a Creative Commons Attribution-NonCommercial 4.0 International License.